```
This token is a `temporary sign-in token`. To use this for following requests we need to
convert it to an `Personal Access Token`.
This is pretty simple, just create a POST request to `https://customers.prepr.io/sign_in_with_magic`
with the received token as the Authentication Bearer header.
This will result in a new Personal Access Token for the customer:
```json copy
{
"id": "a22287ff-7277-4583-8adb-0ca3e55e21b8",
"last_seen": "2021-03-01T15:35:58+00:00",
"first_name": "Ryan",
"last_name": "Vaughan",
"access_token": {
"access_token": "Gniw9Mt90cLj7136M5ao0B7mGHHMHXXw68NlKMyuiinmVU426Dw",
"token_type": "Bearer",
"expires_in": null
}
}
```
**Done!** 🥳 You've completed the sign-in.
Source: https://docs.prepr.io/mutation-api/sign-in-magic-link
---
# Fetching a customer profile
After a customer signs in, you can query the customer profile using the following endpoint.
```http copy
GET: https://customers.prepr.io/customers/me
```
## Customer object
To expand the customer object when querying a customer profile, add the following field names to the fields parameter.
### Fields
| field name | type | description |
|------------------|--------|-----------------------------------------------------------------------|
| `id` | String | - |
| `first_name` | String | Lists the first name of the customer. |
| `last_name` | String | Lists the last name of the customer. |
| `date_of_birth` | String | Lists the date of birth of the customer. Format: `Y-m-d`. |
| `email` | String | Email addresses of the customer. |
| `phone` | String | Phone number of the customer. |
| `reference_id ` | String | Lists the reference\_id of the customer. |
| `tags ` | Array | Lists tags of the customer. |
| `segments ` | Array | Lists the segment the customer is in. |
```http copy
GET: https://customers.prepr.io/me?fields=custom,emails,tags
```
```json copy
{
"id" : "234h-432847-x23498-763x4-324x234",
"first_name": "Jhon",
"last_name": "Doe",
"date_of_birth": "2000-12-01",
"email": "jhon.doe@gmail.com",
"phone": "31612345678",
"tags": {
"items": [
{
"body": "Amsterdam"
}
]
}
}
```
Source: https://docs.prepr.io/mutation-api/customers-fetching-customer-profile
---
# Signing-out customers
Sometimes you will find yourself needing to log your customer out. Here is a small example of how to do so.
To invalidate the session make an `HTTP Delete` request to `https://customers.prepr.io/sign_out`
with the Personal Access Token as the Authentication Bearer header.
If the session is destroyed, the API will reply with a `204 No Content` status code.
Source: https://docs.prepr.io/mutation-api/sign-out
---
# Resending webhooks
In some cases you may need to re-trigger multiple webhook requests for your front end or an integration.
This can be accomplished by triggering the following endpoint.
```http copy
GET /content_items/bulk/webhooks
```
## Parameters
All filtering parameters from the content items collection endpoint can be added to this request.
| argument | type | required | description | default |
|--------------|:-------|------------|------------------------------------------------------------------------------------------------------------------------------|----------|
| `event` | String | true | Defines the webhook event. Possible values are: `content_item.created` `content_item.changed` `content_item.published` `content_item.unpublished` `content_item.deleted` | |
| `webhook_id` | Object | false | Defines which webhooks should be triggered. | |
| `skip` | Int | false | You can specify an offset with the skip query parameter. | 0 |
| `limit` | Int | false | You can specify the maximum number of items as a limit query parameter. The highest limit you can set is 1000. | 25 |
### Resending one webhook
The example below resends webhook events for all the content items with the tag `1fb70a05-7cab-4f7e-bae7-bbf7f69fd091` or
`f9b73994-76bf-49a0-87f8-505252e21086` to a webhook with the ID `312cae95-9343-43e8-bf4a-93898261acd7`.
```json copy
{
"event" : "content_item.published",
"webhook_id" : [
{
"eq": "312cae95-9343-43e8-bf4a-93898261acd7"
}
],
"limit" : 1000,
"skip": 0,
"tags" : [
{
"in" : [
"1fb70a05-7cab-4f7e-bae7-bbf7f69fd091",
"f9b73994-76bf-49a0-87f8-505252e21086"
]
}
]
}
```
### Resending multiple webhooks
The example below resends webhook events for all the content items with one of the specified tags to two webhook endpoints.
```json copy
{
"event" : "content_item.published",
"webhook_id" : [
{
"in": [
"312cae95-9343-43e8-bf4a-93898261acd7",
"312cae95-9343-43e8-bf4a-93898261acd7",
]
}
],
"limit" : 1000,
"skip": 0,
"tags" : [
{
"in" : [
"1fb70a05-7cab-4f7e-bae7-bbf7f69fd091",
"f9b73994-76bf-49a0-87f8-505252e21086"
]
}
]
}
```
## Response
The API response includes arrays of IDs for queued content items and webhooks. Additionally, it provides a count for queued webhooks events labeled as `total_queued` and a count for the number of filtered content items labeled as `total_items`. This supports straightforward pagination of content items when necessary.
Source: https://docs.prepr.io/mutation-api/bulk-webhooks
---
# Mutation API Reference
The Prepr REST API is a Content Delivery and Mutation API.
All responses are cached by our API CDN, caches will be cleared if anything changes in your Prepr environment. Contact support@prepr.io to get help implementing your application, or join our development [Slack](https://slack.prepr.io).
Source: https://docs.prepr.io/mutation-api
---
# Start working with Drafts
Drafts is turned off by default if your environment has REST API access tokens. No changes are made to the functioning of the API endpoints.
Keep the following in mind when activating Drafts.
## What's changed
### Publish On
If drafts is switched off (and the current behaviour), every content item requires you to post and update it with a publish\_on date/time.
When you start using drafts the publish on field is only required when you acutely want to publish the current version of the item.
If the workflow\_stage is set to Done, and you add a publish\_on date/time the item will be published on that specified date/time.
#### Note
Please take in mind that if you until now items always had a `publish_on` param on requests, from now this is optional.
### The Status field
When you start using draft the `status` field for a content item is renamed to `workflow_stage`. Also the response is simplified:
Using the `status` field:
```
"status": {
"nl-NL": {
"id": "cff13c2a-615a-4f85-a50d-cc05104e6d6b",
"created_on": "2018-12-24T09:09:25+00:00",
"changed_on": null,
"label": "Status",
"body": "In progress"
}
}
```
Using the new `workflow_stage` field:
```
"workflow_stage": {
"nl-NL": "In progress"
}
```
#### On creating a new content item
When creating a new content item the input for the workflow\_stage field is the same as the new simplified response.
#### On updating an existing content item
When updating an existing content item, changing the workflow\_stage to something else than Done will no longer
unpublish the item. To unpublish an existing content item, use the new unpublish endpoint.
#### Note
Please take in mind that if you request that `status` in your `?fields` param, you need to update this to `workflow_stage` too.
## Webhooks
When you enabled drafts, everytime a new version is published the `content_item.published` event is sent to your webhook endpoint.
## What's new
### Filtering on published state content items
To filter our all content items that are not published, use the following new filter:
```
"published_status" : {
"eq" : "published"
}
Options are: `published`, `not published`, `scheduled`
```
If you use the new REST API scope `content_items_published` this filter is automatically applied with the `published` value.
### Unpublishing an existing version
To unpublish an existing item.
```
PUT: /content_items/{id}/{locale}/unpublish
```
### The published version field
If a content item has a version published you can easily resolve the version by using the new field `published_version`.
```
"published_version": {
"nl-NL": {
"id": "203405a9-9330-4116-89ec-905a63ed34f7",
"created_on": "2023-09-28T12:03:42+00:00",
"publish_on": "2023-09-28T12:03:00+00:00",
"expire_on": null,
"body": "7bcfgjao58ri"
}
}
```
Source: https://docs.prepr.io/developing-with-prepr/start-working-with-drafts
---
# Adding the Tracking Code (manual method)
To create a tracking code manually, please follow the steps below:
1. Copy the following code snippet:
```html copy
```
2. Replace `PREPR_TRACKING_ID` with your actual access token taken from **Settings > Access tokens**.
3. Add the code to the **\** section of your website.
Once you've set up the tracking pixel, proceed with [recording events](/data-collection/recording-events).
Source: https://docs.prepr.io/developing-with-prepr/tracking-code-manual-method
---
# Develop with Prepr
Experience how easy it is to develop with Prepr CMS.
Source: https://docs.prepr.io/developing-with-prepr
---
# Changelog 2025
Find the beautiful features and important updates that were added to Prepr in 2025. This changelog gives you an insight into the most eye-catching releases during this period.
## Introducing *Impact Goals* for personalization and A/B testing
*Impact Goals* allow you to see the overall impact of your personalization and A/B testing experiments on conversions.
You can create clear conversion definitions by combining multiple behavioral conditions.

This means you can optimize your website not just for click-through rate (CTR), but for deeper insights.
So you can better understand what works for customer experience, boosting engagement and conversion rates.
Check out the [Goals setup guide](/personalization/defining-goals) for more details.
## New *Content tree* layout
You can now view your overall structure of content items, by their slug (URL) value, as a visual tree layout.
The *Content tree* layout provides instant, hierarchical context for how an item relates to other content.
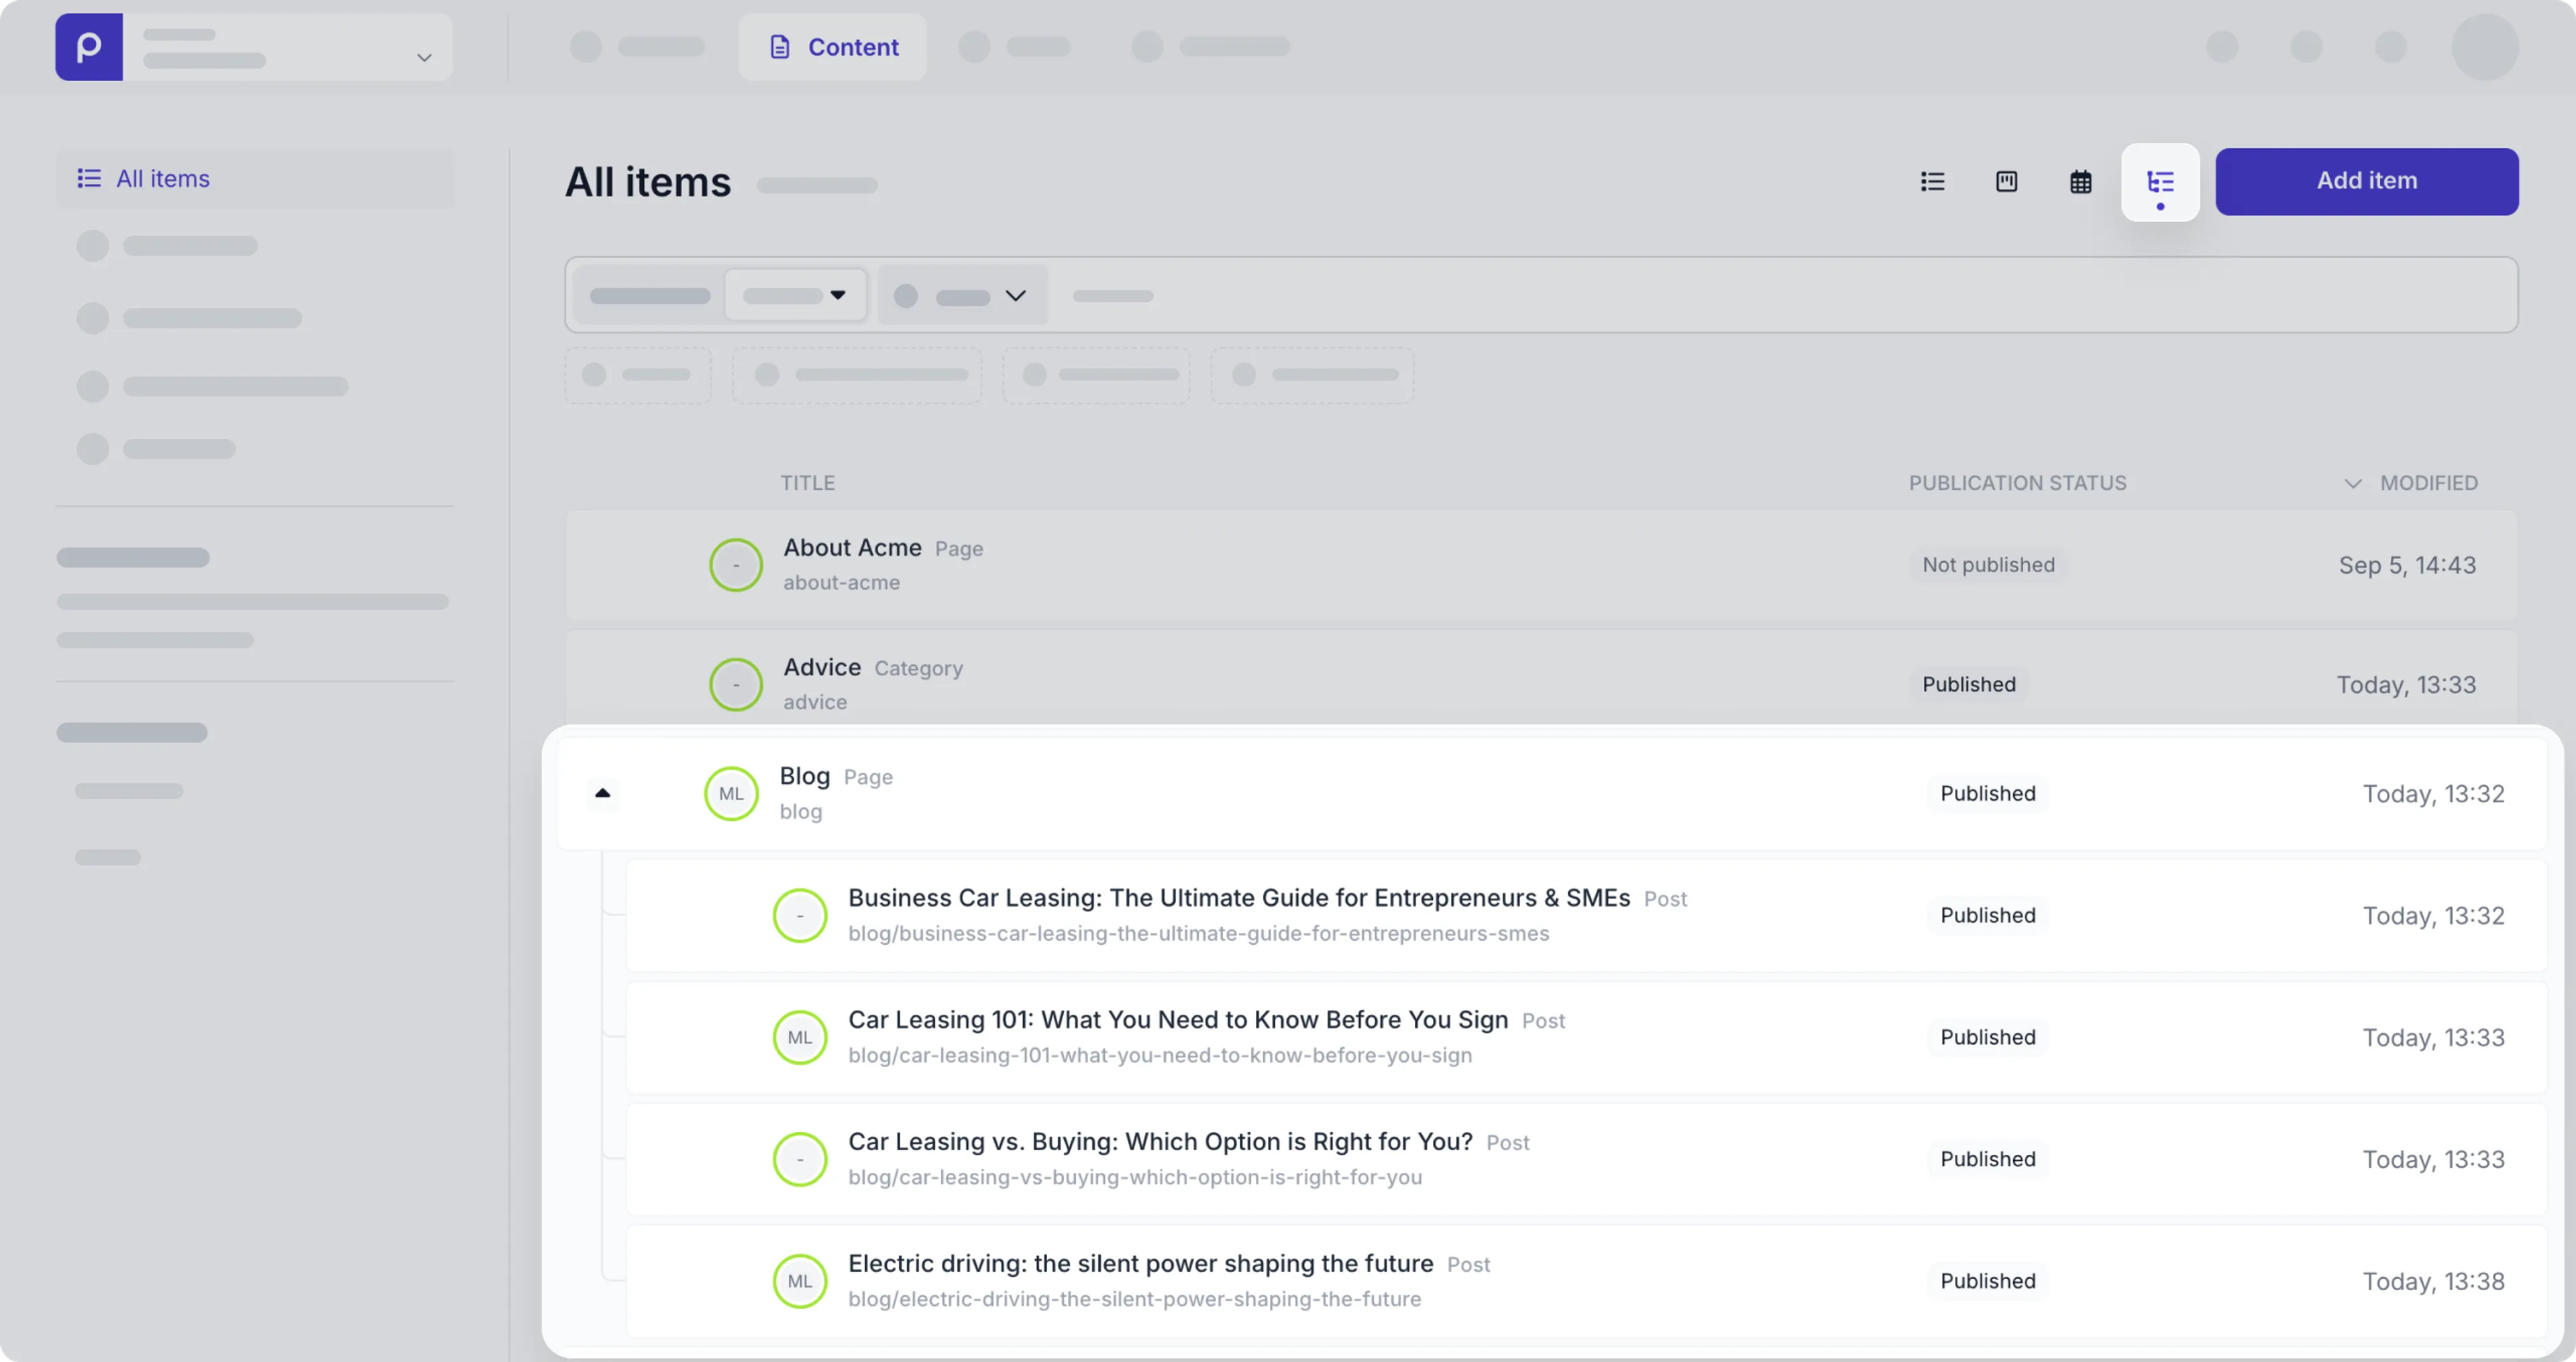
This means improved navigation between content items and less time searching for related items.
For more details, check out the [content tree setup guide](/project-setup/setting-up-environments#content-tree-parent-slug-format).
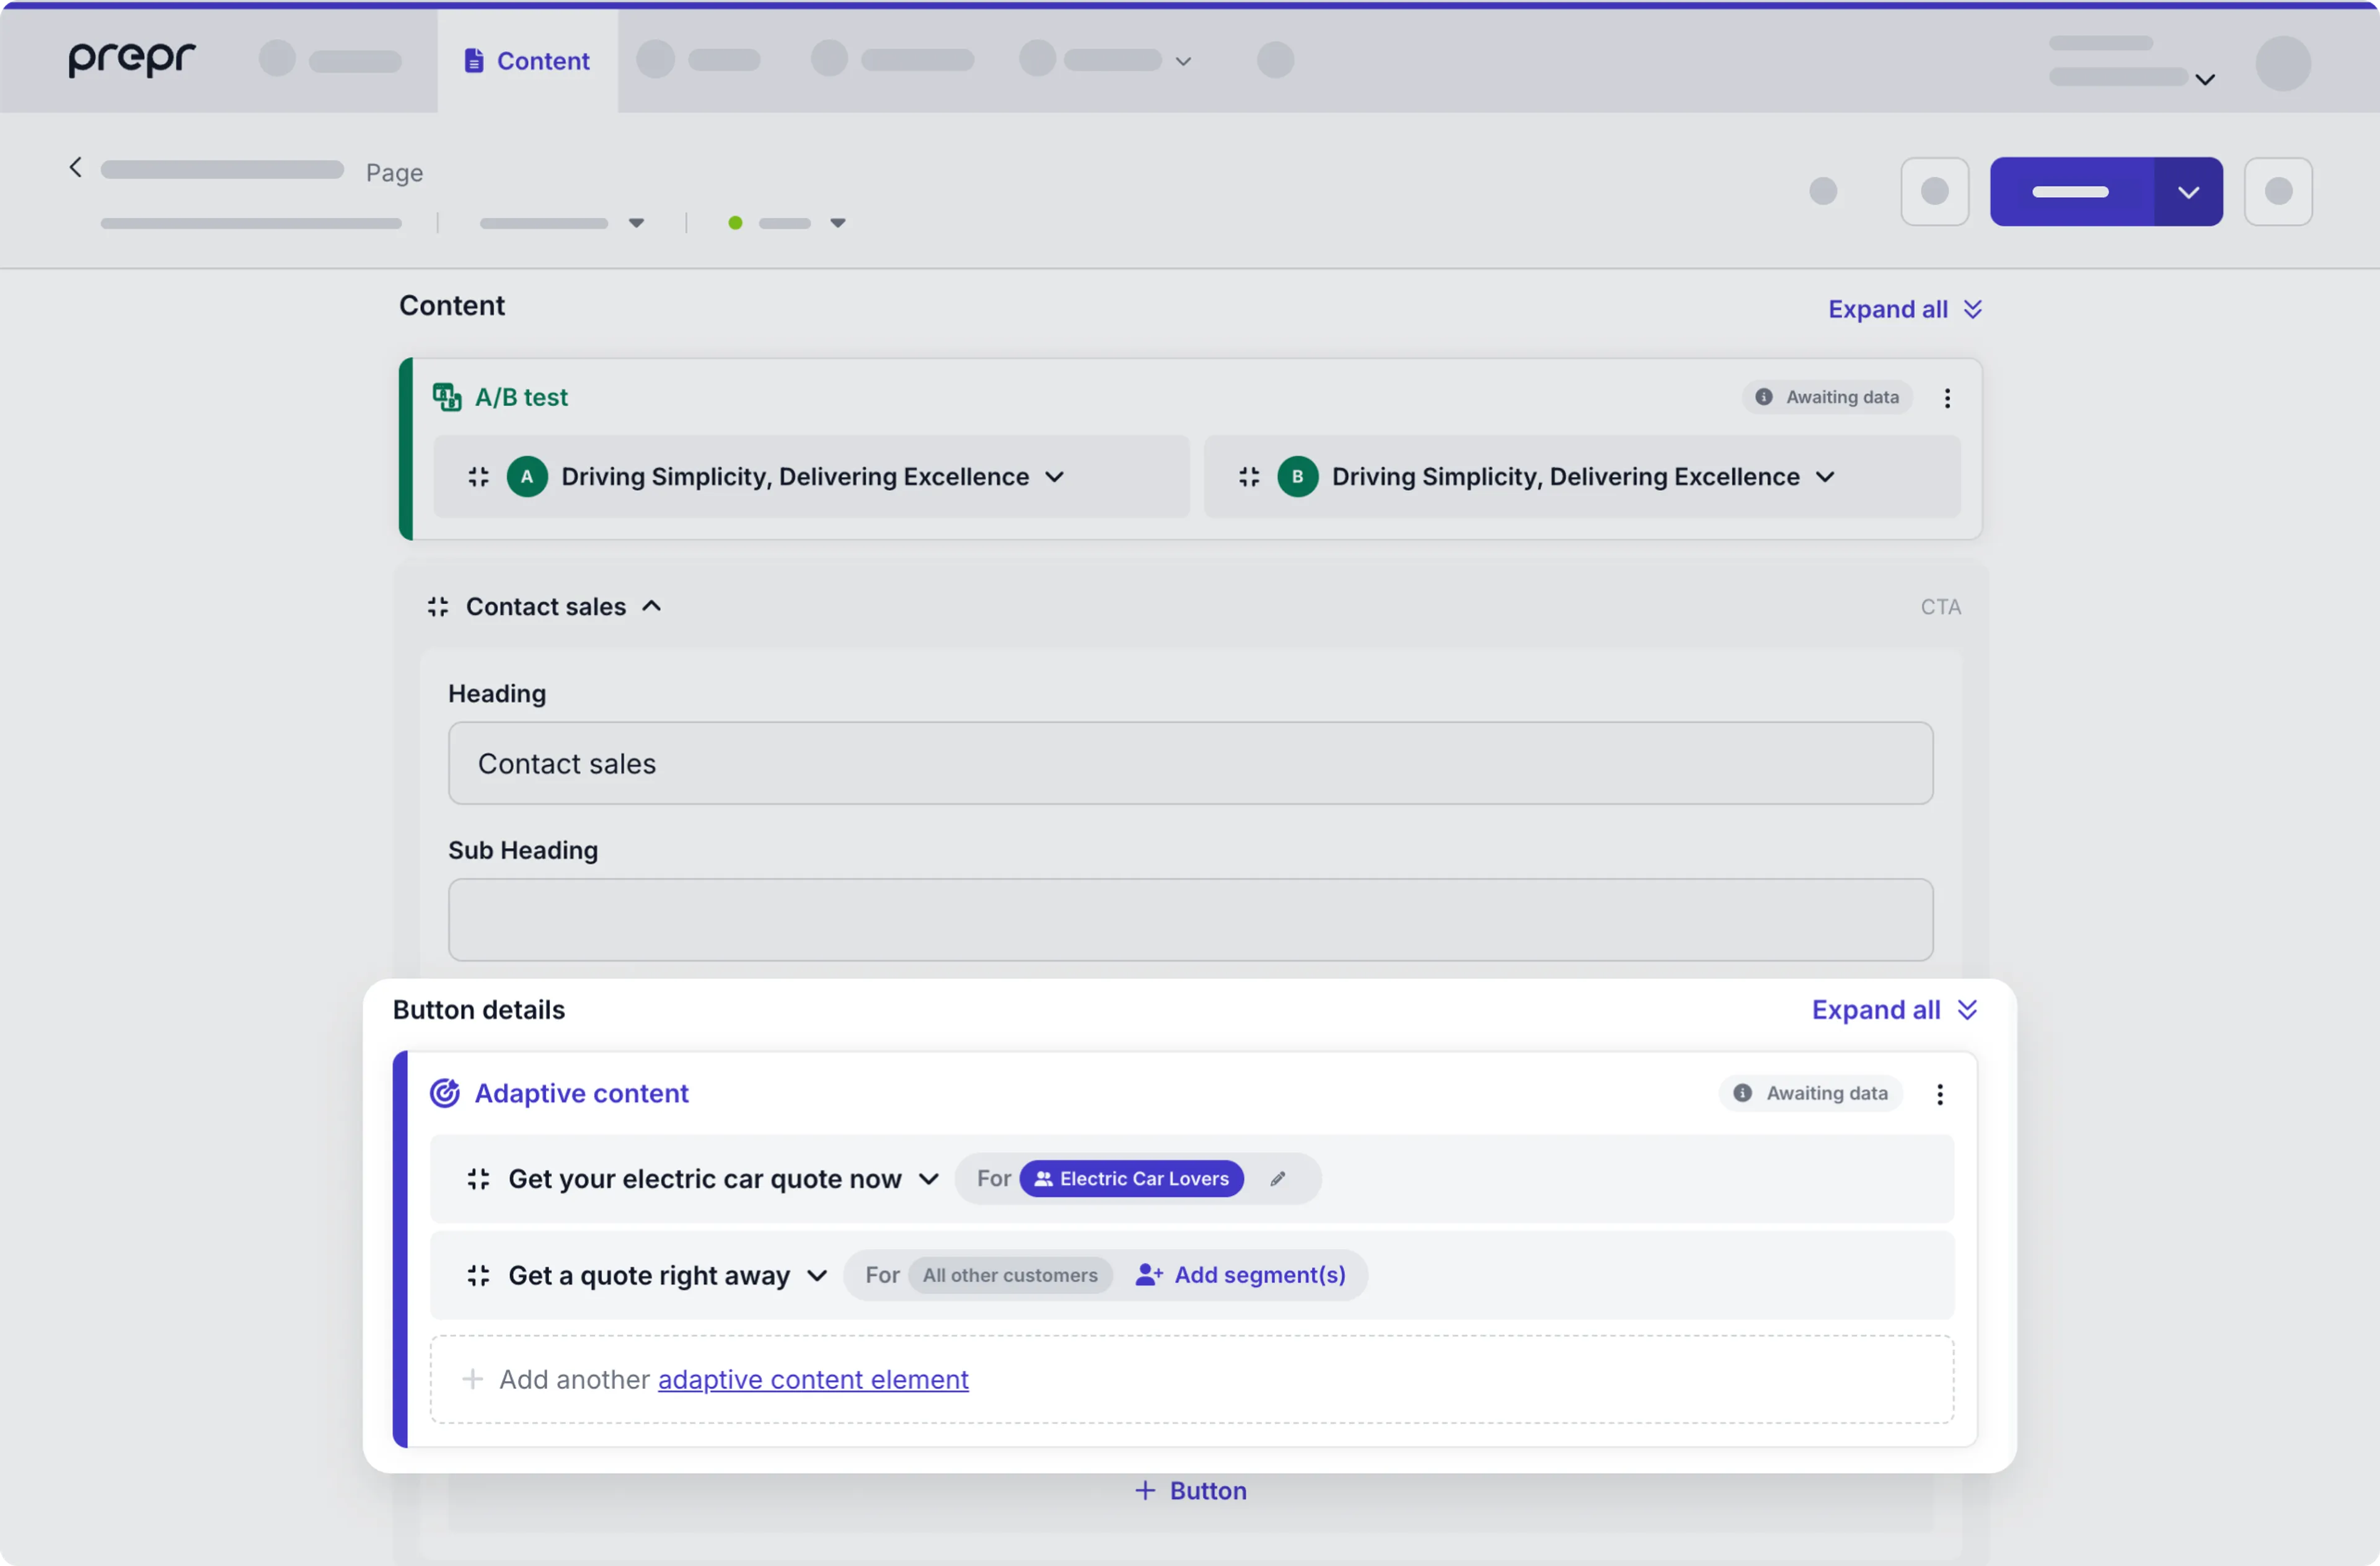
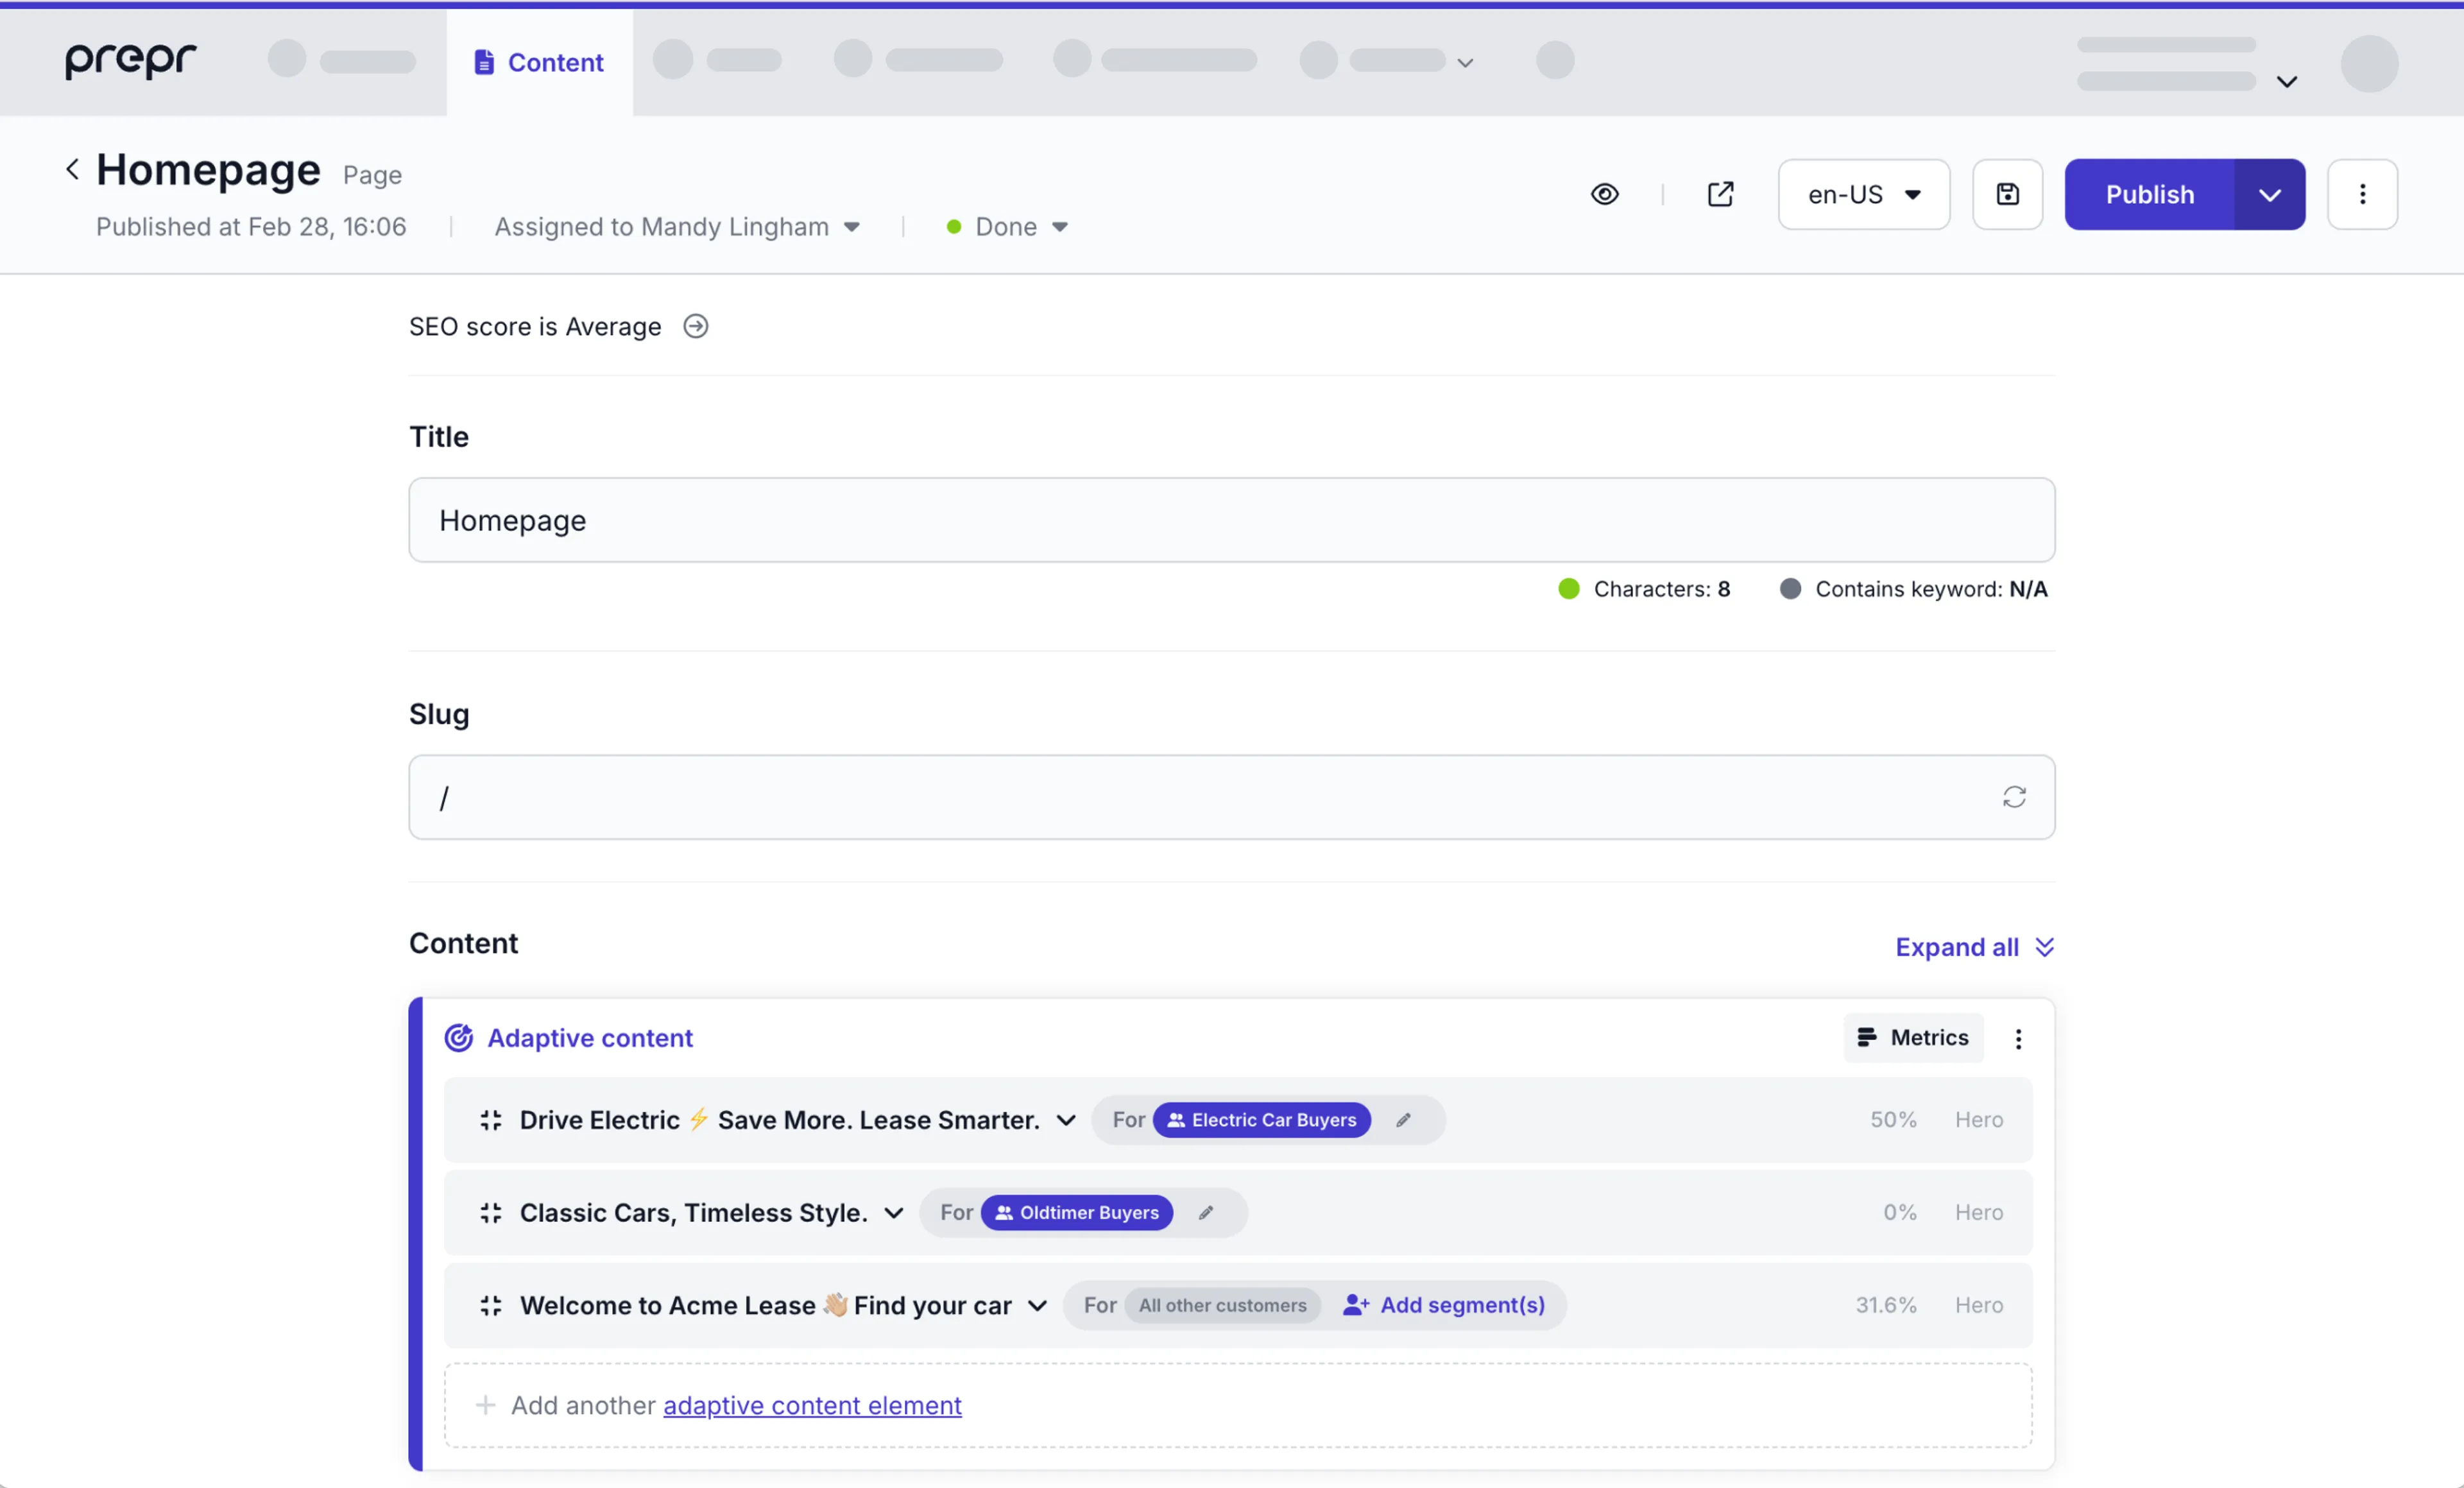
## Generate AI suggestions for personalized variants
When adding personalized content, you can now get AI suggestions for adaptive content based on a customer segment you choose.
The auto-generated variant suggestions give you inspiration to quickly create and fine-tune your adaptive content.

The AI generation of adaptive content allows you to automate normally repetitive work of re-writing content for multiple customer segments.
This means you can scale your personalization efforts in much less time.
Check out the [Adaptive content guide](/personalization/managing-adaptive-content#add-an-adaptive-content-element) for more details.
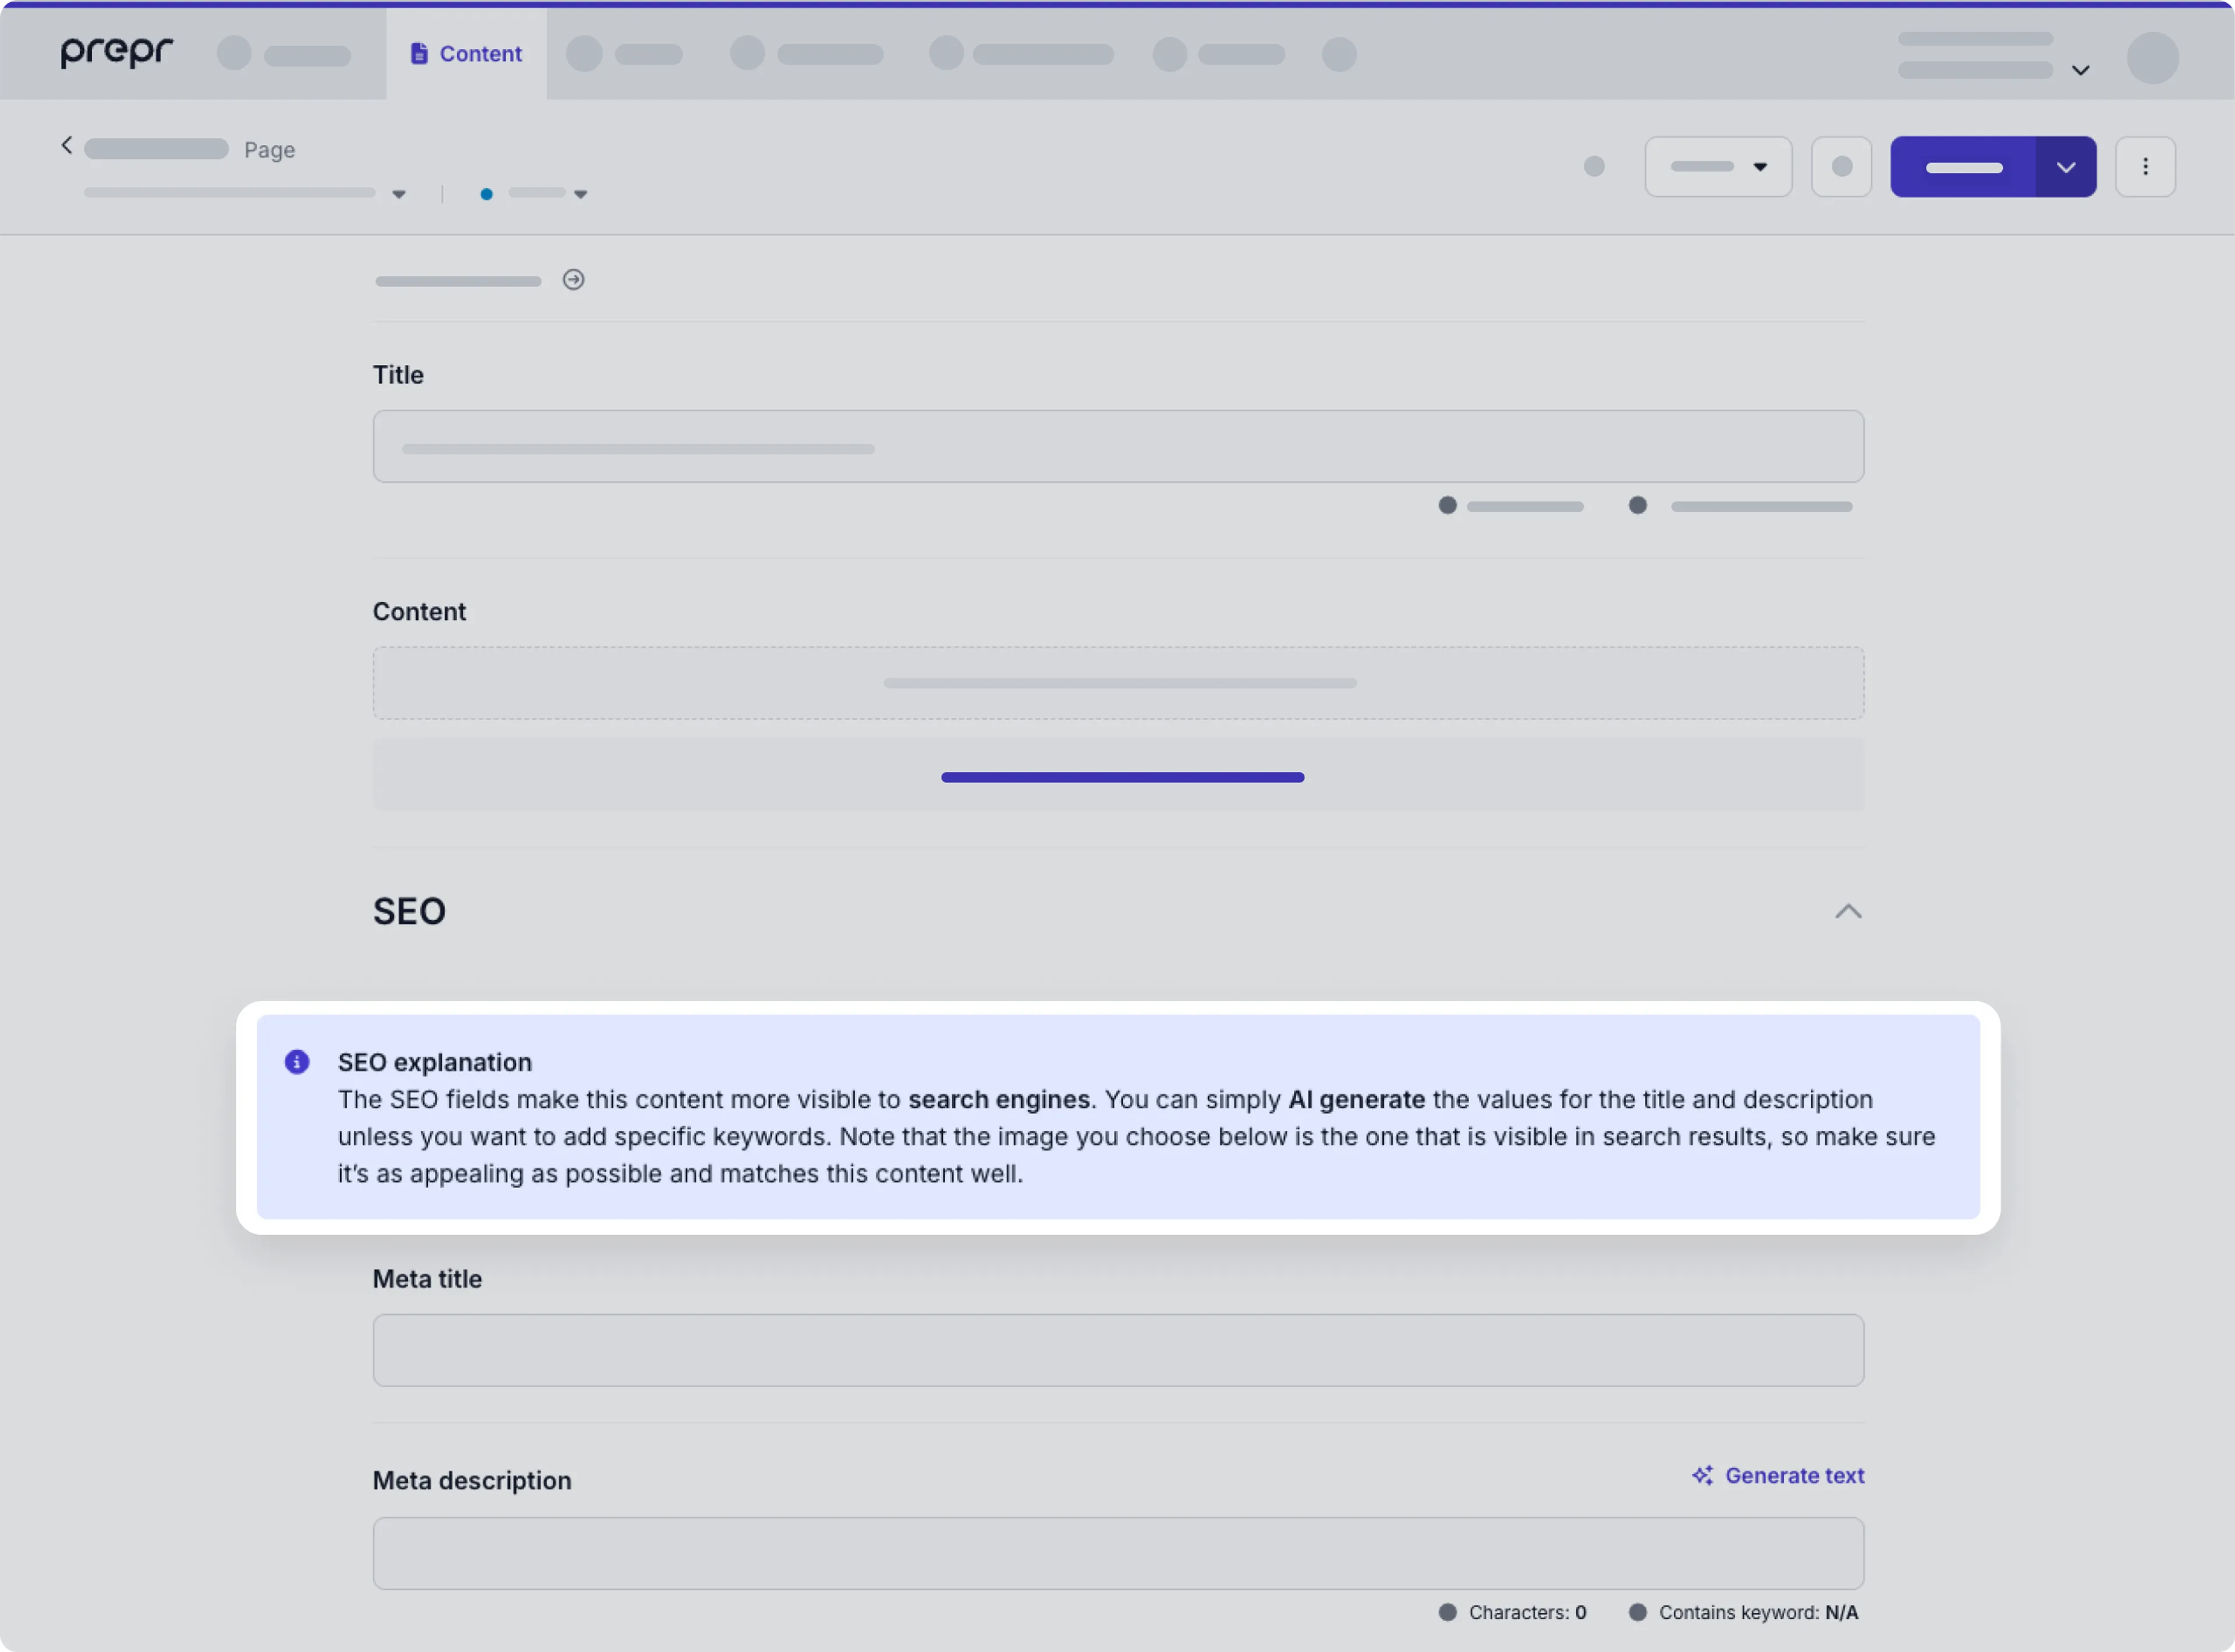
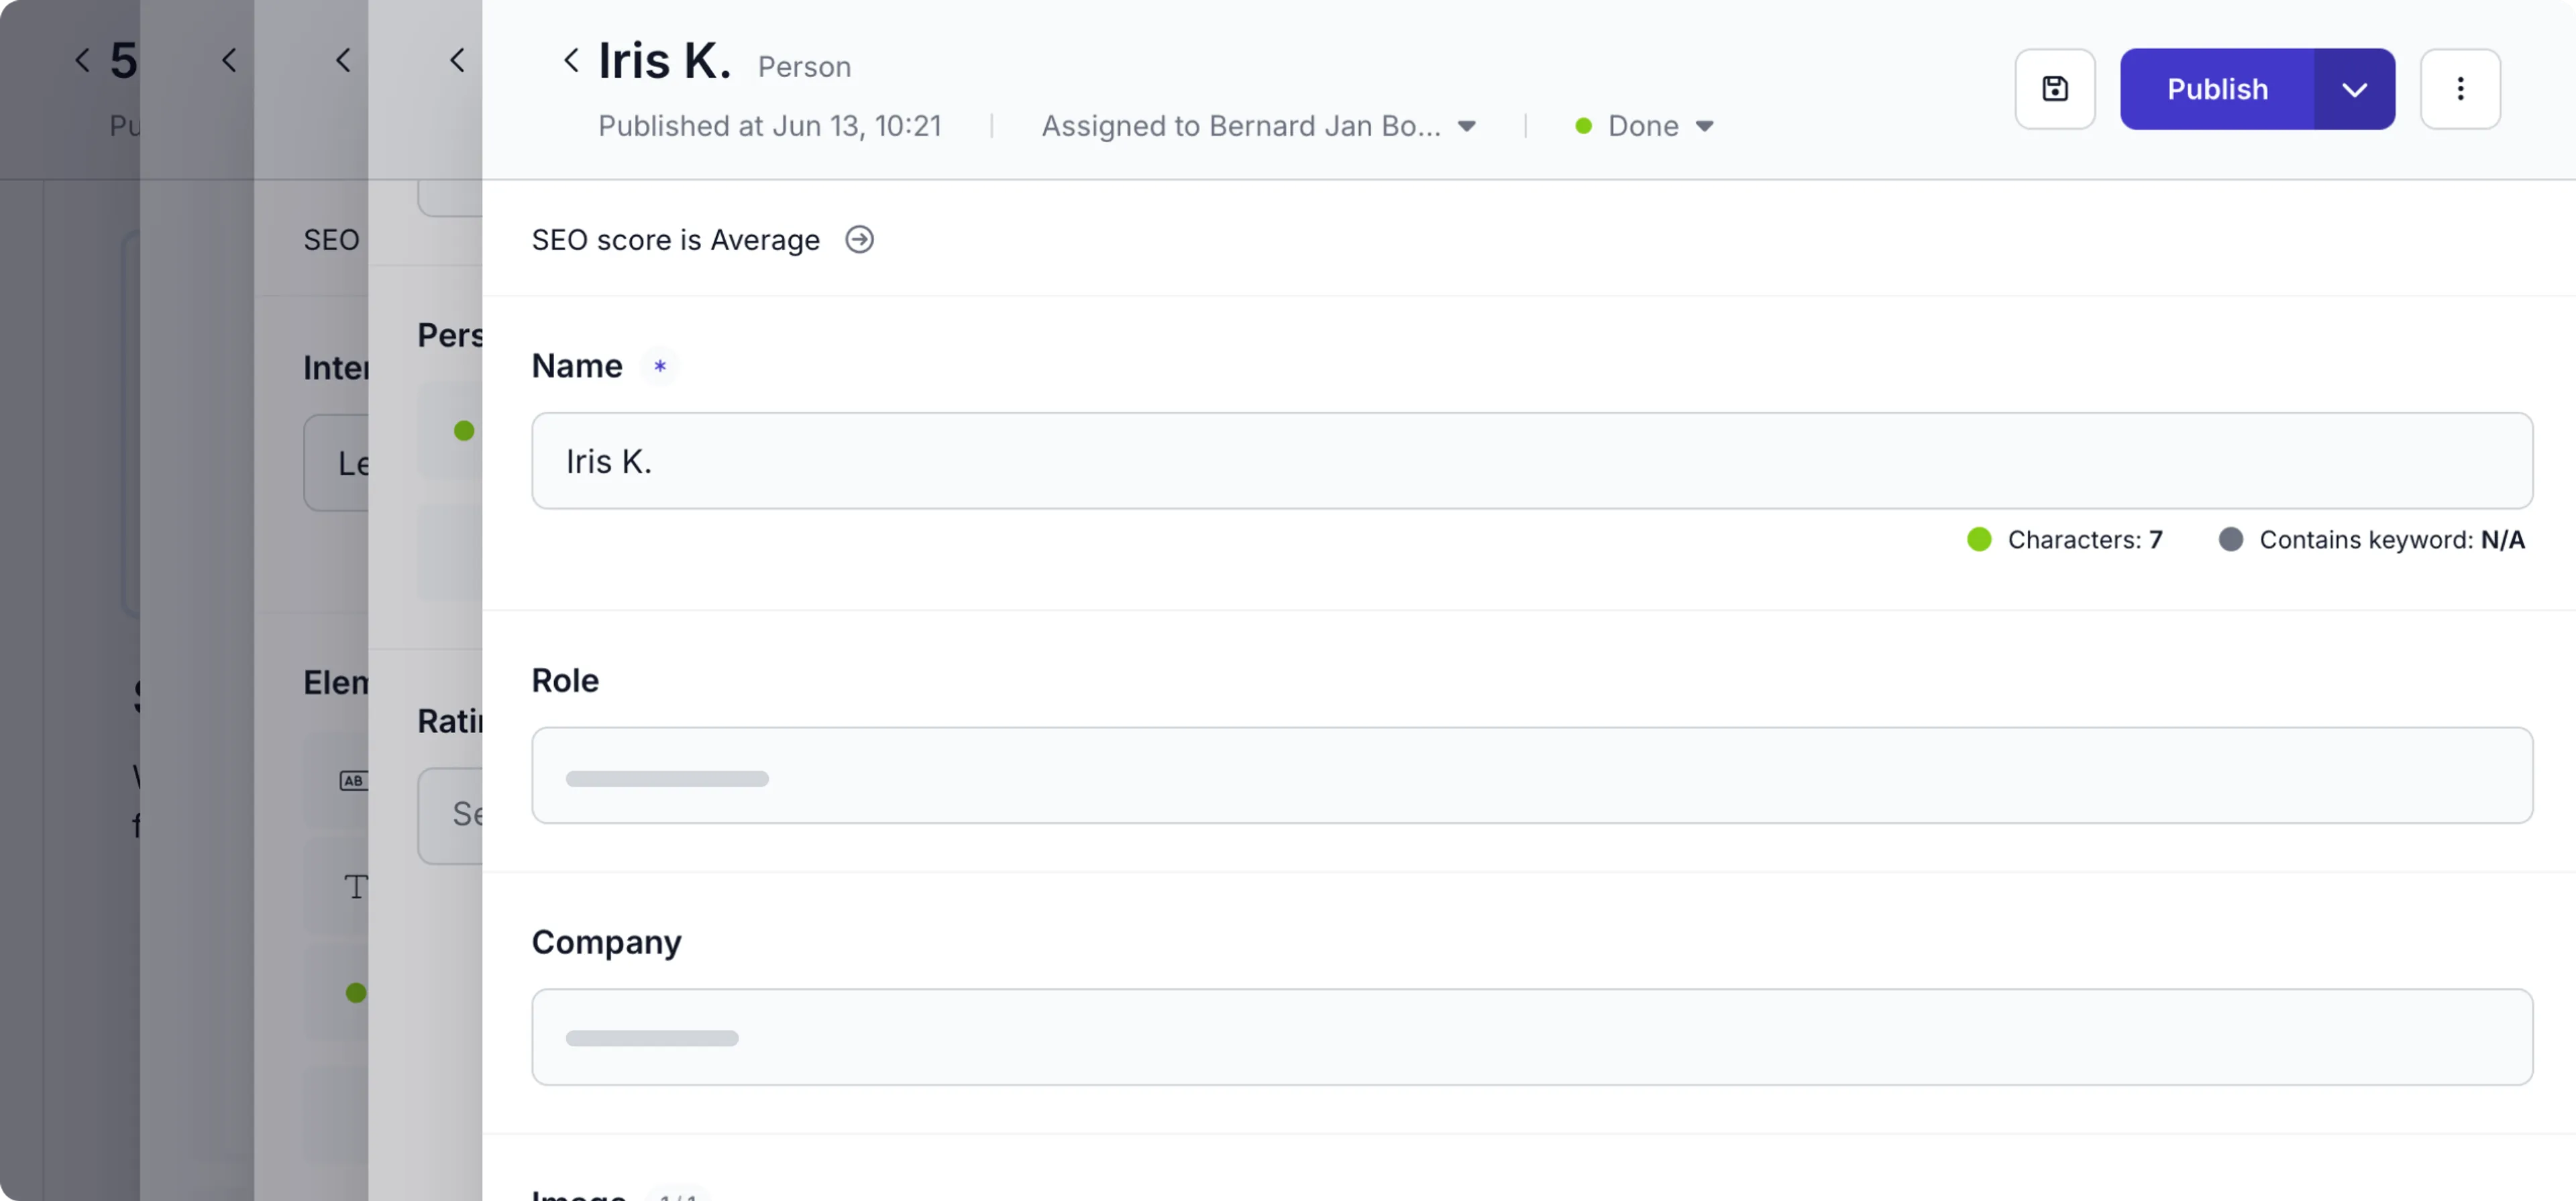
## Dynamic initial values for text fields
With dynamic initial values you can set up text fields to prefill based on other field values helping editors speed up content creation.
For example, for *Post* content items, you can define the initial value for the SEO meta description field to be prefilled with the Post excerpt value the editor enters in the content item.
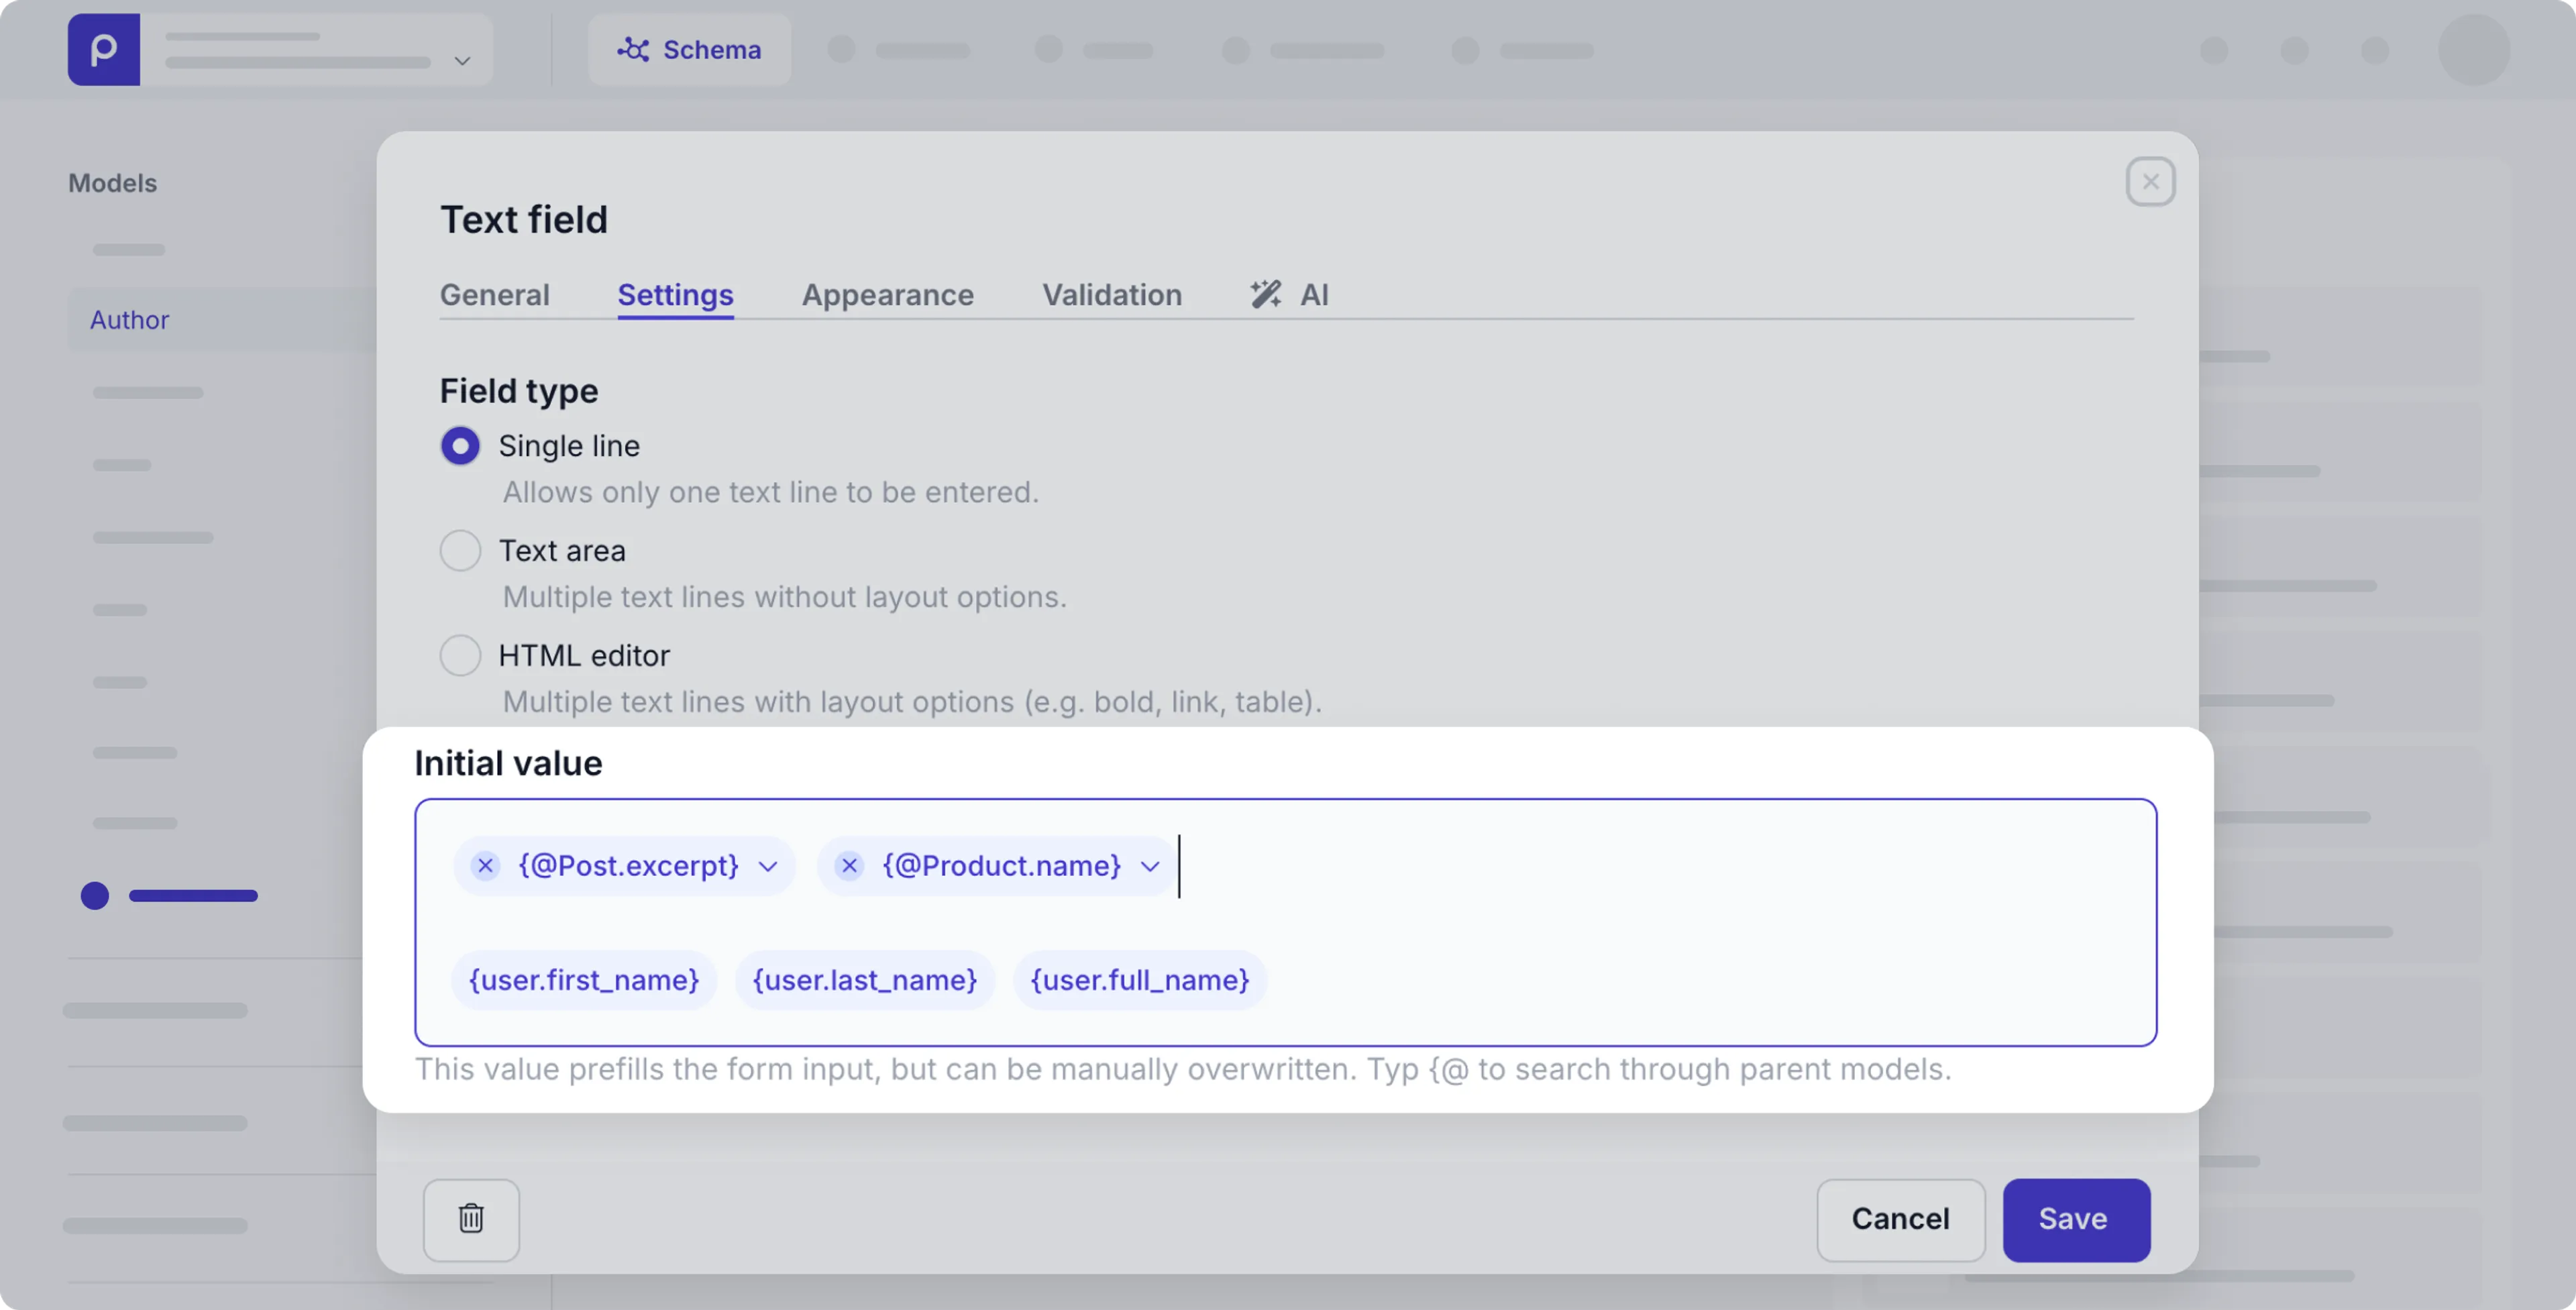
This means simpler data entry and ensures consistency across content items.
Check out the [text field settings](/content-modeling/field-types#text-field) for more details.
## Improved GraphQL caching
We've improved our GraphQL API caching mechanism to significantly improve developer experience and workflow reliability when making changes to your *Schema*.
Now, the GraphQL API automatically refreshes the cache when you make any change to a schema.
This means that your changes are immediately applied when you regenerate your TypeScript types in front-end application.
Check out the [GraphQL API caching doc](/graphql-api/caching) for more details.
## Introducing granular permissions to manage content items
With granular content permissions, you can now precisely define a user role to allow users to only create, read, update, delete, manage comments, publish and unpublish content items.
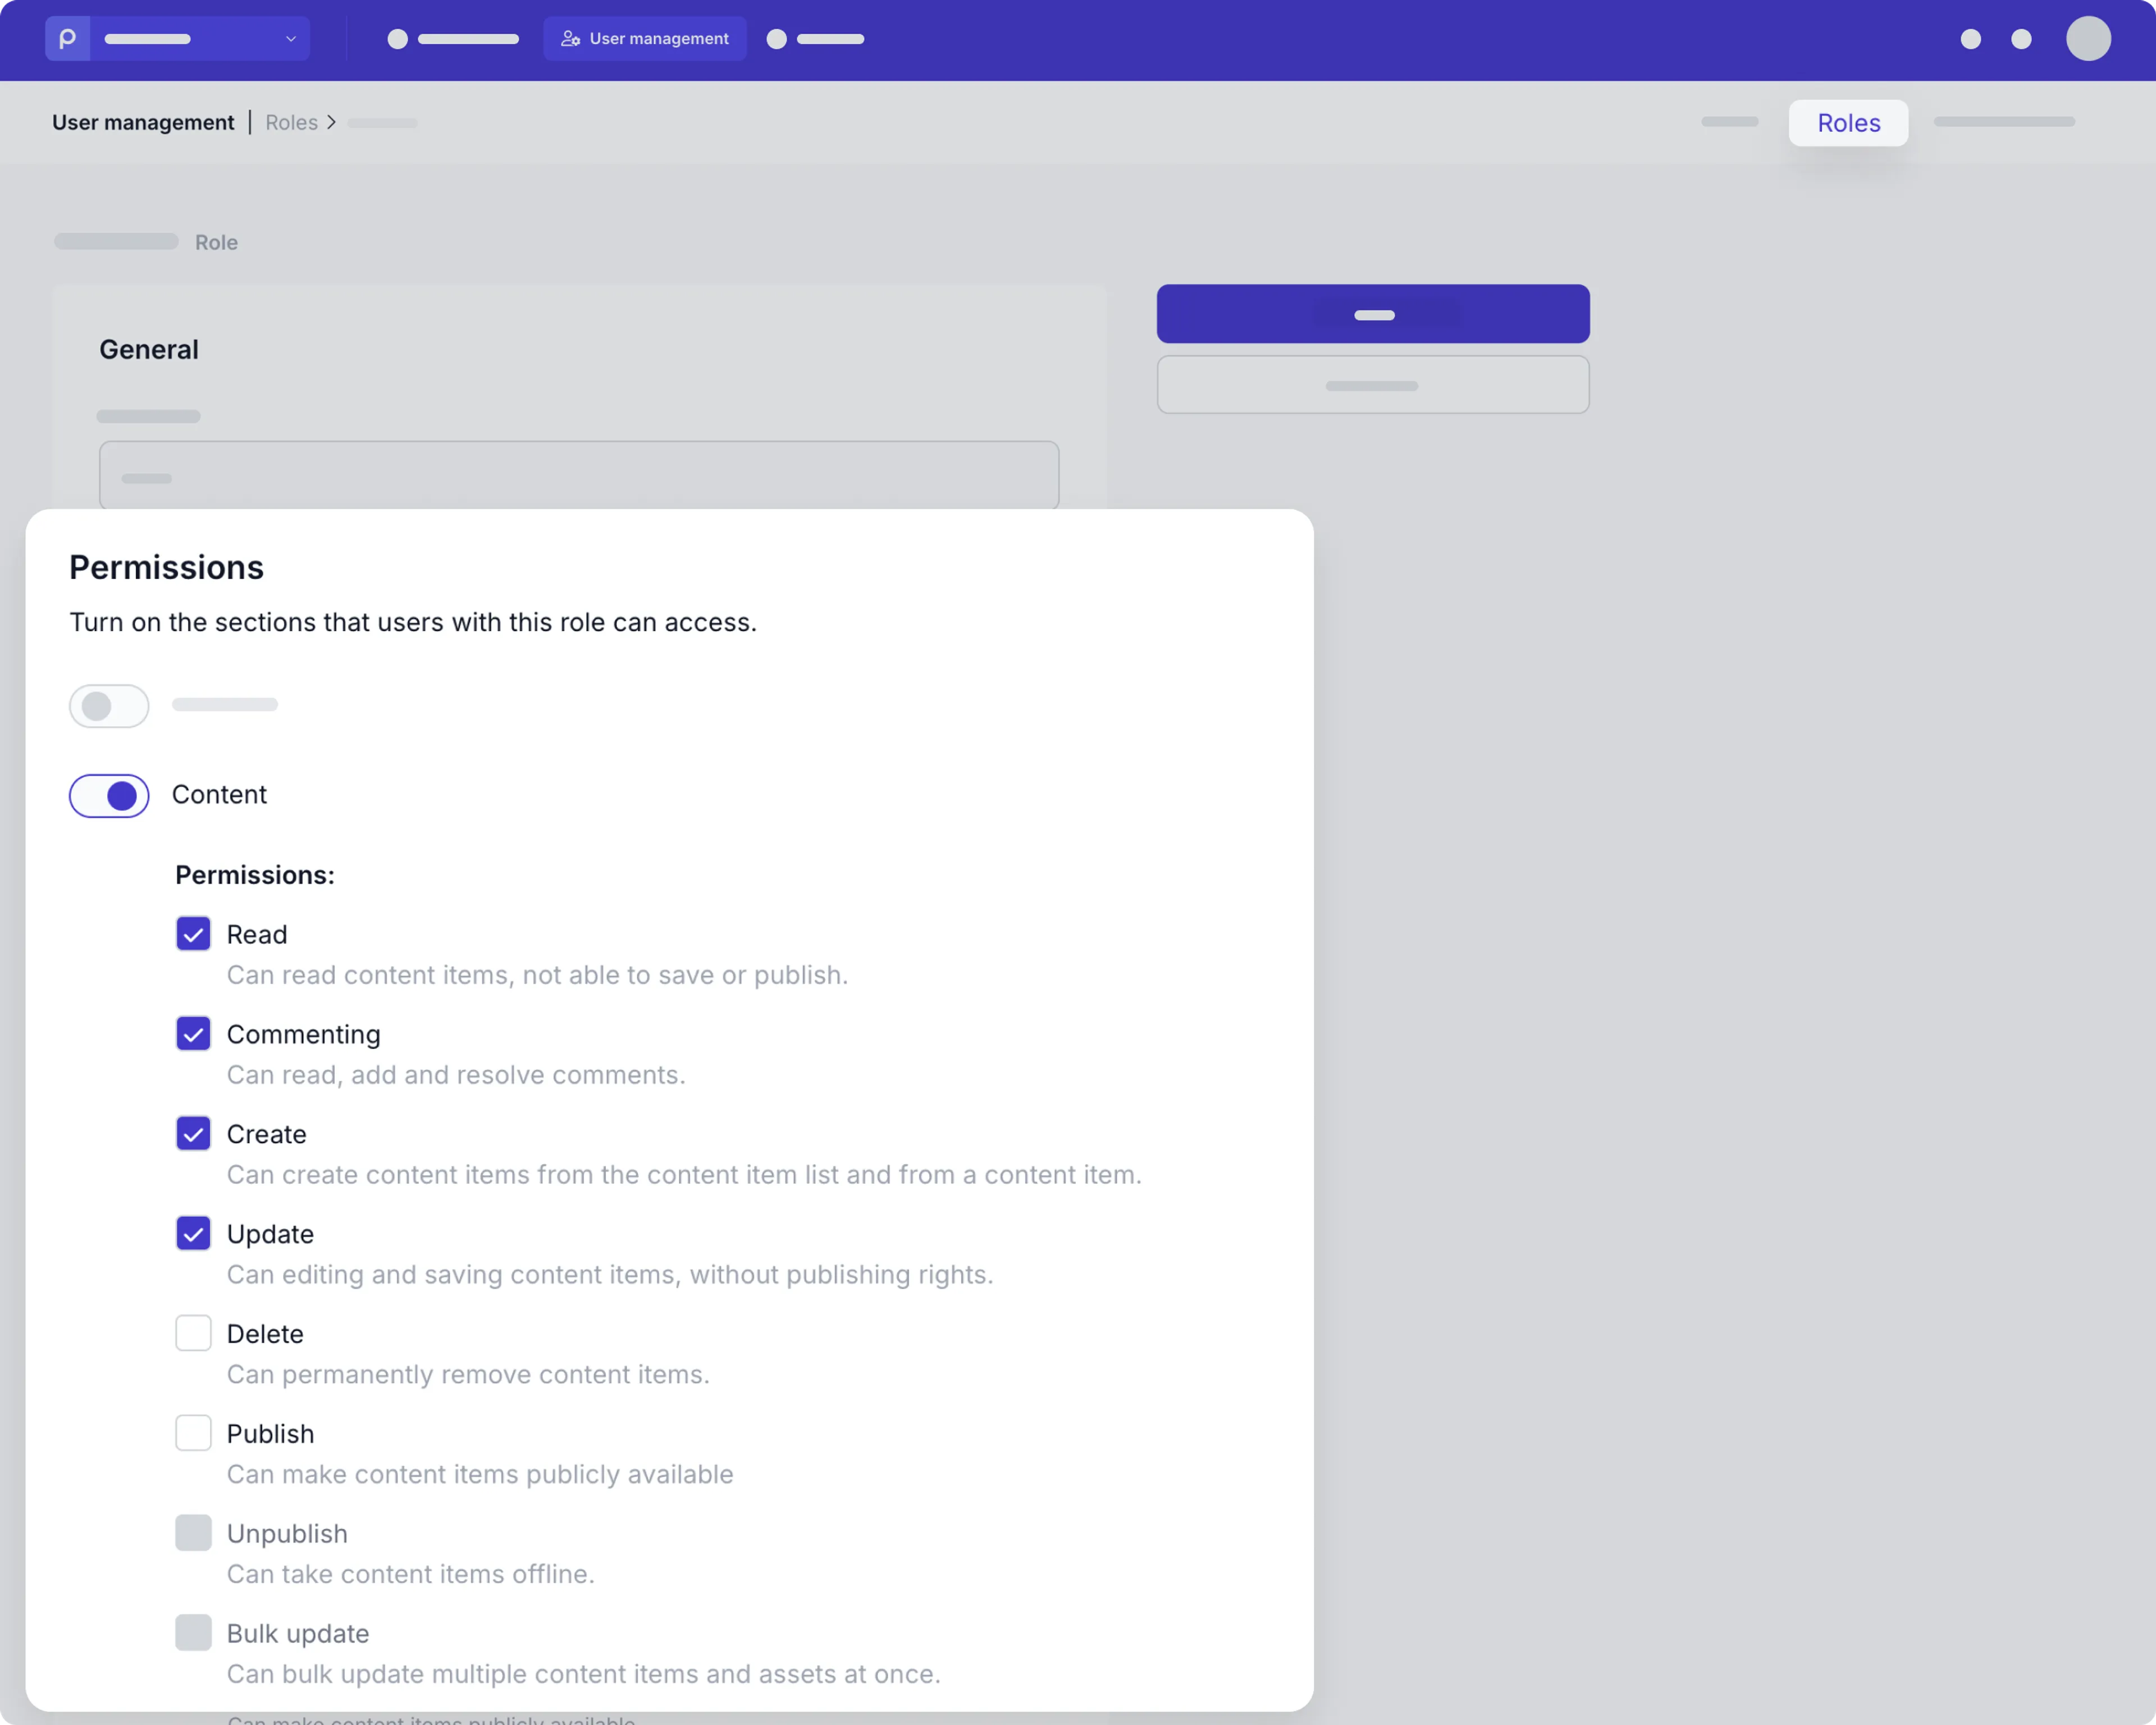
In doing so, you have enhanced security and clearer workflow for every user reducing the risk of accidental errors.
Check out the [user role guide](/project-setup/managing-roles-and-permissions#add-or-edit-roles) for more details.
## Prepr now available in French
With Prepr now available in French, your users in French-speaking regions or those who prefer French can use Prepr in their native language.
You can enable the French UI in the environment settings or each user can set their preferred interface language to French in their [account profile](/project-setup/managing-users#set-language-preferences).
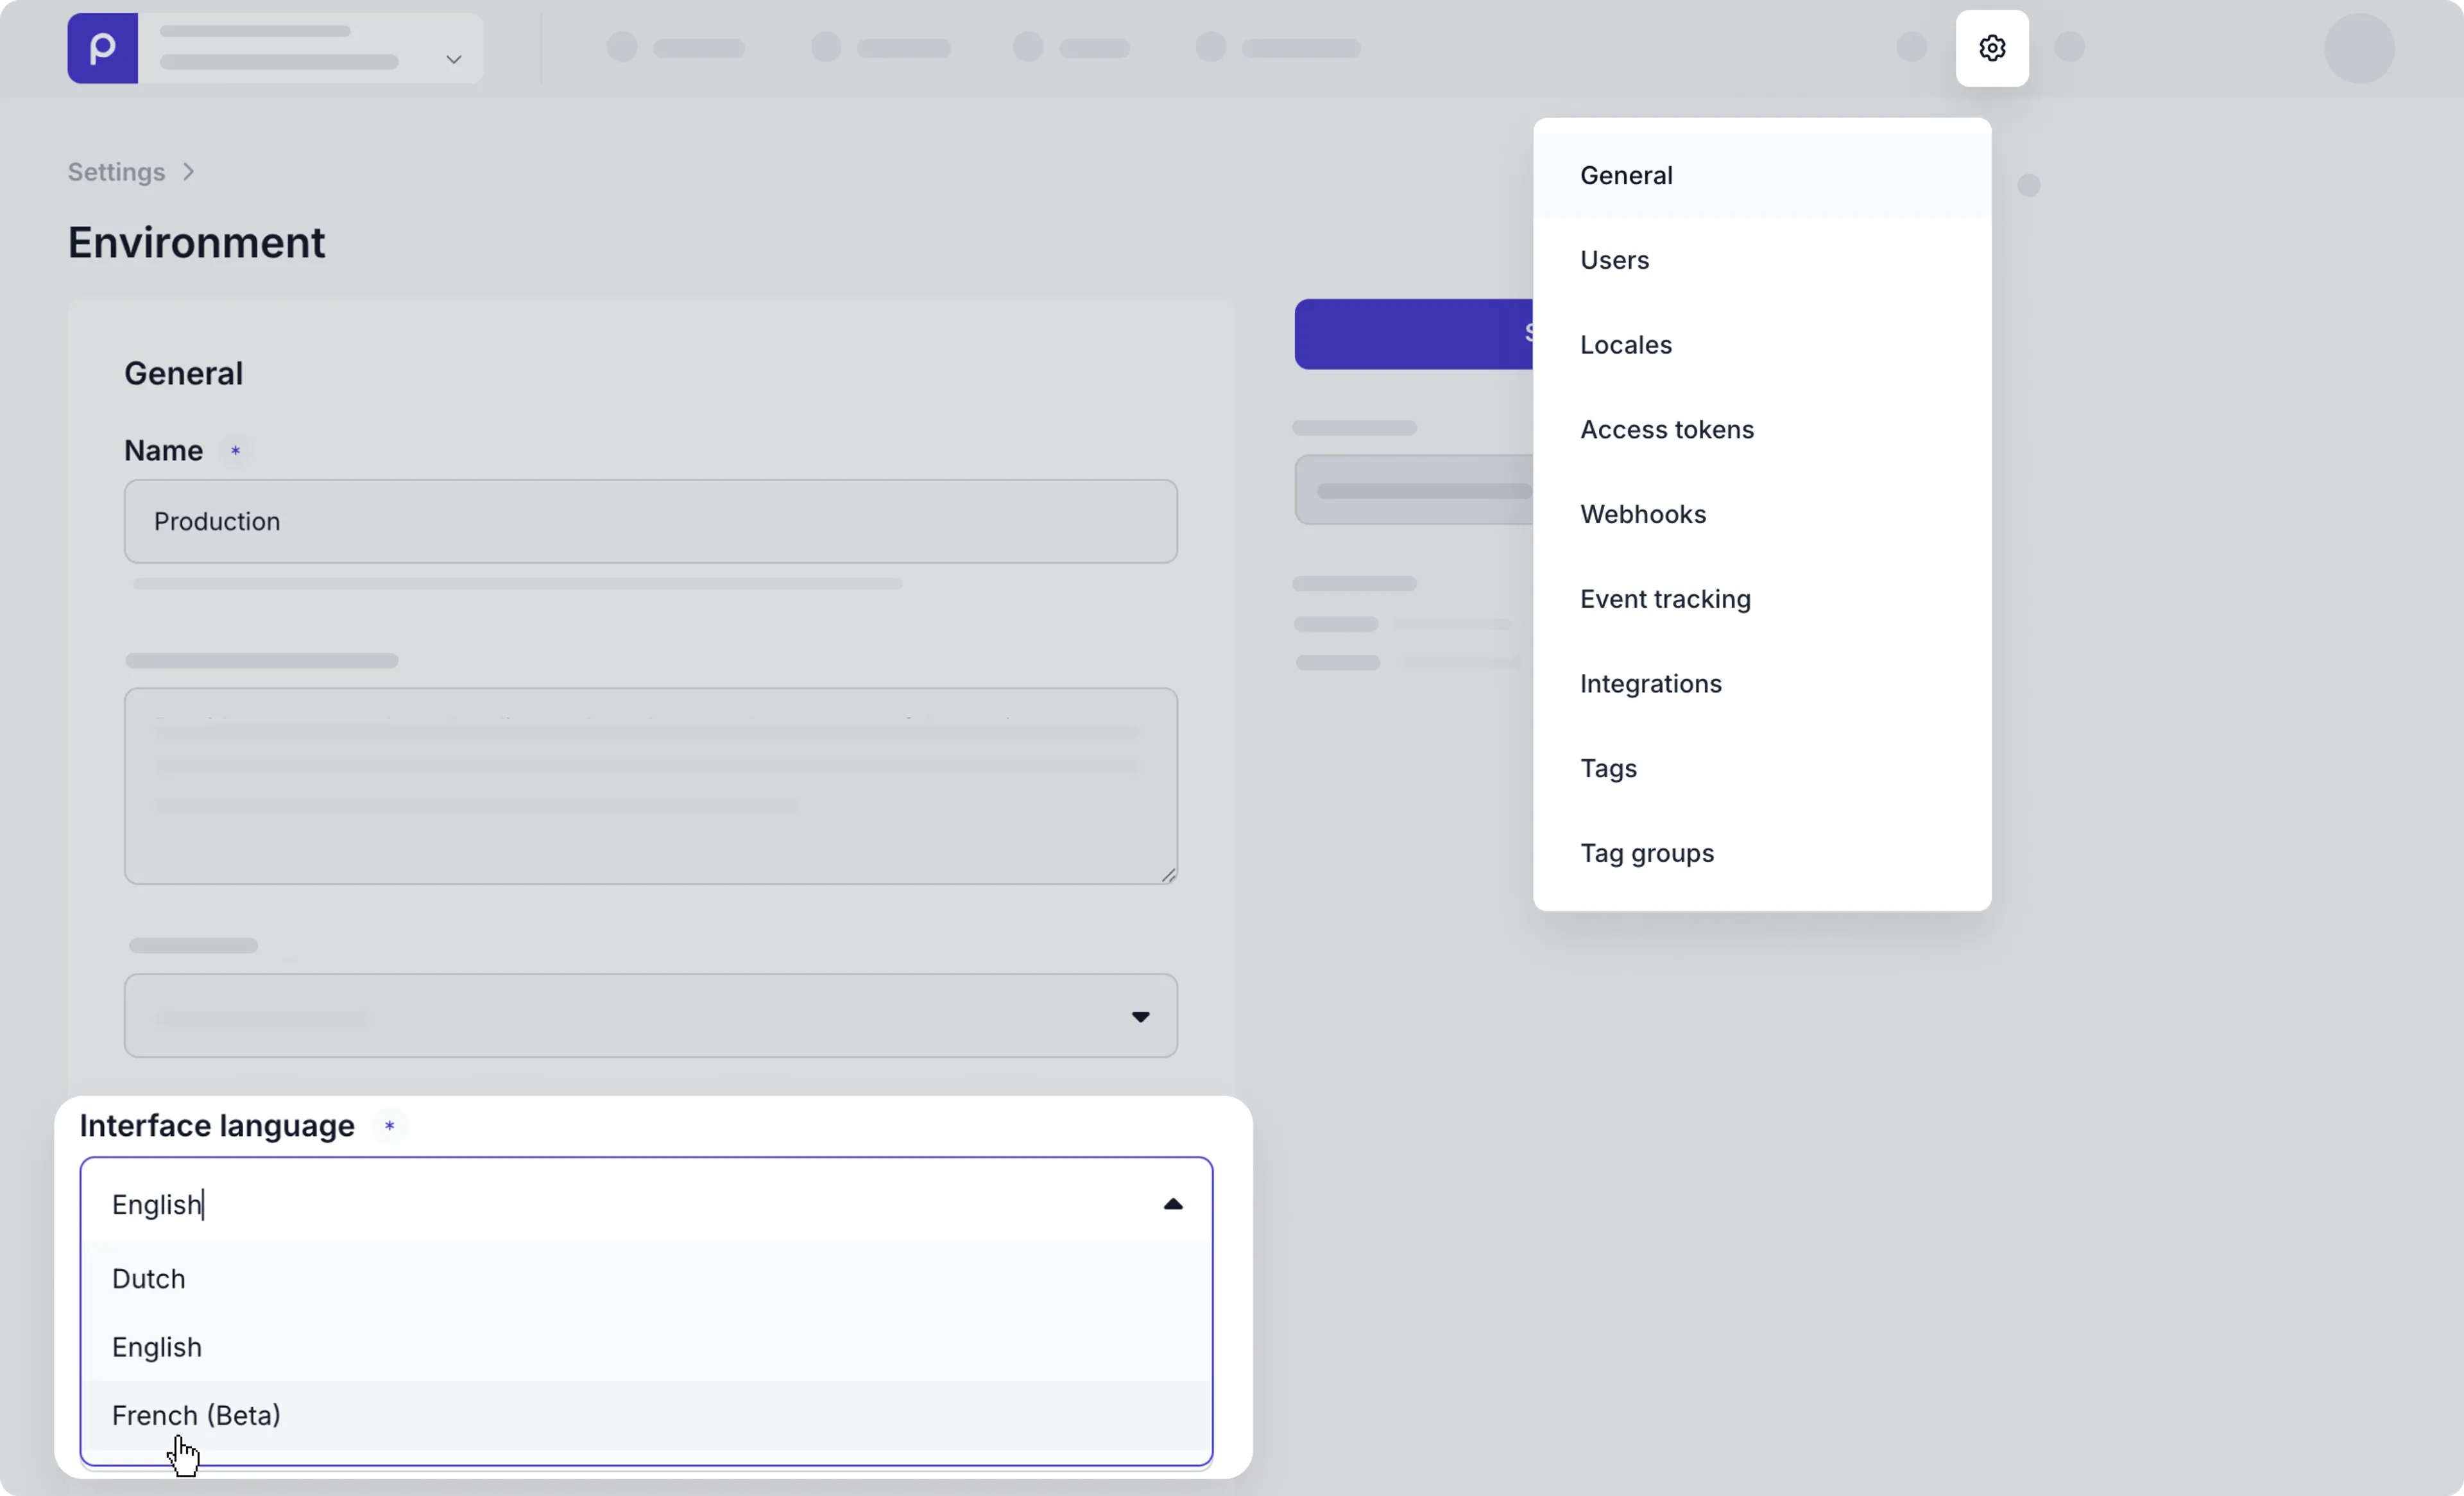
This feature provides a more intuitive and comfortable user experience, leading to greater understanding, and reduced errors for French-speaking users.
For more details, check out the [environments settings](/project-setup/setting-up-environments#manage-environment-settings).
## Making slug prefix read-only
We've introduced a new option to make the first part of a slug read-only.
When you enable this option in the *Slug* field settings, editors can only edit the part of the slug after the last `/`.
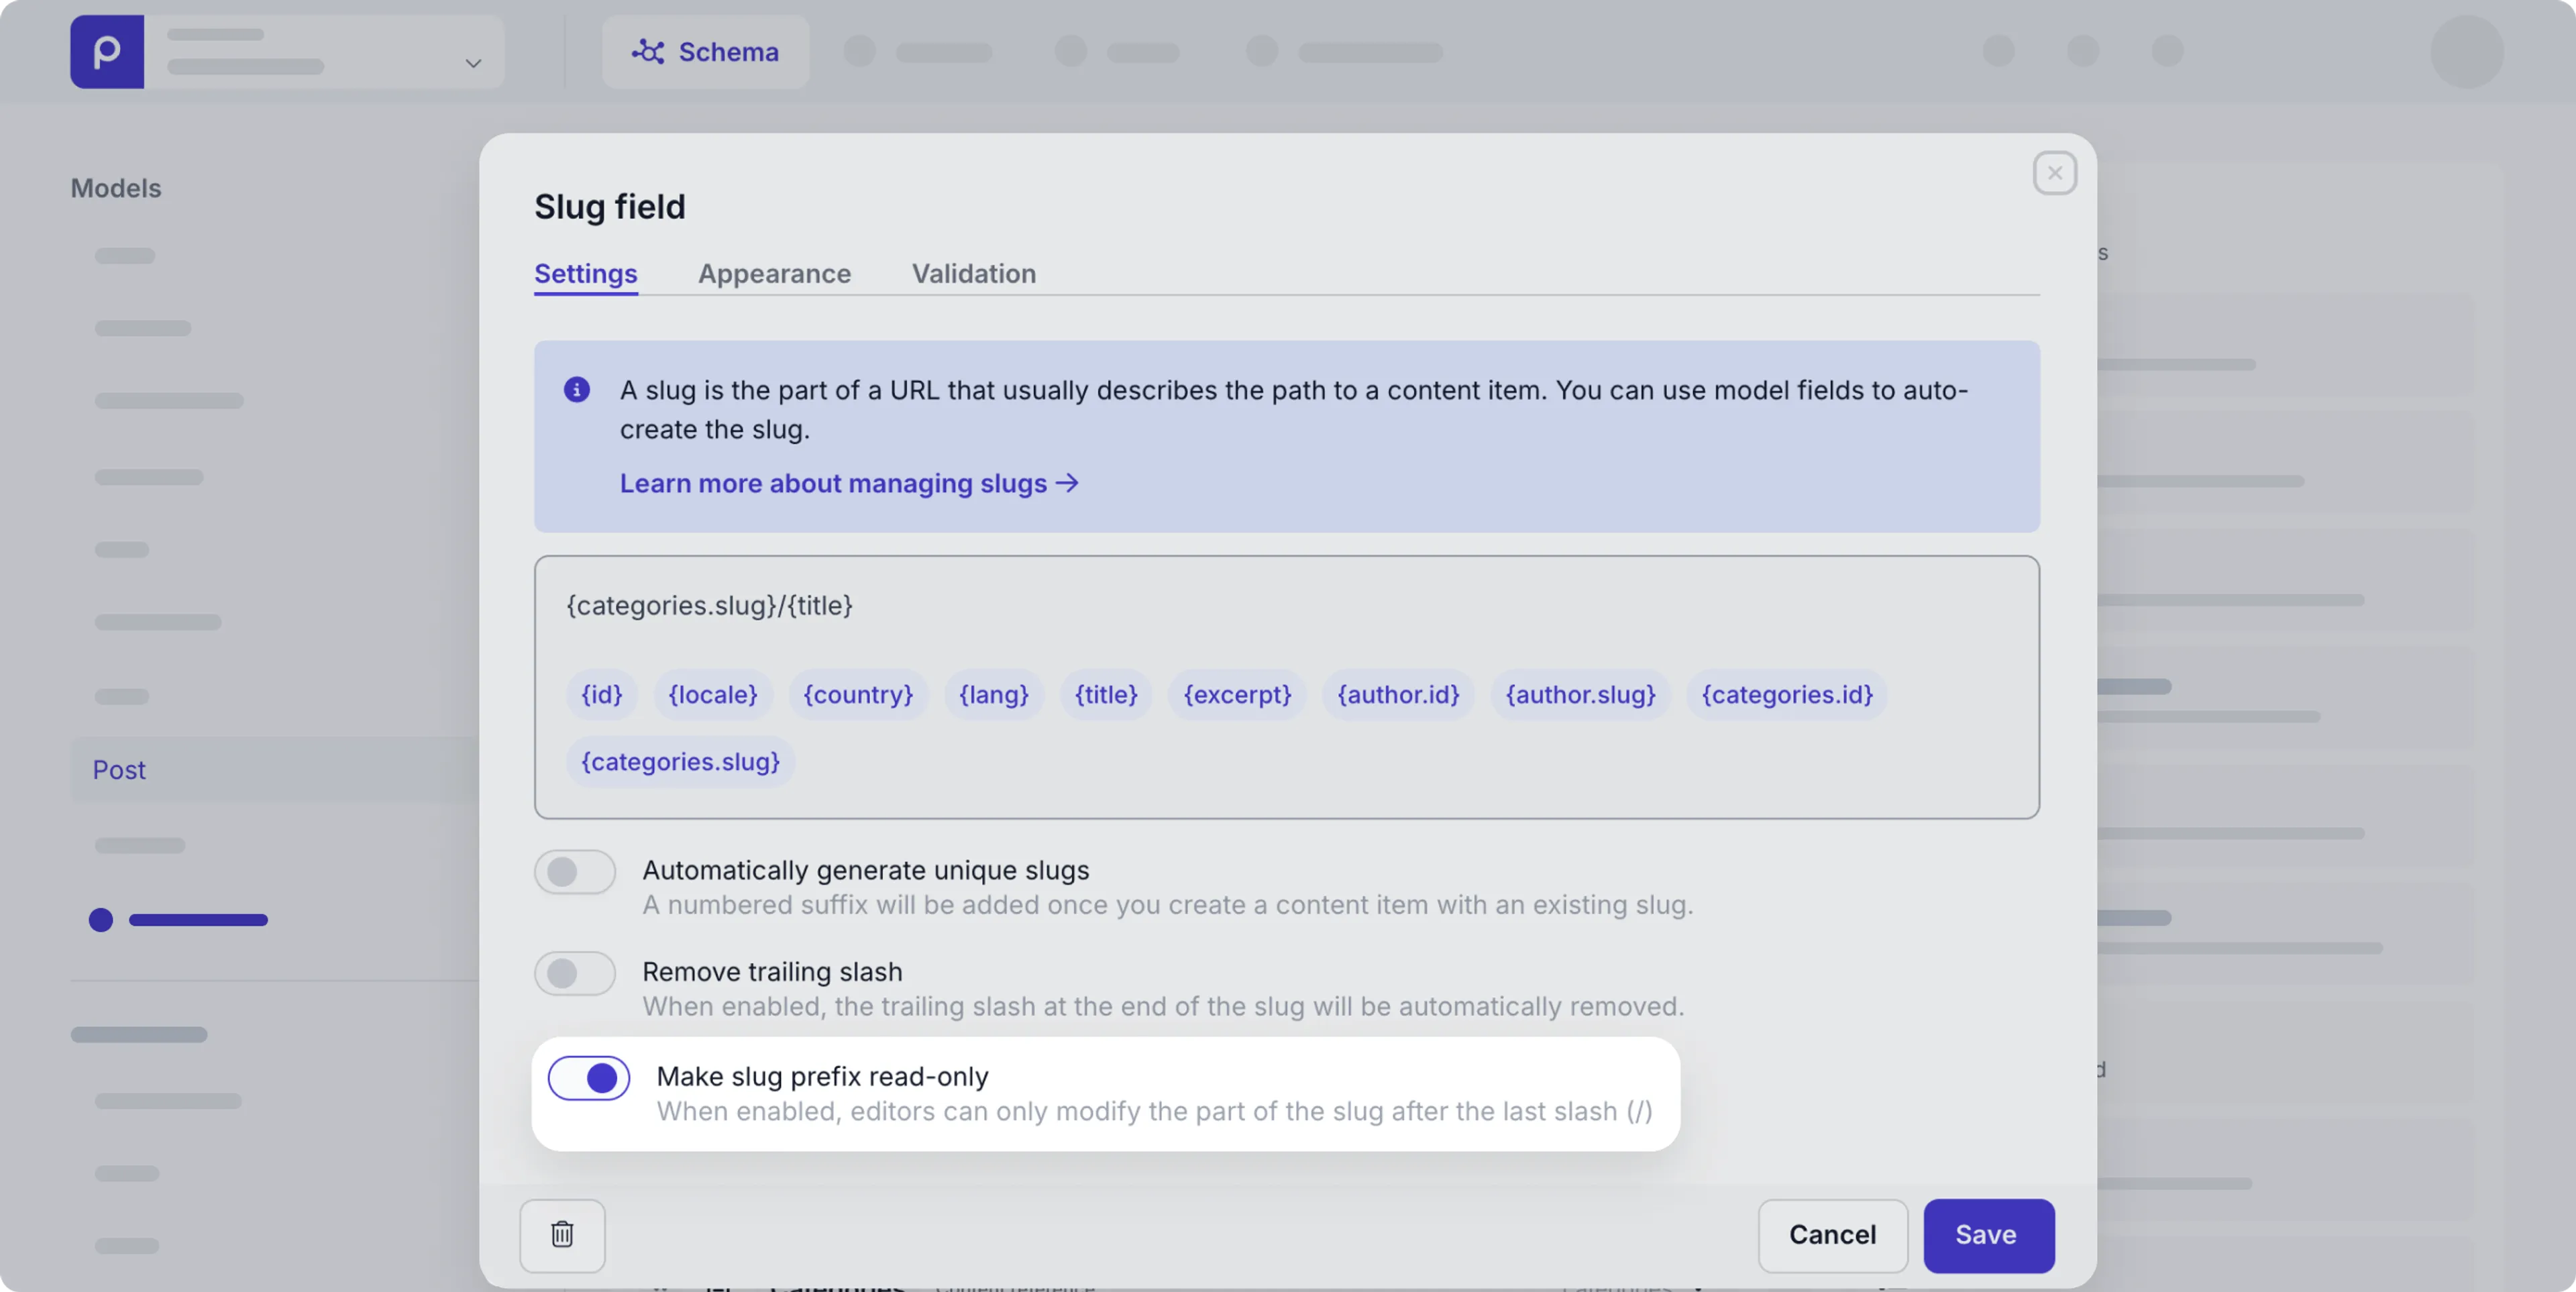
With this feature, you enforce consistent slugs ensuring clean and accurate content item URLs and prevent broken links when editors need to update slug values manually.
Check out the [*Slug* field reference](/content-modeling/field-types#slug-field) for more details.
## Conditional visibility by environment
You can now control field visibility per environment when using a shared schema.
This new option lets you choose which environments to show certain fields, ideal for multi-site or multi-brand setups where fields differ slightly between environments.
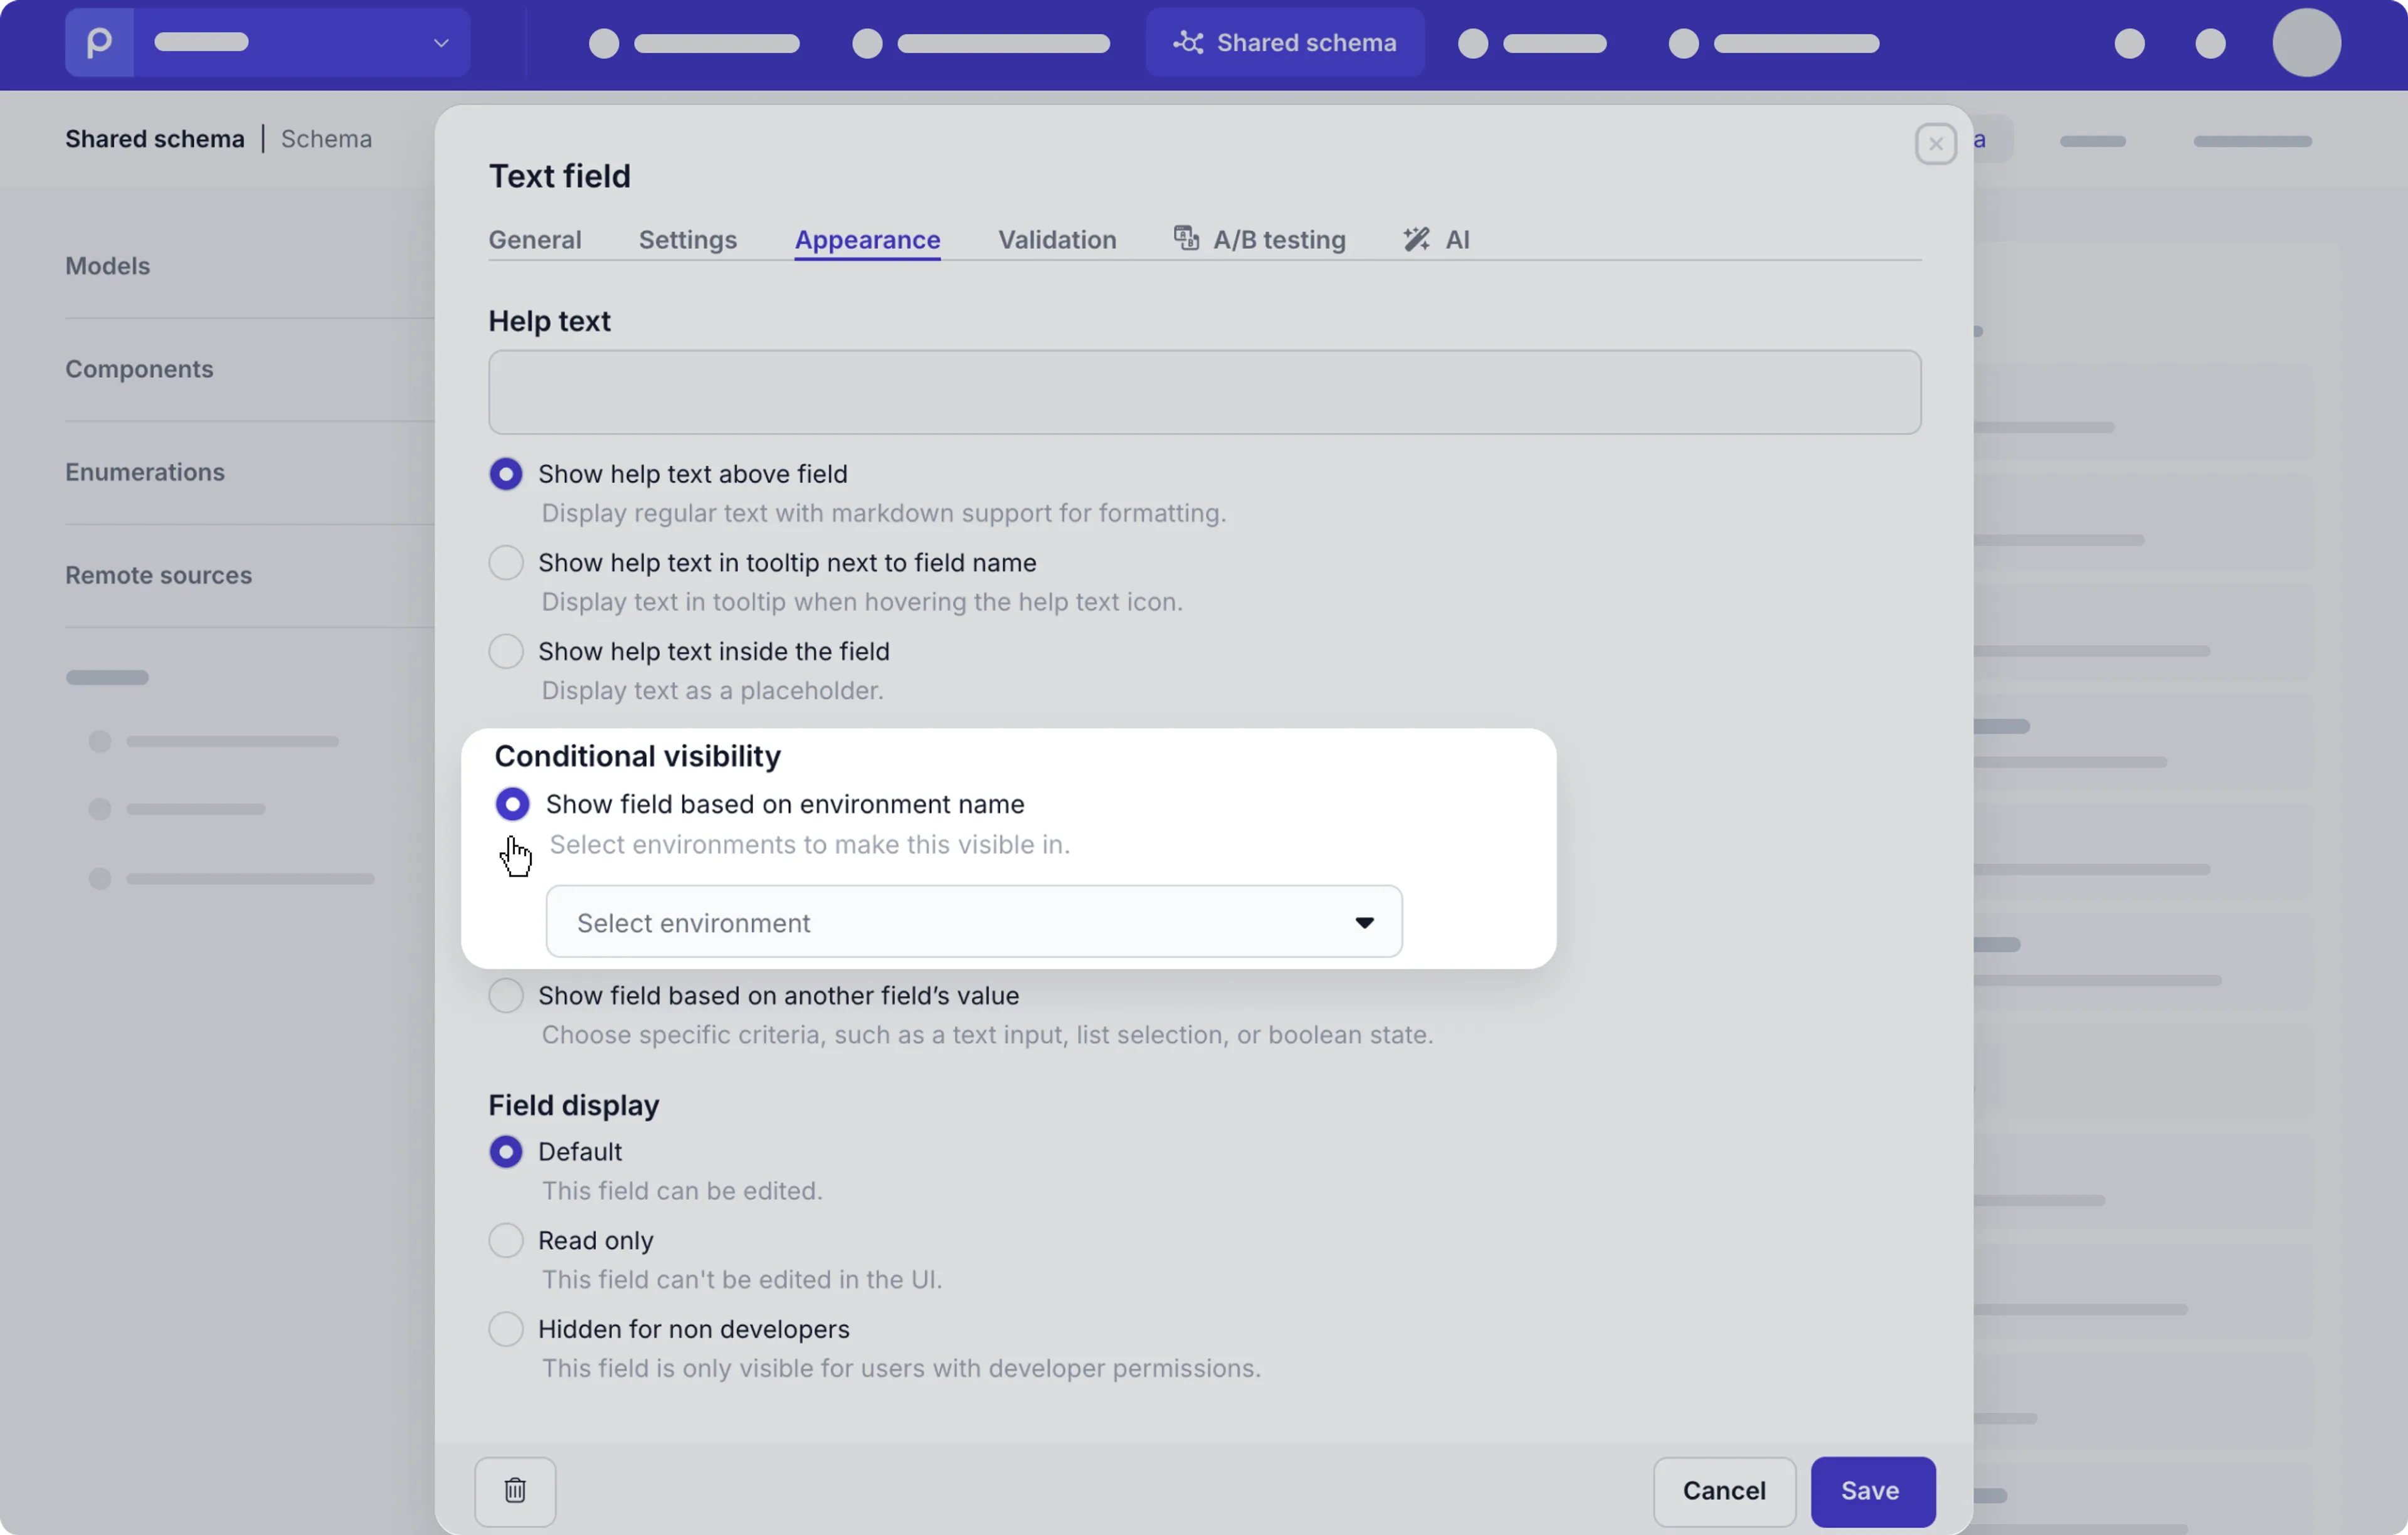
It makes managing shared schemas much more flexible and keeps your content models clean and relevant across all sites.
Check out the [shared schema guide](/project-setup/architecture-scenarios/shared-schema#choose-field-visibility-for-environments) for more details.
## New SSO login options
You can now integrate your preferred identity provider (IdP) to Prepr using one of our new SSO options.
In addition to *Microsoft Entra ID* (formerly *Azure Active Directory*), you can now set up single sign-on for your Prepr users using *Google Workspace*, or any identity provider with either the *SAML 2.0* or *OpenID Connect* open standards.
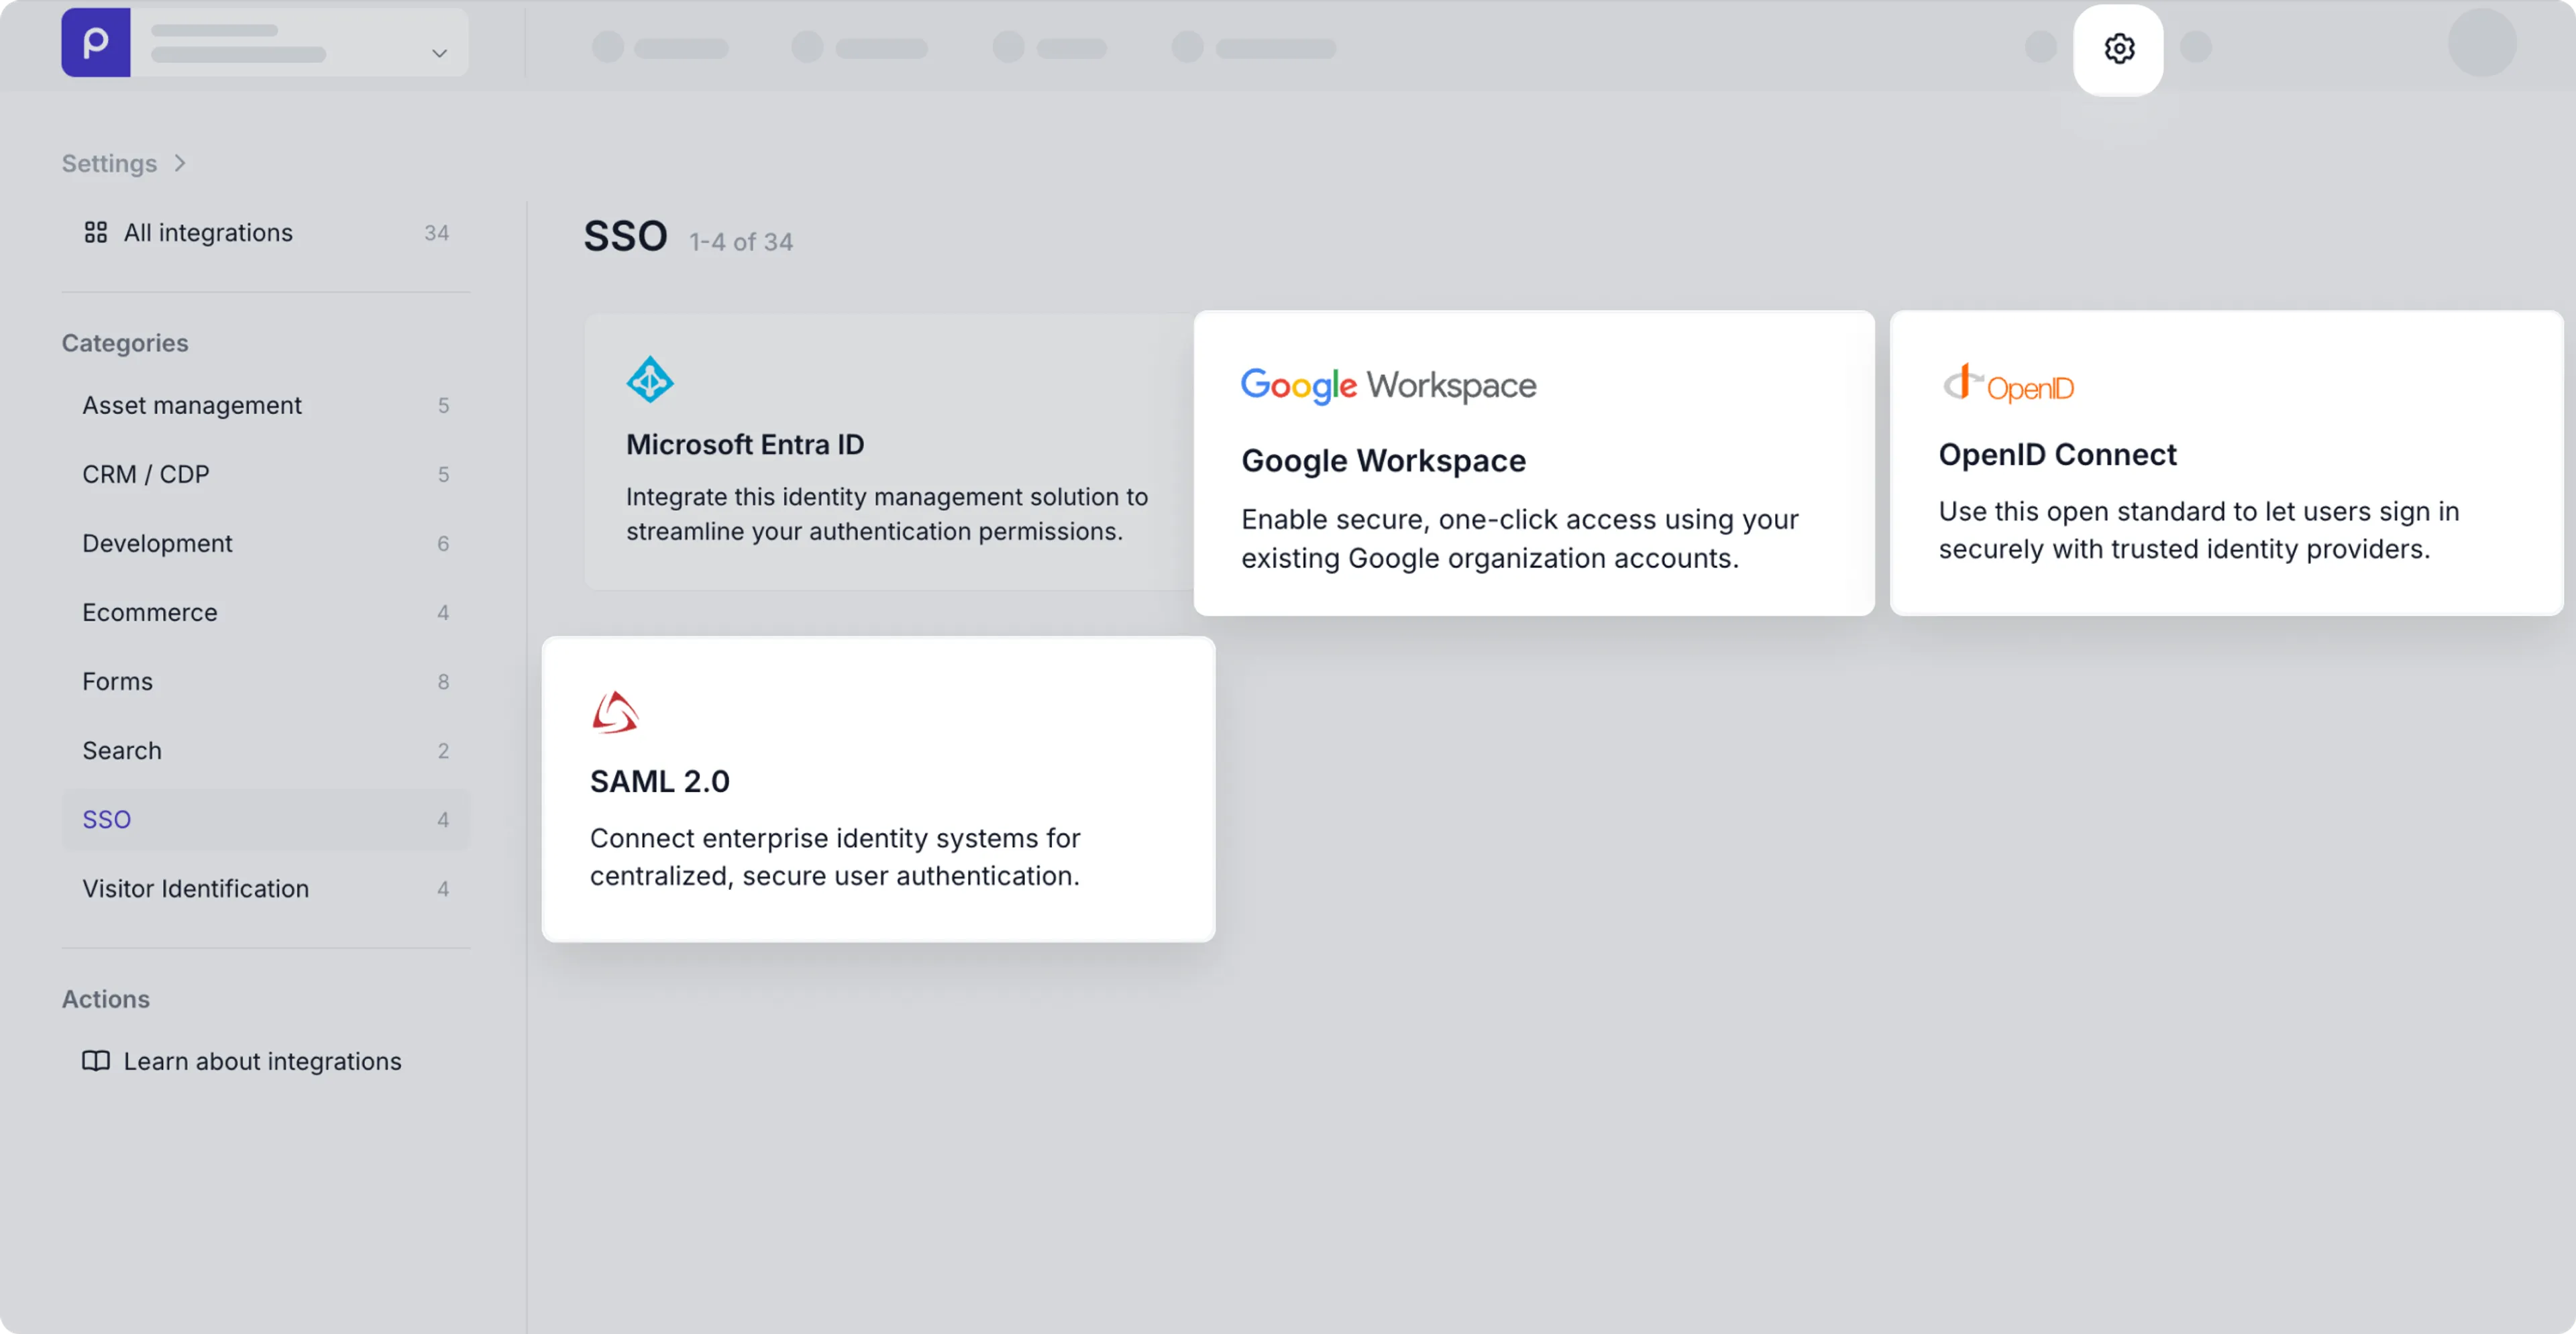
By setting up one of these options, you enhance security and give your users an improved login experience.
Check out the [updated SSO guide](/project-setup/setting-up-sso) for more details.
## Improved navigation user interface
We've improved our navigation with a cleaner and more intuitive interface.
The environment selector is now on the left and you'll see a prominent banner to indicate when you're logged into a test or development environment.
You'll also find the *Settings* in a new location on the right when you click the icon.
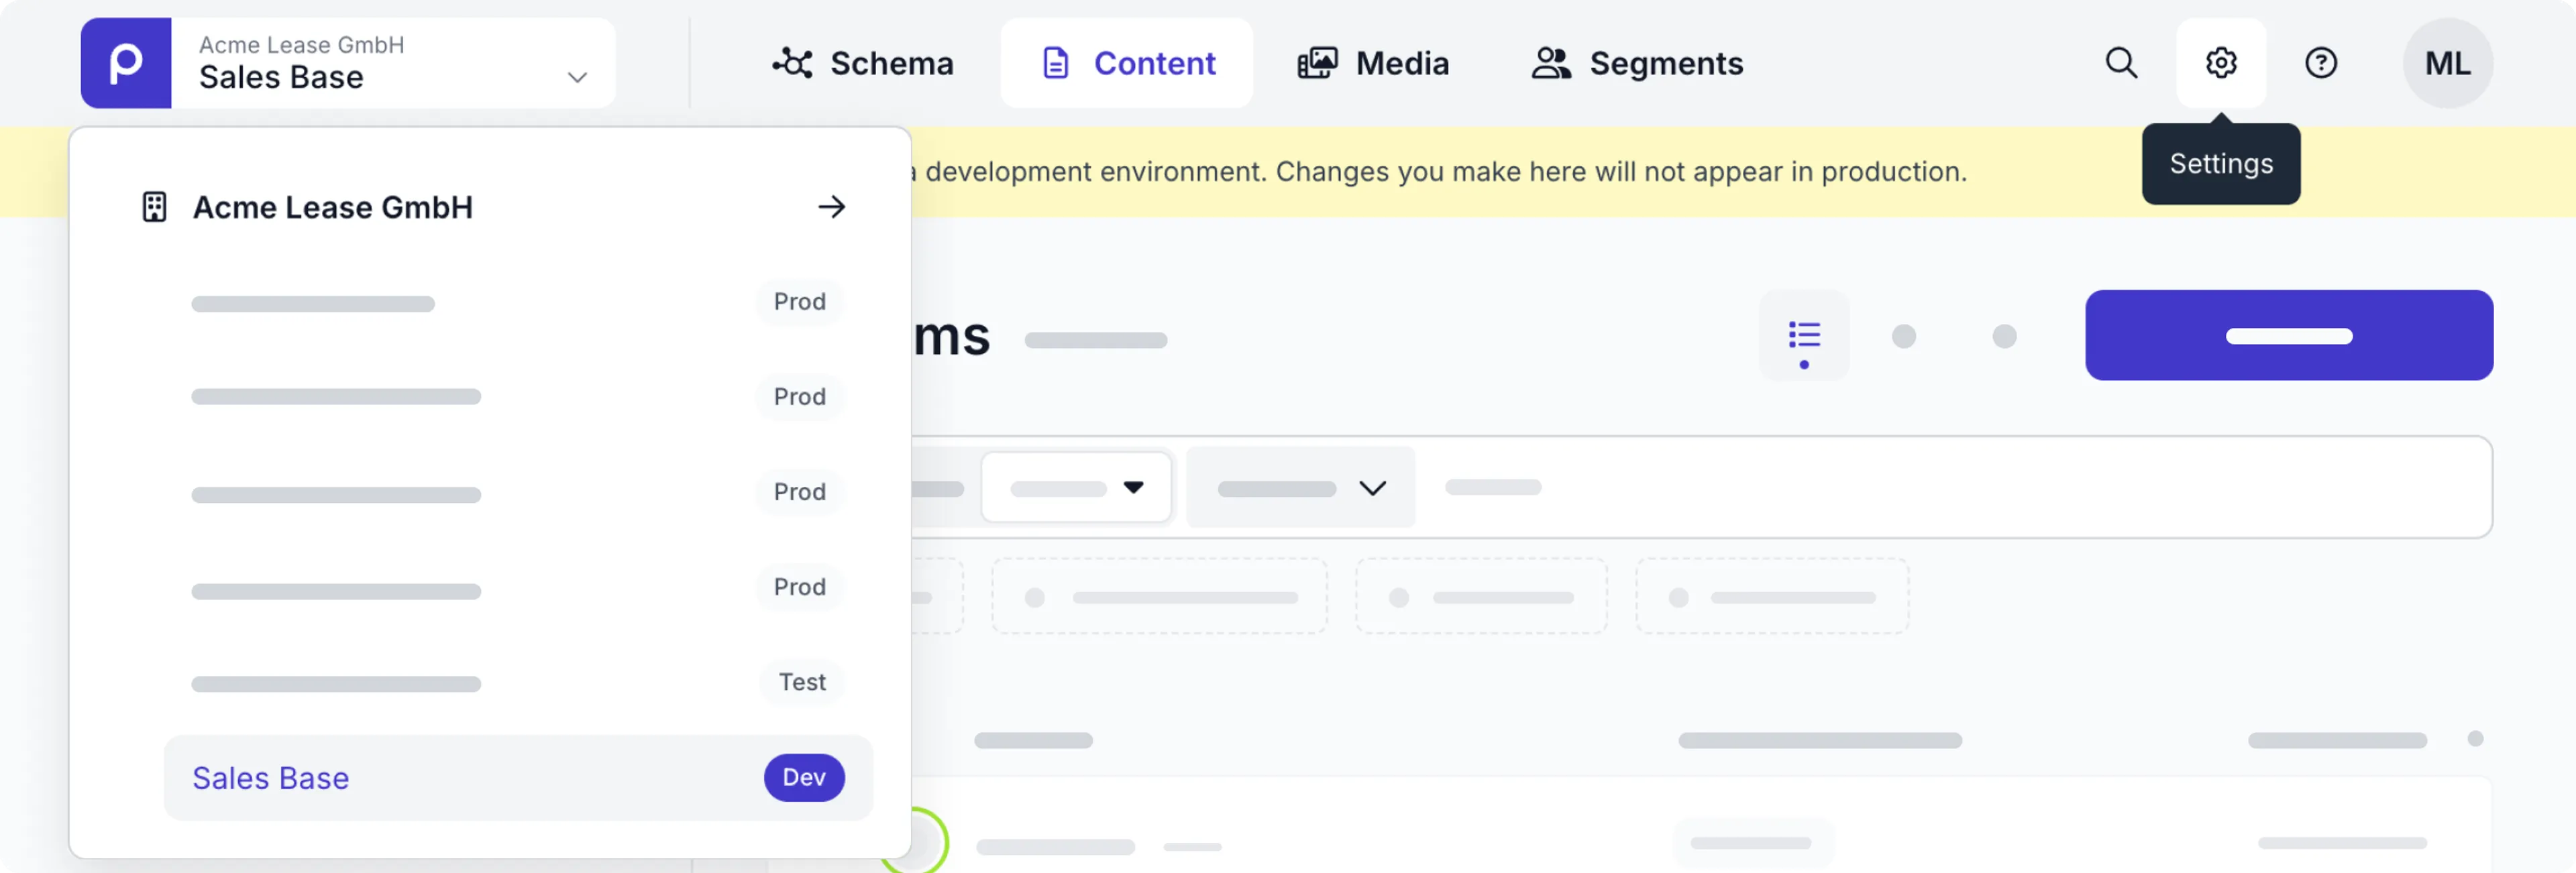
The updated navigation allows you to work more confidently in Prepr with the clear indication of the environment and type of environment you're working in.
For more details, check out the [environments guide](/project-setup/setting-up-environments).
## Publish nested content items
You now have the option to publish all linked child items in one go when publishing a parent content item.

This prevents broken or incomplete pages and ensures all linked content goes live at the same time.
So, you save time and avoid errors by publishing the whole content structure in a single action.
Check out the [content management docs](/content-management/managing-content/managing-content-items#publish-a-content-item) for more details.
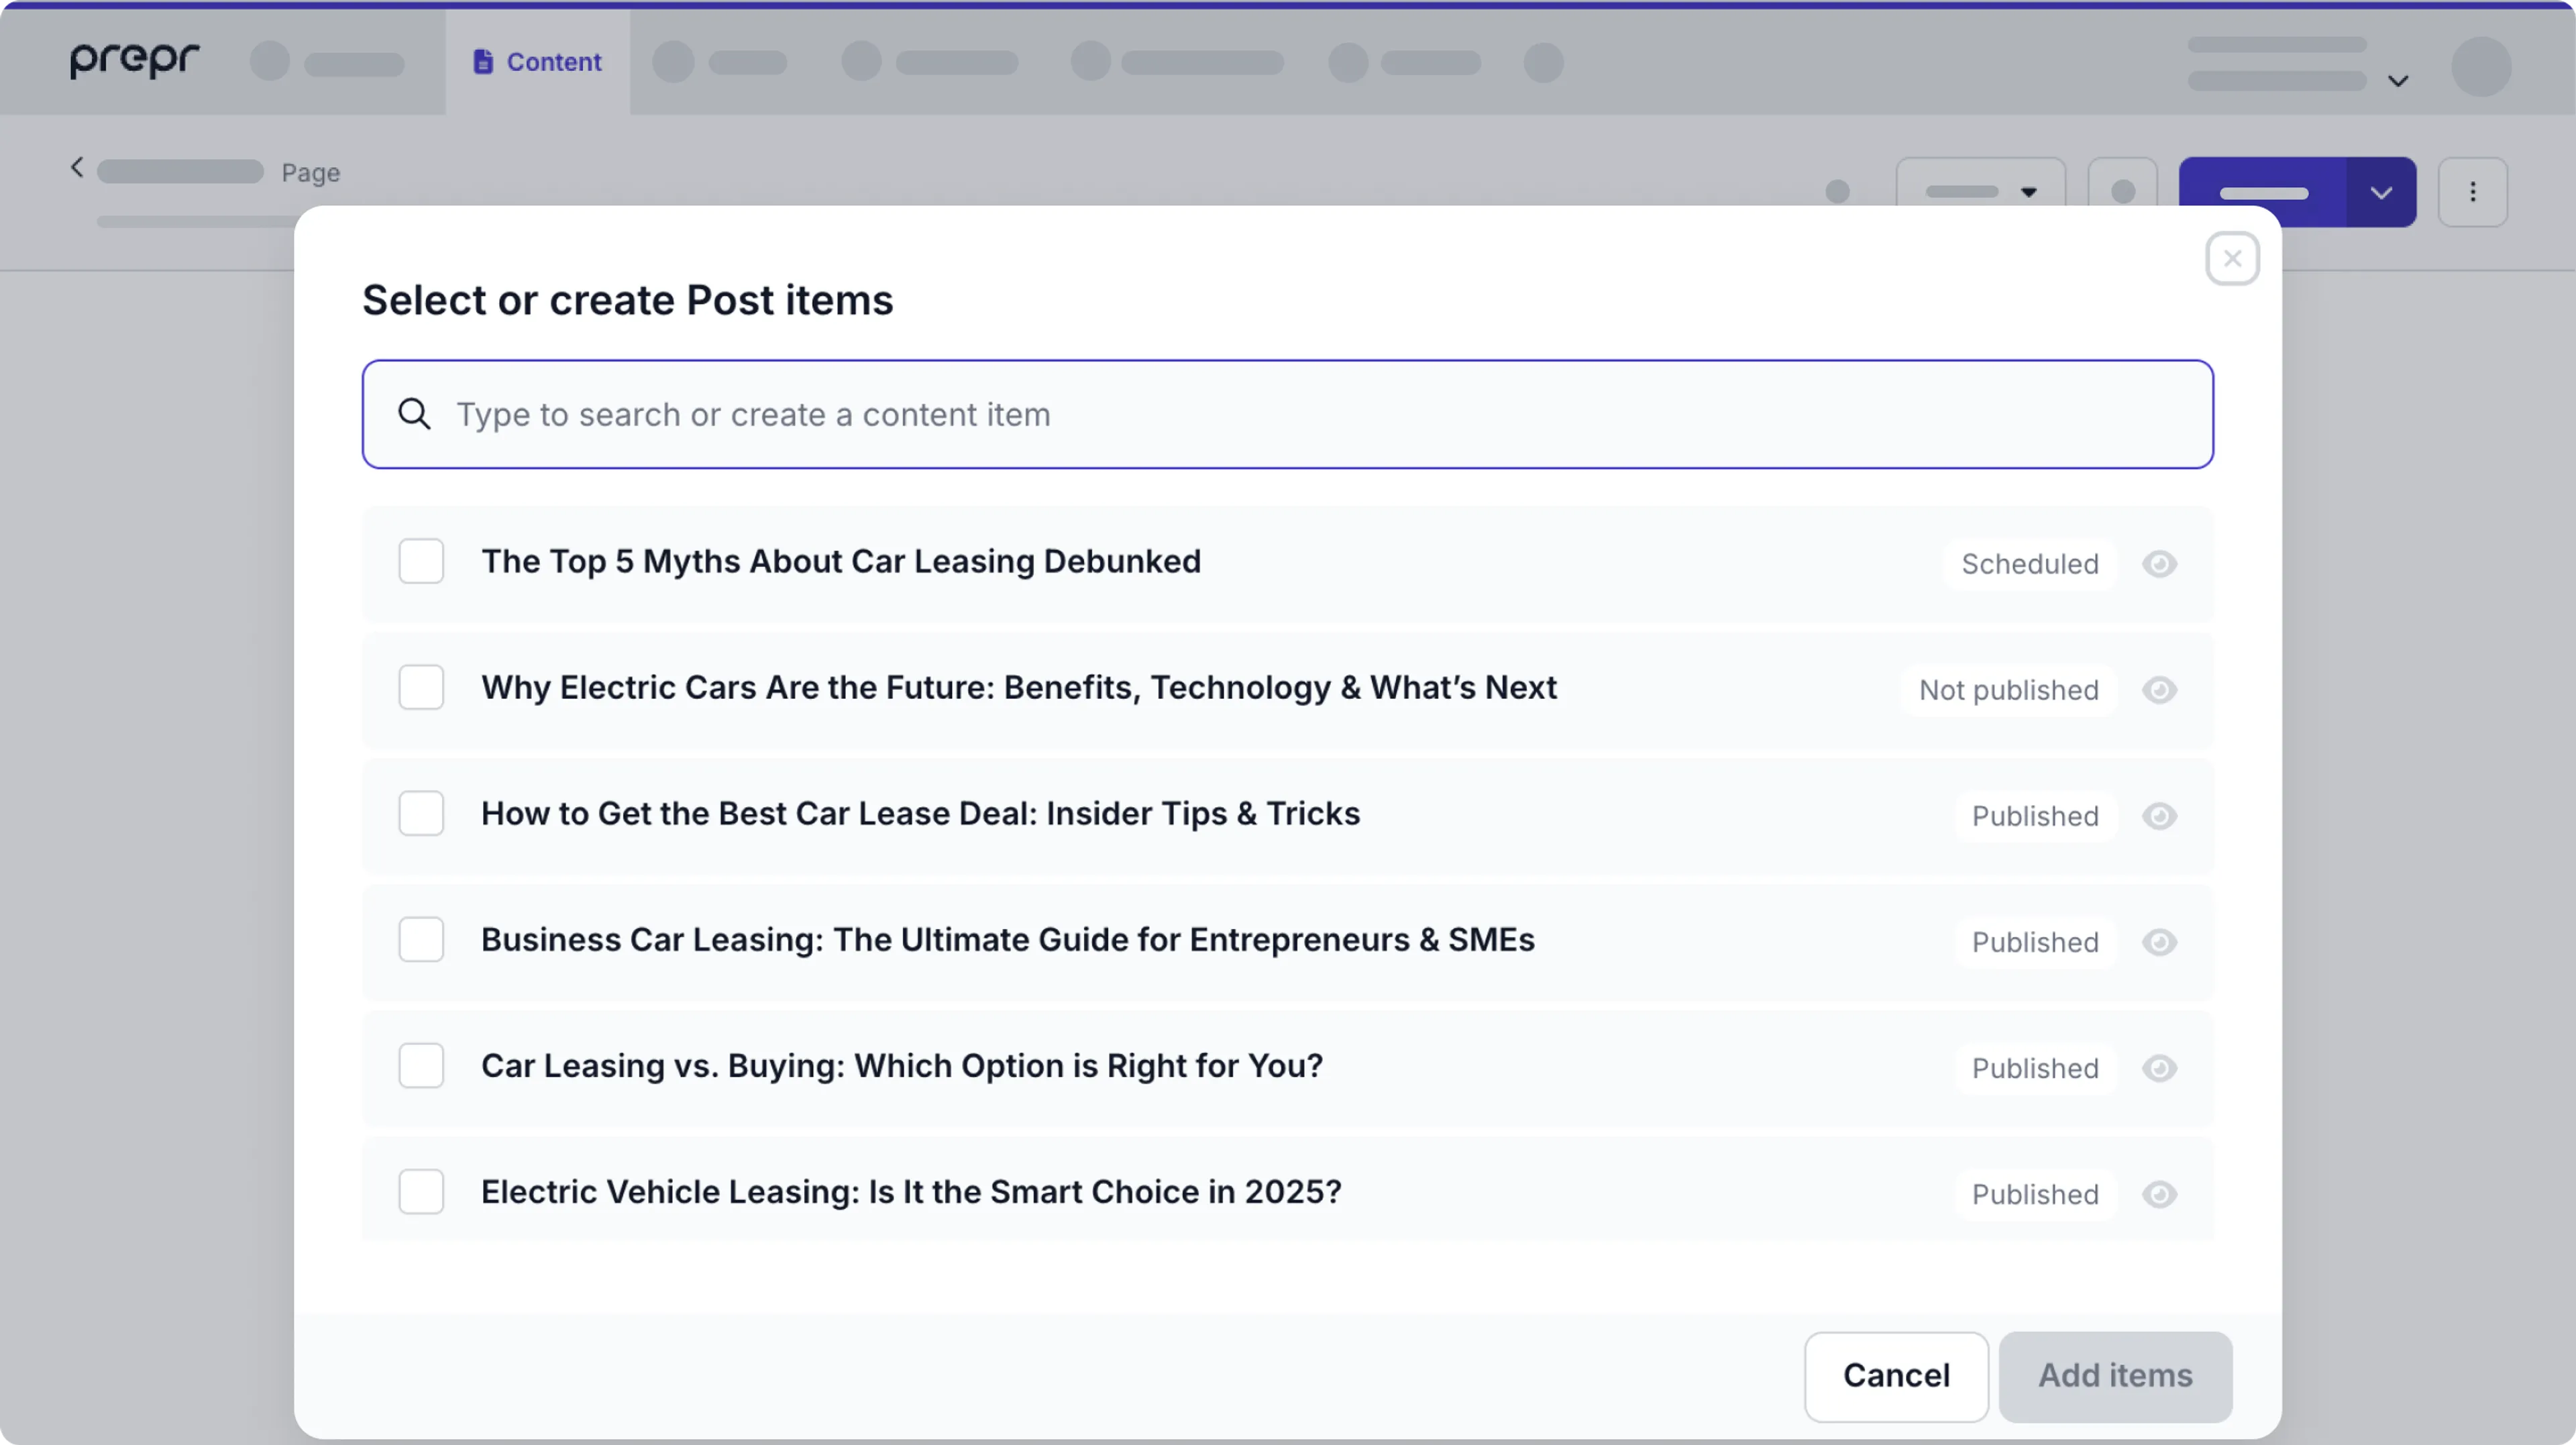
## Introducing filter options for content selection
You can now see filter options in the content item selection modal when you choose to add related content items to your content item.
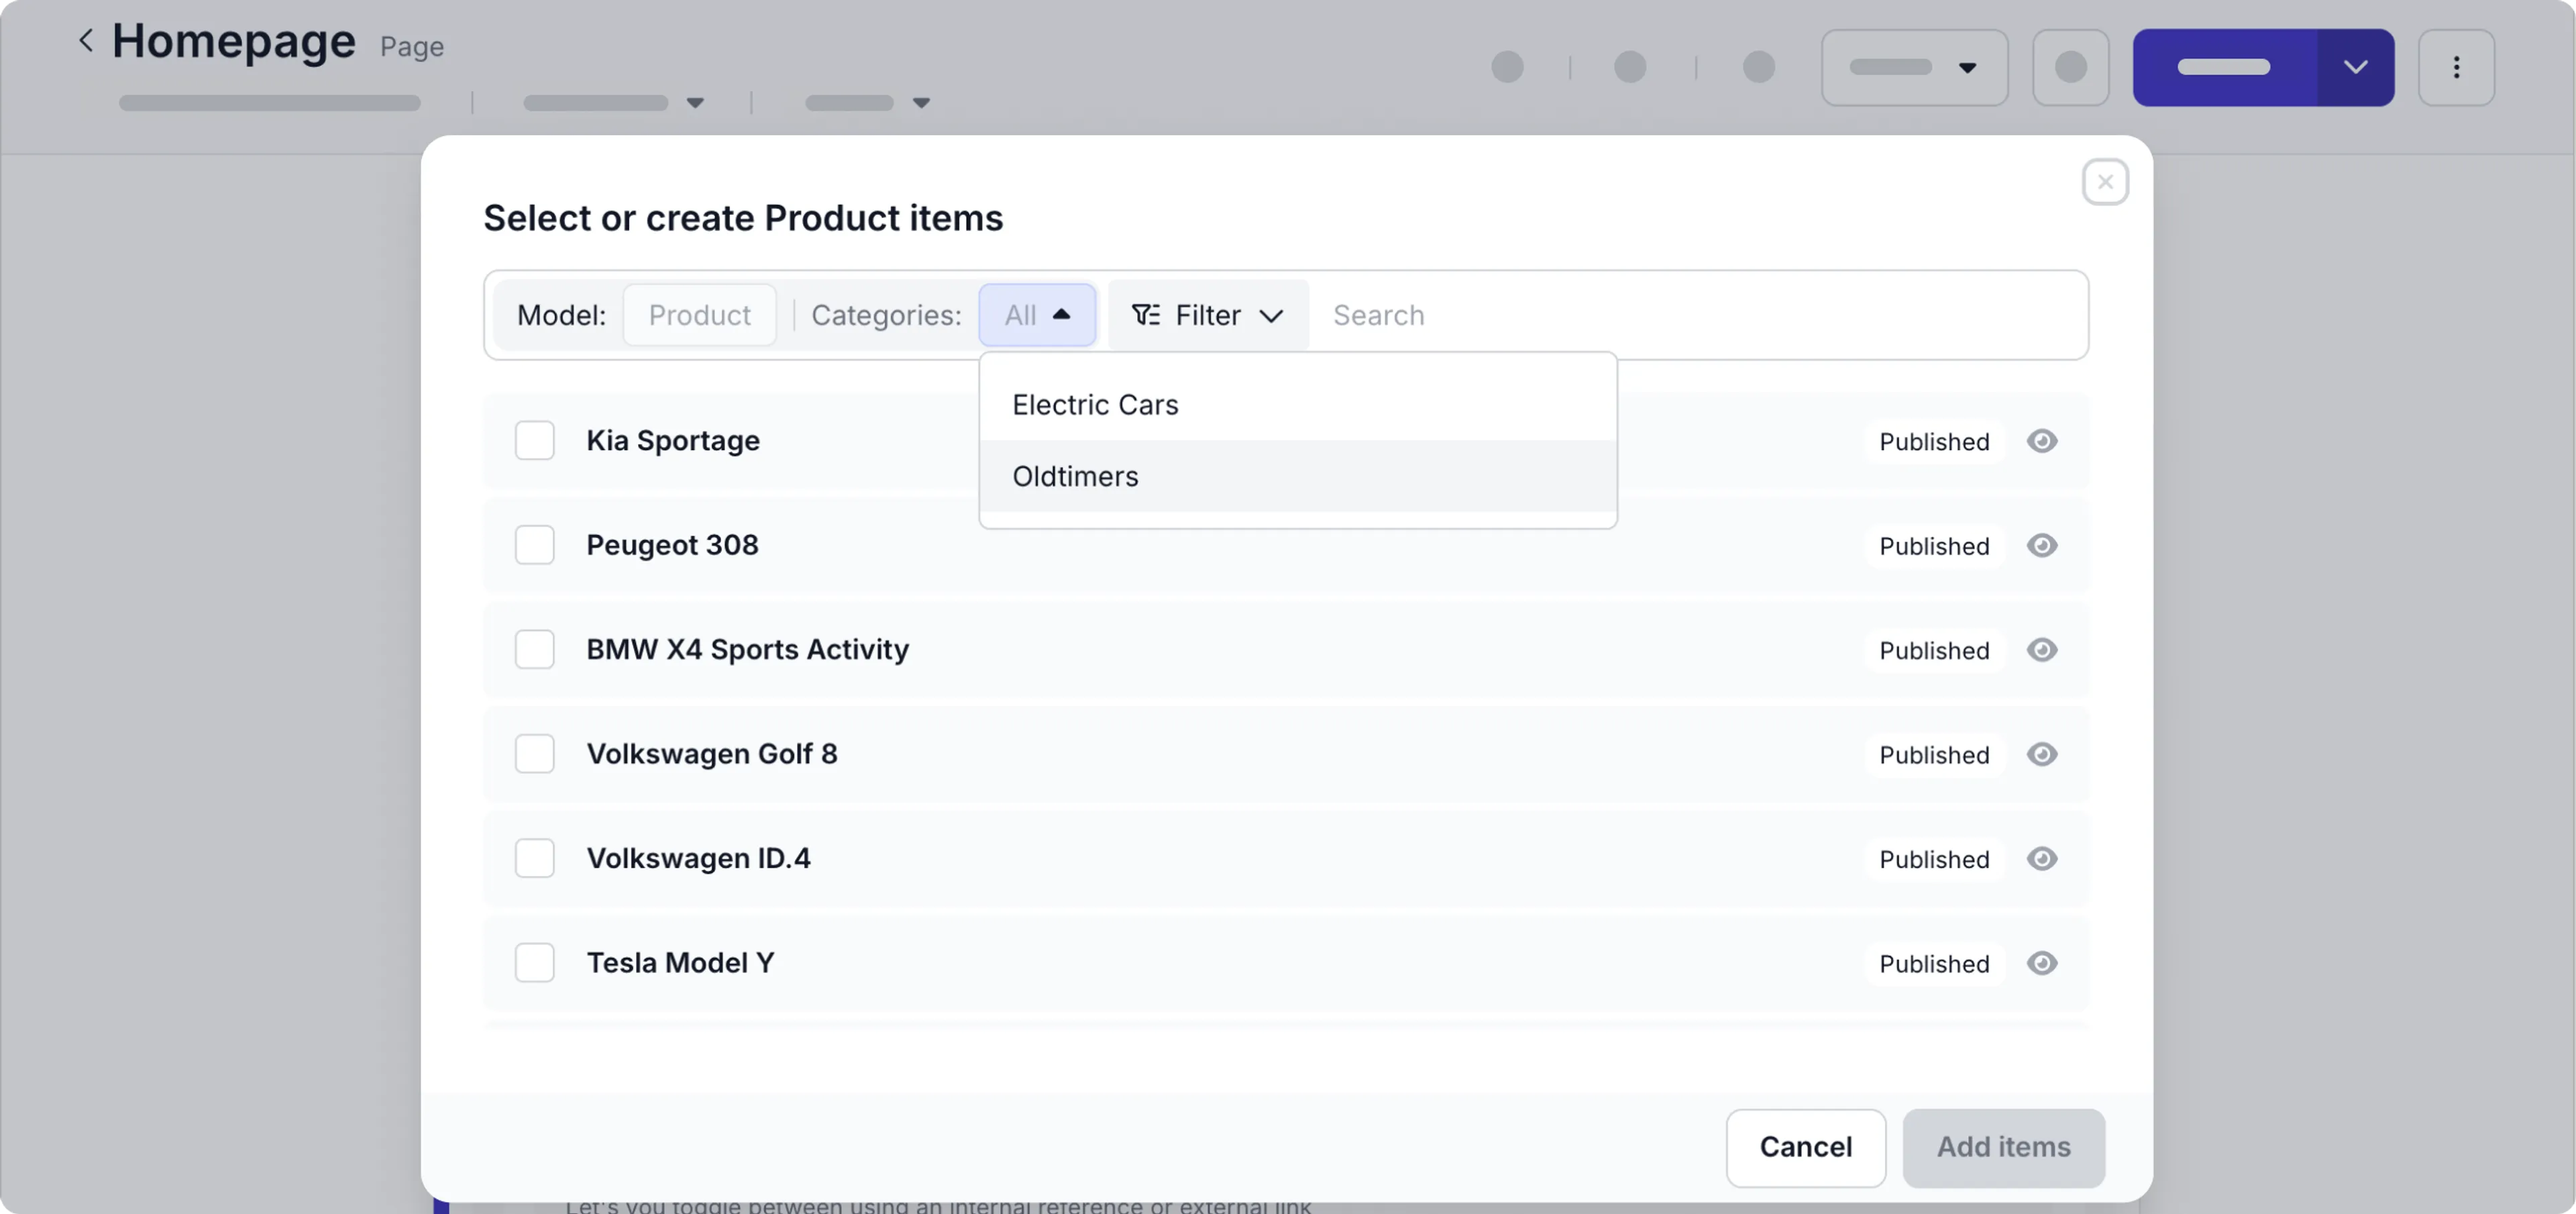
These options allow you to quickly narrow down large lists of content items by key criteria like model, category, or workflow stage.
So, you save time and ensure you link related content items more accurately.
Check out the [adding content references doc](/content-management/managing-content/creating-rich-content#adding-content-references) for more details.
## Introducing custom workflow stages
We've added the ability for you to add custom workflow stages to your Prepr collaboration workflow on the *Environment* detail page.
For example, when you have translation tasks for content items, you could add stages like *Translate* and *Review translation*.

This means you can seamlessly align the Prepr workflow with your own content creation process.
For more details, check out the [environment settings doc](/project-setup/setting-up-environments#workflow-stages).
## New GraphQL API version 2025-10-07 is available
Our newest GraphQL API version brings you additional localization support with the following new features:
- A new root query field `DefaultLocale` returns the environment's default locale.
- `_locale` in the Interface `Model`
- `_locales` in the Interface `Model`
Check out the [GraphQL API upgrade guide](/graphql-api/upgrade-guide#version-2025-10-07) for more details.
## Introducing the Shopify integration
Our new Shopify integration lets your team easily include products, variants and collections in content items.
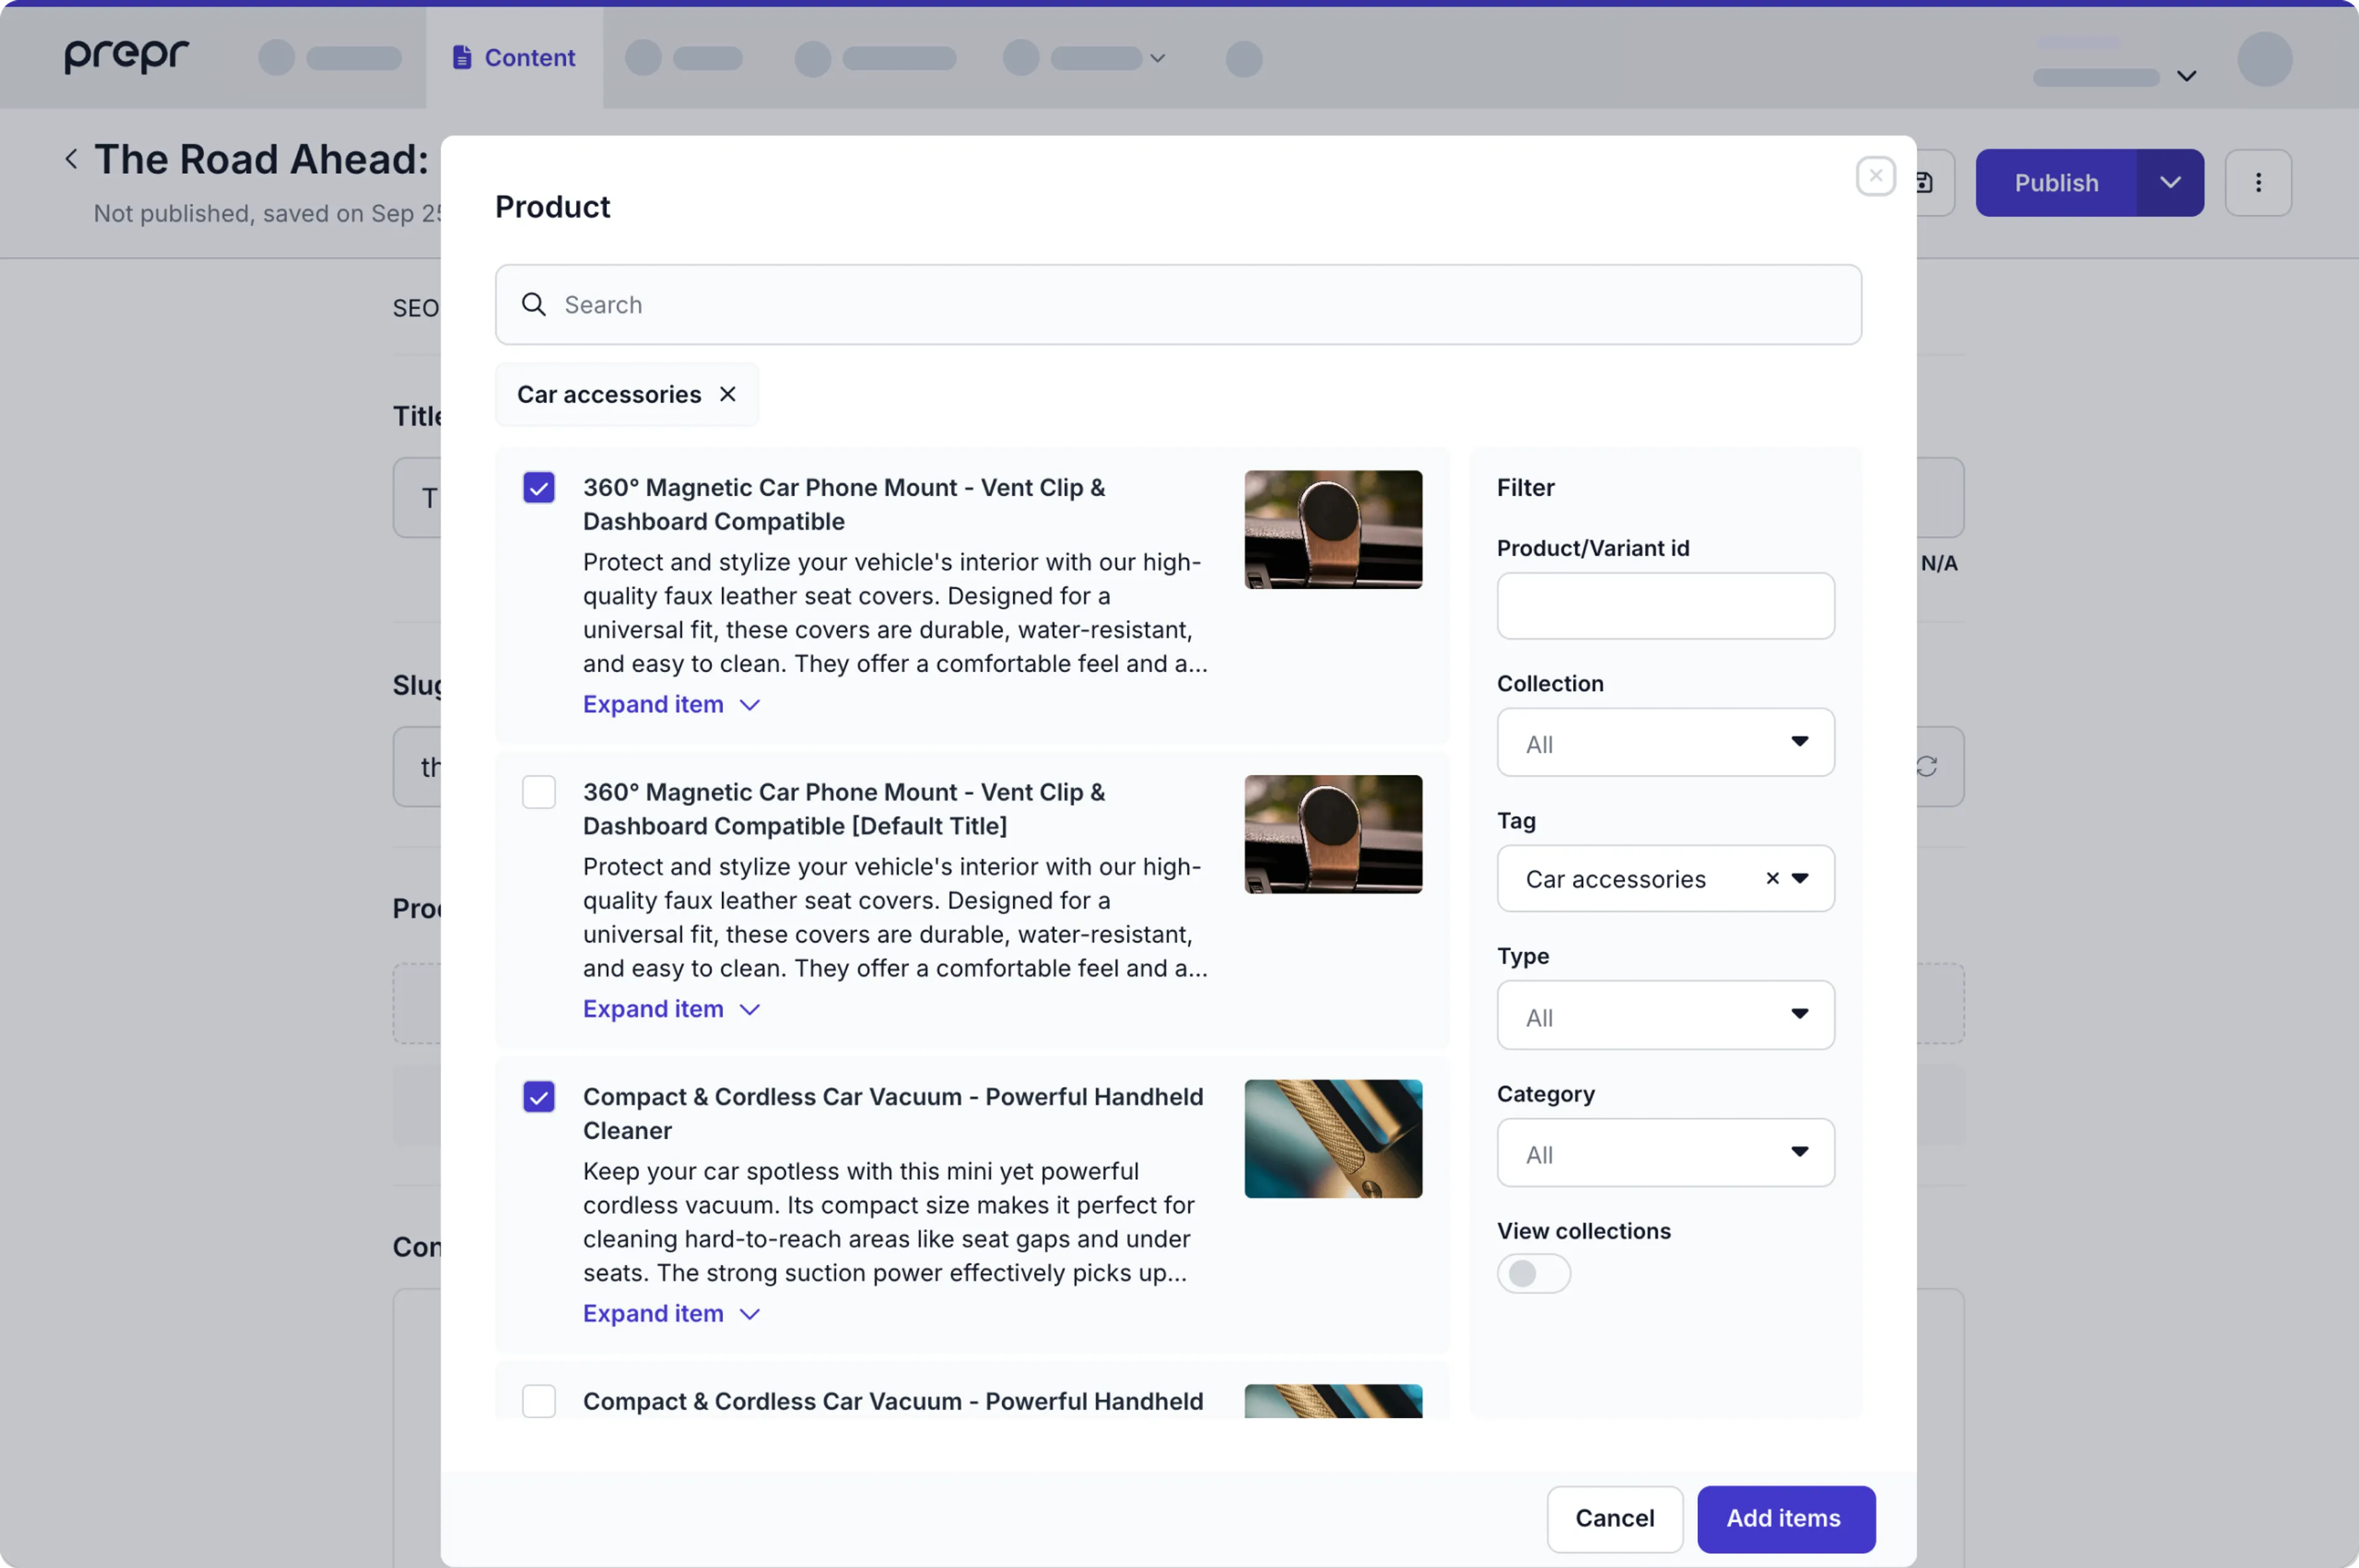
This means your content editors can work more efficiently and error-free by simply choosing the relevant Shopify entries directly in Prepr.
For more details, check out the [Shopify integration guide](/integrations/shopify).
## Introducing the BigCommerce integration
Now you can integrate Prepr with BigCommerce to seamlessly add product details to your content.
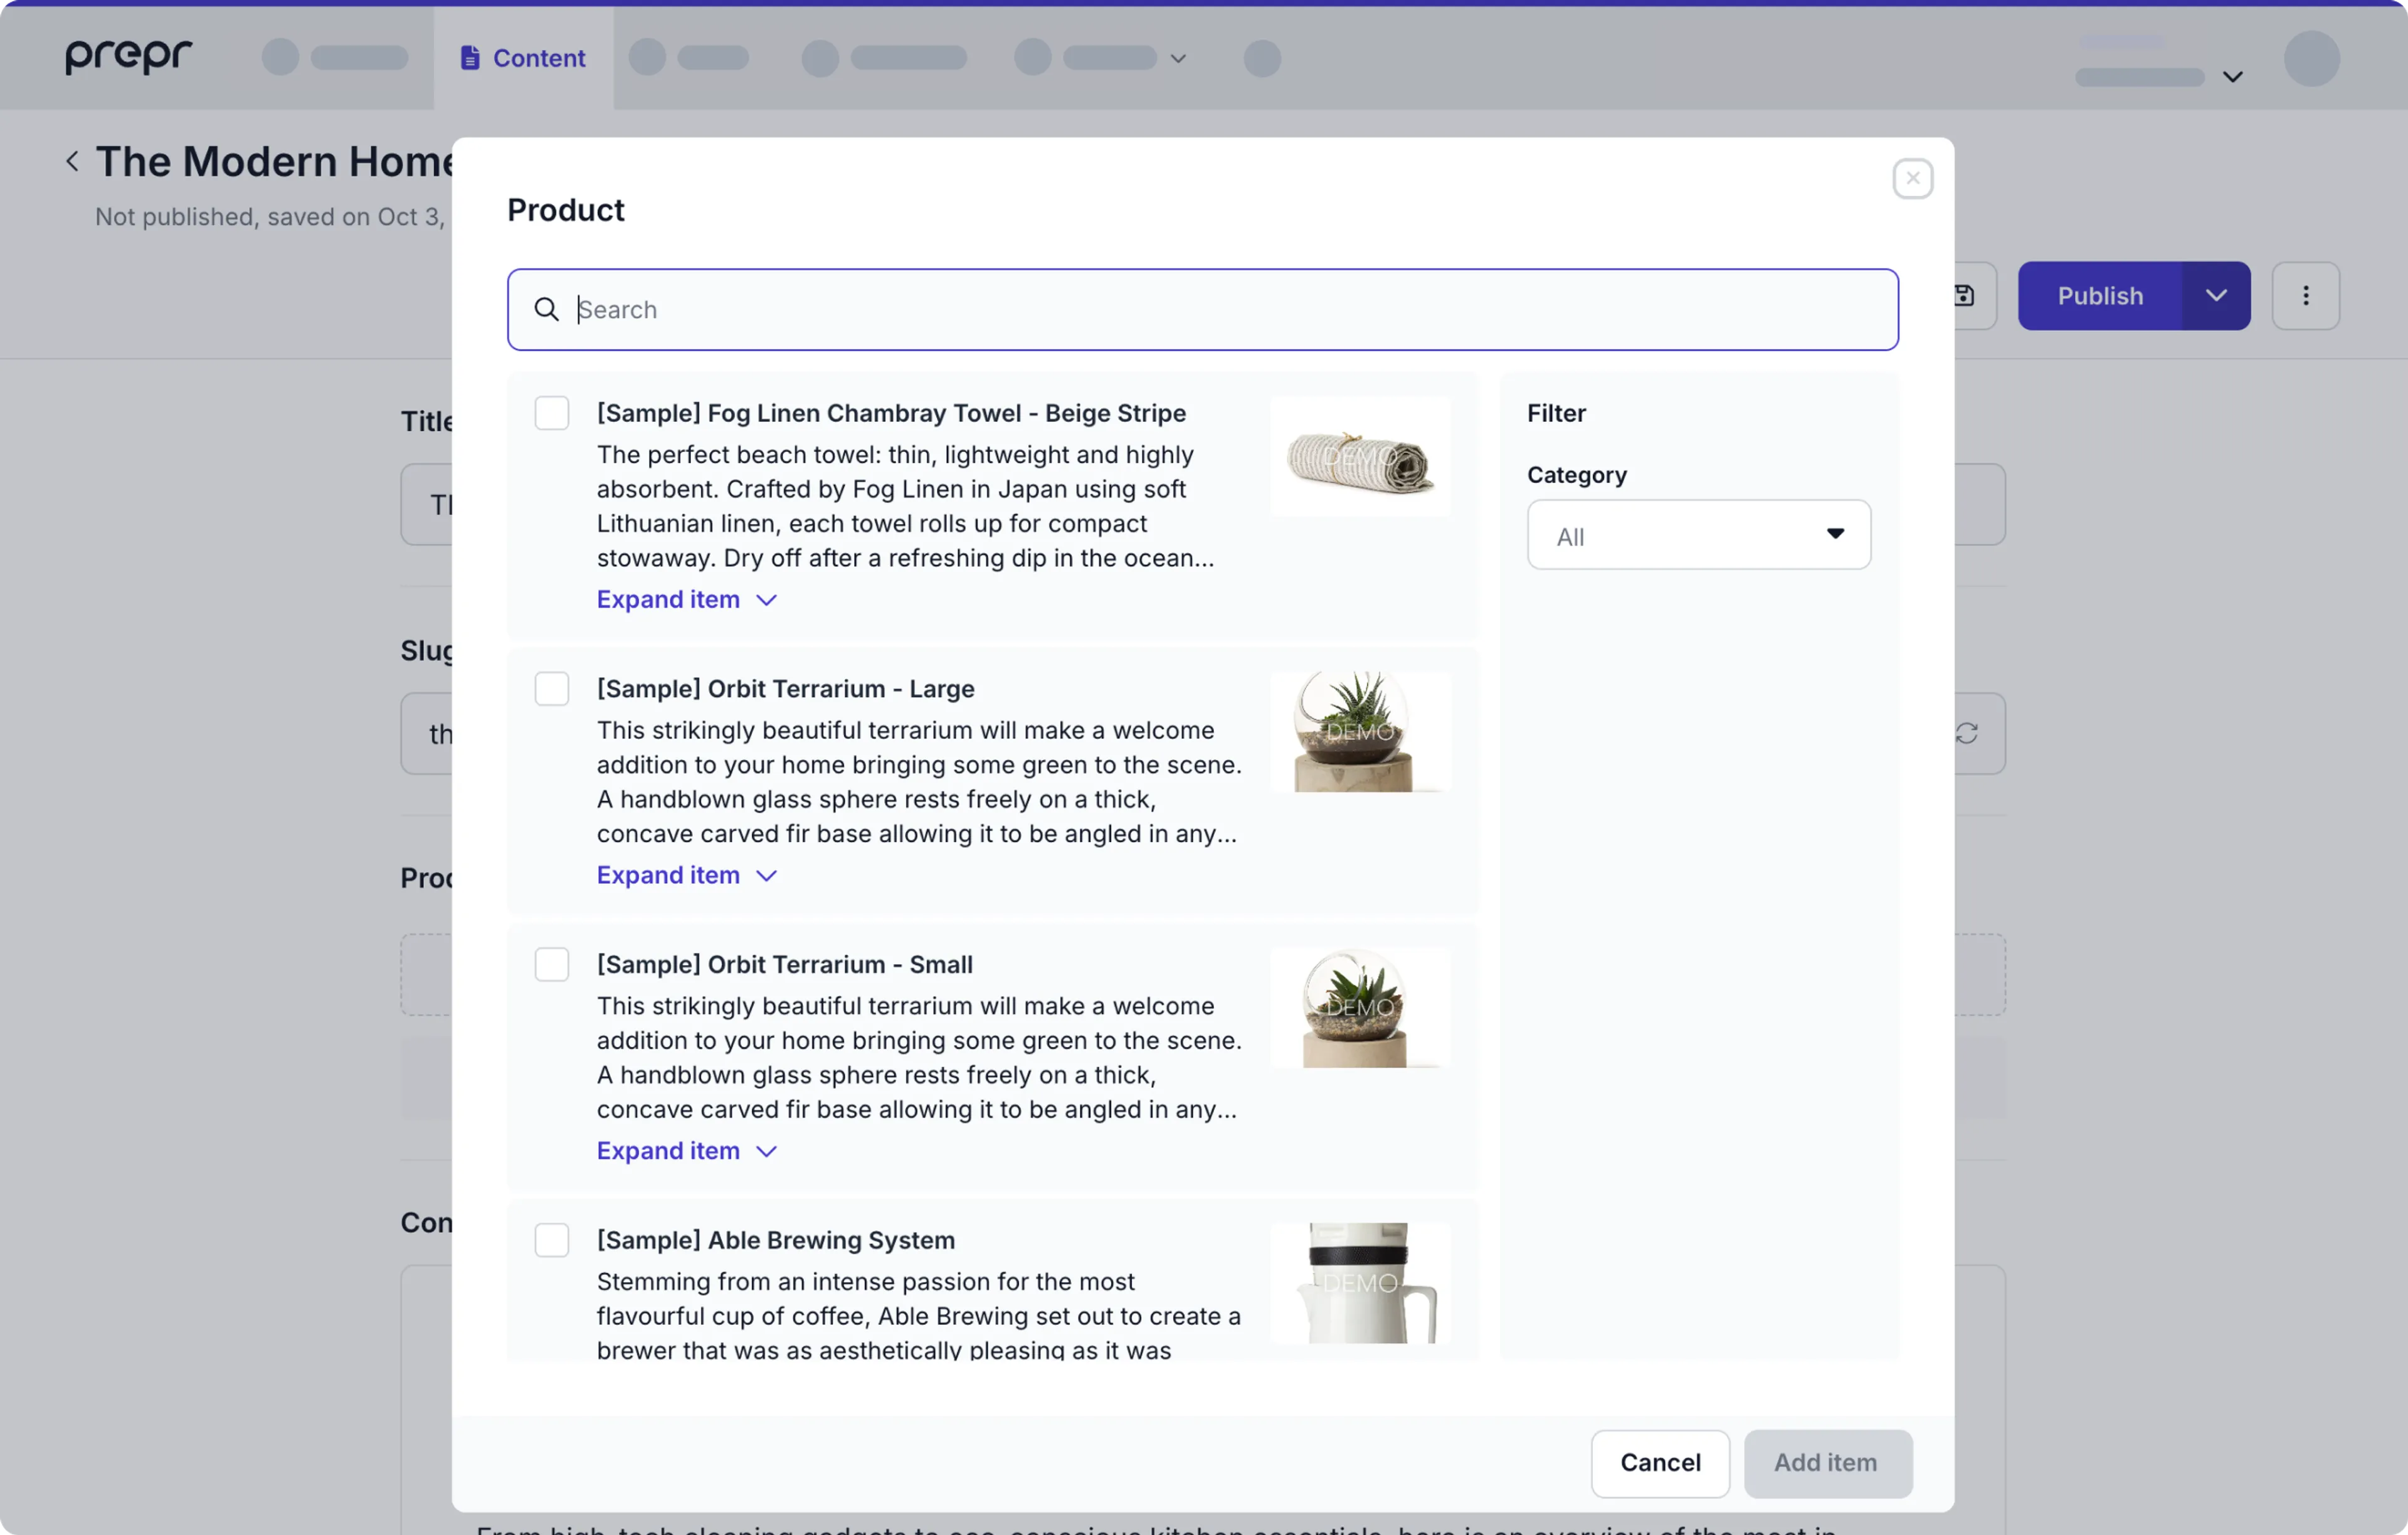
With this integration, your content editors can save time by simply choosing BigCommerce products directly in Prepr.
For more details, check out the [BigCommerce integration guide](/integrations/bigcommerce).
## Automatically review your content items
Introducing *Content check*, a new feature that automatically validates the quality of your content and provides AI-powered suggestions for improvements.
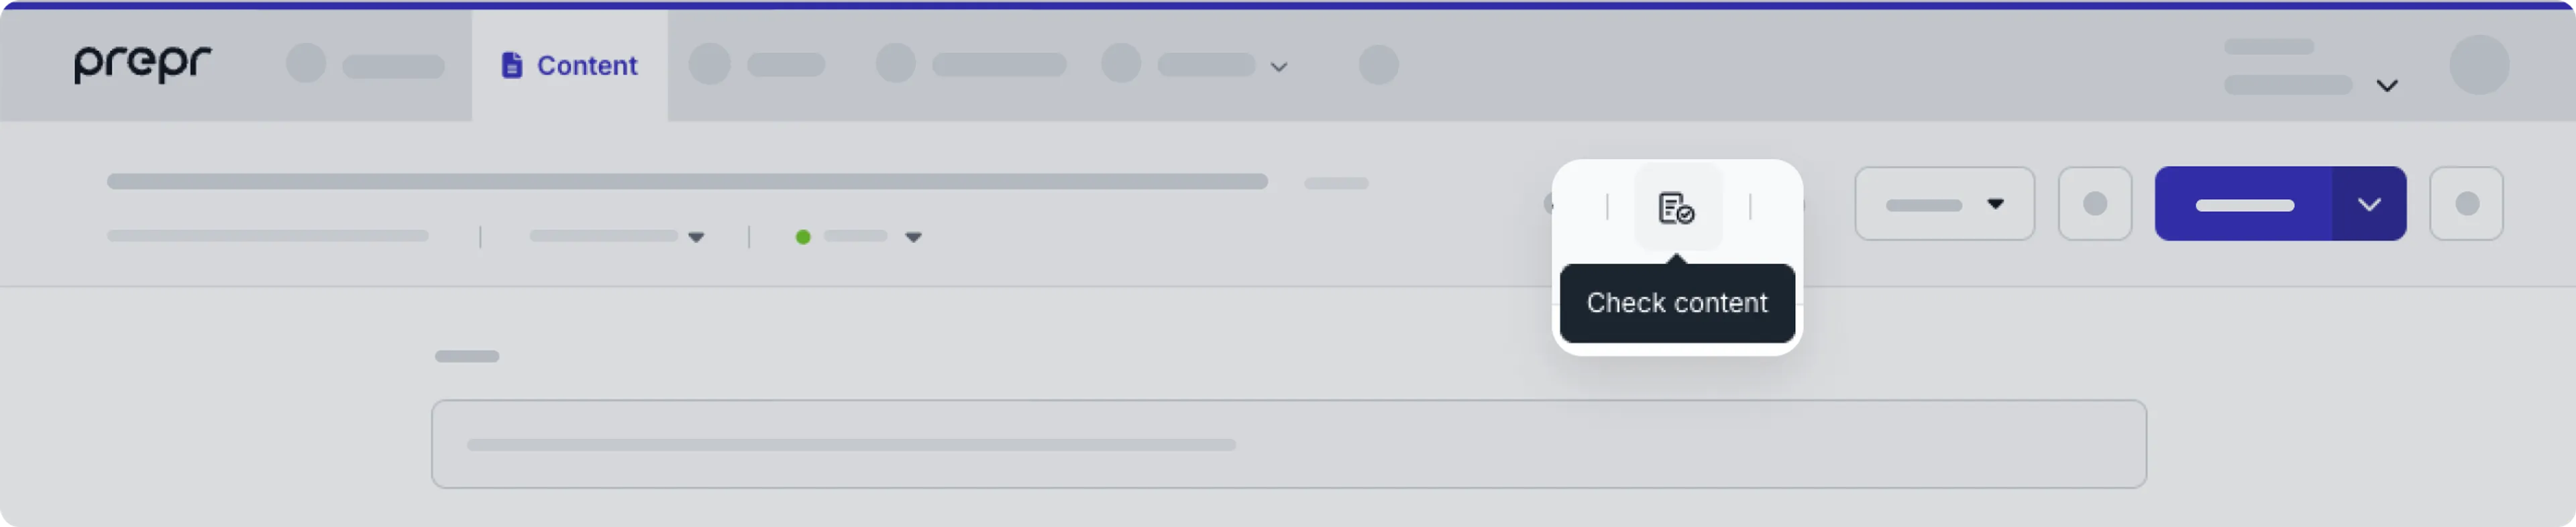
In just one click, it checks for missing required fields, broken links and options to boost your SEO.
Try out this new tool, part of our continuous efforts to optimize the quality of the content in less time, and [let us know your thoughts](https://prepr.io/feedback).
Check out the [Reviewing content guide](/content-management/reviewing-content#content-check) for more details.
## Introducing the Snitcher integration
With the new Snitcher integration, you can easily connect Prepr to Snitcher, a B2B website visitor identification platform.
This integration allows you to segment website visitors based on their company profile.
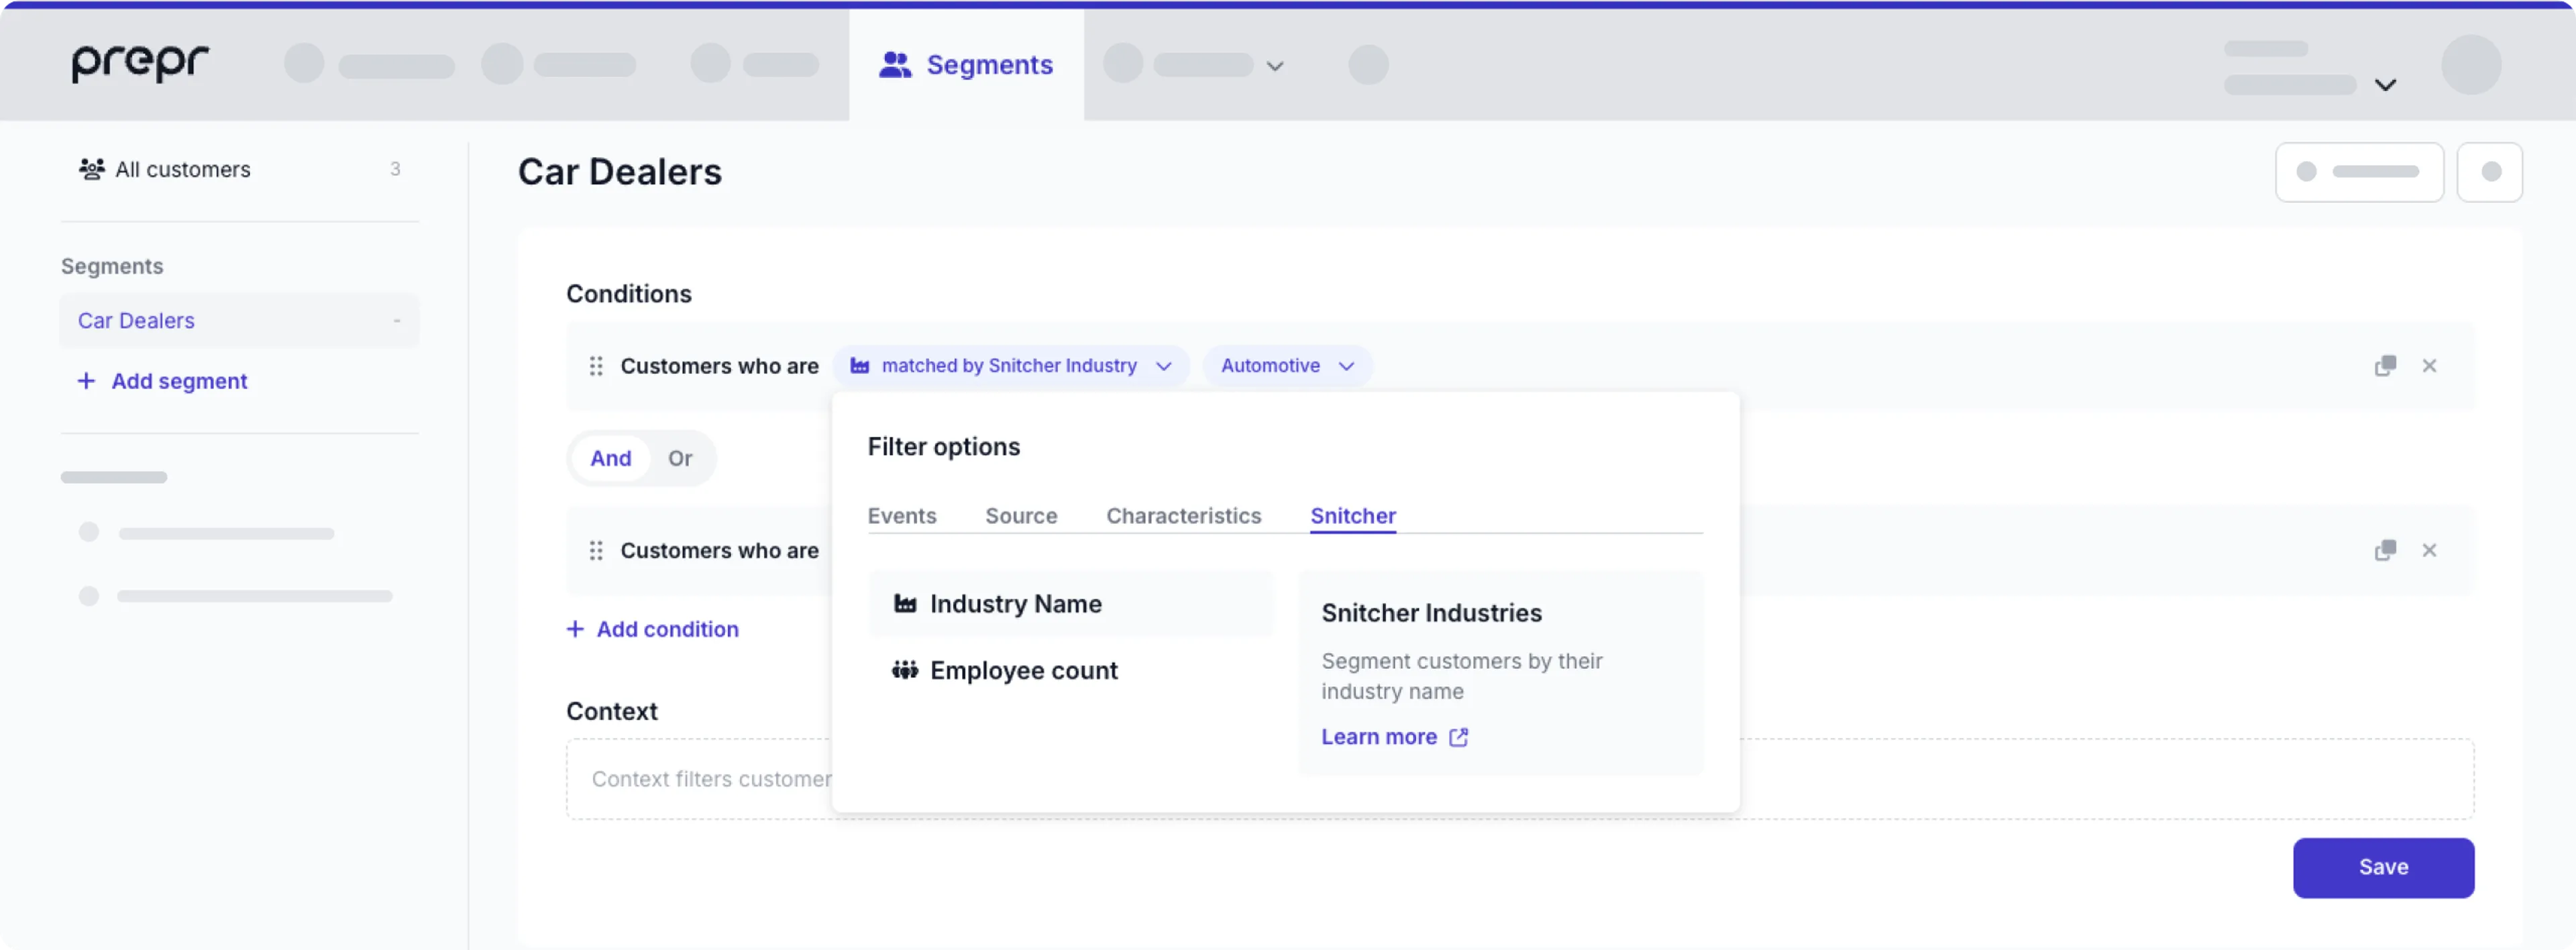
So, you can personalize content for an enhanced user experience for your B2B audience.
Check out the [Snitcher integration guide](/integrations/snitcher) for more details.
## New sign-in option to use passkeys
We've released a new sign-in option to use passkeys.
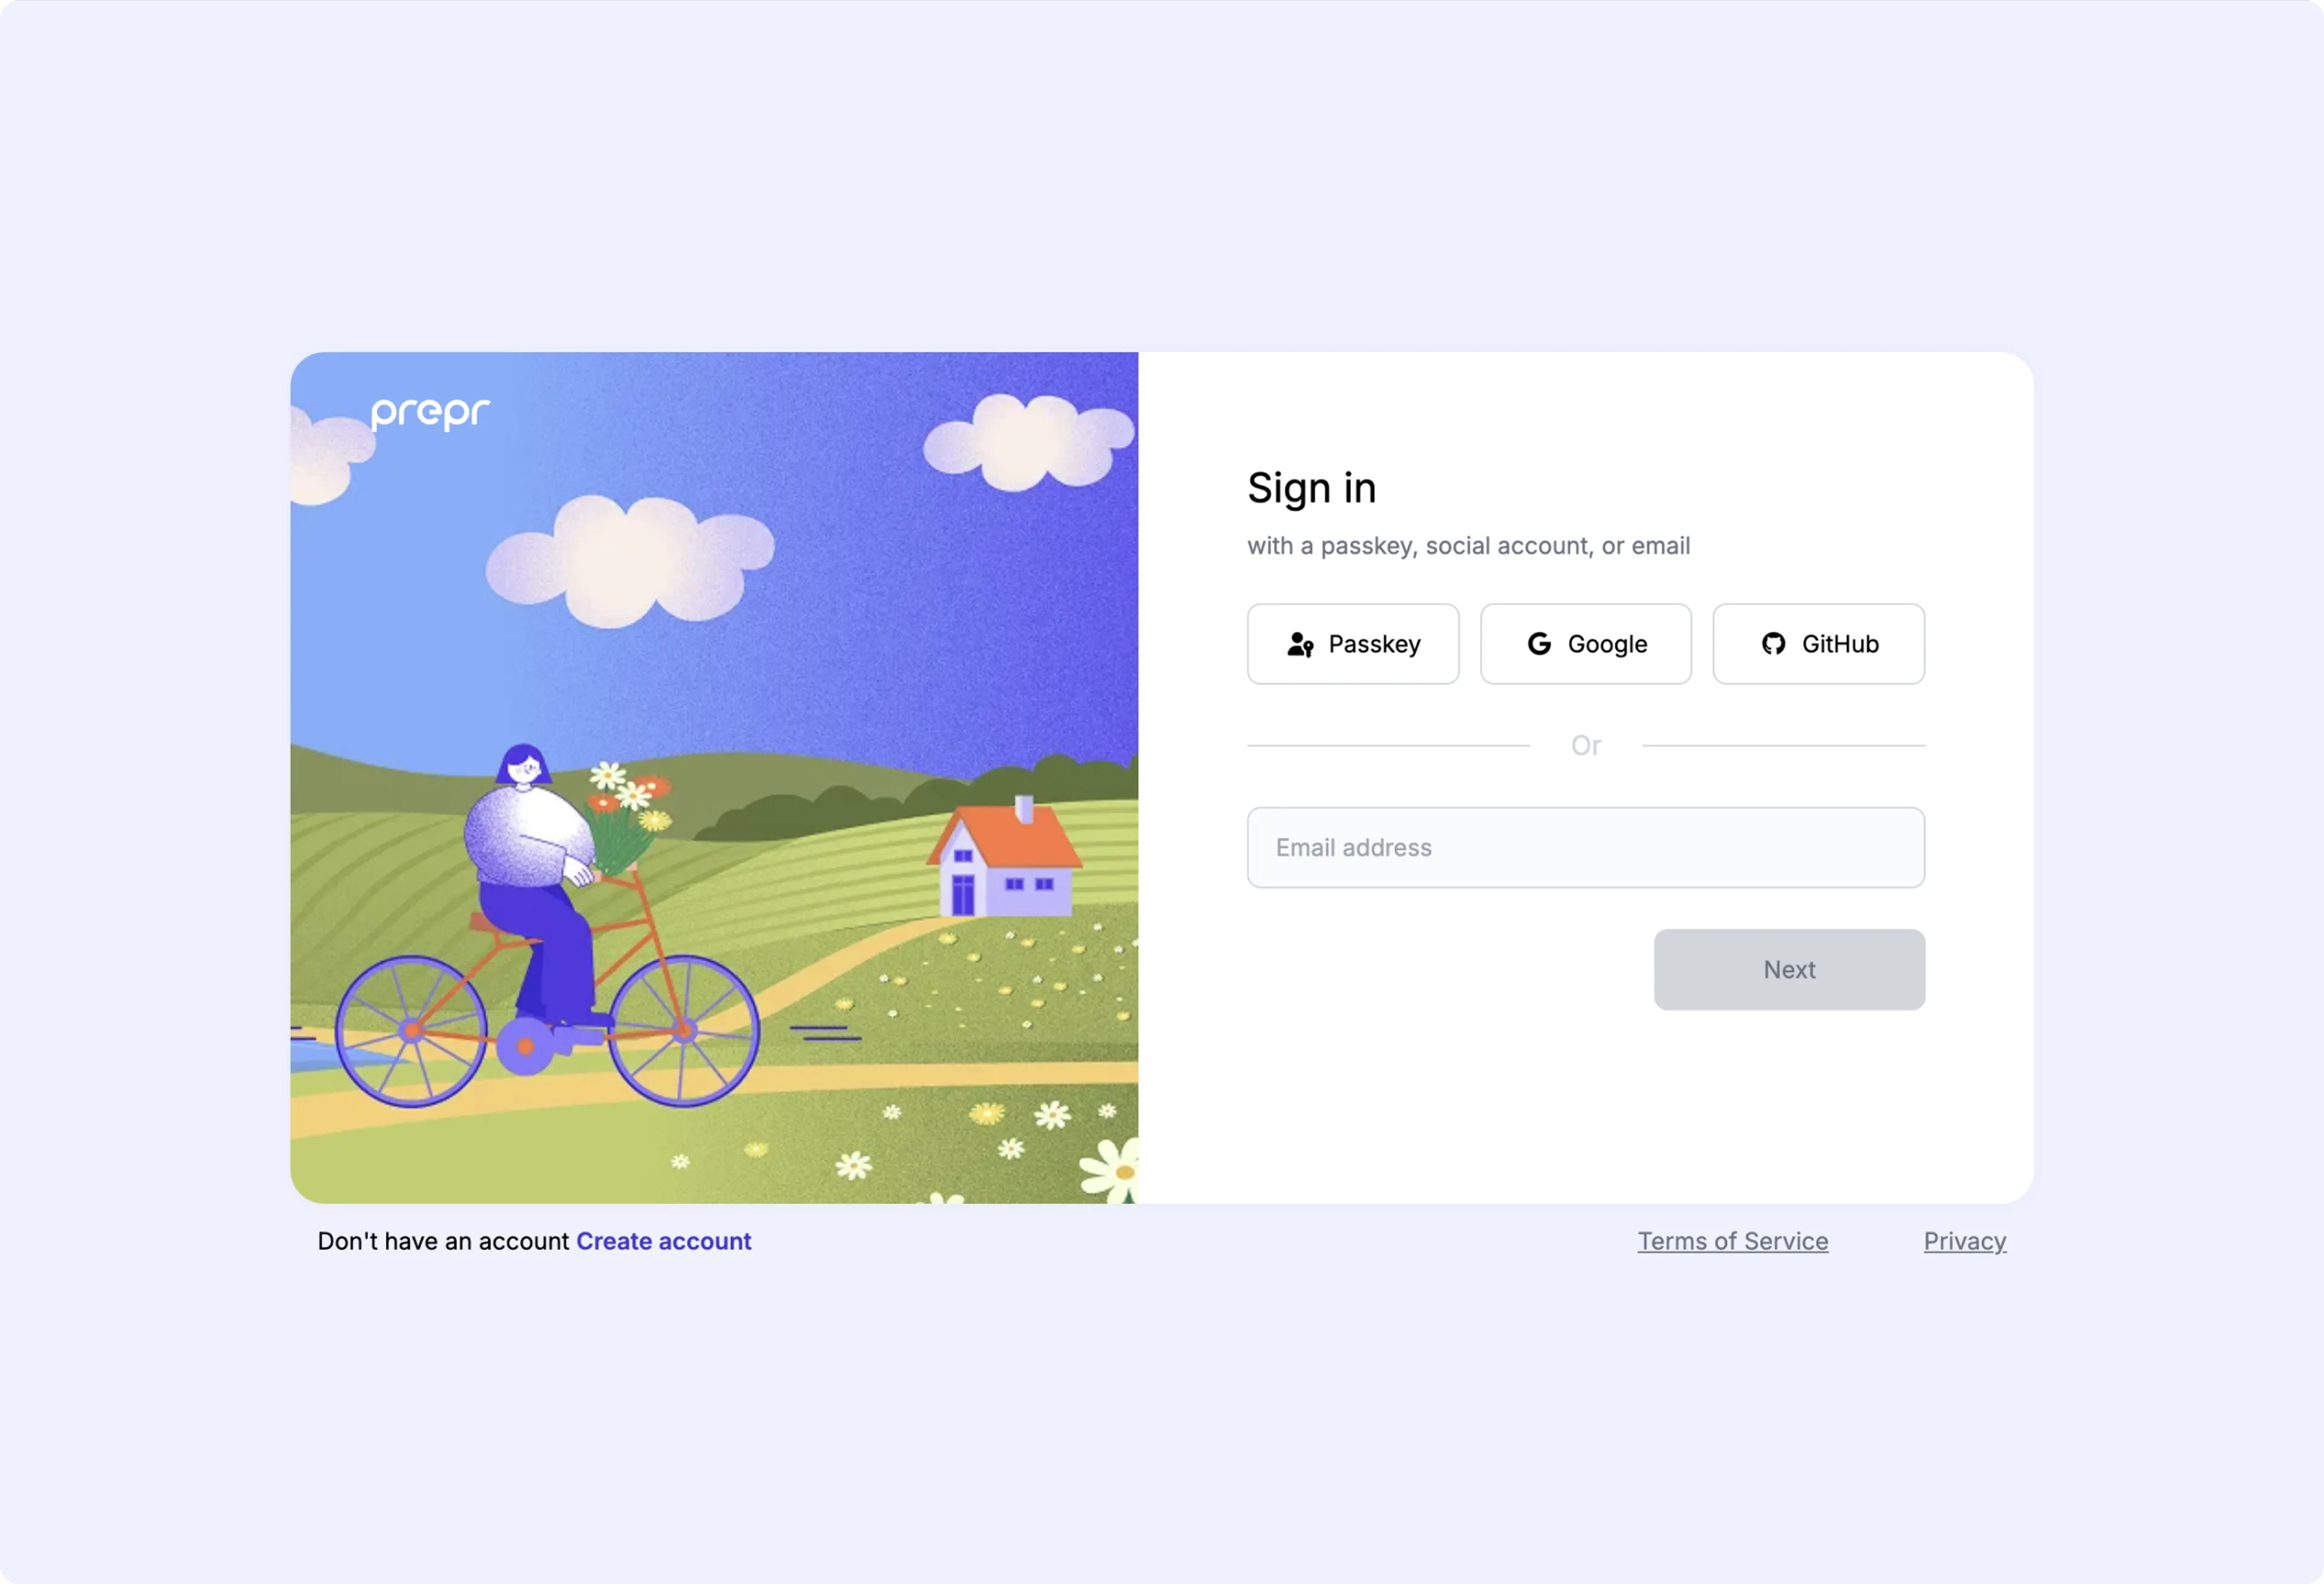
This feature gives you an alternative to using the email, password combination and 2FA.
This means you can log in securely and conveniently without needing to manually manage passwords or additional authentication steps.
For more details, check out the [account profile settings](/project-setup/managing-users#add-passkeys).
## New option to hide models from *Add item* list
You can now simplify the content creation experience by reducing the list of models content editors need to select from.
To make this possible, choose which models to hide from the selection list in the *Add item* modal.
For example: Hide models for child content items like an *Author* or *Category* which are usually created when editing an *Article*.
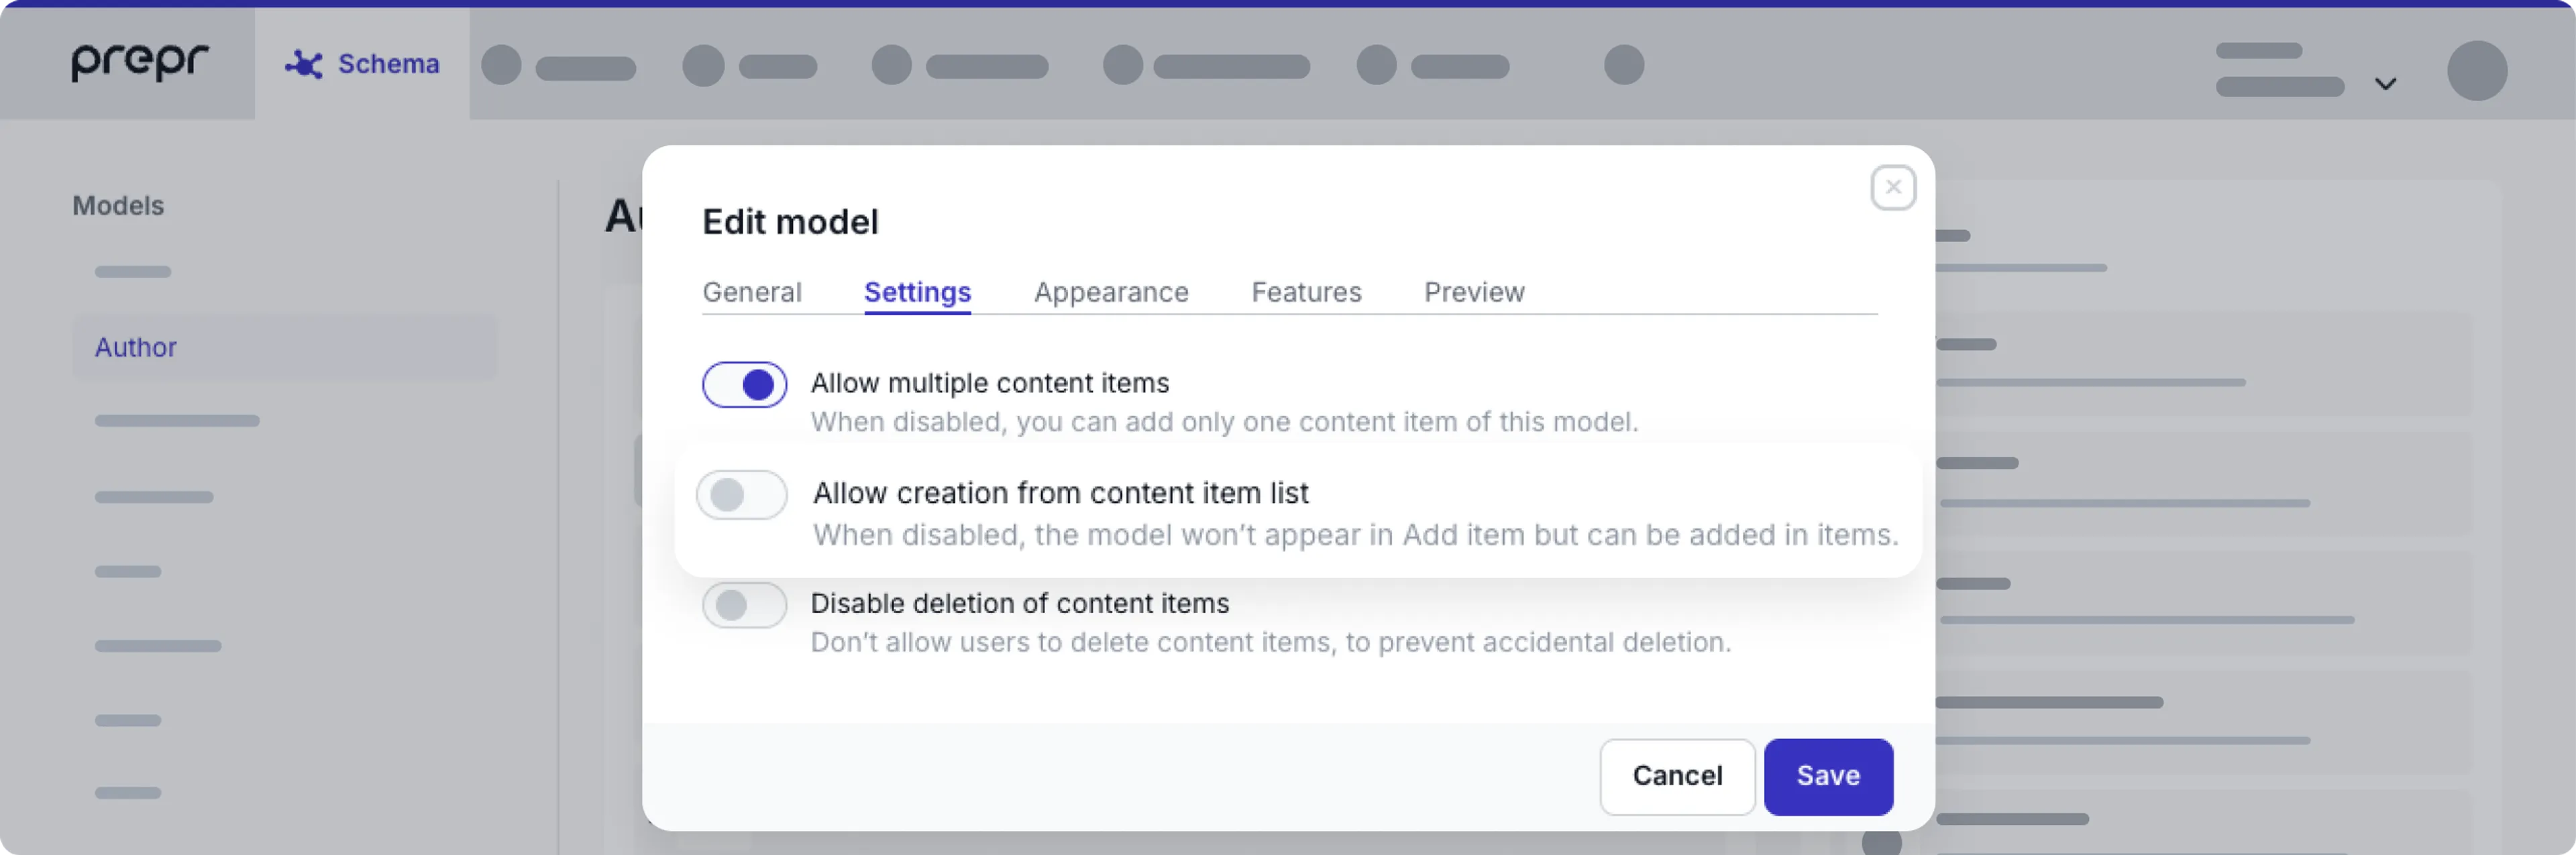
By disabling the visibility of certain models, you ensure content editors only see what's relevant to them.
Check out the [Model settings](/content-modeling/managing-models#settings) for more details.
## Organize your segments into folders
You can now group your segments into folders, making it easier to manage and navigate when working with many customer profiles.
Instead of scrolling through a long alphabetical list, related segments can be organized together in a structured way.

This update gives you a simple way to stay organized and find the right segment faster.
For more details, check out the [Managing segments guide](/personalization/managing-segments#organize-segments-into-folders).
## Matching HubSpot contacts to Prepr customer profiles
Prepr now automatically matches your HubSpot contacts to existing Prepr customer profiles, putting them in their matching HubSpot segments and updating their company name and email address.
This way, you ensure your HubSpot customer profiles are always accurate and up to date.
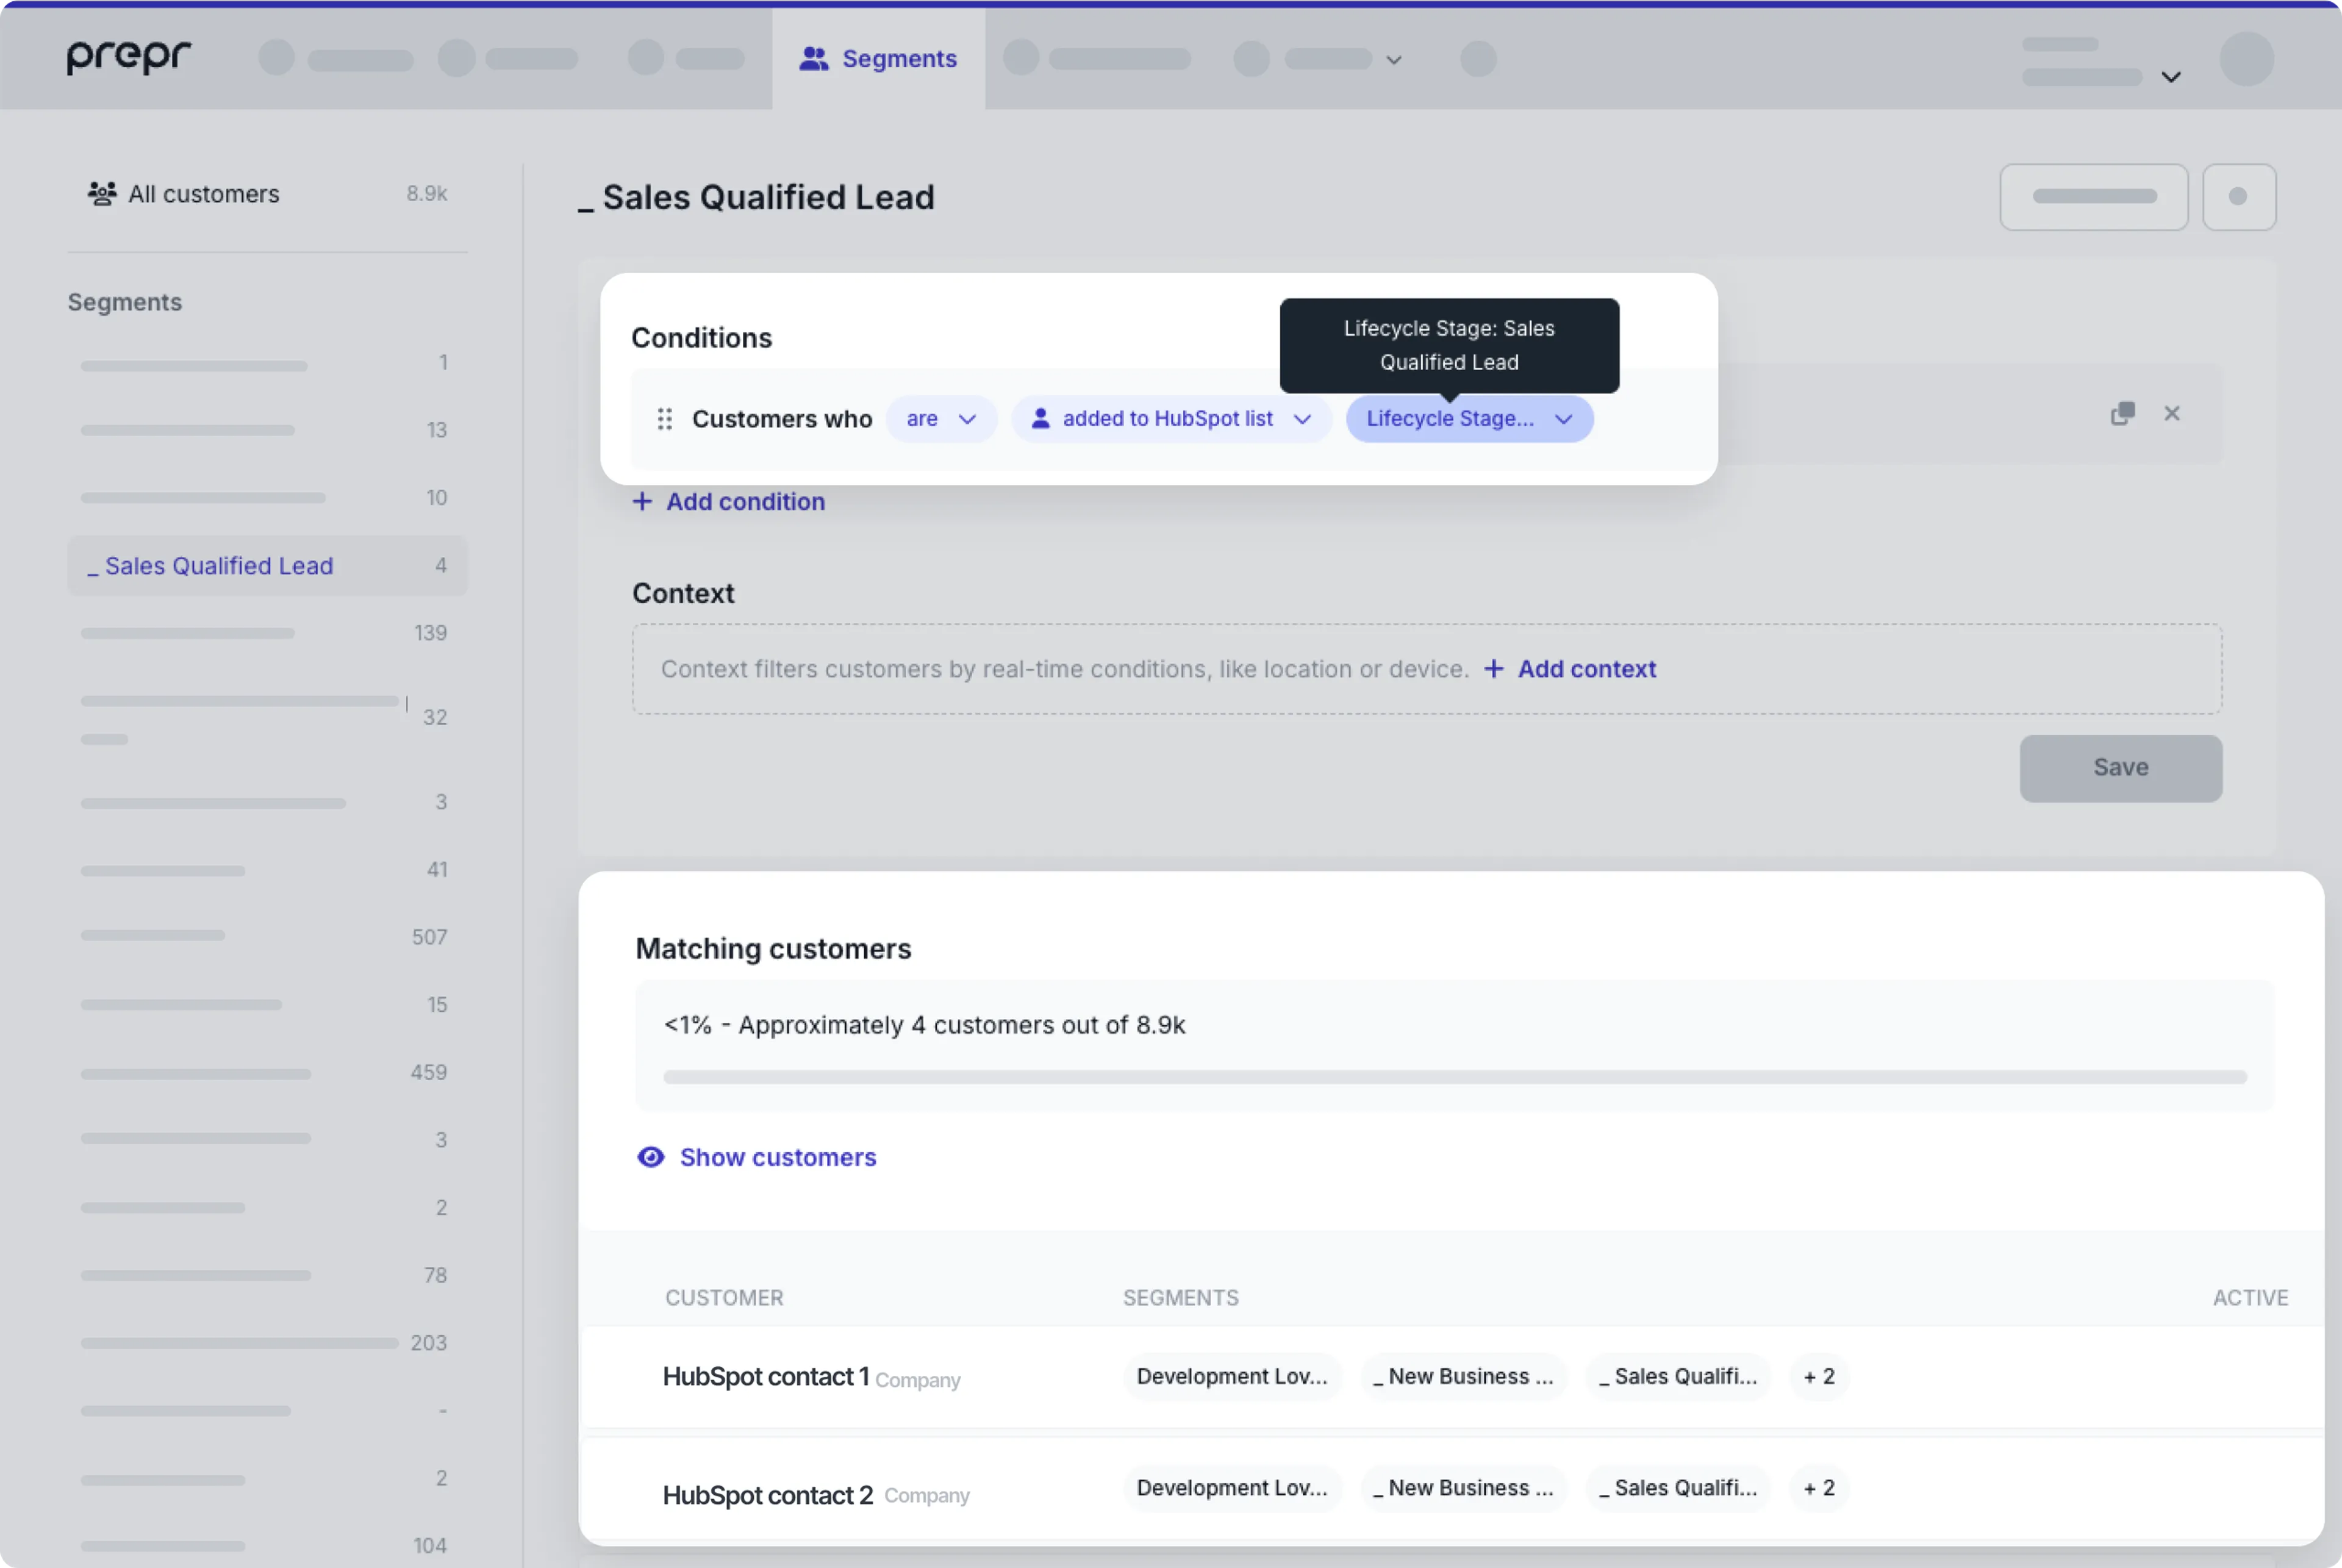
With this release, you can create personalized, data-driven content even more precisely.
Check out the [HubSpot integration](/integrations/hubspot) guide for more details.
## Algolia Auto sync option
With the new Algolia **Auto sync** option you can choose to disable automatic synchronization of content to Algolia directly in Prepr.
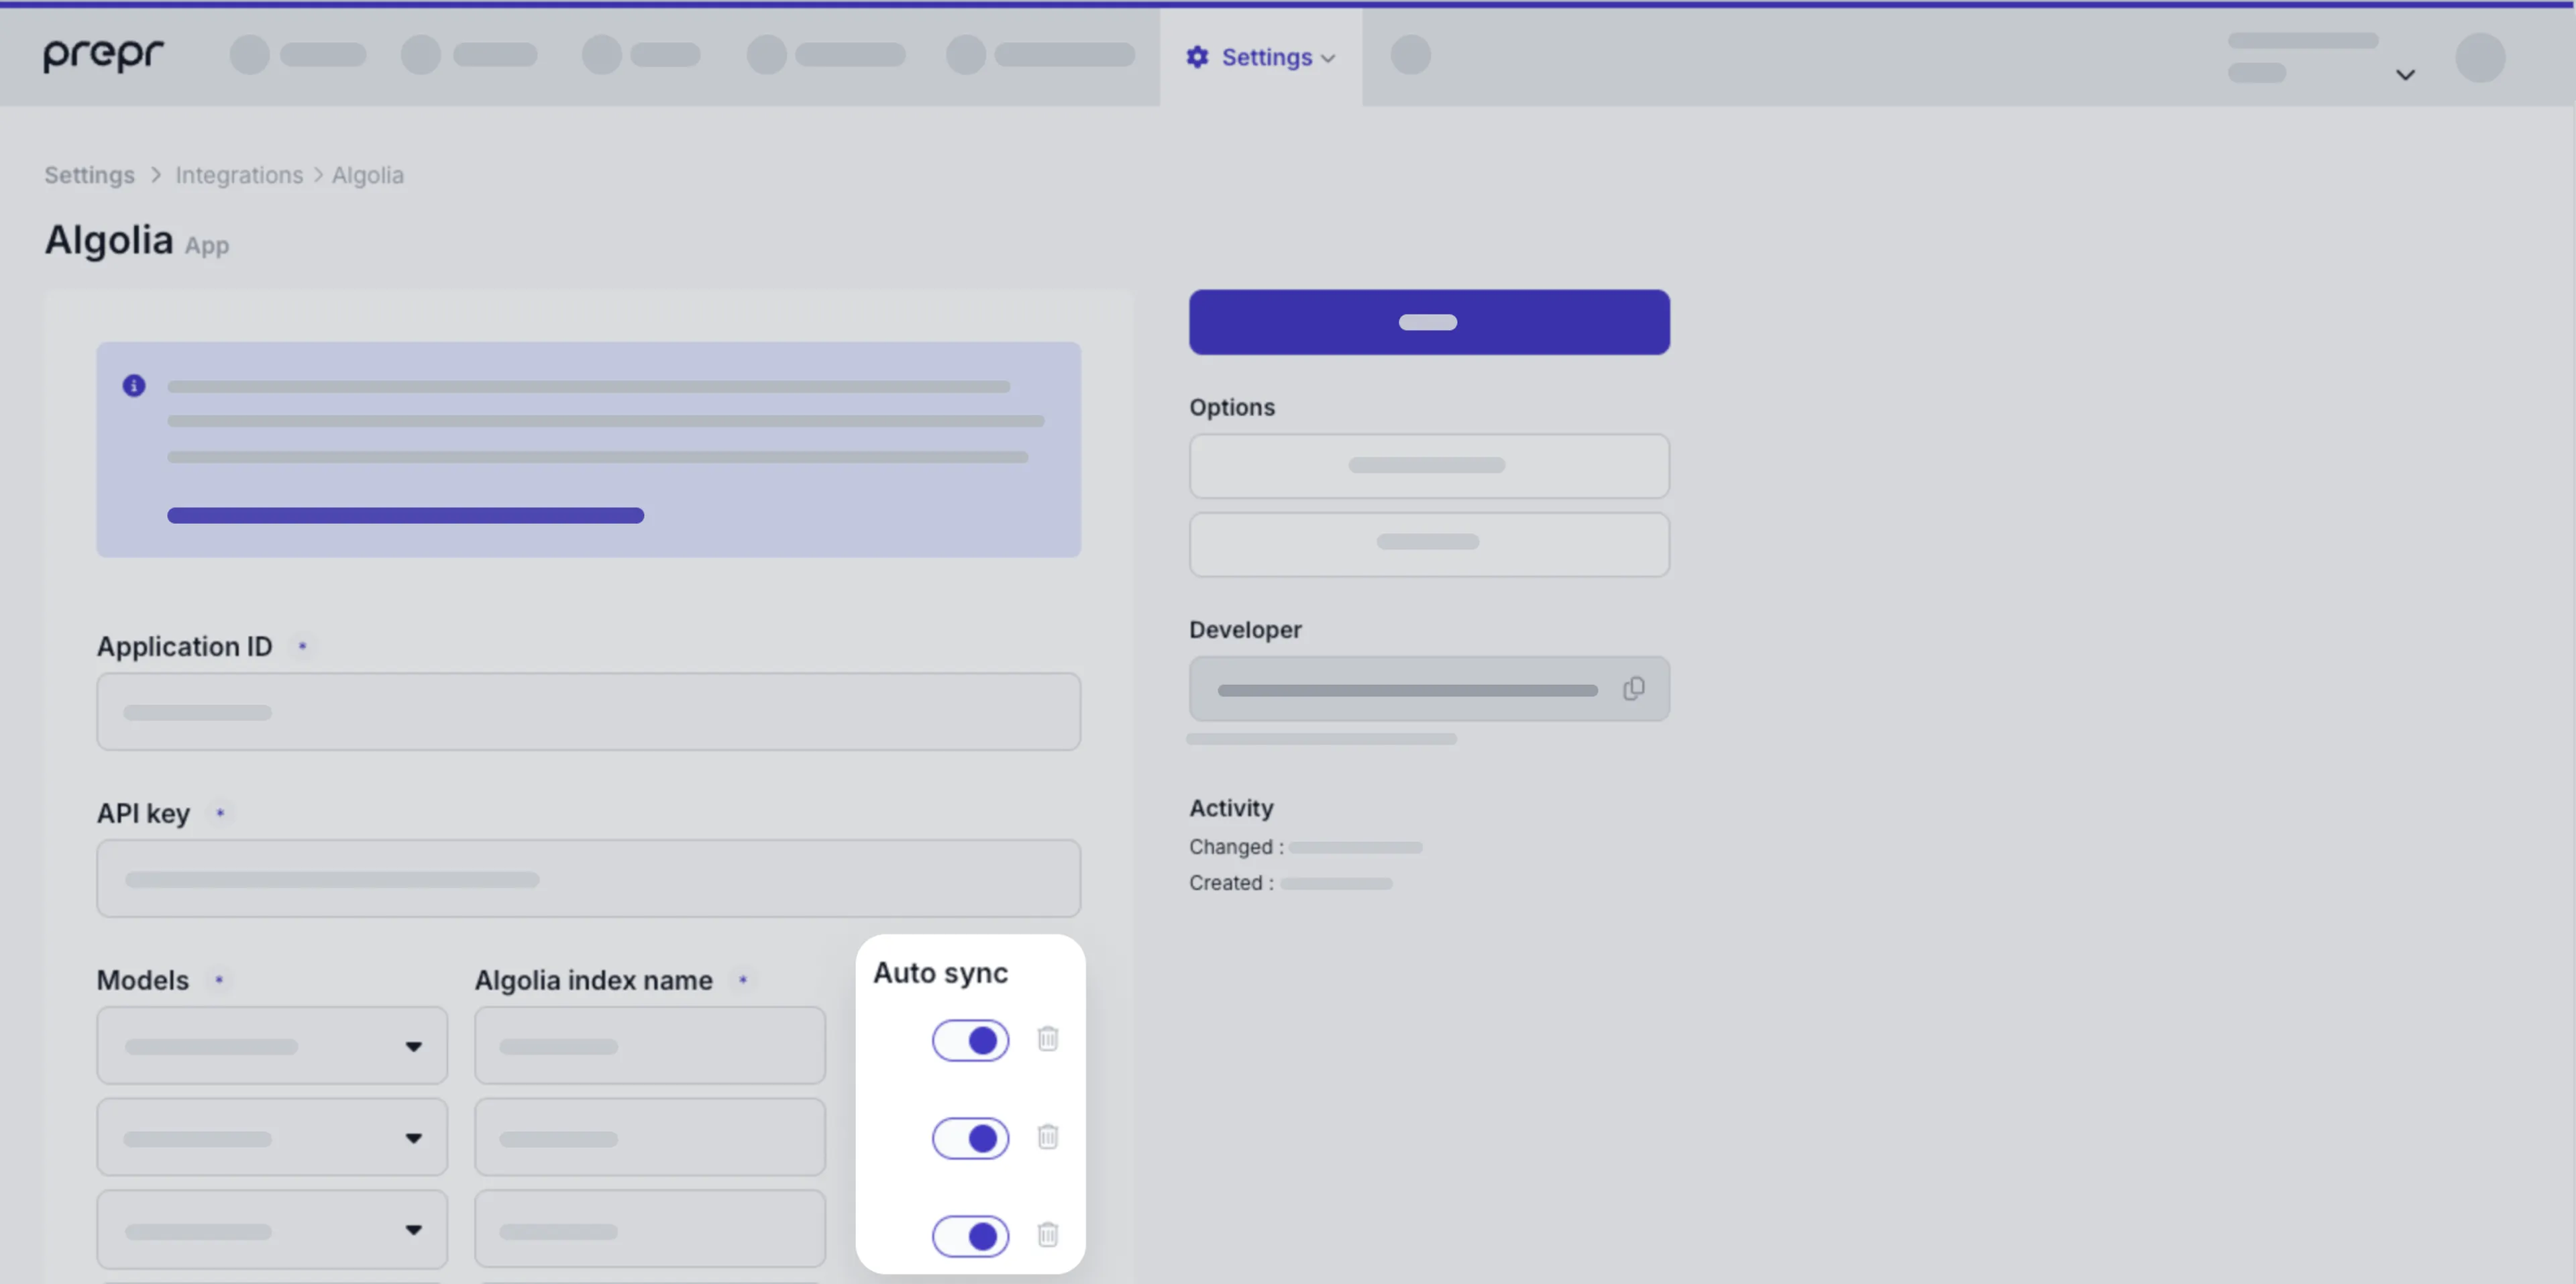
This gives you more control and helps you prevent issues with the web app search functionality resulting from bulk updates, for example.
In other words, ensure a stable search experience for your users.
Check out the [Algolia integration guide](/integrations/algolia#connect-prepr-to-algolia) for more details.
## A/B testing article headlines
You can now run experiments for article headlines by adding an A/B test directly to a header or title *Text field*.
For example, to test headlines in a list of recommended articles on the home page.
Now you can measure which headlines encourage readers to open the article they want to read.
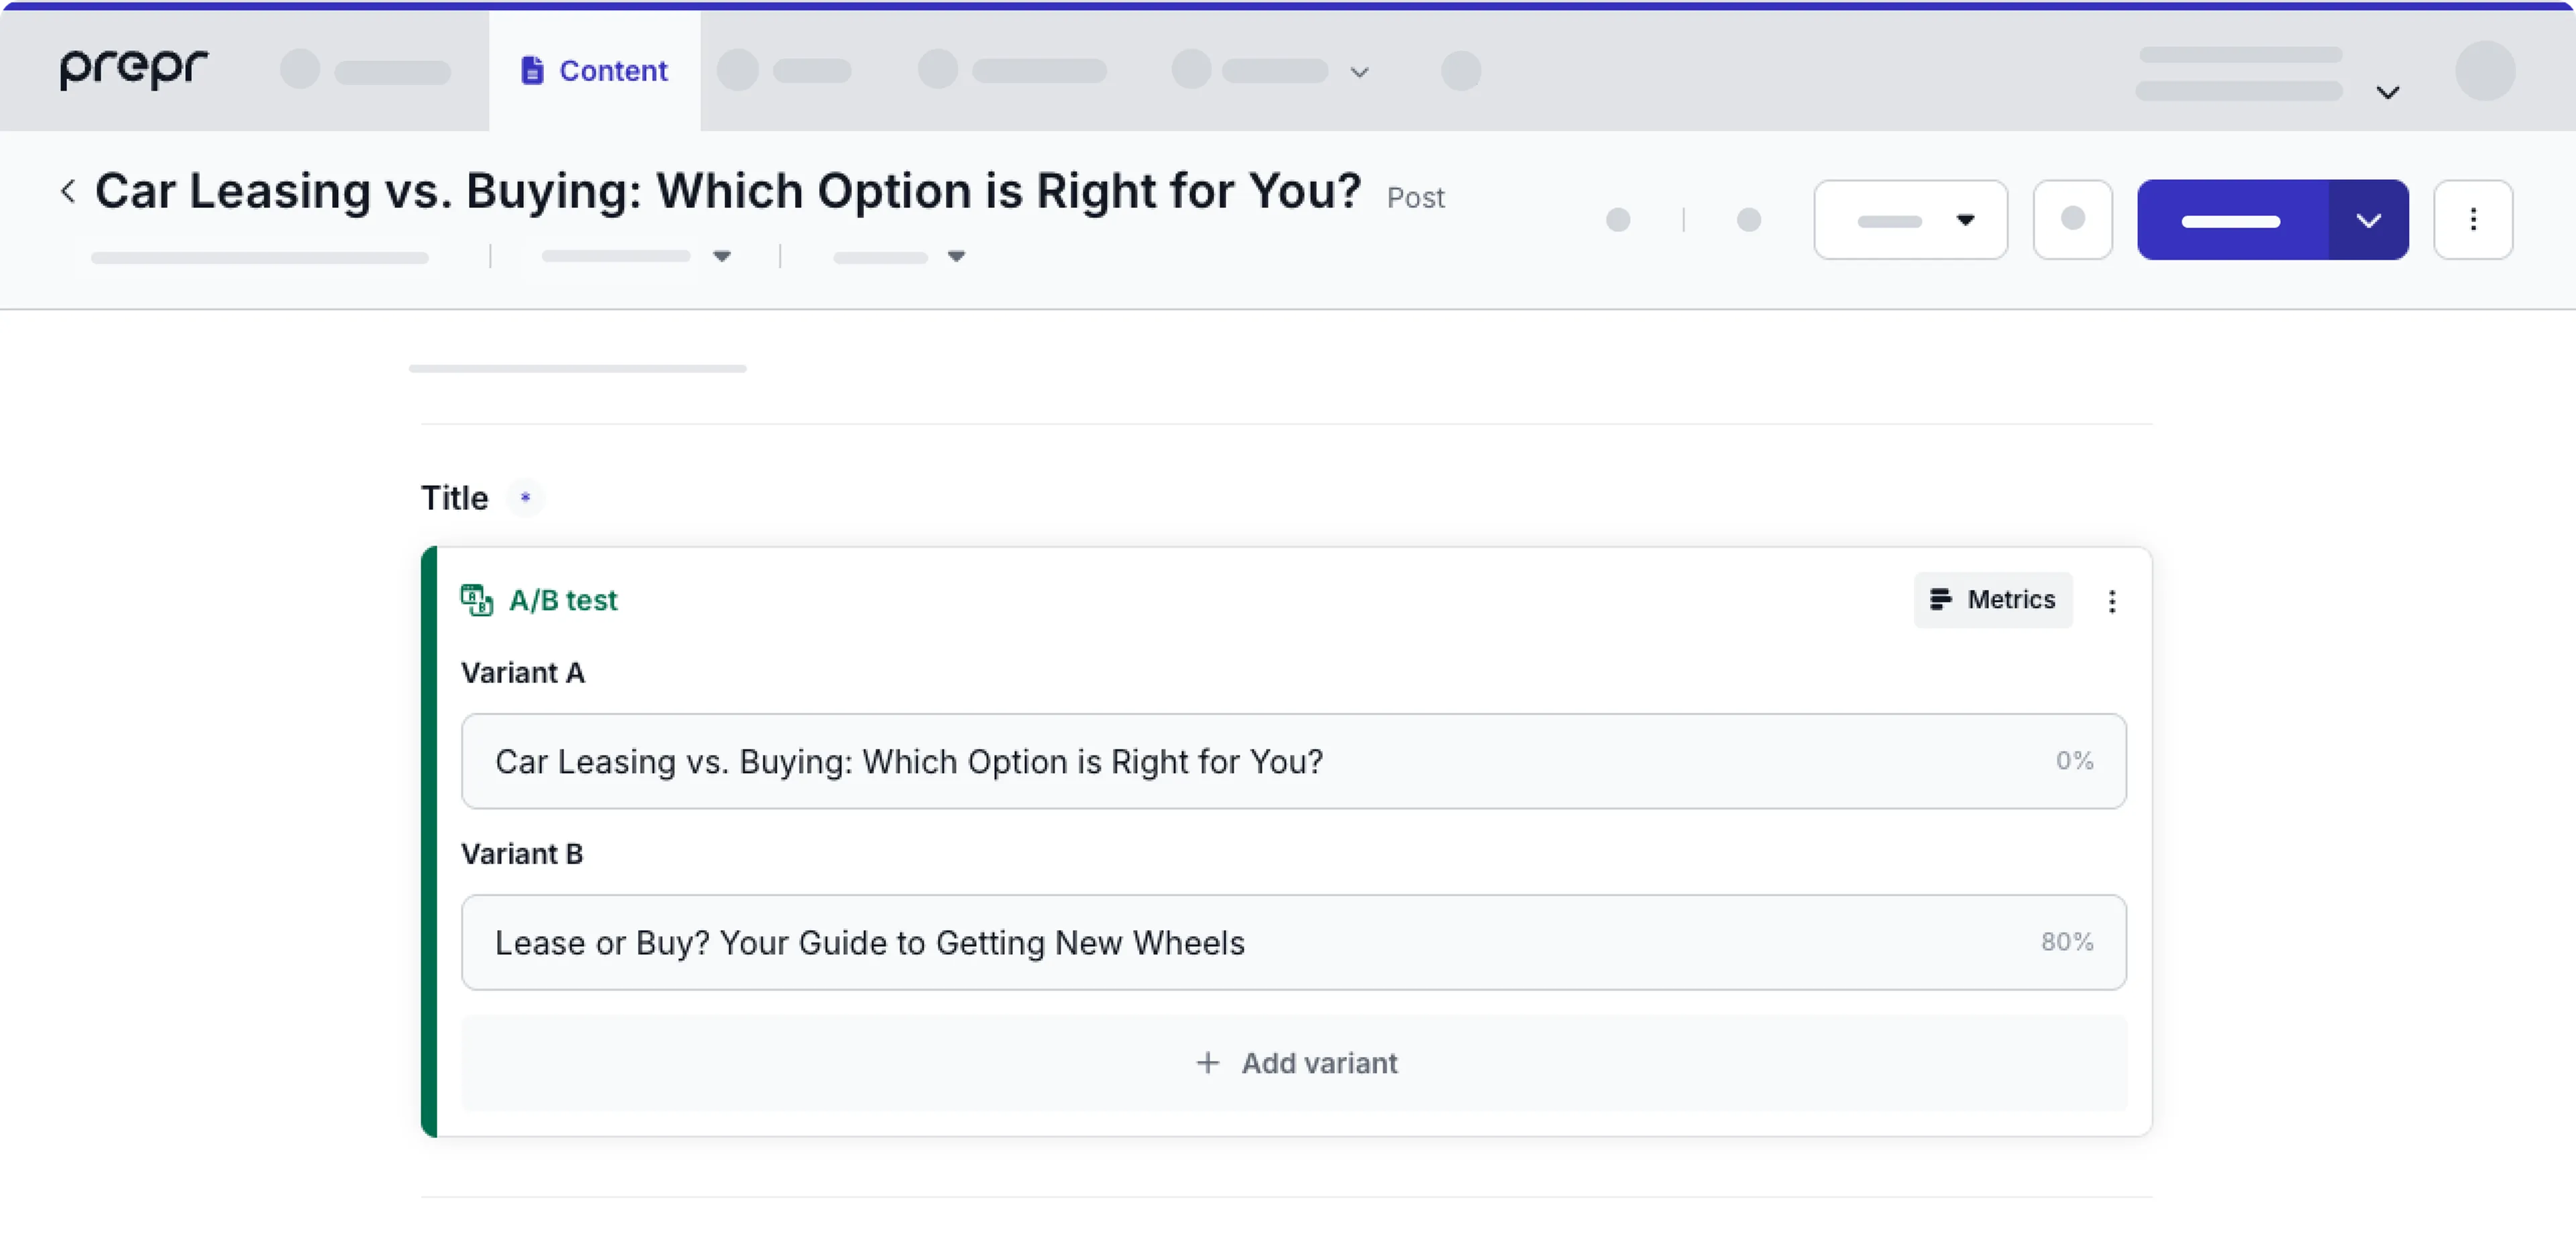
Optimize performance with surgical precision, driving higher engagement and conversion rates.
To enable A/B testing on a text field check out the [Text field settings](/content-modeling/field-types#ab-testing).
## New Prepr Next.js package version is available
We're happy to bring you a new and improved version of the **Prepr Next.js package**, a toolkit to streamline your personalization and A/B testing implementation for your Next.js front end.
We’ve redesigned the *Preview Bar* into a less intrusive floating toolbar, giving content editors a cleaner, distraction-free preview experience.
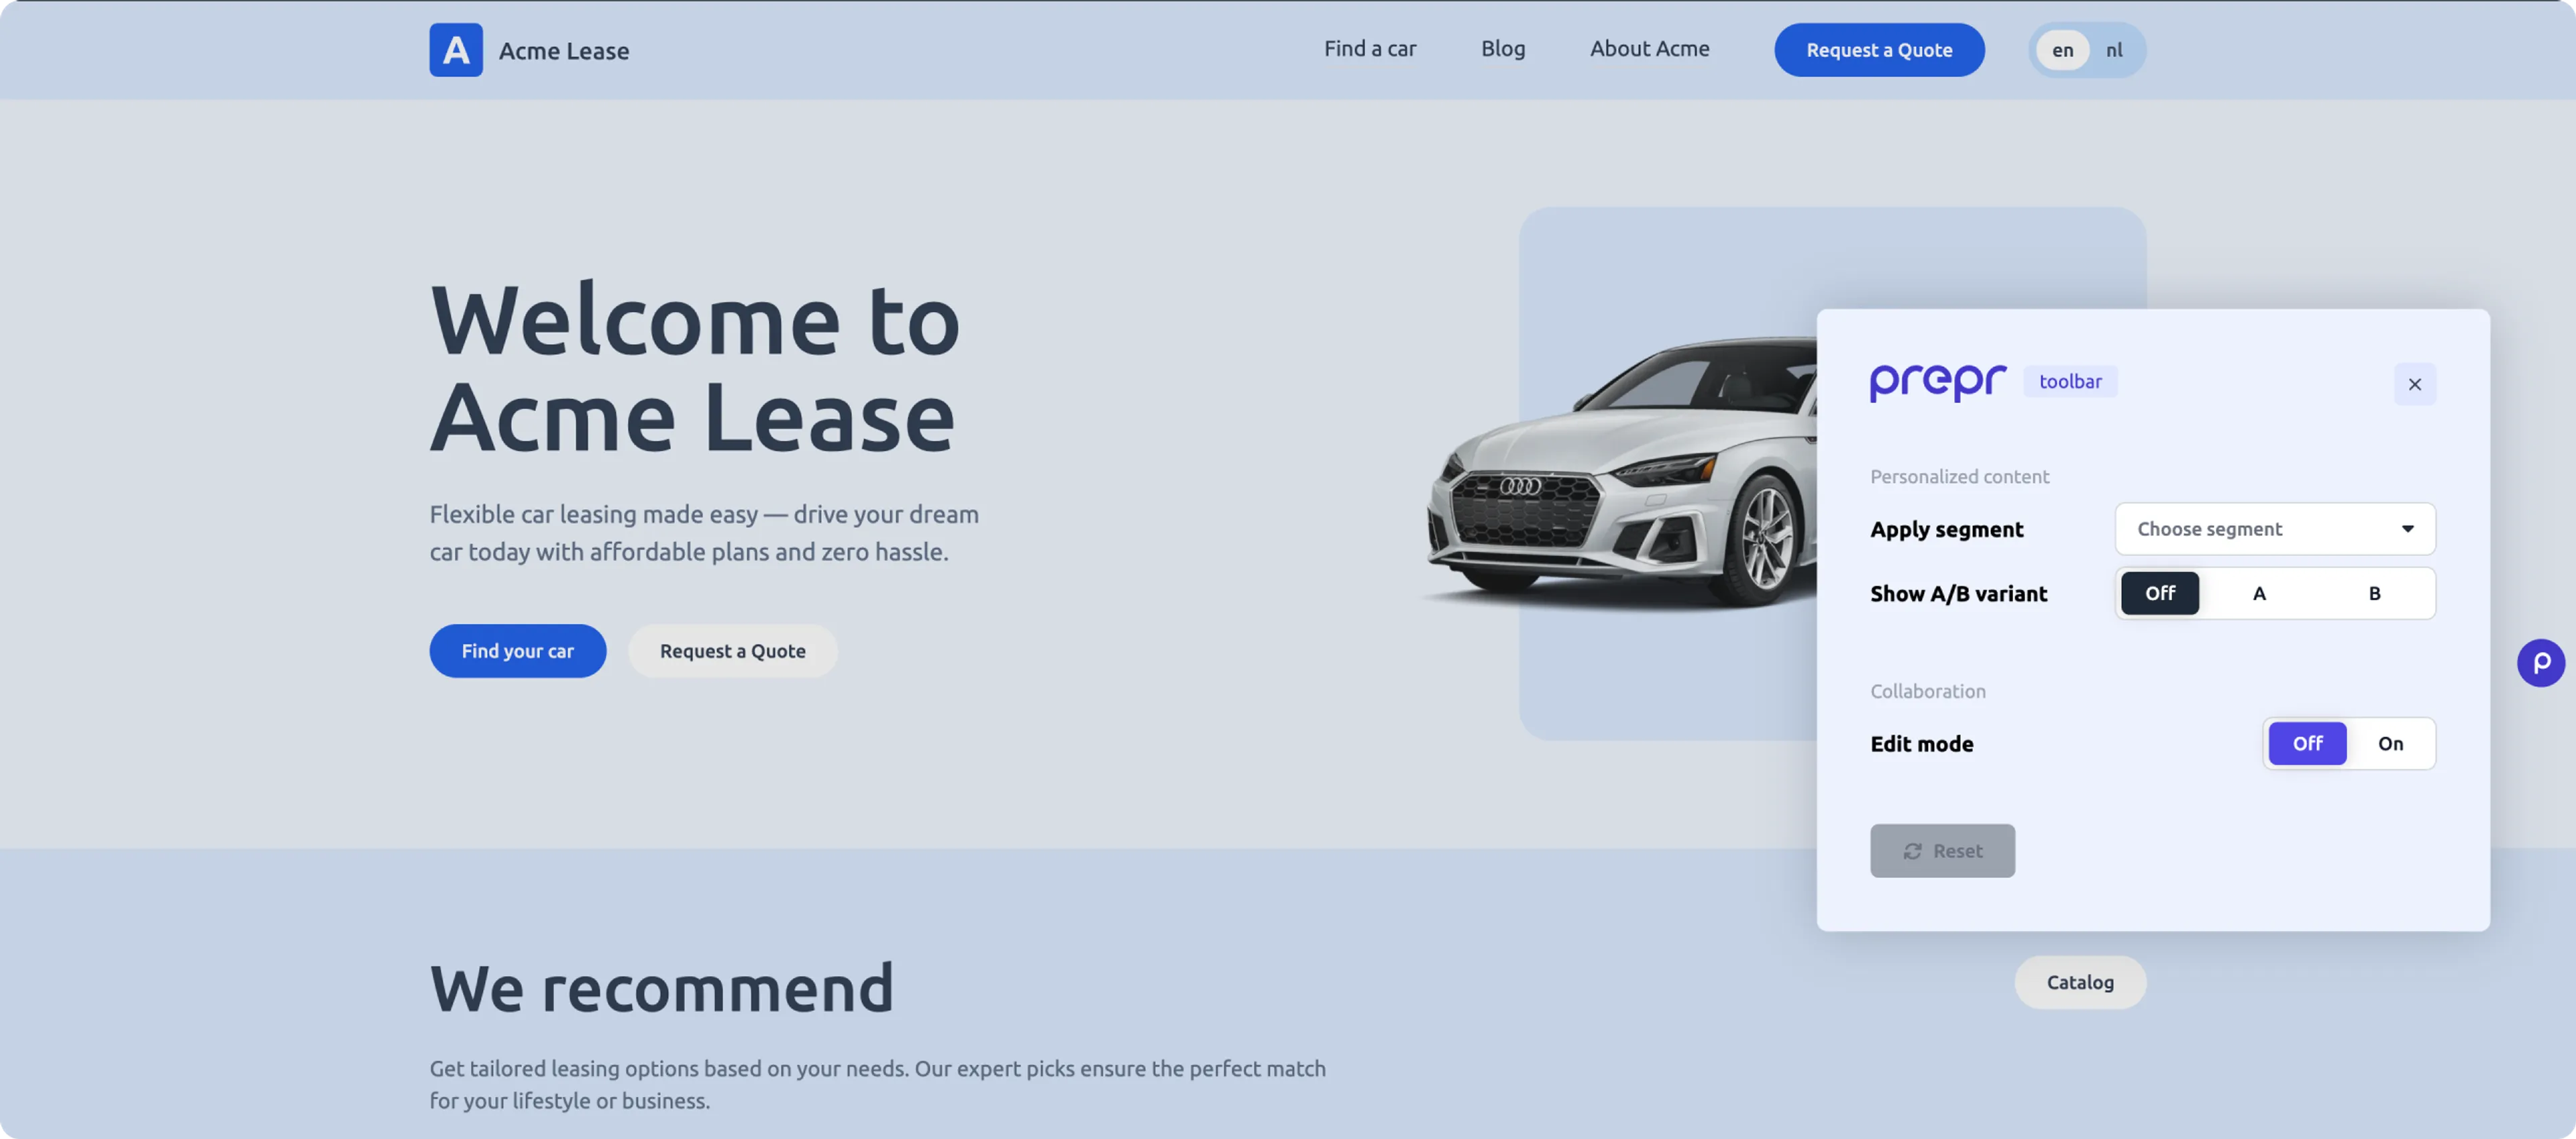
In addition to previewing different A/B test variants and personalized experiences, content editors can now enable **Edit mode** to highlight any element in the preview page.
When enabled, they can then simply hover over elements to reveal links that open the corresponding item directly in Prepr for quick updates.
Check out the [Prepr Next.js package guide](/prepr-nextjs-package) for more details.
## Improved handling of conditional required fields
We’ve released an important update to ignore the required field validation when a field is conditionally hidden.
Previously, if a required field was hidden due to conditional logic, it would still prevent a content item from being published.
This often led users to mark fields as non-required simply to avoid validation errors during publishing.
With today’s update, a required field is only enforced when it is visible to the content editor.
If the field is hidden due to a conditional setting, it'll be treated as not required in the API schema.
However, fields that are always visible remain required both in the editor and the API.

This improvement is enabled by default for new customers, while existing environments can activate the feature manually in the **Environment** settings page.
Check out the [environment settings](/project-setup/setting-up-environments#manage-environment-settings) for more details.
## Introducing content item views
With the new content item views, we're introducing a cleaner interface to manage content visibility.
This new feature allows you to create, organize, and access your own tailored views.
The new content item views replace how you previously used saved filters for content items.
You can save time by creating views that are most relevant for you, while your team can collaborate more effectively with shared and role-based views.
Check out the [managing content doc](/content-management/managing-content/managing-content-items#views) for more details.
## Introducing the *Needs attention* overview
To enhance the reliability and quality of stored content, we've added a content quality checker to find content items with broken links or content items that could not be published.
You can find the list of these content items in the new *Needs attention* view.
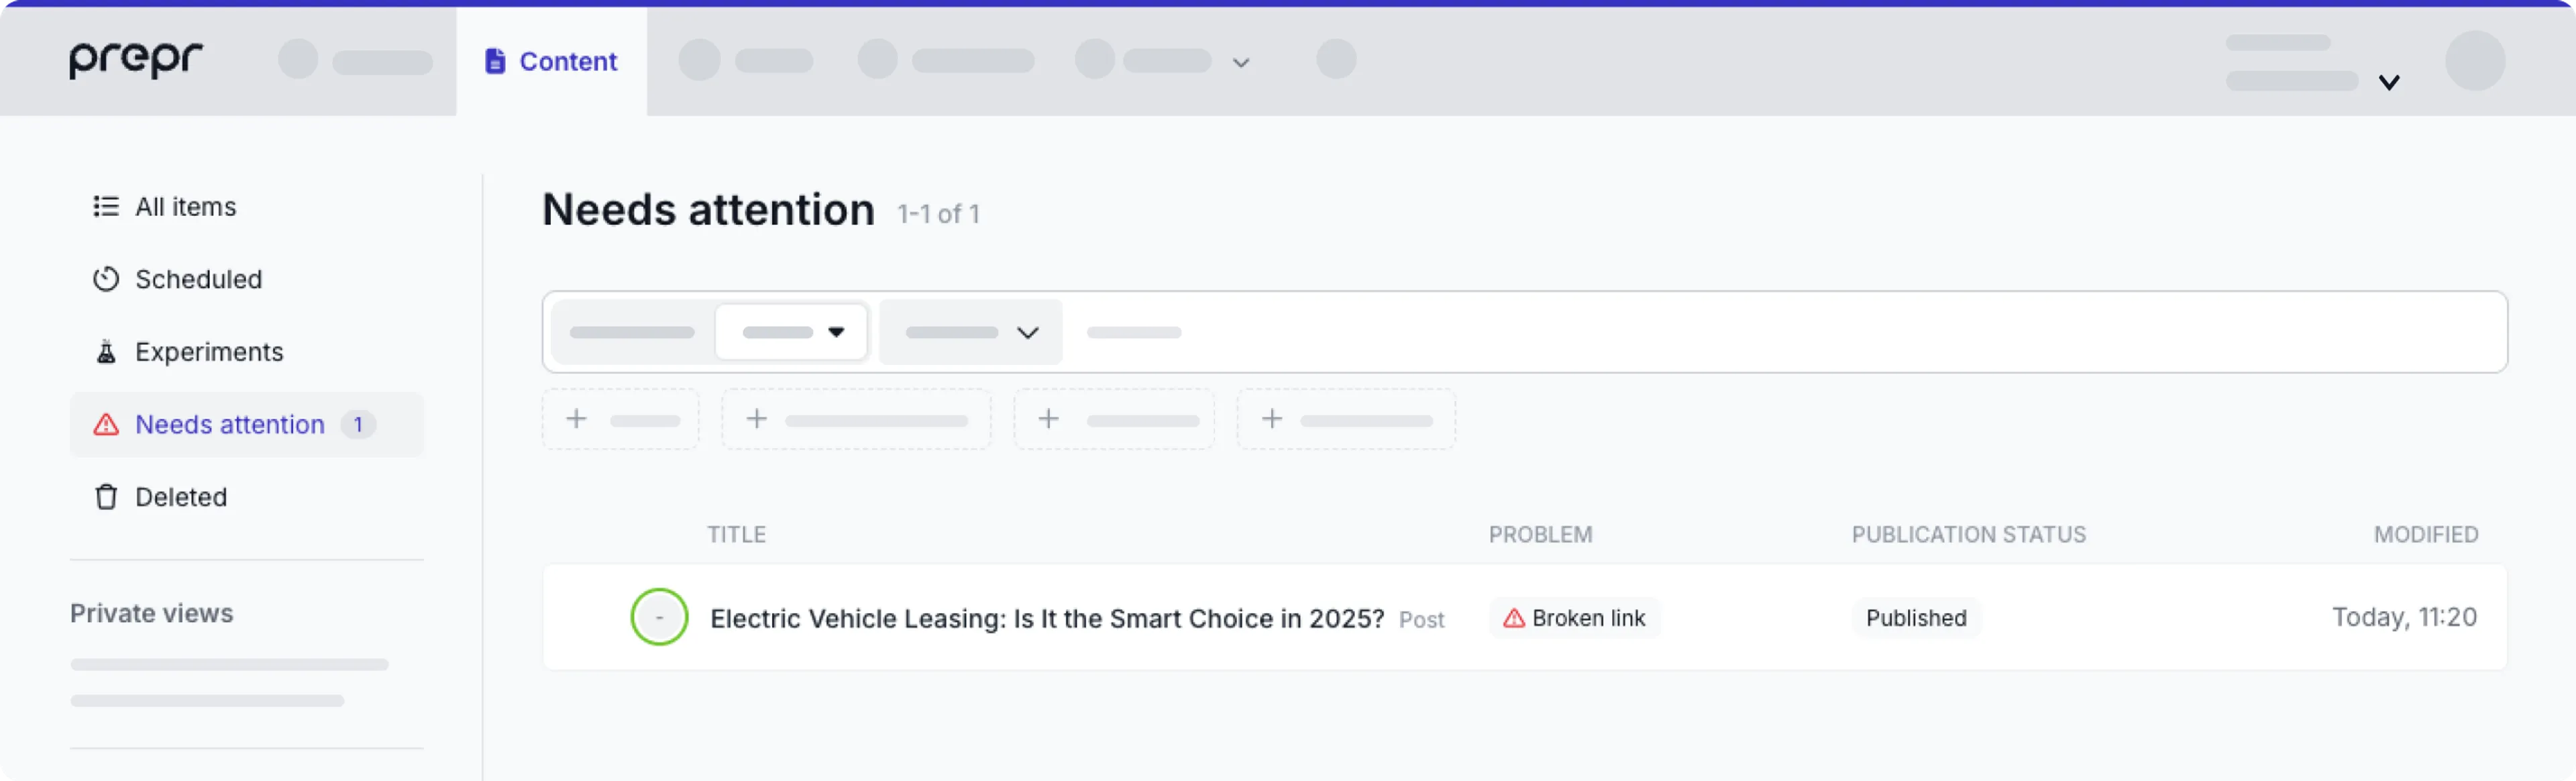
These quality indicators help prevent broken user experiences on live websites and empower content teams to quickly identify and resolve issues before publication.
Check out the [managing content doc](/content-management/managing-content/managing-content-items#manage-content-quality) for more details.
## Recovering deleted content items
With the new *Deleted* view, you can now quickly find and restore deleted items with just a few clicks, for example, if you deleted an item accidentally.
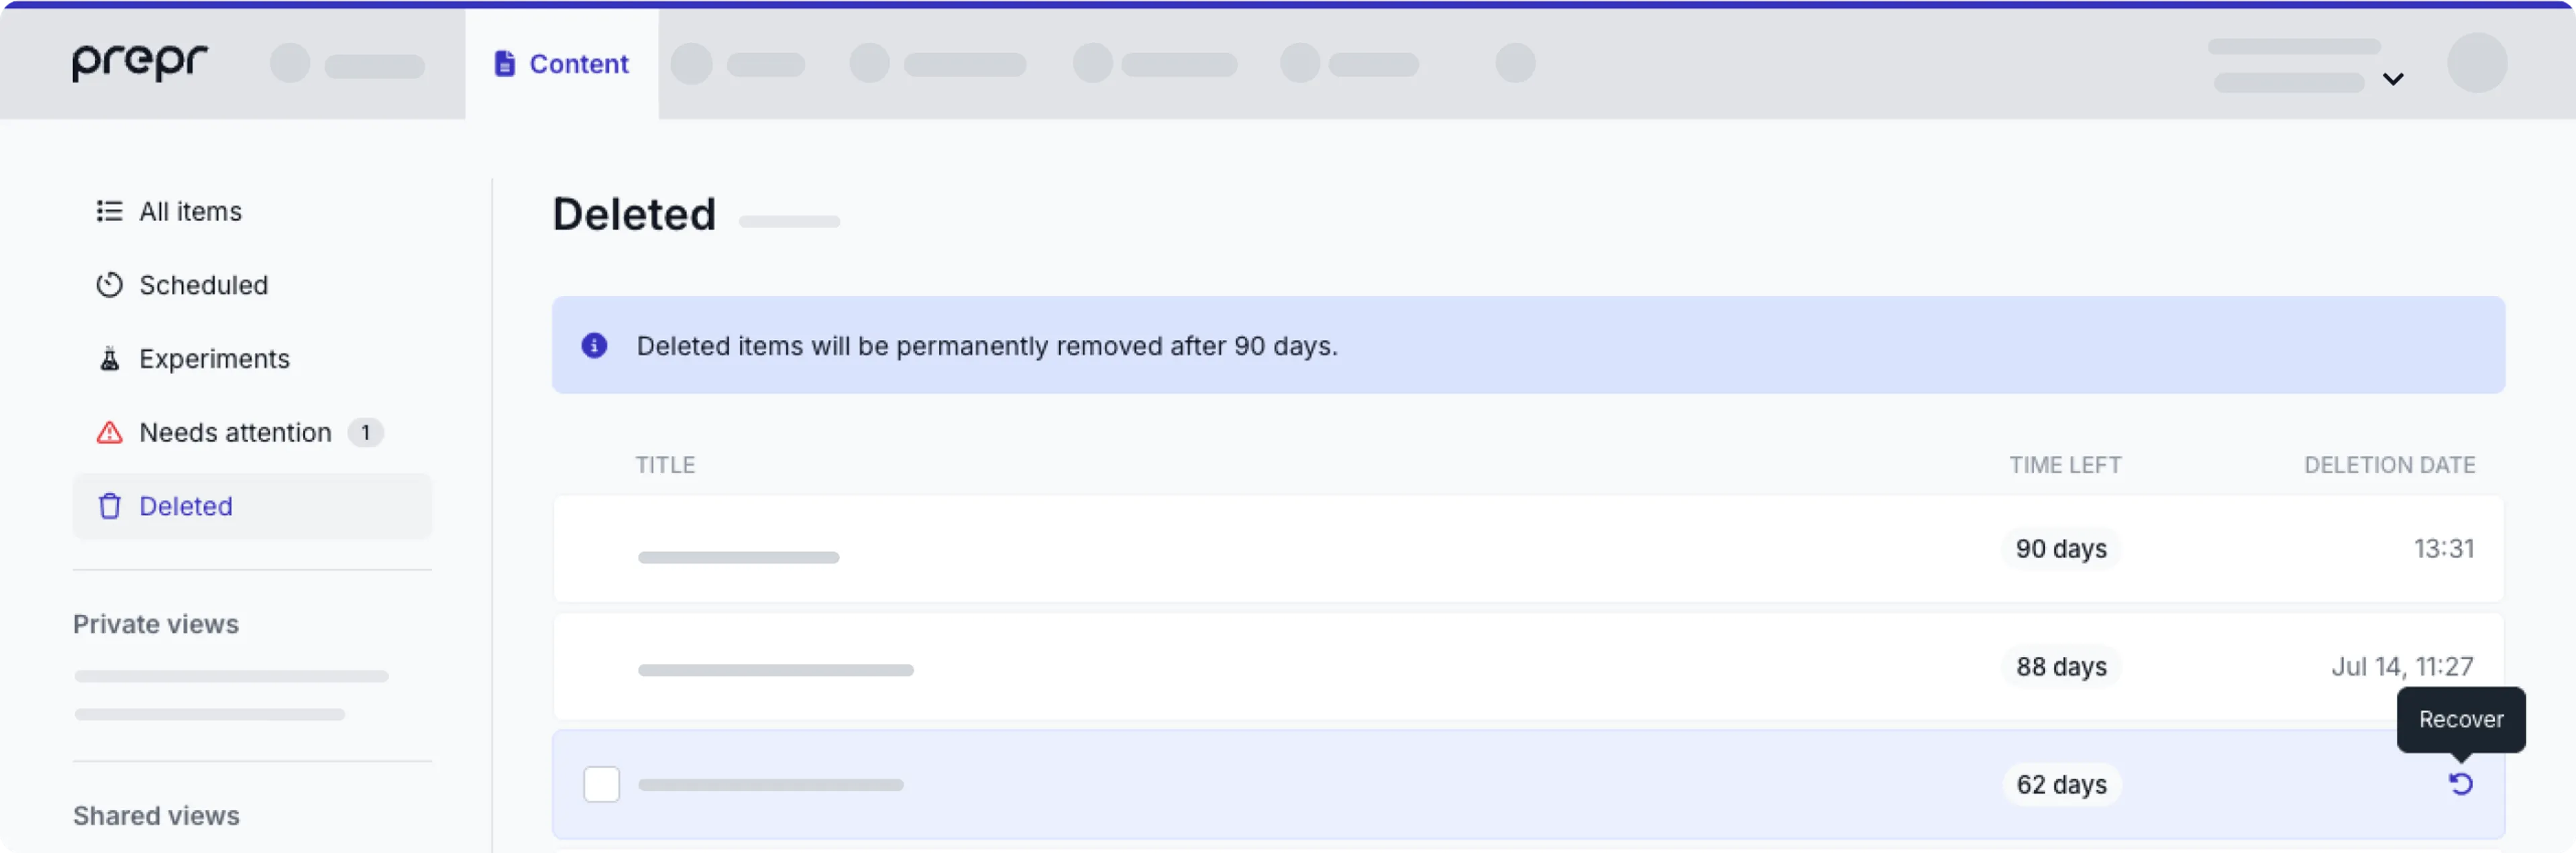
Check out the [managing content doc](/content-management/managing-content/managing-content-items#recover-a-deleted-item) for more details.
## Two-factor authentication (2FA) required for Owners and Admins
To strengthen account security, 2FA is required for all users with an *Owner* or *Admin* role in a paid Prepr organization as of July 1, 2025.
If 2FA is not enabled, users will be prompted to set it up before accessing Prepr. SSO users are exempt from this requirement.
Check out the [Activating two-factor authentication](/project-setup/managing-users#activate-two-factor-authentication) guide for more details.
## New Identify event to store identity provider user IDs
The new `Identify` event stores a user's unique ID from your Identity Provider directly in their matching customer profile in Prepr.
```js copy
prepr('event', 'Identify', 'external-profile-ID');
```
This event allows you to accurately link customer data when they log in to your web app giving you more precise data analysis.
For more details, check out the [recording events doc](/data-collection/recording-events#using-identify-providers).
## Introducing the Pipedrive integration
With the new Pipedrive integration, you can embed Pipedrive forms directly into your content items.
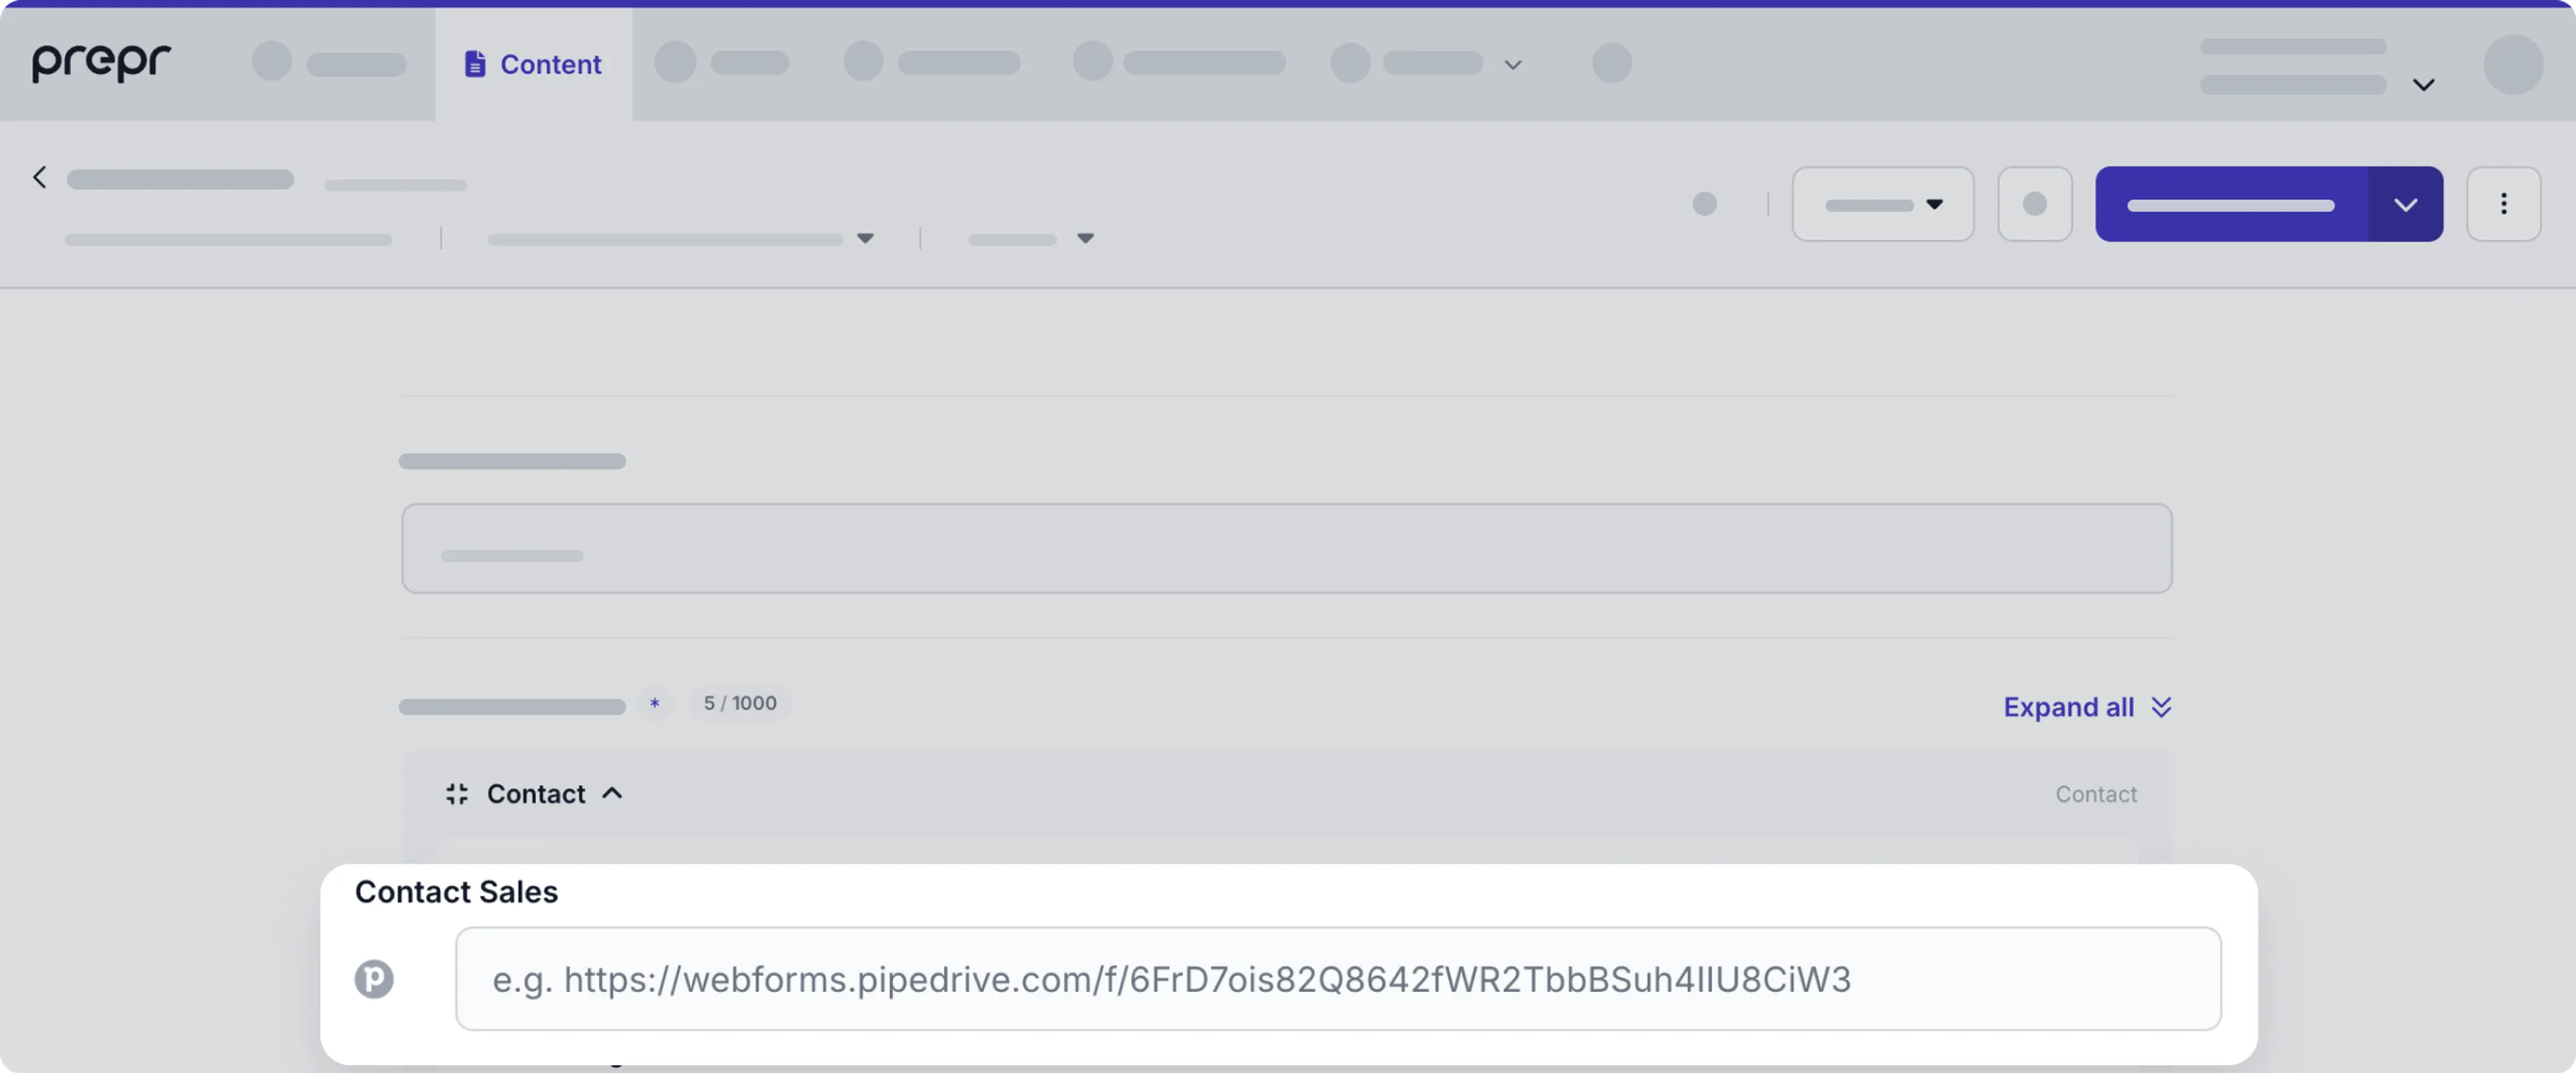
This means you keep your content and related Pipedrive forms in one place.
Just enter the matching Pipedrive form URL to link the form you need.
Check out the [Pipedrive integration doc](/integrations/pipedrive) for more details.
## New PATCH mutation endpoint in public beta
We’ve introduced a new `PATCH` endpoint for content items in the Mutation API, allowing you to update just a single field in an
existing item instead of replacing the whole object. This aligns with HTTP PATCH best practices for partial updates and efficiency.
Plus, thanks to refined metadata handling, this endpoint won’t trigger the `changed_on` timestamp — so batch updates no longer
clutter the editor interface.
For more details, check out the [Mutation API doc](/mutation-api/content-items-create-update-and-destroy#patch-a-content-item).
## Introducing the Dealfront (Leadfeeder) integration
We’re excited to introduce a new B2B integration in Prepr with Dealfront.
This powerful new integration lets you segment website visitors based on their industry and company size.
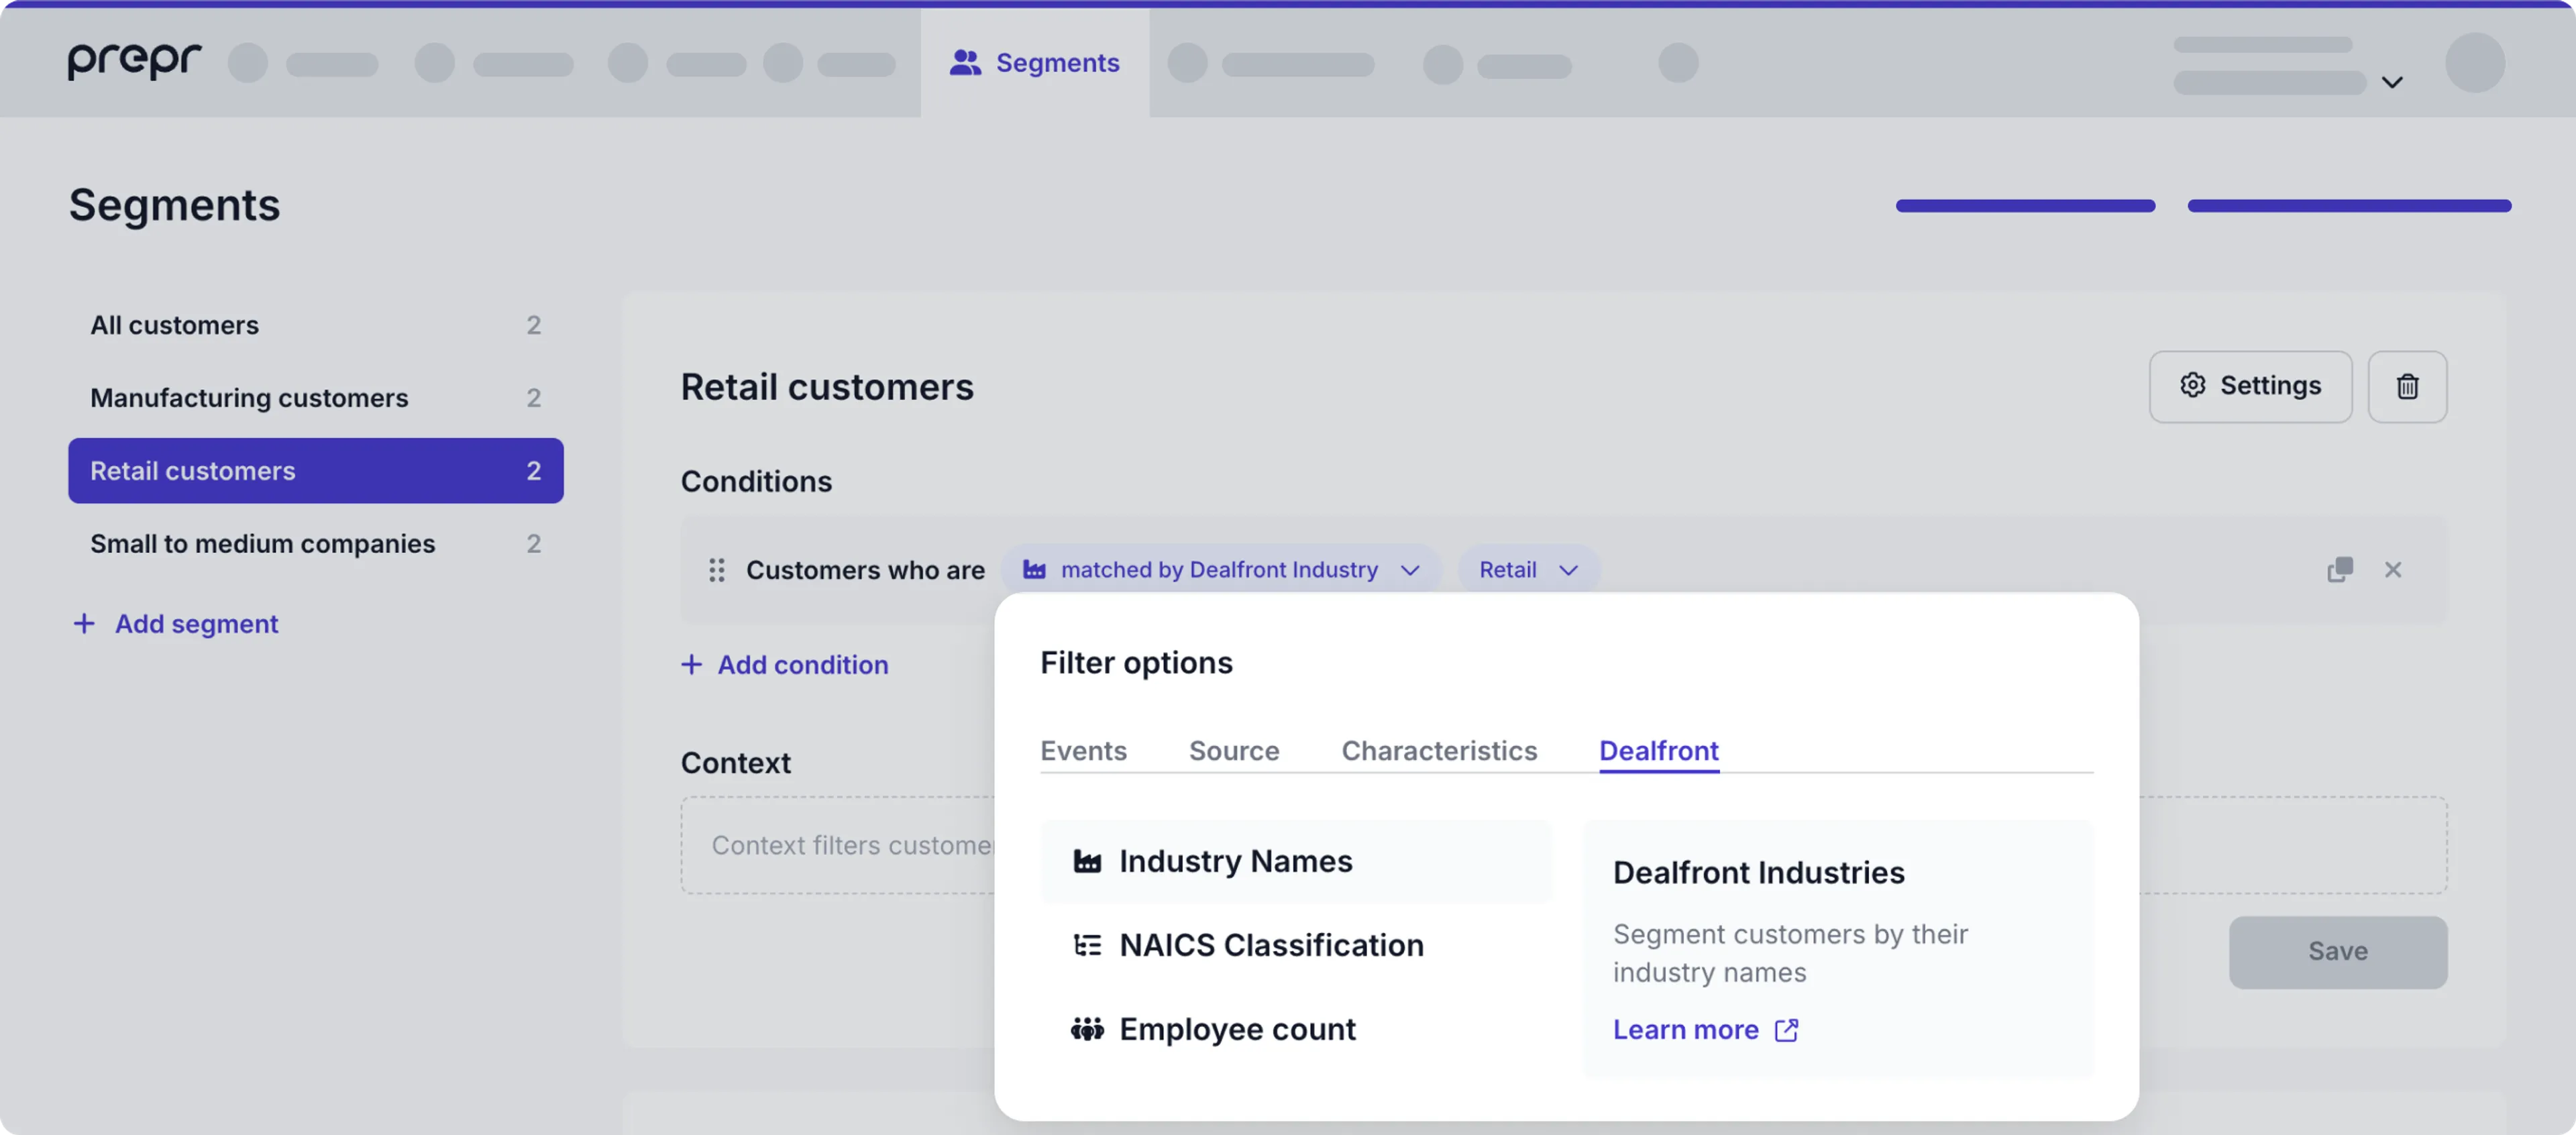
This allows you to personalize content for an enhanced user experience for your B2B audience.
For more details, check out the [Dealfront integration guide](/integrations/leadfeeder).
## New enumeration JSON editor
We've introduced a new option to add or edit enumeration values using a JSON editor.
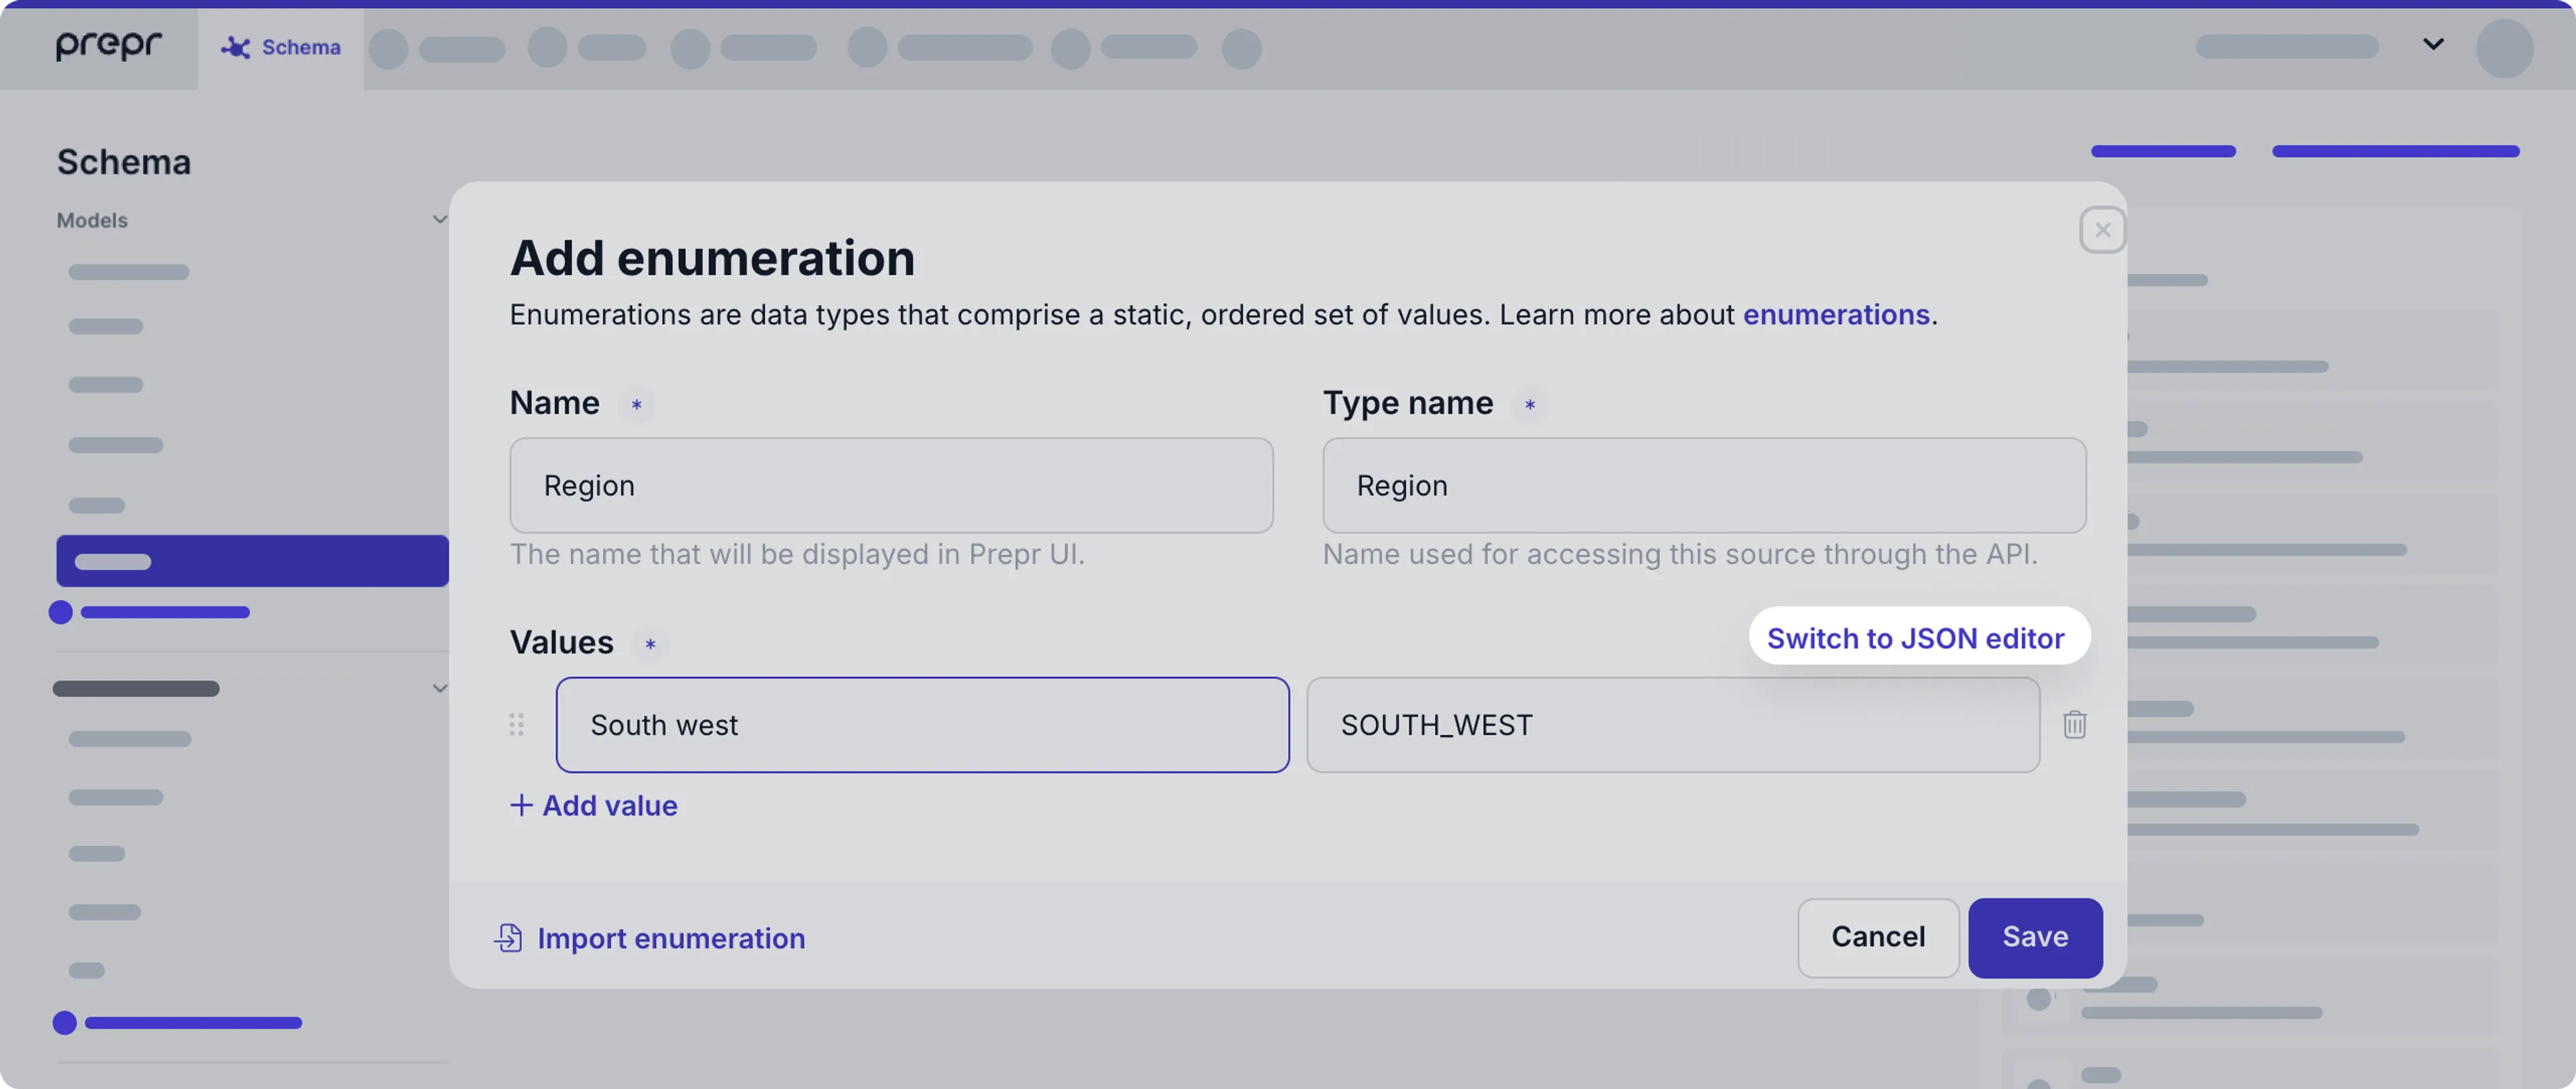
This new option enables you to quickly access and copy the data structure and add your own updated JSON.
This saves time, especially when you need to add or edit an enumeration with an large list of values.
Check out the [enumerations doc](/content-modeling/managing-enumerations) for more details.
## Personalization across all Stack fields
Previously, you could add personalization and A/B test content only to a stack field directly included in the model.
We've enhanced the *Stack* field to allow personalization and A/B test content at any level in the content structure.
These include stack fields in components and within dynamic content fields.
For example: In a CTA button component to only personalize the button instead of the whole section of the content item where it's used.
This feature gives you more flexibility for adaptive content in the web app and an improved user experience.
To use this feature, make sure to use the newest [GraphQL API version 2025-05-27](/graphql-api/upgrade-guide#version-2025-05-27).
## Dynamic content in components
Previously, you could only add a dynamic content field to a model.
It's now possible to add a *Dynamic content* field to a component to add rich content sections to your section-based pages. For example, to publish a guide with your chosen styling.
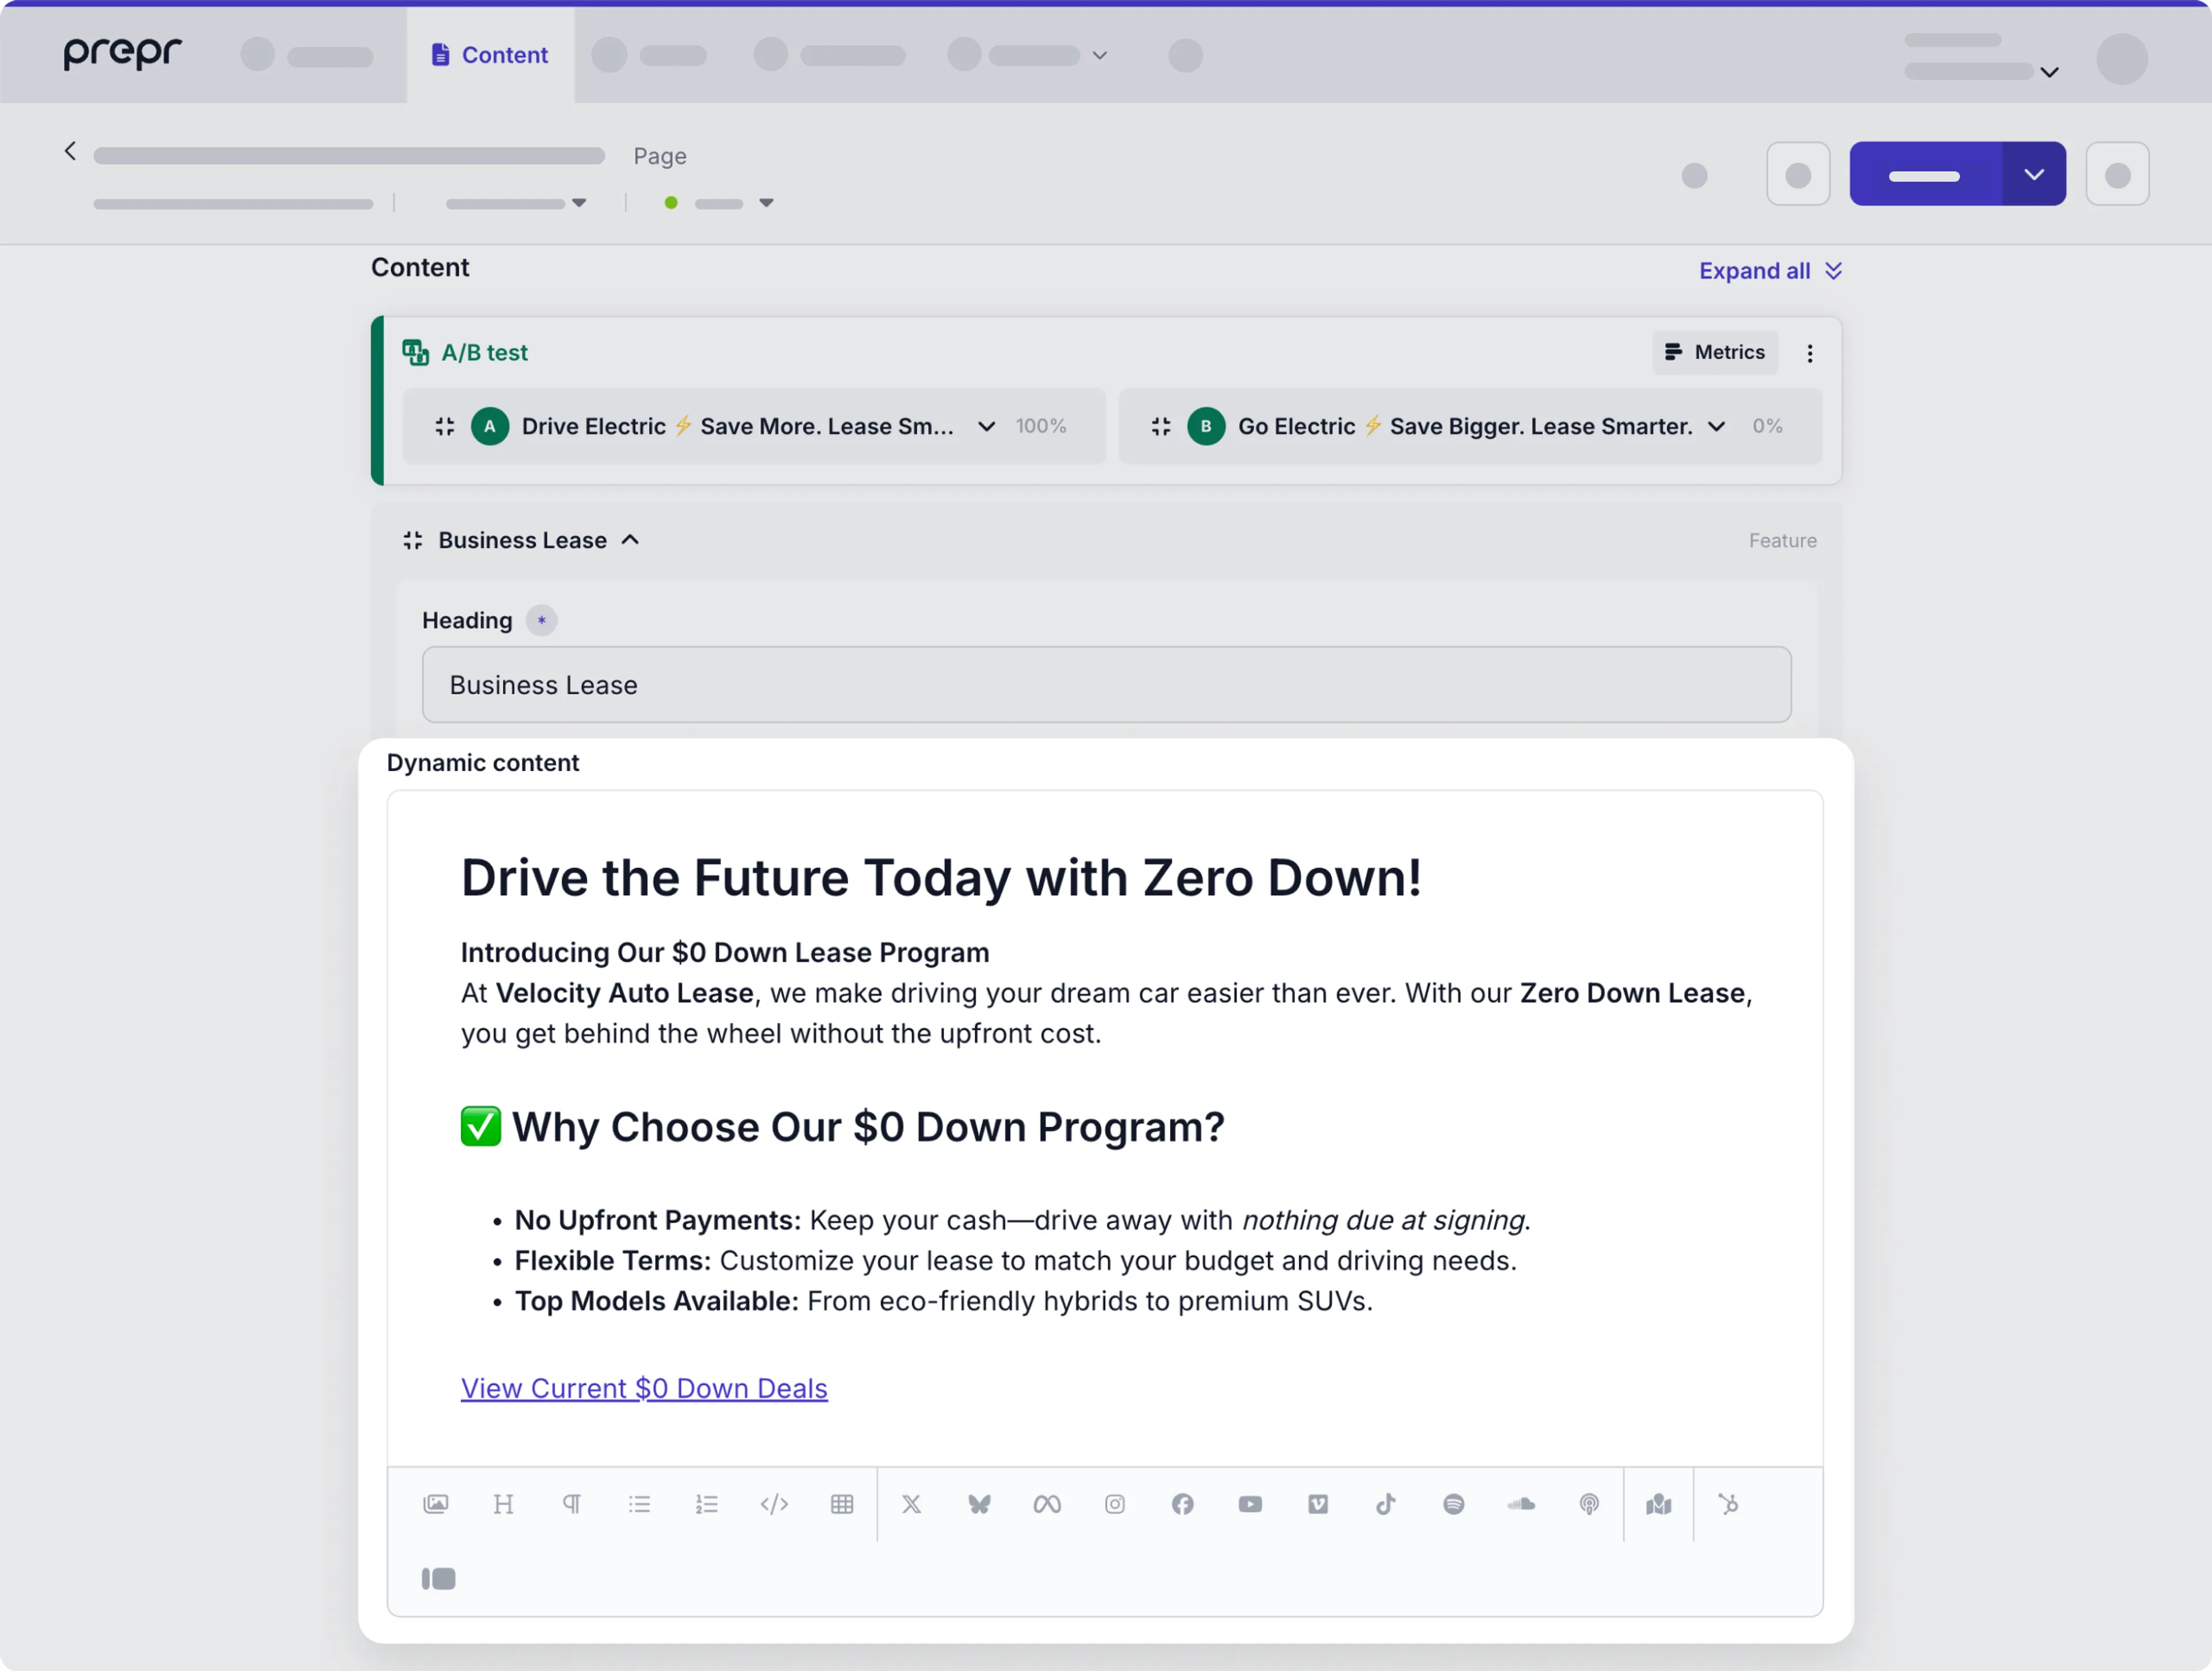
This feature allows more flexibility when editing content and more dynamic content delivery in the web app.
To use this feature, make sure to use the newest [GraphQL API version 2025-05-27](/graphql-api/upgrade-guide#version-2025-05-27).
## New GraphQL API version 2025-05-27 is available
Our newest GraphQL API version brings you more flexibility when creating a schema and developing an adaptive web app with the following new features:
- Support for A/B tests and adaptive content elements within *Stack* fields in components, allowing for more dynamic content delivery and an improved user experience.
- The *Dynamic Content Editor* field is now available in components, enabling you to create engaging and personalized content easily.
- We’ve introduced the *Tags* field in components, providing a flexible way to categorize and manage your content more effectively.
- You can now access a default query to retrieve the locales available in your environment, making it easier for you to implement localization in your front end.
- We've enhanced sorting on `string` fields to be case-insensitive, ensuring a more intuitive and user-friendly experience.
Check out the [GraphQL API upgrade guide](/graphql-api/upgrade-guide#version-2025-05-27) for more details.
## Setting an initial value for *Stack* field
It's now possible to add elements such as specific content items and components to the initial value of a *Stack* field.
This release also allows you to add an initial value to a [*Content reference* field](/content-modeling/field-types#content-reference-field).
With this feature, you get a suggested outline when you create more complex content items such as pages with many possible elements.
For example, when you create a new *Page* content item, you could get a preselected *Hero* component, *Feature* component and a *Call to action* item.

This allows you to create consistent and structured content, and saves you time and reduces errors.
Check out the [*Stack* field setup](/content-modeling/field-types#stack-field) for the setup details.
## Improved content item filtering
We've added the **Unpublished changes** option to the *Publication status* filter.
This addition joins the existing filters for *Published*, *Scheduled*, and *Not published* items, giving you better control and visibility over draft updates.
You can use this filter option in the list, calendar, and kanban views to streamline your content management workflow.
Check out the [content management doc](/content-management/managing-content/managing-content-items#publication-status) for more details.
## Support for dates and location fields in Algolia and Typesense integrations
The Prepr search integrations with Algolia and Typesense now support date fields and location fields. This update enables more flexible filtering options, such as showing nearby events or sorting content based on dates, making the integration more useful for time-based and location-based use cases.
Check out the [Algolia docs](/integrations/algolia) and [Typesense docs](/integrations/typesense) for setting up the integration with dates and location fields.
## Two-factor authentication (2FA) required for Owners and Admins starting July 1, 2025
To strengthen account security, 2FA will be required for all users with an *Owner* or *Admin* role in a paid Prepr organization as of July 1, 2025.
If 2FA is not enabled by that date, users will be prompted to set it up before accessing Prepr.
SSO users are exempt from this requirement.
Check out the [Activating two-factor authentication](/project-setup/managing-users#activate-two-factor-authentication) guide for more details.
## Improved document naming and URL structure
We're pleased to let you know that we've improved how document files are named and how their URLs are set in Prepr CMS.
Now when you upload new documents (pdf, zip, docx and xlsx), they retain their original file name.
The URL to download a document includes a cleaner prefix after the hostname, providing a more structured and consistent format for better organization and readability.
**Example**
Previous URL structure: `https://example.files.prepr.io/695a4d1eiaom-sustainability-report.pdf`
New URL structure: `https://example.files.prepr.io/695a4d1eiaom/sustainability-report.pdf`
These changes make it easier for you to manage these assets, better visibility, and they align with SEO best practices.
Check out the [Editing assets doc](/content-management/managing-assets/managing-assets#editing-assets) for more details on documents fields.
## Sending events to Google Tag Manager
It's now possible to send experiment-related Prepr events to Google Tag Manager (GTM).
This is a seamless integration of Prepr's experiment data with your existing GTM setup, giving you centralized tracking.
To enable the integration to GTM, simply update the *Prepr Tracking Code* in your front end to include the *googleTagManager* destination flag.
Check out the [tracking setup doc](/data-collection/setting-up-the-tracking-code#sending-events-to-google-tag-manager-gtm) for more details.
## Introducing content item calendar view
With the content item calendar view, you can now easily manage your scheduled content directly within a calendar interface.
With this clear, visual overview of all your scheduled items, it's now easier to manage timing and avoid overlaps saving time and keeping you organized.
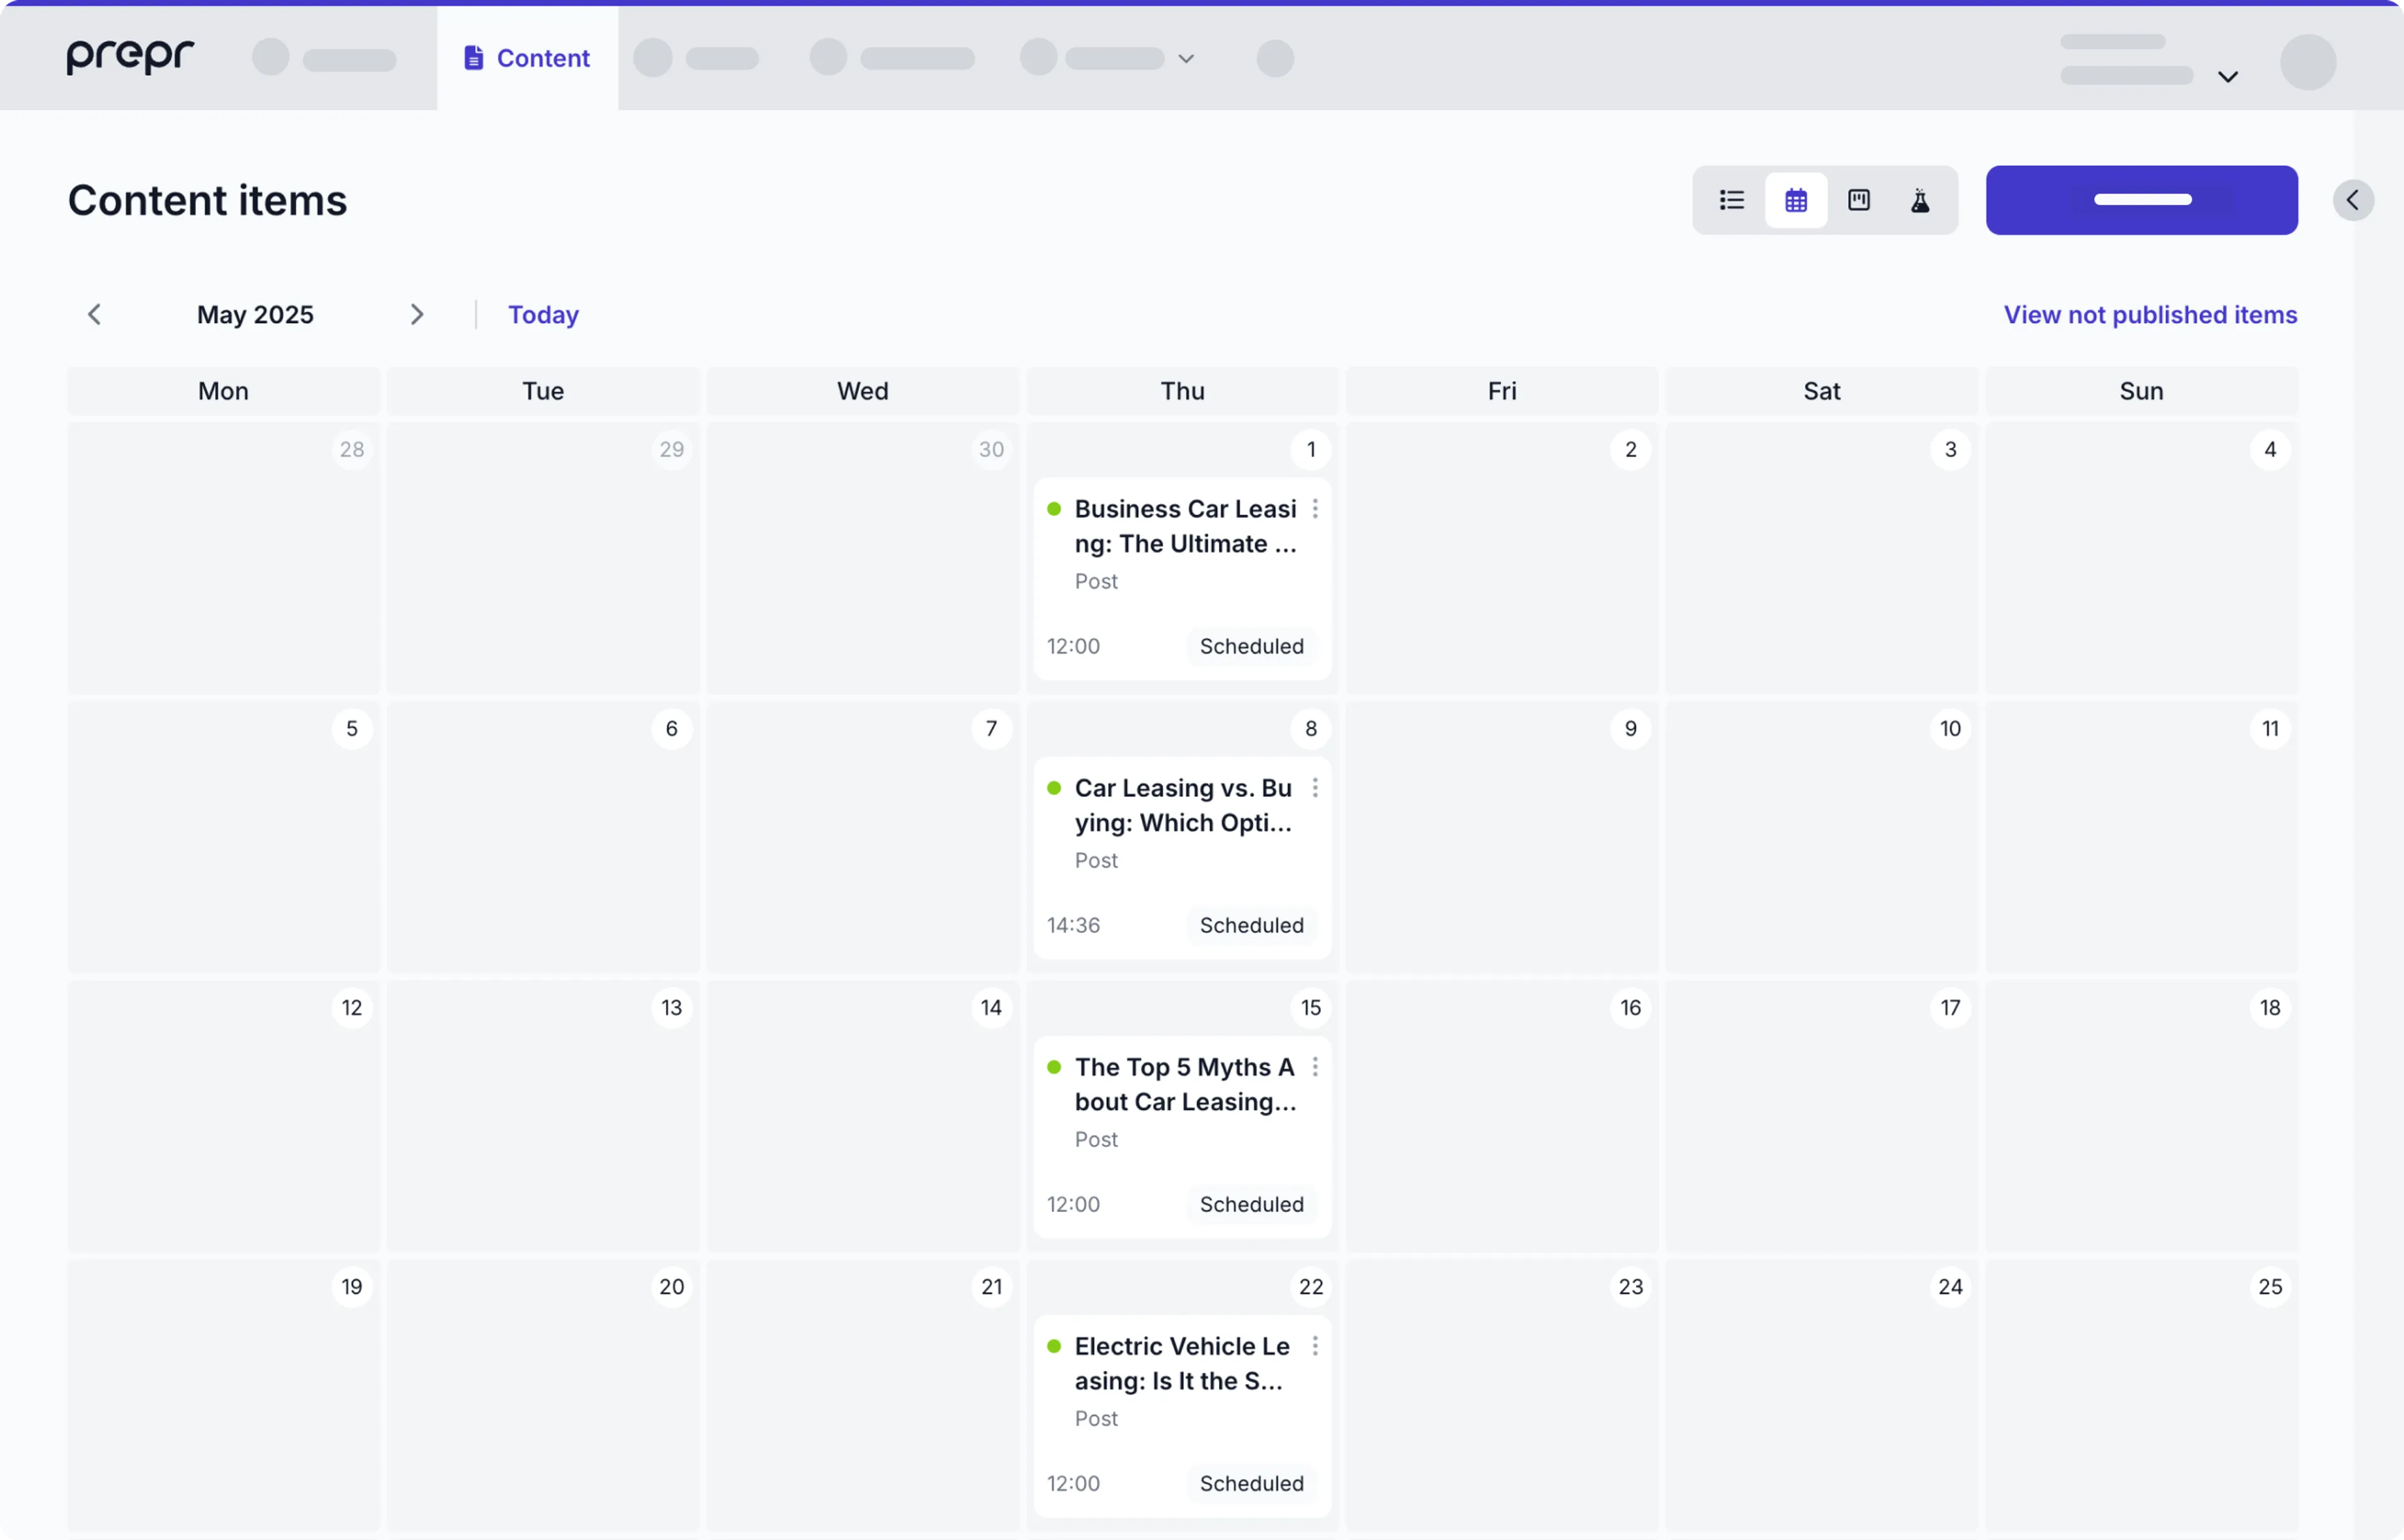
For more details, check out the [content management doc](/content-management/managing-content/managing-content-items#calendar)
## Publication status in content item list
We’ve updated the content item list display for content reference fields, stack fields and their corresponding search dialogs to display the publication status instead of the workflow stage.
Now when you view these fields or add a content item for a content reference or stack field, you can easily see which of the listed content items are published or not.
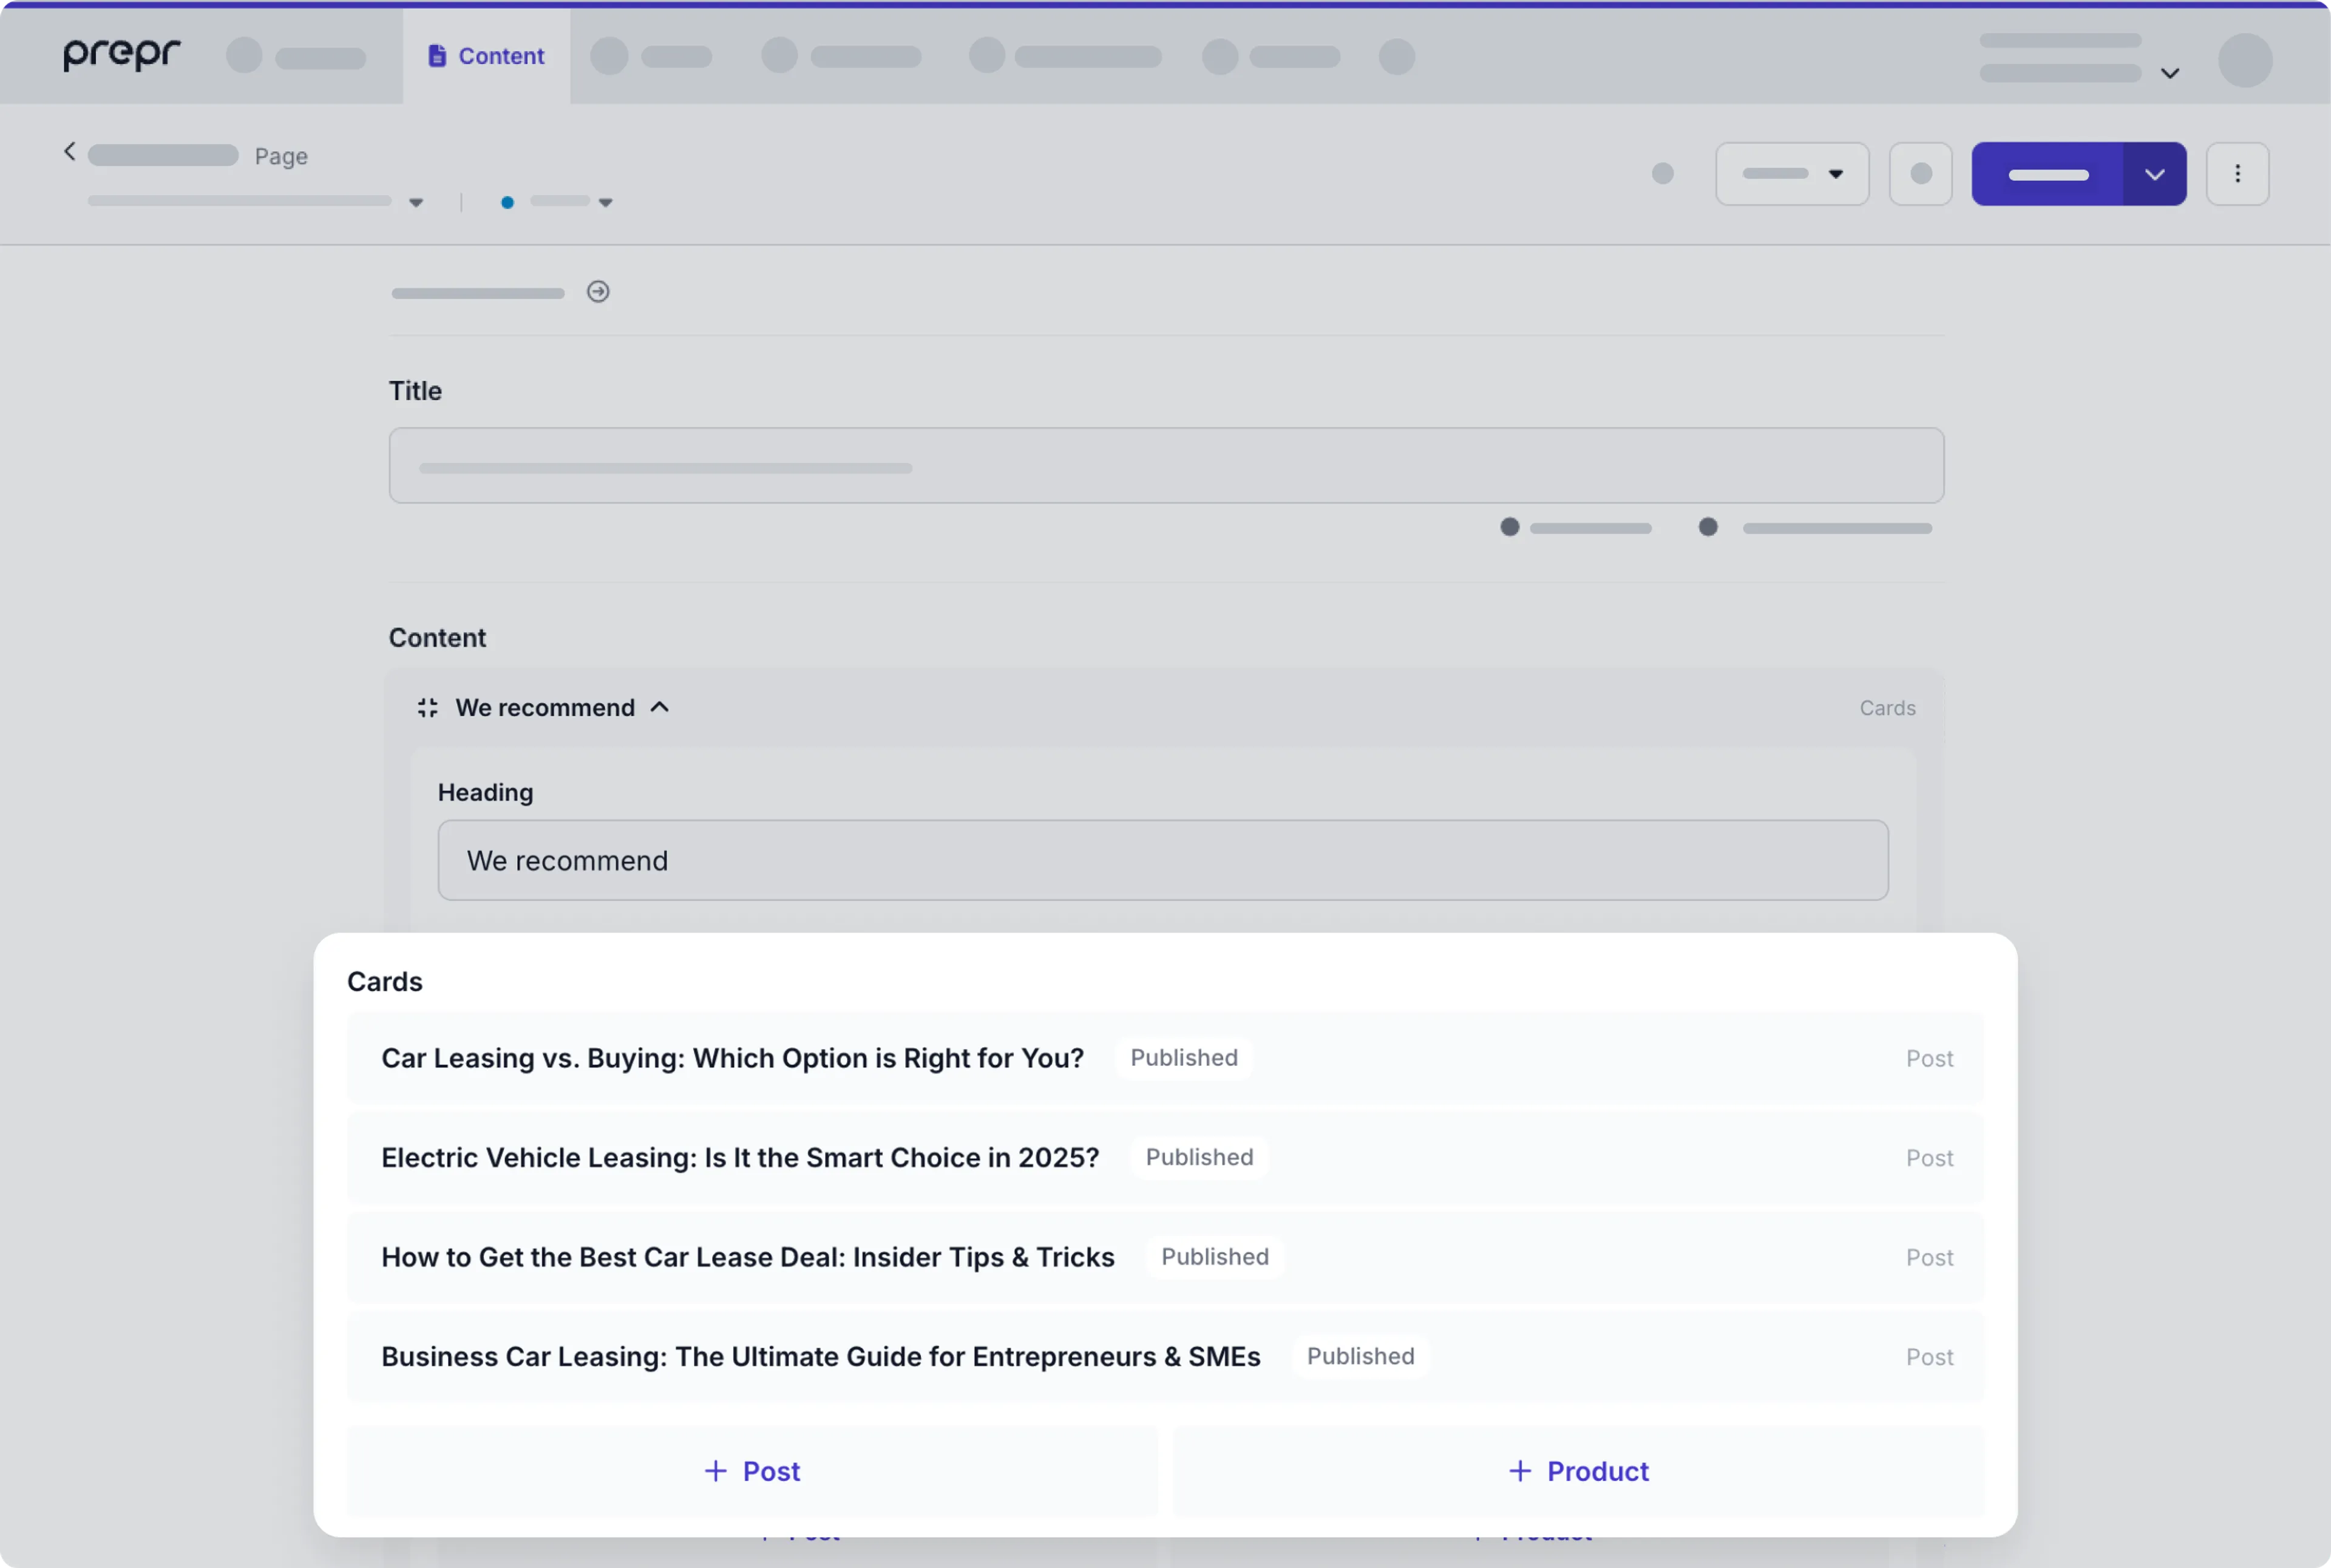
This change helps reduce confusion, and gives you clearer and more actionable information.
Check out the [content management docs](/content-management/managing-content/managing-content-items#publication-status) for more details on the publication status.
## Setting a personal default locale
Users can now set a personal default locale that overrides the environment’s default.
This is especially useful for international teams, giving editors a more tailored experience when working with multilingual content.
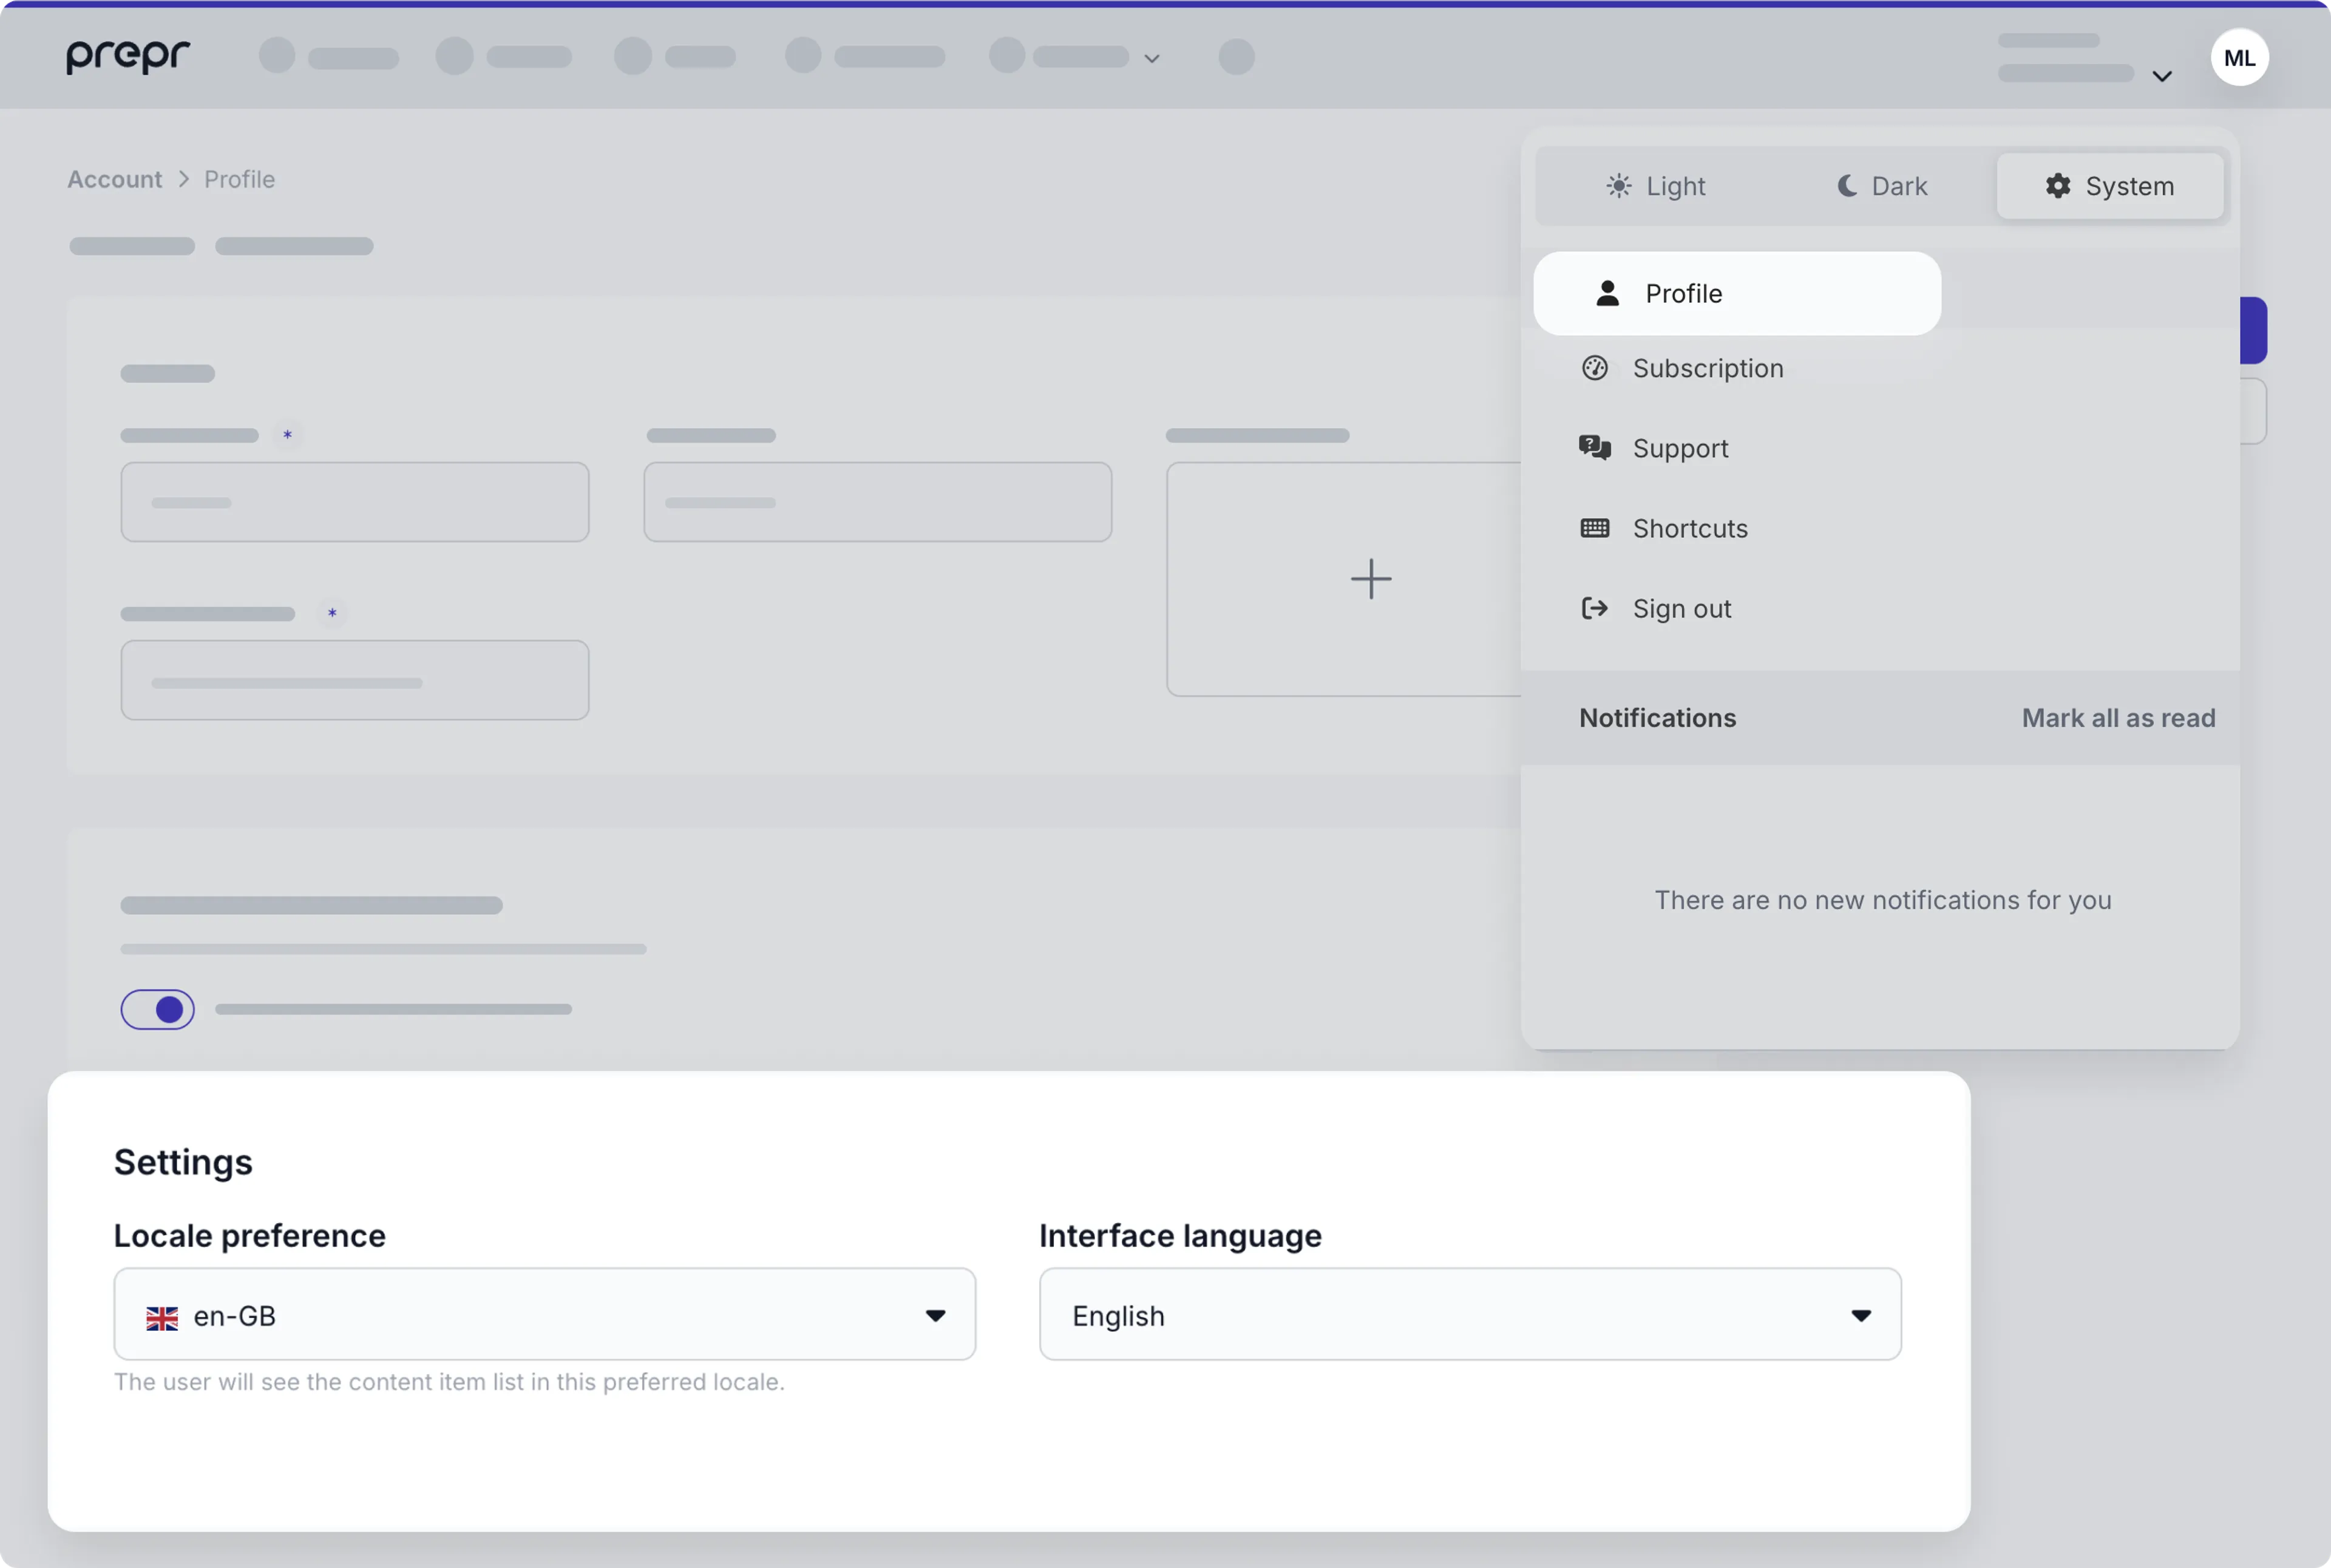
Check out the [localizing content docs](/content-management/localizing-content#working-with-multiple-locales) for more details.
## New slug option to remove trailing slash automatically
We’ve added a new option to automatically remove trailing slashes from slugs when the field loses focus. A trailing slash typically indicates a directory in URLs, but inconsistent use can lead to messy or duplicate links. With this update, Prepr ensures cleaner and more consistent URLs by trimming trailing slashes, helping you maintain a more structured and SEO-friendly content setup.
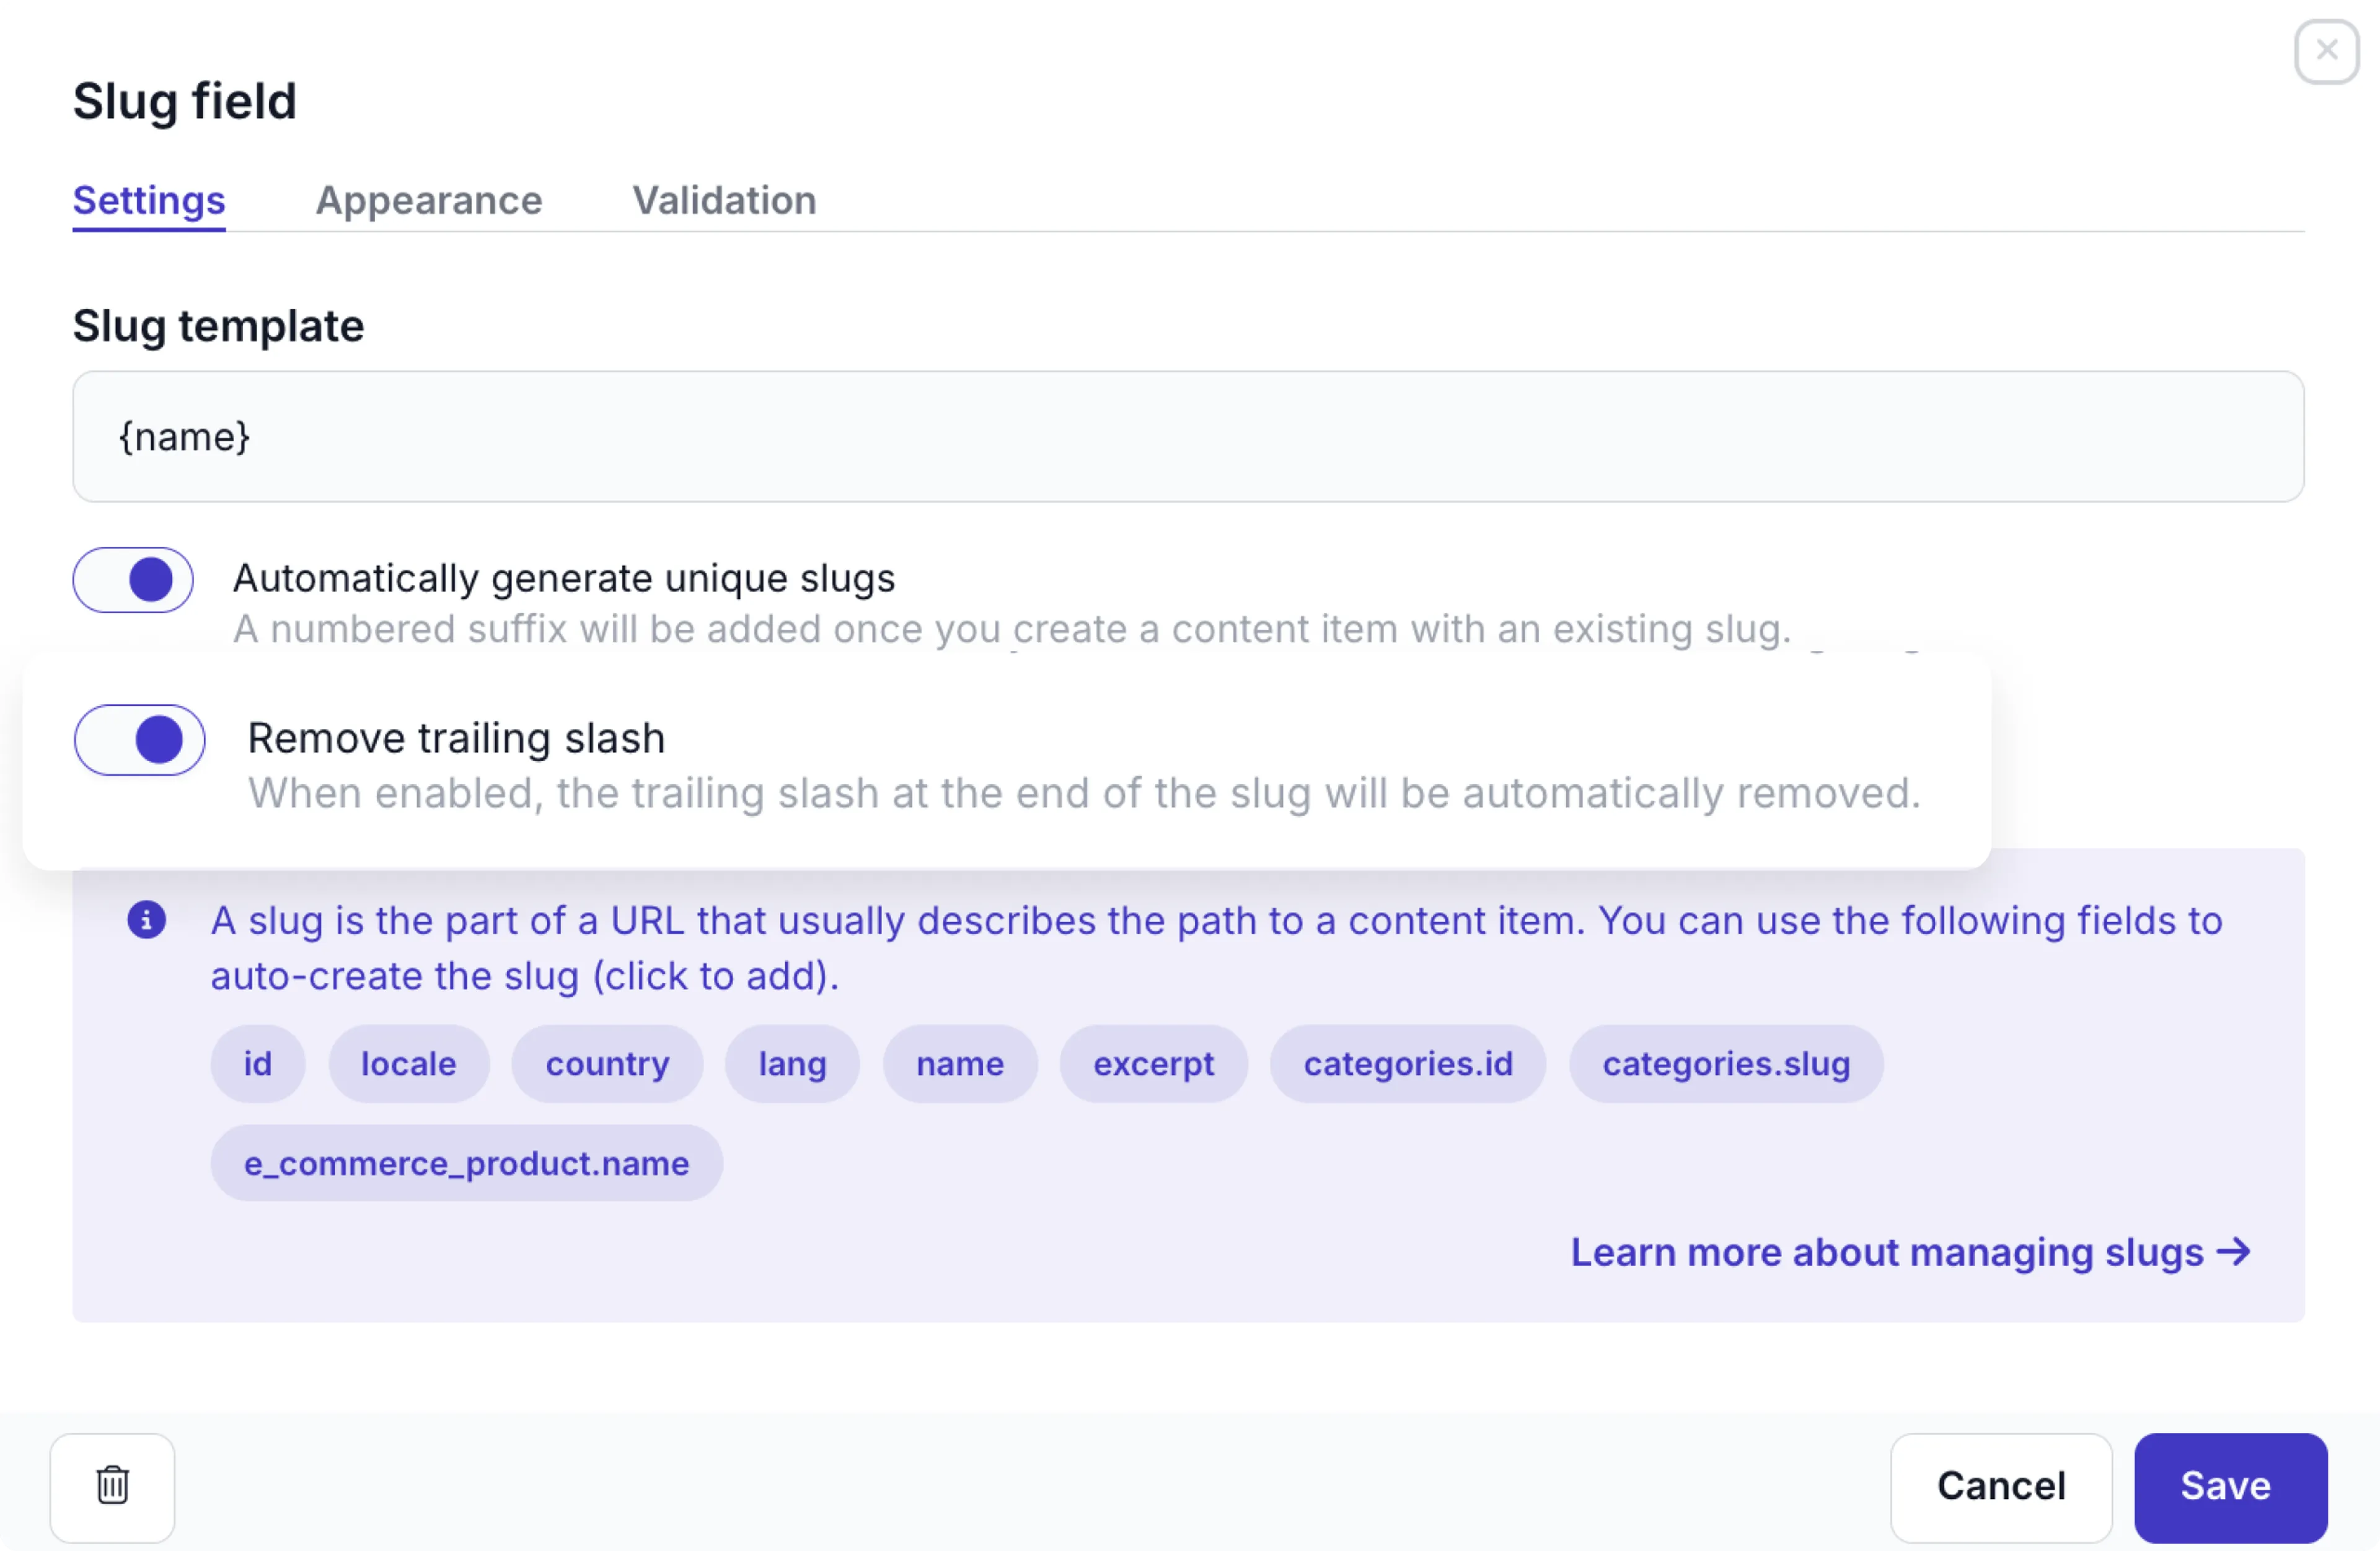
Check out the [slug field settings](/content-modeling/field-types#slug-field) for more details.
## Introducing the new *Form* field
With the new *Form* field, you can now easily add *HubSpot* and *Typeform* forms directly in your content items.
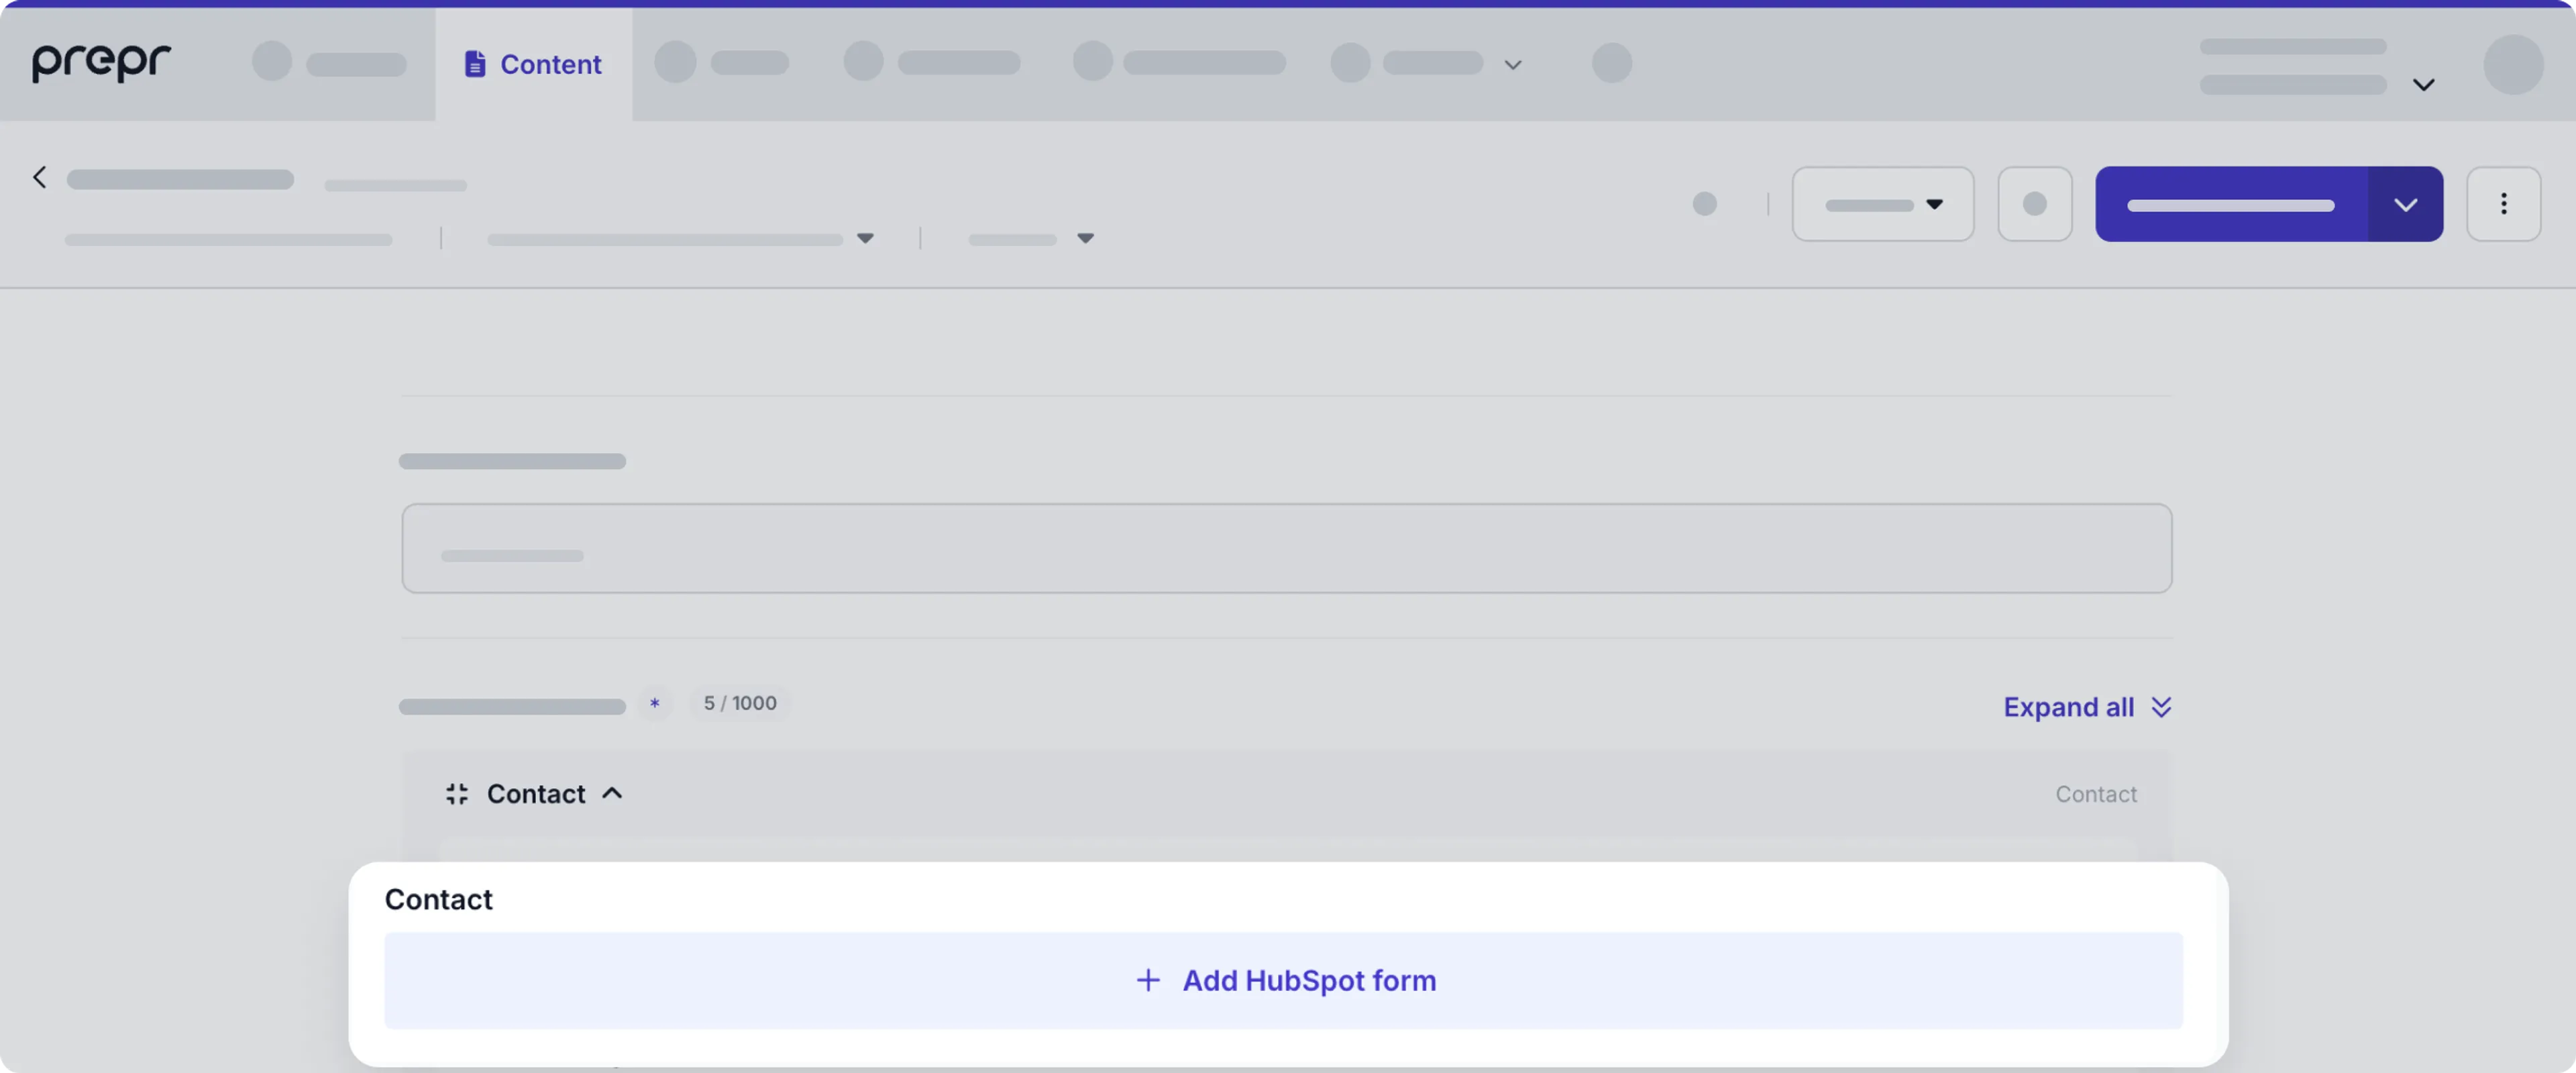
With this feature, you keep your content and related embedded forms all in one place.
Just click to search for the form you need. It's that simple.
Check out the integration docs for [HubSpot](/integrations/hubspot#make-hubspot-forms-available-in-content-items) and the [Typeform](/integrations/typeform#add-form-field-to-schema) to learn how to use the [Form field](/content-modeling/field-types#form-field).
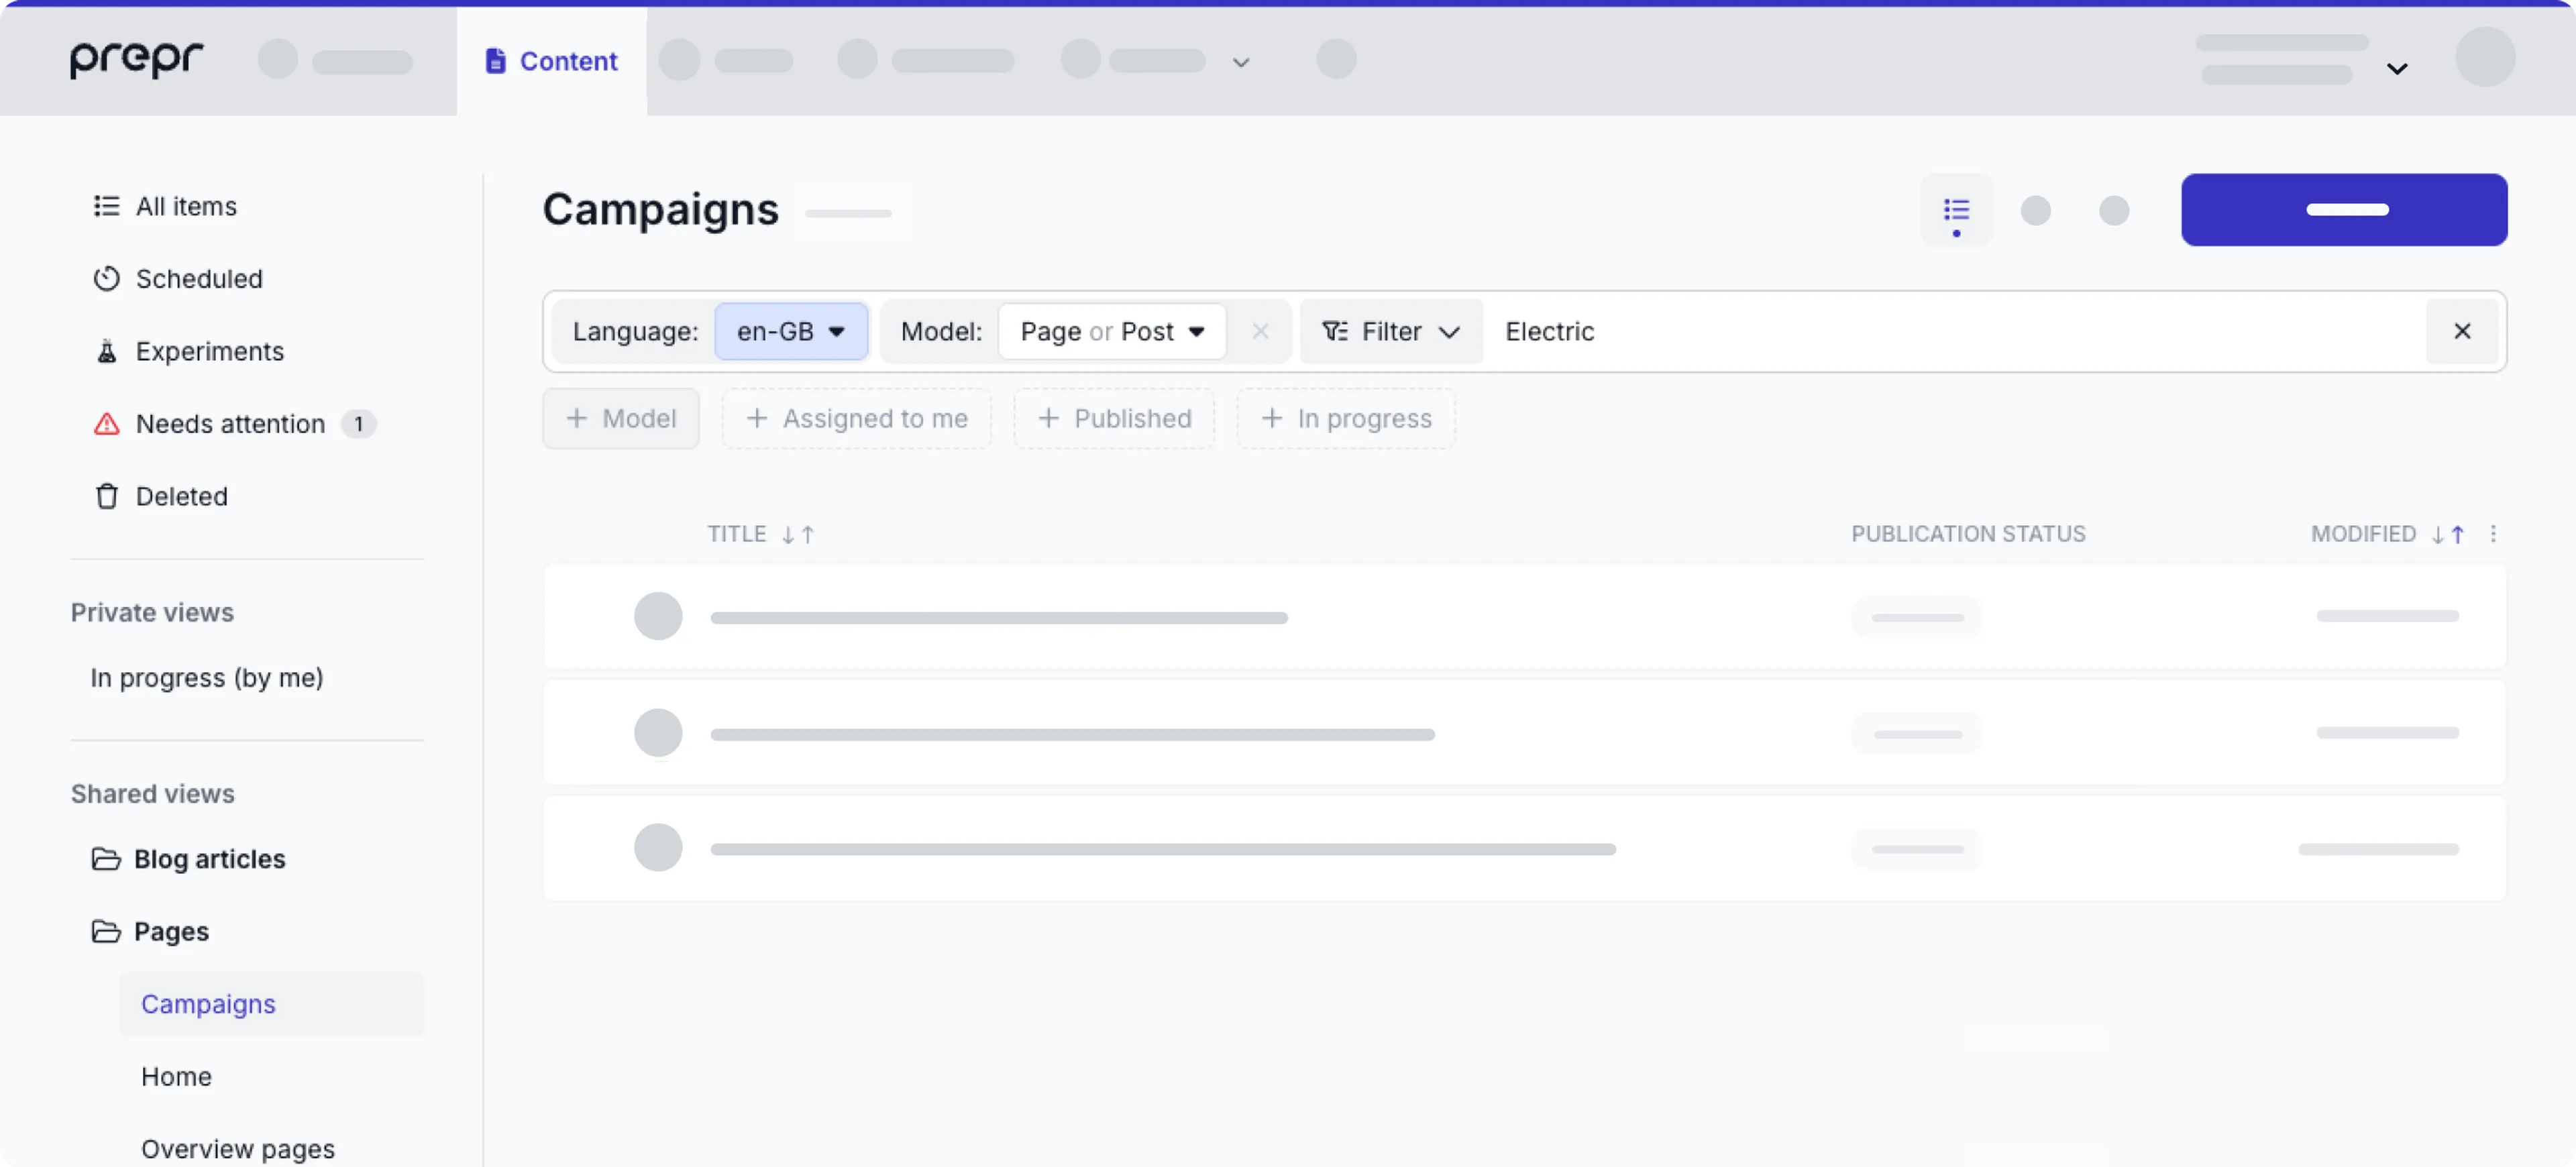
## Advanced filtering on content items
We bring you more advanced filtering on content items to help you find exactly the content items you need.
Until now, you could only filter by one value for each of the listed filter options, apart from *Tags*.
With this update you can filter by multiple values, for example when you want to view a list of both *Page* and *Post* content items, you can simply choose both values when you filter by the *Model* option.
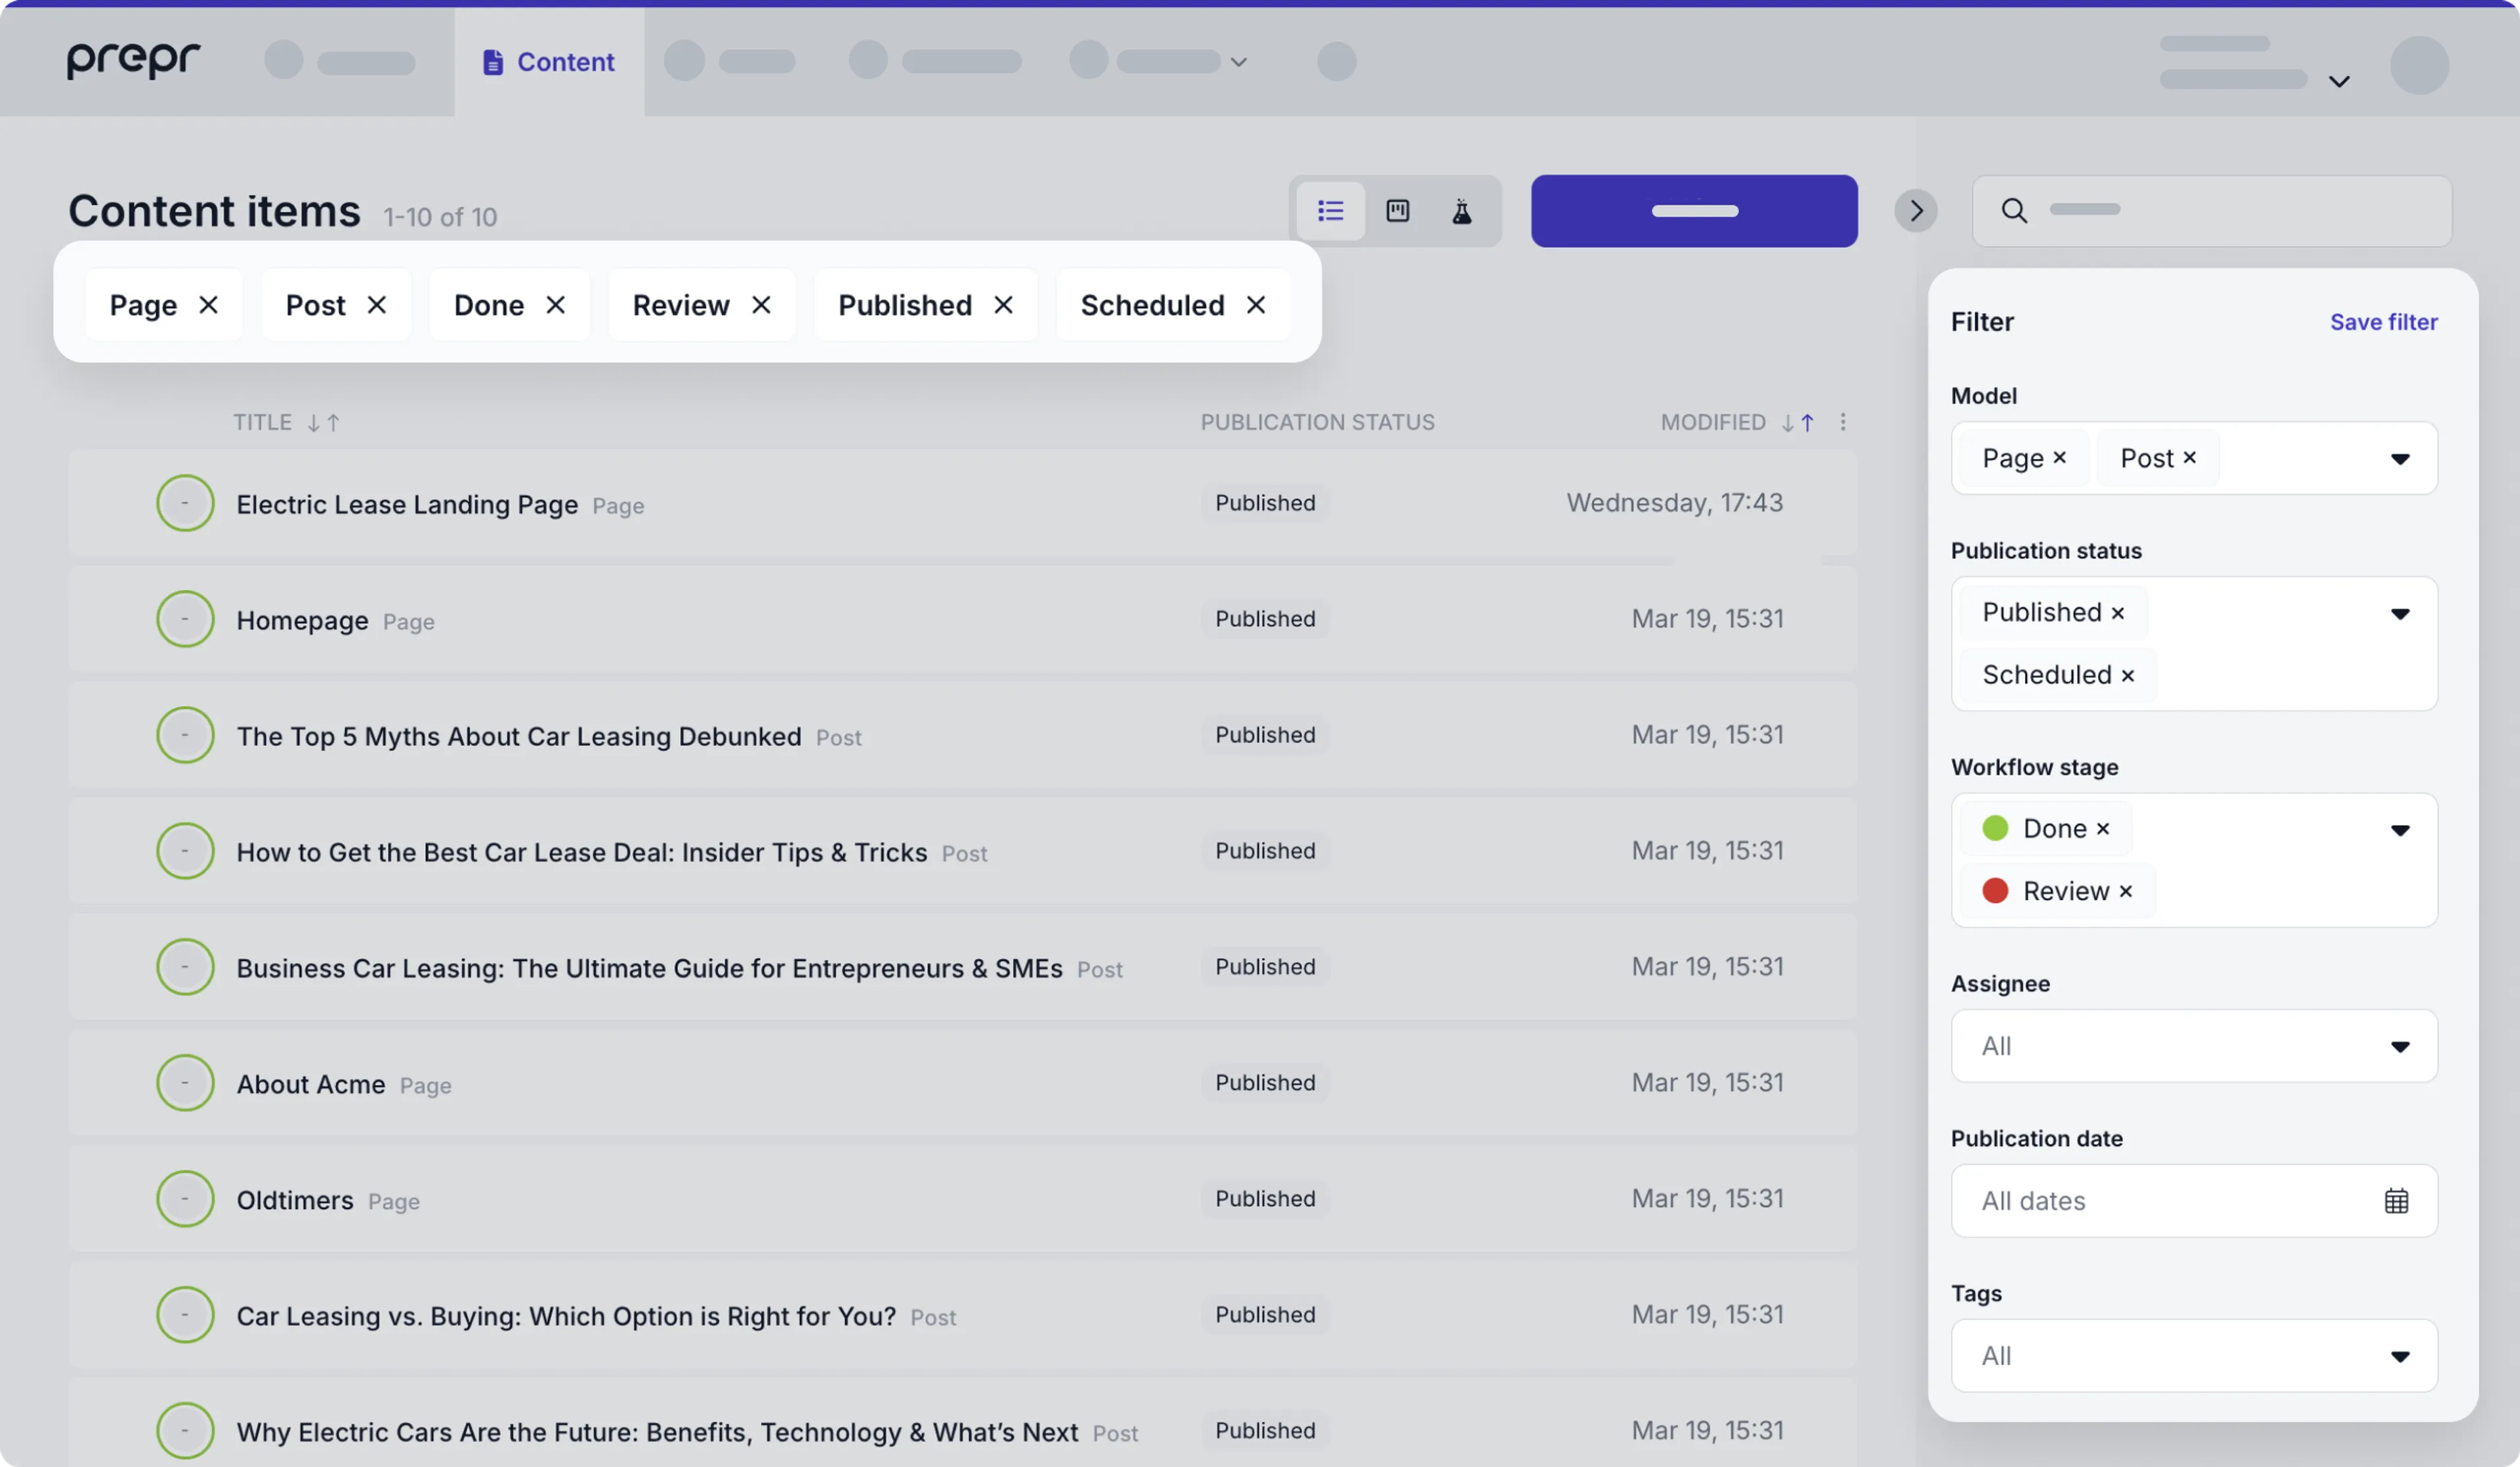
This update ensures efficient content searches.
Check out the [content management docs](/content-management/managing-content/managing-content-items#filter-content-items) for more details on content filters.
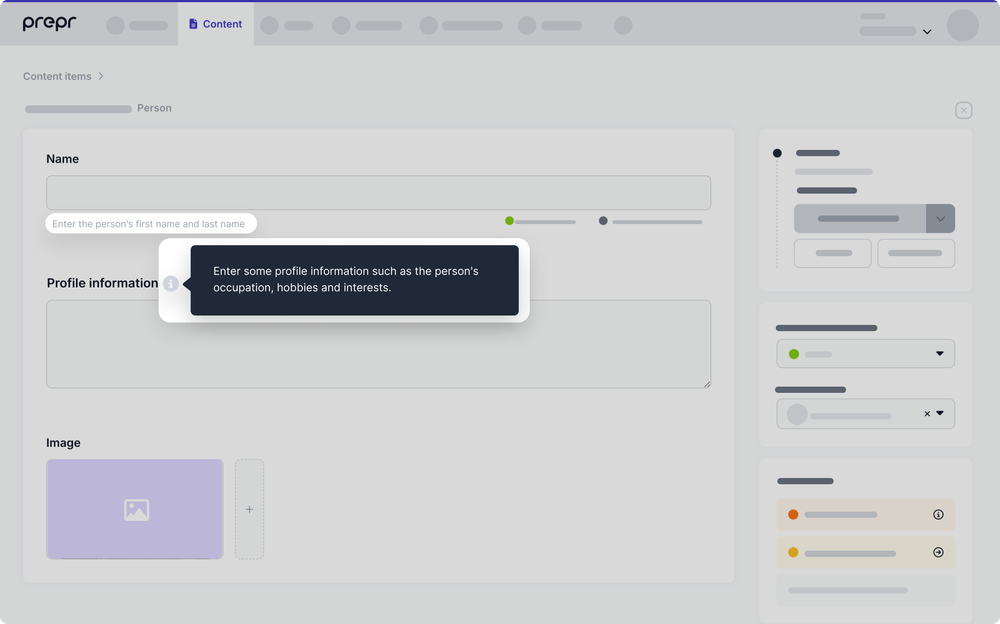
## Help text as field value placeholder
In addition to the help text line above a field or as a tooltip next to a field name, we've added a new way to display help texts: directly in the field value as a placeholder.
Now, you can see some help text directly in the *Text*, *Slug*, *Tags*, *Number*, *Location*, and *Social* fields.
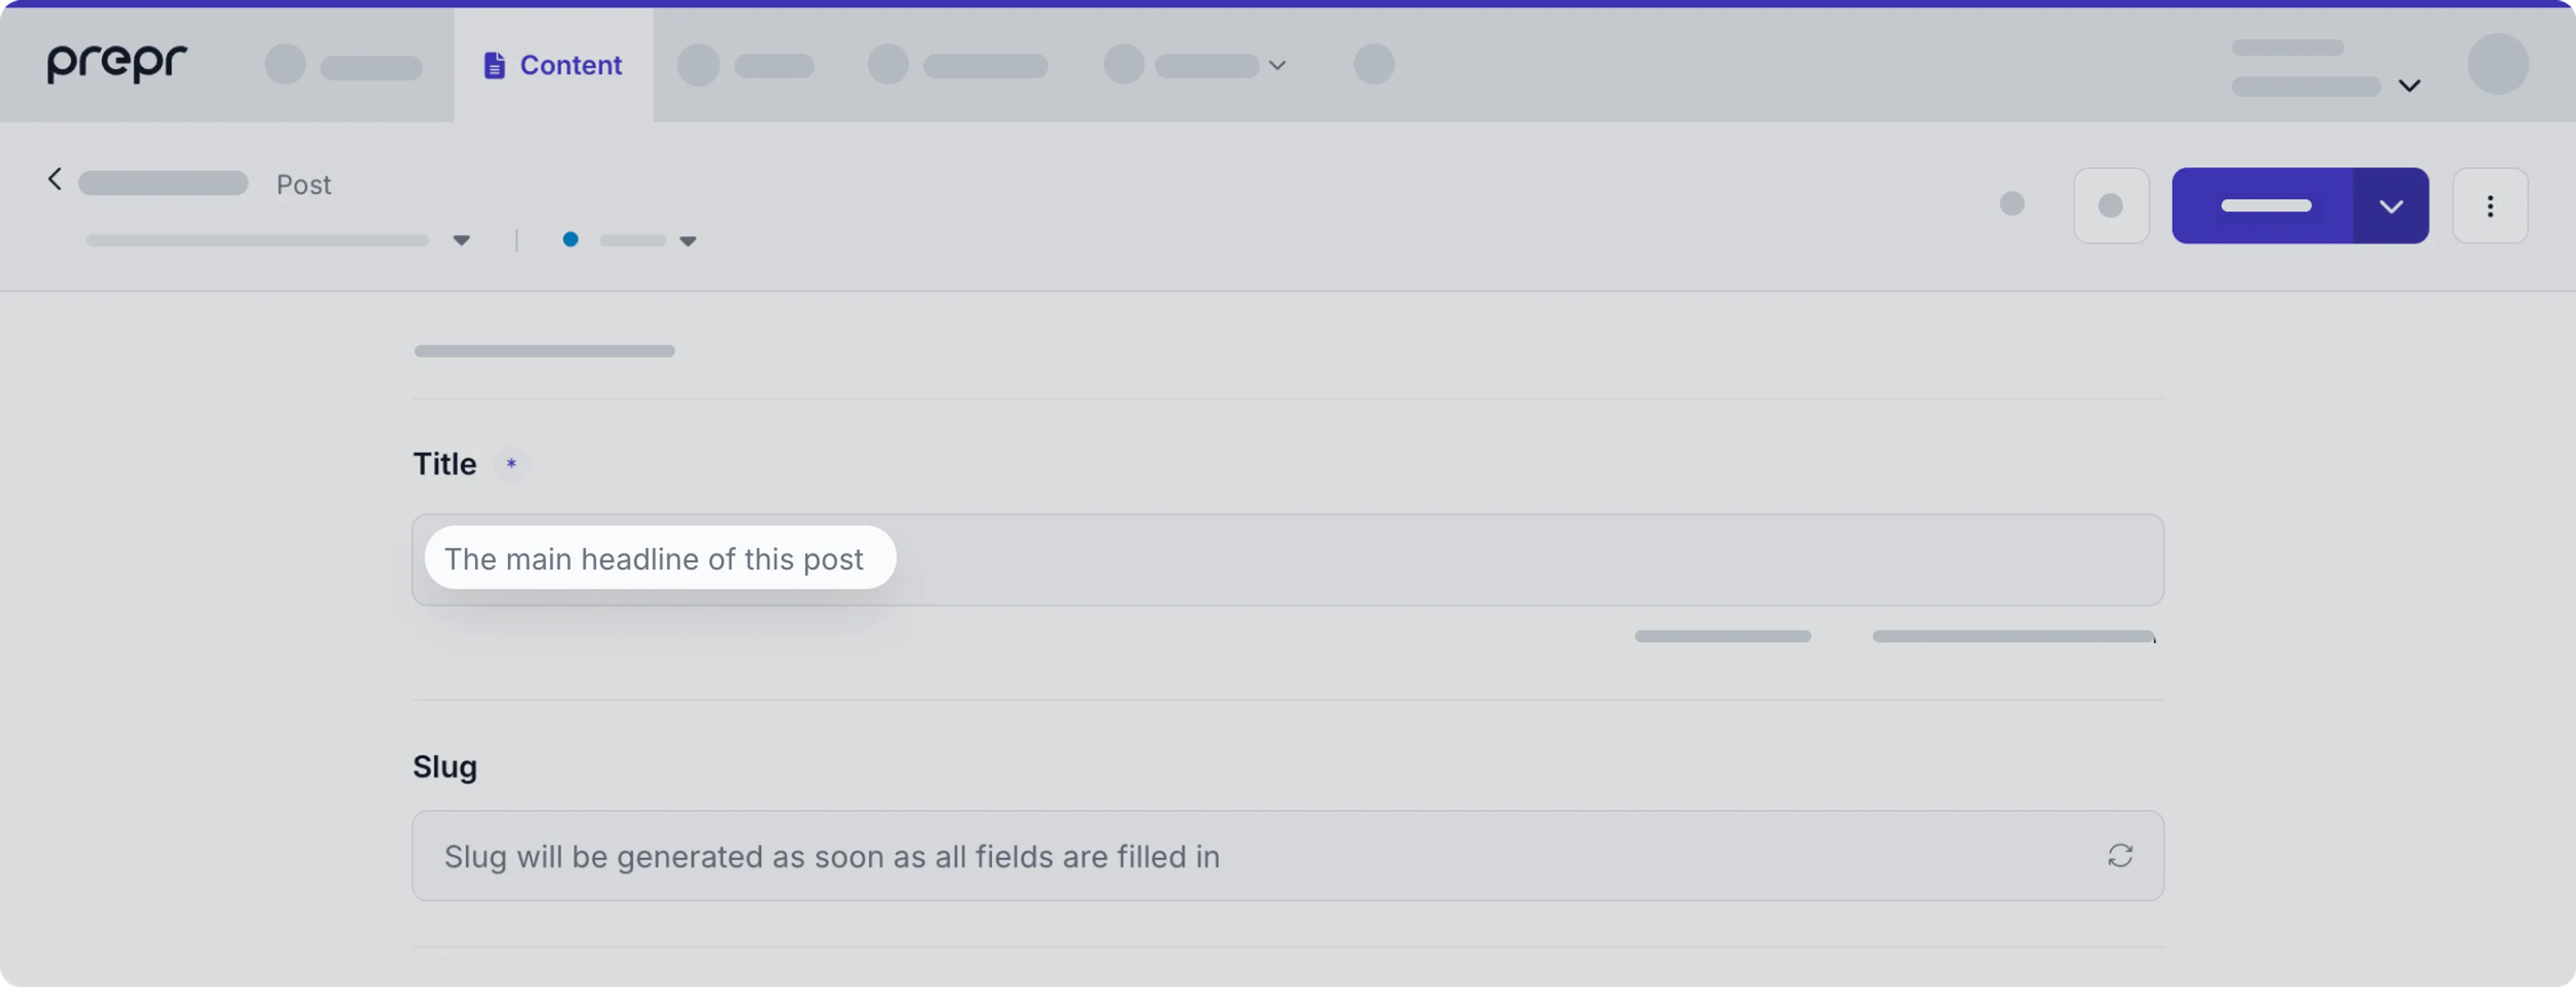
This gives you clear instructions while keeping the interface clean and intuitive.
With this update, editor guidance is always in the right place without cluttering the design.
Check out the setup details in the [field appearance settings](/content-modeling/field-types#common-settings).
## New Help text field for better editor guidance
We're happy to bring you improved guidance while editing content with the new *Help text* field.
A developer can add this field to any model or component to give you more visible and structured instructions.
With the flexibility of this feature, it ensures smoother and more efficient content management.
For more details, check out the [Help text field setup](/content-modeling/field-types#help-text-field).
## Removal of after and before parameters in REST Mutation API index requests
We’re simplifying our REST Mutation API pagination parameters. Starting **July 1, 2025**, the following changes will take effect in all index requests:
- The `after` and `before` response parameters will be removed.
- The `after` request parameter (used to skip pagination items) will also be removed.
If you’re currently using the `after/before` parameters, we recommend updating your integration to use the `skip` parameter instead.
This update improves consistency across our APIs.
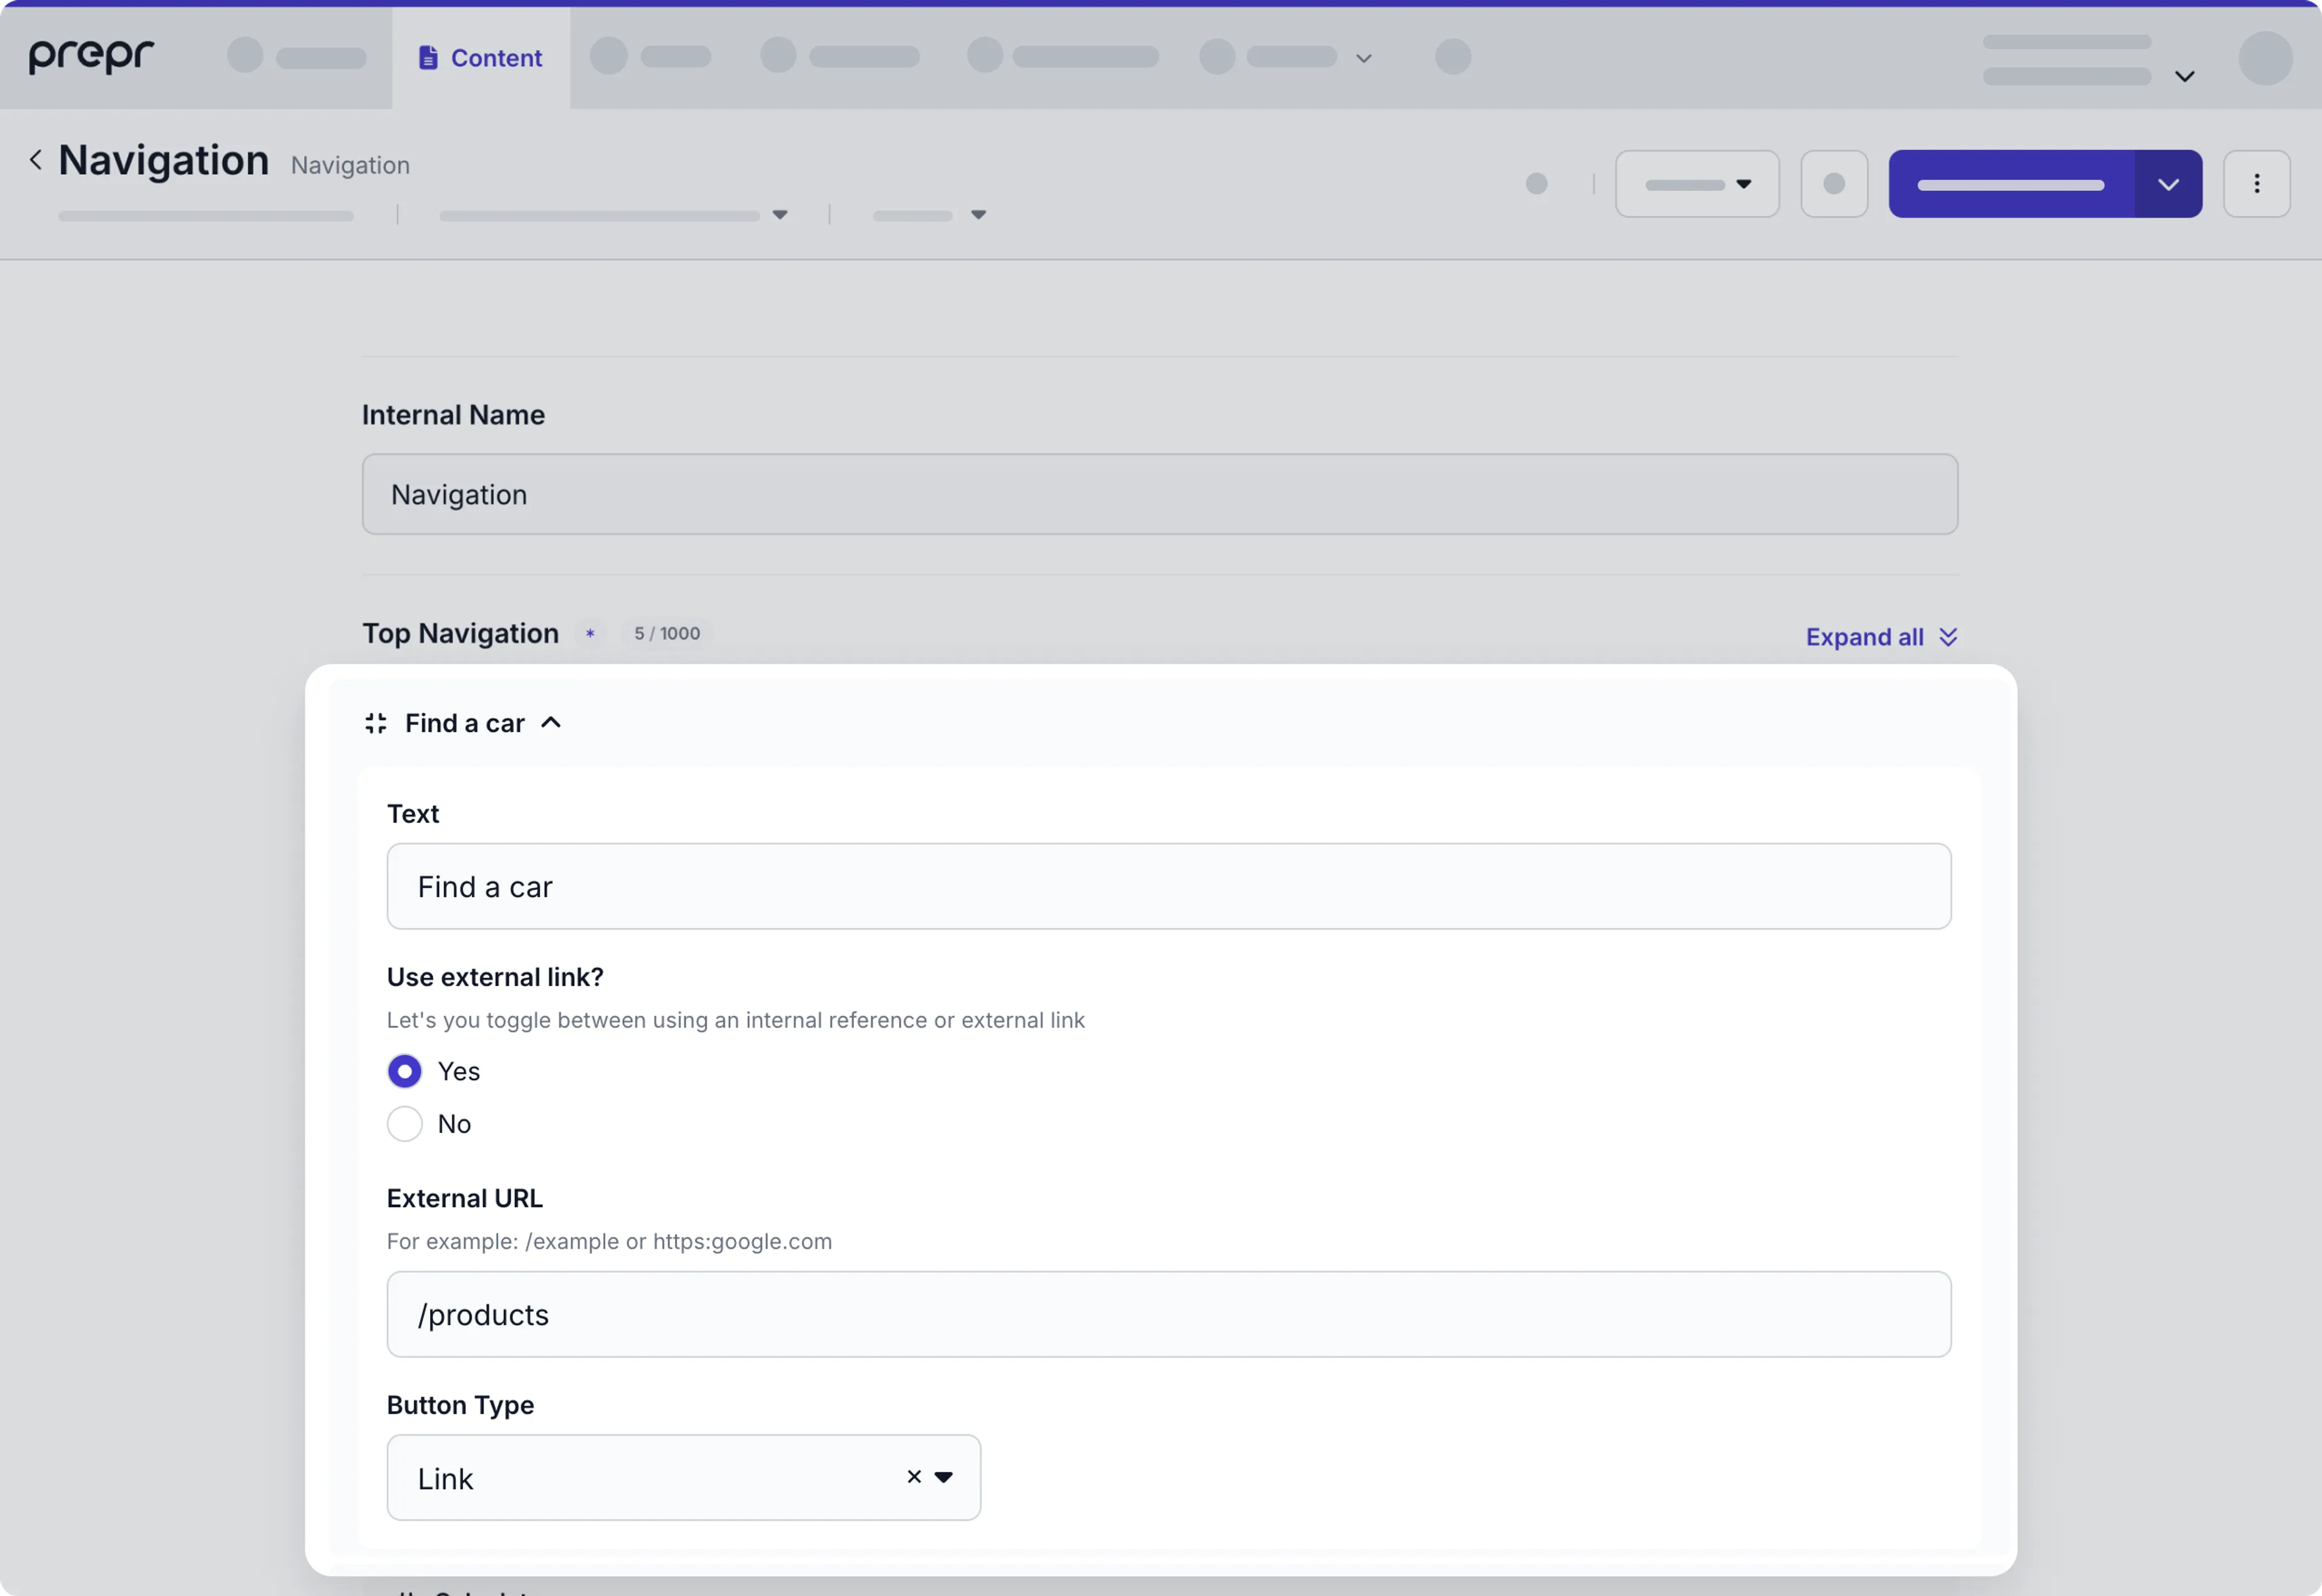
## Introducing conditional fields
Introducing conditional fields - a huge step toward easier and more efficient content management.
With conditional fields you can now choose to show or hide fields or sections depending on another field's value.
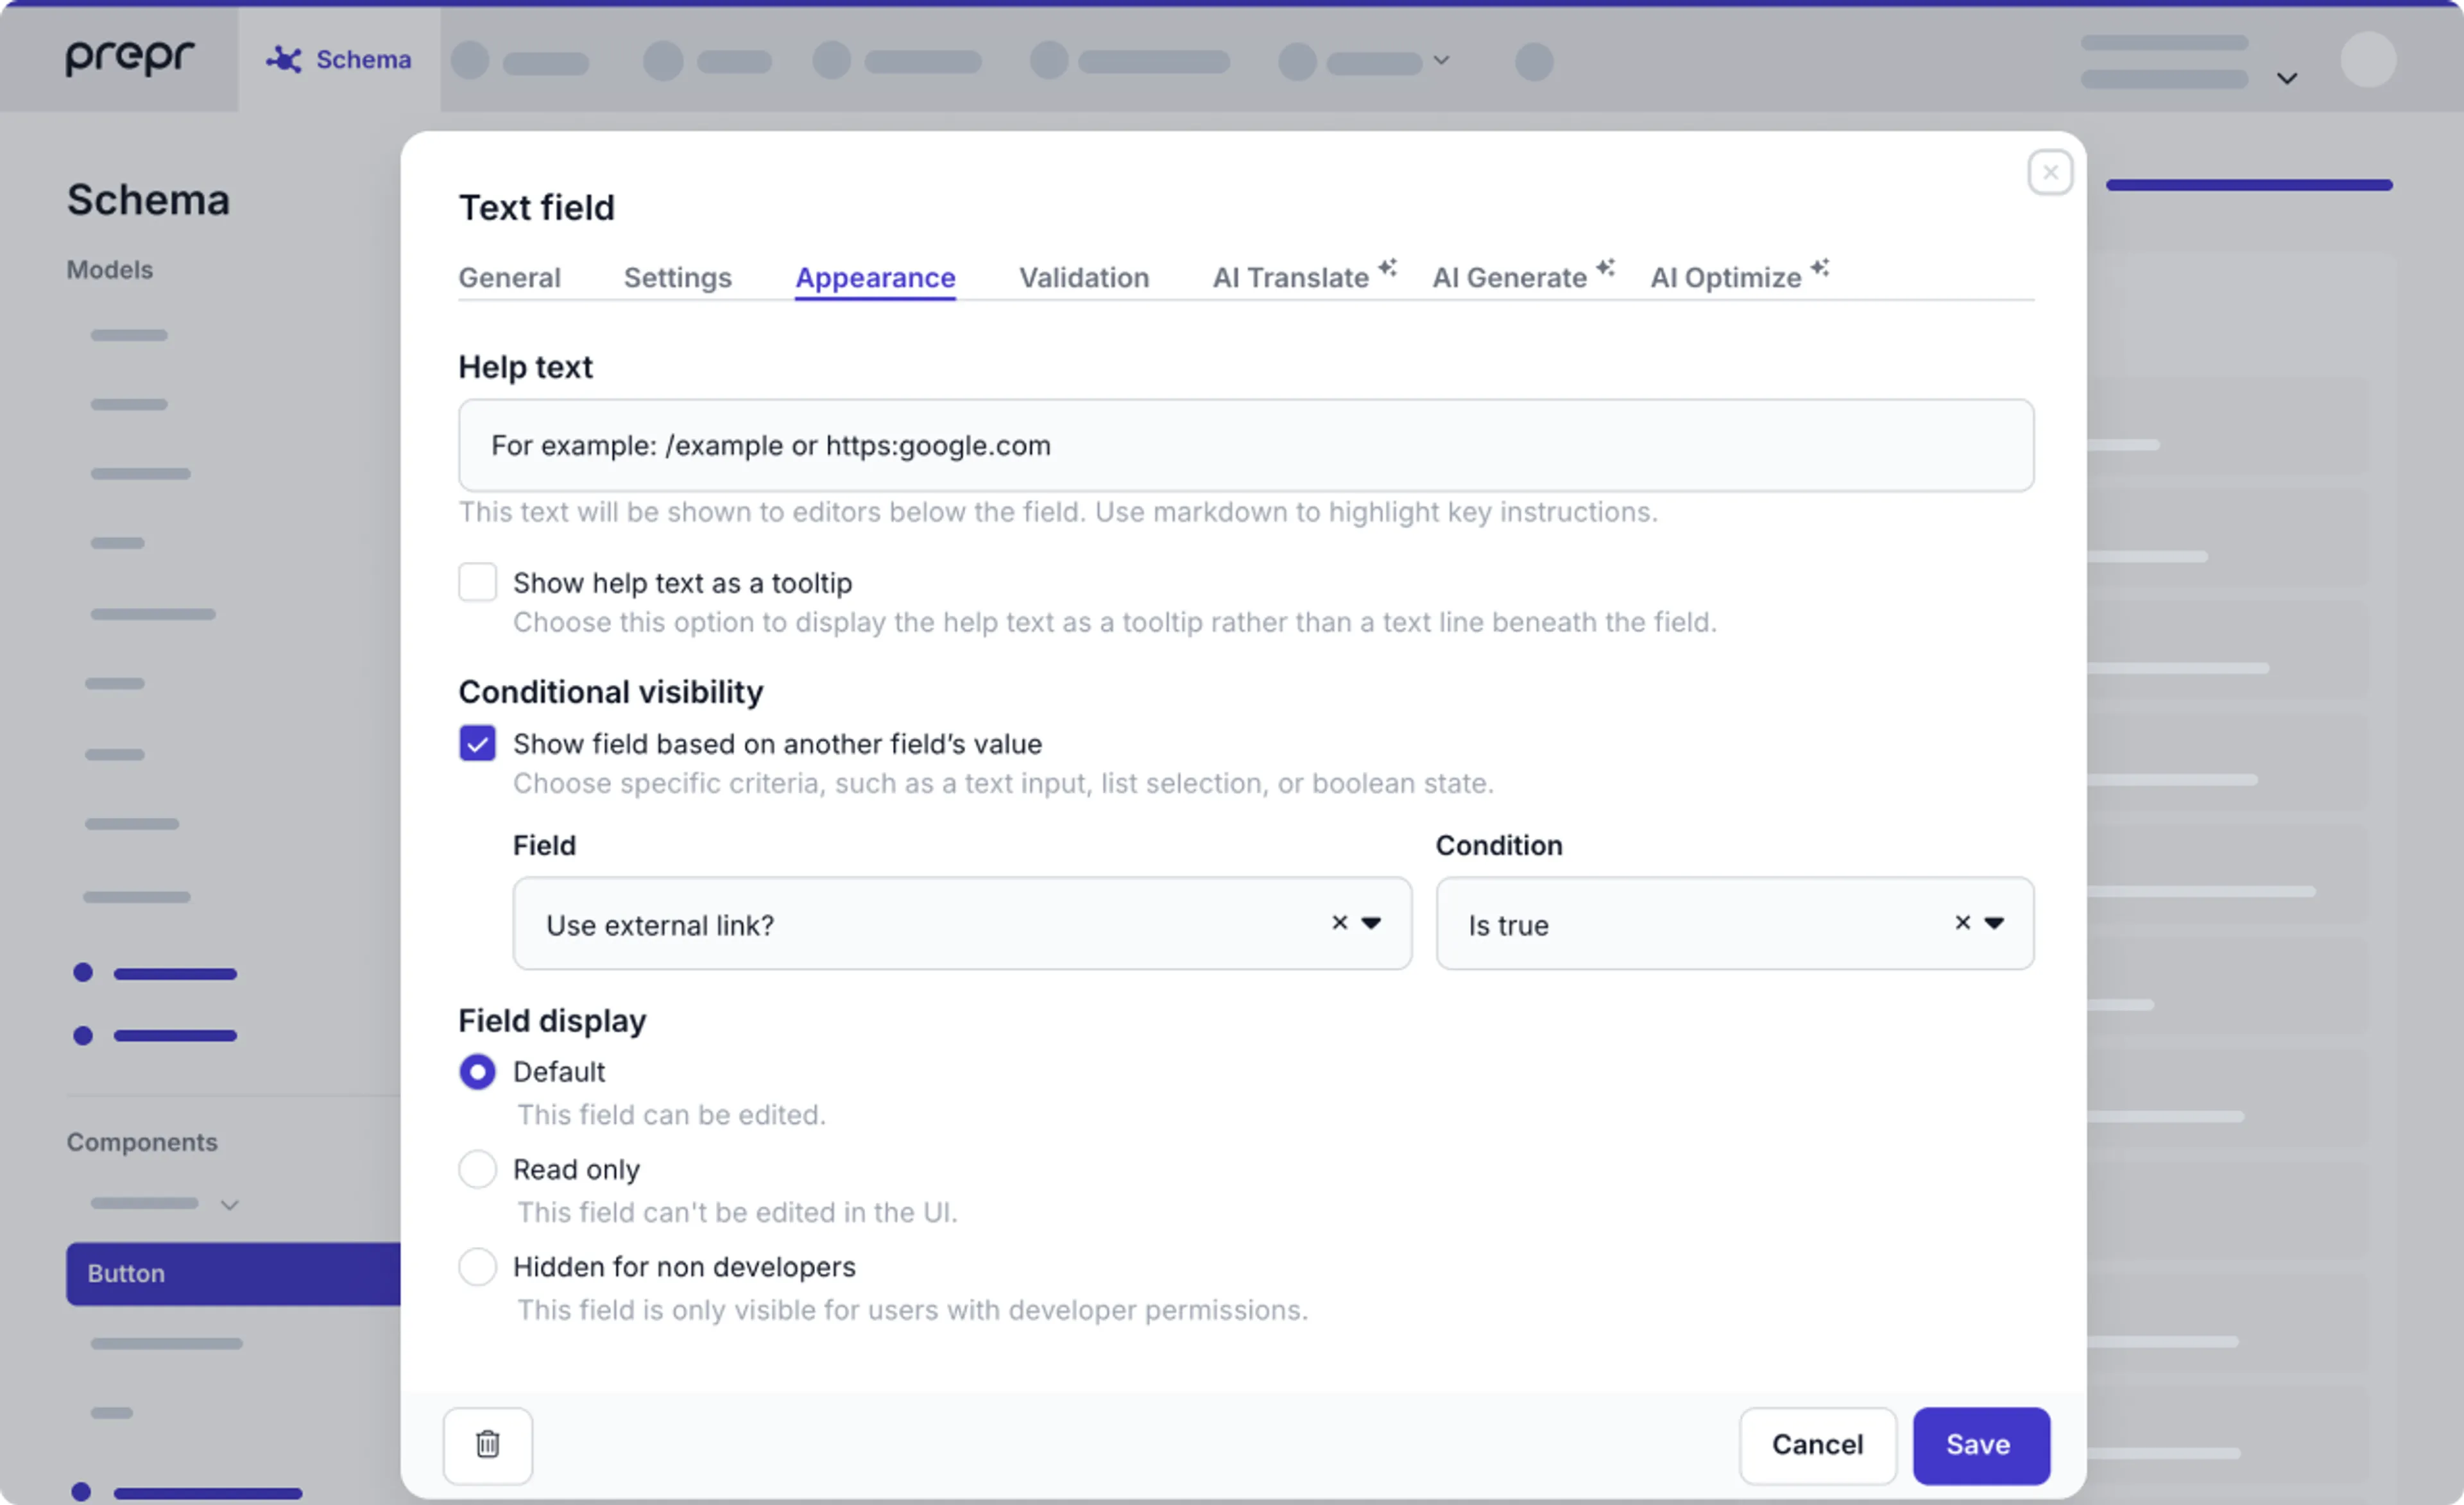
This feature simplifies the editing experience with a cleaner interface without unnecessary fields.
For example, to show either the external URL field or an internal link field in the content item and not both.
Check out the [field settings doc](/content-modeling/field-types#common-settings) for more details.
## New in Visual Editing: Segment & A/B Test preview
We've enhanced [Visual Editing](/changelog#introducing-visual-editing) with new *Segment* and *A/B test* variant switches.
These switches allow you to preview personalized content for specific segments and each A/B test variant before publishing the content item.
By previewing content for specific groups of targeted visitors, you have more control and confidence in your content adjustments.
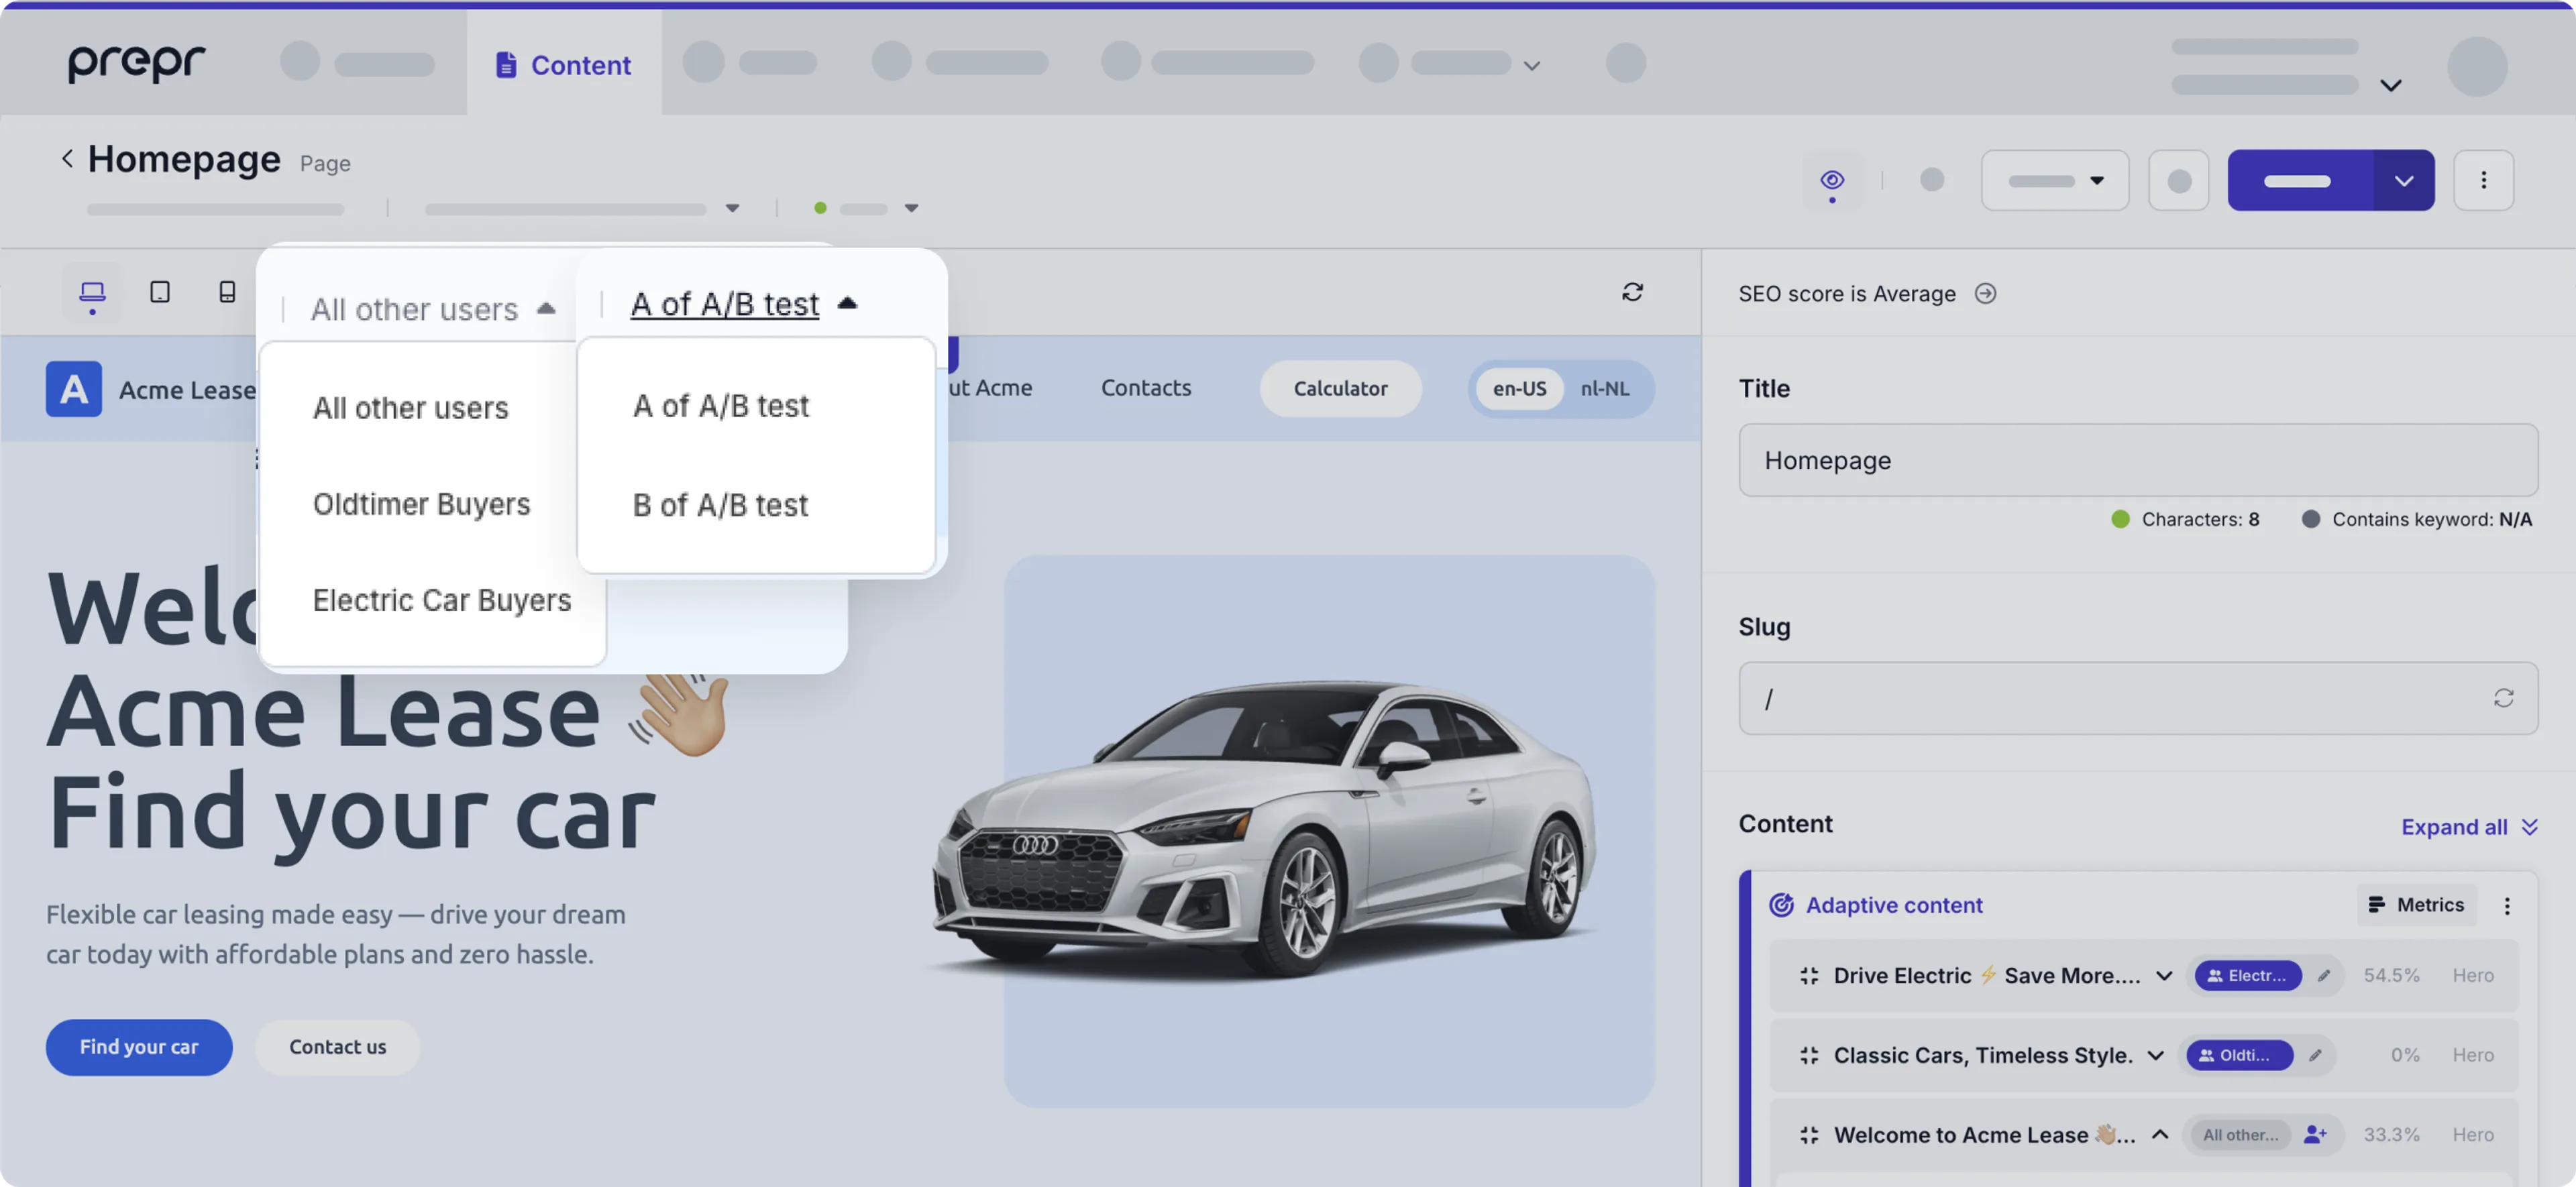
The *Segment* and *A/B test* switches are available automatically if your front end uses the [latest Prepr Next.js package](/prepr-nextjs-package).
If not, check out the [setup details](/project-setup/setting-up-previews-and-visual-editing#enable-segment-and-ab-test-switches) to enable the adaptive preview for any other front-end framework.
## Managing content with shortcut keys
In line with the [*Content UX* improvements](#updated-content-item-ux) released last week, we're happy to introduce new shortcut keys to help you manage your content faster and more efficiently.
Now, with just a couple of keystrokes, you can quickly select all content items with , add an item with , publish a content item with , and more - giving you greater control and saving you valuable time.
For more details, check out the [managing content items docs](/content-management/managing-content/managing-content-items#manage-content-items-with-shortcut-keys).
## Improved rescheduling of content items
Based on your feedback on the [recent Content UX updates](#updated-content-item-ux), we've improved how rescheduling works for published content — it now updates the *First Published at* date and time to the new date and time you choose when you reschedule the content item.

By rescheduling a published content item, you can choose how to order the content items in the front end when they're ordered by the *First Published at* date and time.
This gives you more flexibility and allows you better control over the order of published content.
Check out the [content management docs](/content-management/managing-content/managing-content-items#schedule-a-content-item) for more details.
## Introducing Visual Editing
Visual Editing is finally here! This new feature allows you to view content changes to your web pages in real-time with a convenient side-by-side view in the Prepr Content page.
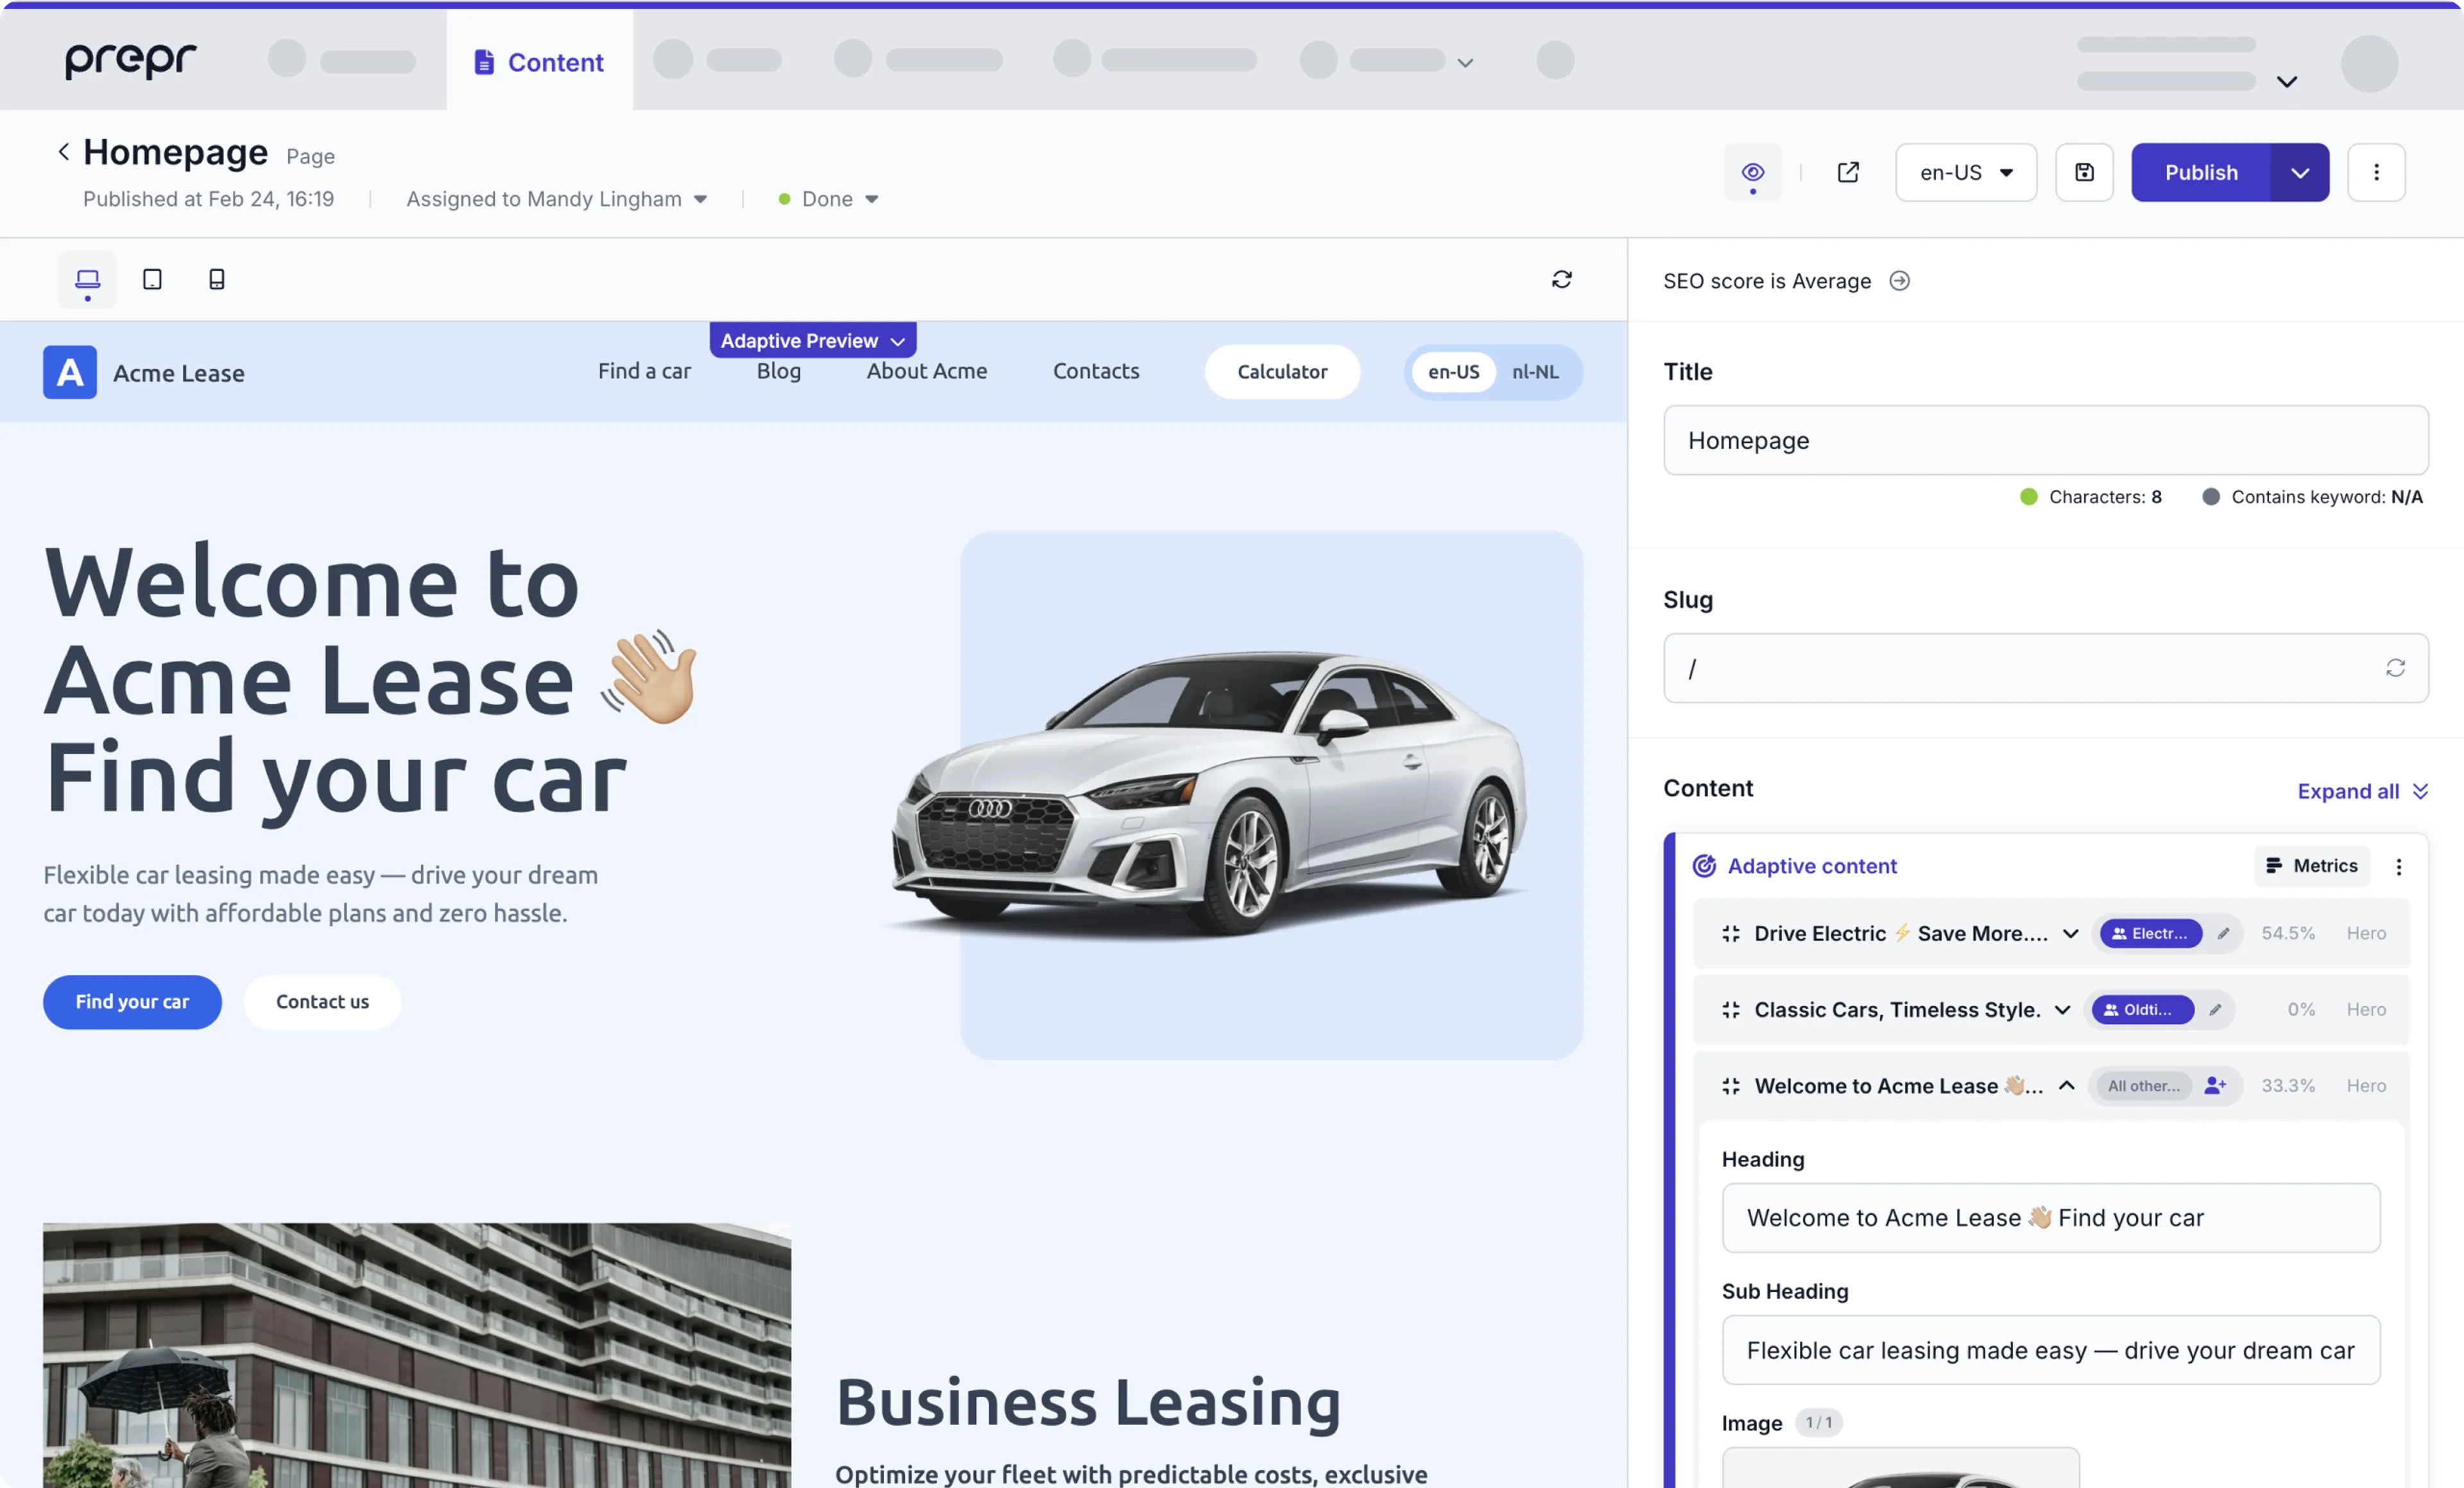
This means, you can instantly see how your edits affect the page layout and content, reducing the need to switch between tabs to check your updates.
Visual Editing gives you instant, crystal-clear insight into your changes, making your editing process a lot faster, effortlessly smooth, and a great deal more intuitive.
Check out the [visual editing setup](/project-setup/setting-up-previews-and-visual-editing) and the [content management docs](/content-management/managing-content/managing-content-items) for more details.
## Improved UX for content references
In response to your feedback, we've improved the UX for content references when editing a content item.
With the updated overlays, now you always know where you are in deeply nested items.
Together with a cleaner interface, this clarity minimizes errors and gives you full control over your content, making content updates seamless and stress-free.
Check out the [content reference doc](/content-management/managing-content/creating-rich-content#adding-content-references) for more details.
## Updated content item UX
To support the *Visual Editing* feature, we've updated the *Content Item* detail page with a cleaner, more intuitive interface.
Primary content editing actions have been moved to the top.
You'll also notice that the default publish action has been updated to match your preference.
We trust this update gives you a more streamlined experience when editing content.
Check out the [content management docs](/content-management/managing-content/managing-content-items) for more details.
## Deploying to Vercel directly from Prepr
As you've requested, you can now deploy your website directly from Prepr.
Simply click the new **Build and deploy** button to deploy your website to Vercel and the live website is updated with your latest published content as soon as you need it.
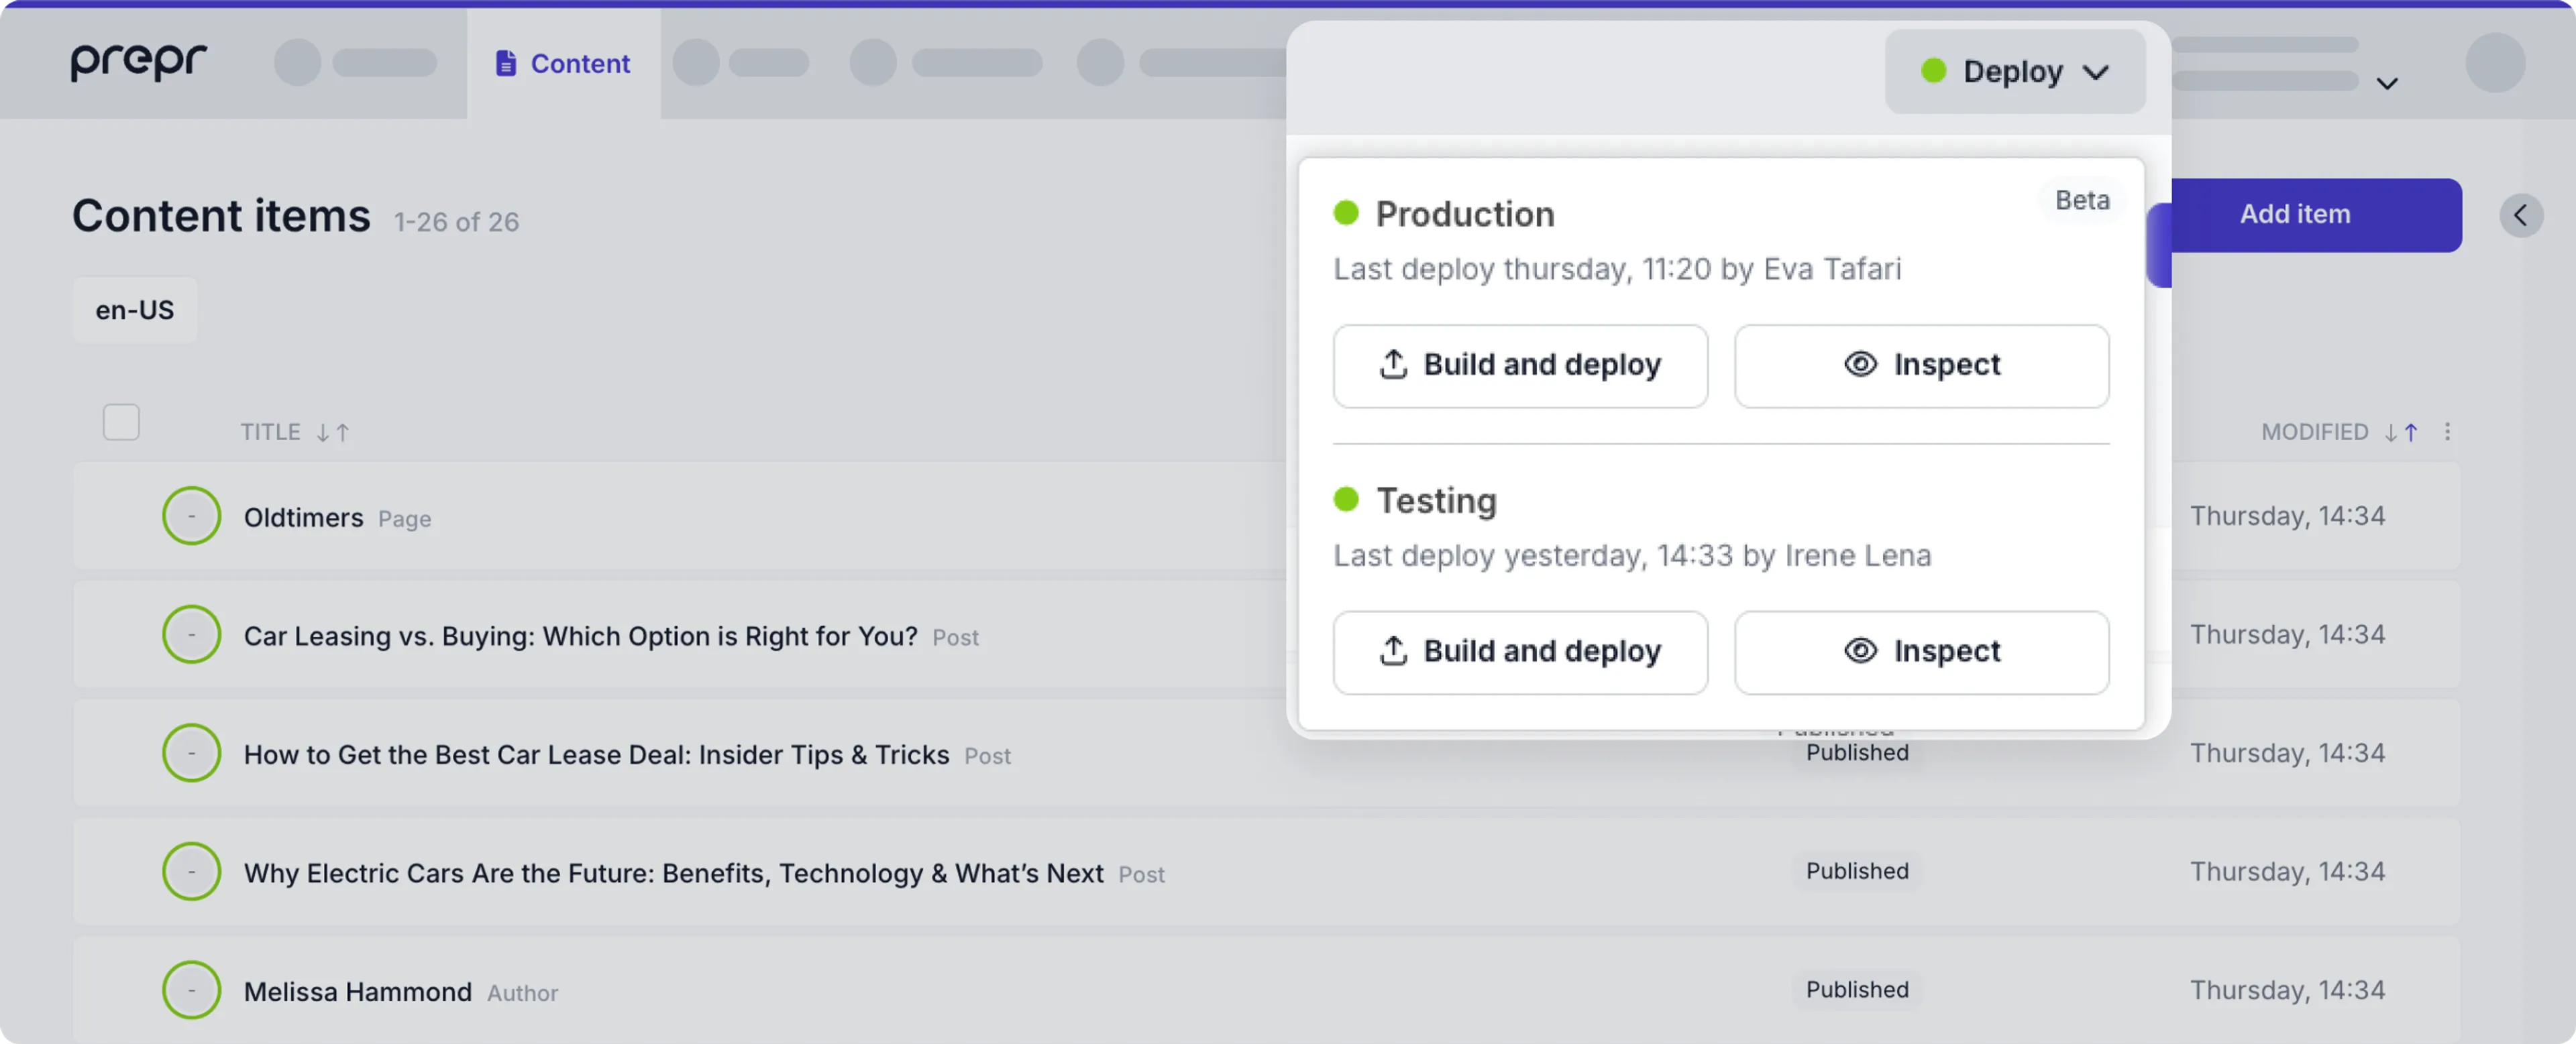
This new feature is especially useful for statically built and deployed websites where you don't see your content changes immediately after publishing.
This way, you have more control over the website content without needing to switch over to Vercel or to contact developers to trigger a new deployment for you.
Check out the [Vercel integration doc](/integrations/vercel) for the setup details.
## Improved video upload feedback
We've improved the video upload experience in Prepr by adding a real-time progress indicator, showing the exact percentage of transcoding completion.
This makes it easier to track the status of larger video uploads.
Additionally, we've introduced a `Failed to Transcode` error message, providing clear feedback if an issue occurs during processing.
Check out the [assets doc](/content-management/managing-assets/managing-assets#uploading-assets) for more details.
## Improved content item creation
Based on your feedback on adding content items, we've refined the **Add item** action for usability.
Previously, when adding an item, you could select from all models when creating new content items.
From now on, the model selection window excludes single-item models if their content item has been created.
This update declutters the model selection, making content management more intuitive and efficient.
Check out the [content management](/content-management/managing-content/managing-content-items#create-a-content-item) doc for more details.
## Setting an image focal point
As requested, we’ve added a feature that allows you to set a focal point when adding or editing an image in a content item.

To enable the option to set an image focal point instead of the option to crop the image, check out the [asset field settings](/content-modeling/field-types#assets-field-settings) for more details.
By setting a focal point for an image, you ensure the key parts of the image remains visible (such as a person’s face or a product), even when resized for different screen sizes.
This feature means your front end delivers better visual presentation, and improves user experience.
Check out the [image docs](/content-management/managing-assets/editing-and-configuring-assets#setting-an-image-focal-point) for more details.
## New Marketer role
With the new *Marketer* role, you can add your marketing team members to Prepr.
The Marketer role is designed for users who manage and optimize audience segmentation within Prepr.
This role has the same permissions as the existing *Editor* role, allowing users to create, edit, and manage content.
However, marketers also have access to the **Segments** feature, enabling them to define and view audience segments.
Check out the [roles and permissions doc](/project-setup/managing-roles-and-permissions) for more details.
## Introducing the Zapier integration
We set up Prepr’s Zapier integration as part of our efforts to continually improve your experience with integrating to Prepr CMS.
This new integration enables automated tagging of customer profiles and provides an external trigger for event tracking in Prepr.
With Zapier you can choose any listed app to send data to Prepr automatically.
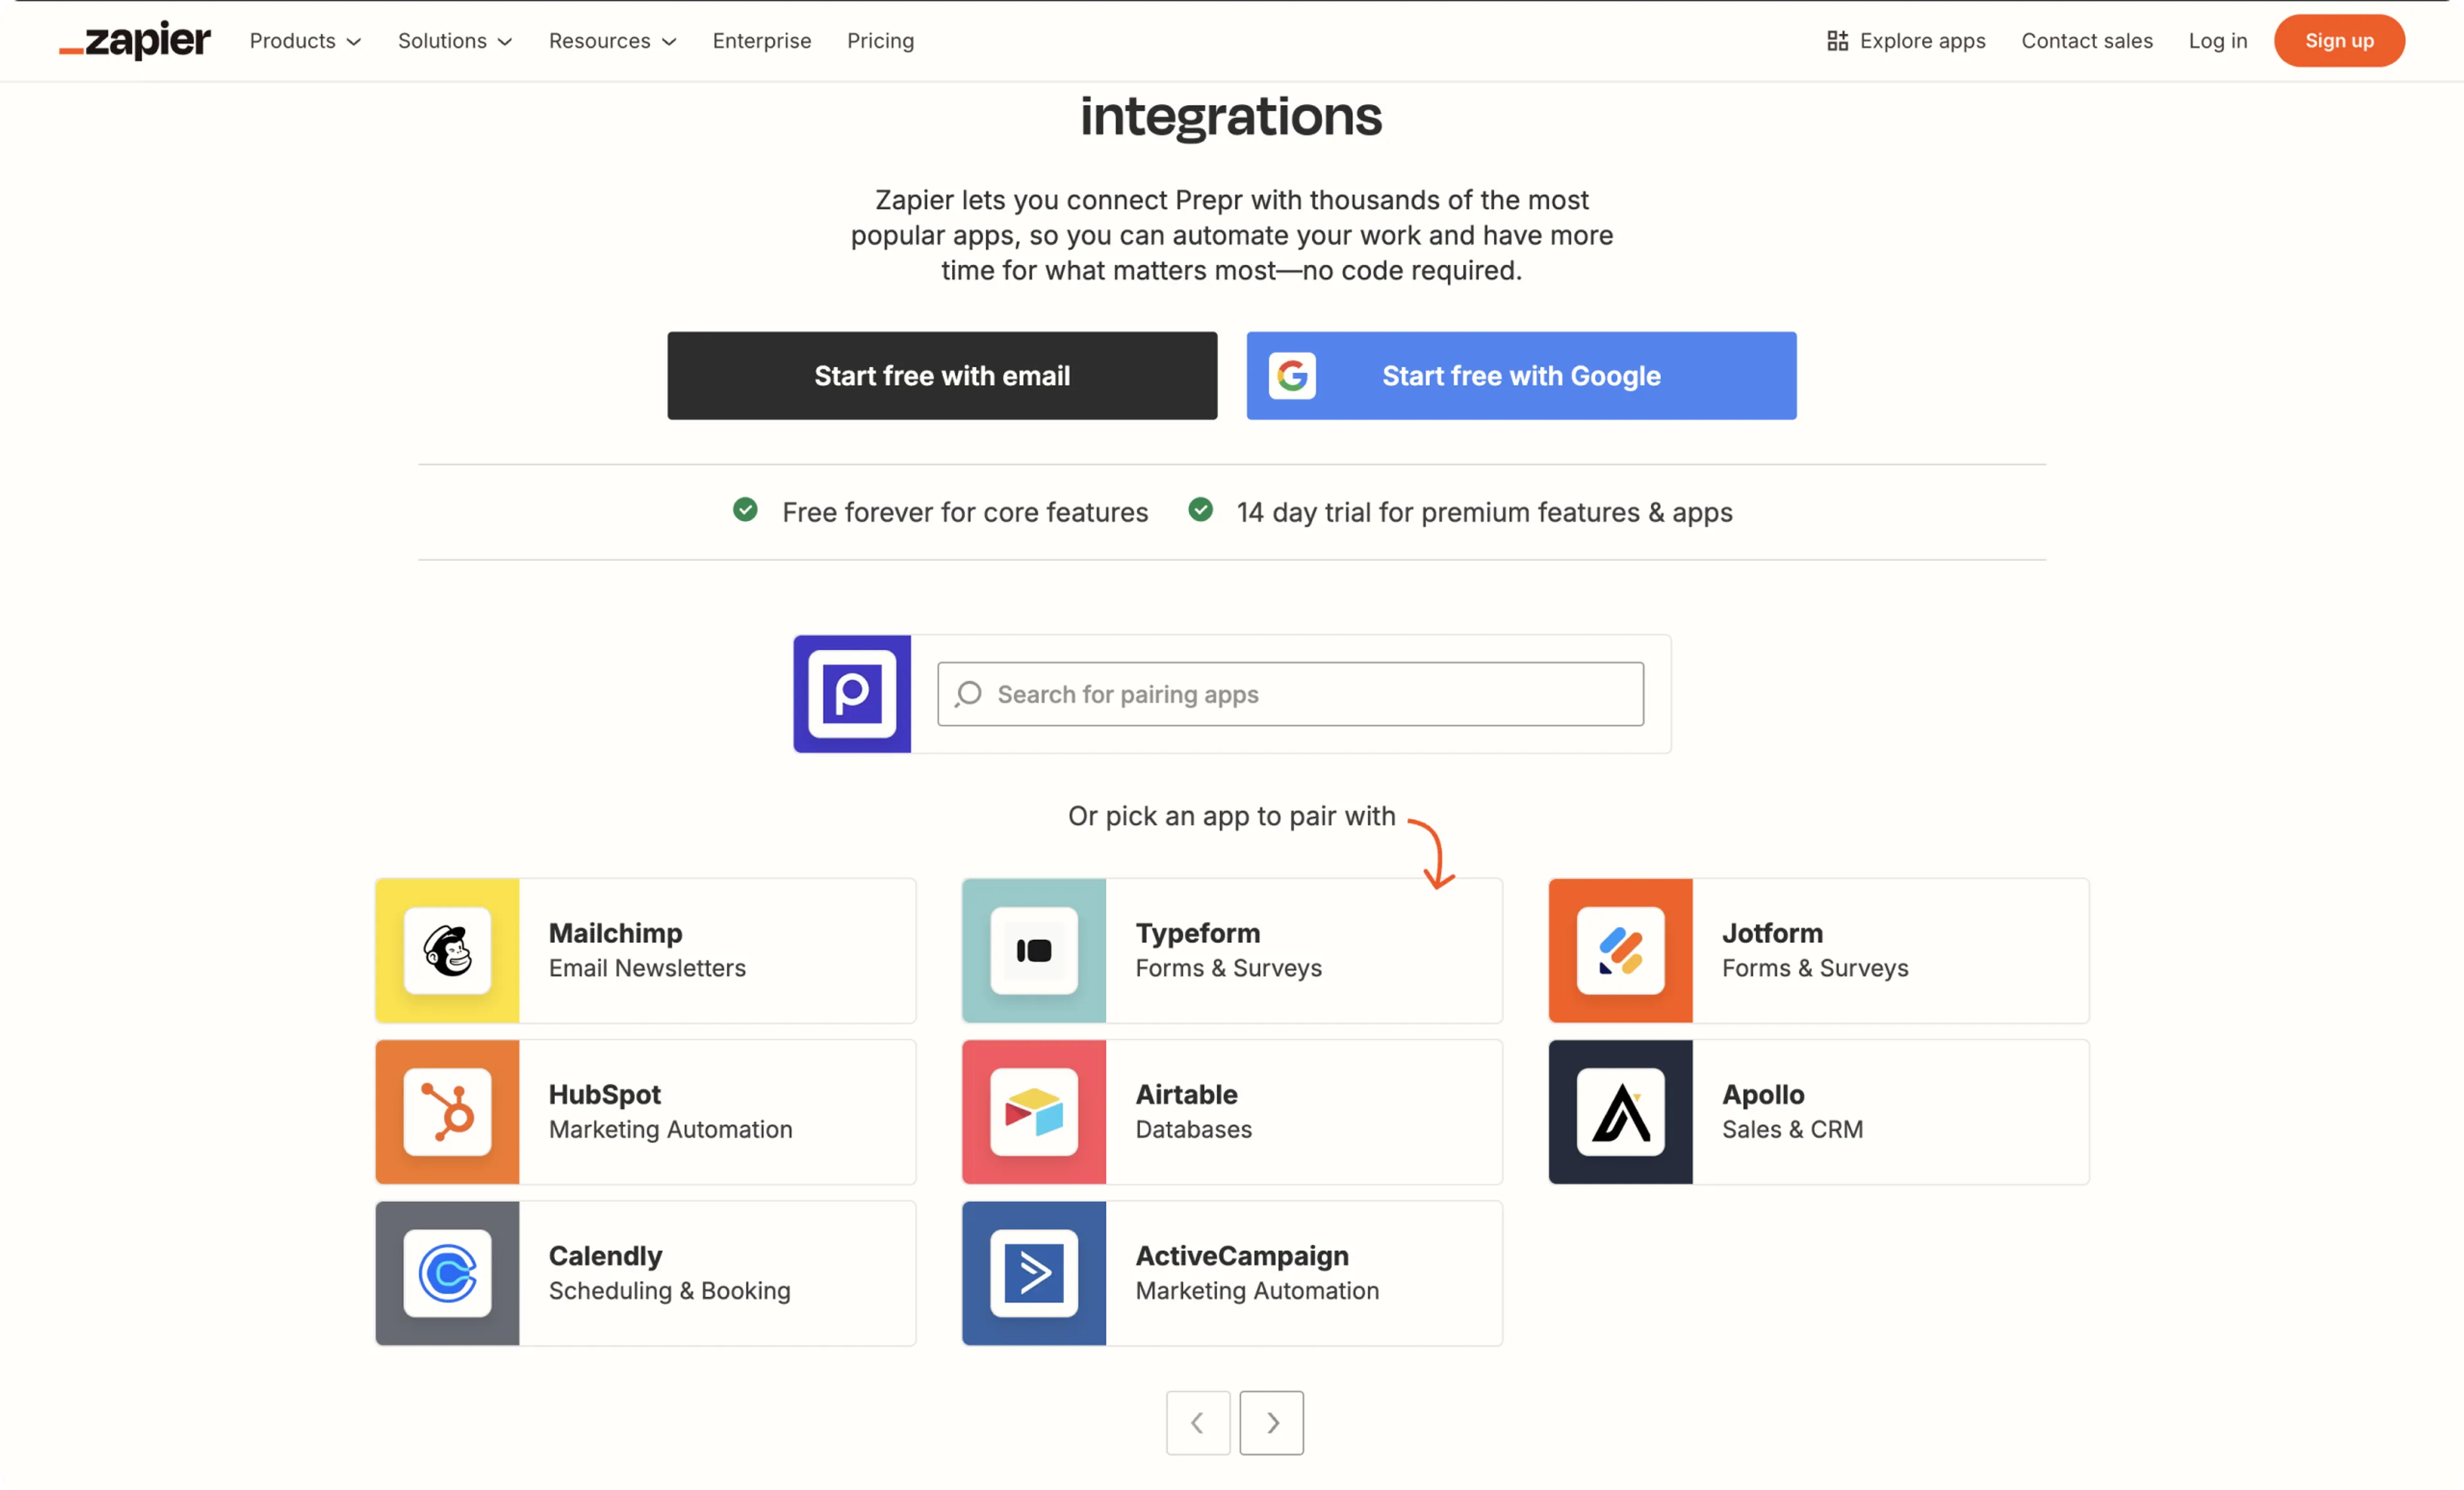
Think about the case where you want to add a tag with the `industry` of a known customer in Prepr when they request a demo through a HubSpot form.
Previously, you had to manually export and import this data to Prepr or create a custom API integration.
Now you can easily automate this process with [Zapier](https://zapier.com/apps/prepr/integrations) by simply choosing the listed app to pair such as **HubSpot**, a trigger like a **New Form Submission** (for example, when there's a demo request), and the Prepr action of **Tag a Customer Profile**.
This workflow in Zapier automatically triggers Prepr to save the customer data you choose in the tag of a known customer profile.
This means you have an easy, automated segmentation setup without development effort, leading to better personalization.
Check out the [Zapier integrations doc](/integrations/zapier) for more details.
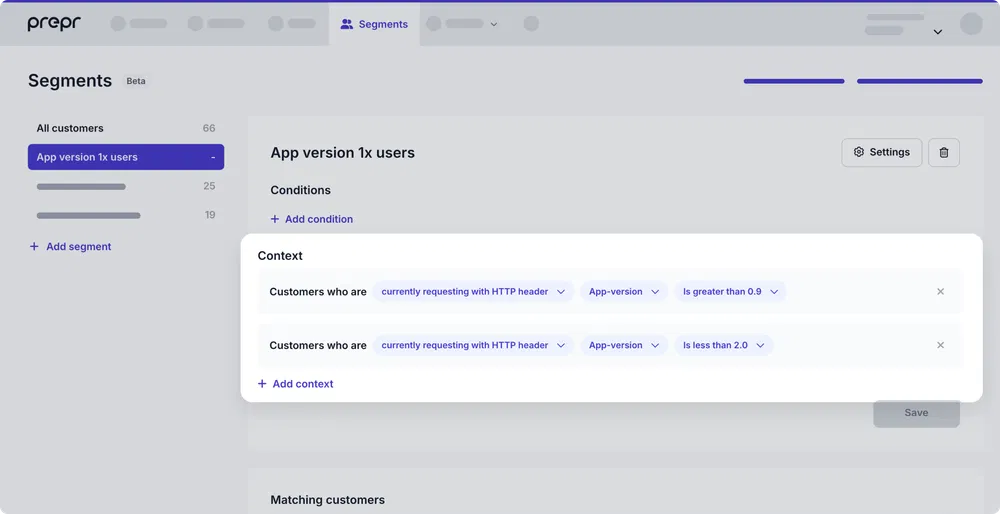
## Introducing support for semantic versioning (SemVer)
As requested we've added support for semantic versioning in the *HTTP header* context in segments.
This means you can create conditions like in the example image below.

Semantic versioning gives you more flexibility and precision with your segmentation in the HTTP header context.
You can confidently enforce version requirements, preventing unwanted or inconsistent content when segmenting your customers.
Check out the [segments doc](/personalization/managing-segments#http-header) for more details.
## Bulk publishing content items
We’re very happy to bring you new options to quickly publish or unpublish multiple items simultaneously.
With these new actions you can choose to publish or unpublish your chosen content items immediately or to schedule these actions for a future date.

These new features help you efficiently release and manage batches of content items, such as campaigns or updates that span several pieces of content, saving time and reducing manual effort.
No more repetitive manual tasks means that you can manage your content faster, freeing up time to focus on strategy and creativity.
Check out the [managing content docs](/content-management/managing-content/managing-content-items#bulk-actions-on-content-items) for more details.
## Introducing the Prepr Next.js package
We’re excited to introduce the **Prepr Next.js package**, a powerful toolkit to streamline your personalization and A/B testing implementation.
Now you can integrate Prepr’s features into your Next.js front end faster and more efficiently with the following features:
- It provides API request headers for the following values:
- Each visitor's customer ID. You need this API request header, `Prepr-Customer-Id`, when you query adaptive content and content with A/B testing.
- Any UTM parameters, if applicable. This is useful to identify customers who enter your website through a social media campaign, for example.
- HubSpot cookie, if it exists. This is useful for identifying customers who are tracked in HubSpot as a lead, for example.
- The visitor's IP address. This is useful for localization.
* The *Adaptive Preview Bar*. When you include this component in your front end, you allow content editors to effortlessly toggle between A/B test variants and personalized experiences for validation.

Check out the [Prepr Next.js package guide](/prepr-nextjs-package) or visit the [GitHub repository](https://github.com/preprio/prepr-nextjs) directly for the step-by-step instructions to install and use the package.
## Tracking customers by their email address
You can now track a visitor's email address and store it in their customer profile in Prepr.
You can do this by triggering a simple javascript in your front end when the customer provides their email address in the web app.
```js copy
prepr('event', 'Email', 'jesse.ward@acme-company.com');
```
Check out the [tracking events doc](/data-collection/recording-events#Email) for more details.
This feature makes it easier to track customer interactions in other platforms you might be using, enabling more insights.
## Improved *Publication date* filter for the content item list
We're happy to bring you an improved publication date filter when you view the content items list.
The previously called *Published on* filter is now called *Publication date* for greater clarity.
This filter is based on the content item *Publication date* instead of the previous *Publish on* dates.
We've also updated the date selection for this filter to support future dates, allowing you to easily find not only past published content items, but also scheduled content items.
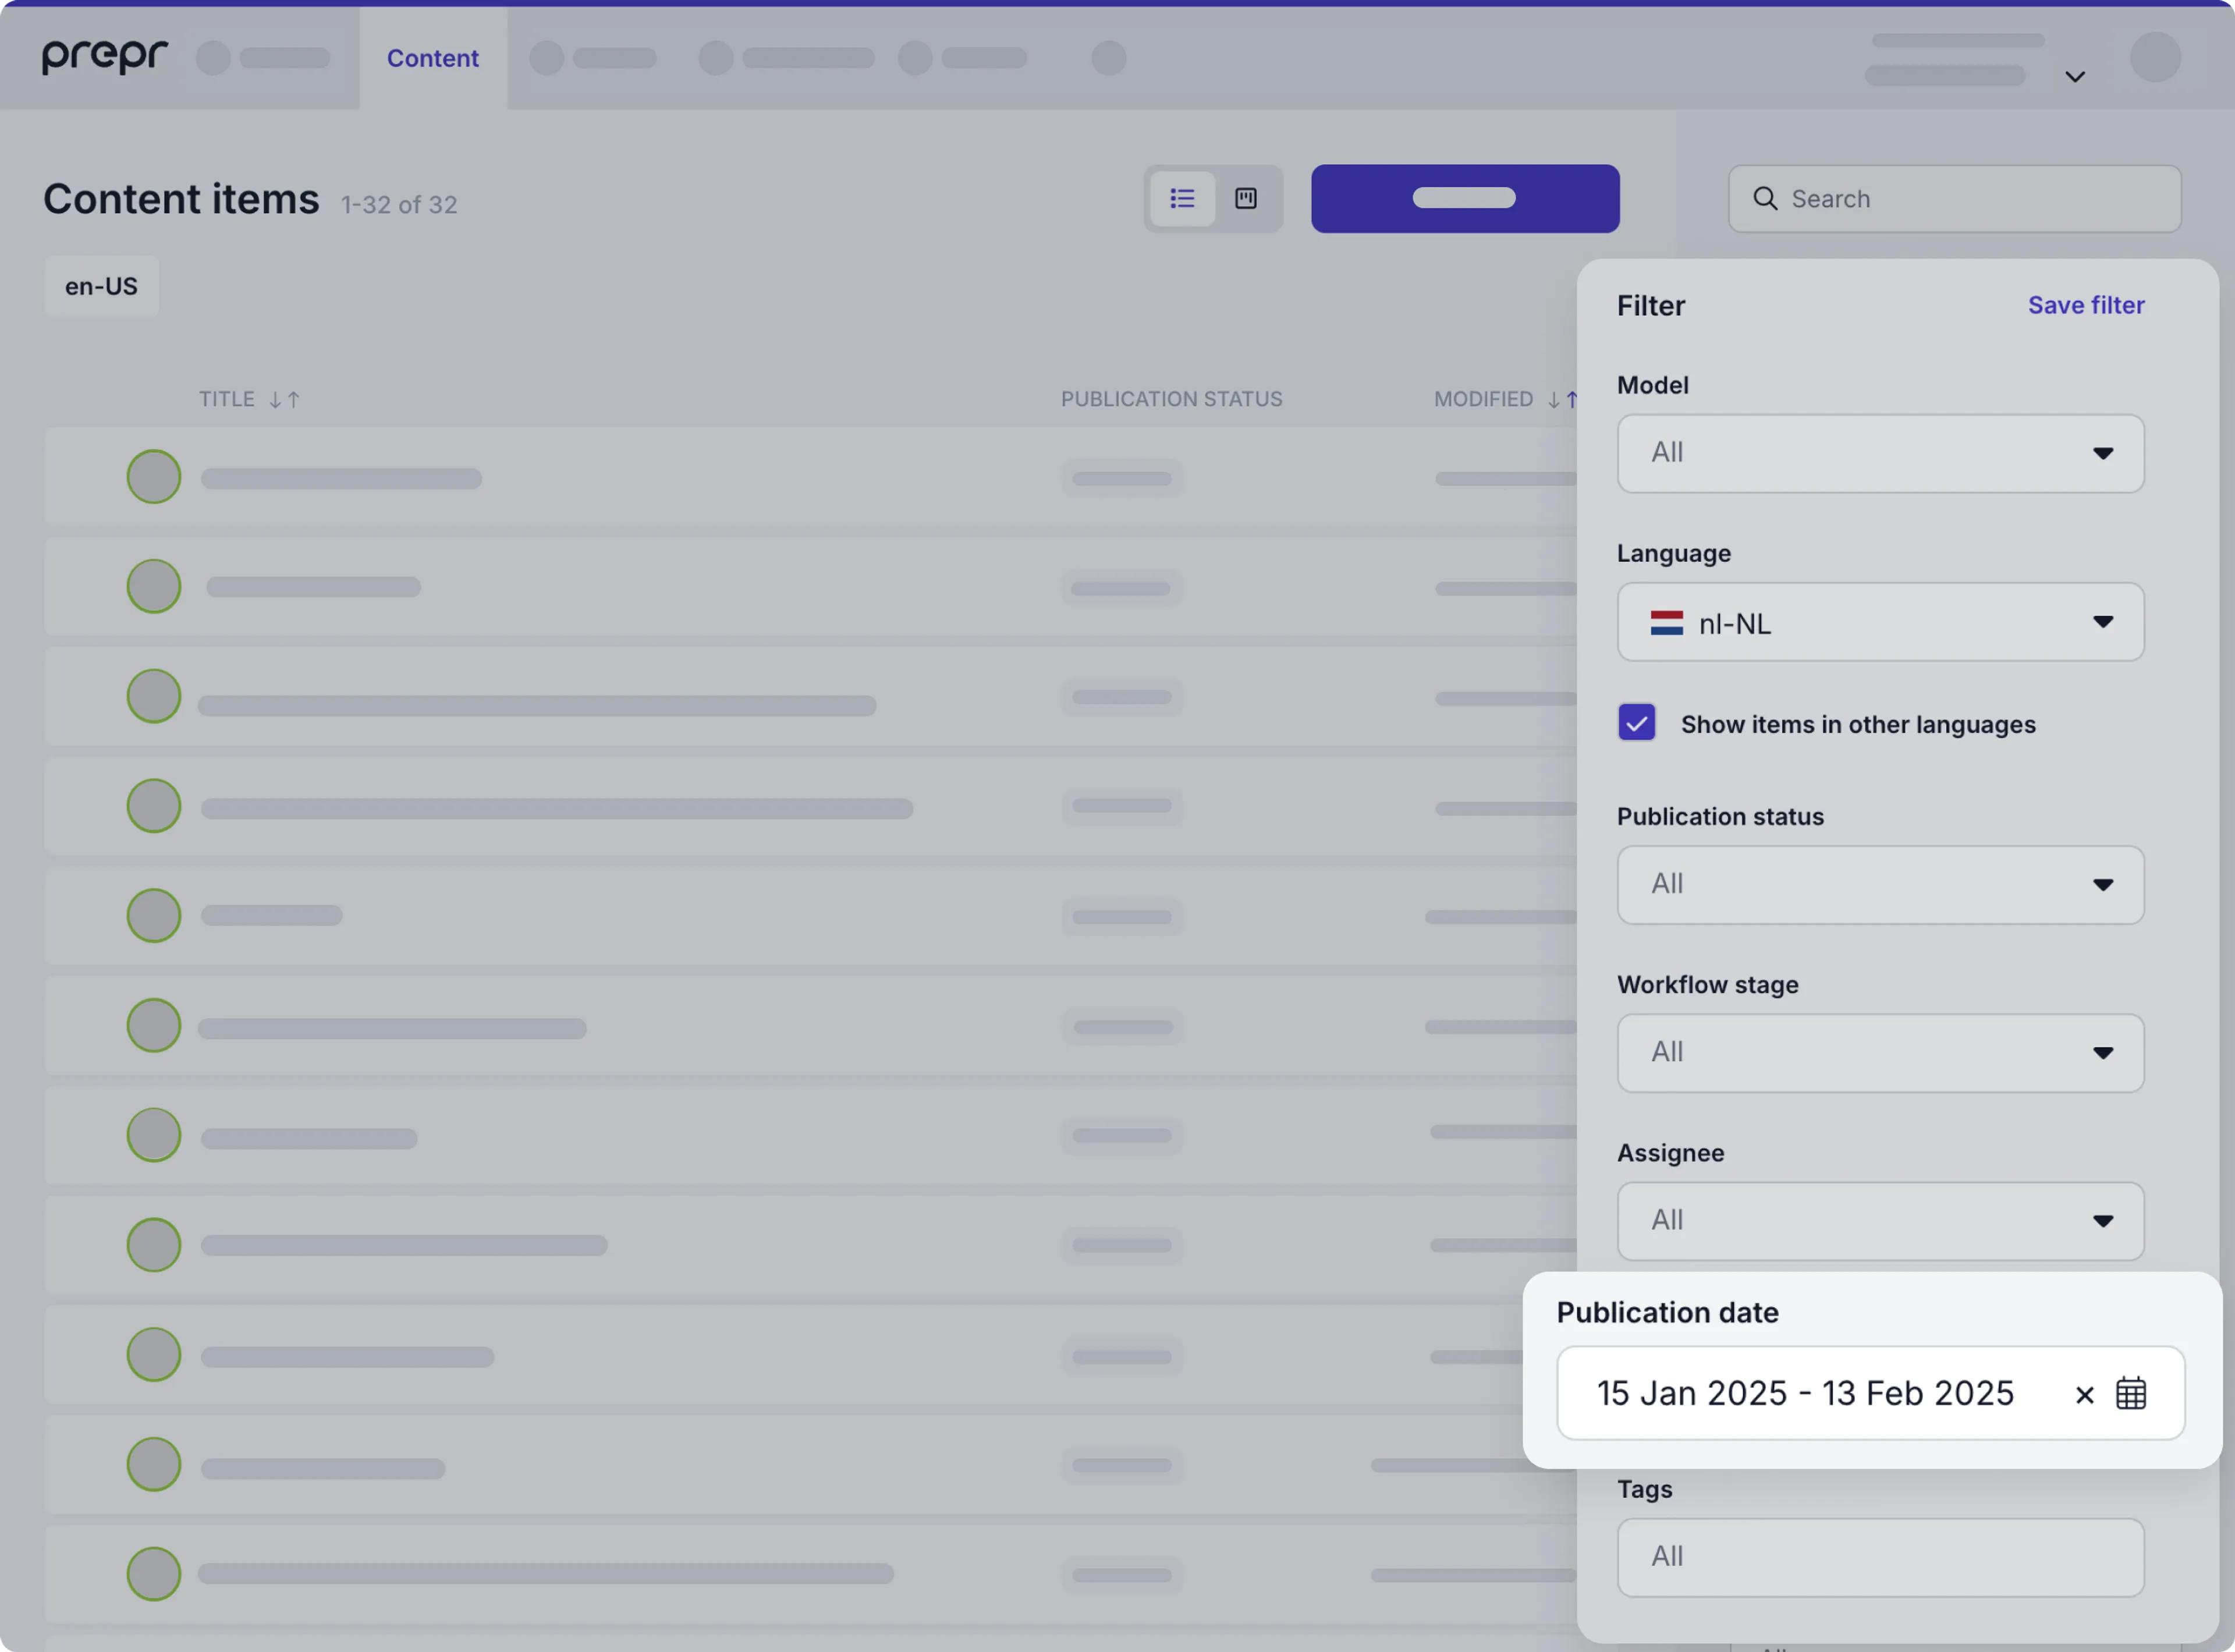
For more details on filtering content items, check out the [managing content doc](/content-management/managing-content/managing-content-items#filter-content-items).
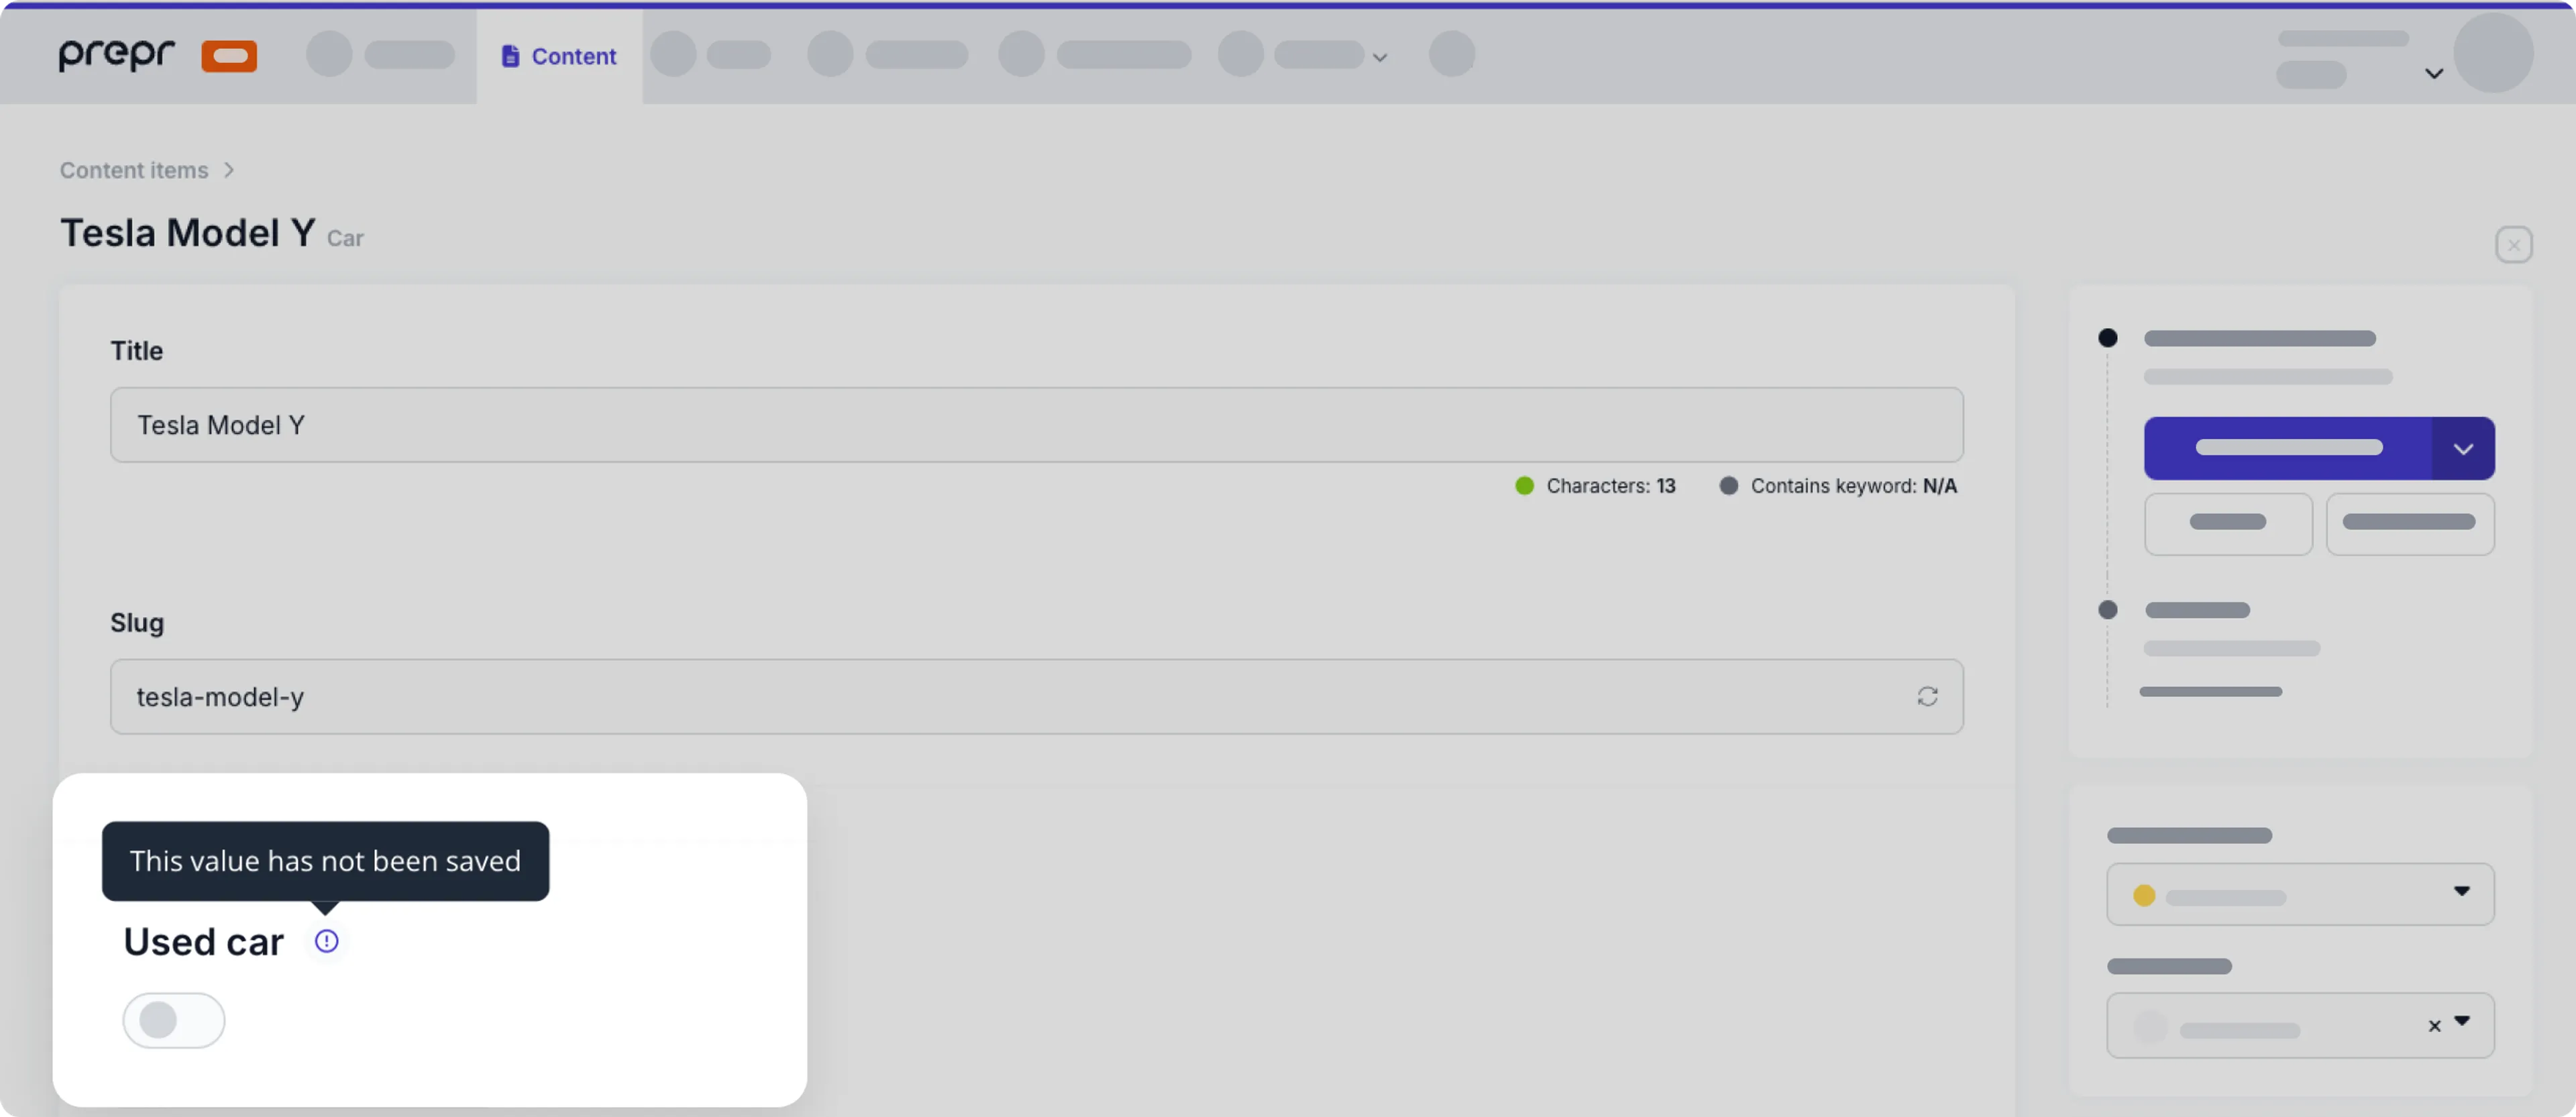
## New info text to indicate null boolean values
We've added info text to indicate when a boolean value is null in a content item.
This info text indicates that you need to explicitly set a value for this field and save the content item.
## Sync your schema with Azure DevOps
We're happy to announce that we've added another option to the *Schema sync* feature in Prepr.
You can now choose to sync a schema using *Azure DevOps*.
If your preferred tool for CI/CD workflows and source control management is *Azure DevOps*, you can include the sync process to manage schema updates in this single platform.
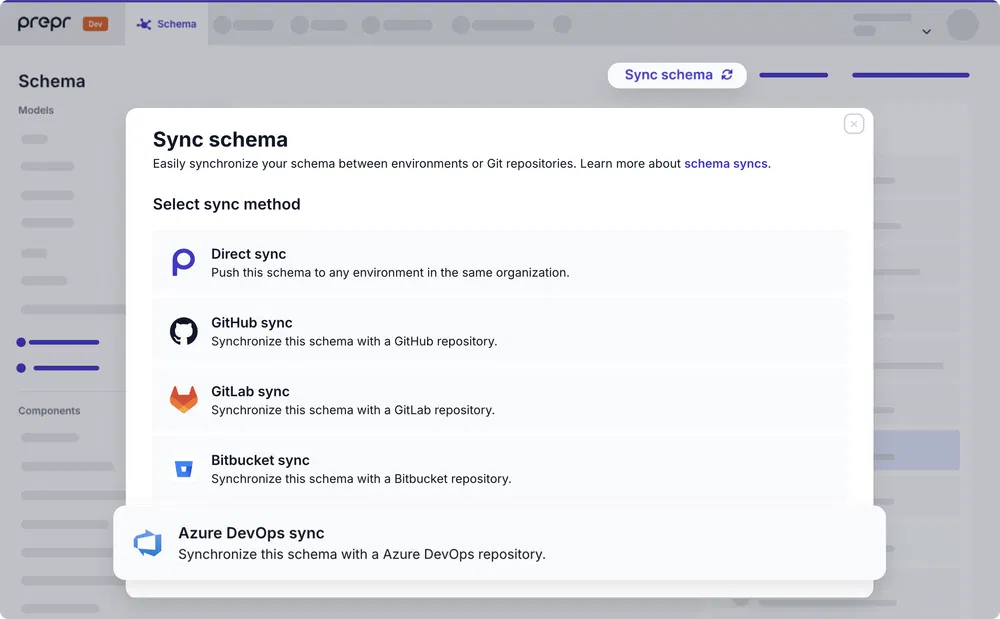
Check out the step-by-step guide in the [Azure DevOps schema sync doc](/development/working-with-cicd/syncing-a-schema#azure-devops-schema-sync).
## Support for Stories in the REST API has been fully removed
Following the deprecation of Stories in Prepr UI in January 2024, we have now completed the removal process by eliminating all related functionality from our REST API. We trust that this update has very limited impact, if at all, but please ensure your integrations are updated, if needed. Contact Prepr support if you have any questions.
## Duplicate models, components and enumerations instantly
We're happy to bring you yet another feature you've requested - The option to duplicate models, components, and enumerations.
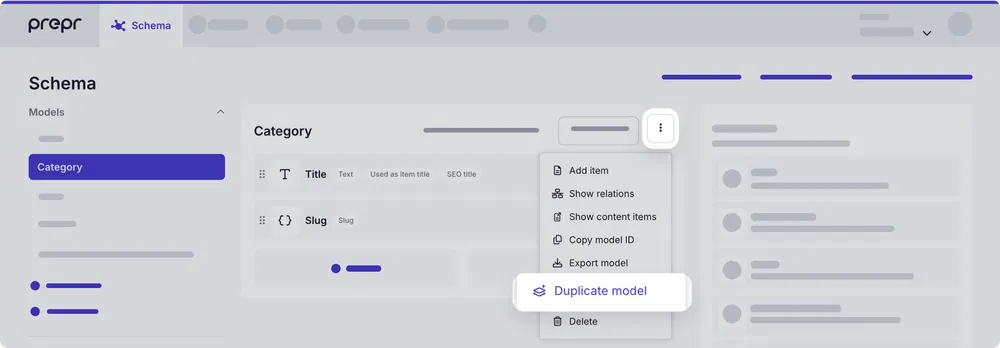
Quickly create similar models, components or enumerations without the need to manually add each field.
This saves you time and reduces errors by duplicating existing structures, streamlining your workflow for faster content modeling and delivery.
For more details, check out the [content modeling docs](/content-modeling/managing-models#duplicate-a-model).
## Improved image naming and URL structure
We're pleased to let you know that we've improved how image files are named and how their URLs are set in Prepr CMS.
Now when you upload new images, they retain their original file name.
The optimized URL for each image also includes a cleaner prefix after the hostname, providing a more structured and consistent format for better organization and readability.
**Example**
Previous URL structure: `https://example.stream.prepr.io/{format_options}/695a4d1eiaom-sustainability.png`
New URL structure: `https://example.stream.prepr.io/695a4d1eiaom/{format_options}/sustainability.png`
These changes make it easier for you to manage these assets, better visibility, and they align with SEO best practices.
Check out the [Editing assets doc](/content-management/managing-assets/managing-assets#editing-assets) for more details on image fields.
Source: https://docs.prepr.io/stay-updated/changelog2025
---
# Changelog 2024
Find the beautiful features and important updates that were added to Prepr in 2024.
This changelog gives you an insight into the most eye-catching releases during this period.
## Introducing new embeds for Bluesky and Threads
As requested, we're pleased to bring you two new embeds in your content: Bluesky and Threads, two rapidly growing social networking platforms.
These embeds allow you to enrich your content with real-time updates from these platforms.
By leveraging embeds from Bluesky and Threads, you keep your content relevant and make your content more appealing to web app visitors.
Check out the [creating rich content doc](/content-management/managing-content/creating-rich-content#the-dynamic-content-editor) for more details.
## Prepr now supports Vercel Content Link
We’re excited to announce that Prepr now supports *Vercel Content Link*.
This feature allows you to edit website content directly from your preview website.
By enabling *Edit Mode* via the toolbar, users can simply hover over elements to reveal links that open the corresponding item for quick updates — no developer needed.

Check out the [Previewing doc](/project-setup/setting-up-previews-and-visual-editing#activate-edit-mode-in-your-front-end) on how to activate the Content Link.
## New HubSpot integration: Adaptive content for HubSpot segments
The new HubSpot integration allows you to create segments in Prepr based on HubSpot lists.
Once this integration and relevant segment is set up, Prepr automatically adds the known HubSpot contact to the appropriate segment when they visit your website.
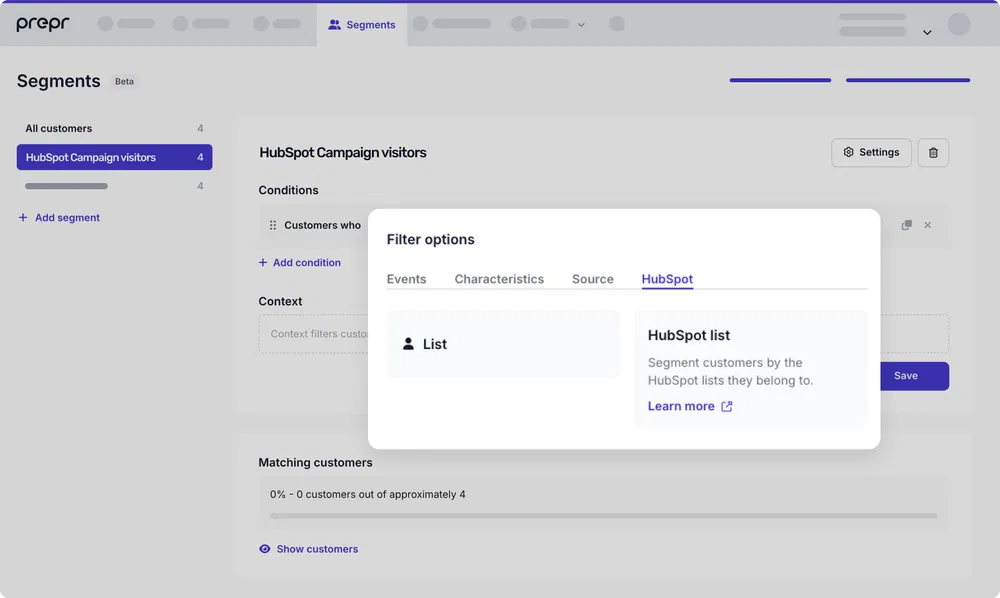
Your website can then render adaptive content for this visitor. Check out the [segments docs](/personalization/managing-segments) for more details.
This integration is useful when HubSpot is a source for your segments, such as for specific campaigns or segments based on leads.
This means you can seamlessly leverage these existing segments to deliver adaptive content directly in your website.
Enhance your engagement strategy by providing adaptive content for contacts from HubSpot campaigns.
Check out the [HubSpot doc](/integrations/hubspot) on how to activate the integration.
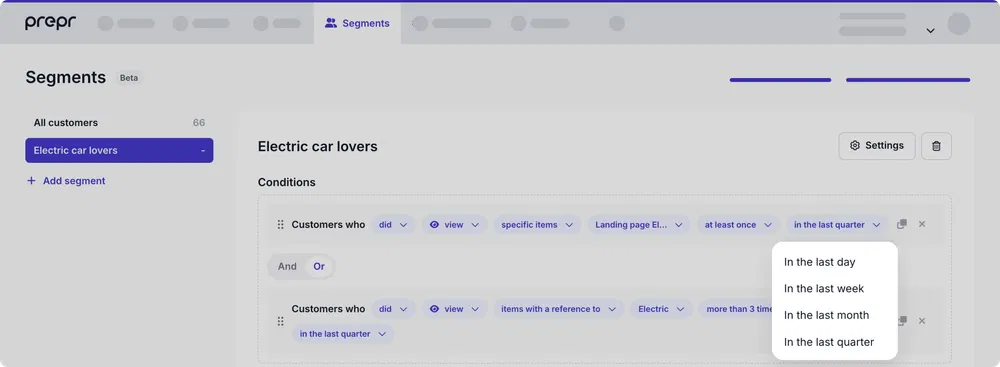
## Adding time filters to event conditions in a segment
As part of our ongoing efforts to enhance the adaptive content features, we've extended the segment event conditions with a time filter.
Now you can add a time filter when adding an event condition to target customers who interacted with specific pages.
For example, to segment customers who visited a landing page in the last month.
This precise segmentation allows you to identify and engage with customers based on their recent activity or interest.
By leveraging these insights, you can improve engagement and conversions by targeting the right audience at the right time.
Check out the [segments doc](/personalization/managing-segments#time-filter) for more details.
## New Day and Time context filters in segment designer
We're happy to announce an extension to the segment designer context selection.
You can now choose one or more days or times when customers visit your website.
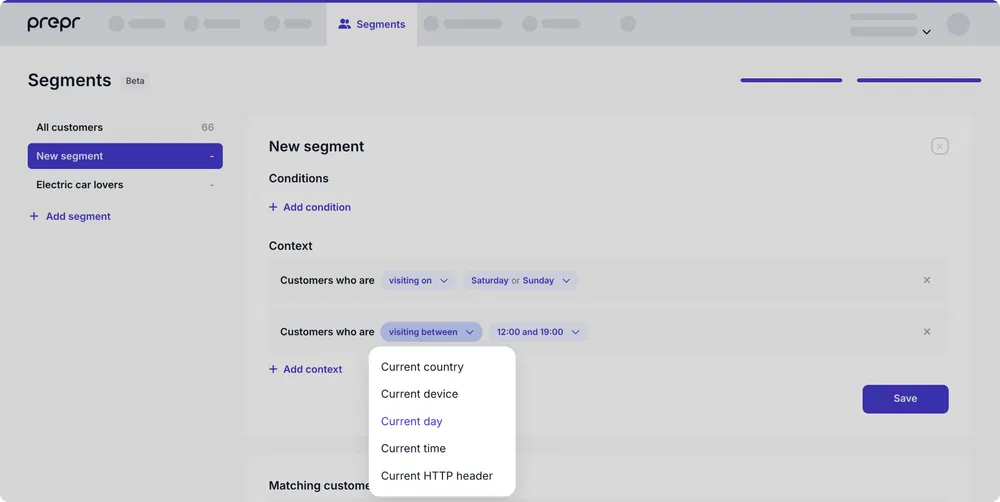
Creating segments with these filters allow you to target customers with special time-specific or day-specific content such as discounts/promotions.
For example, offering discounts to customers who make purchases on the weekend.
Check out the [Segments doc](/personalization/managing-segments) for more details.
## Improved media browser
We’re happy to introduce a new workflow for adding assets to content items with an improved media browser.
When you add assets to content items, you now have the option to drag and drop an asset directly into your content item.

Other than the clearer asset upload options, you'll notice more intuitive image cropping.
This streamlined process allows you to manage assets directly while editing your content, making everything faster and easier.
We've cut out all the extra clicks, letting you focus more on your core tasks to create impactful content.
Check out the [assets doc](/content-management/managing-assets/editing-and-configuring-assets) on how to edit and configure assets in your content items.
## New GraphQL API version 2024-12-05 is available
The GraphQL API has been updated with the following additions:
- There is a new default `_json` field in the Remote Source type that contains the raw data content for the remote source.
- The API now supports single-item Remote source fields.
- It also supports two new embed types, `BlueskyPost` and `ThreadsPost`.
- The API allows you to filter *Stack* fields in a model by the *Typename* of a component in the stack.
Check out the [GraphQL API upgrade guide](/graphql-api/upgrade-guide#version-2024-12-05) for more details.
## New HTTP header context in the segment designer
Once again, we bring you an update based on your feedback: The new *HTTP header* context option in the segment designer.
You can now segment customers based on a context related to the web app that customers use.
For example, to display specific content to customers based on the app version they're using.
This means you can deliver precise content, such as version-specific content, to customer segments, supporting seamless feature rollouts or phased updates.
Check out the [segment designer docs](/personalization/managing-segments) for more details.
## Update existing content items when adding fields
We're excited to bring you a new option to streamline your workflow when adding new fields.
Now, when you add a *Text*, *Number*, *Boolean*, or *List* field to a model and set the **Initial value**, Prepr allows you to update all existing content items with one click.
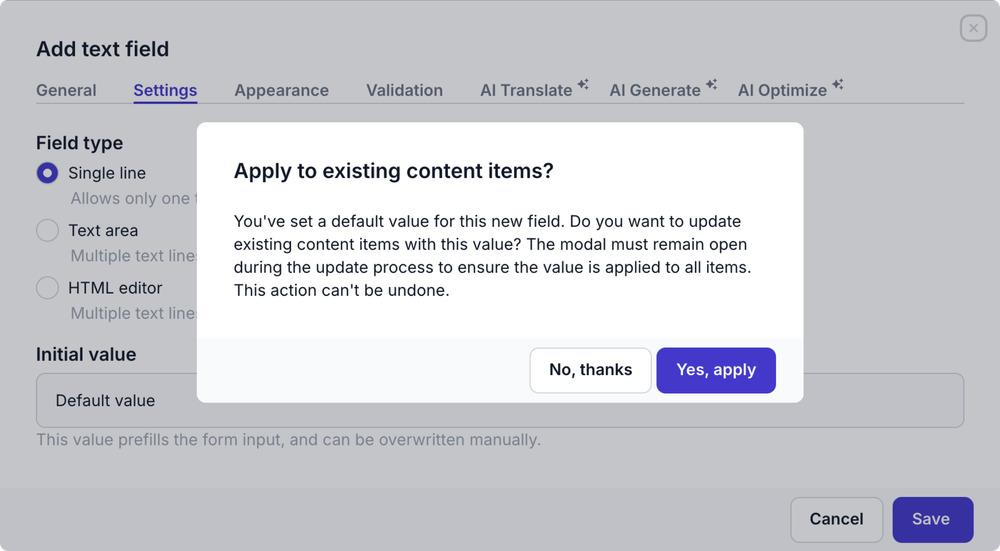
You no longer need backend scripts to bulk update the related content items when adding new fields to a model.
This feature not only saves you time but reduces the risk of missing content and potential site issues.
For more details, check out the [field types doc](/content-modeling/field-types#text-field).
## Reassigning a duplicate content item
As requested, we've made creating similar content items even more efficient.
From now on, when you duplicate a content item, it's automatically assigned to you.
This also means no more unnecessary notifications for others.
For more details on editing content check out the [Managing content items docs](/content-management/managing-content/managing-content-items).
## New Segment Designer
We’re thrilled to introduce the new *Segment Designer*, a major product update shaped by your feedback on the Prepr personalization feature.
The *Segment Designer* helps you segment your audience with greater precision, improving visitor experiences that lead to higher engagement and conversions.
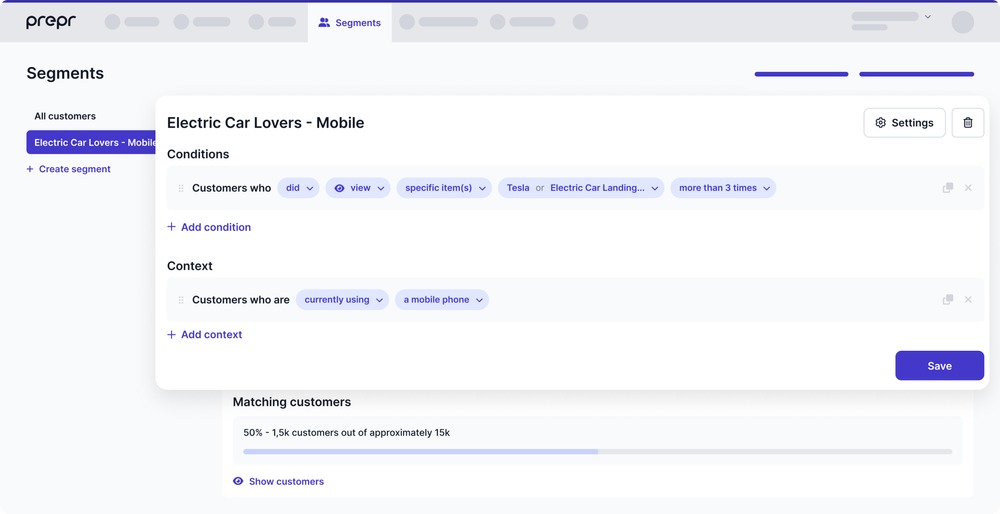
Now when you create customer segments, you can set up more precise conditions, and define a current context for the segment.
The *Context* of a segment includes current info about the customer, like the device they're using or the country they're in, when they interact with personalized content.
To align with the new *Segment Designer*, we've made some minor updates when you add *Adaptive content* to a content item.
The *Country* selection based on a visitor's geolocation has been removed. You can now set this up in the *Context* of the segment instead.
These changes ensure that your segments in the Adaptive content are consistent with the segments that you've built.
Let's take a look at new features in more detail:
- Logical operators
Previously, multiple conditions in the same segment were processed as mutually inclusive (AND), so it was more difficult to set up independent conditions for the same segment.
Now you can explicitly choose the logical operators `AND` or `OR` to combine conditions exactly the way you need them.
- Streamlined UI for easier segmentation
The *Segment Designer* has a more intuitive design that makes it easier for you to build segments.
As you set up conditions, they now form clear, logical sentences making it easier to see exactly which groups of customers are included in your segments.
- New filter options
- *Event frequency:* Segment customers who, for example, viewed a page more than three times.
- *Event with content reference:* Target customers based on a referenced content item, such as an article by a particular author.
- *Event for specific models:* Create segments for customers who viewed types of content like blog articles.
- *Previous session:* Segment based on customers who last visited within a specific time frame, like the past 30 days.
We're confident that this update makes segmenting your audience much simpler and more intuitive, while giving you the option to be more precise with your personalization.
For more details on how to build customer segments, check out the [Segments doc](/personalization/managing-segments).
If you have more suggestions on how we can simplify your experience with Prepr, [we'd love to hear from you.](https://docs.google.com/forms/d/e/1FAIpQLSf2kANsW0MRMOsETQVE5Ac6ikVyJqz7Zi7yes86aKaC9oFf5w/viewform?usp=pp_url)
## New visual model and component selection
Great news for content editors! The new visual model and component selection solves the following challenges when adding content to your web pages:
1. Many components have technical names, like a *Call to action* component.
2. The list of content items and components is often very long for you to scroll through.
Now when you choose a content item or component in a stack or reference field, you'll see a visual preview of what your content item or component could look like.
You can also easily find content items or components by a tag which shows you a logical grouping, such as *Articles*.
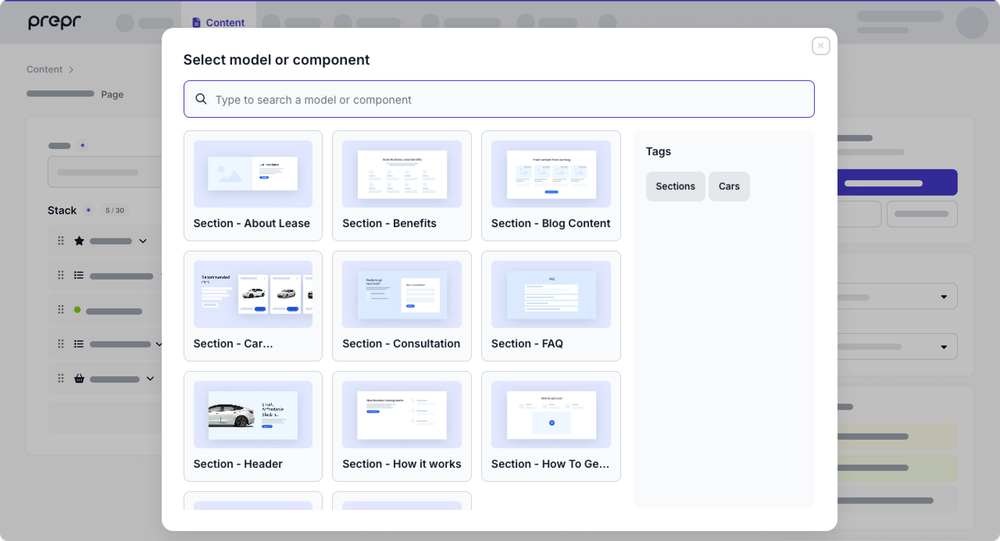
We trust that you'll enjoy this more intuitive selector that boosts productivity when editing content.
To make the preview images and tags available, developers can upload preview images and define relevant tags, where needed, directly in the model or component settings.
Check out the [model settings](/content-modeling/managing-models#appearance) or [component settings](/content-modeling/managing-components#appearance) for more details.
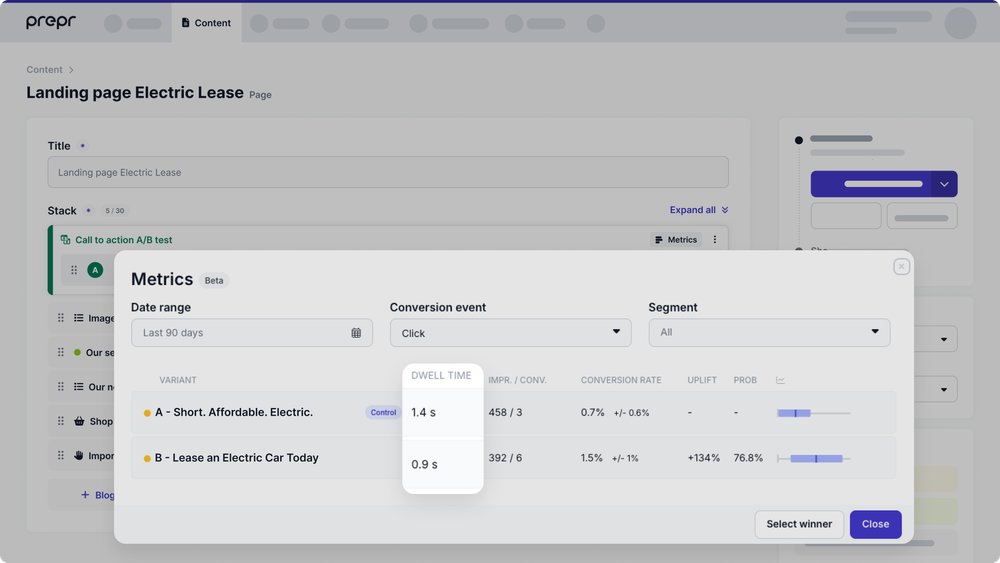
## New dwell time metric
We are excited to introduce the new dwell time metric for your A/B tests and adaptive content.
Until now, you could only track their results with surface-level metrics such as the number of impressions and conversions.
While these metrics provide good insights into visitor behavior, in some cases you need a better insight into user engagement of some elements on a page, especially when you're not tracking any clicks.
With the new dwell time metric, you can track the average amount of time that customers view a specific element on a page, giving you this deeper insight.
When used in A/B testing, dwell time allows you to compare the effectiveness of different versions of content.
For example, if variant A of a *Product description* holds the user’s attention for an average of 45 seconds, while version B only captures 20 seconds, it's obvious that variant A is more effective.
Check out the [A/B testing guide](/ab-testing/running-ab-tests#evaluate-the-ab-test) or the [Adaptive content guide](/personalization/managing-adaptive-content#evaluate-the-personalized-variants) for more details.
## New GraphQL API version 2024-10-04 is available
The GraphQL API has been updated to support the single-item [*Stack*](/graphql-api/schema-field-types#fetching-a-single-stack-field) and [*Content reference*](/graphql-api/schema-field-types#fetching-a-single-content-reference-field) fields.
It also includes a change to retrieving an A/B test with only an A variant.
A/B tests without a B variant will now return no element for B targeted visitors, instead of defaulting to A.
Check out the [GraphQL API upgrade guide](/graphql-api/upgrade-guide) for more details.
## Filter assets by enumeration values
You can now filter your assets by specific enumeration values, making it even easier to find the ones you need.
For example, filter assets by an enumeration field *License holder* to find videos or images that belong to certain companies.
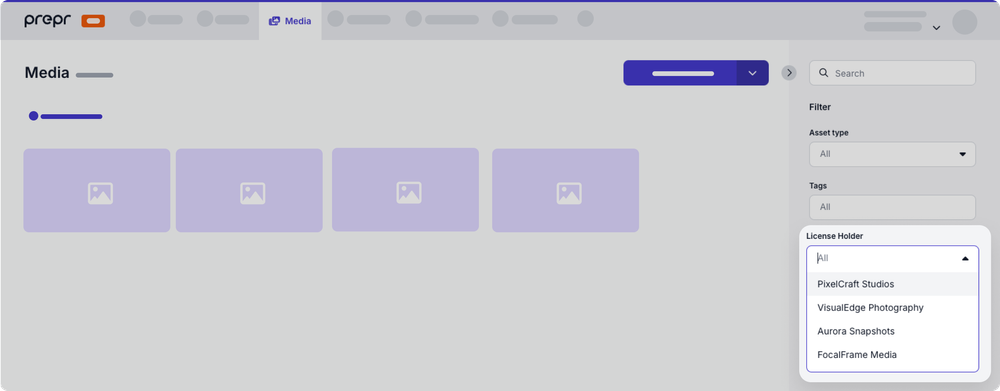
This enhanced filtering allows you to quickly and easily locate the assets you need, boosting your productivity.
Check out the [managing assets doc](/content-management/managing-assets/managing-assets#finding-assets) for more details.
## Choosing a component title
Normally, the title of a component in a *Stack* or *Dynamic content* field is set to the first text element in your component.
But, based on your feedback, we’ve made things a bit more flexible.
At times, you may want the component title to be the title of a referenced content item.
For example, when the embedded component title should be the headline of an article.
Also, a component might just have a *List* or *Number* field, and in those cases, you might want the component title to be the chosen list item value or the number entered.
For example, a number of the item that defines its order in a list.
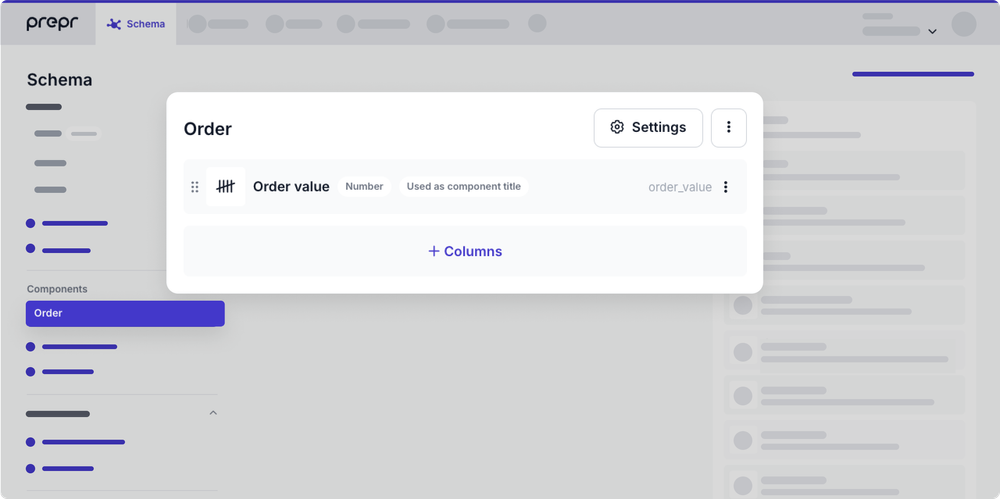
As a developer, you now have the option to set the component title to these values instead, giving you more control and flexibility.
This means the content editor sees clearer and more meaningful component titles in their content, making their content more understandable at a single glance.
Check out the [components doc](/content-modeling/managing-components) for more details.
## Single content reference field and single stack field
As a developer, you can now configure a single content reference field and a single stack field.
This setting limits the content editor to adding just one referenced content item to a content reference field
and just one referenced content item or component to a stack field.
For example: If an article should only have one author.
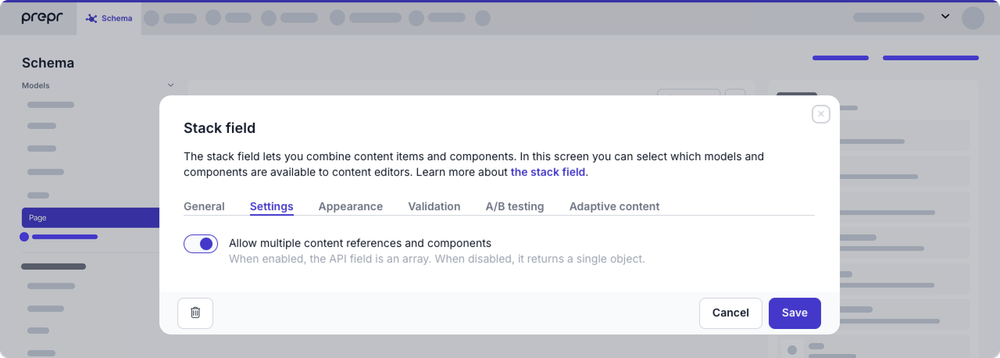
If you change a content reference or stack field to a single type, you'll get a warning to change existing queries in your front end.
The single, flat structure reduces data complexity, making API queries faster and simpler.
This means improved performance and quicker data retrieval, so you can focus on building with less overhead.
Check out the [API field types doc](/content-modeling/field-types#content-reference-field) for more details.
## Choosing your own conversion event
Until now, your metrics data for *Adaptive content* and *A/B testing* was based on the `click` event.
With this update, you can now choose the event which represents conversions for you.
Check out the [A/B testing doc](/ab-testing/setting-up-ab-testing#track-impressions-and-conversions-for-stack-field-ab-test) on how to send your conversion event to Prepr, such as a custom event for quote requests.
With the new event filter in the metrics modal, you can choose to view metrics by the conversion event that matters to you.
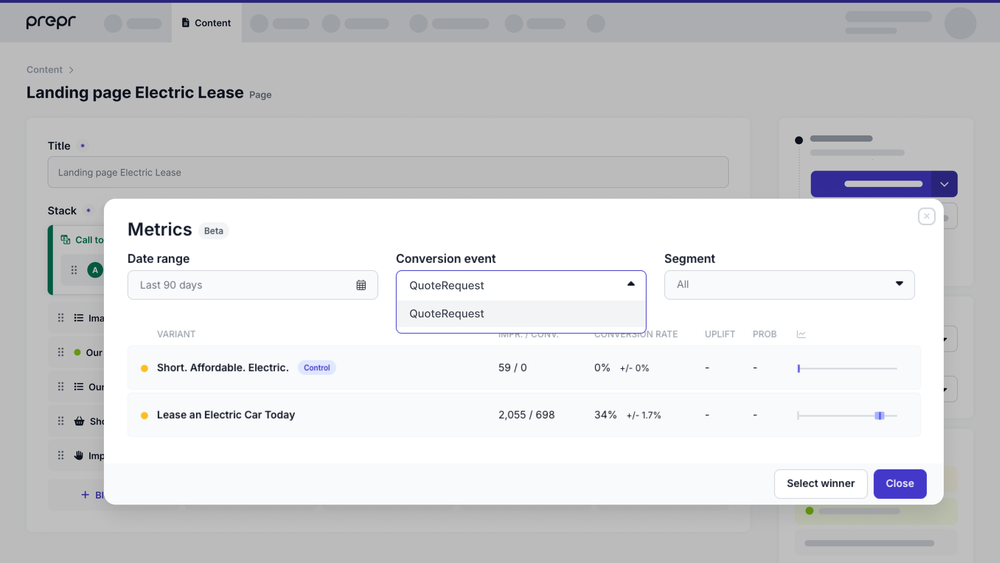
This means you’ll be making optimization decisions based on even more precise and relevant data, helping you drive better results.
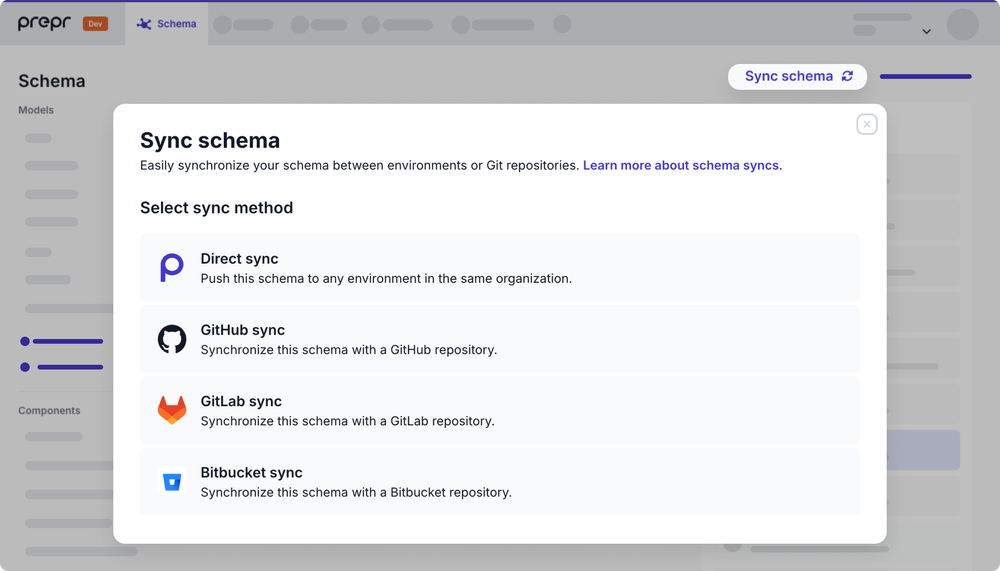
## Introducing Bitbucket Schema Sync
In addition to the *Direct*, *GitHub*, and *GitLab Schema Sync* options, you can now choose to sync the schema using Bitbucket.
If your preferred tool is Bitbucket, you have control over the sync process to manage schema updates exactly the way you need.
Check out more details in the [syncing a schema doc](/development/working-with-cicd/syncing-a-schema).
## New Technical contact role
With the new *Technical contact* role, you can add your technical admin team members to Prepr.
They can then be contacted directly for any incidents related to failed webhooks, or remote sources that are not syncing.
Any announcements from the Prepr status page will also be emailed to them automatically.
This means a quicker collaboration and response to solving incidents.
Check out the [roles and permissions doc](/project-setup/managing-roles-and-permissions) for more details.
## New help text display option
We’ve added a new way to show help text in content items.
Instead of displaying the help text in small font below each field, you can now have it appear as a tooltip when editors hover over the icon next to the field name.
This option makes longer help text more readable and keeps content items uncluttered.
Content editors can quickly check the help text when they need it, without it getting in the way.
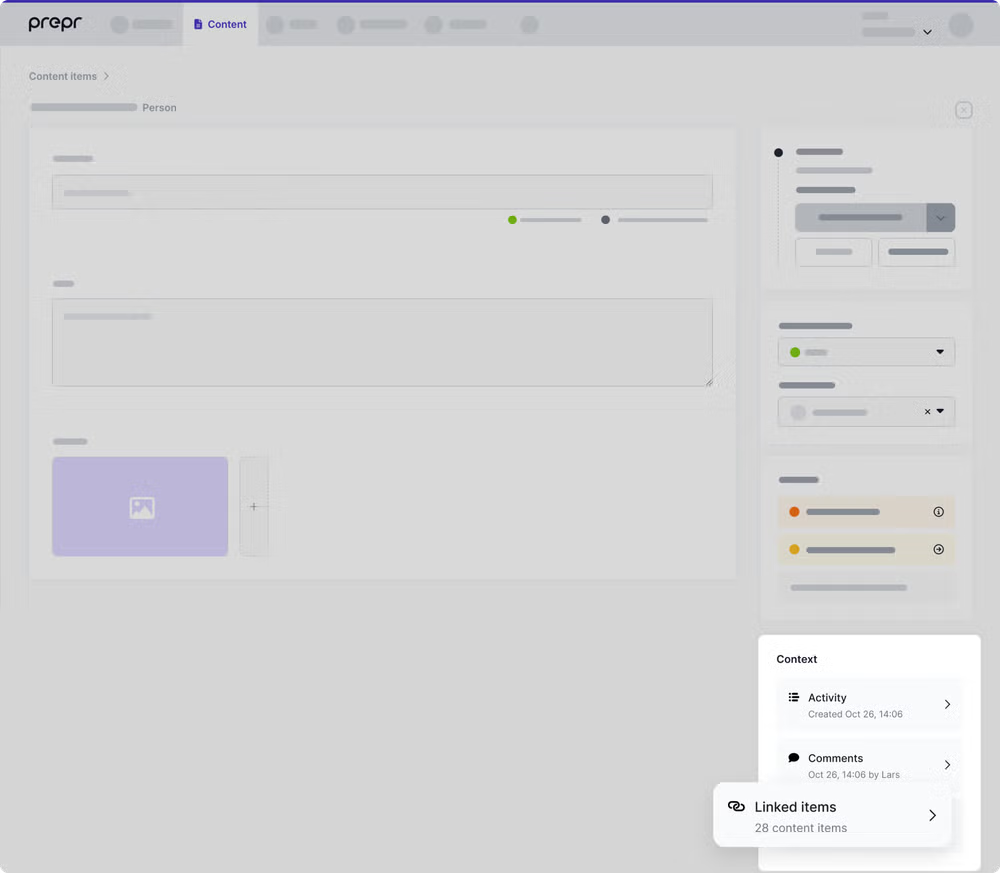
## Overview of linked content items
We've added a new sidebar option to the content item detail page that shows where this content item is referenced.
You can now easily find and view linked content items.
When you try to delete a content item that is referenced in other content items, you'll get a warning about the linked items.
This means you can avoid broken pages when deleting a content item with linked items. For example, find all articles linked to a specific author from their detail page.
## New content view: Adaptive content and A/B tests
With more users adding A/B tests and adaptive content in Prepr, and thanks to your valuable feedback, we've introduced a brand-new view to the content items overview page. Now, you can easily see all content items with adaptive content and A/B tests at a glance.
It’s faster and simpler to find exactly what you're looking for.
You can also filter this view further by the **Status** (*Active* or *Inactive*), **Type** (*Adaptive content* or *A/B test*), the content item **Model**, and the **Language**.
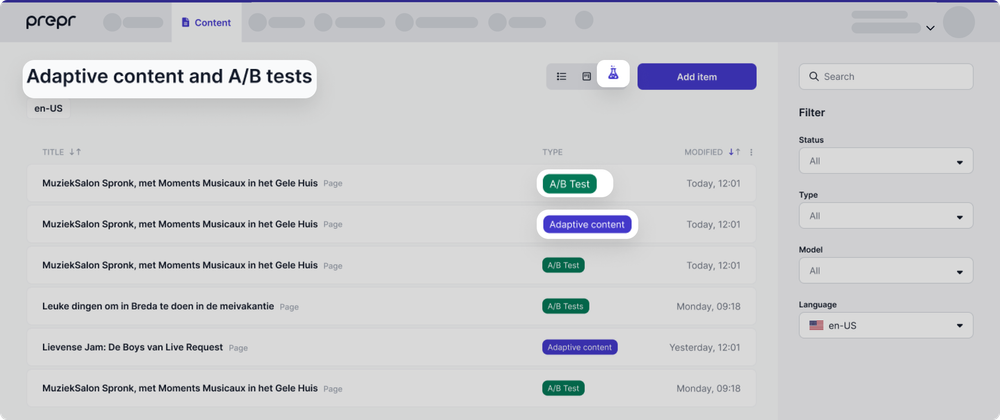
Check out the [content items doc](/content-management/managing-content/managing-content-items#content-views) for more details.
## Block AI bots from scraping assets
We've implemented an update to block all AI bots from scraping your video and document files from Prepr *Media*. This reduces the amount of bandwith you use.
If you want to enable access to that content for those bots, ask the Prepr account owner to [contact our Support Team](https://prepr.io/support) to enable this.
## New API option to open files in the browser
When you request files in a GraphQL API query, they are downloaded by default.
With this update, you can now include a URL argument, `inline` with a value of `true` to display the file contents in a browser instead.
This means that you get the file exactly the way you need to deliver it to your visitors.
Check out the [GraphQL docs](/graphql-api/schema-field-types#files) for more details.
## Organize your enumerations into schema folders
It's now possible to organize your enumerations into folders like you can with models and components.
When you have dozens of enumerations, these folders make it easier to find related enumerations instead of scanning a long alphabetical list.
For example, when you have multiple enumerations needed for the same components.
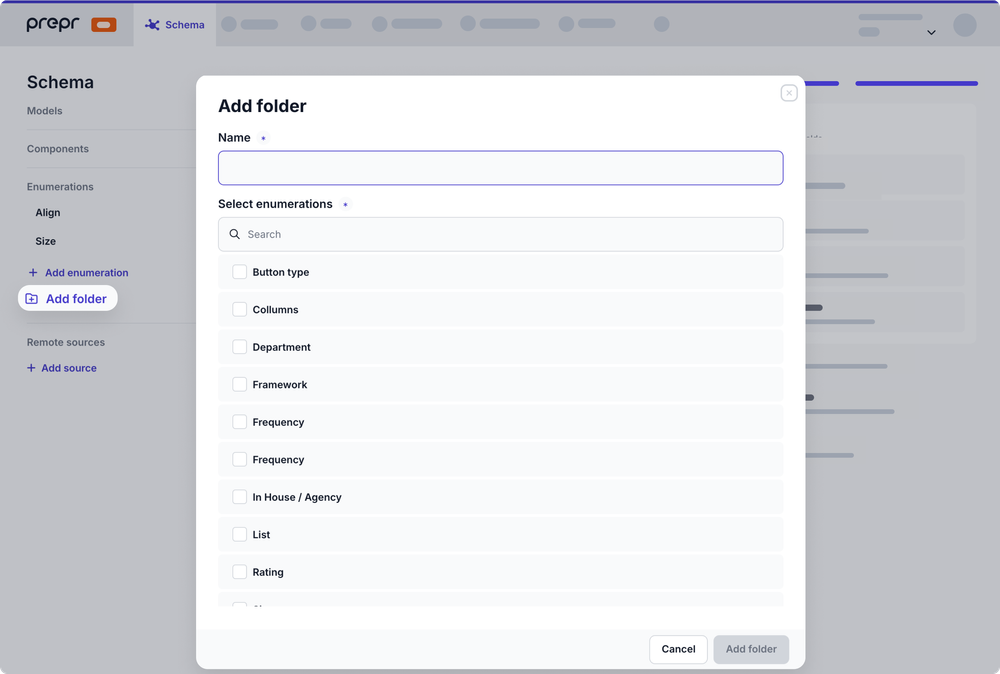
Check out the [enumerations doc](/content-modeling/managing-enumerations#organize-enumerations-into-folders) for more details.
## Exclude IP addresses from data collection
We've added a feature in the event tracking settings that lets you exclude specific IP addresses from data collection. This helps you maintain the integrity of your analytics by ensuring that actions like impressions and clicks from those IPs are not tracked. By filtering out internal traffic, you can keep your data clean, which is crucial for accurate AB testing and decision-making.
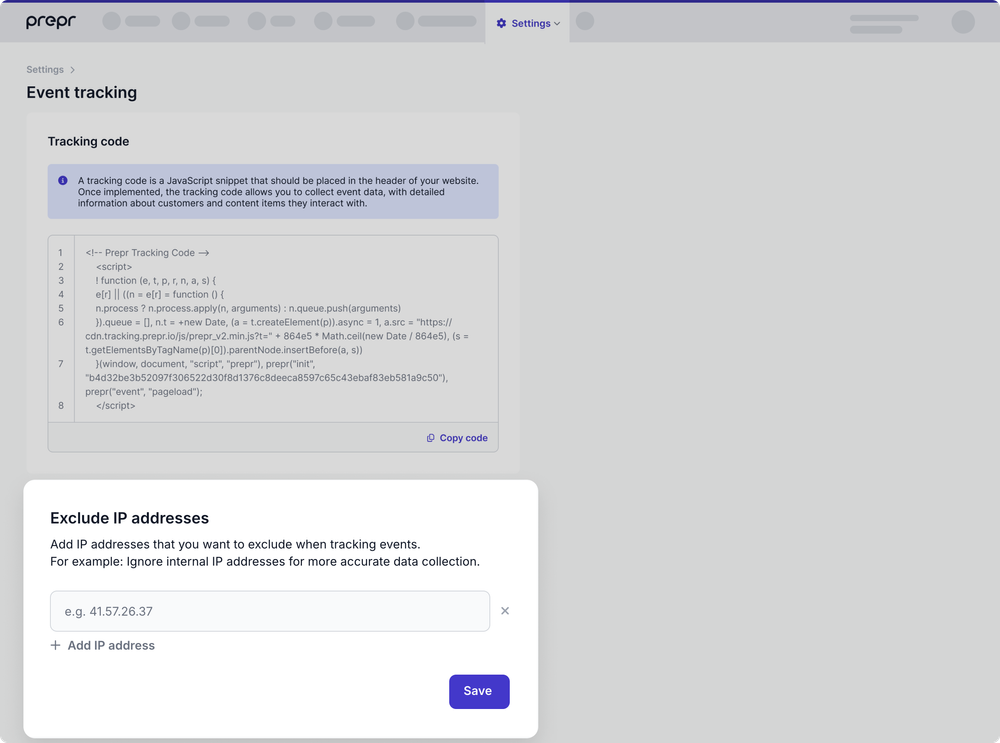
Check out the [collect event data docs](/data-collection/setting-up-the-tracking-code#excluding-ip-addresses) for more details.
## Filter content items by enumeration values
You can now filter your content items by specific enumeration values, making it even easier to find the items you need.
For example, filter *Product* content items by the *Size* to find large T-shirts.
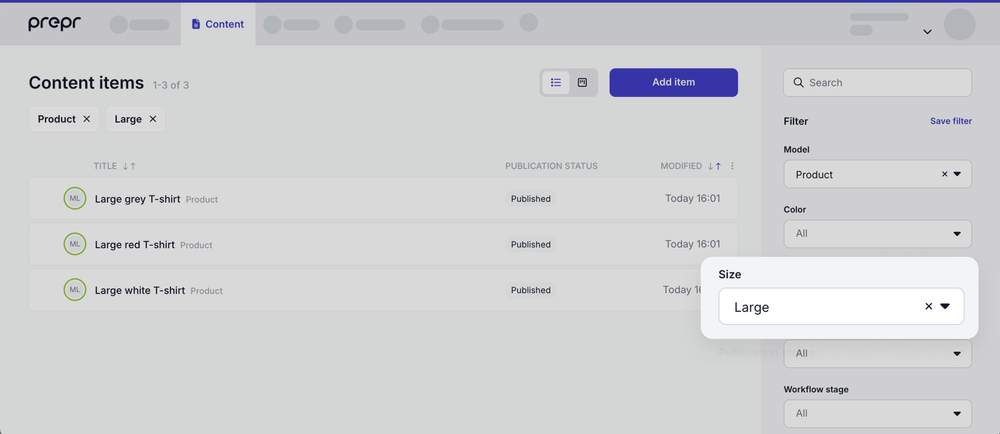
This enhanced filtering allows you to quickly and easily locate the content you need, boosting your productivity.
Check out the [filter content items doc](/content-management/managing-content/managing-content-items#filter-content-items) for more details.
## Schema sync upgrade
We've upgraded the *Schema Sync* and added the *GitLab Schema Sync*.
With the improvements to the Schema Sync process, you'll see better error handling and can now preview changes before completing the sync.
In addition to the *Direct Schema Sync* and the *GitHub Schema Sync* options, you can now choose to sync the schema using GitLab.
This upgrade gives you more control over the sync process to manage schema updates exactly the way you need.

Check out the [Schema sync doc](/development/working-with-cicd/syncing-a-schema) for more details.
## Improved schema import and export processes
As part of our continued efforts to improve existing Prepr features, we've updated the import and export of models and components.
The import and export logic has been updated to match the *Direct Schema sync* process to ensure consistency of models and components during the individual import/export processes.
In addition to this improvement, it's now also possible to import and export individual enumerations and remote sources.
When you only want one or a couple of enumerations or remote sources created in a test environment then you no longer have to create them manually.
The improved import and export keeps your data structure intact.
This means your schema integrity is maintained even when importing complex models or components with embedded elements and reference fields.
This, in turn, means more accurate testing. For more details, check out the [Schema docs](/content-modeling/managing-models#export-and-import-a-model).
## User management updates
We've made some improvements to the user management feature. In particular, the following updates are now available for Agency users:
- 2FA is now required for added security when managing client environments.
- Agencies now have to manage permissions for agency users at agency account level. It’s no longer possible to manage agency users at the organization or environment level.
- Agencies can now create their own custom roles that can be used in all client environments.
- Permission to view the audit logs are now available to all agency accounts.
The updated user management improves control for agency users, provides better oversight and gives more flexibility when managing their client users and permissions.
Check out the [manage users doc](/project-setup/managing-users#agency-accounts) for more details.
## Introducing Metrics for A/B Testing and Personalization
Prepr is a headless CMS with A/B testing and personalization features. Until now, it was only possible to measure A/B testing and personalization in external analytics tools.
Based on feedback from our customers, we've implemented the option to track impressions and conversions to help you determine the results of your optimizations.
Now you can see these results directly in Prepr.
This means you gain insights into the impact of your experiments quickly and easily without needing other analytics tools. You can then use these insights to continuously improve customer satisfaction and conversion rates. Moving from biased design decisions to fact-based design decisions.
It's now possible to set up your front end to send data to Prepr for metrics.
For more details on how to set up your front end to trigger metrics calculations in Prepr, check out the [A/B testing doc](/ab-testing/setting-up-ab-testing)
or the [Personalization doc](/personalization/setting-up-personalization).
When metrics data is available you can view the results from your A/B test or personalization group.
You can then filter the results by a chosen date range (defaulted to the last 90 days)
or by a chosen segment in the case of A/B testing. The following metrics data is available:
- Number of impressions
- Number of conversions
- Conversion rate
- Standard error
- Uplift
- Probability that a particular variant performs better than the control.
- Simple graph view of results

For details on how to intepret the metrics, check out the [Run A/B tests doc](/ab-testing/running-ab-tests) or the [Personalize website doc](/personalization/managing-adaptive-content).
The Metrics feature can be used successfully from GraphQL API Version 2023-04-17. If you have an older GraphQL API version, check out the [GraphQL API upgrade guide](/graphql-api/upgrade-guide#how-to-upgrade-to-a-newer-graphql-api-version).
If you have more suggestions on how we can simplify your experience with Prepr, [we'd love to hear them!](https://docs.google.com/forms/d/e/1FAIpQLSf2kANsW0MRMOsETQVE5Ac6ikVyJqz7Zi7yes86aKaC9oFf5w/viewform?usp=pp_url)
## New Settings for A/B Testing and Personalization
We're happy to announce new settings available for your A/B tests and personalization.
Previously, each A/B test variant was shown to 50% of customers.
It's now possible to modify the percentage of traffic allocated to each variant during an A/B test.
This means you can optimize your experiments for more accurate results. So, it ensures faster decision-making.
Check out how to manage this setting in the [A/B testing guide](/ab-testing/running-ab-tests#manage-the-ab-test).
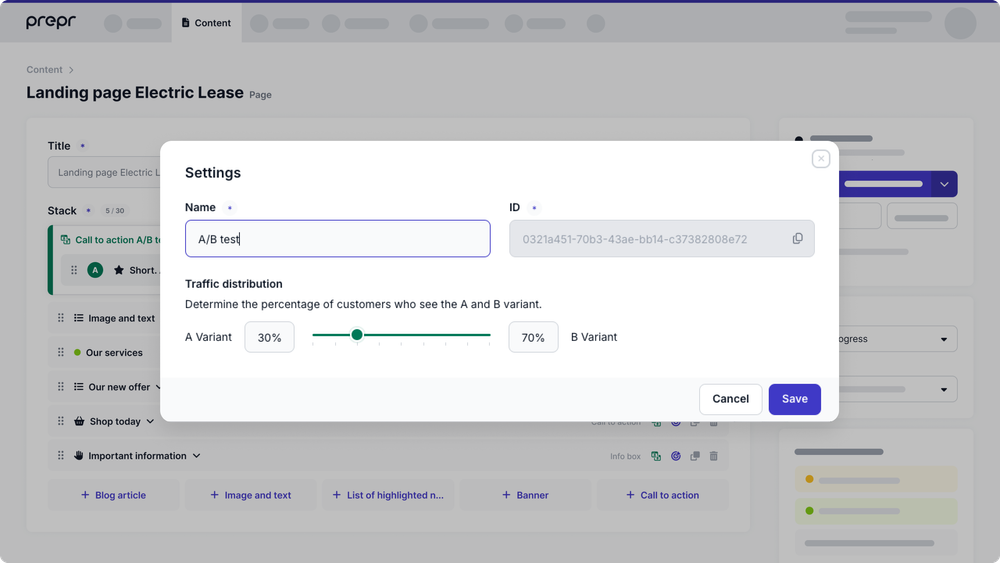
Previously, a query for a content item with personalization only returned the first matched personalized element.
It's now possible to enable the API to return all the matching personalized elements instead.
For example, when there are multiple FAQ items that include the same segment.
This allows you to choose which personalized elements are shown in the front end, meaning more relevant content.
Check out how to manage this setting in the [Personalization guide](/personalization/managing-adaptive-content#manage-the-personalization).
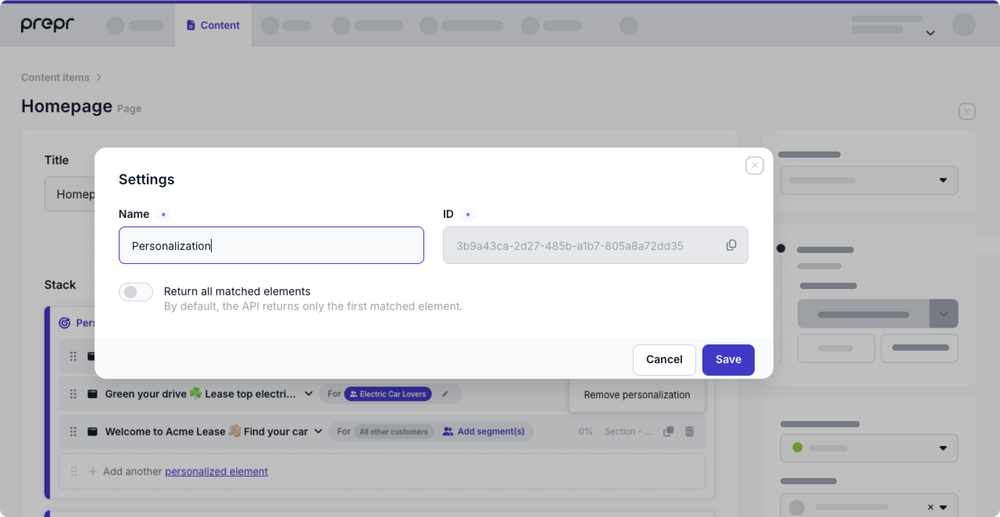
## New SEO field options for components
Previously, you could only set model text fields as SEO titles or meta descriptions.
Now, you can mark text fields in components as SEO titles or meta descriptions, like you can in models.
This means you can manage your SEO attributes consistently across your schema.
In so doing, you improve the visibility and ranking of your content more efficiently, leading to better search engine performance and increased web traffic.
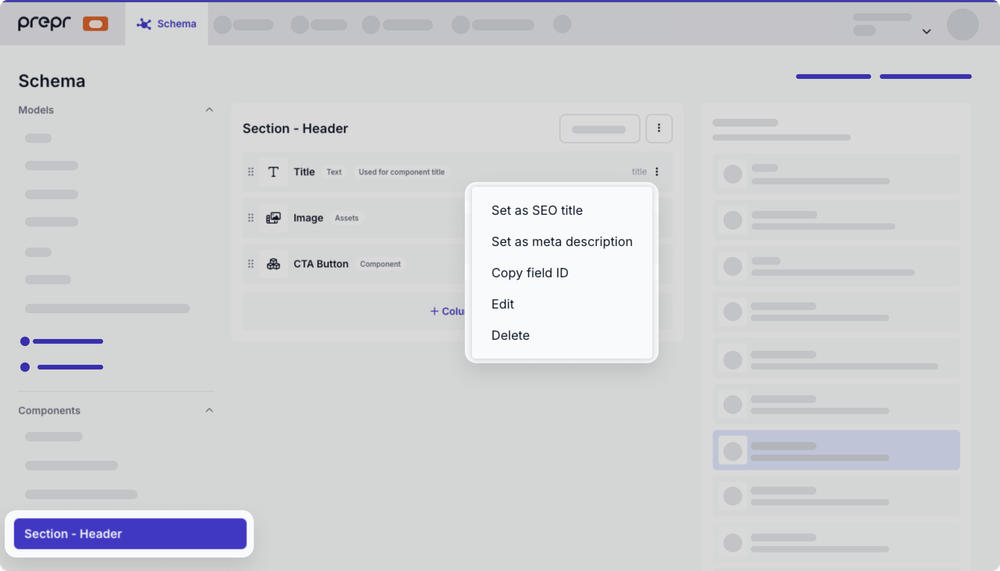
Check out the [Text field doc](/content-modeling/field-types#item-title-and-seo-fields) for more details.
## Disable content item deletion
Based on your feedback, we've added a setting that disables content item deletion for a model. When active, this setting prevents editors accidentally deleting content items.
Now you don’t have to worry about content editors removing content items that store important system information, such as *App configuration* like global meta tags and copyright info.
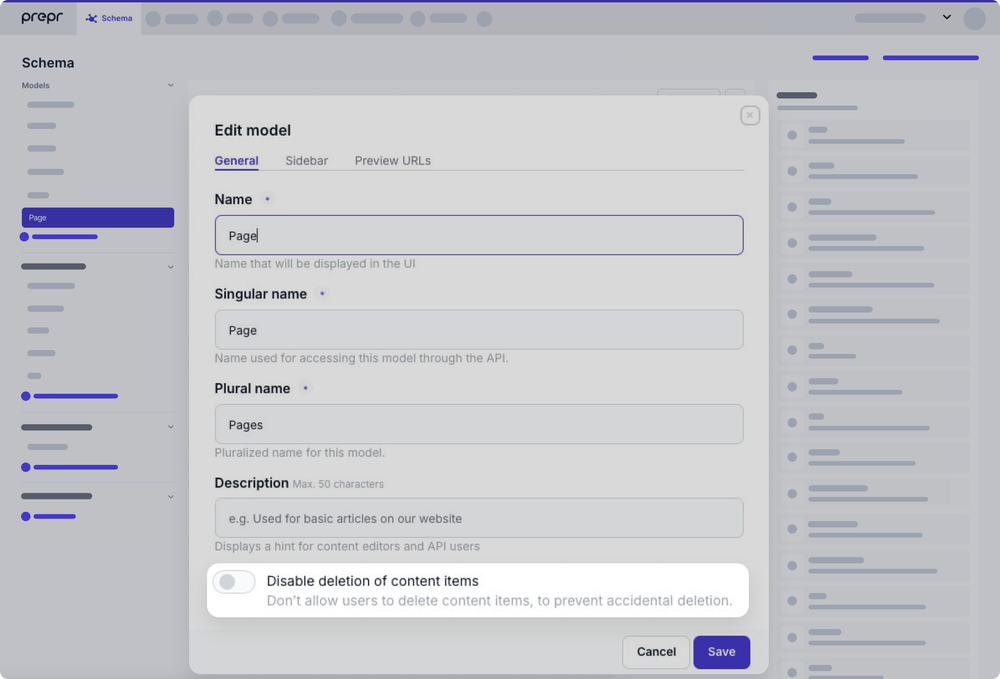
This update makes working with Prepr even smoother. If you have more feedback on how we can simplify your experience with Prepr, [we'd love to hear from you!](https://docs.google.com/forms/d/e/1FAIpQLSf2kANsW0MRMOsETQVE5Ac6ikVyJqz7Zi7yes86aKaC9oFf5w/viewform?usp=sf_link)
## New Billing role
A new default user role, Billing, is now available. This role grants access to the organization's plan and billing information, enabling users to manage payment details, view and handle invoices, and oversee subscription details. Billing users do not have access to other administrative or content-related functions within the environments or organization.
For more information on the new Billing role and its capabilities, please refer to our [updated documentation](/project-setup/managing-roles-and-permissions).
## Improved access token management
As requested, we've made a couple of updates to improve the management of access tokens.
It's usually very useful to open the *API Explorer* directly from a content item to perform GraphQL queries.
By default, this API Explorer connects to the first access token when the environment was created.
Previously, you couldn't change this default access token.
With these new UI updates, you can now switch the default access token for the **Open API Explorer** button.
Also, now you can just hover over each access token to **Edit**, **Delete**, or **Use for API Explorer**.
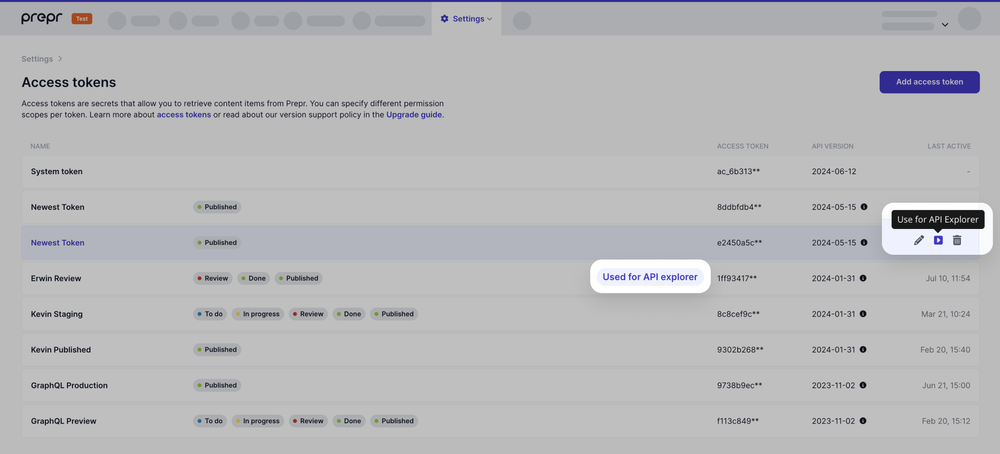
This improvement makes managing access tokens more intuitive and efficient.
Switching access tokens ensures the API Explorer uses the most up-to-date token.
These updates give you more flexibility and control and managing access tokens is now easier and more user-friendly.
## Improving environment stage visibility
Some of our customers manage multiple Prepr environments. In this situation, there are times when users accidentally make updates in the wrong environment.
That is why we've made minor UI updates to make it clearer to users which environment they're currently working in.
We've updated the environment drop-down selector and added a new label at the top of the screen to indicate which non-production environment you're currently working in.
This helps users who frequently swap between staging and production environments and reduces the risk of making updates in the wrong environment.

## Environment-to-environment Content Export
We are very proud to bring you the most requested feature by developers, the *Environment-to-environment Content Export*.
With the *Environment-to-Environment Content Export*, you can easily copy content across different environments.
This streamlined process reduces your dependence on Prepr support, significantly saving time.
By maintaining current content for development and testing, you improve collaboration with marketers and editors for
more accurate testing of realistic scenarios and ensure superior quality assurance, ultimately accelerating your project timelines.
The *Environment-to-environment Content Export* goes hand-in-hand with the *Schema* sync process which should be run first to make sure that content is exported to a valid schema.
Check out the [Schema sync docs](/development/working-with-cicd/syncing-a-schema) for more details.
As a developer, you can select specific content items you want to copy over to another environment.
Trigger the content export with the **Export to** action available in the Content item list page.
You can copy content between any two environments you have access to in the same organization.
Check out the [Export content doc](/development/working-with-cicd/syncing-content) for more details on the process and troubleshooting errors.
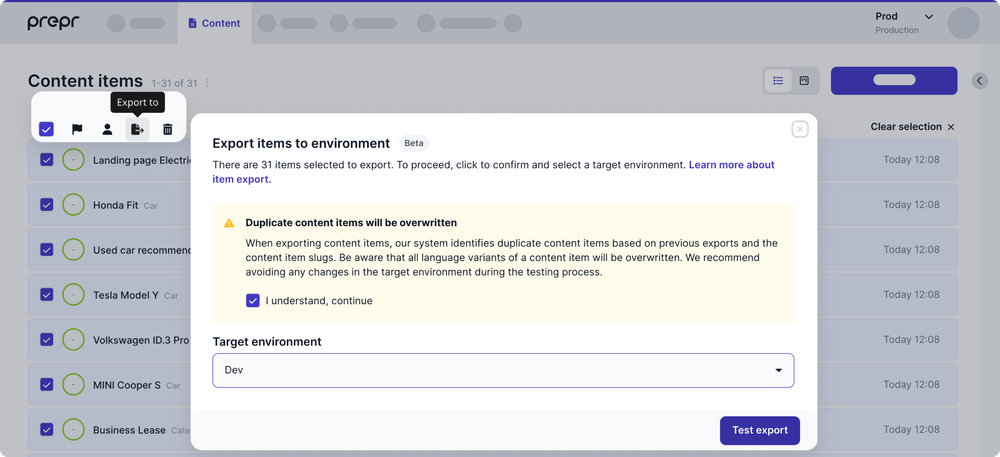
## Introducing sharing of filtered lists with URL
Sometimes, you may want to share a filtered list of content items with a team member.
However, this was previously not possible because the URL did not contain the filter parameters.
We've now added these parameters. This means you can simply copy and share the URL with your team.
This small enhancement makes collaboration easier.
## Introducing collapsible components in the Dynamic Content field
We have great news for those who use components in the Dynamic Content field.
It is now possible to collapse individual or all components in dynamic content fields in your content,
reducing clutter and providing a clearer overview.
Previously a dynamic content field with a lot of components could become chaotic to manage.
Now it's easier for you to manage and focus on the specific content that needs editing,
enhancing your workflow efficiency and making the editing process more intuitive.
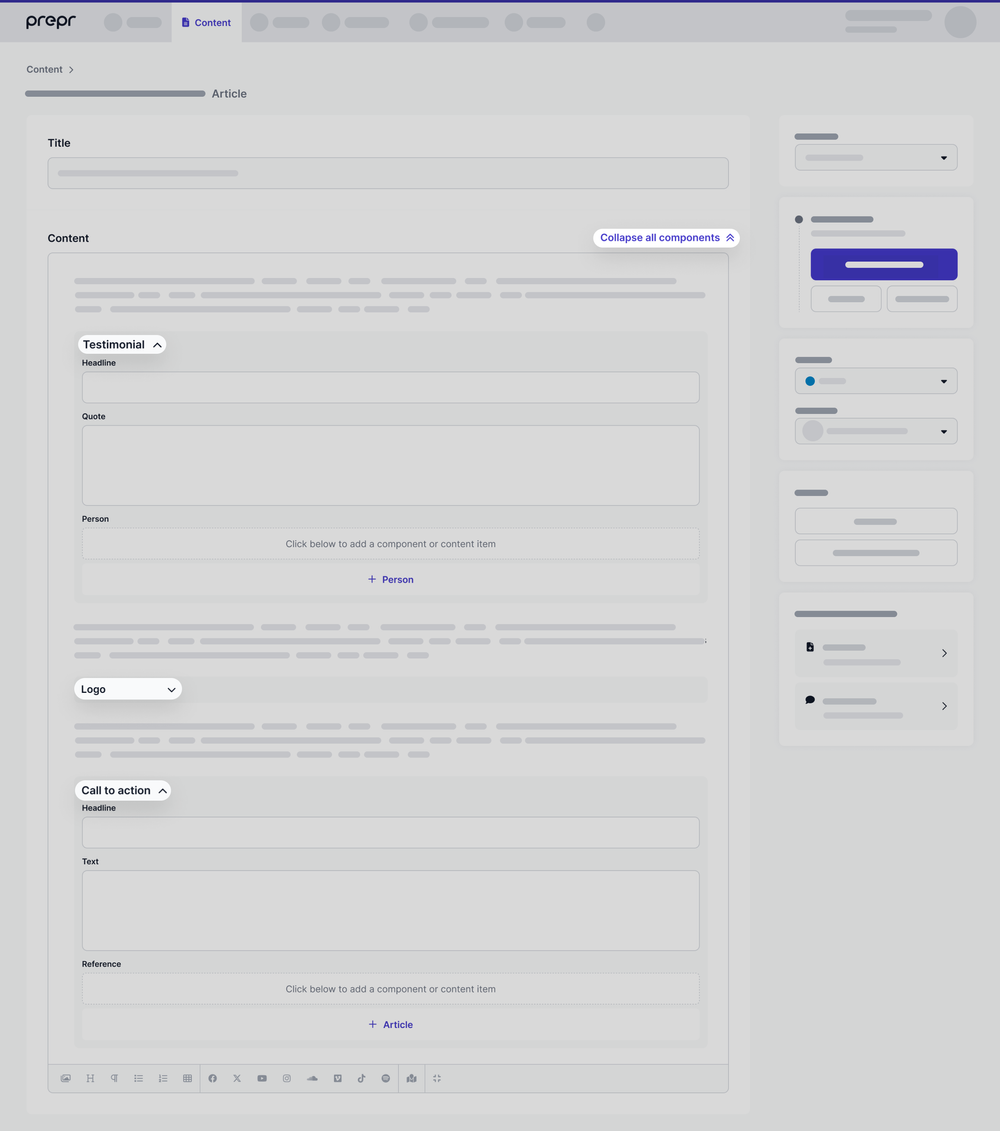
## Added Text Filter Option to Remote Source
Upon customer request, we've added a text (`string`) filter to the list of filter options in a custom remote source.
You can now set this filter in the custom remote source feed and it'll become visible when an editor adds a remote item, allowing them to filter by text. For example, by a category name.
Check out the [custom remote source doc](/content-modeling/creating-a-custom-remote-source#step-1-set-up-your-custom-api-endpoint) for more details on how to set up an endpoint with filters.
## New heading display options in HTML fields
Today, we bring you new heading display options for HTML fields.
These new options allow you to configure display options for the HTML text field headings,
by giving you the flexibility to choose which headings (`H1` to `H6`) are available to editors.
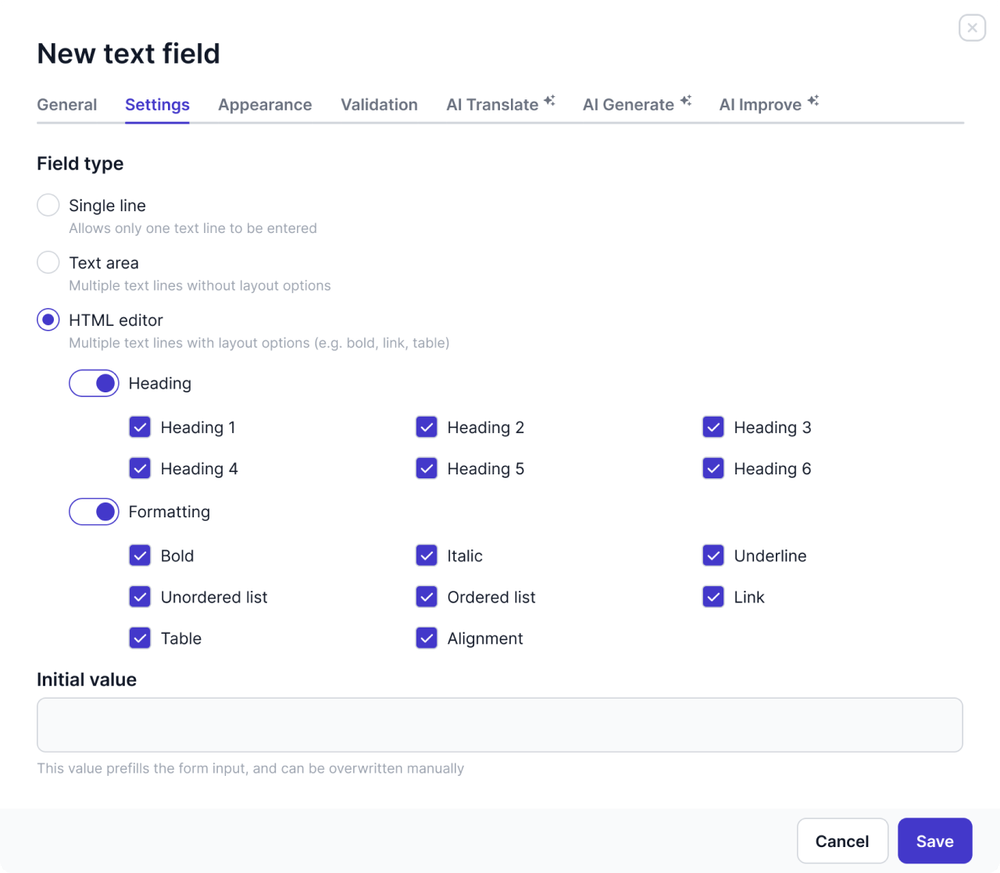
Previously, all heading options were available to editors which sometimes caused styling inconsistencies in the front end.
For example, now you can ensure that key headings, like `H1`, are reserved exclusively for article titles.
By providing this level of control, this setting supports the alignment of content with the website's design and editorial standards,
enabling more effective content management.
Check out the [Text field doc](/content-modeling/field-types#text-field) for more details.
## New component display option
Based on the results from our user research, we've implemented new component options that define how component fields are displayed in a content item or in another component. You can now choose to display component fields grouped or ungrouped in content items.
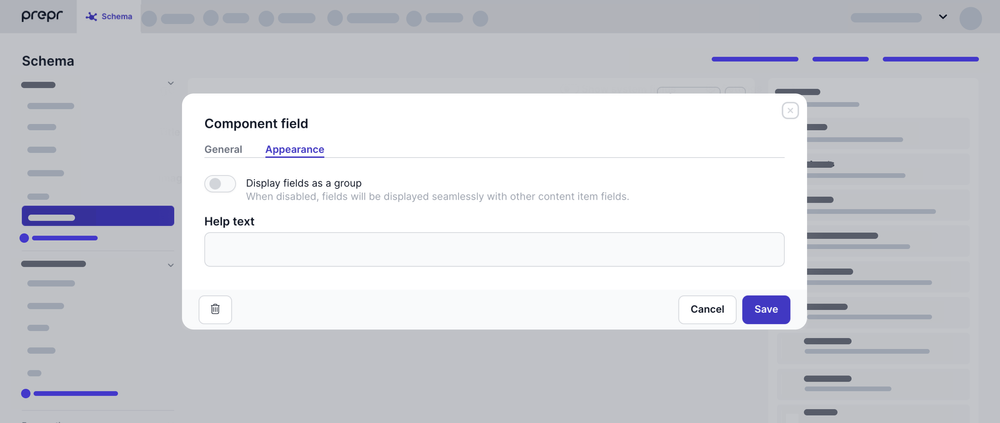
Previously, the display of component fields were always grouped with the name of the component at the top of the group. For some components, it's cleaner and avoids confusion by displaying the fields like any other content item field.
Now you can display component fields seamlessly with other content item fields. For example: An *Image + Caption* component that has an image field and caption field.
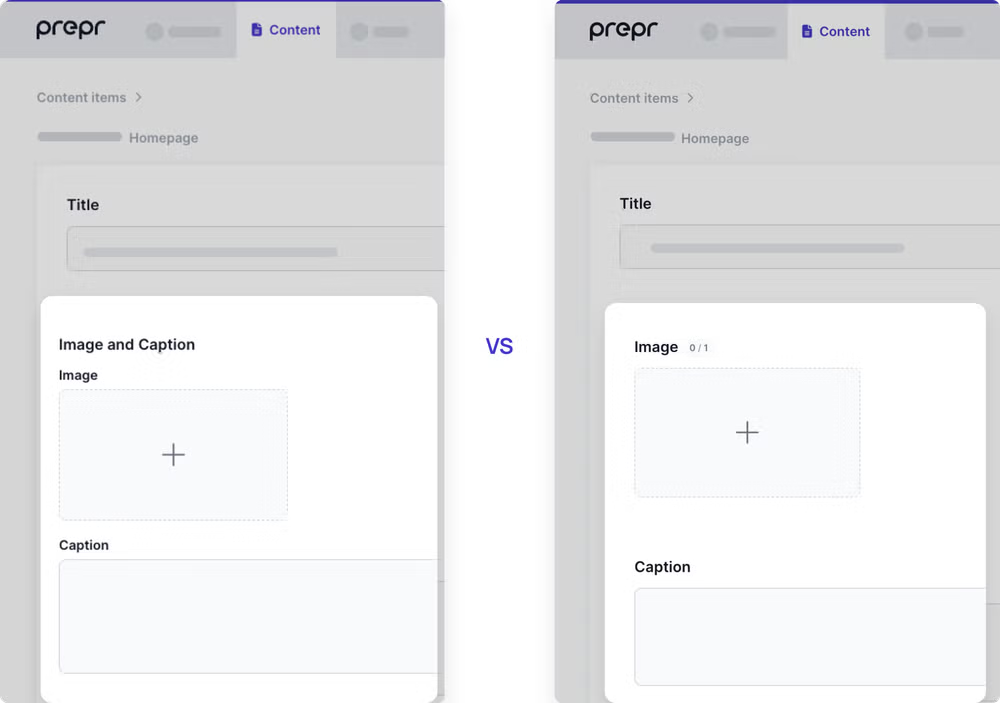
However, an SEO component is a good example of where grouping all SEO-related fields is sensible, to differentiate them from other fields in the content item.
Check out the [Component field doc](/content-modeling/field-types#component-field) for more details.
## Content item search improvement
We've implemented a change to the content item *Search* functionality.
Previously, the content item search scanned through all the text in each content item, by default.
With this change, it now does a narrowed down search on the content item *Title* by default.
This improves the quality of the search results and the performance of the search when you have thousands of content items.
It's still possible to search through the *full-text* of content items by explicitly choosing this option when you click on the search bar.
The same goes for searching on the *Slug* or *ID* fields of the content items.

## Introducing Custom Events
Based on user research and your feedback on segmentation, we've implemented *Custom Events*.
Previously you could only use, capture, or track predefined events in Prepr which limited your options
and didn’t always align with your segmentation needs.
Now you can define custom events so you're completely free to set up and track the events you need.
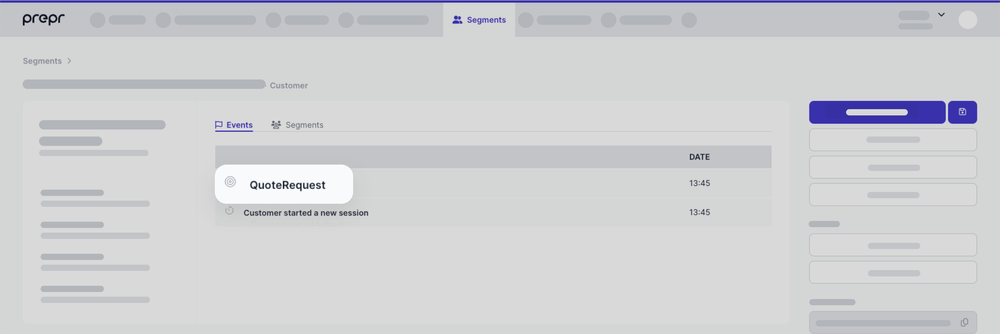
We've also streamlined the predefined events to the list below.
- The `View` event is automatically sent to Prepr when a page load is detected by the Prepr tracking pixel.
- The `Click` event is available for an upcoming feature to create metrics for A/B testing and personalization.
- The `Like`, `Bookmark` and `Subscribe` events have built-in constraints. These events can only be recorded once per customer per content item.
- The `SignUp` event is the only event not linked to a specific content item. This event prevents the customer from being automatically deleted after 90 days of inactivity.
We trust that the custom events and predefined events cover all your needs to easily track visitors.
For details on how to track and send events to Prepr, check out the [Events doc](/data-collection/recording-events#recording-custom-events).
## New GraphQL API version 2024-06-12 is available
The GraphQL API has been updated for custom events and in preparation for upcoming features:
- A new field `variant_key` to allow you to track impressions and clicks for Personalized and A/B tested components.
This key supports the upcoming feature to provide metrics for A/B testing and personalization.
- A new system field `_event` has been added to the schema. This field along with some other minor changes to the API support *Custom Events*.
The new release also includes the following changes:
- `ENUM` types can now be set to legacy mode and will be returned as a `STRING` (for existing Prepr environments).
- Improved errors for incorrect requested locales.
Check out the [GraphQL API upgrade guide](https://docs.prepr.io/graphql-api/upgrade-guide#version-2024-06-12) for more details.
## Content item list improvements
Based on findings from our user research, we've implemented some improvements to the *Content items* list page that significantly enhance your experience with Prepr. Overall, we've updated the UI design of the *Content items* list page to make it more intuitive and less cluttered for content editors.
As part of these UI updates, you'll notice that the checkboxes in the first column are visible when you hover over a content item. Click the checkbox to select content items to perform bulk actions like **Delete** or **Assign to**. This makes it easier for editors who need to perform actions on multiple items.
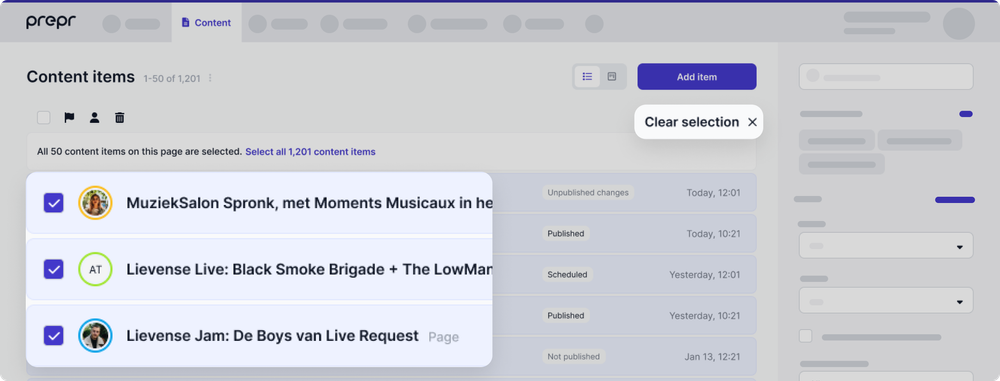
When the editor clears the selection with the new **Clear selection** button, the column names will become visible again. In this view you can see the intuitive sorting in the *Content item Title* and the *Modified date* column headers.
Simply click the name of the column header or the arrows to toggle between ascending and descending order.
Click the icon to choose other sorting options for *Publication date*, *Scheduled date* and the *Created on* date.
You will also notice that we've made the sidebar collapsible to hide filters and avoid confusion. This means the editor can now focus on their core tasks, in other words, editing content items.
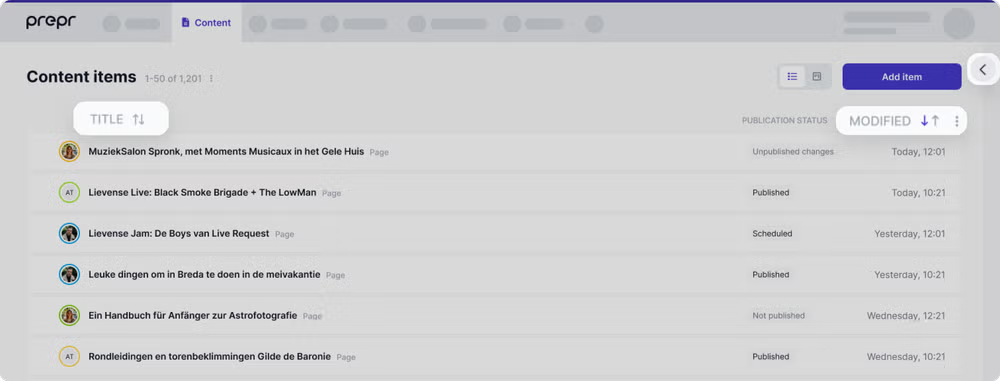
Last, but not least, we've made the hover interactive for actions per content item when you need them. Instead of clicking, a simple hover over the content item makes the actions you need available, like the **Edit** or **Delete**.
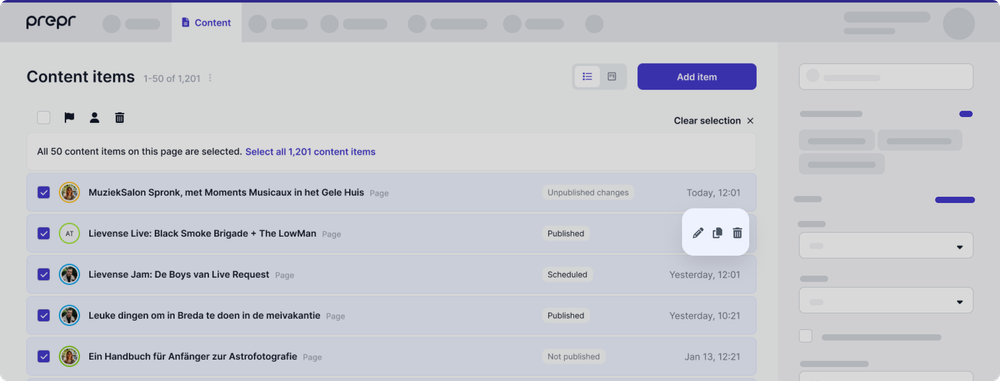
While the actions and sorting capabilities have always been available, the new UI changes make the editing experience a lot more intuitive and user friendly. Check out the [Manage content docs](/content-management/managing-content/managing-content-items) for more details.
If you have more suggestions on how we can simplify your experience with Prepr, we'd love to hear them!
## Content item workflow improvements
Based on user research and your feedback, we've implemented some small improvements to content items that significantly enhance your experience with Prepr.
The most obvious change is the introduction of additional publishing options. Instead of just **Publish and close**, you can now select **Publish and stay** or **Publish and add new**. This simplifies the process of publishing your work, then continuing with the same content item or immediately starting a new one.
We've also added a convenient button at the top of a content item. This lets you cancel editing without having to scroll down to find the cancel button.
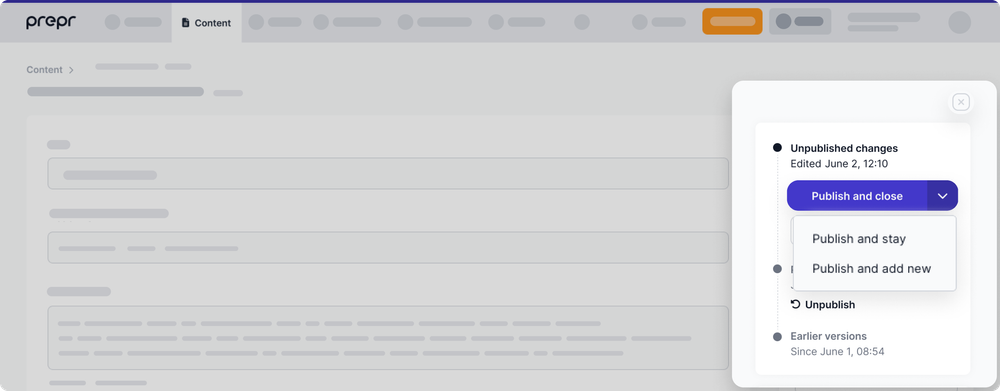
Another improvement is the clear option to remove a schedule. While this was possible before, it wasn't very obvious. We've now added a link that allows you to easily remove the schedule.
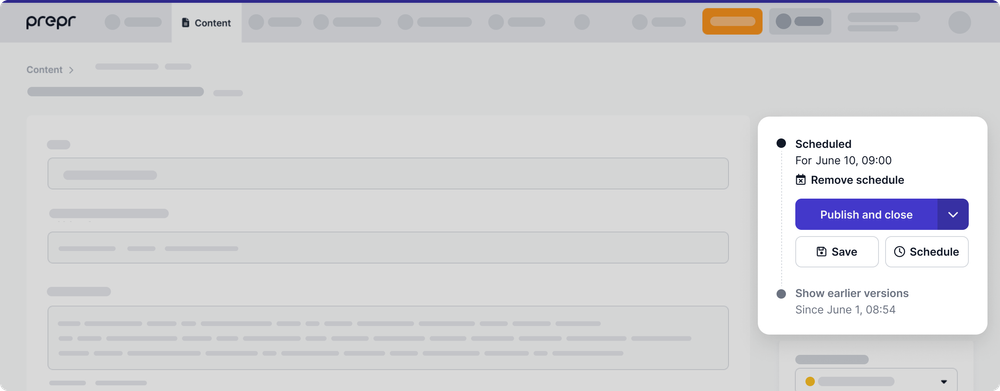
Finally, you no longer need to publish parent content items when a child item is changed. Previously, changing a linked item required you to re-publish the parent item, even if it wasn't altered. This led to unnecessary extra clicks. Now, you only need to publish the changed item and can immediately continue with other tasks.
These updates have made working with Prepr even easier. If you have more suggestions on how we can simplify your experience with Prepr, we'd love to hear them!
Check out the [Manage content docs](/content-management/managing-content/managing-content-items) for more details.
## Define your own fields for *Assets*
We are very excited to bring you the long-awaited feature to add fields to Assets. It is now possible to define your own fields to keep track of asset-specific info like *Copyright* or *Source* in addition to the core asset fields for the title, description and the author.
Now, it's also possible to enable localization for your assets. This means your editors can enter information about assets in the locale that is relevant for them. This feature gives you the flexibility to create your own Asset content structure with localization and makes it much easier for the front end to retrieve additional information about assets.
This feature introduces a new **Asset** model available to any user who has access to the Prepr *Schema* or *Shared schema*.
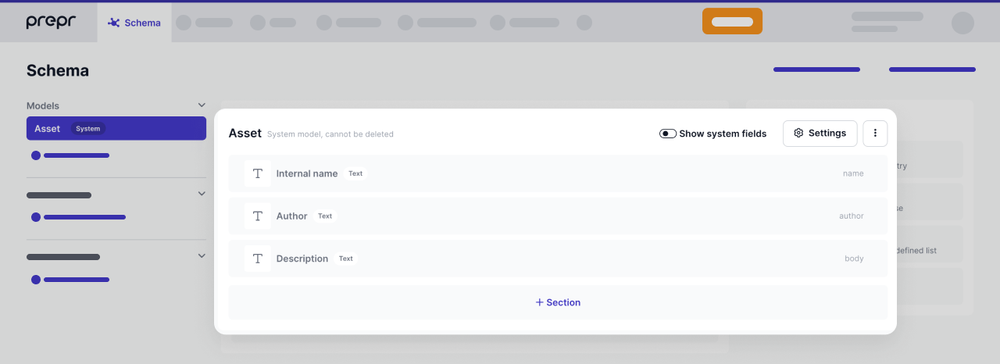
When you enable localization on the **Asset** model, the fields in each asset will be available for all [available locales](/content-management/localizing-content).
Check out the [Asset model doc](/content-modeling/defining-the-asset-model) for more details.
## Organize your models and components with Schema folders
It's now possible to organize your models and components into folders. When you have dozens of models or components, these folders make it easier to find related models or related components instead of scanning a long alphabetical list. For example, when you have multiple components which are used as section of a page.
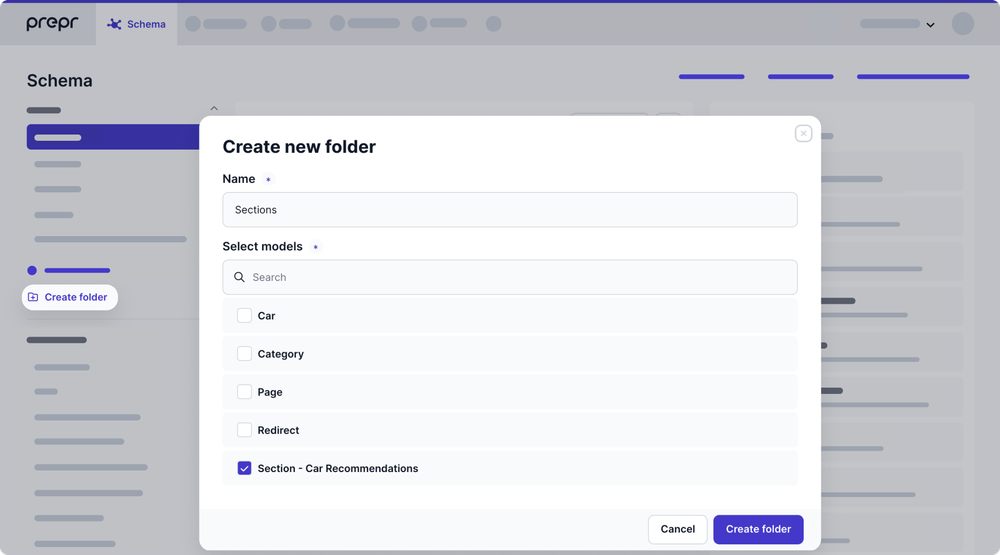
## Speed up text editing with new AI Generate and AI Optimize features
We are very pleased to bring you two new features, *AI Generate* and *AI Optimize*.
The *AI Generate* feature generates new text on request, for example, when a content editor wants to create a summary based on the main body text of an article. *AI Optimize* helps content editors to improve existing text, for example, to make their text longer, shorter or simpler. Both features make it quicker and easier for content editors to create more engaging text in their content.
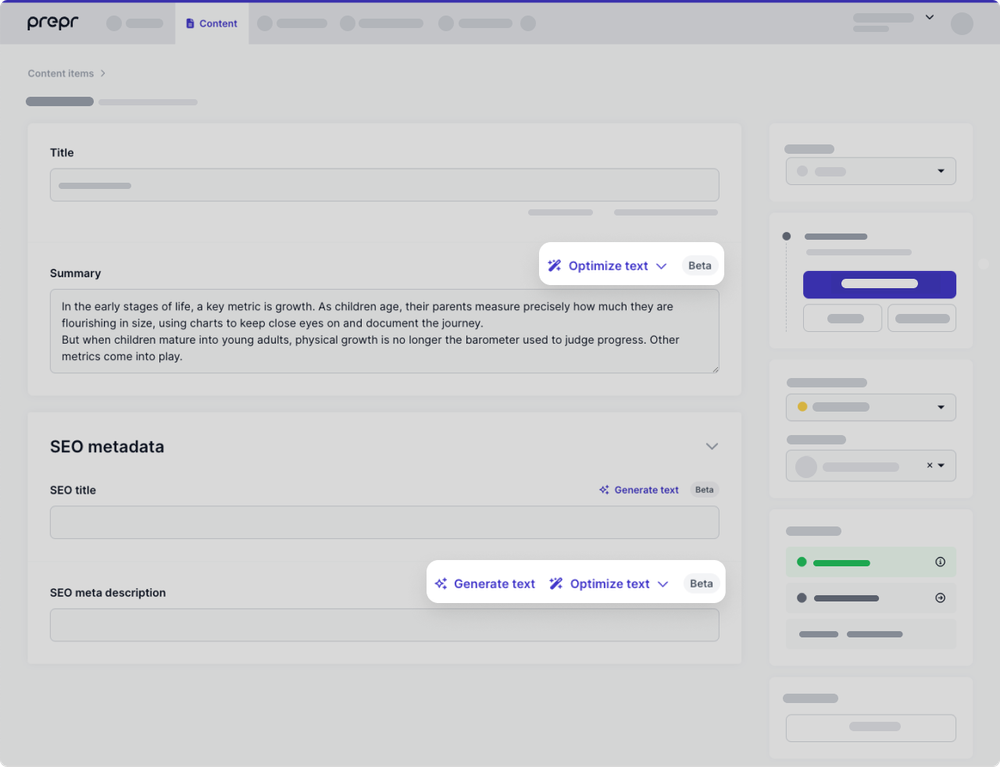
Go to the **Schema** tab to set up the AI parameters for these features in the relevant *Text* fields. Check out the [*Text field* settings](/content-modeling/field-types#text-field) for more details.
## Use Frontify brand assets in Prepr content
As requested, we've added a DAM integration to Prepr CMS to allow content editors to access Frontify brand assets in Prepr content. This integration gives you the benefit of ensuring that your assets are brand-compliant and allows you to maintain a single source for these assets.
With this built-in integration, it's easy to set up a connection between Prepr CMS and your Frontify account. When your request for activation has been approved, you can activate the *Frontify* app in Prepr.
Once done, content editors can include Frontify assets in their content items.

For detailed instructions on integrating Frontify, please refer to the [Frontify integration guide](/integrations/frontify).
## New locales added for `fy-NL` and `es-MX`
As requested, we've added support for the Frysk `fy-NL` and Mexican Spanish `es-MX` locales. Locales can be set up in the Organization **Settings** page. This feature is available to users who have the `Owner` role or a role with the *General* `Locales` setting enabled.
For more details, check out the [localization doc](/content-management/localizing-content).
## Create cleaner schemas with Enumerations
We are excited to bring you the long-awaited *Enumerations* feature. We've expanded the *Schema* so you can define your own enumerations and use them in any model or component with the *List* field. For example, when you want to define days of the week.
Until now, you had to define list values every time you added a *List* field to a model or component. Now, you only need to create an enumeration once with a set list of values and reuse this list in multiple models or components. This means that you define a cleaner schema without duplicate list definitions.
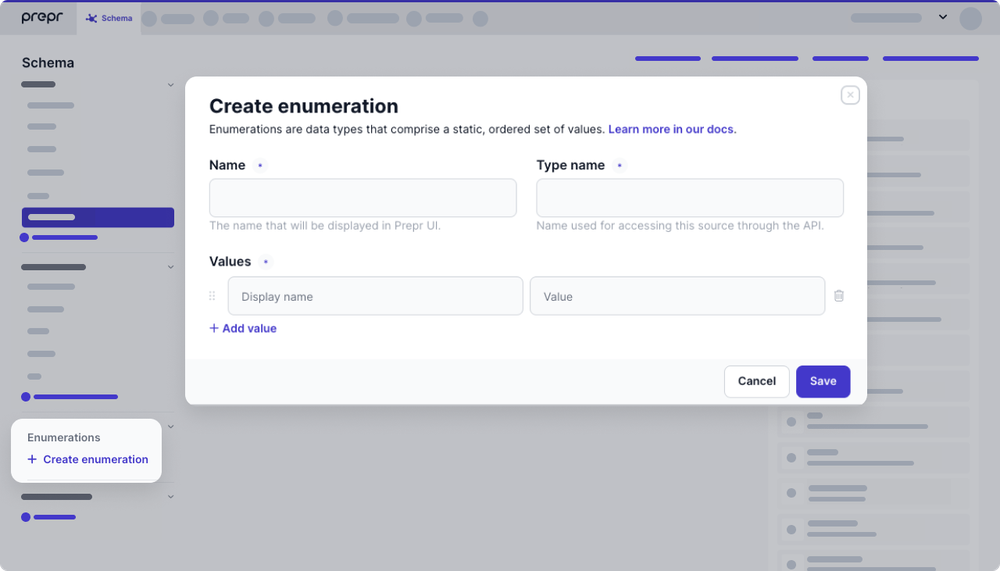
Check out the [enumerations doc](/content-modeling/managing-enumerations) for more details.
The enumerations feature is available as from GraphQL API Version 2024-03-26. To activate and use enumerations, check out the [GraphQL API upgrade guide](/graphql-api/upgrade-guide).
## Sync your schemas with GitHub for a seamless CI/CD workflow
We are happy to bring you a new feature, the **GitHub sync**. Until now you could only use the **Sync schema** feature to sync one schema to another, but it's not always ideal.
The **GitHub sync** allows you to use standard GitHub functionality to sync schemas between environments. As a developer, this gives you more control over the sync process to manage schema updates exactly the way you need to.
- You can sync both ways with the GitHub pull and push requests.
- This sync not only adds items in the schema, but also removes unneeded items.
You benefit from *version control* in GitHub, namely:
- You can review the schema change history.
- And you can revert changes.
Check out the [Sync schemas doc](/development/working-with-cicd/syncing-a-schema#sync-schema-with-github) for more details on how to Sync your schemas with GitHub.
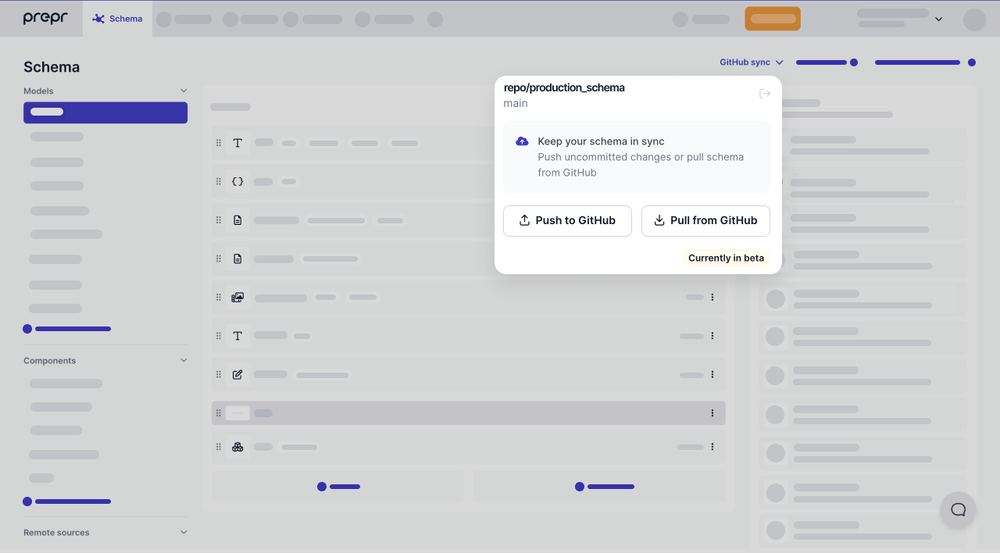
## Keep track of user activities with the new Audit log
With the new *Audit log* feature, it is now possible to keep track of user activities. The *Audit log* helps developers to troubleshoot errors or inconsistencies with the schema or content. The audit log is available at the organization level and you can filter logged activities by the **Date**, **Environment**, **User** and **Resource type**.
The audit log shows you *Create*, *Update* and *Delete* actions on content items, models, components, remote sources, enumerations, webhooks, apps, users, assets, roles and segments. You can also track when a user publishes a content item and when a user executes a schema sync or GitHub push/pull sync.
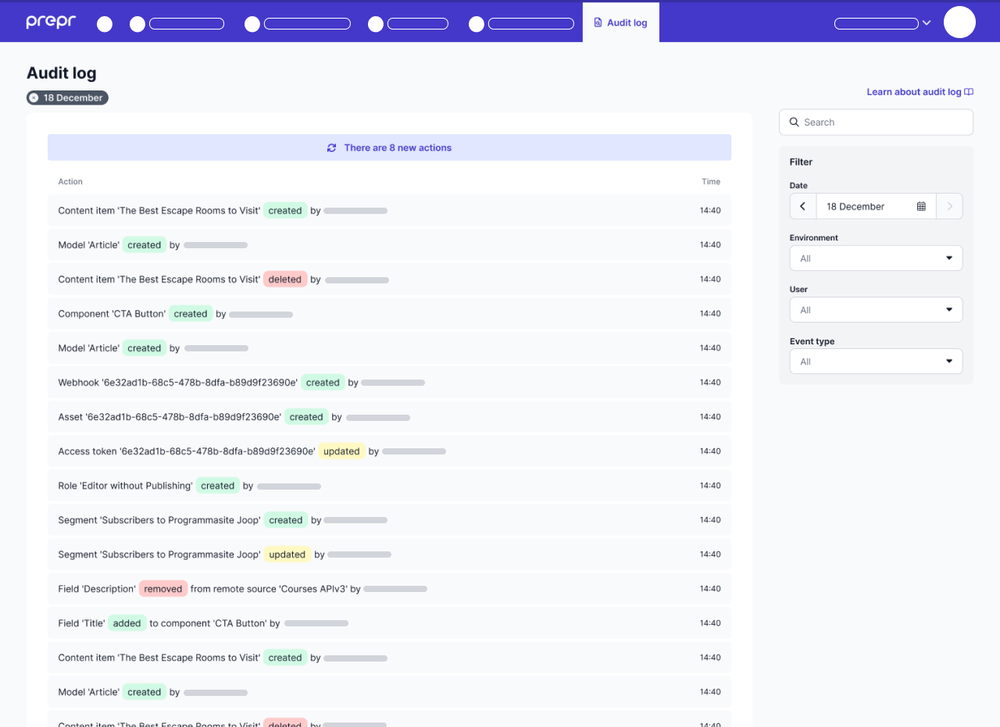
Check out the [Audit log doc](/project-setup/audit-log) for more details.
## New Stage option available to create a Testing environment
In our efforts to support the CI/CD process of your development team, you can now choose a **Testing** stage option when creating a new environment. This will help you adhere to best practices when managing your *Development*, *Testing*, *Acceptance* and *Production* Prepr environments. Check out [DTAP configuration options](/project-setup/setting-up-environments#set-up-a-dtap-configuration) for more details.
## Set the GraphQL API version in code
When we make changes to the GraphQL API that aren't compatible with older versions, we release a new one with a specific date. By default, the API uses the default version associated with your access token. However, in response to customer feedback, you can now override this version using the 'Prepr-Version' header. For more information, refer to our [Versioning & Upgrade Guide](/graphql-api/upgrade-guide).
## More flexibility with new remote source features
We bring you new remote source features in our ongoing endeavor to advance our existing functionality. The new features listed below give developers more control to manage remote sources more flexibly.
- **Filters**
Now you can enable filters for content editors to find remote items easier like in the example below.
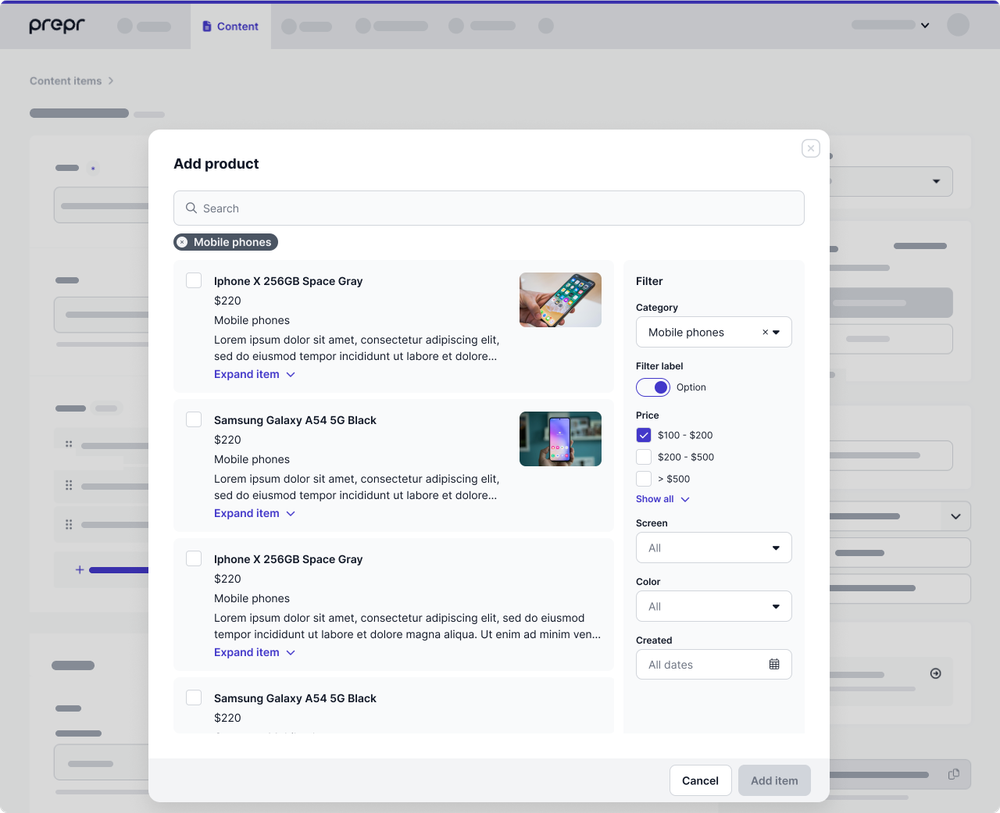
Check out [the custom remote source doc](/content-modeling/creating-a-custom-remote-source#step-1-set-up-your-custom-api-endpoint) for more details on how to set up an endpoint with filters.
- **New remote source actions**
Go to the remote source and click the icon to see the new remote source actions.
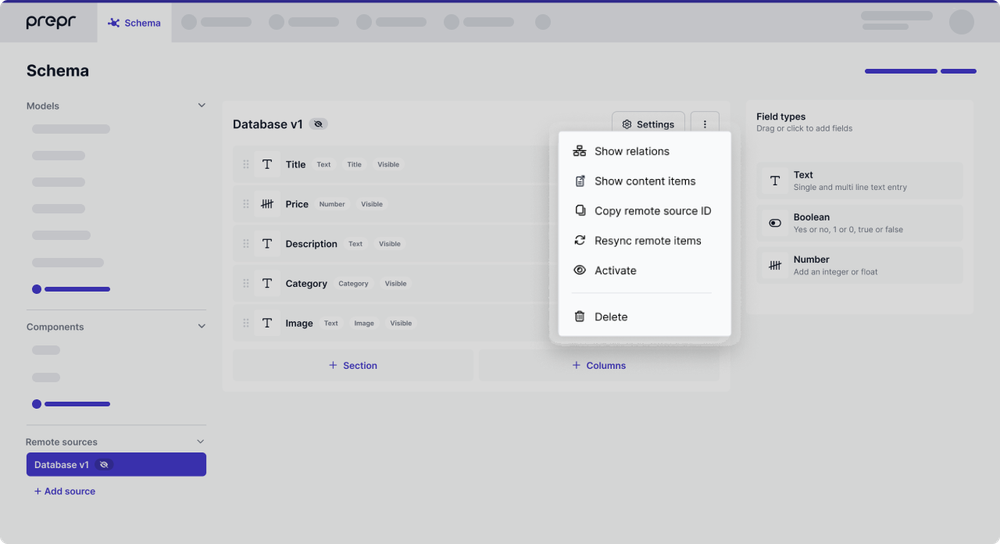
- **Resync remote items**
As a developer, you can now manually resync the items from a remote source. Prepr automatically resyncs remote source items when the `changed_on` date has been modified, but there are times when you need to resync the items on demand. This way, Prepr CMS is updated and the front end is up to date with current remote items.
- **Activate**
It is now possible to activate the remote source. This is useful when the API endpoint URL is no longer valid or the external source system is updated and no longer matches the endpoint definition. To resolve errors in these situations, the remote source will be deactivated until the issues are fixed. Once fixed, click **Activate** to reactivate the remote source.
- **New remote source field settings**
- **Set as Title** and **Set as Image**
It is now possible to specify the `Title` and the `Image` when defining the fields in your remote source. Prepr uses these settings to display the Title and image for content editors to identify items from the remote source more easily.
- **Make visible when searching for remote content**
You can also choose which of the fields in the endpoint should be made `Visible` to the content editor. In the field settings, open the **Appearance** tab to enable or disable this setting.
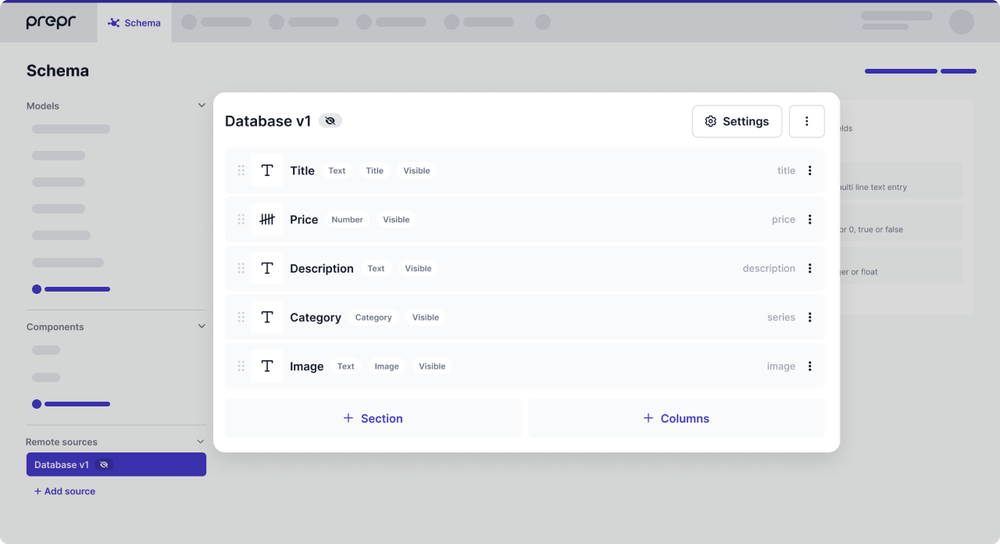
## Add Stack to the Dynamic Content field
As you've requested, we released a new feature that allows you to add a *Stack* to the *Dynamic content* field. This new feature is an extension to the recently released [*Stack in component*](#create-better-content-structures-with-stack-in-a-component). It enables editors to create structured lists in articles that are created with the Dynamic Content field. For example, to add a list of recipes to an article about cooking equipment.
Simply enable components in the list of content types in the *Dynamic content* field and choose the components that contain a *Stack* field.
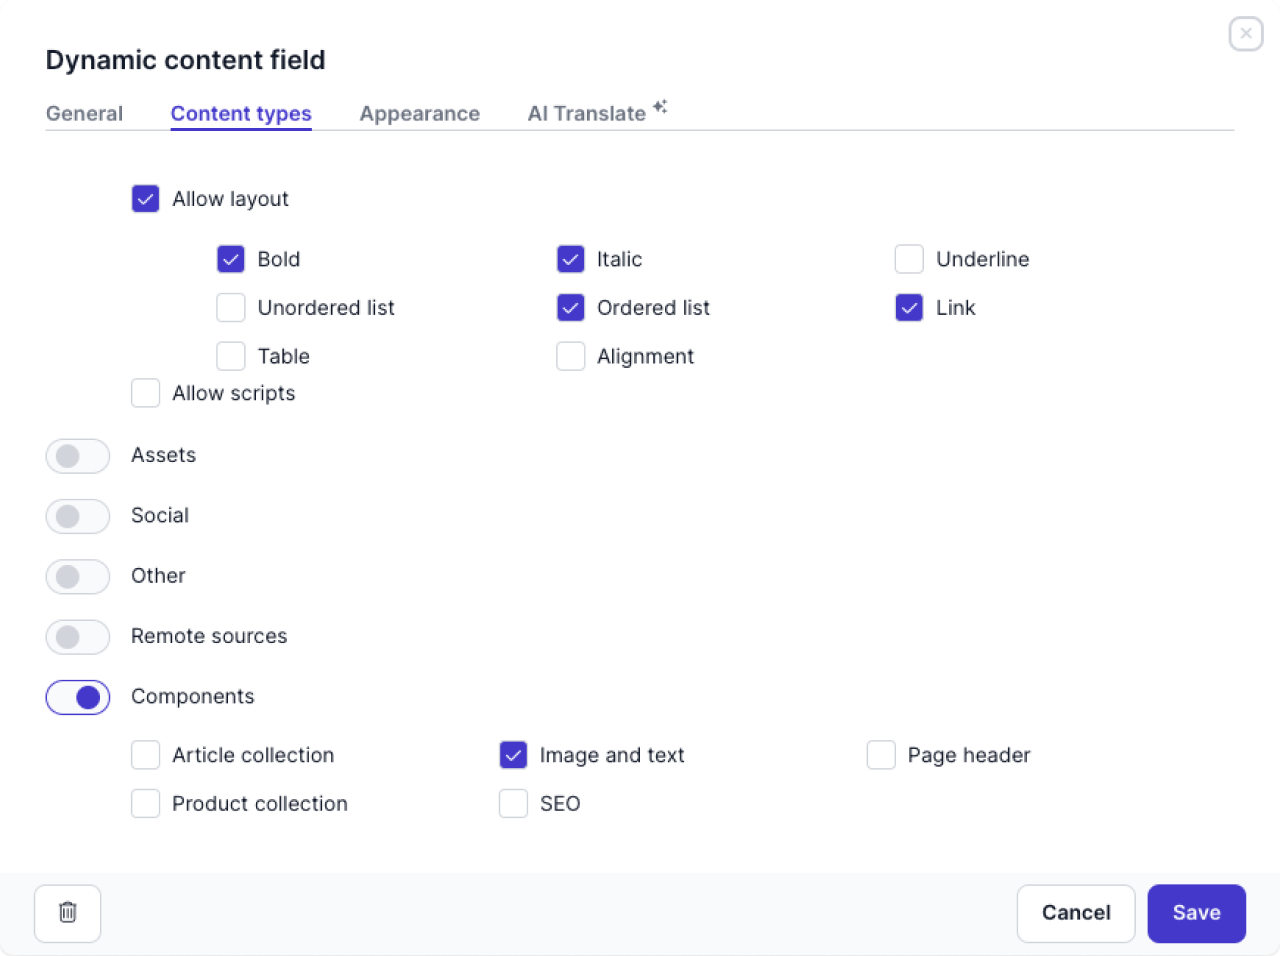
By doing this, you allow the content editor to add a component with a *Stack* field in their dynamic content. For example, they can easily add things like a list of articles to their rich text like in the image below.
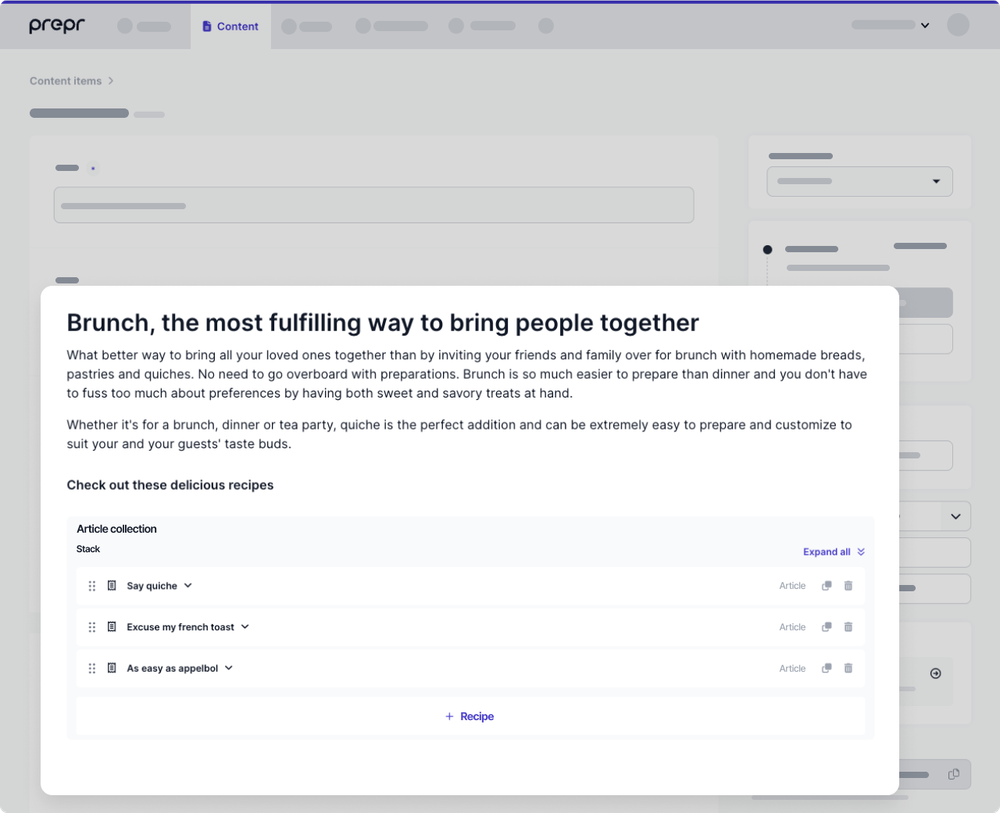
## Make the most out of components by including a date field
We are pleased to announce that you can now include a date field in components. Enjoy this flexibility when modeling your content, for example, in an *Event* component where the event date is an integral part of this type of content.
The date field in a component works the same way it does in a model, with the following options:
- Single or multiple Date values
- Single or multiple Date range values
- Single or multiple Date time values
- Single or multiple Date time range values
- Business hours
Check out the [Date field](/content-modeling/field-types#date-and-time-field) for details on how to set up this field.
For developers who need to make API requests, the date field in a component is available as of GraphQL version 2024-01-31.
## More accessible content with 27 new Arabic locales
As requested, we've expanded the range of locales with Arabic languages. We've included 27 new countries in the list of locales, such as Egypt `ar-EG` and Morocco `ar-MA`. If you have international partnerships and customers, make your content more accessible and marketable by publishing content in their local language.
Check out our [localization docs](/content-management/localizing-content) to learn how to work with localization.
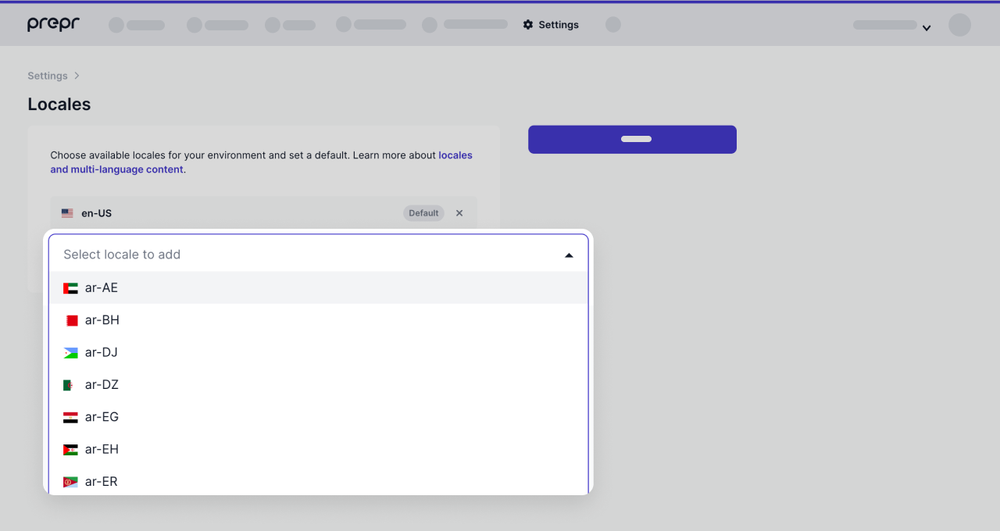
If you need a specific locale that is not listed, please [contact our Support Team](https://prepr.io/support), and we will add it upon request.
## Create better content structures with Stack in a component
The long awaited *Stack in a component* feature has been released. As a developer, you can now add a Stack field to components. This means that you can create more logical, flexible, and scalable content structures for your component-based pages.
A typical example is when you need a row of buttons in a Call to action. To do this, create a *Button row* component and add a stack field to it to hold the buttons. You can then add the button row to any component you need like a *Call to action*.
[Watch the video on how to use Stack in components.](https://youtu.be/SOdw6GM0wRA)

## Enjoy a renewed Dynamic Content Editor and Content Item detail page
We are happy to enter the new year with this release which promises to deliver a multitude of benefits to you as a content editor:
We implemented a new front-end framework in preparation for an upcoming release of the Live preview feature. You can now enjoy faster page loads with this update and a consistent layout when editing a content item with reference or stack fields. See below for an example of the renewed look and feel of the Personalization and A/B testing blocks in a **stack** field:
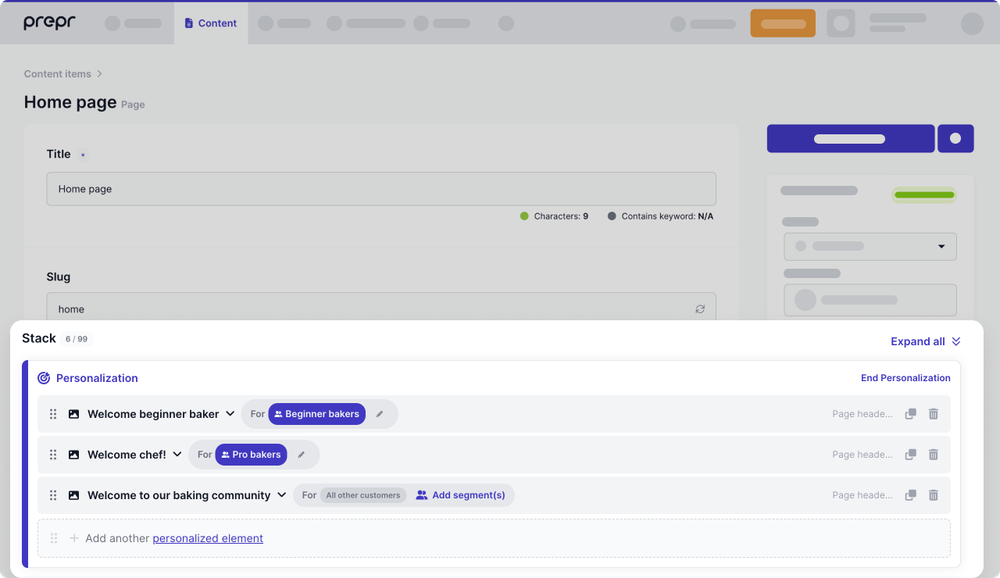
This release also includes some reworked code resulting in faster loads and an improvement to the word counter and SEO information. The deprecated **Preview** button has also been removed, but check out [the content item preview doc](/project-setup/setting-up-previews-and-visual-editing) for details on how to set up your own preview URLs.
A new *Dynamic Content Editor* has been implemented to give you a better user experience when editing lots of content at once. It's based on an established API that resolves some ongoing issues. You will notice clearer validations in the dynamic content fields, an improvement to the copy-paste function within content items and from external sources to content items, and the ability to use the Undo and Redo options.

## Make the most out of your components with the location field
We are pleased to announce that you can now include the location field in components. Enjoy this flexibility when modeling your content, for example, in an *Event* component where the event location is essential for this type of content.
The location field in a component works the same way it does in a model.
For developers who need to make API requests, the location field in a component is available as of [*GraphQL version 2023-11-02*](/graphql-api/upgrade-guide#version-2023-11-02).
## Gain more flexibility with new read/write options on your fields
With the release of new read/write options, you have more control over how fields are used by content editors and developers. As requested, you can now set the following new options on a field:
- Default - The field can be edited in the UI.
- Read only - The field can’t be edited in the UI, but it can be edited through the API.
- Hidden for non developers - The field is only visible for users with developer permissions.
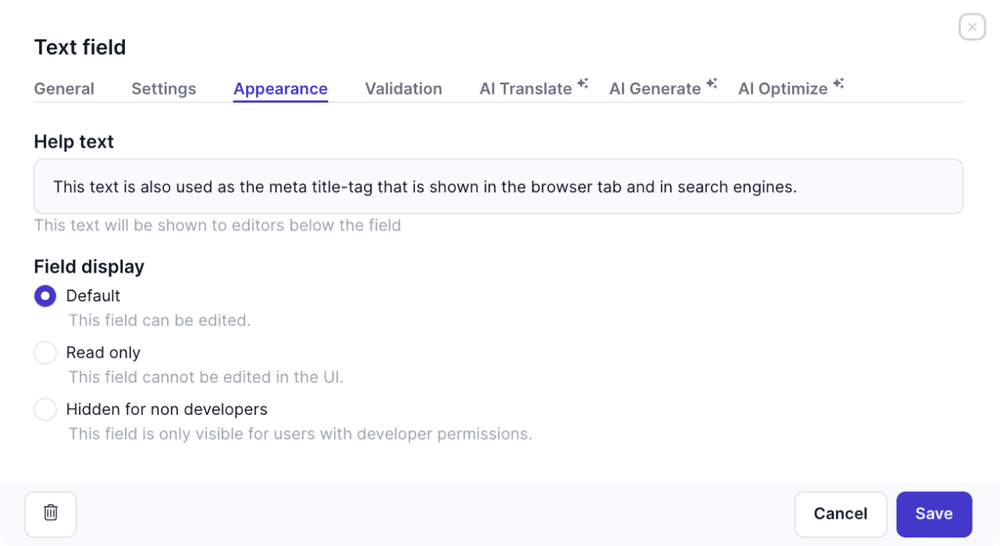
## New Stack filter on content items
We are happy to bring you a new Stack field filter on content items in the GraphQL API and the Prepr UI. This feature makes it even easier to filter your content items. If you have content items with Stack fields that reference other content items, it is now possible to filter by these referenced content items. To add this filter in an API request, check out more details in [the reference docs](/graphql-api/fetching-filtering-collections#simple-reference--stack).
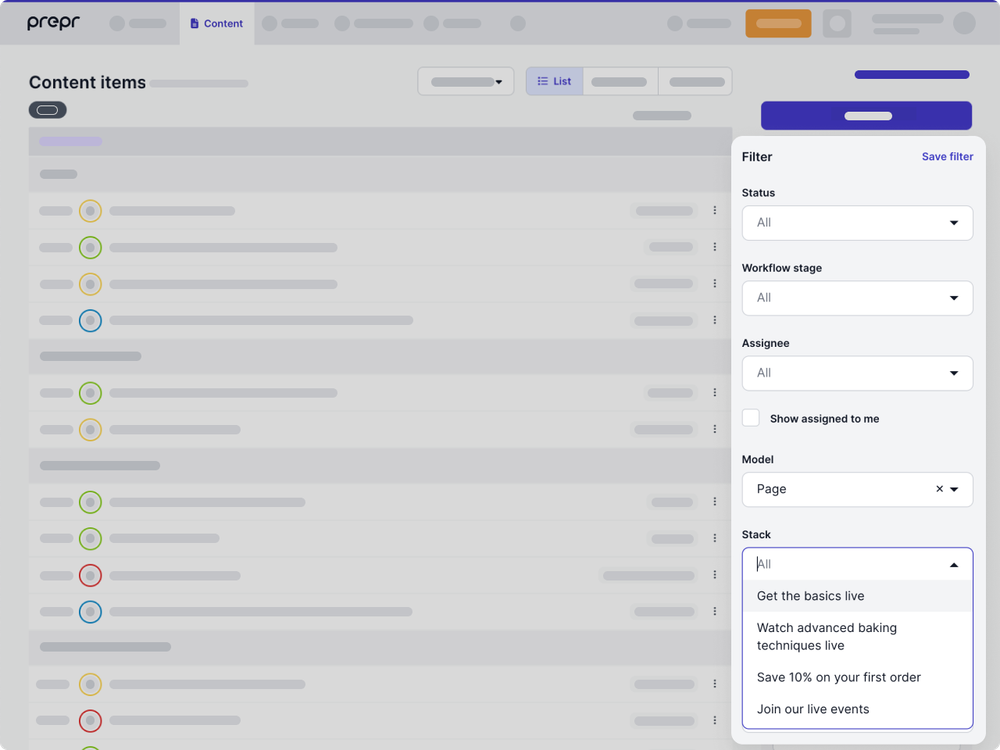
## Prepr's UI is now up to eight times faster
Prepr continually strives to enhance the reliability and performance of its applications. This is our primary focus, and we are always seeking ways to improve user and developer experiences.
A recent update to our database queries has significantly improved the speed of our APIs and the UI. As a result, working with Prepr has become twice as fast since this past weekend. If you use the Mutation API, GraphQL API, and the Prepr UI in a development chain, you could experience time savings of up to eight times.
If you have any feedback on the speed improvements, feel free to respond to feedback@prepr.io.
Source: https://docs.prepr.io/stay-updated/changelog2024
---
# Changelog 2023
Find the beautiful features and important updates that were added to Prepr in 2023. This changelog gives you an insight into the most eye-catching releases during this period.
[Latest](/changelog) | [2025](/stay-updated/changelog2025) | [2024](/stay-updated/changelog2024) | **2023**
## Ensure content integrity with our new unique field validation
*November 21st, 2023*
As you've requested, we've added a validation to check for unique field values in content items. This validation is available for [*Single line Text*](/content-modeling/field-types#text-field) and [*Number*](/content-modeling/field-types#number-field) fields. Not only does this prevent content editors from entering duplicate values, but it also means you don't need this additional check in your code when updating or inserting content items through the [Mutation API](/mutation-api/content-items-create-update-and-destroy).
To activate this validation, simply enable the **This field must be unique** toggle under the *Validation* tab for the chosen field. When done, an error will be triggered when a content editor or an API request tries to save a content item with a field value that already exists in the same field in another content item in the environment.
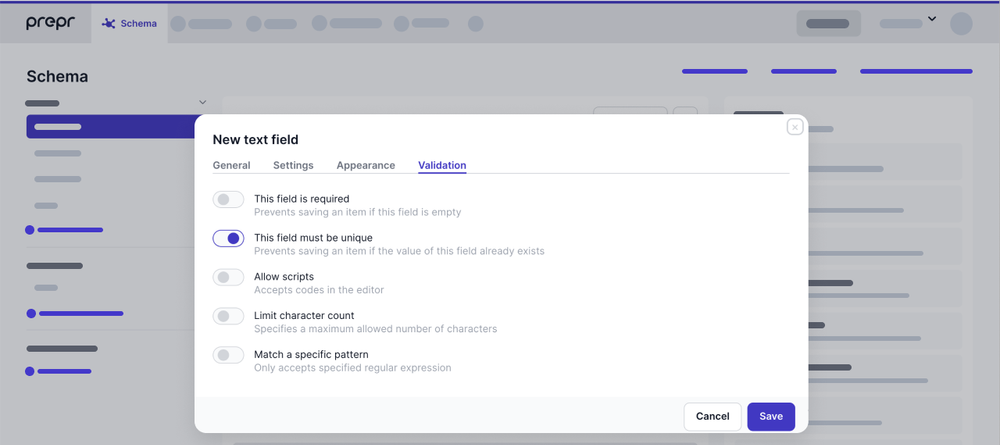
***
## Enable Personalization and A/B testing
*November 16th, 2023*
It is now possible to enable or disable personalization and A/B testing on a stack field. As a content modeler, this gives you more control over which content items can have personalization and A/B testing added to them. Limit these features to relevant models by enabling or disabling these features on the stack field in the model.
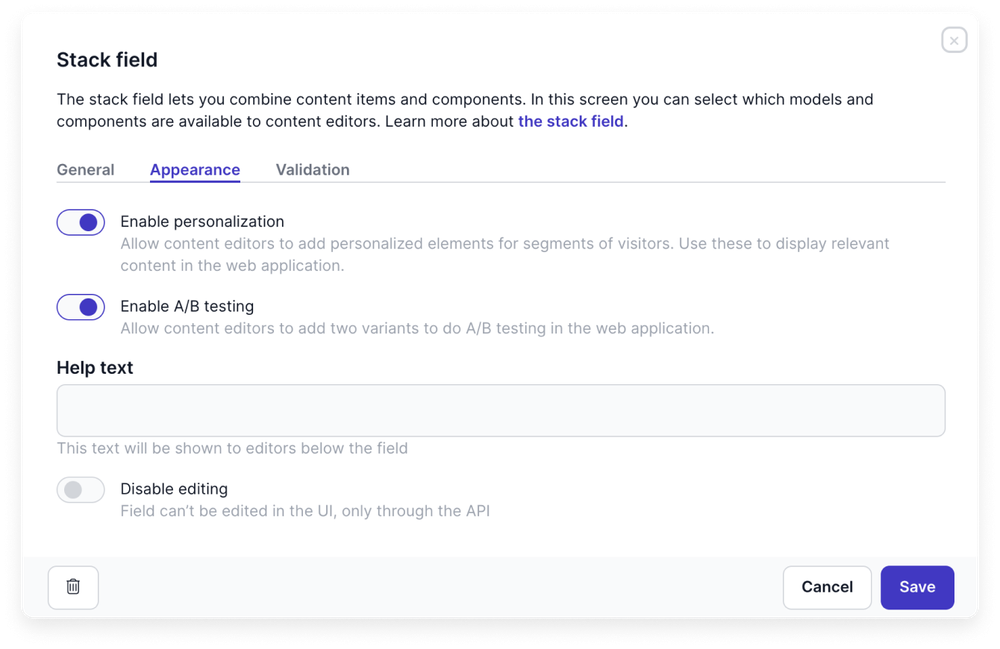
***
## Choose workflow stage to trigger required validation
*November 6th, 2023*
As requested, we've added a feature for you to choose when to trigger the required field validation for content items. Previously, the editor could save content items without filling in required fields and they only got an error for missing required values when the workflow stage was updated to *Done*.
This new feature gives you the flexibility to choose the workflow stages that will trigger the required field validation. In the **Settings → General** screen, simply choose the workflow stages of the content item that will trigger the required field validation, for example, *In Progress*, *Review* and *Done*. *Done* is selected by default.
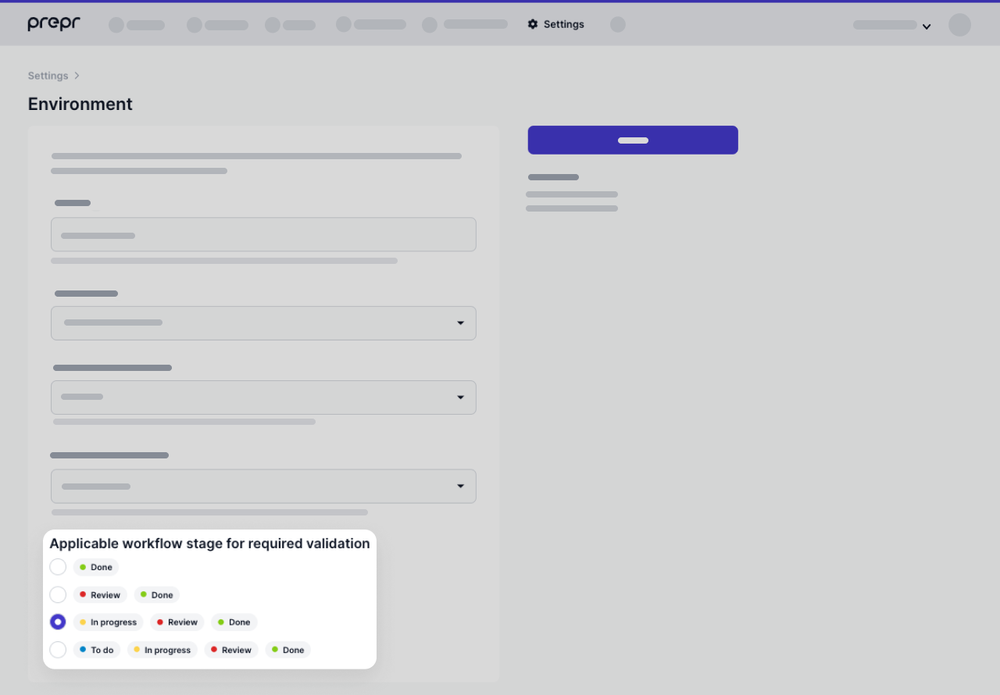
***
## Enable Strict Mode to support TypeScript
*November 6th, 2023*
We are pleased to bring you a feature to enable *Strict Mode* on the GraphQL schema. This means you will get accurate TypeScript types from your GraphQL schema which in turn means simpler, cleaner and more consistent code when processing GraphQL requests. For example, the strict GraphQL type of `String!` will never be null as opposed to the `String` type.
In the **Settings → Access Tokens** screen, enable *Strict Mode* for a specific GraphQL access token.
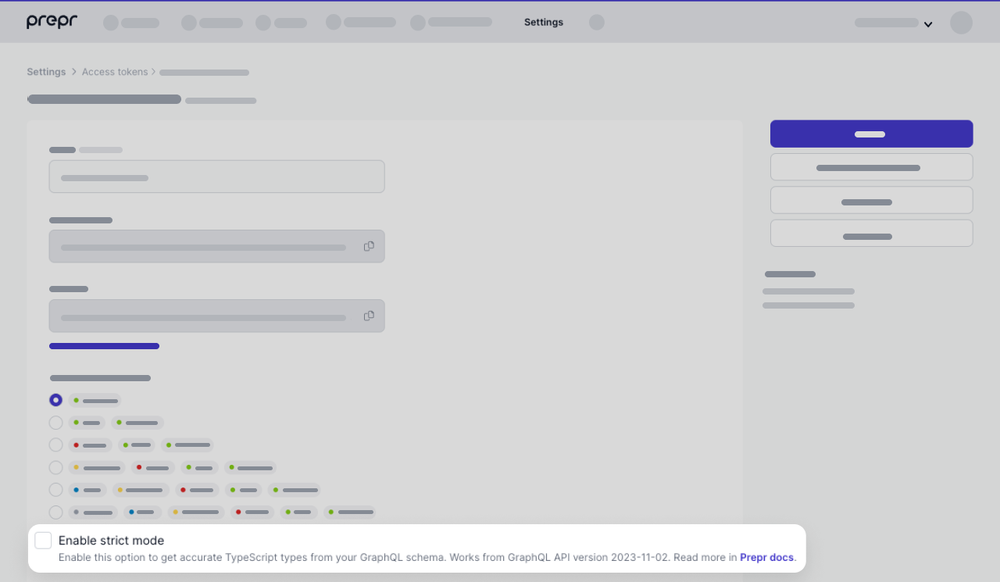
***
## Integrate with Typesense for content searches
*November 3rd, 2023*
We’re happy to announce that you can now integrate Prepr and Typesense to provide users with fast and flexible searches across your web app content.
Setting up the Typesense integration in your Prepr is easy. With just a few clicks, you can connect Prepr to your Typesense application, and Prepr will handle the rest automatically.
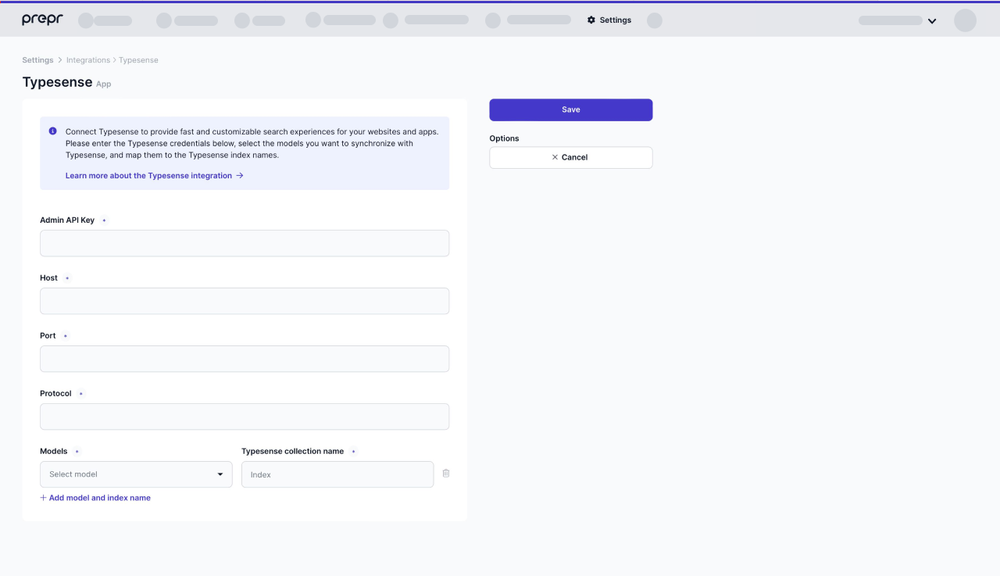
Check out the [Typesense integration doc](/integrations/typesense) for more details.
***
## Role permission to delete content items
*October 12th, 2023*
As requested, we've added a feature to set special permission for users to delete content items. This gives you more flexibility when defining roles for different types of content editors.
Simply enable or disable the option **Allow user to delete content items** in the user role.
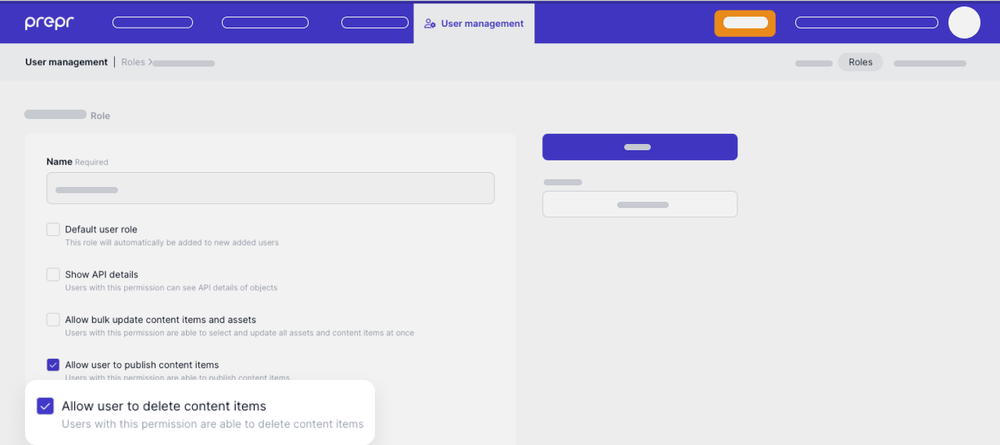
***
## Purge access token cache
*October 11th, 2023*
It's now possible to purge content cache linked to a specific access token. This means that developers can make sure that API requests made with the purged access token will return fresh content when needed, for example when you need a real-time sync of new content related to an important product launch or you need to clear old versions of data in the case of a manual deployment.
Simply click the **Purge token cache** button for the access token for which you want to purge the cache.
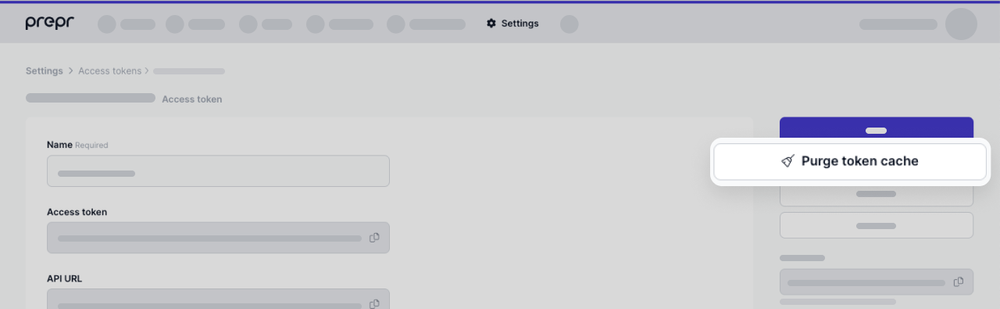
For more details check out the [GraphQL caching doc](/graphql-api/caching).
***
## Drafts for published content items
*September 29th, 2023*
We are happy to bring you a renewed workflow to publish your content items. Now you can make changes to already published content items without affecting the published version. You can then explicitly publish or schedule the content item when it's ready. This means that you have complete control over changing and republishing previously published content items.
Once you've created a content item and want it published to the web app, simply click **Publish and close** to publish it right away. You can easily make updates to the published content item directly and then click the **Save** button. This will save the changes without publishing them. This means there'll be two versions; your saved version and the published version.
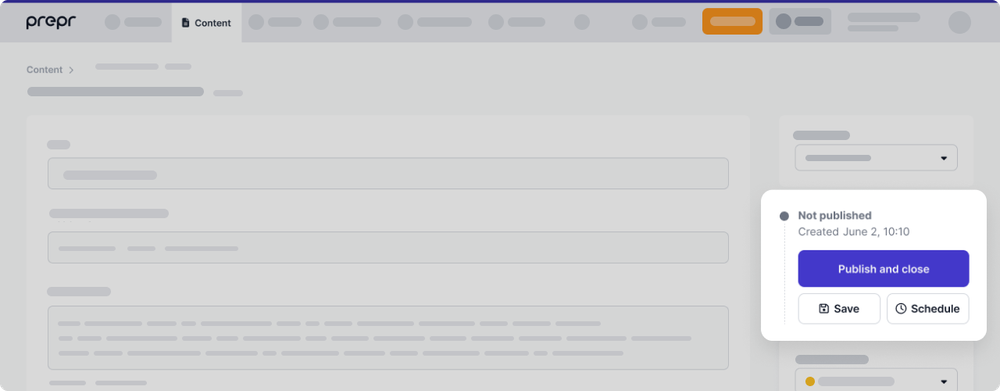
You can still schedule your content items to be published at a later date, now with just a click of the **Schedule** button. Enter the *Publish on* date and click the **Schedule** button and that's it. You can also enter an *Unpublish on* date for temporary content.
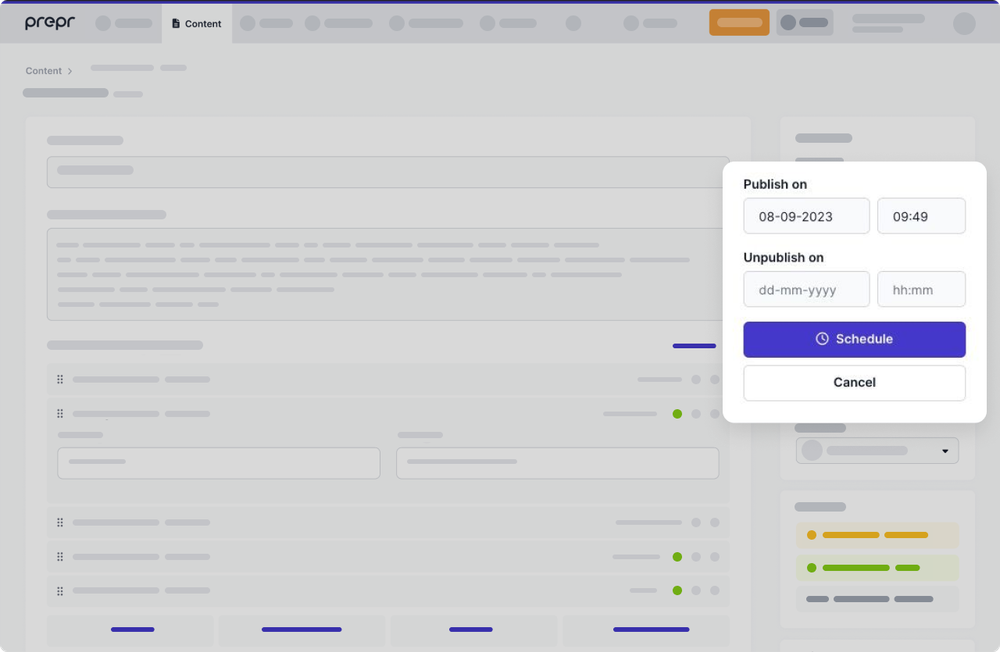
When publishing your content items, the workflow stage of the content item will be updated to *Done* automatically.
For more details, check out the [Manage content item docs](/content-management/managing-content/managing-content-items#publish-a-content-item).
***
## Specify which text fields you want to automatically translate
*September 12th, 2023*
We recently added an AI-powered auto-translation feature to Prepr. While we've received a lot of positive feedback, some customers have expressed a desire for settings to skip or ignore auto-translation. This update allows users to specify which text fields should be ignored during automatic translation.
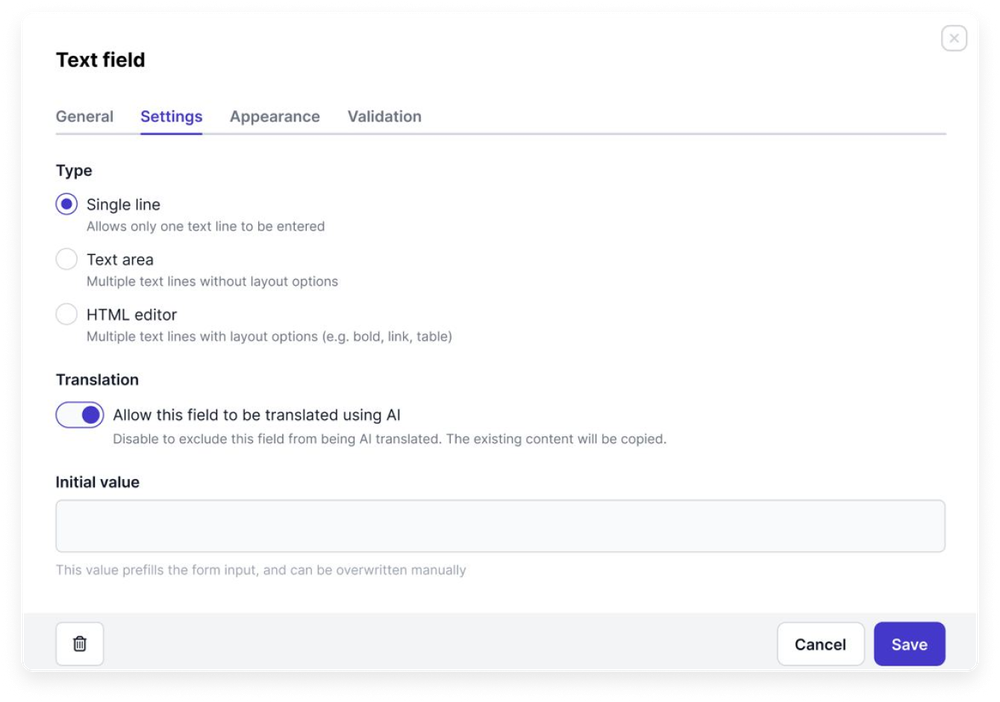
***
## Check linked and unused assets
*September 12th, 2023*
We are happy to bring you a long-awaited update to the media library. It is now possible to check if an asset is being used in any content items. This view helps you when deciding which assets can be deleted.
There is a new filter checkbox called *Unused*. When you select the *Unused* checkbox, all the assets that are not used in any content items will be shown.
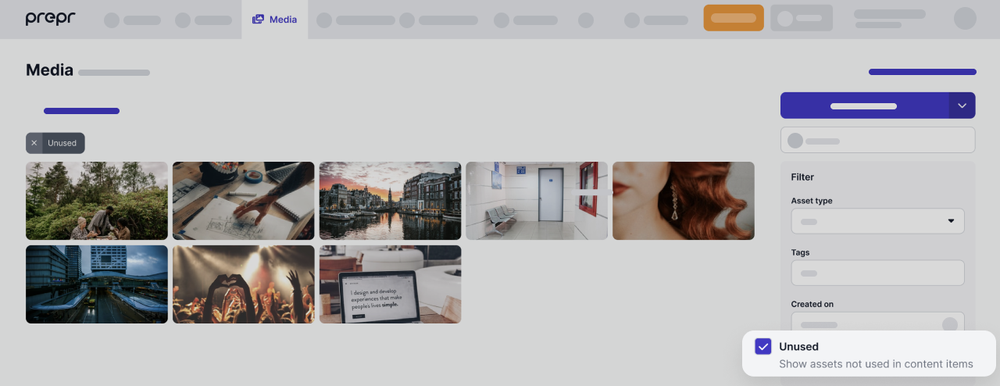
Open a specific asset to see a list of content items that use this asset.
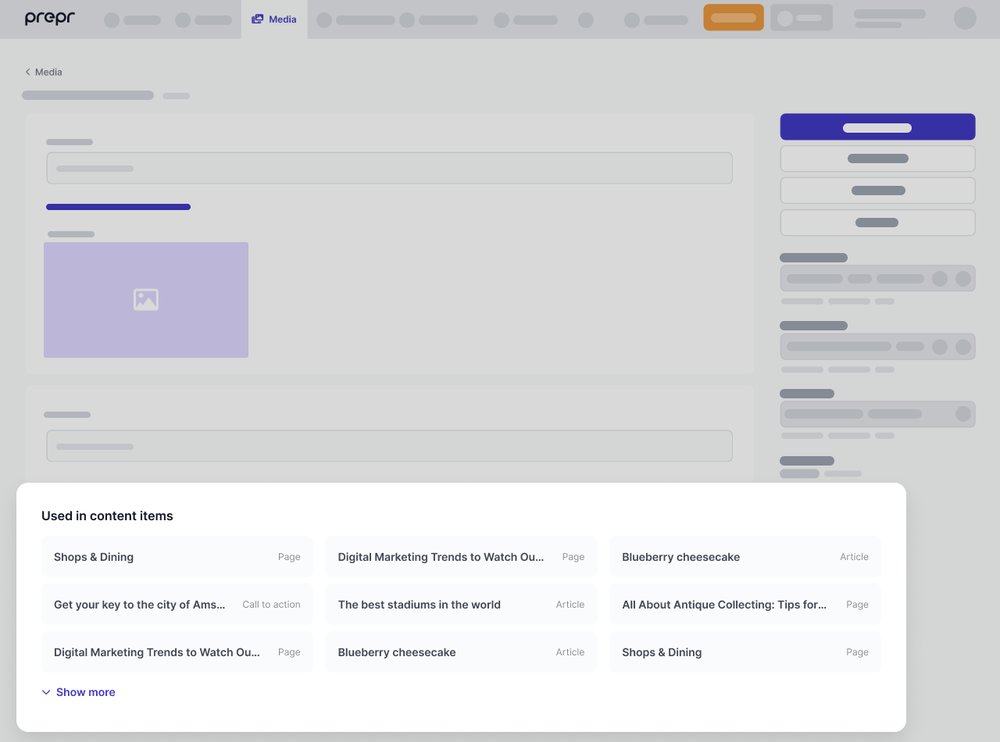
***
## View system fields in the Schema Editor
*August 1st, 2023*
As requested, we've added a feature to view the system fields directly in the Schema Editor when editing or viewing a model. This gives you the benefit of having an overall view of a model and direct access to the *API ID* of a system field that you can use in your API query requests.
Simply enable the **Show system fields** toggle at the top of your model to see the list of system fields. You can also see some help text and the *API ID* of each system field.
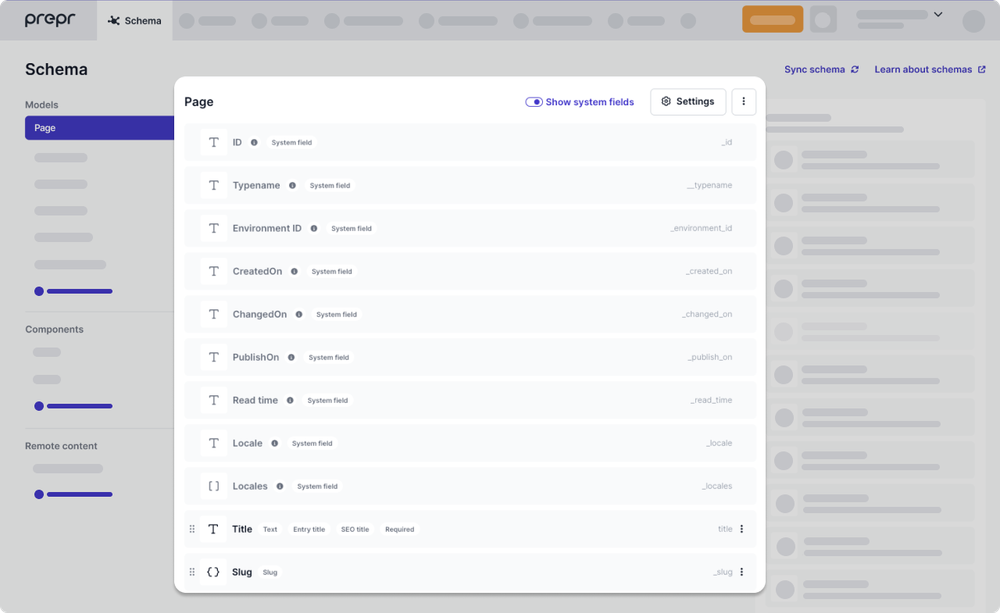
Check out the [Model docs](/content-modeling/managing-models#view-system-fields) for more details.
***
## AI translation of content items now available
*July 13th, 2023*
We are very excited to bring you the option to auto-translate your content items using AI. This will lighten the workload for content editors who need to create translated copies of a content item.
To use the new feature, go to the content item that you wish to translate. Simply, choose a language from the drop-down menu and click *Translate automatically using AI*. Choose a source language for the translation and that's it! The result is a machine-translated content item entry for the chosen language. You can then review and adjust the translation as needed before publishing.
Check out the [Localization doc](/content-management/localizing-content#working-with-multiple-locales) for more details.
***
## Support for multiple-asset and single-asset fields
*June 30th, 2023*
You can now choose between using a multiple-asset or single-asset field [when adding it to a model or component](/content-modeling/field-types#assets-field), depending on the number of assets you intend to add.
A *single-asset field* only allows for a single image, video, audio fragment, or file to be added. The API response for this field type is simpler since the API doesn’t return an array of assets. A single-asset field might be a better fit for content items such as author profiles or contact pages.
The *multi-asset field* allows for multiple assets to be added and is returned as an array by the API. You may want to use this field type for content items like articles and products.
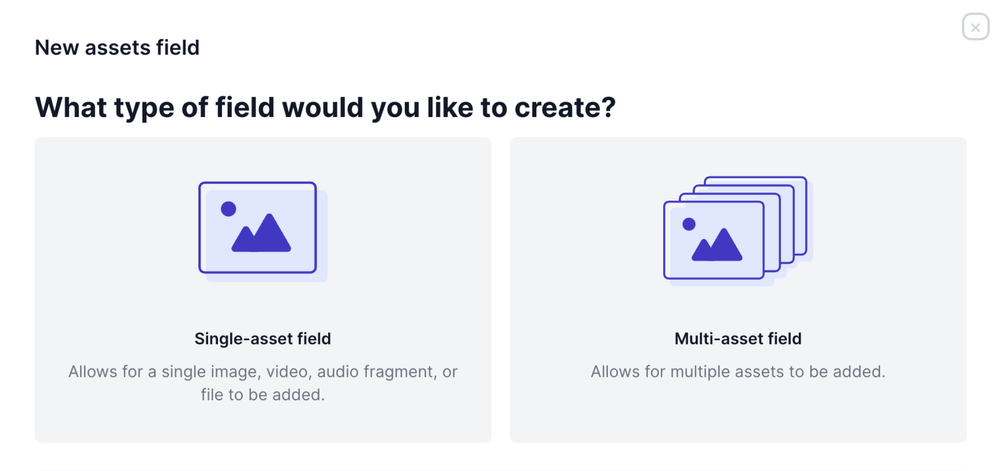
This feature provides you with more flexibility in creating customized setups for your content and simplifies [querying assets](/graphql-api/schema-field-types#assets) using the API.
Check out our [asset guides](/content-management/managing-assets) to learn how to add assets to your web app.
To get this feature, upgrade you API to the latest version [2023-06-30](/graphql-api/upgrade-guide).
***
## New GraphQL API version released
*June 30th, 2023*
The latest version of the GraphQL API version, 2023-06-30, introduces a new recommendation algorithm to the API. All models now have a People Also Viewed recommendation query to serve your customers with content they are likely to enjoy and keep them engaged with your web app for longer.
This release also simplifies the querying of images. An asset field can now be configured as a single-asset field, removing unnecessary arrays when using an asset field with only one asset.
To take advantage of these features, upgrade to the latest version of the API. For more information, see the [upgrade guide](/graphql-api/upgrade-guide).
***
## Creating complex web pages is now easier with nested components
*June 23rd, 2023*
The introduction of nested components has made content modeling in Prepr even more powerful. In addition to adding a component to a model or Stack field, you can now [embed one component into another](/content-modeling/managing-components#create-a-nested-component), creating a parent-child relationship within a component.
For instance, you can add a call-to-action component to a page header component:
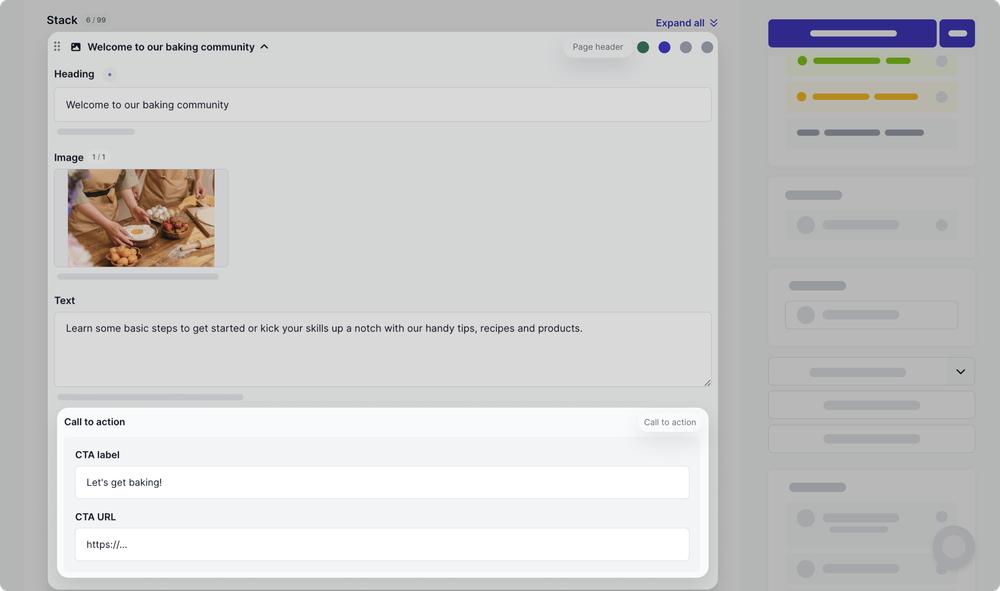
You can reuse individual components as many times as needed, even if they're already used within nested components. So you can use a call-to-action component in both a page header component and a product collection component.
With nested components, your page elements can be customized even further, providing more options for users to engage with your content. Check out our [schema docs](/content-modeling) for more tips on how to build web page layouts of any complexity with ease.
***
## Redesigned Access Tokens page for a better user experience
*June 5th, 2023*
We’re excited to introduce a redesigned Access Tokens page in Prepr to bring you a more user-friendly and intuitive experience.
With this update, you will be able to view the [permissions](/graphql-api/authorization#permissions) granted to tokens, as well as which token is currently in use in the [API Explorer](/graphql-api/test-queries). This will help you keep track of your tokens and ensure that you are using the correct one for your needs.
In addition, we have also added a new feature that notifies you when a new access token becomes available. You will see the notification as an information badge on your existing token. It will help you stay up-to-date and have access to the most recent [API features](/graphql-api/upgrade-guide).
Also, on the Access Tokens page, you can now copy the image and file domains to use them in your front-end framework add-ons, such as Nuxt Image, if needed.
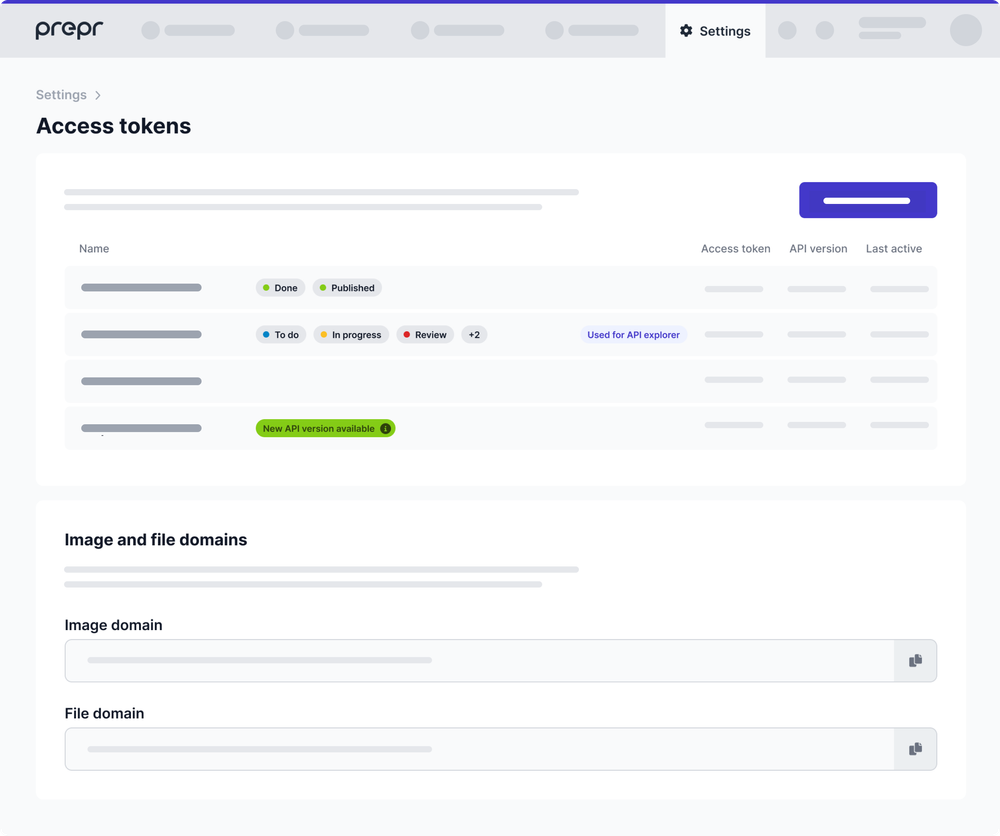
If you have any feedback or suggestions for further improvements, please let us know in the [Slack channel](https://slack.prepr.io/) or by [contacting Support](https://prepr.io/support).
***
## Option to restrict a user role by locale
*May 23rd, 2023*
With this update, we've added a new feature that lets you manage user role permissions at a more granular level.
You can now define the locales to which a specific user role has access. This is especially useful for those who work with a multi-language setup in Prepr and need to ensure that certain users have access to specific locales. For example, you can restrict a marketer of your Belgian brand to accessing only content in the nl-BE and fr-BE locales.
To use this feature, [create a new role](/project-setup/managing-roles-and-permissions#add-or-edit-roles) and enable the *Content* permission. Then, select the necessary locales that the user role should have access to. If you want this user role to access content items of all locales, you can leave the field empty.
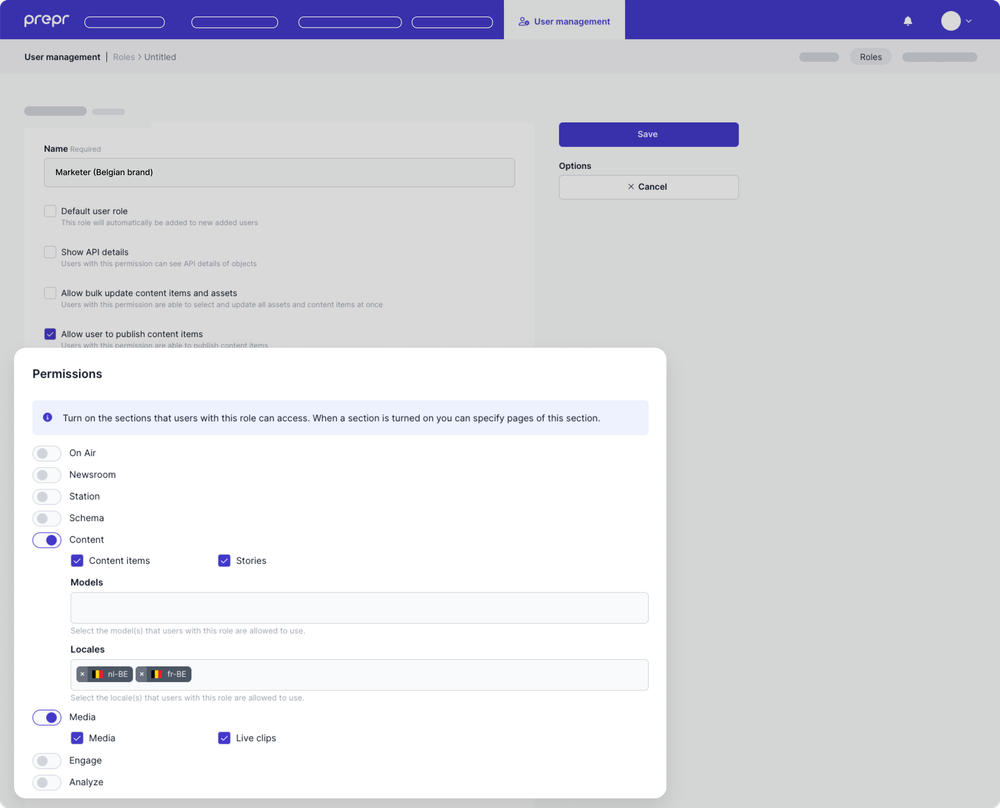
***
## Option to include a country, language, and optional fields in a slug template
*May 22nd, 2023*
When [adding a slug to a model](/content-modeling/field-types#slug-field), you can define which fields are used for slug generation. This update extends the list of available fields, making it easier to identify and memorize content item URLs.
In addition to the existing *title*, *id*, and *locale* fields, you can now include the following:
- *country* – adds the country code for a locale, such as *DE* for de-DE and *FR* for be-FR.
- *lang* – adds the language for a locale, such as *de* for de-DE and *be* for be-FR.
Also, the slug generation has become more flexible for slugs with multiple fields. If any of these fields are not required in a model, a slug can still be generated without those values. In other words, making a field optional in a model allows the field to be omitted when generating a slug.
For example, if the slug template equals *`{title}/{authors.slug}`* and the author is not set, then the generated slug will only be the title value.
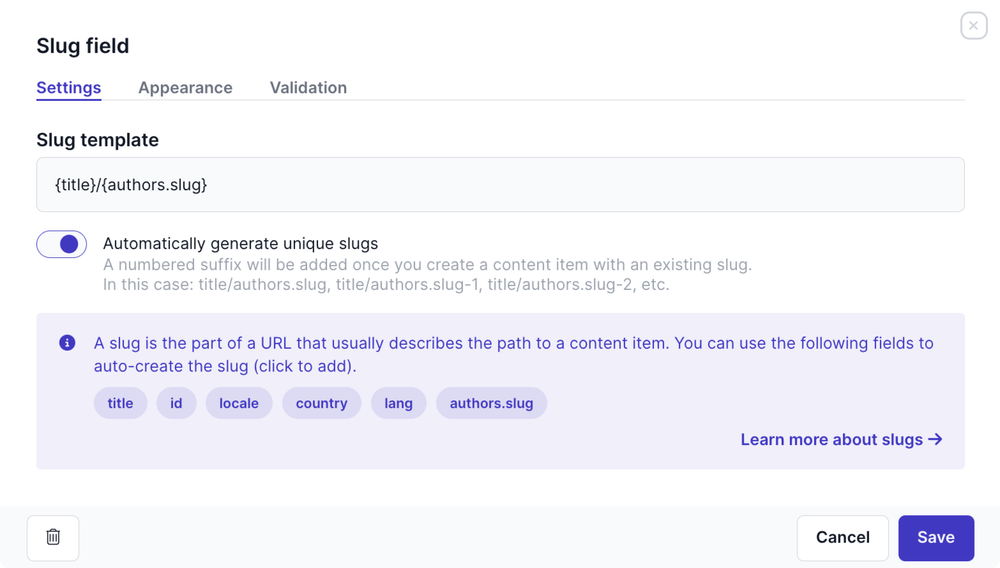
***
## UX improvements for Environment settings
*May 17th, 2023*
As part of our ongoing efforts to improve user experience in Prepr, we have introduced several updates to environment settings. The changes include:
- *General environment settings* were moved from the organization level to the environment level. This means you can now rename your environment and change its timezone and language settings with fewer clicks. Read more about [environments in Prepr](/project-setup/setting-up-environments).
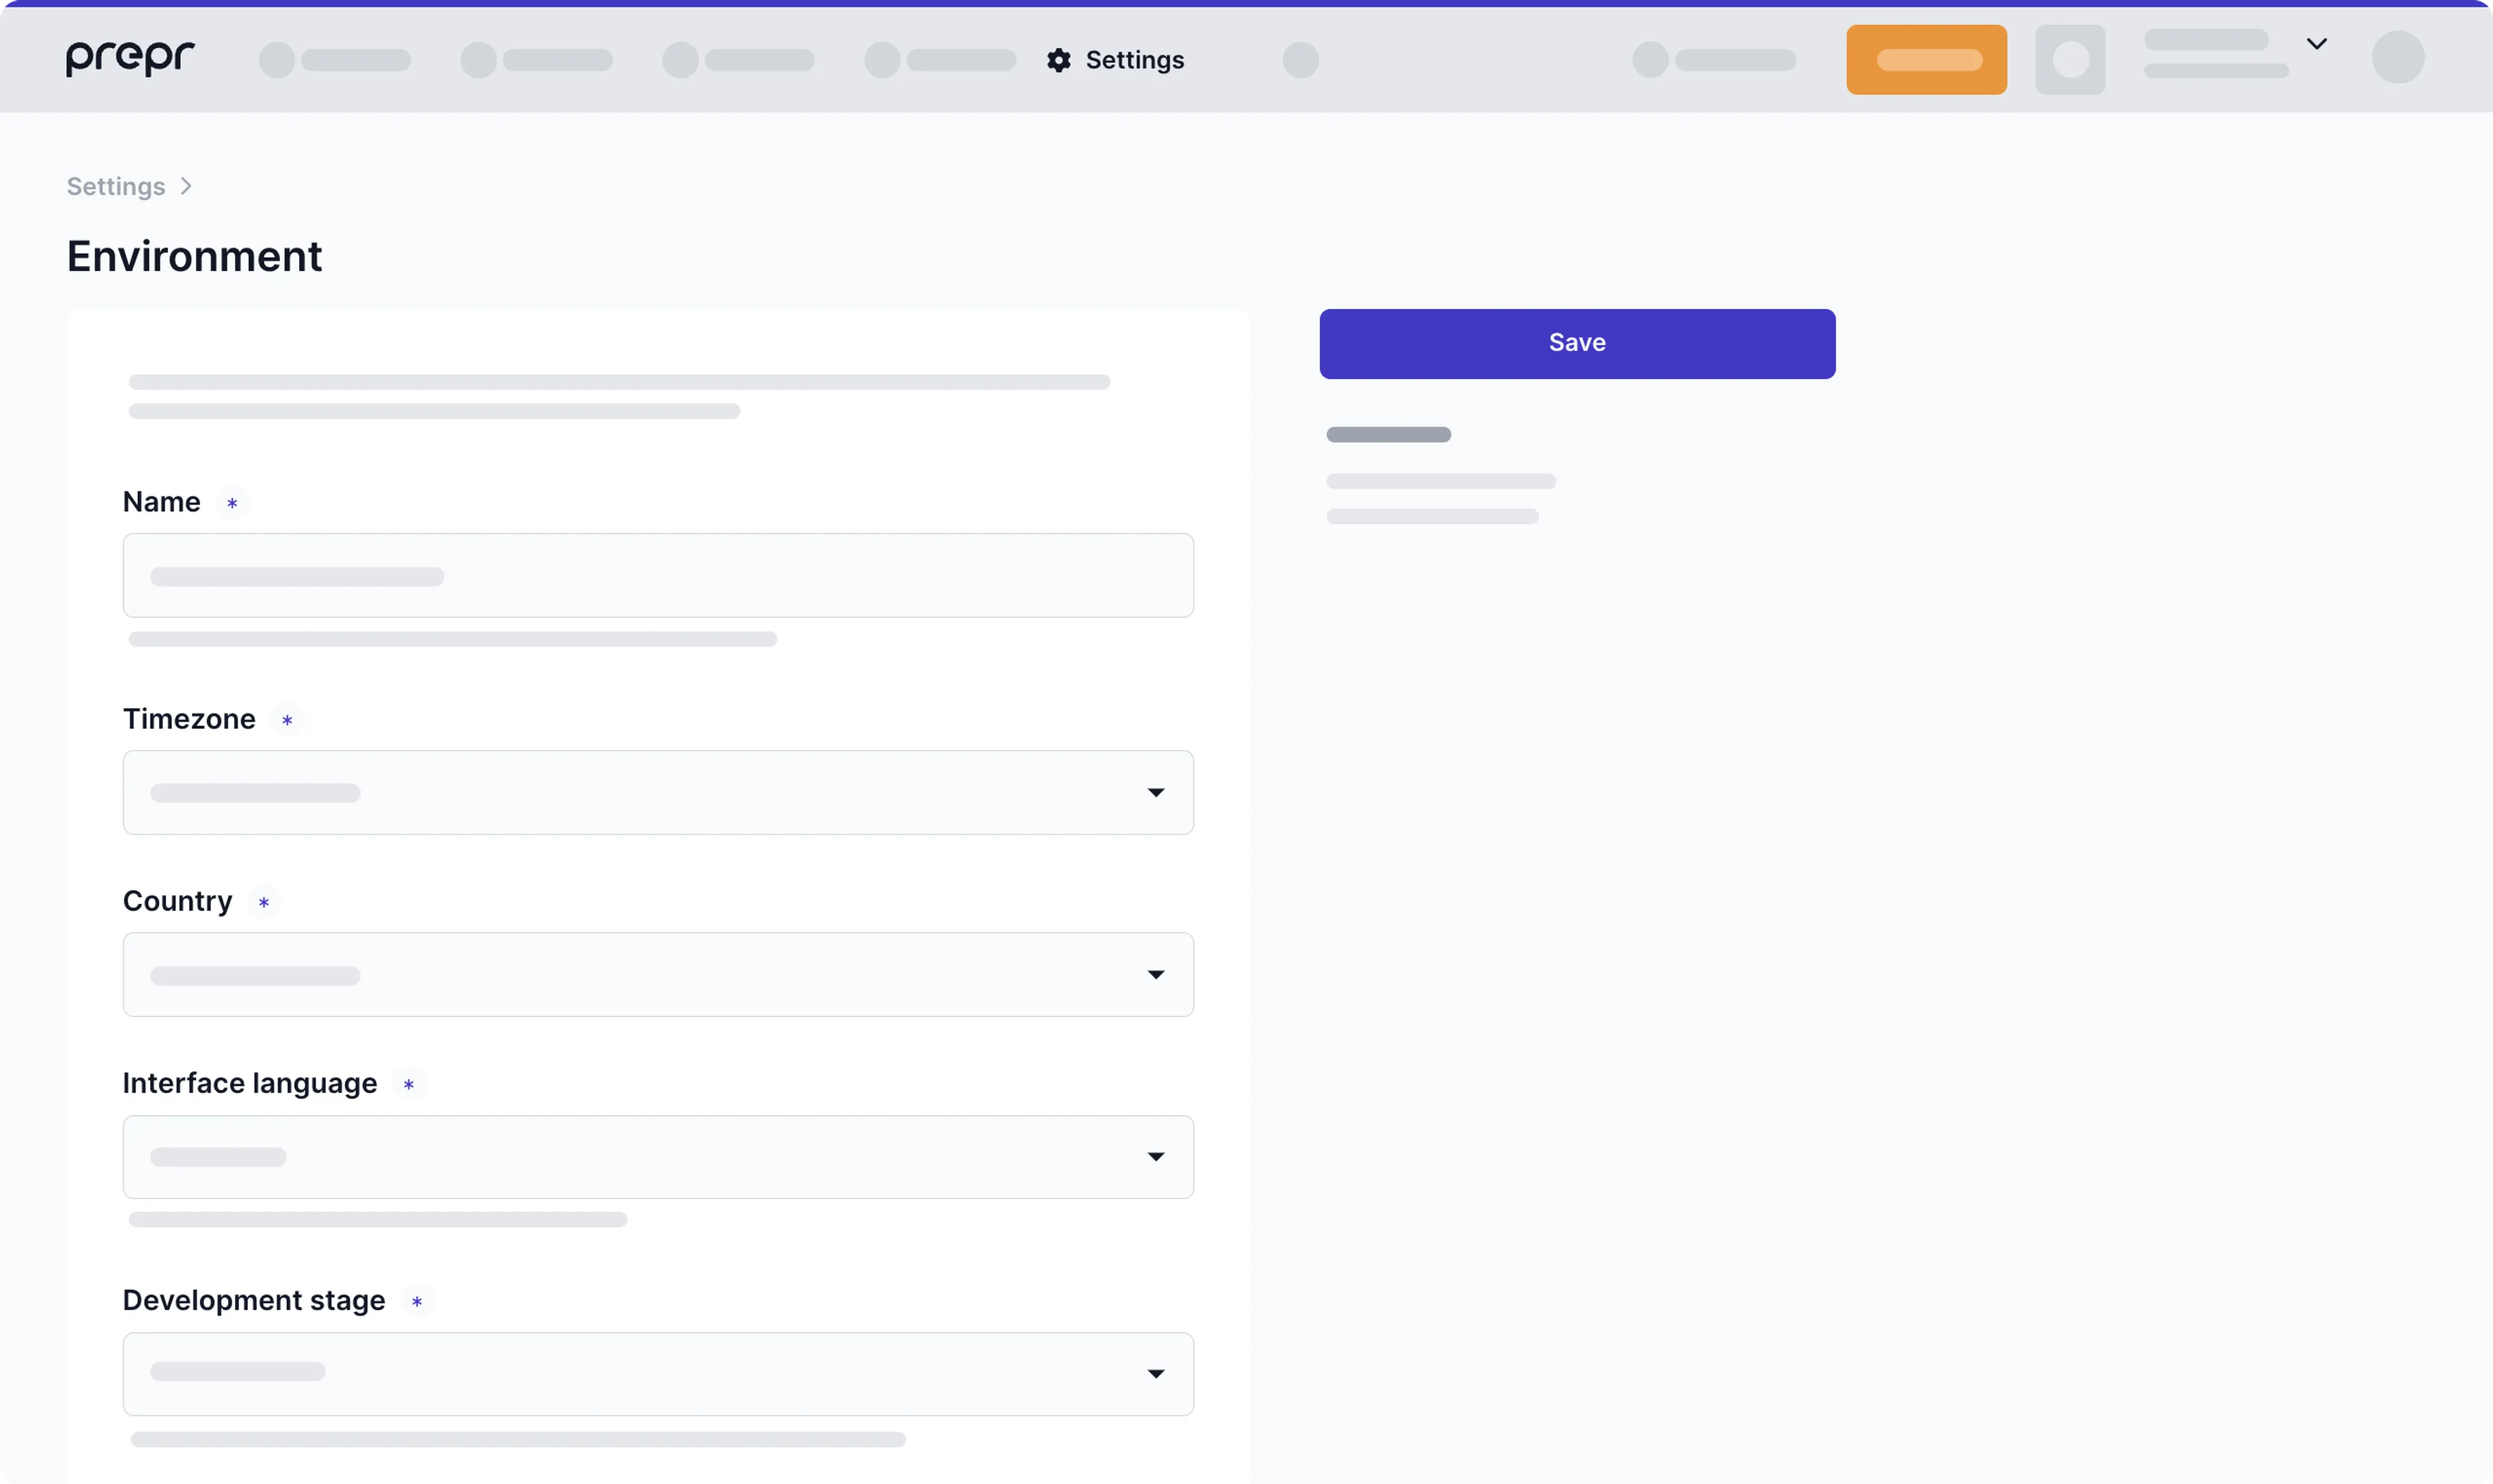
- *Locales settings* were moved to a dedicated page for quick access to a multi-language setup. Here, you can choose available locales for your environment and set a default. Learn more about [content localization with Prepr](/content-management/localizing-content).
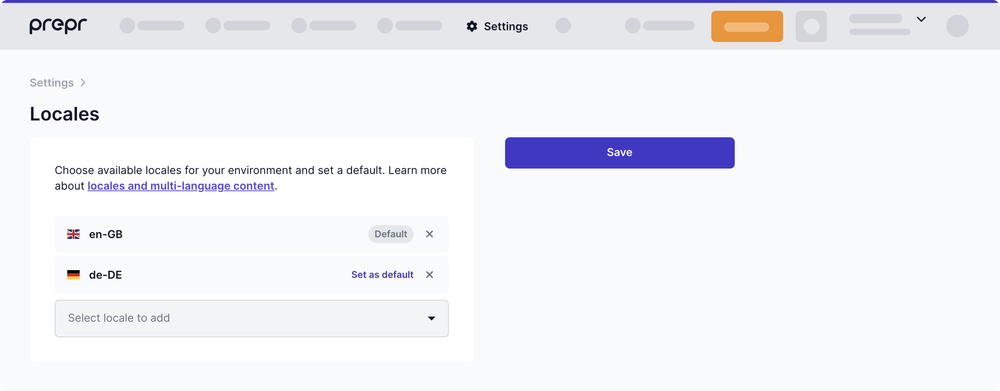
- The *Apps* page was renamed to *Integrations* to better reflect its functionality. Here, you can connect your Prepr to a chosen 3rd party service. Explore available [integrations in Prepr](/integrations).
***
## Sign up to Prepr with your GitHub and Google accounts
*April 28th, 2023*
You can now use your GitHub or Google accounts to [create a new Prepr account](https://signup.prepr.io/) or log in to an existing one. This makes the sign-up process quicker and more convenient for you.
Don't miss out on the opportunity to streamline your account creation process and start exploring all that Prepr has to offer.

***
## Expanded range of languages for content creation
*April 26th, 2023*
Prepr has expanded the range of available languages with 41 new locales, including second languages of many countries. This provides editors with a greater choice when creating content for audiences around the world. No matter where your readers come from, whether it's Brazil, Italy, Norway, or Greece, they can find content that truly resonates with them.
To learn more, please [refer to our localization docs](/content-management/localizing-content) and check out the full list of available locales in your Prepr environment settings.
If you need a specific locale that is not listed, please [contact our Support Team](https://prepr.io/support), and we will add it upon request.
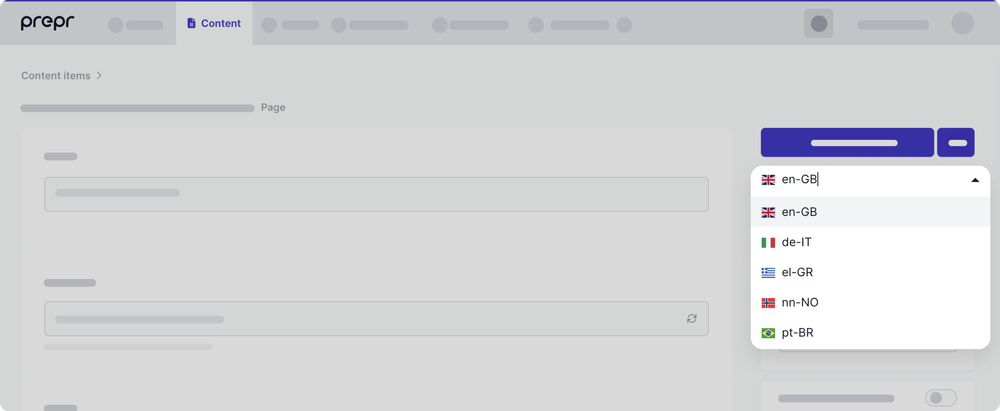
***
## View your Prepr content on the Patterns site
*April 26th, 2023*
We are happy to announce that you can now view a live website based on imported demo data, without writing a single line of code. Follow these steps below to view your content on the site:
- After you have created an environment, choose to **Load demo data**.
- Click the **View site** button. A new window will open and show the *Patterns site*.
- Edit or add content for web pages, articles, live stream events and even a navigation with menu items using the imported models and components. Your content will be visible on the site in realtime.
You are most welcome to clone and edit the Nuxt.js repository if you'd like to change the schema and see the results on your own localhost. You can also deploy the site using Vercel with just the click of a button.
We’d love to hear your feedback on this feature through the [Prepr Slack channel.](https://slack.prepr.io/)
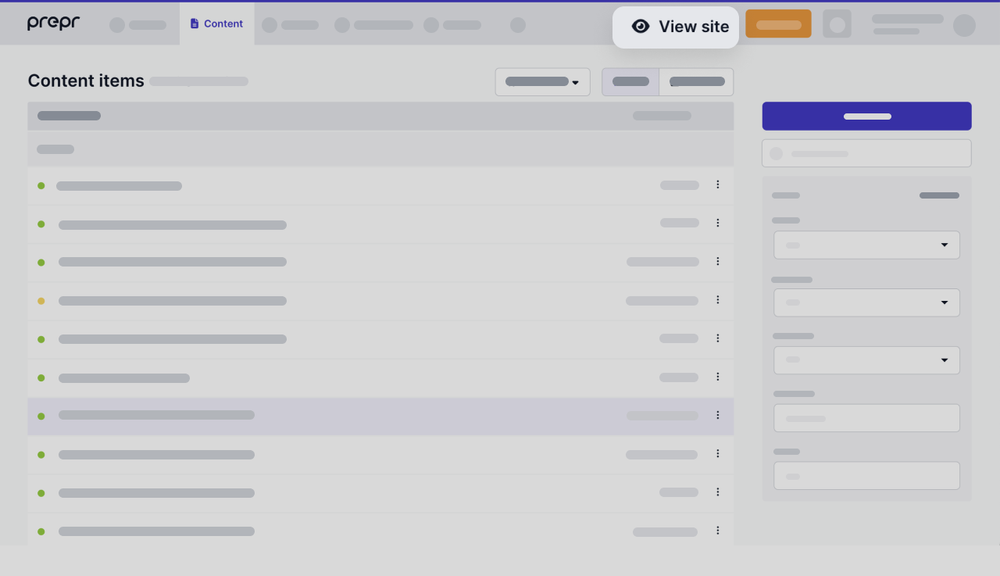
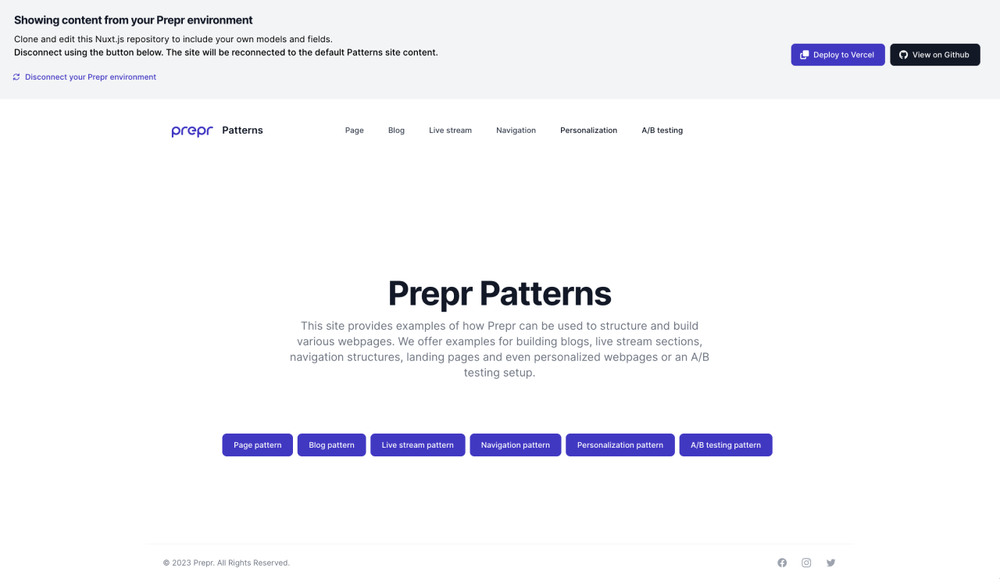
***
## GraphQL API update
*April 17th, 2023*
The following updates to the GraphQL API help to keep queries clean and adds support options for analytics and SSR when using personalization and A/B testing. There is also a speed improvement especially for customers with complicated content models.
- Added new field `_context` to models and components in a Stack. See the [API system fields](/graphql-api/schema-system-fields#personalization-and-ab-testing) and the [API reference docs](/graphql-api/personalization-recommendations-personalized-stack) for more details.
***
## Personalize content for 3rd party customer segments
*April 7th, 2023*
Delivering personalized experiences with Prepr has become even more accessible. You are no longer limited to customer segments created by Prepr when personalizing content. Now you can use segments maintained in any CRM or CDP system of your choice without importing customer data into Prepr.
To use this feature, provide a *Segment reference ID* copied from your external system when [creating a new segment in Prepr](/personalization/managing-segments#use-external-segments-from-crmcdp-systems). Once you've personalized your content, call the API, passing the `Prepr-Segments` header in your API request. Read more about [using external segments for content personalization](/personalization#segments-from-external-crmcdp-systems).
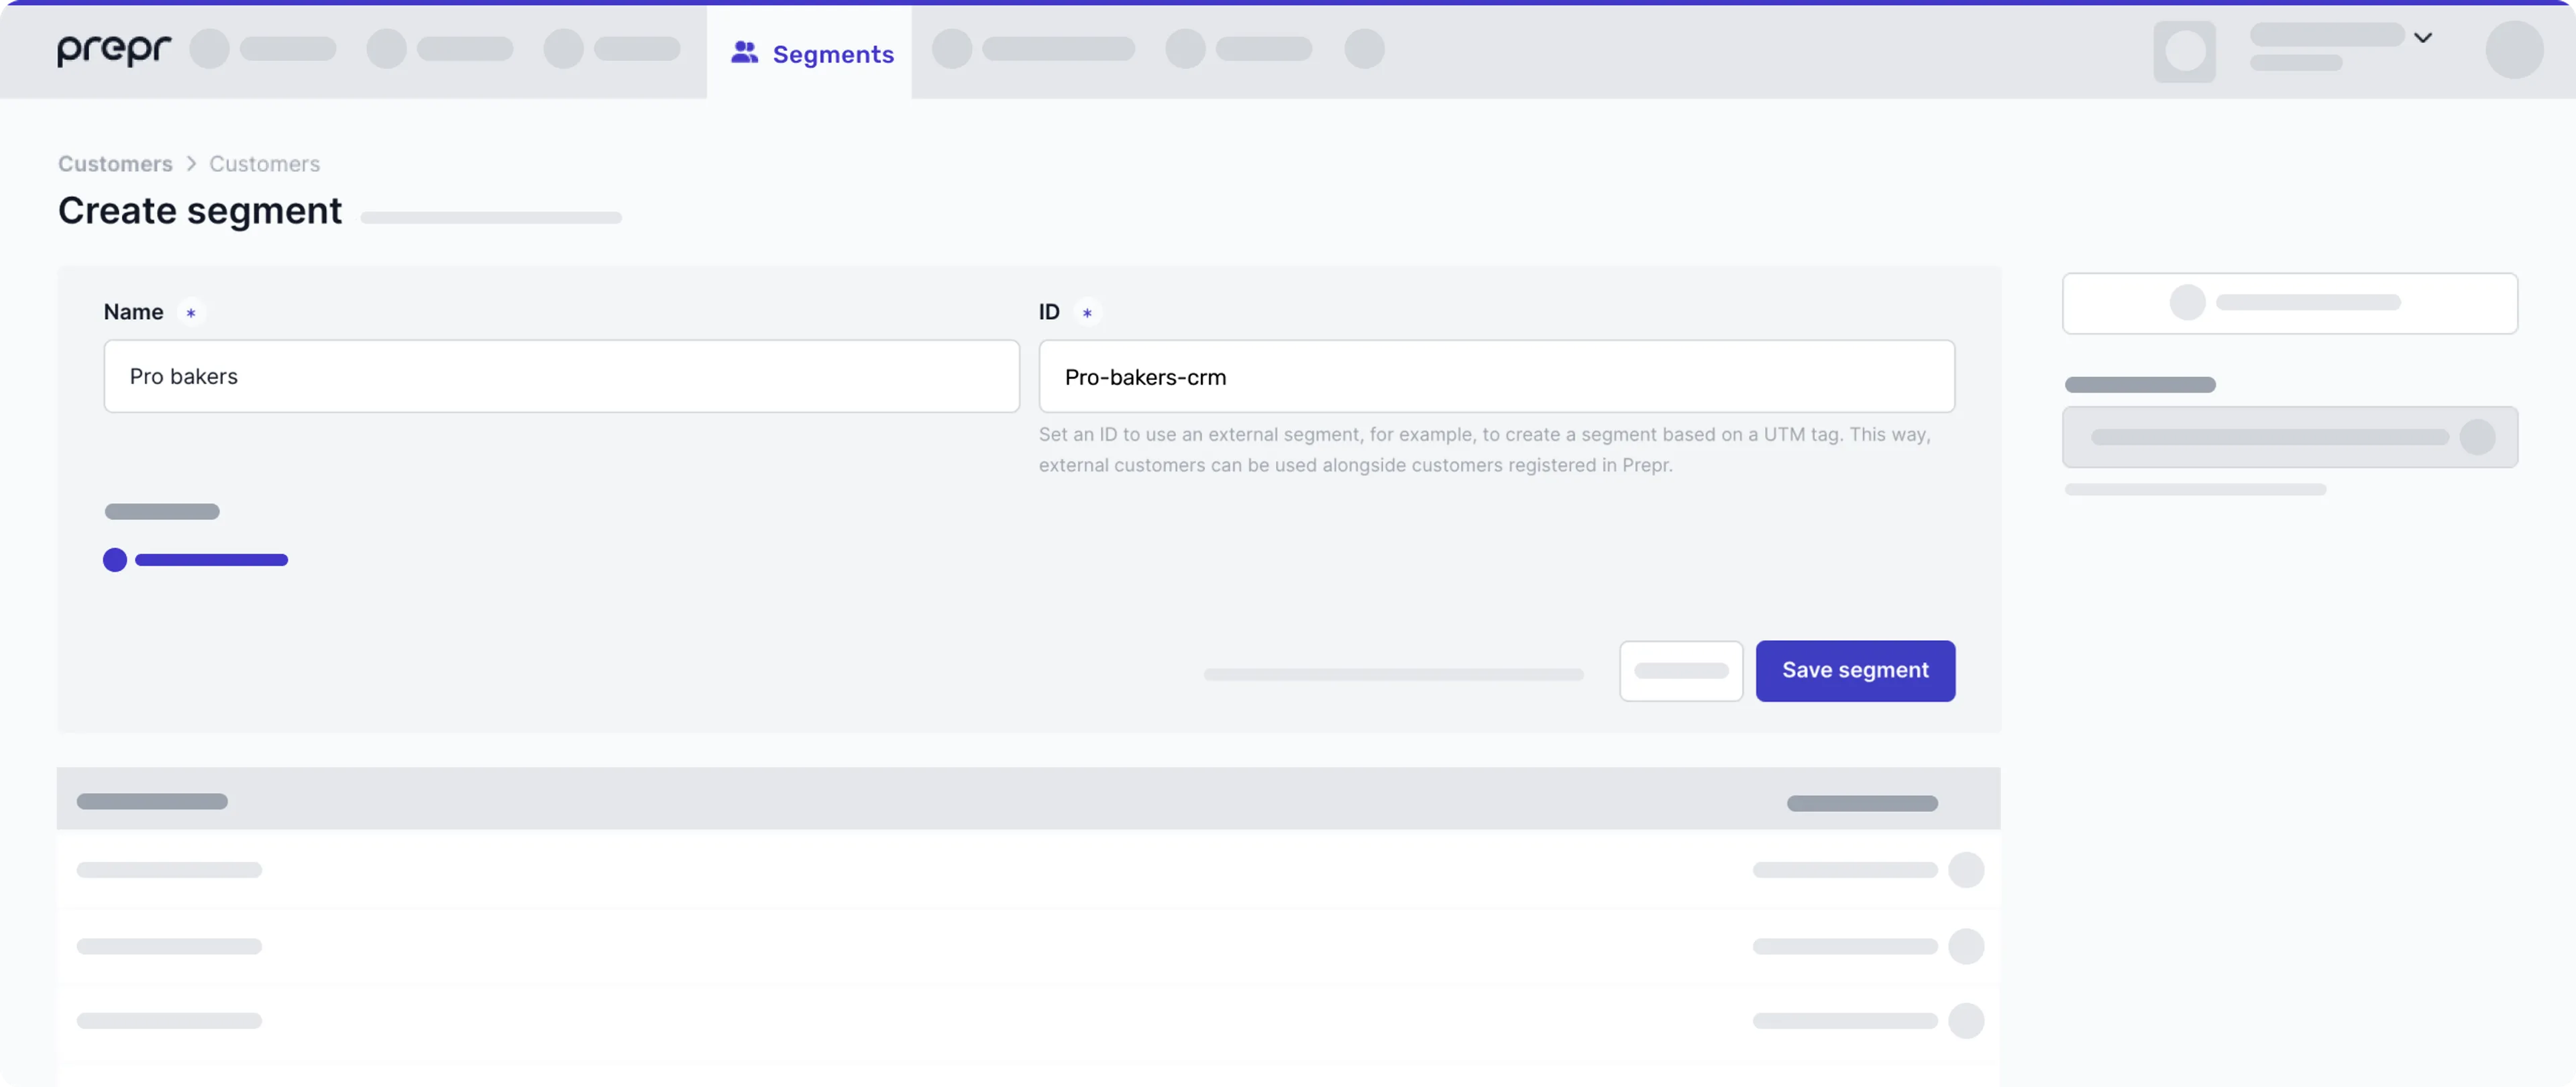
***
## Improve Prepr content searches with Algolia
*March 30th, 2023*
We’re happy to announce that you can now integrate Prepr and Algolia to provide users with fast and flexible searches across your web app content.
Setting up the Algolia integration in your Prepr is easy. With just a few clicks, you can connect Prepr to your Algolia application, and Prepr will handle the rest automatically.
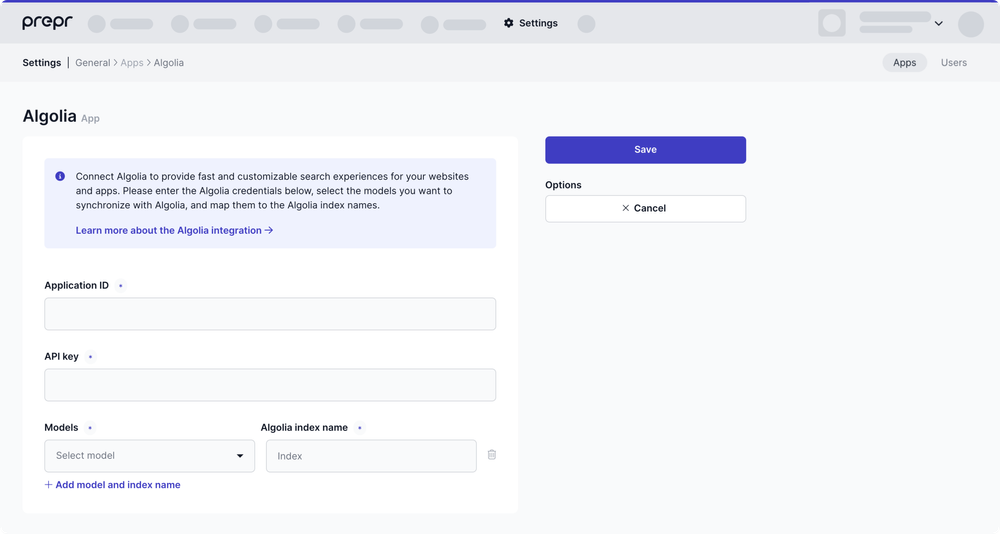
Once Prepr is connected to Algolia, it sends your content item data to Algolia. Whether you publish, update, or delete a content item, all the changes will be reflected in real-time in your search index via the Algolia Search API. This ensures that your users receive the most up-to-date search results.
For detailed instructions on integrating Algolia, please refer to the [Algolia integration guide](/integrations/algolia).
Please note that the Algolia integration is a paid option on top of your regular subscription and needs to be activated upon request. For more information, please [contact our Sales team](https://prepr.io/contact-sales).
***
## Introducing Dark Mode for Prepr
*March 30th, 2023*
We’re excited to announce that Dark Mode is now available in Prepr. So you can enjoy all the same functionality with your preferred appearance.
When designing and developing dark mode, we focused on refining all UI elements for their color and contrast to help reduce eye strain and provide a comfortable viewing experience to our customers.
- **Colors:** We use dimmer background colors and brighter foreground colors to ensure the interface has sufficient contrast.
- **Text and Icons:** We display the text and icons in a contrasting color on a dark background to maintain high text legibility and image visibility.
You can switch between dark, light, and system modes anytime. Hover over your Prepr profile icon and pick your preferred display setting.
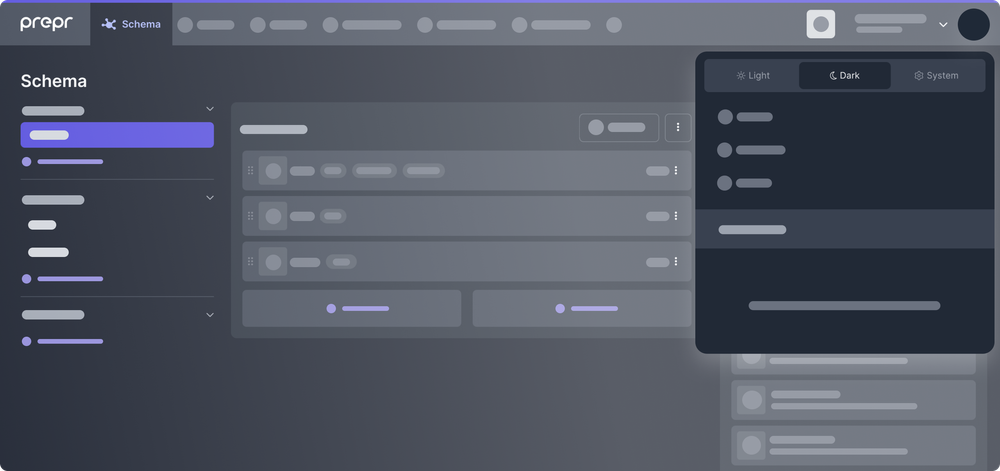
***
## Upgraded model templates
*March 28th, 2023*
We are pleased to announce that we upgraded our model templates when you create a model. Now, it's even easier to set up commonly used patterns in Prepr such as *Page*, *Blog*, *Live stream*, *Navigation*, and *App config*. All you have to do is create a model and choose the pattern template. Prepr will then create the models and components that you need automatically. If the template you choose doesn't completely fit your needs, simply update the models and components according your requirements.
***
## A/B testing update
*March 23rd, 2023*
As part of our ongoing improvements on existing features in Prepr, we bring you an update to the A/B testing feature. Now, it's even simpler to do A/B testing and you can A/B test parts of a content item instead of the whole content item. This is possible by using the *Stack field*. Check out the [stack field doc](/content-modeling/field-types#stack-field) for more details.
Simply click the A/B test icon on the element in the stack, which could either be a content item or component. Duplicate the element and update the copy to create a Version B of the element.
You can also run an A/B test with a single item. In that case, 50% of your users will see the selected item and the other 50% won’t see it.
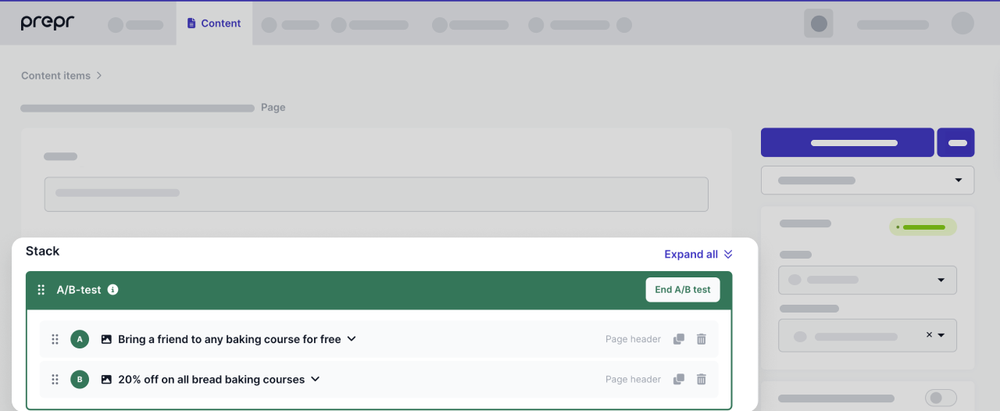
***
## Sync two versions of a schema
*March 10th, 2023*
It is now possible to sync schemas between two environments in the same organization at the click of a button. This is useful, for example, if you have the most up-to-date version of your schema in the production environment and you want the schema version in the development environment to be updated to do testing with more realistic test cases.
Check out the [Sync schema docs](/development/working-with-cicd/syncing-a-schema) for more details.
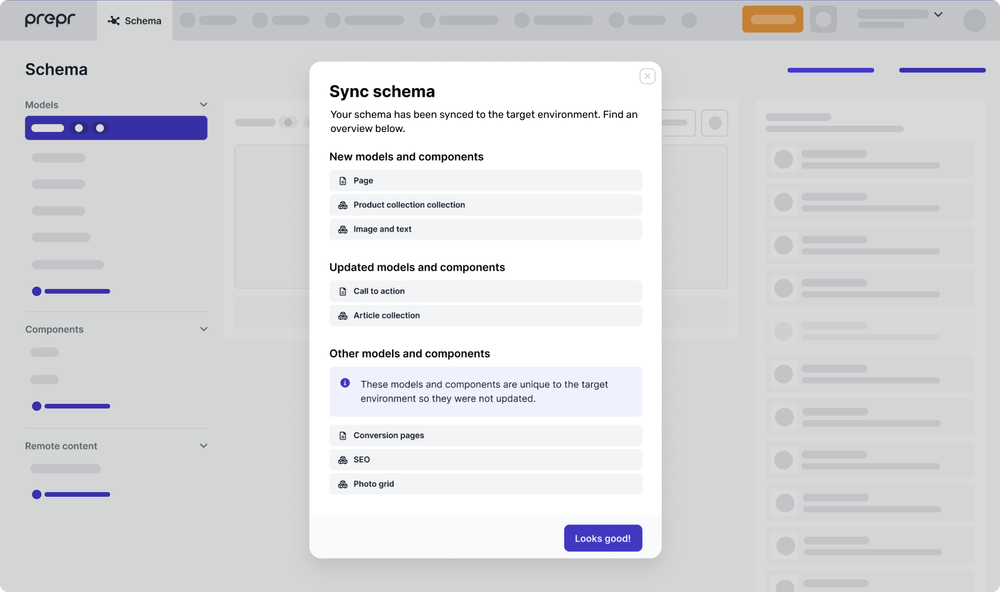
***
## Delete a language variant of a content item
*March 8th, 2023*
With this update, Prepr now offers an additional level of flexibility in managing content items. Content editors can now choose to delete the entire content item or a specific language variant. This is particularly useful when you need to remove unwanted content from only one locale without affecting the entire web app.
[Click to delete a content item](/content-management/managing-content/managing-content-items#delete-a-content-item) and then choose a preferred option:
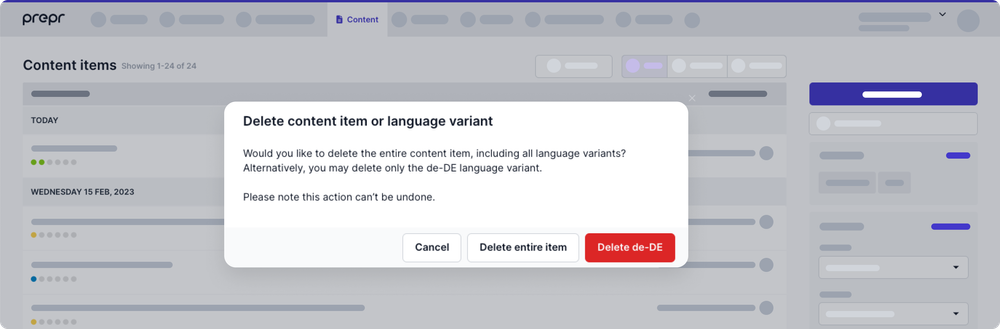
***
## Content item sidebar configuration
*March 6th, 2023*
We are happy to give you more control to help your content editors. You can now set up additional sidebar settings for content items. For example, if you want to skip reviews for some types of content items or publish them right away when saving. The following new options are available when you create or edit a model:
- *Workflow:* If you disable this option, the *Status* and *Assignee* won't show up on the sidebar and content editors will directly publish a content item when they save it.
- *Scheduling:* This option lets you choose whether or not content editors can schedule content items for publishing or archiving.
- *Engagement insights:* This option lets you choose whether or not content editors can see engagement analysis in the sidebar.
- *Commenting:* If you enable this option content editors can view and make comments for the purpose of reviewing content items.
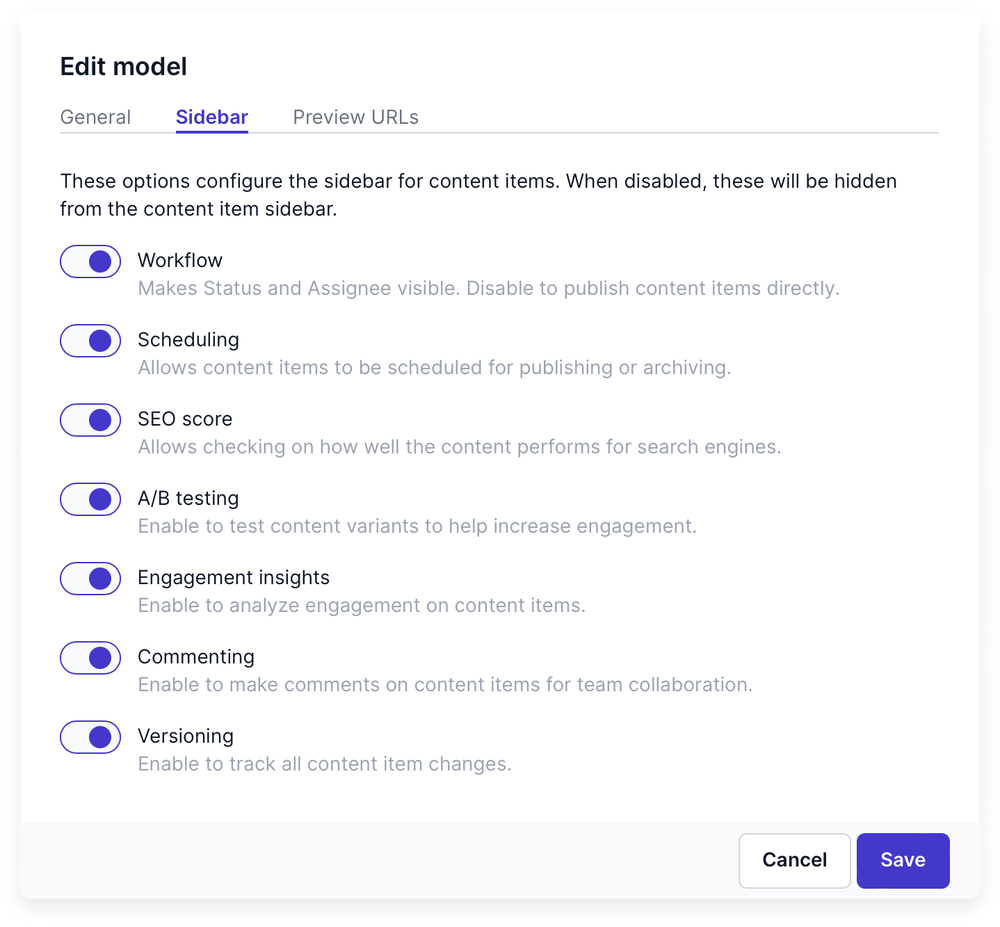
***
## Add subtitles to your Mux video assets
*February 21st, 2023*
You can now easily add subtitles to your Mux videos in Prepr to provide multilingual support to your web app visitors and extend the web app accessibility.
To add subtitles, navigate to the needed video file in your *Media Library*, click **+Add Subtitle**, choose a locale, and upload either an *SRT* or *WebVTT* file containing the subtitle information. Prepr will automatically generate a subtitle URL and add it to the video in Mux.
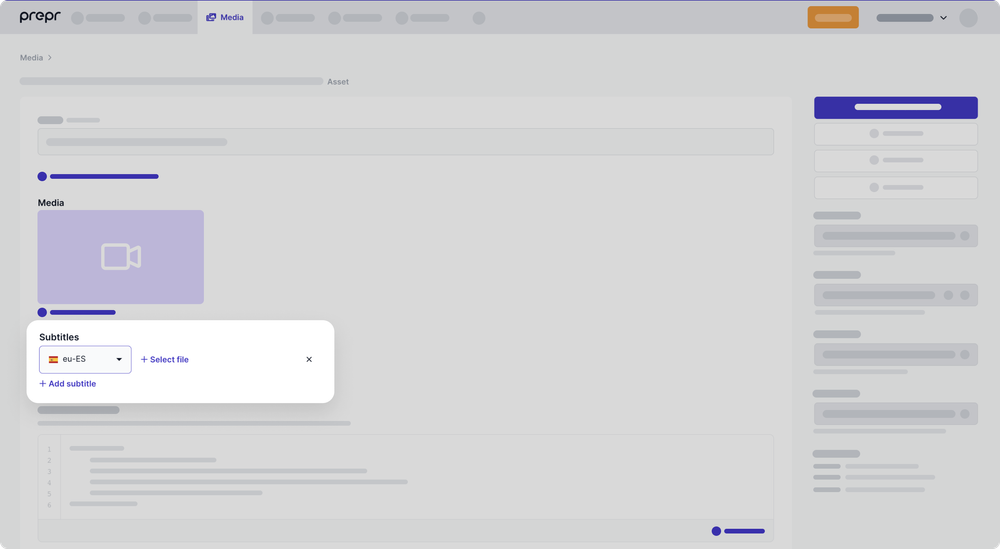
There's no limit on the number of subtitle files you can include in your video asset. Each subtitle file will be stored as an individual file asset in Prepr.
[Learn more about video assets in Prepr](/development/best-practices/assets/video-audio).
***
## Stack field with personalization
*February 13th, 2023*
We are excited to announce the release of the *Stack field*. A stack field is a field in which you compile a 'stack' of content items and components. This new field makes it much easier to structure and compose your component-based web pages. When you add this field in your models, you can combine content items and components in a single step when composing the content.
The personalization process has also been streamlined and made more flexible. Now you can personalize items and components based on [customer segments](/personalization/setting-up-personalization) or countries within a content item. For example, set up the stack as follows:
- In your schema, add a stack field to your page model and allow the applicable components and items to be added.
- Add components or items to your page stack such as page headers and CTA's.
- Finally, add segments and countries to personalize the components and items within your stack.
Check out the [page pattern](/content-modeling/examples/page) doc on how to use a stack field and the [personalization](/personalization/setting-up-personalization) step-by-step guide for more details on setting up personalization within the stack.
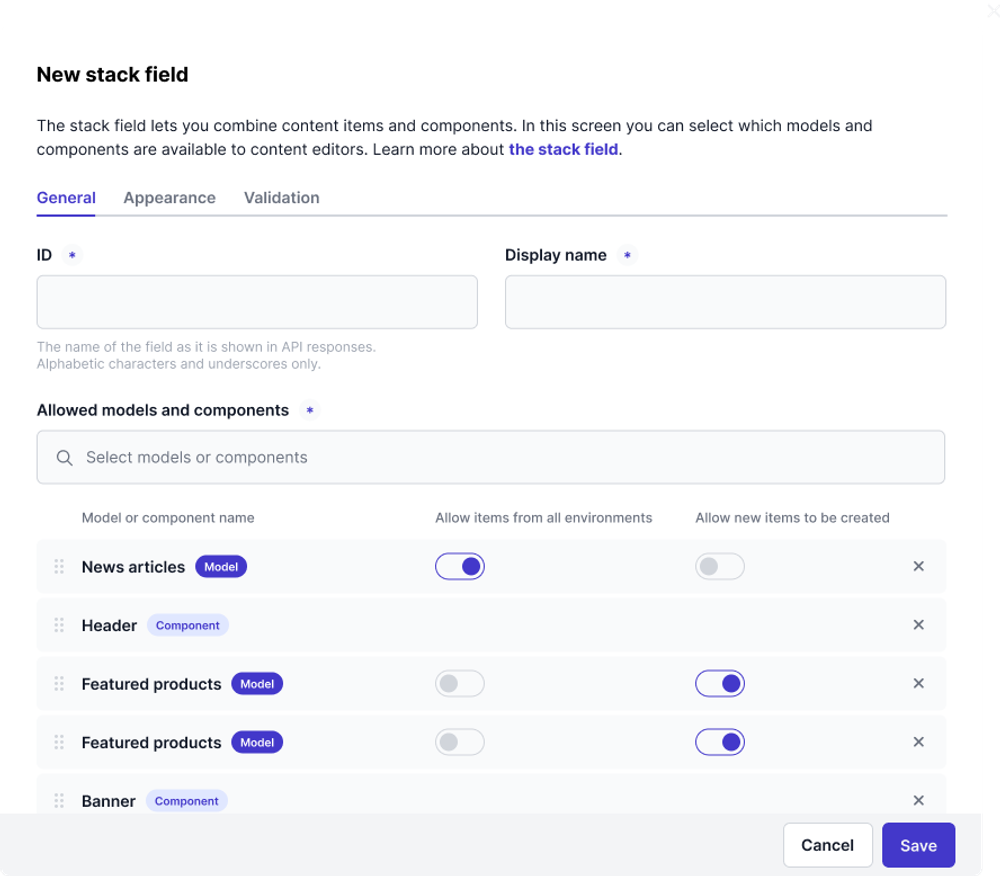
Also, Prepr has developed an automatic migration tool that allows upgrading the *Content reference* field to the *Stack* field without needing to change the front-end setup.
You will see the **Upgrade to Stack field** button next to the content reference field if it exists in your schema. The **Upgrade to Stack field** button will only appear for a *Content reference* field with the *Modal* appearance setting.
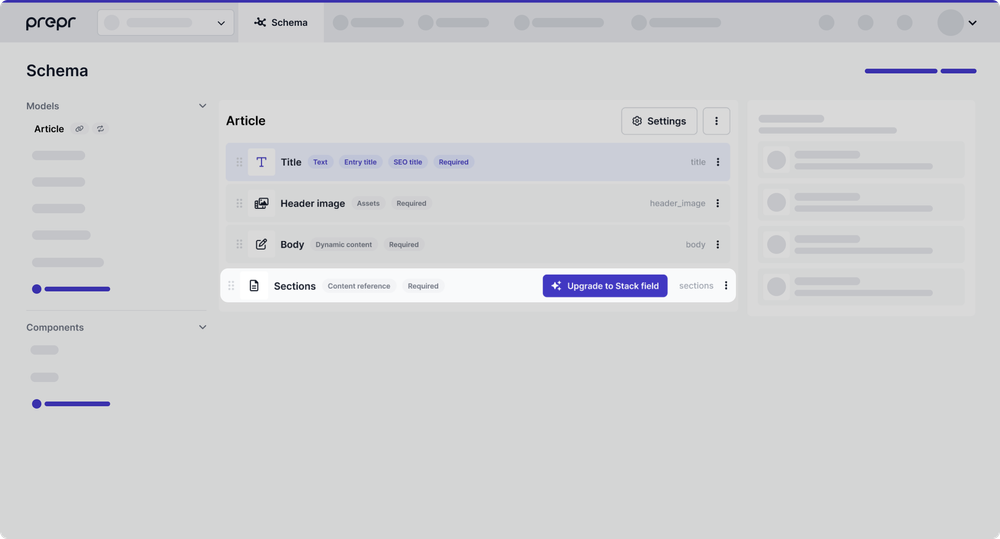
***
## Embed Apple Podcast in your content item
*February 13th, 2023*
As of today, it is possible to use Apple Podcast as a social embed in Prepr. Choose Apple Podcast as a social field, or as an element in your dynamic content field.
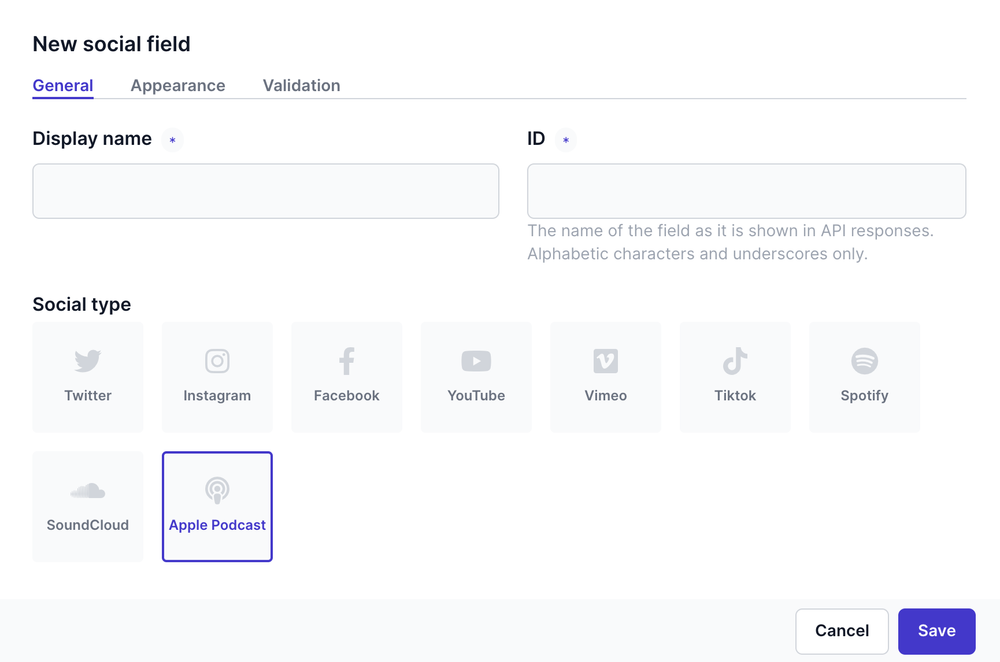
Add the URL of a podcast and Prepr generates a preview in real-time.
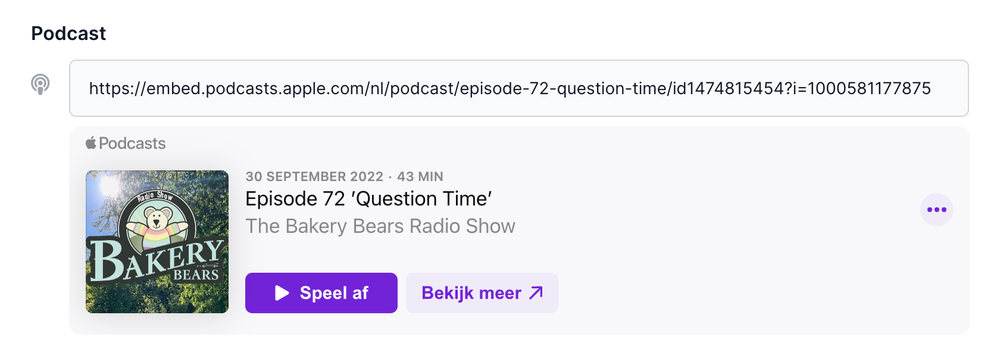
***
## Updated permission scopes for GraphQL access tokens
*February 8th, 2023*
Now you can define a permission scope per GraphQL access token more granularly. The new approach lets you choose which content item statuses are accessible for an access token. For example, you may want to get items that are still *In progress* or under *Review*.
You can see the full permissions list in the screenshot below:
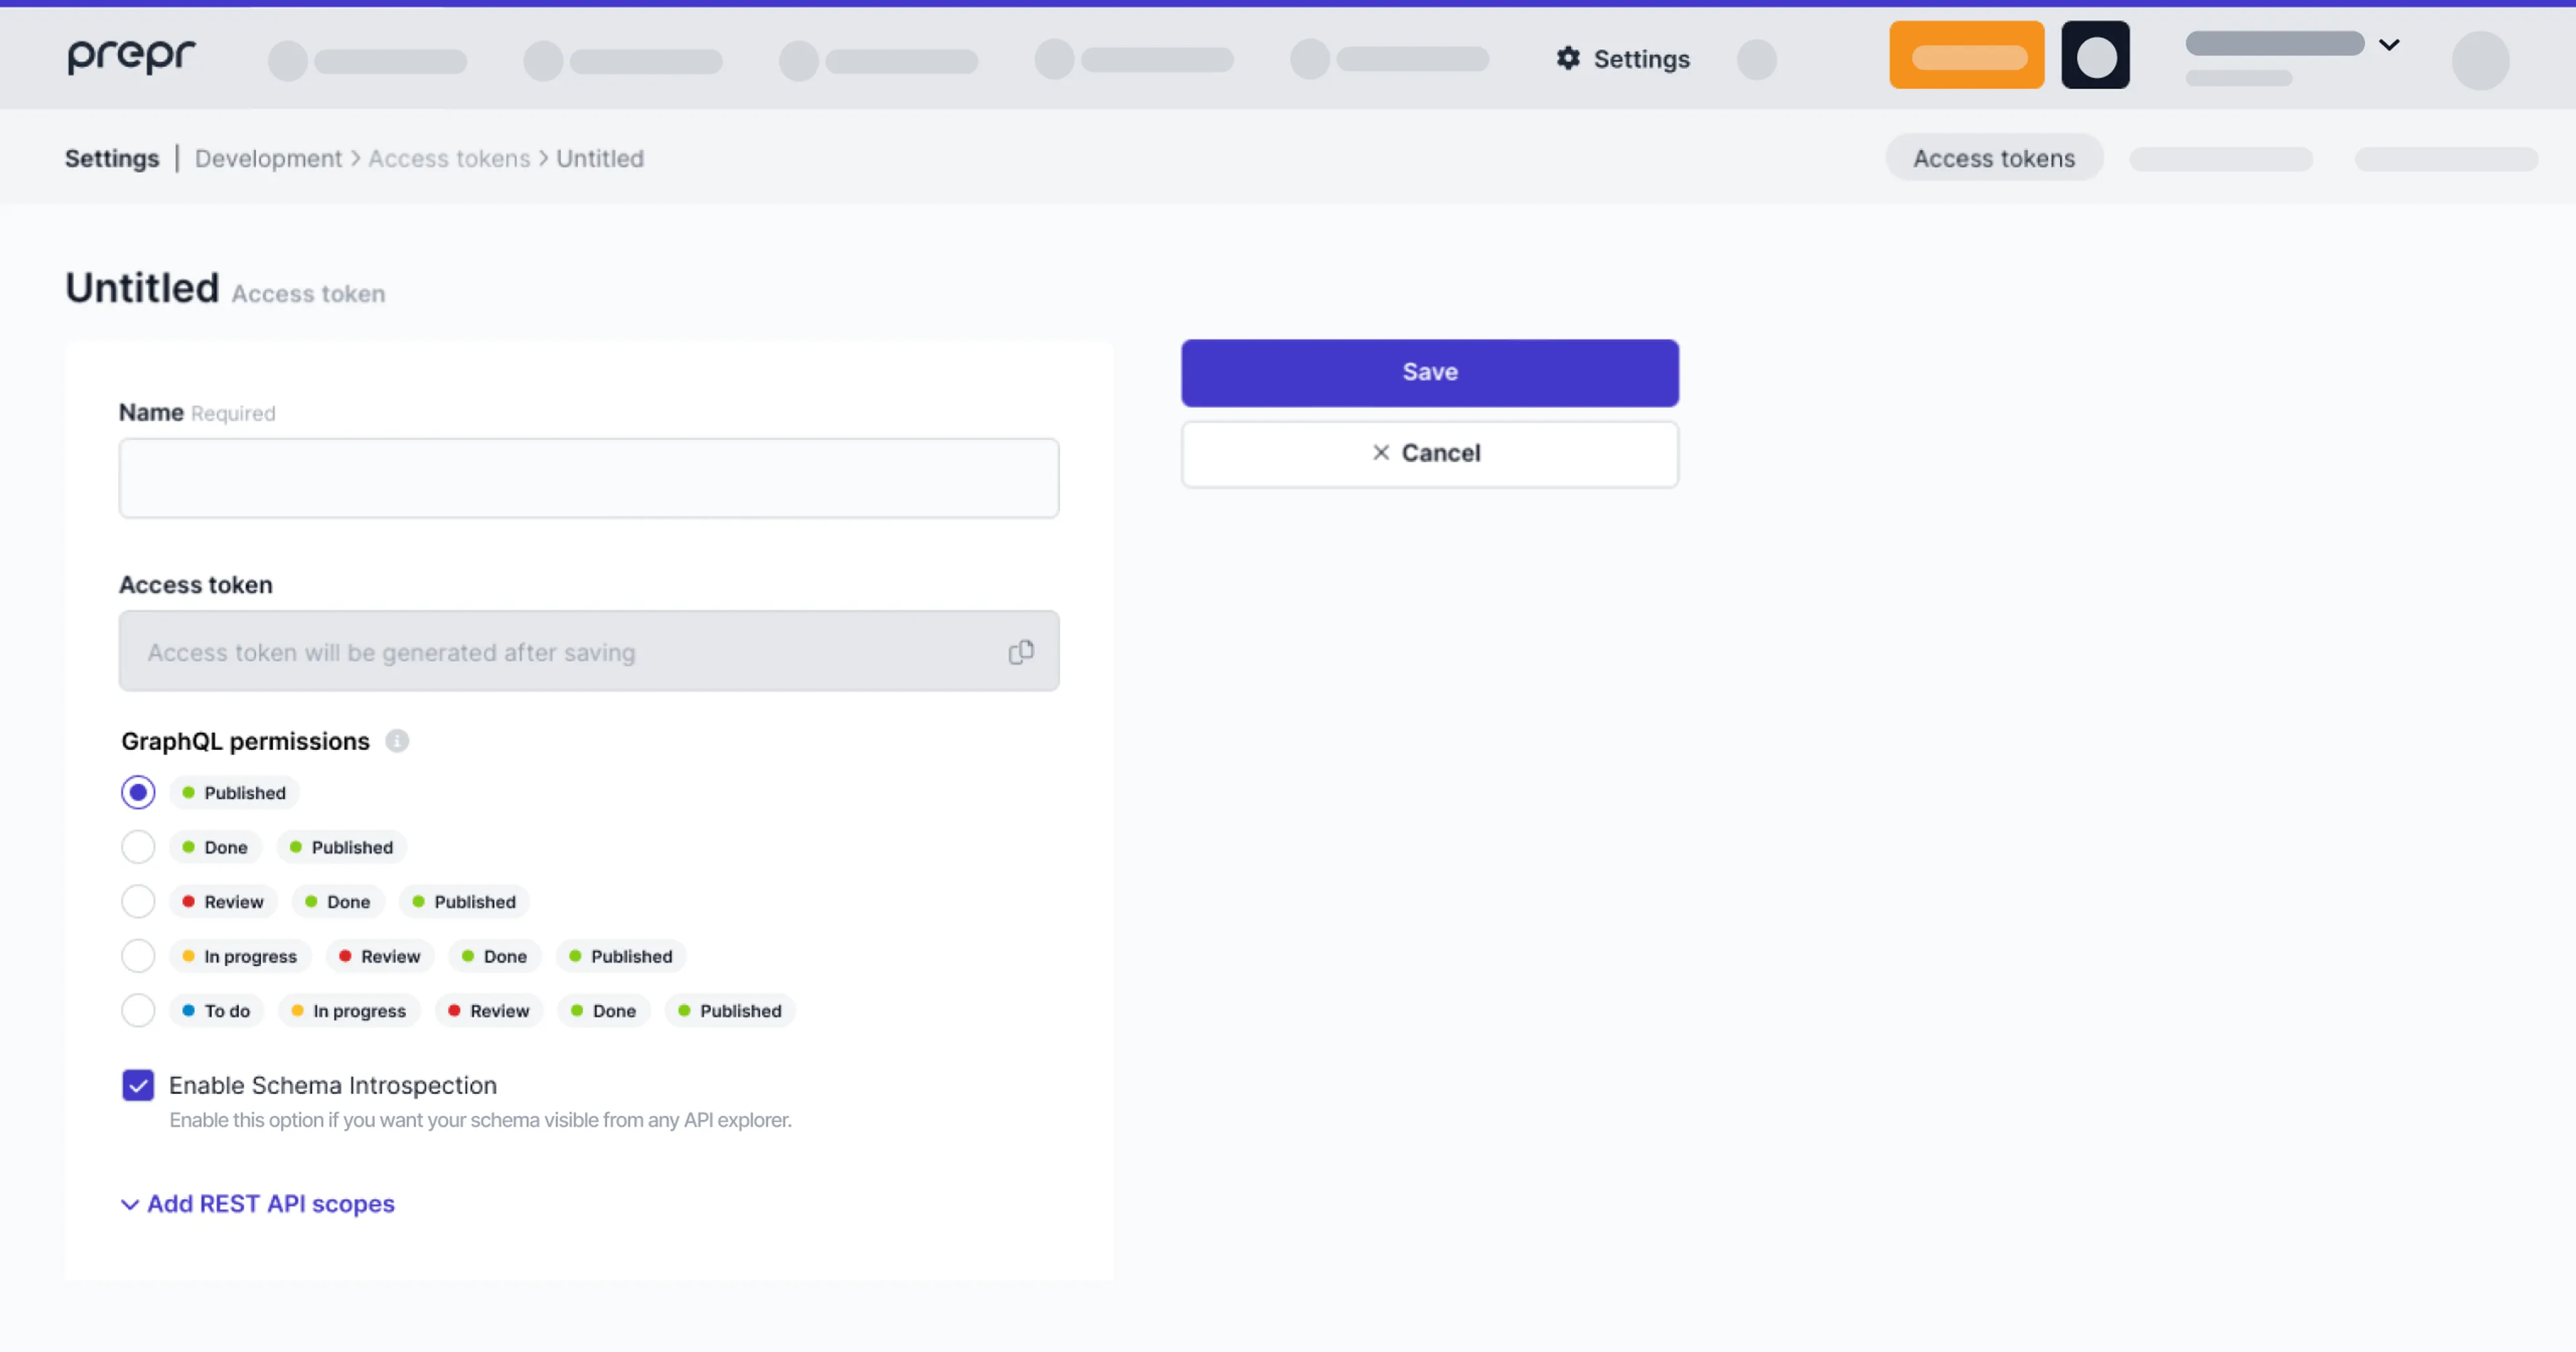
Additionally, you can manage the GraphQL introspection setting. Disable it to prevent unauthorized users from accessing your schema, including types, fields, and queries.
***
## Improved usability for setting up content references
*January 4th, 2023*
We’re introducing a new design of the *Content reference* field in the Schema Editor and on the Content item page to make it easier to combine multiple content items on a single webpage.
When you select allowed models, you can now choose whether editors are allowed to create new content items or not and whether to include content items from other environments for these specific models. So you get more flexibility with less effort. Check out the new options in the screenshot below.
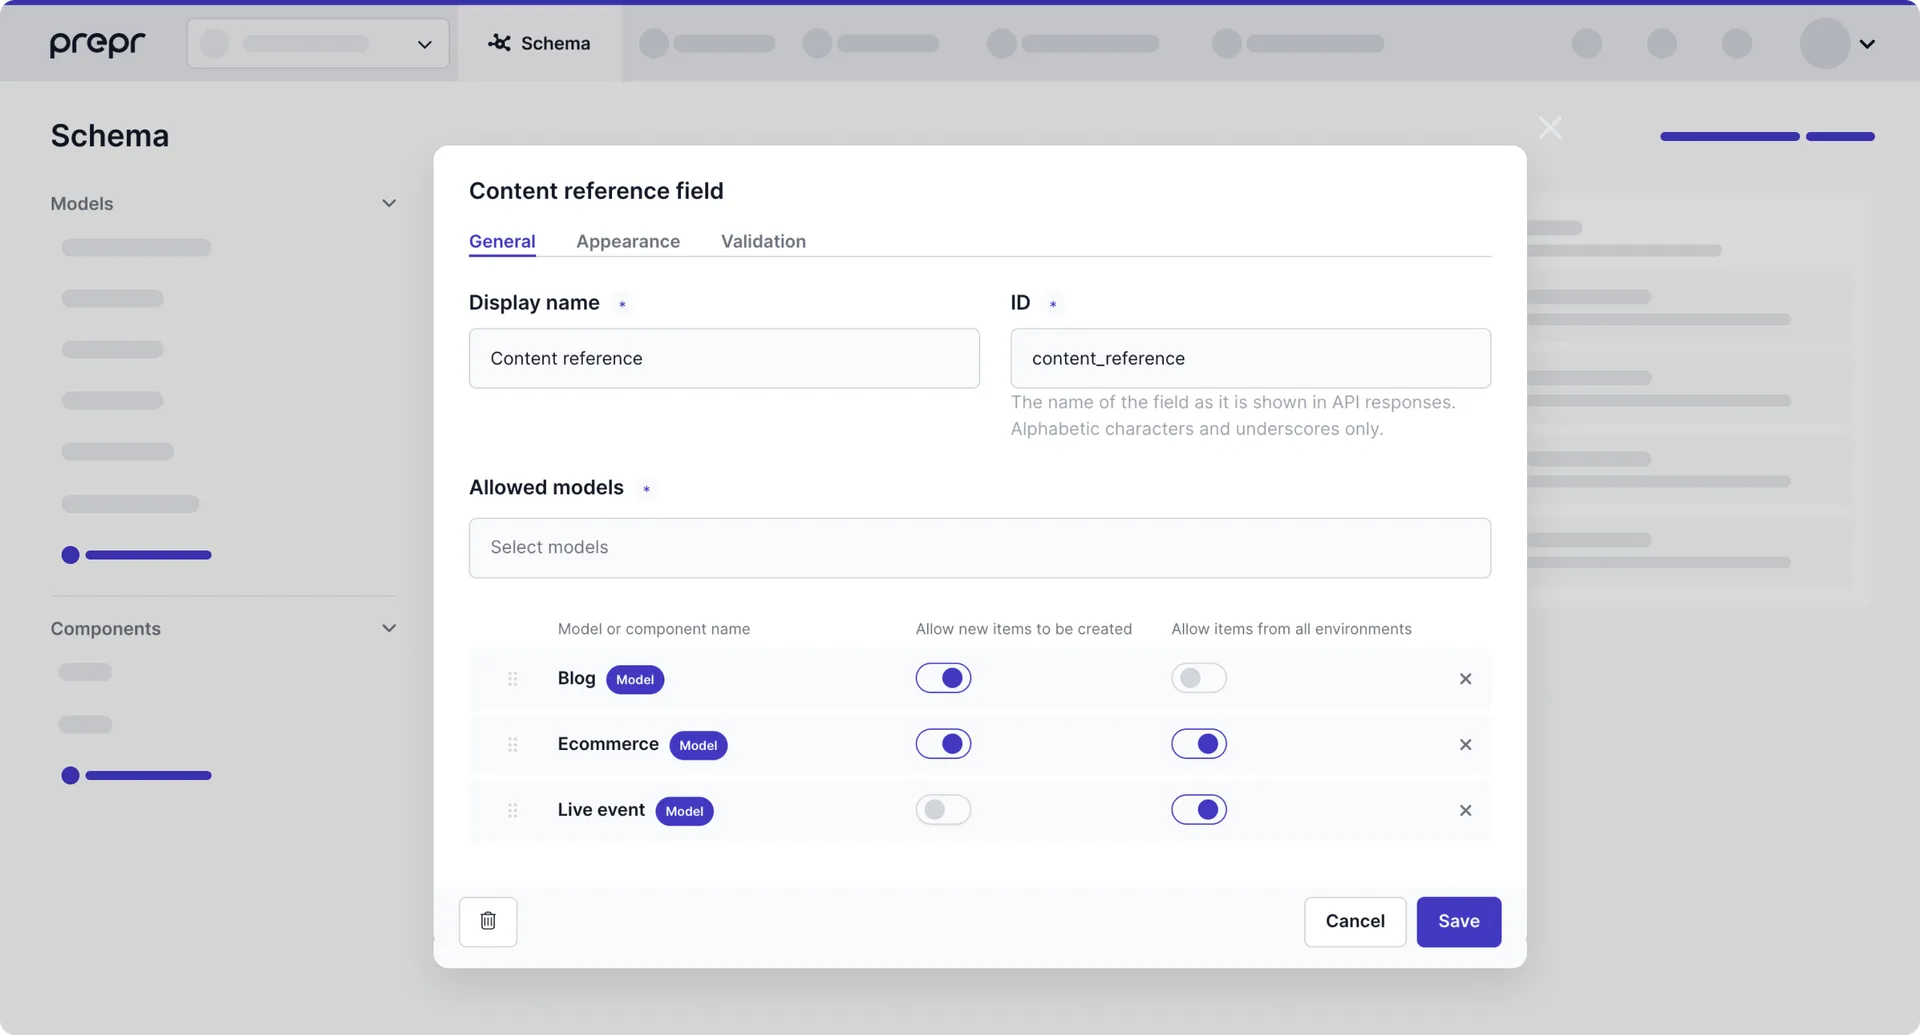
We've also updated the look and feel of the Content reference field in content items when the Modal with search appearance type is selected. Instead of selecting create/search item first, editors now choose the model first to see a filtered list of content items. If the needed item is not present, editors can create it there and then.
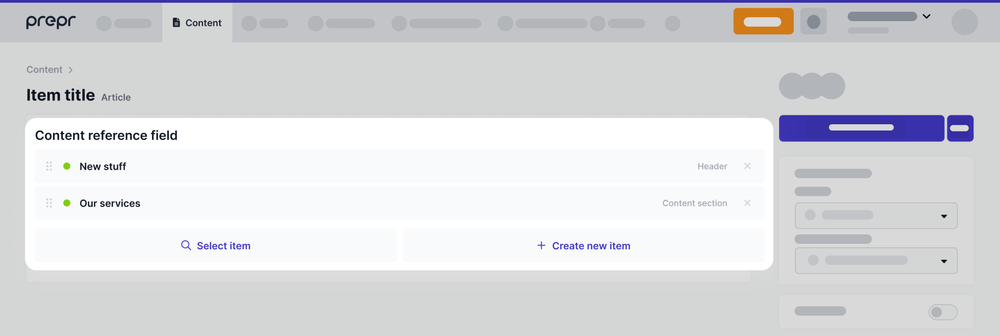
***
## Improved 3rd party content integration
*January 4th, 2023*
With this update, we’re introducing *Remote Content* – an improved workflow for using 3rd party content in Prepr content items, for example, products from an ecommerce platform or job postings from a backend system.
The setup process has become more convenient and faster thanks to our [new advanced *Schema Editor*](/changelog#release-of-a-new-schema-editor). You can now [set up a remote source](/content-modeling/setting-up-a-built-in-remote-source) and add it to the desired model within a single interface.
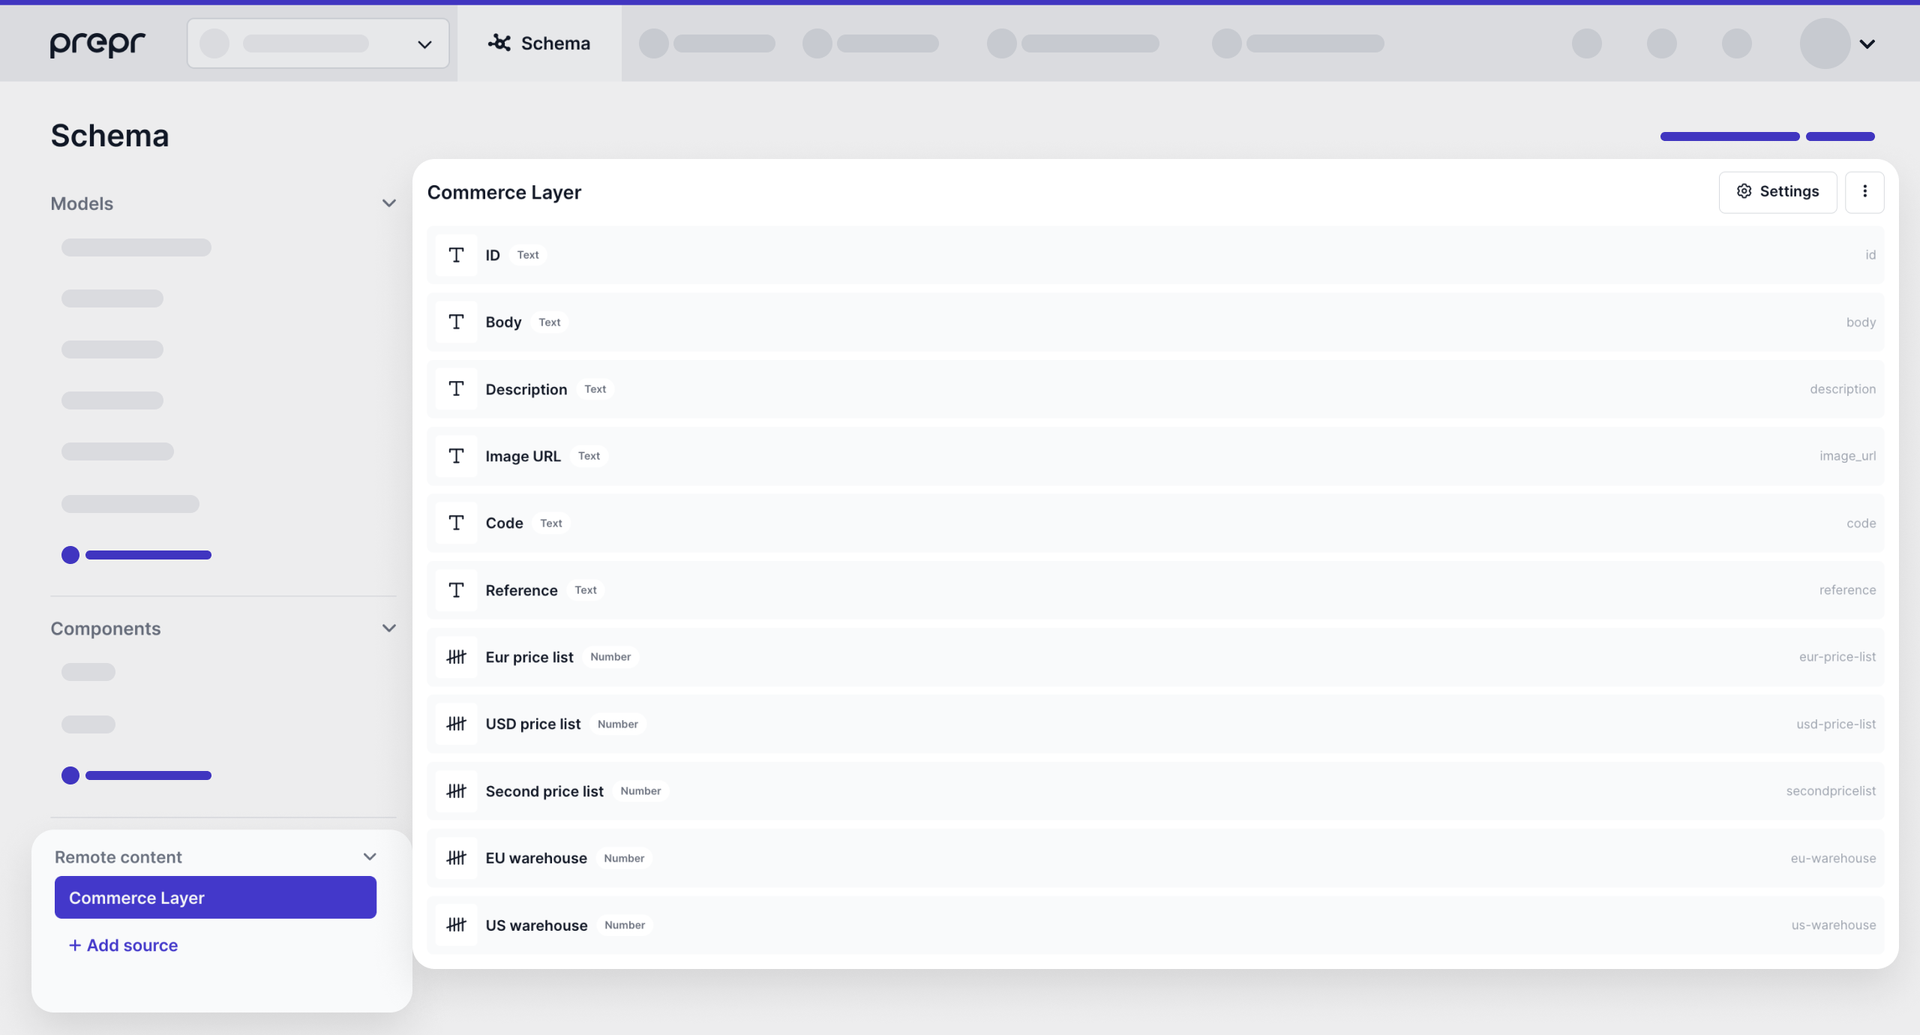
To get started, check out our [Integrations guides](/integrations).
Source: https://docs.prepr.io/stay-updated/changelog2023
---
# Changelog 2022
Find the beautiful features and important updates that were added to Prepr in 2022. This changelog gives you an insight into the most eye-catching releases during this period.
[Latest](/changelog) | [2024](/stay-updated/changelog2024) | [2023](/stay-updated/changelog2023) | **2022** | [2021](/stay-updated/changelog2021)
## Introducing Prepr Live Stream
*Dec 15th, 2022*
You can now create and manage live streams from Prepr, without the need for an additional streaming platform. Prepr is the first CMS in the world to offer a built-in live stream feature. Start streaming in seconds using Prepr Live Stream.
Learn more [on our blog](https://prepr.io/blog/live-stream) or [follow our guide](/development/best-practices/assets/live-video-stream).
***
## Deprecating oAuth Apps
*November 29th, 2022*
OAuth is the authentication process Prepr uses to grant third-party developers secure access to Prepr customers’ data, via the API. Historically, we’ve used OAuth Apps (client credentials) but, to better serve our entire community, we’re moving to the industry standard using a static long-lived token.
We’ve been communicating this since late 2019 and the change has come into effect. Existing apps are now converted to static long-lived tokens and the endpoints for refreshing an access token will now respond with the same token upon any request for that app.
If you have any questions, please [contact our support team](https://prepr.io/support).
***
## Option to disable editing a slug value
*November 24th, 2022*
It is now possible to disable editing on Slug fields. Turn on the **Disable editing** toggle if you don't want a content editor to edit the slug value. In this case, you can only update the field through the API.
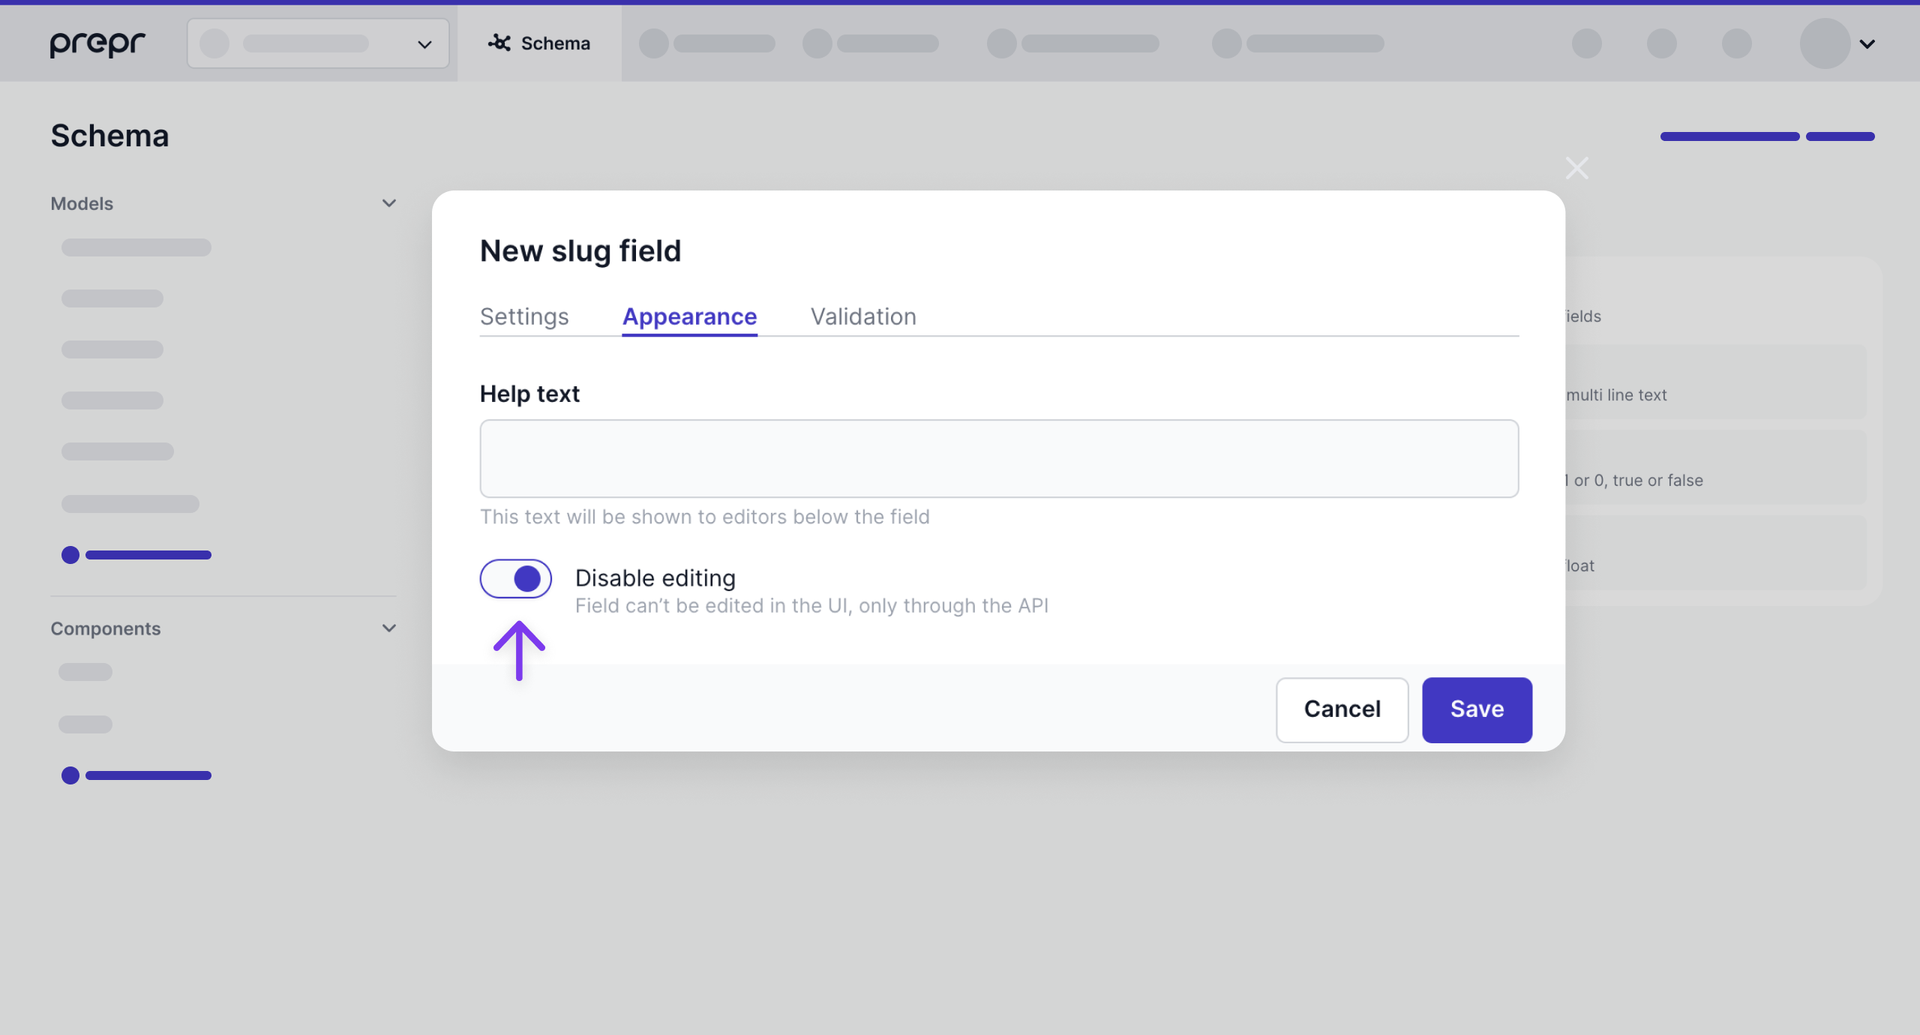
Check out [Field types](/content-modeling/field-types) for more details.
***
## New navigation for Organizations and environments
*November 7th, 2022*
We are pleased to announce new navigation when switching between environments, or between an environment and the organization level. The organization level screens have also been renewed to make it clearer when you are working at the organizational level. The detailed changes include:
- A new environments overview page to make it easier to manage your environments within your organization.
- Renamed tabs on the organizational level, namely, *Shared schemas* and *Shared customers* to make it clearer when you want to manage schemas and customers at an organizational level.
- We've also updated the environment switch to ease the transition between organizations and environments.
See an example environments overview page below:
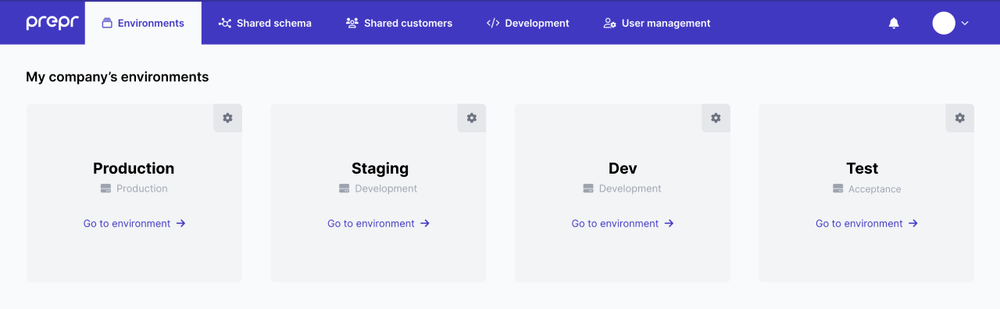
See an example of the new environment switch below:
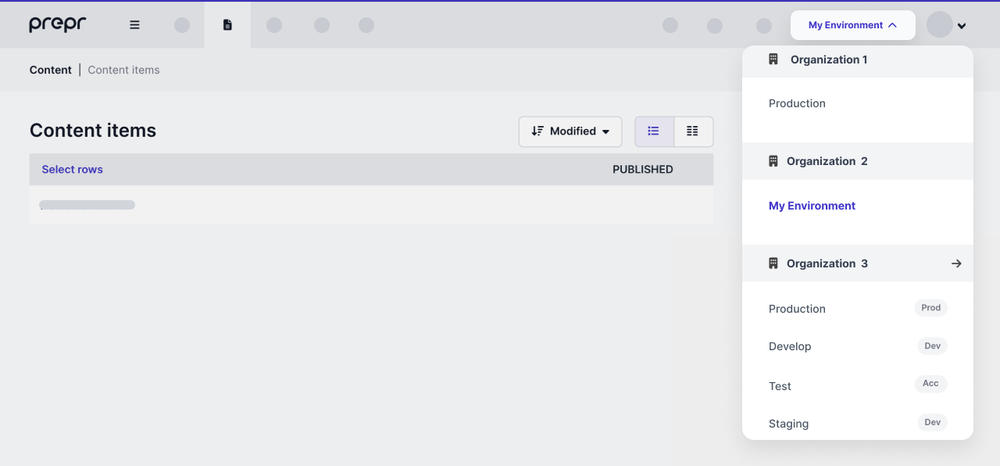
These are just a couple of several updates that we are releasing within the next few weeks to improve your user experience, so stay tuned!
***
## Slug field validation
*October 26th, 2022*
Publishing a content item without a slug value, for example, the slug was accidentally deleted, leads to broken links on a website.
With this update, we’ve added a validation algorithm that prevents editors from publishing content items with empty slug values. It will help you to maintain link integrity across your site.
To activate the validation check, go to the [Slug Field settings](/content-modeling/field-types#slug-field) in your model, click the **Validation** tab and turn on the toggle for **This field is required**:
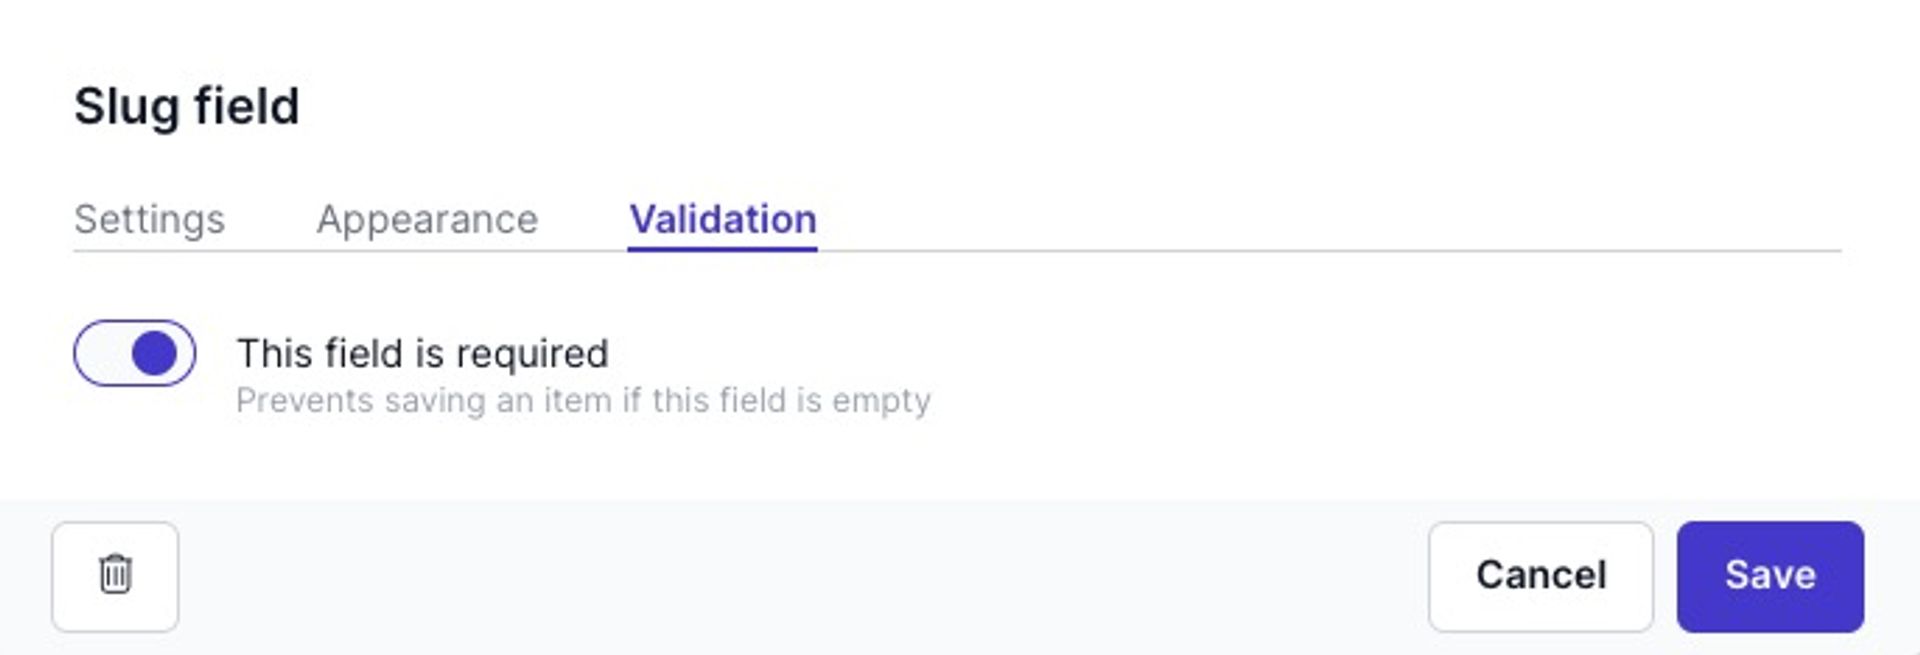
***
## GraphQL API update
*October 18th, 2022*
- Added new filters for Integer, Float, Date, DateTime and Date Range fields.
- Added popular sort for ContentItems query (multi type filtering).
- Improved descriptions of fields and filters in the introspection schema.
***
## Release of a new Schema Editor
*September 29th, 2022*
We are excited to announce the release of the brand new **Schema Editor**. This editor enables you to define a content structure for your web app which consists of models, components and their related fields. Now, not only can you create models, components and fields a lot easier than before, it's also a lot quicker to navigate between models and components with an easy-to-access single view within the **Schema Editor**. When creating models, you can choose to use templates that will create models for you and there is drag-and-drop functionality making it a breeze to add and rearrange fields. Watch this [short video](/content-modeling/managing-models) on how to use this new feature or check out the [Create a model](/content-modeling/managing-models#create-a-model) documentation for more details.
***
## Introducing single-item models
*September 29th, 2022*
Previously, Prepr always allowed content editors to create multiple items for a model. It's now possible to restrict the content editor to only create one item for a model per environment, for example, for site settings or navigation. You can enable this feature when you create a new model. Note that it's not possible to switch an existing multi-item model to a single-item model and vice versa. For more details, check out the [Create a model](/content-modeling/managing-models#create-a-model) documentation and for the API details, check out the [Content item object](/mutation-api/content-items-create-update-and-destroy#the-content-item-object).
***
## Option to disable auto-generated unique slugs
*September 29th, 2022*
Prepr automatically generates unique slugs when you save a content item with a slug that already exists. It's now possible to disable this feature in cases where you want to prevent duplicate content items. A typical situation to use this feature is when you want to add content items through the API and don't want a content item to be added automatically if the slug already exists. In this case, if you disable the auto-generated slug option, the API will return an error response if the slug already exists. For more details, check out the [slug field type](/content-modeling/field-types#slug-field) documentation and for API details check out the [Content item object](/mutation-api/content-items-create-update-and-destroy#the-content-item-object).
***
## Getting all locales of a content item at once
*August 15th, 2022*
We have improved the content locale support in the latest GraphQL API version ([2022-08-15](/graphql-api/upgrade-guide#upgrade-from-version-2022-03-22-to-2022-08-15)). Now each content item has the *\_localization* field that contains all available locales for that content item.
With this update, you can fetch and render multi-language content with a single piece of front-end code and seamlessly adapt your website to international audiences.
Use the following query to get all the translations of your content item at once:
```graphql copy
query {
Page {
items {
id,
title
_localizations {
_id
_slug
title
}
}
}
}
```
For more information, read [Localization](/content-management/localizing-content) and [API reference](/graphql-api/localization).
***
## Pre-fetching B variant data for A/B testing
*August 15th, 2022*
With the latest GraphQL API update ([2022-08-15](/graphql-api/upgrade-guide#upgrade-from-version-2022-03-22-to-2022-08-15)), we have added a new system field *\_ab\_testing\_variation* to content model configurations. It allows getting all content model fields for the B variant in your A/B test.
You might need to pre-fetch the B variant data to run an A/B test on a static site. In this case, run the following query, and use the results to pre-initialize your call-to-action component with the known values during the site build.
```graphql copy
query {
Post( id : "76b42254-dfb0-4568-ae84-4800717d23df") {
_id
title # Returns the A variant.
_ab_testing_variantion {
_id
title # Returns the B variant.
}
_ab_testing_active
}
}
```
Find out more in [A/B testing](/ab-testing/setting-up-ab-testing) and [API reference](/graphql-api/personalization-recommedations-ab-testing).
***
## Validation of third-party content inserts
*August 14th, 2022*
Prepr always takes care of your data safety. That is why we have improved the validation of third-party content inserts. From now on, you need to specify a 3rd party service domain in your content integration set-up to whitelist that service in Prepr.
You can do it in your [remote source](/content-modeling/setting-up-a-built-in-remote-source) settings under **Schema → Remote sources**:
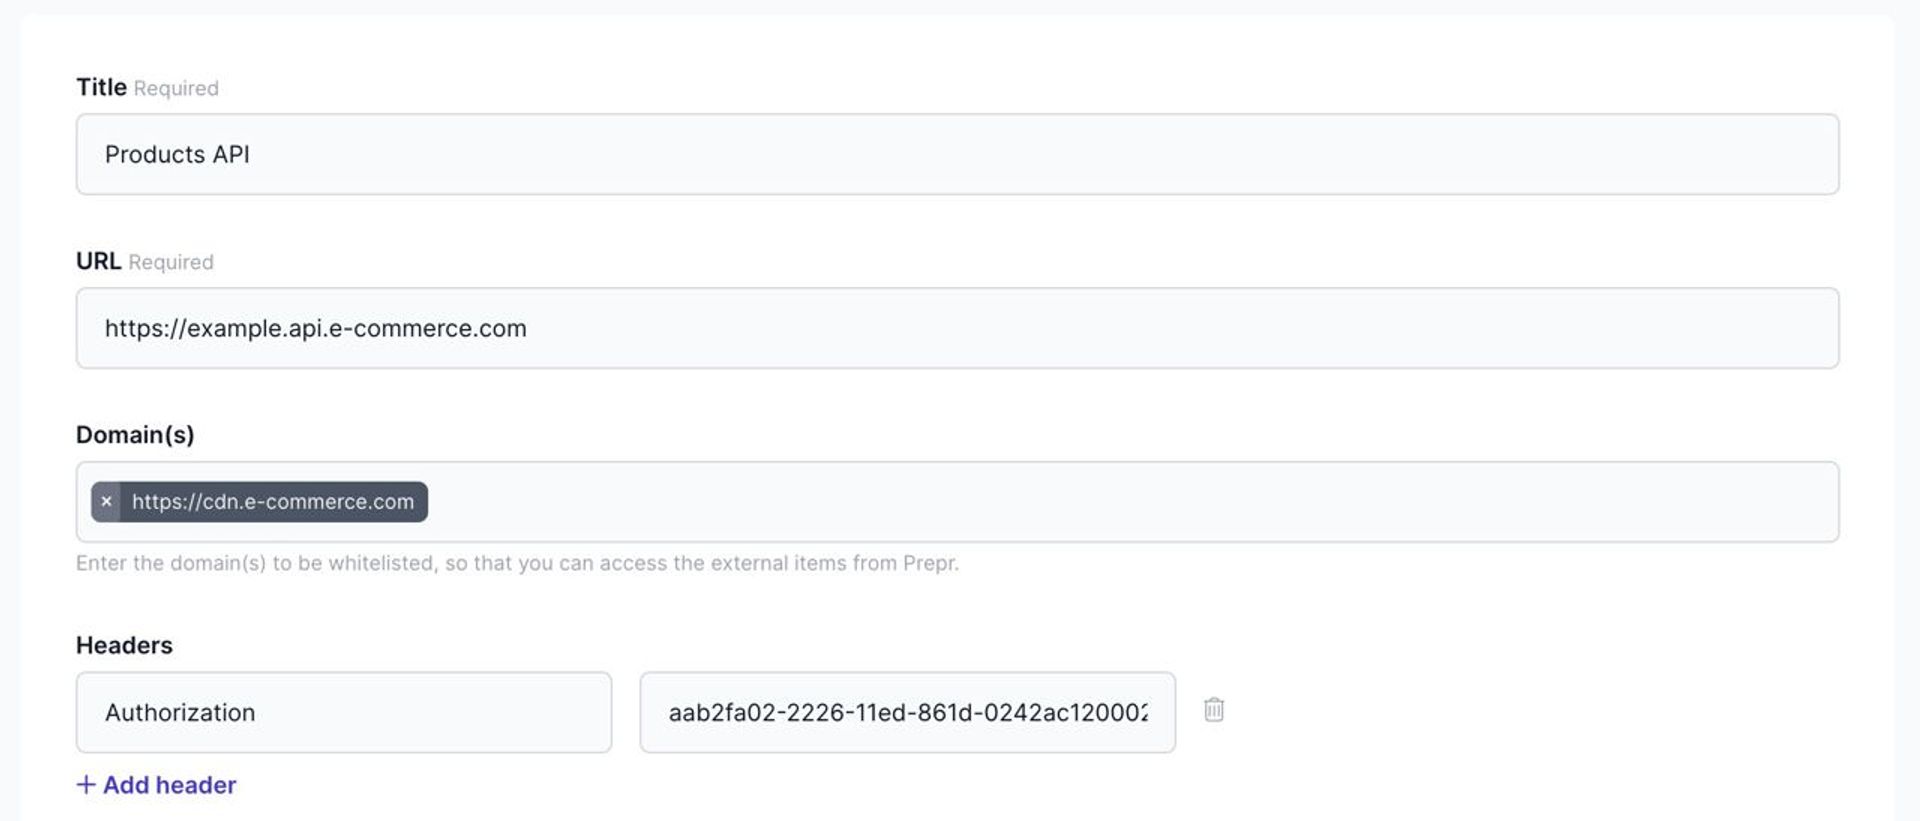
This way, you can control which external sources your Prepr environment uses for content inserts. For more information, see [Integrations](/integrations).
***
## Marking required fields in component
*August 11th, 2022*
Now you can make any field in a component required to fill in by editors. To do that, enable the **This field is required** option under the **Validation** tab in field configurations when adding a new field to your component or updating an existing one.
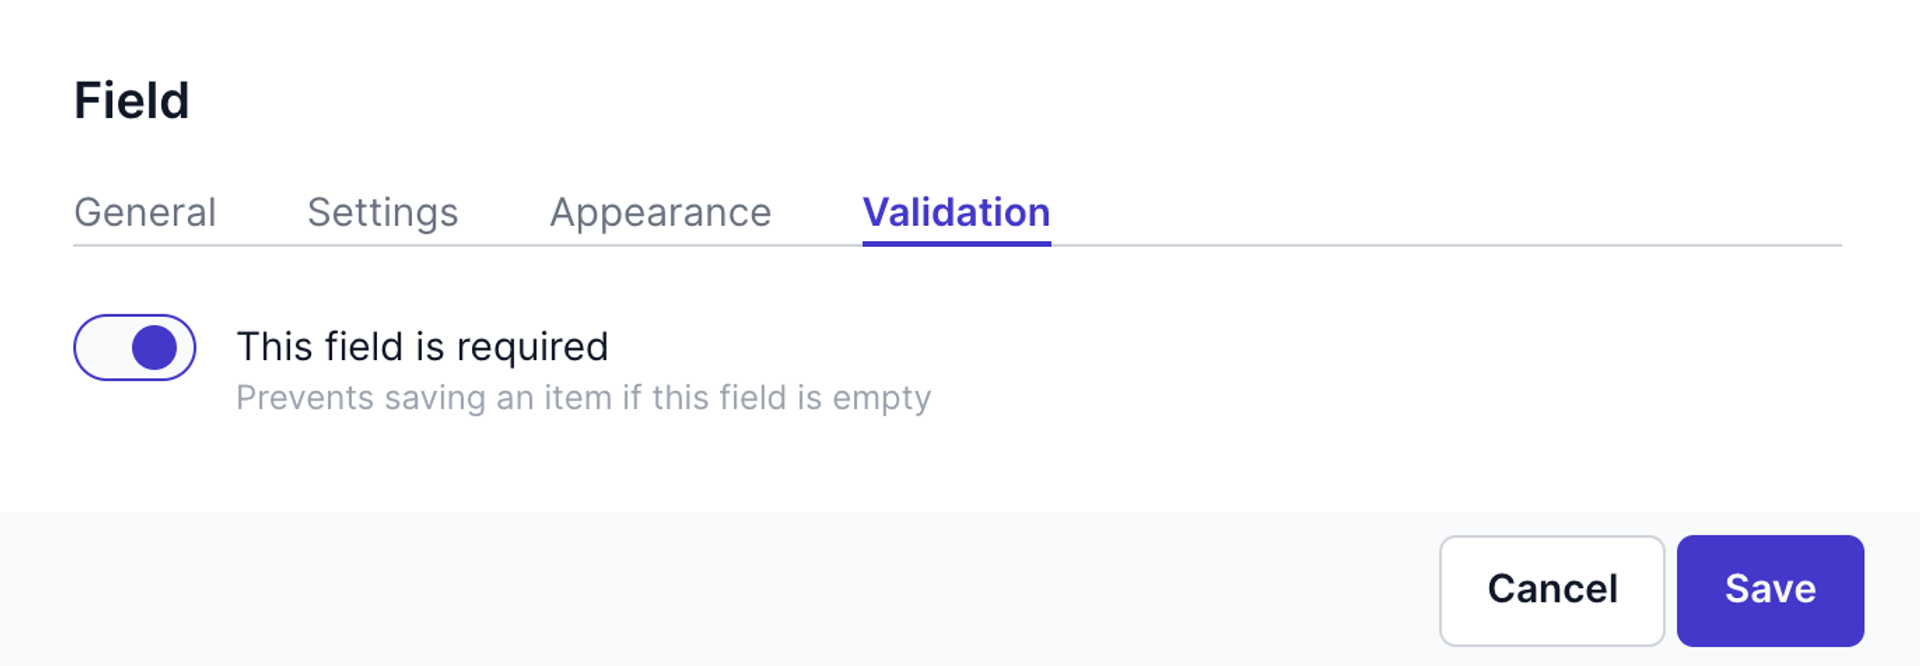
Once done, the required fields will be highlighted in the **Required** column on the component overview page and marked with the **Required** label in a content item.
With this update, we have created consistency between models and components. In addition, it provides editors with a better user experience, and developers now have more granular control over components in Prepr.
Read more in [Managing components](/content-modeling/managing-components).
***
## Improved password policy
*August 8th, 2022*
At Prepr, we believe that forcing a strong password policy is a crucial step in defending confidential user information. Therefore, we are introducing an updated password policy.
New criteria are designed to create a strong password and include the following:
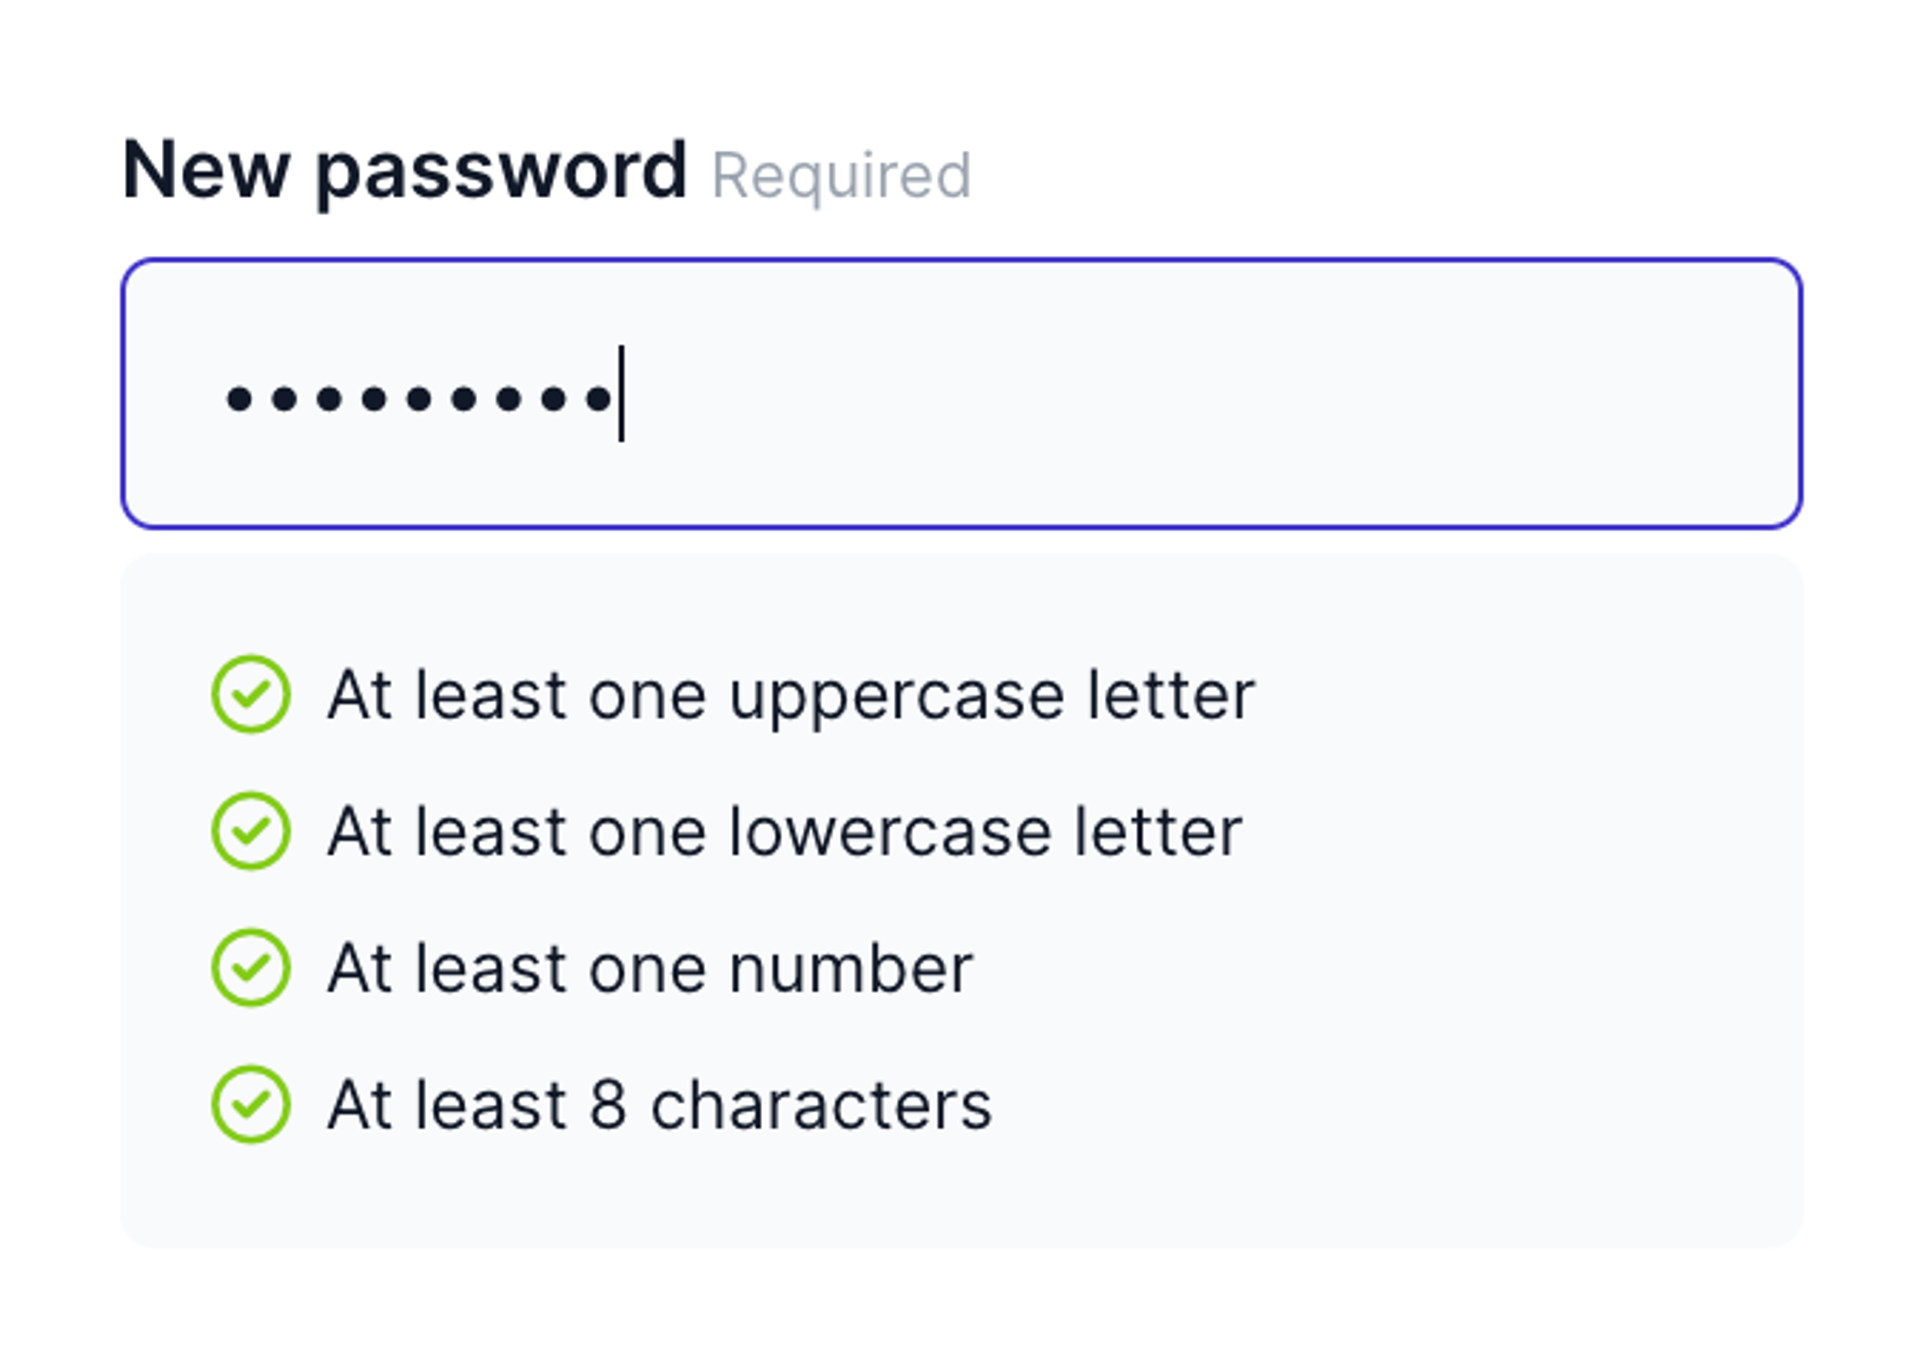
When signing up or changing an existing password in Prepr, these criteria are mandatory for all users to keep accounts safe.
***
## Updated navigation titles
*August 2nd, 2022*
Based on user feedback we have renamed the titles of navigation items inside Prepr. We have renamed 'Publish' to 'Content', 'Engage' to 'Customers' and 'Analyze' to 'Engagement'. These new titles should make the purpose of each of these sections easier to understand.
In addition, we have moved the Personalization page to the main menu. This change reflects our focus on the features for building personalized content experiences we offer.
***
## Automatically regenerate slugs
*August 1st, 2022*
When changing the title of a content item, you may also want to adjust the slug for the item to match the new title. Until today, this had to be done manually. We have added an option to regenerate the slug with the click of a button. Simply click the 'Regenerate' button next to any slug field. Clicking it will generate a new slug based on the slug conststruct you have defined. This new feature can be a great timesaver when you're adjusting slugs frequently.
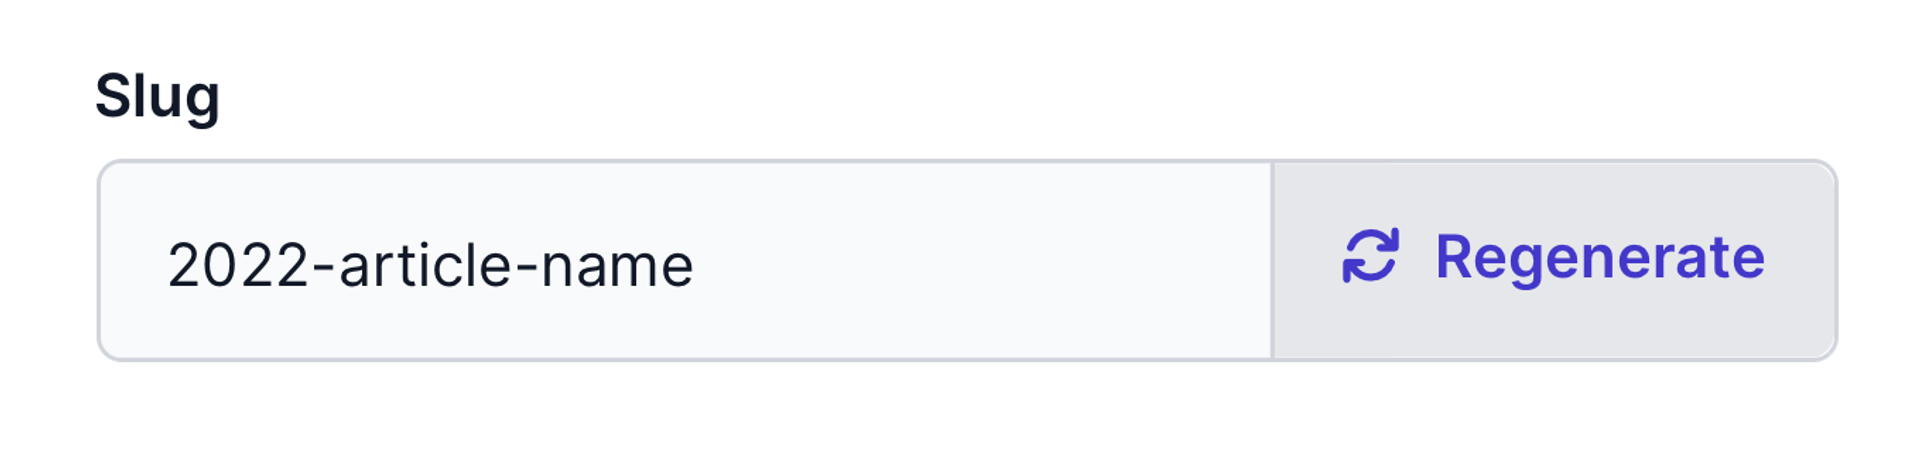
***
## New column options for models and components
*July 22nd, 2022*
When working with smaller fields in a content model, the column option makes it easy to divide those fields over multiple columns. We have increased the maximum number of columns from 3 to 5 columns for content models in Prepr. This will make for a better editor experience if you need to display a lot of small fields, like fields for numeric values.

In addition, we have added the column option for components as well. You can add up to three columns to any component.
To add columns to a model or component, click the arrow button next to the 'Add field' button and select 'Add columns'.
***
## Added no-NB locale
*July 22nd, 2022*
We have added support for the no-NB locale. This locale is an addition to the, already existing, no-NO locale in Prepr. Bokmål (no-NB) is an official written standard for the Norwegian language, alongside Nynorsk. Locales can be set up from the organization settings page. This feature is available to organization owners and users with the environments permission.
***
## API Explorer for content items
*July 18th, 2022*
Content items in Prepr can now be opened in the API Explorer, which will generate a complete GraphQL query for the selected content item. Simply click the 'Open in API Explor' button on the right of the content item detail page.
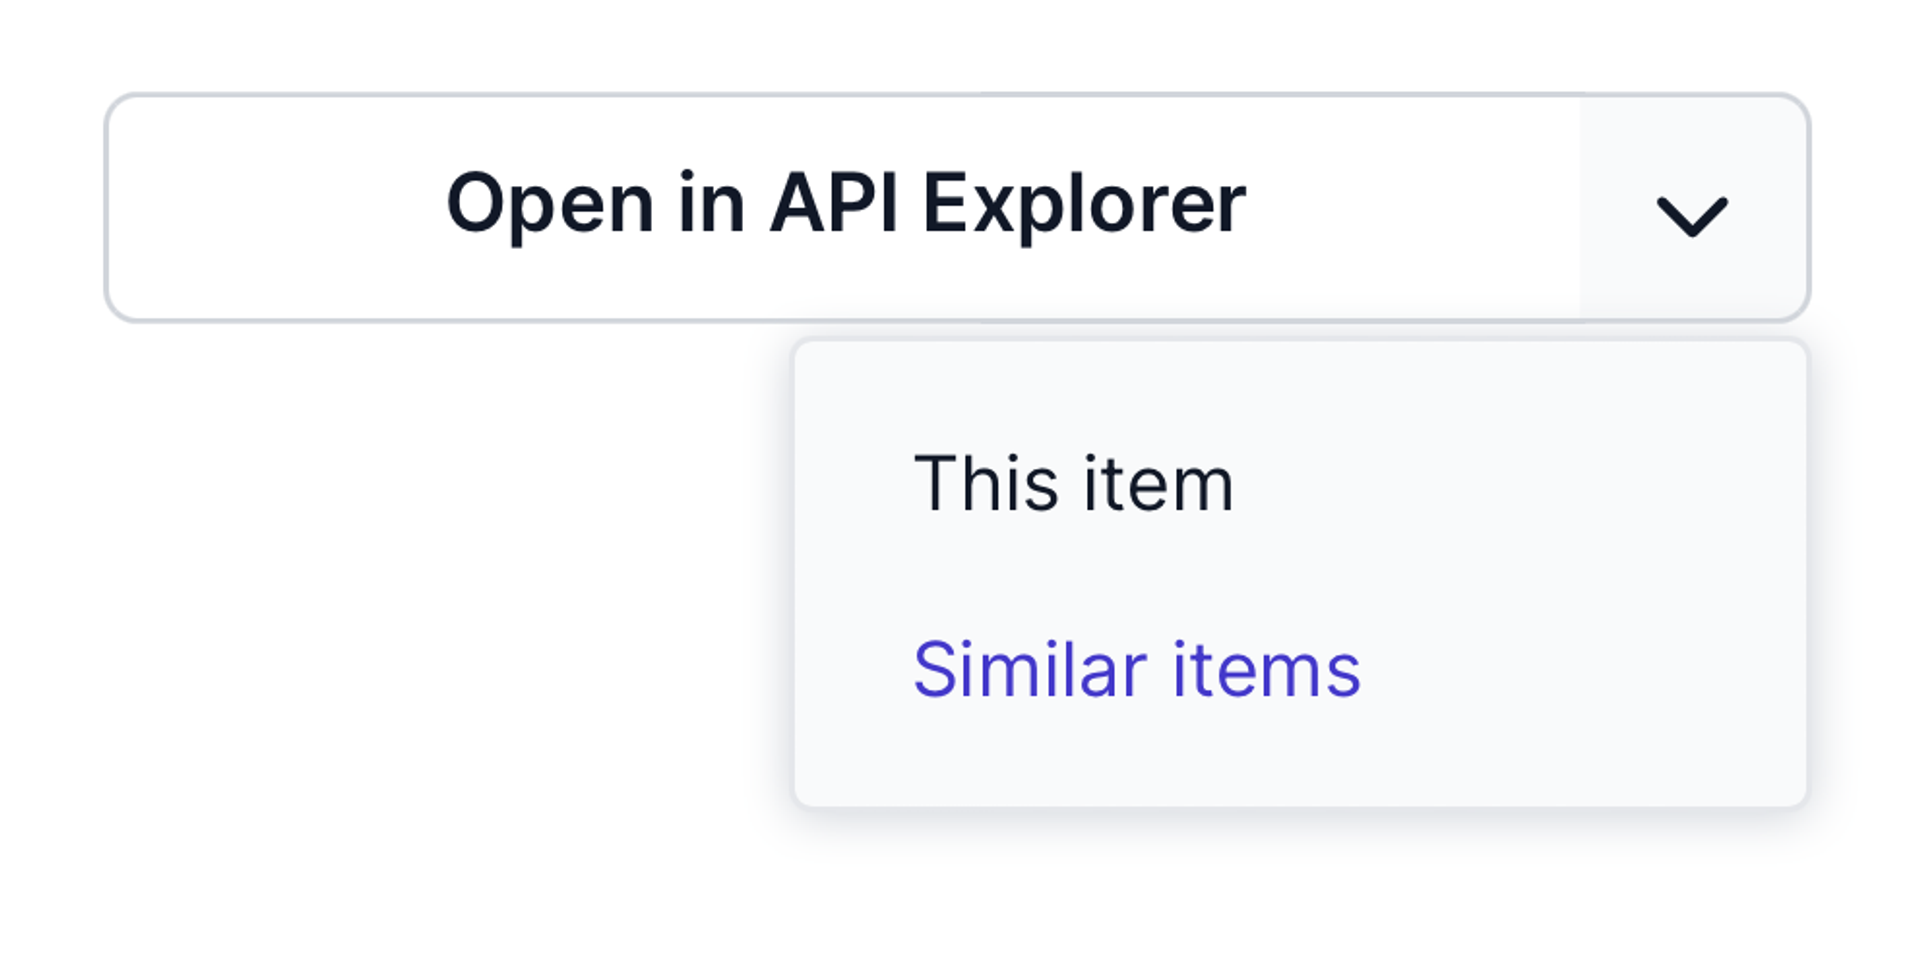
Clicking the arrow on the side of the button will also bring up the option to generate a query for [similar content items](/recommendations#querying-the-api-for-similar-items).
These new features allow developers to generate queries easily and make testing the response of a query much faster.
***
## Performance improvements for managing content items
*July 18th, 2022*
We have rolled out an update to improve the performance of the 'Content' section in Prepr. This update brings significant performance improvements to common tasks in Prepr. For example, creating a new content item is now 50% faster, the list of content items loads more quickly and opening an existing content item is also much faster. This update improves the user experience for content editors. We are constantly working on performance improvements like these.
***
## Elements are now called Components
*June 30th, 2022*
We always try to use familiar terms in our interfaces to create an intuitive experience for our users. Therefore, we have renamed the Elements functionality in Prepr to Components. Components allow you to create a reusable sets of fields, which can be used in content items. This new name is more coherent with naming for similar concepts in other applications and should therefore be more familiar to new users. To learn more about Components, [learn about it on our documentation website.](/graphql-api/schema-field-types#components)
***
## Introducing Mux: next-level video and audio processing
*June 22nd, 2022*
We're introducing Mux for all new Prepr accounts and are raising the bar for video quality and delivery methods. Mux Video is an API for professional video and audio streaming. Your video and audio files will automatically be uploaded to Mux by Prepr. From there you can stream them using a few simple API calls. Your videos will look beautiful every time, on any platform and at any scale. No matter if your content gets 10 or 10,000,000 views, it will play instantly.
Compared to our previous video and audio solution, Mux offers various performance improvements that result in a better user experience for both your customers as well as content editors working with video and audio content in Prepr. Uploading video content is now up to five times faster, resulting in a significantly faster editing experience for content editors.
***
## Indexing your content items for visitor recommendations
*June 7th, 2022*
You can use Prepr's built-in personalization engine to show related content by sharing recommendations based on user behavior or the item's characteristics. To start offering Similar content, it is important that your content is analyzed and grouped around common characteristics.
As of today, this analysis takes place automatically with your new content. Write your content, publish it on your site, and our Prepr analysis tool takes care of all text calculations. Learn more about this new feature on [our blog](https://prepr.io/blog/introducing-ai-text-analysis-for-better-recommendations).
Start offering similar content on your site or app immediately. [Learn more about our recommendation engine](/recommendations).
***
## Added SDK support for Vue 3
*May 25th, 2022*
Vue 3 became the default Vue.js version in February of 2022. Therefore, we have updated our SDK to add support for Vue 3. The SDK now supports both Vue 2 and Vue 3. We have also updated our documentation to reflect this change. [Learn how to set up Prepr in your Vue.js application](/connecting-a-front-end-framework/vuejs).
***
## Clean up your customer database by merging profiles
*May 18th, 2022*
Ever noticed duplicate customers in your Prepr environment? Now there’s a way to fix that! We’re thrilled to tell you more.
Prepr’s Customer Data Management feature is a great way to learn about user behavior and it’s the starting point for creating personalized experiences. Maintaining high data quality is critical to making this work. Due to a combination of data import methods, you may encounter duplicate contacts at times. This can lead to inaccurate data analysis, incorrect personalization, and reduced data quality. To fix this we recommend merging duplicate customers. That’s why we developed the new Customer Merge feature. [Learn how to use it in our user guide.](/data-collection/managing-visitor-data-manually)
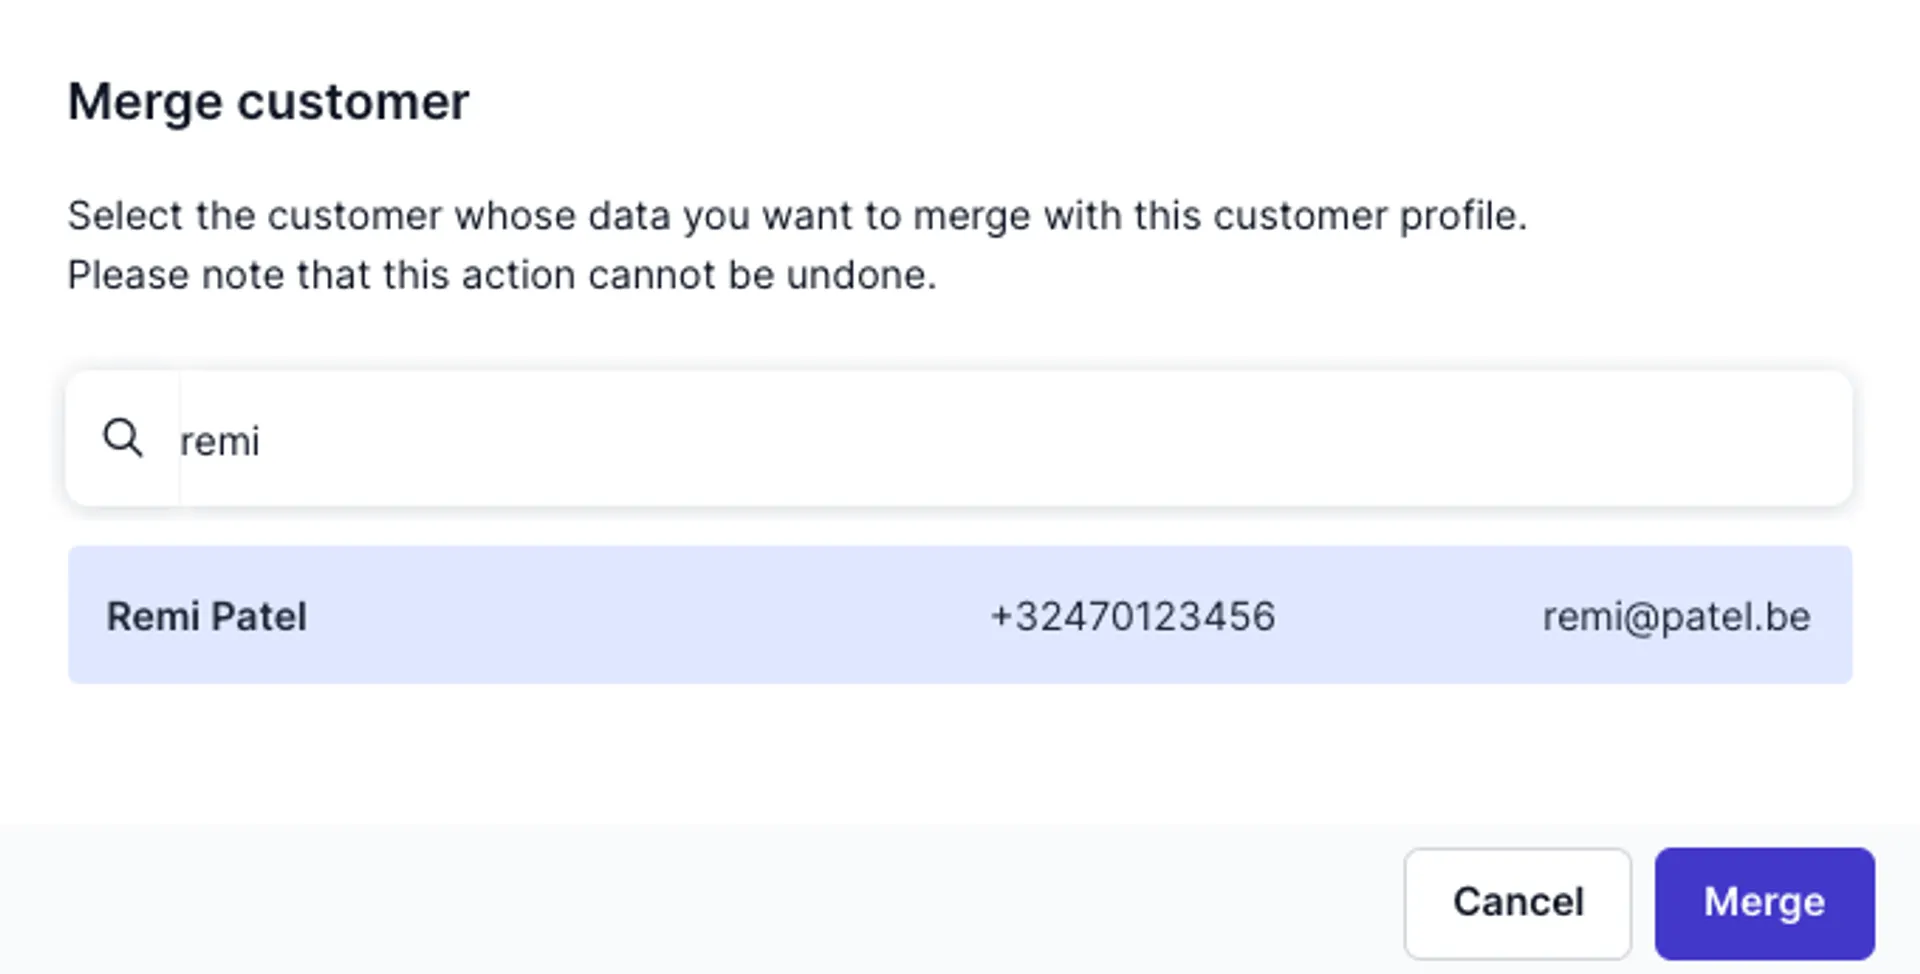
***
## Exclude bots and spiders from event data and segments
*May 10th, 2022*
Bots are automated computer programs that click around in a browser, attempting to mimic humans, or to indexing the web. They can either run on servers in a data center such as Amazon Web Services or sometimes, on people’s personal computers that have been infected with malware or a virus (referred to as a botnet).
As of today, Prepr excludes these bots from the capturing of event data. This means that no event will be created for the page visits of a bot or spider, no customer profile, and therefore no engagement score. [Click here for more information on how Prepr handles search bots, as well as a full list of all excluded bots](/data-collection/fundamentals#how-search-bots-impact-event-data).
***
## Set a user-friendly display name as a list option
*April 7th, 2022*
Today's update includes an improvement to the list field in models and elements. Previously, a list field consisted of only 1 value; a text line. This means that this field must be relevant for the editor in Prepr as well as for the developer who retrieves the list via the API. This sometimes proved to be a problem. For example, when the developer needs a key without spaces or characters, but this is valuable to the editor.
Now, it is possible to add a key-value as list items. This allows you to give a list item a technical name (a unique identifier, a key) and a user-friendly value that you see in the Prepr content items (the data, the value). All existing list fields are updated to the new key-value format.
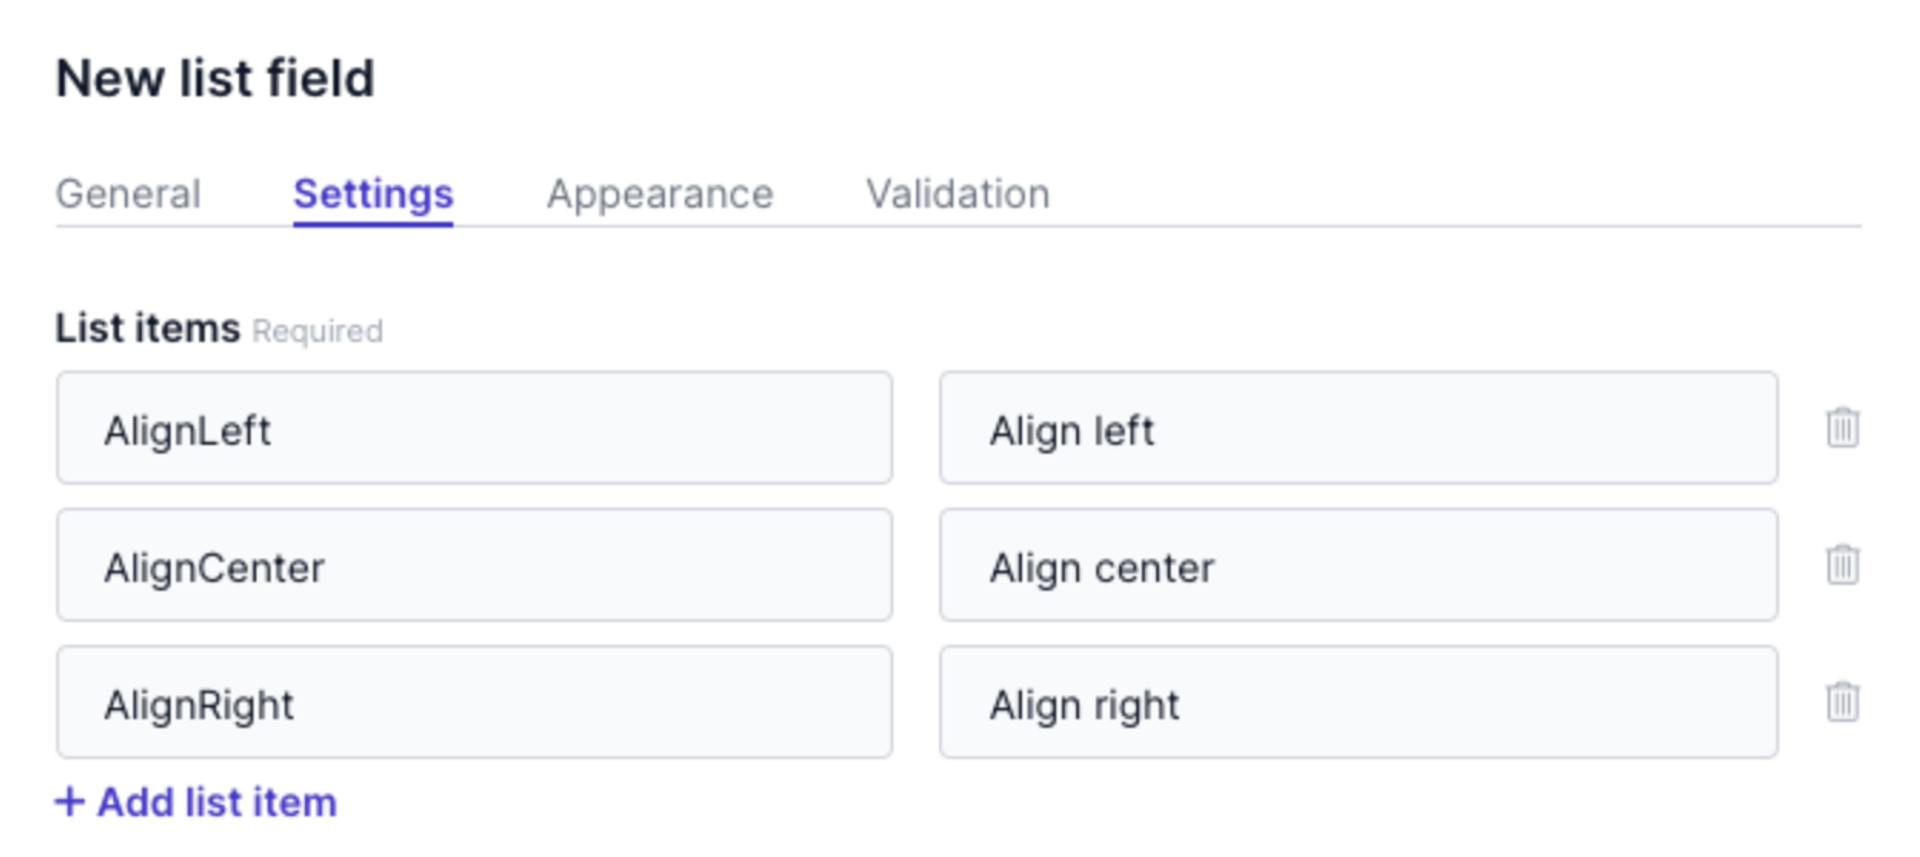
***
## Clarify help text for your editors with markdown
*April 6th, 2022*
The help texts for a field in a model or element are an instruction to the editors of your content. It is now possible to further clarify the instructions by making text bold or italic. You can do this by using markdown in the help text, such as \*\* and \_. Read more about the possibilities of markdown in help texts.
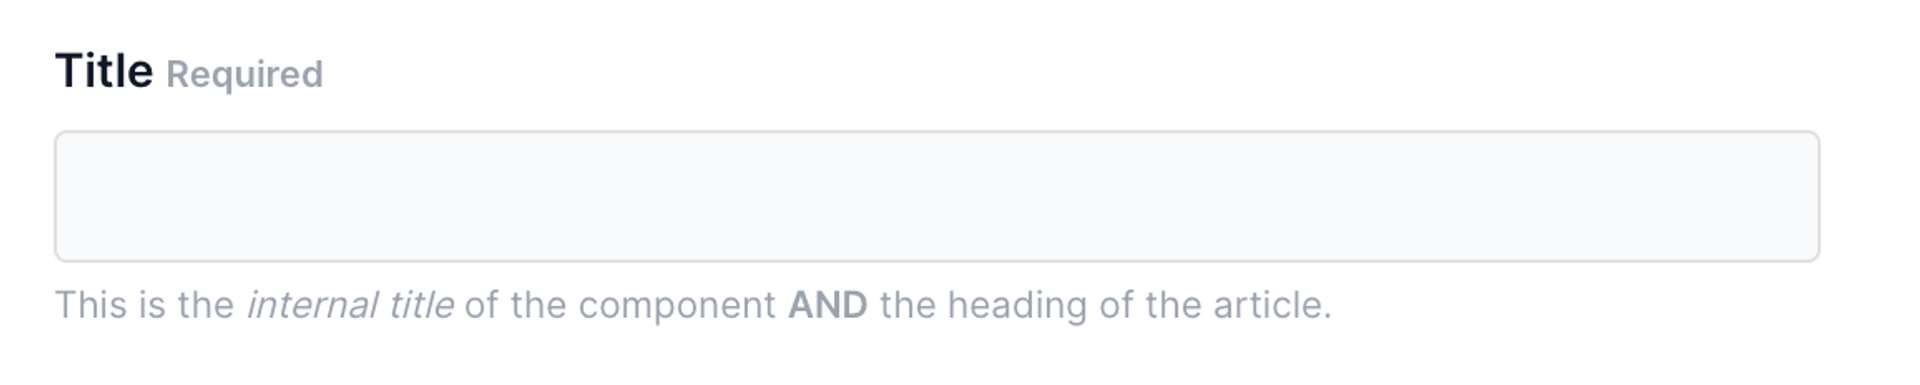
***
## Added support for Catalan and Basque locale (ca-ES and eu-ES)
*March 11th, 2022*
Catalan and Basque locales are now available in Prepr. To set a locale, go to the environment details on the organization settings. You are able to select one or more locales for multi-language publications. This feature is only accessible for owners and users with the 'environments' permission. [Learn more about roles and permissions](/project-setup/managing-roles-and-permissions).
***
## Rock-solid segmentation for online marketing campaigns is now possible
*February 16th, 2022*
Today's update includes an important extension to the segment builder in Prepr. Segments are groups of customers based on one or more common details. You can use segments for engagement analysis purposes, sending notifications, or personalizing your content.
As of today, it is possible to segment customers by UTM data (such as sources and campaigns), by referral URLs, and by the number of sessions. You can also segment by browser and device type. At last but not least, you can now segment people by everyone who signed up on your front end.
This extension will be an important contribution to the personalization of your content. [Learn more about segments](/personalization/managing-segments).
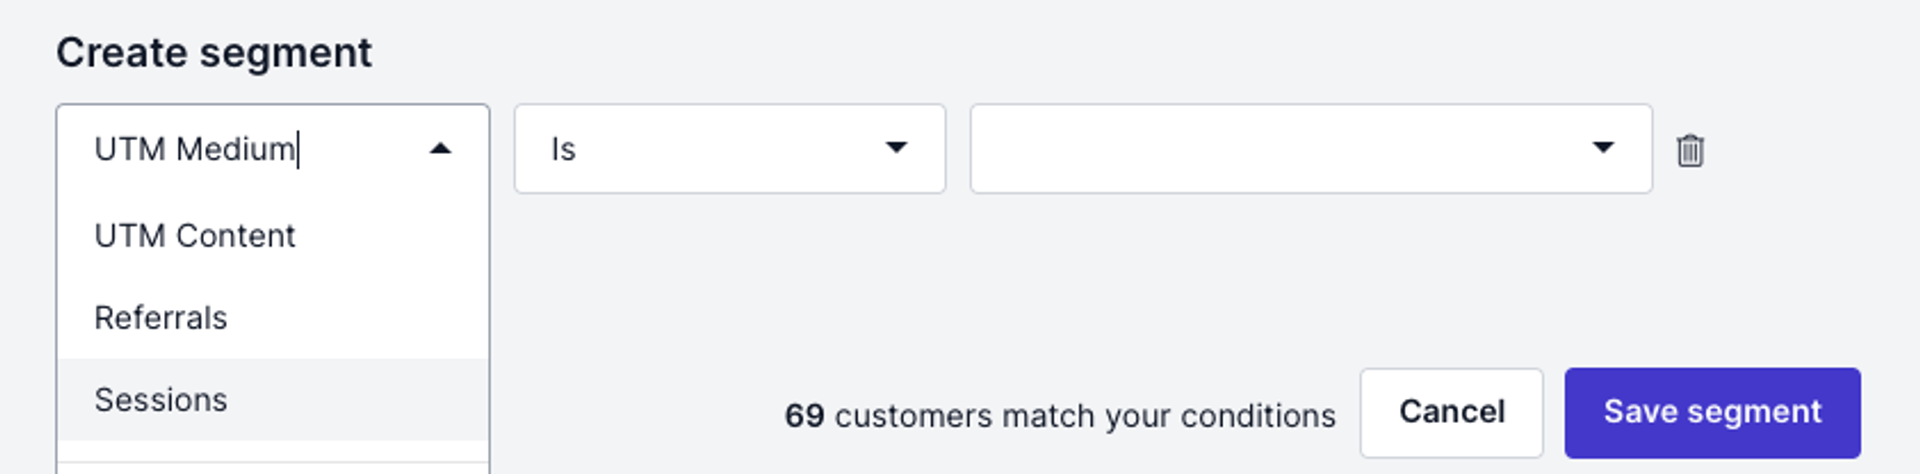
***
## Introducing dynamic links to prevent broken URLs
*February 15th, 2022*
Today, we have a big update for you. This feature has been requested by a lot of editors and now we are happy to announce the release of dynamic links in Prepr.
To manage content in a CMS you often use links to point to other pages. But what if the URL of a page changes due to a last-minute change, a site structure update, or URL edits for Search Engine Optimization? Then a dead link appears on your website.
This is where dynamic links come in. It allows you to link to content items or assets with a dynamic link that stays in sync with the title or slug. The link is automatically updated when the title, slug, or URL changes. This way the link stays intact when you move or rename content, and you don't have to enter a URL yourself. With Dynamic Links, your URLs will always be correct! Isn't that convenient? [Learn more about dynamic internal links](/content-modeling/field-types#content-reference-field).
***
## Match a specific pattern in your text fields
Today's update includes regex validation on text fields. It's now possible to validate whether the value of a field matches a specific regex pattern. For users’ convenience, a number of predefined regular expression rules are provided for the most common cases; email, URL, date (European and US), and time (12h and 24h). Learn more about regex validation on text fields.
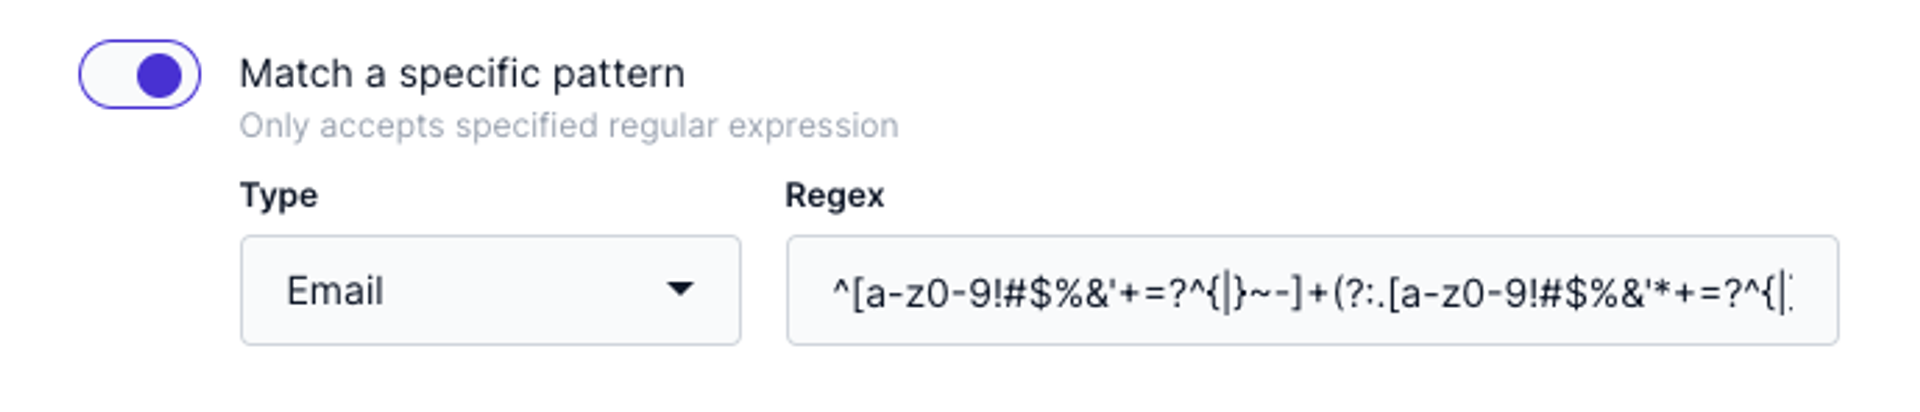
***
## Predefine field inputs with initial values
Initial values are predefined values that are set for specific fields in a content model. Today, we launched initial value support for the following fields: text (line, area, and HTML), number, list, color, and boolean.
Initial values help you be more efficient in editing content by letting you focus on editing the primary content fields while secondary fields are pre-filled with the initial values you provided. Any field that contains an initial value is editable: you can change the pre-filled value and fill in the field with a different value.
***
## Format your content item with text alignment
Text alignment is a feature that allows you to horizontally align text in a content item. It enables the composition of a content item using different text positioning on the whole or selected part of the item.
Starting today, Prepr offers four options for customizing your items: left alignment, center, right alignment and justify. Simply click the alignment option, and the text is visible the way you selected. And, also, the API response contains a p style:
```html copy
```
You can enable or disable text alignment in the model and element fields.
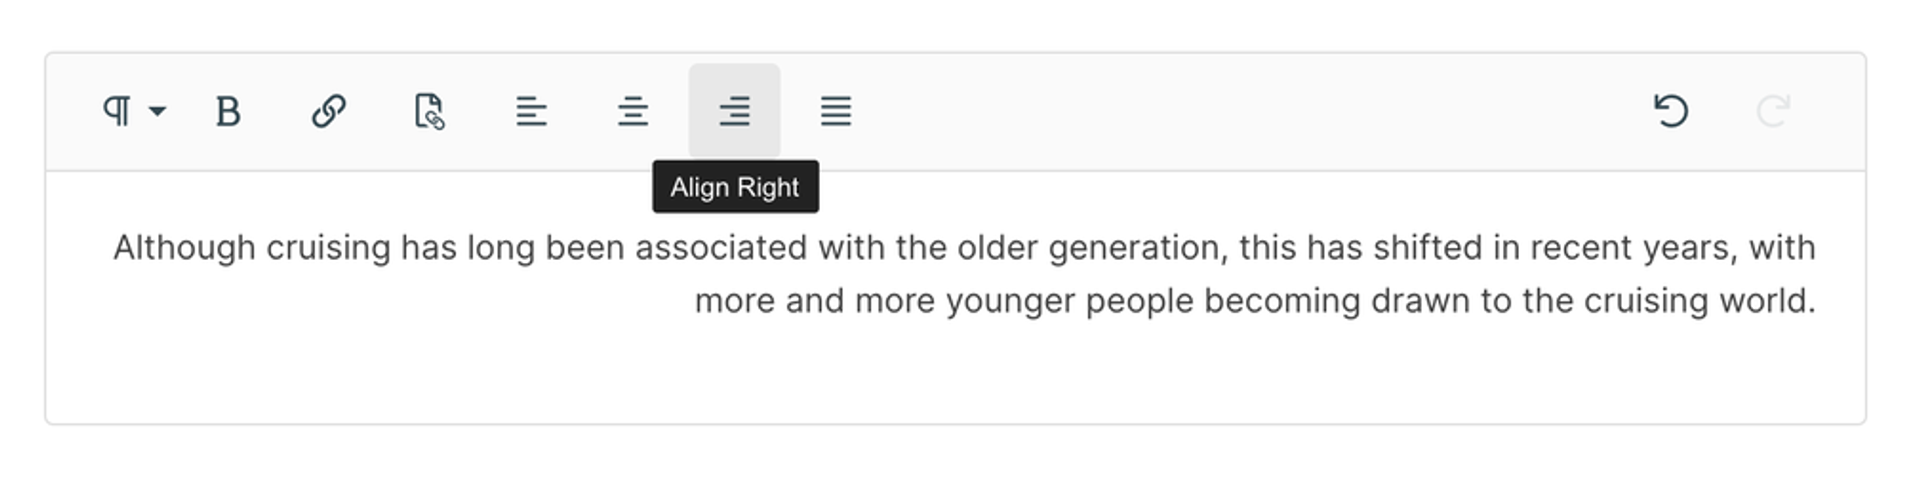
***
## Model and element design update
Today we launched a completely new design for managing models and elements. This new design has been implemented to give you an even faster and more enjoyable content modeling experience. Adding or changing fields has become super clear through the use of tabs in the modals.
Let us know about your experience with content modeling in Prepr! [Send us an email to give feedback](mailto:feedback@prepr.io).
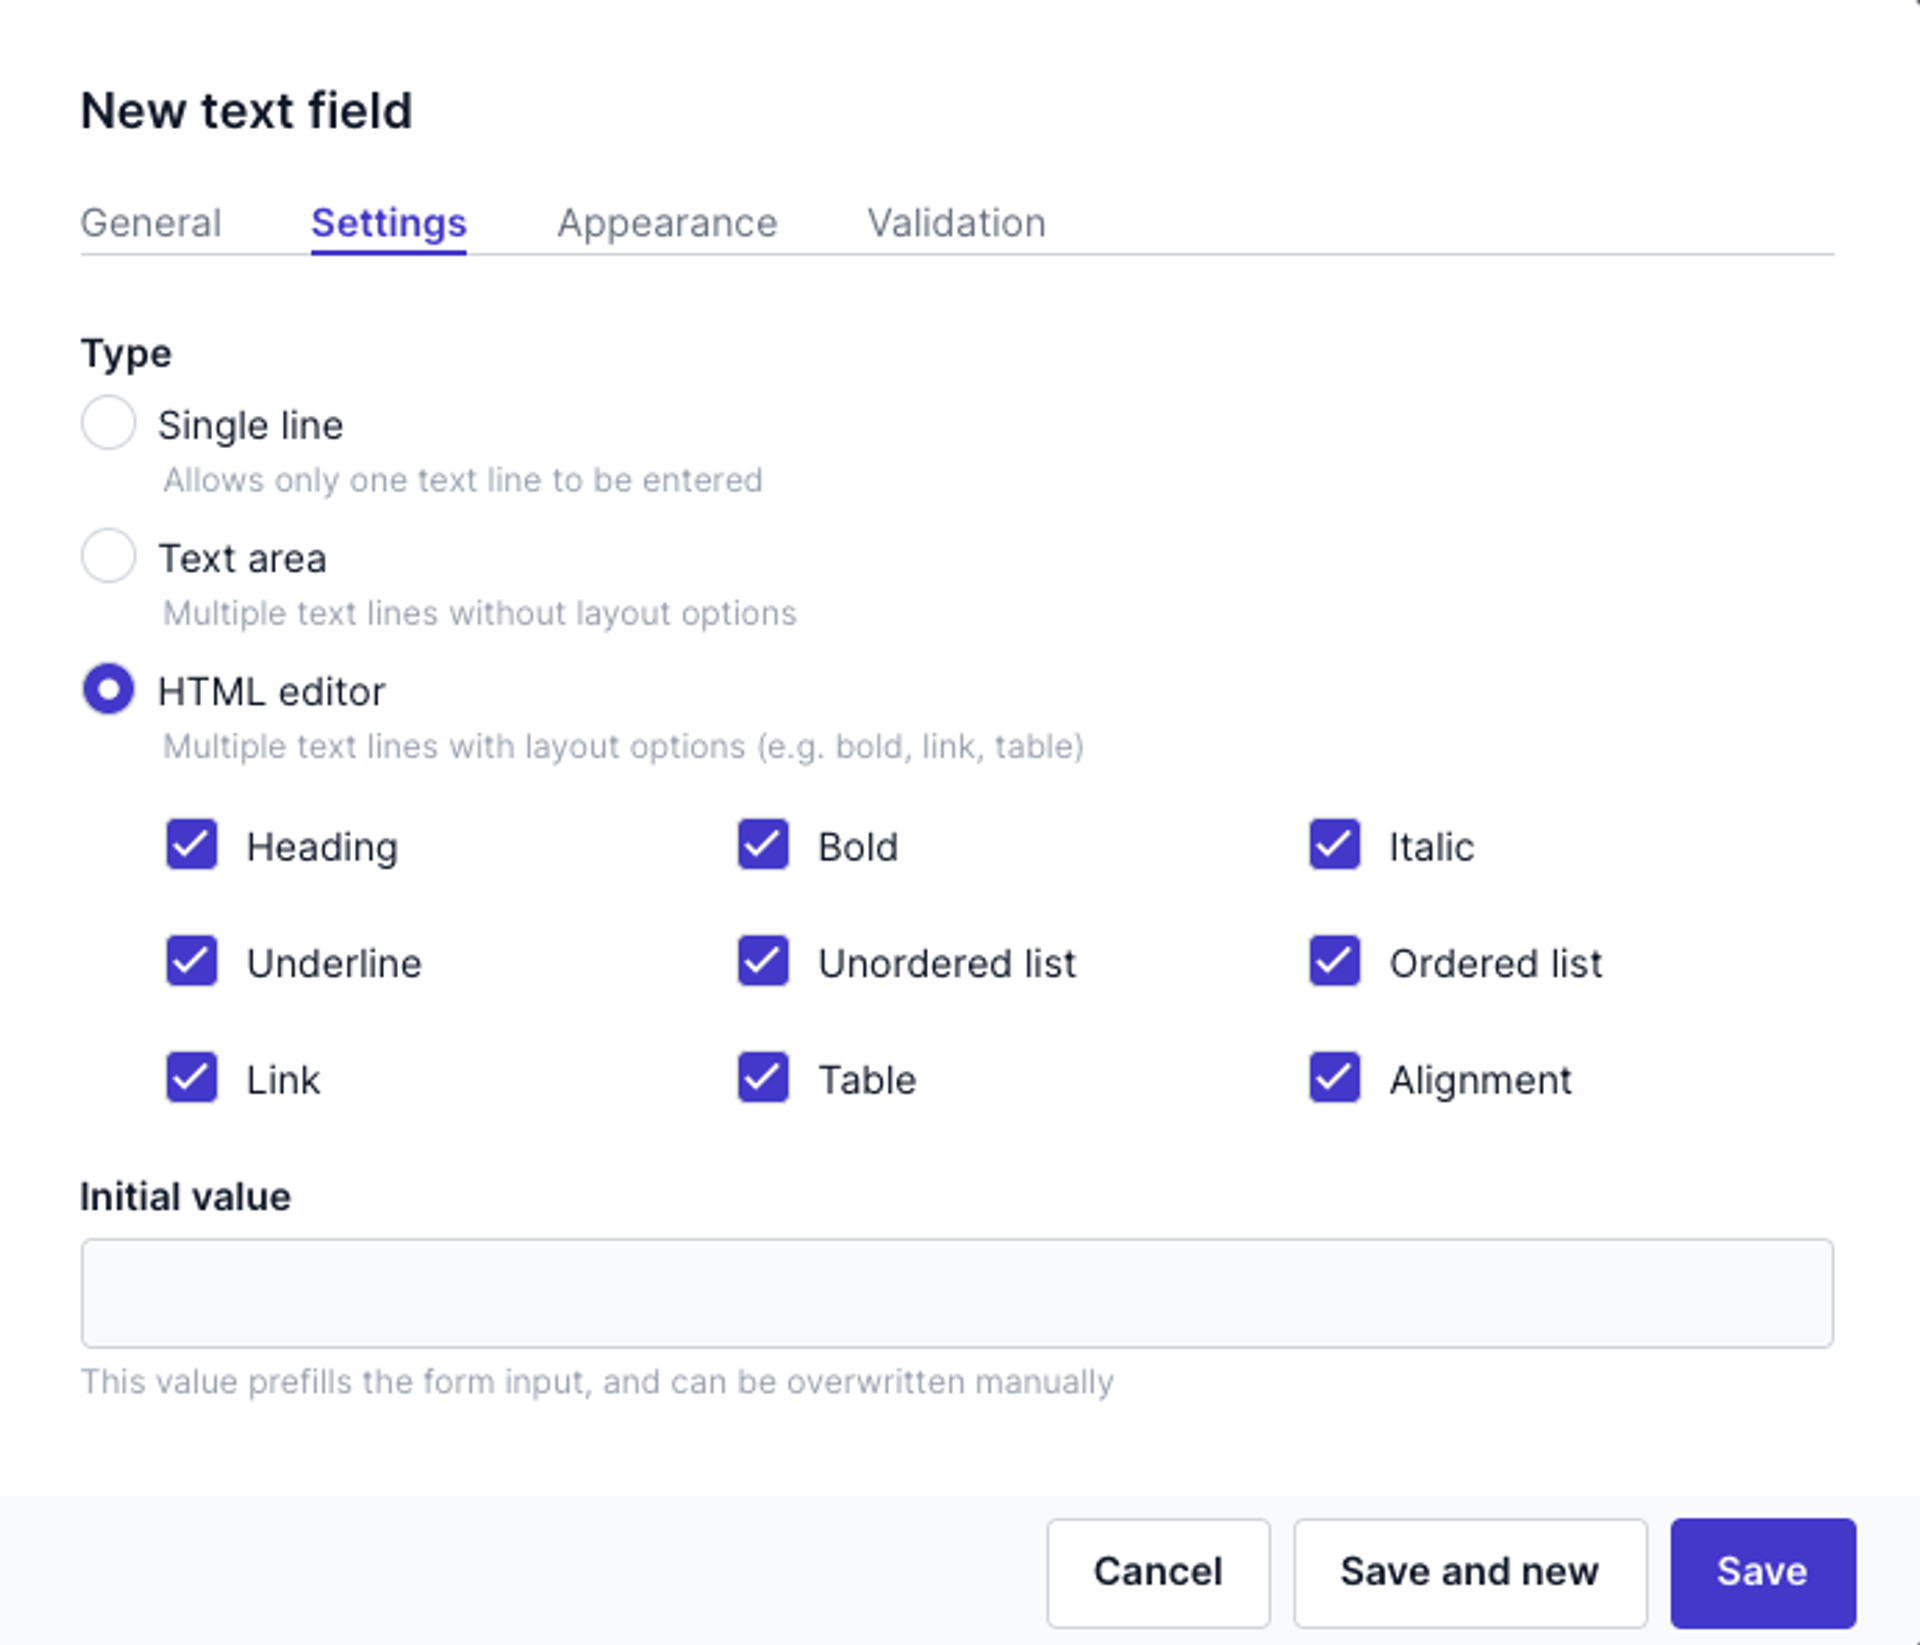
***
## Manage the API names of your model
For each content model in your Prepr environment the GraphQL API creates a corresponding GraphQL Type. The Type name is a PascalCase version of the content model name, stripped of all non-alphanumeric characters. Since today's update, you can manage the names of the Singular type and the Plural type. The given display name results in a singular and plural name; both can be overwritten manually.
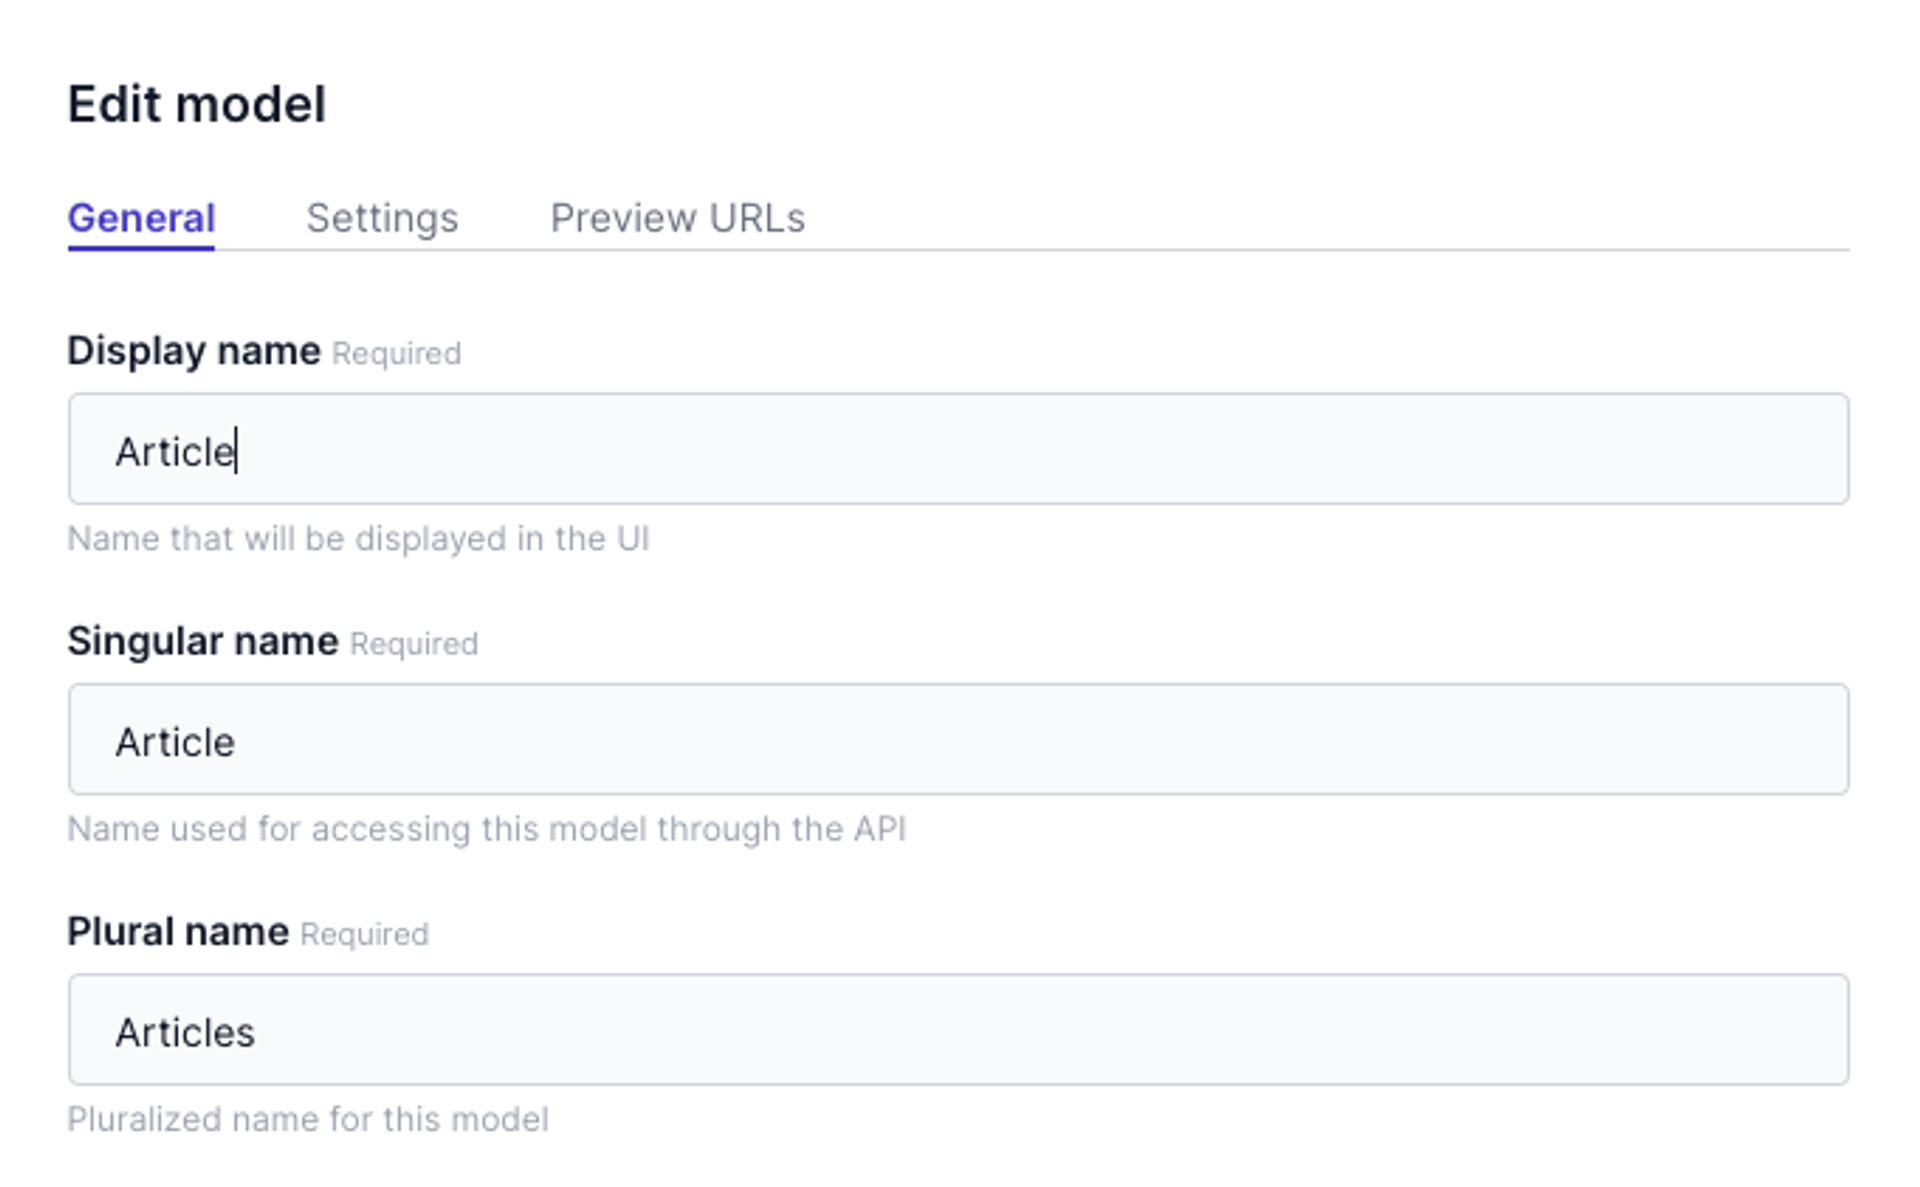
***
## Overall performance upgrade
*January 6th, 2022*
At Prepr, we find it very important that our application works fast and that all users can quickly perform their tasks in our system. That's why we ended the year with a performance upgrade in which we thoroughly reviewed the code in Prepr CMS. We found out that several code snippets were slowing things down. Therefore, the team optimized specific code snippets for speed. This has improved the performance of the whole system. We hope you've noticed the difference and have optimized your workflow.
***
## Personalize digital content at scale for exceptional customer experiences
*January 3rd, 2022*
We all know by now how important it is to approach your customers in a personal way with targeted content. But how do you do that? Many companies struggle with this because they don't have enough data, content, or know-how. Next month there will be a major beta release of the personalization engine for a select group of customers.
With the updated personalization engine, it will be even easier to deliver hyper-personalized content. We will then introduce Content Targeting which allows you to very easily specify exactly what content should be shown to a particular visitor segment. For example women or men. Or people who have visited a specific section of your website. You can then show them specific banners that are tailored to their preferences and thus improve engagement with your content.
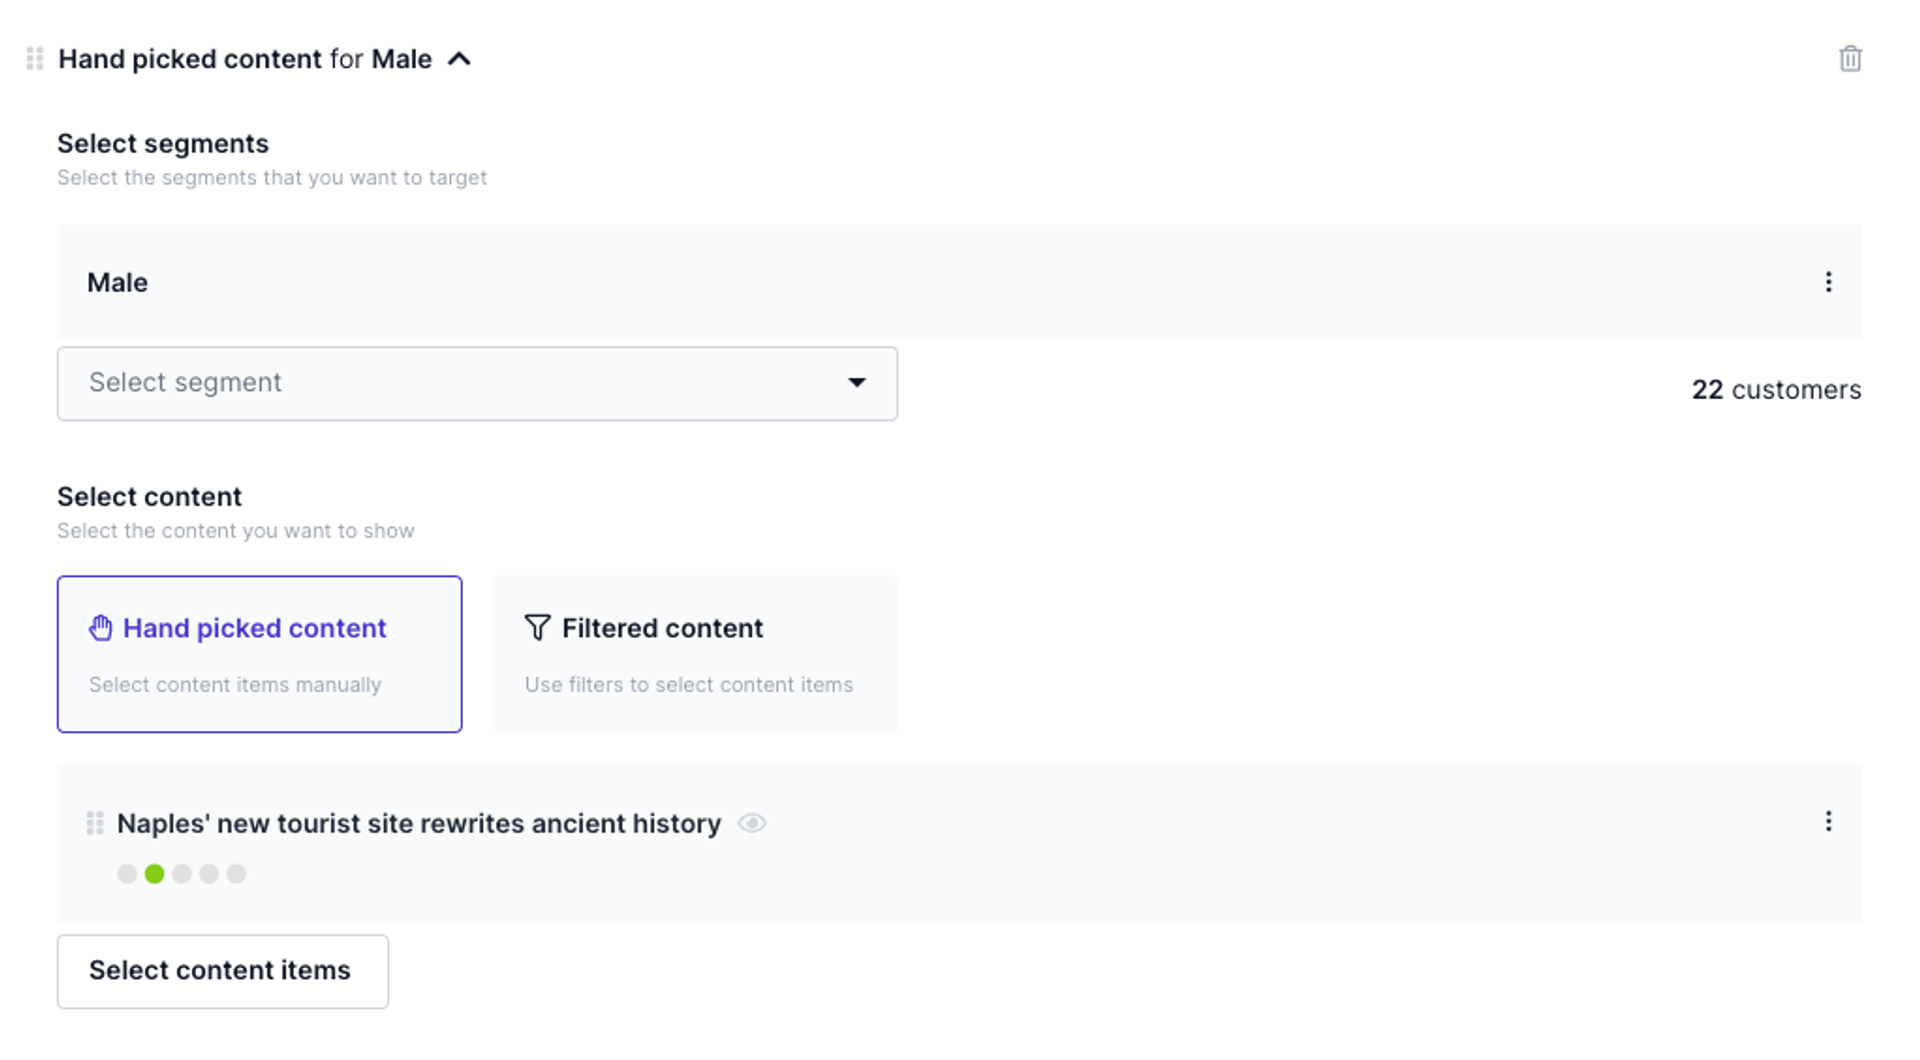
Source: https://docs.prepr.io/stay-updated/changelog2022
---
# Changelog 2021
Find the beautiful features and important updates that were added to Prepr in 2021. This changelog gives you an insight into the most eye-catching releases during this period.
[Latest](#changelog) | [2024](/stay-updated/changelog2024) | [2023](/stay-updated/changelog2023) | [2022](/stay-updated/changelog2022) | **2021**
## Multi-select to copy or delete text fields
*December 2nd, 2021*
Starting today, you can copy or delete multiple text elements at once in the dynamic content field. To select those elements completely, drag your cursor over the elements, or use your arrow keys to do so. Copy the selected elements, paste them elsewhere in the editor, or delete them. [Learn more about the dynamic content field in Prepr](/content-management/managing-content/creating-rich-content#the-dynamic-content-editor).

***
## Publish content on other websites with Embeds Fields
*November 9th, 2021*
The new Embed field allows you to place a content item from Prepr on another website. The embed field is a shortcode in HTML language to copy and paste into your own website.
To add data dynamically from Prepr to your embed code, you can use variables, such as title and id. When adding data to your content item, all variables are replaced in real-time. Using an embed code is simple: just click the ‘Copy code’ button and paste it on your front end. [Learn more about embedding Prepr content on your front end](/content-modeling/field-types#embed-html-field).

***
## The icon bar is back in the Dynamic Content field
*November 4th, 2021*
After the Dynamic Content field was fully live and we received feedback from our customers, we decided to bring back the icons of the different elements in the Dynamic Content field. As a result, you can now quickly add new elements again at the end of the content. And of course, it is still possible to quickly add an element by pressing the slash key and selecting elements from the dropdown.
By listening to our customers, we want to make the most user-friendly CMS out there. Make sure to send us your feedback if you have any: feedback@prepr.io.

***
## Add static front-end components to your content items
*October 21st, 2021*
Starting today, you can add empty elements to your dynamic content field. This way you can trigger the front end to insert static front-end components, such as banners, marketing widgets, or forms.
An empty element is an element without fields. All empty elements in a dynamic content field are shown as a label. This way you can easily and quickly recognize the elements.
***
## Add a locale to your content item slug
*September 30th, 2021*
A slug is part of a URL that usually describes the path to the specific content item: it is the part that comes after your domain name in the URL.
Starting today, it is possible to use the content item's locale in the slug construct. This way you can use different slugs for separate locales. [Learn more about working with slugs](/content-modeling/field-types#slug-field).
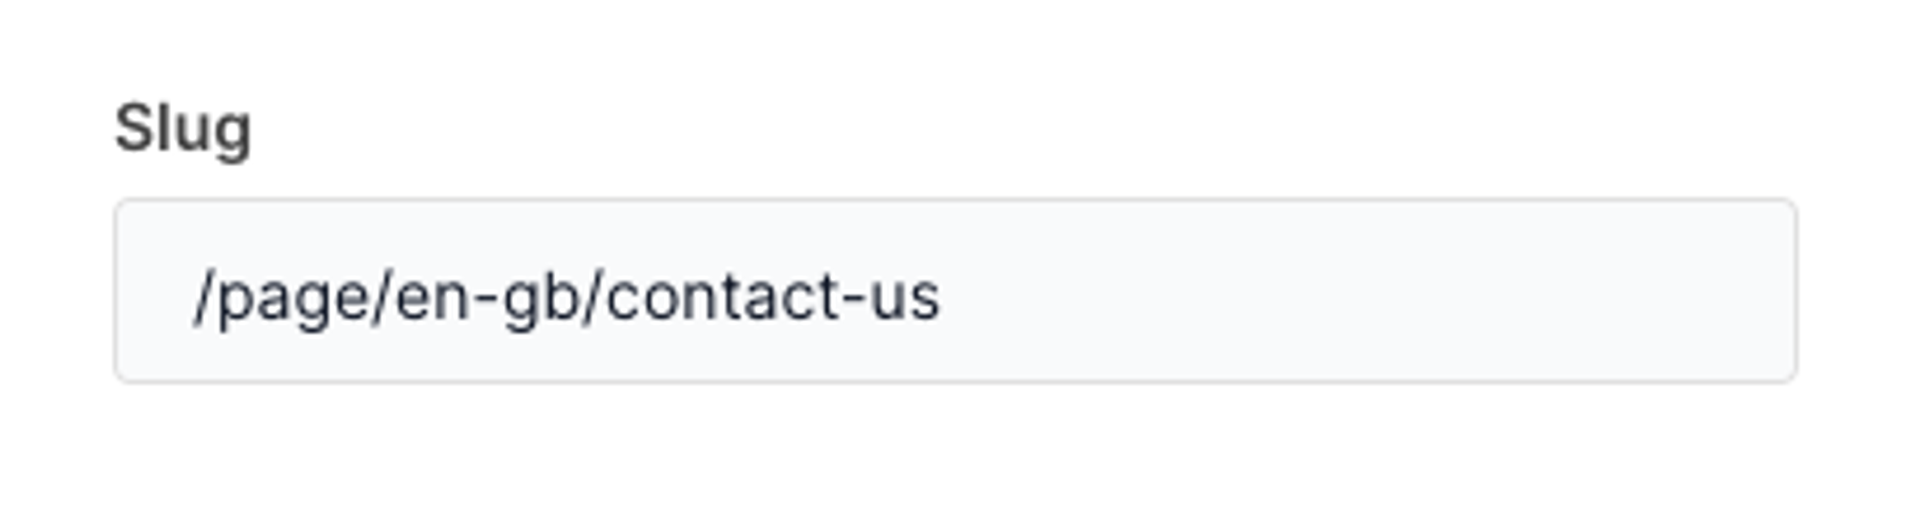
***
## Publications are now called Content items
*September 28th, 2021*
Today, we changed the name of 'Publications' to 'Content items'. We have done this to avoid confusion: sometimes publications were confused with the model rather than the content item of a model. In addition, we also changed the 'publication link field' to 'content reference field' for the same reason.

***
## Now available for all Prepr users: Dynamic content field for smoothly content editing
*September 27th, 2021*
Today we fully replaced the drag-and-drop editor with an all-new dynamic content editor for all Prepr users. With the new editor, the playground has changed. For this everyday feature, we tried to make it as user-friendly as possible and optimize your workflow. [Please let us know what you think about it!](mailto:feedback@prepr.io)

***
## Make your Tweets interactive by mentioning people
*August 26th, 2021*
With today's update, it is now possible to mention other Twitter users and Twitter accounts in your Tweet publications. Type @ and a part of the name to search for Twitter accounts. This user will be notified immediately after publishing your Tweet.
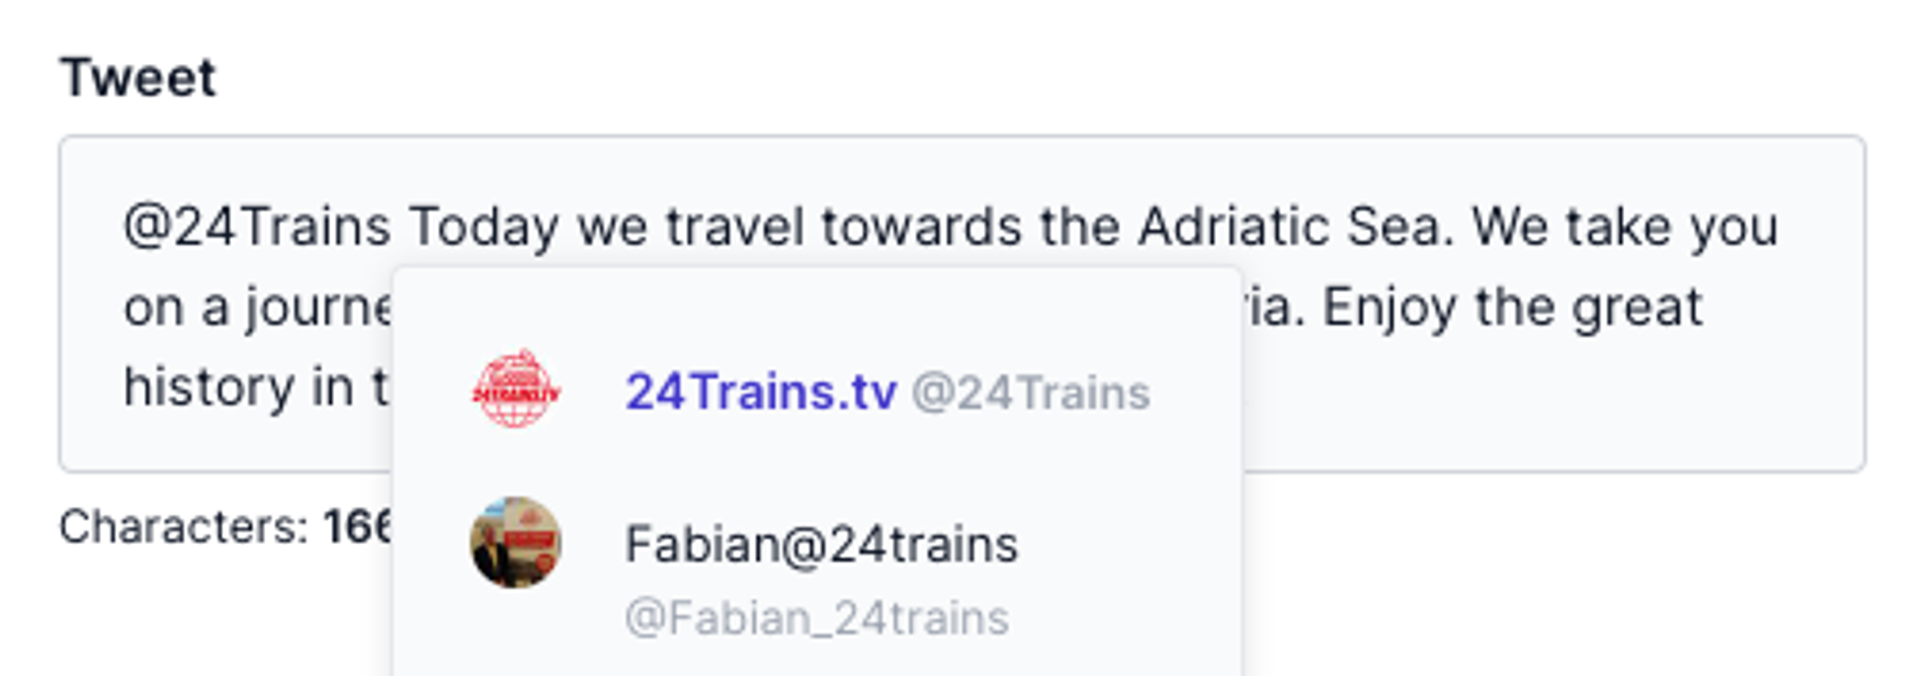
Please be sure that you have selected the 'Tweet' setting in the publication model text field. Note that this option is only available for Prepr users with the new dynamic content field. [Learn more about sending Tweets with Prepr](/content-modeling/field-types#social-field).
***
## Get notified when something important happens
*August 18th, 2021*
Prepr offers the possibility to be notified of important events in the application. This way you are always aware of events that are relevant to you. Today, we released the notification management tool on the profile page.
To activate personal notifications, enable notifications on your profile page. Select the triggers and choose if you want to receive the notification via email or in the browser.
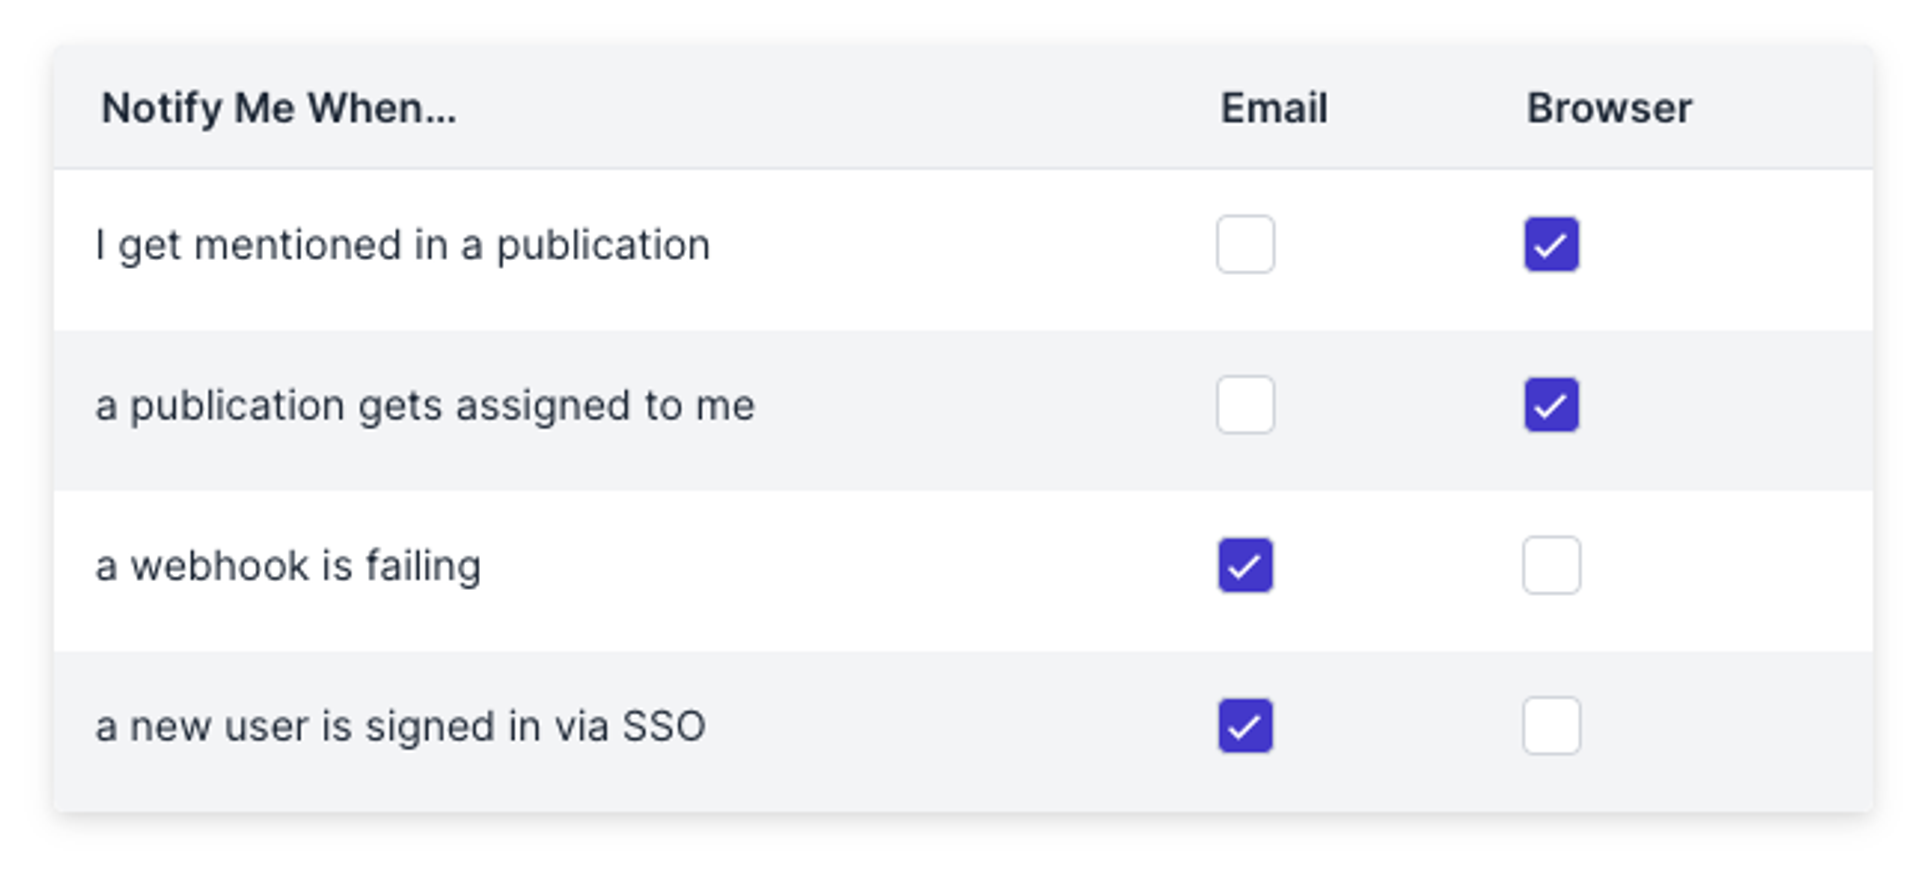
***
## Major update: dynamic content field for smoothly content editing
*August 16th, 2021*
Today we have an exciting and big update. We fully replaced the drag-and-drop editor with an all-new dynamic content editor. With the new editor, the playground has changed. For this everyday feature, we tried to make it as user-friendly as possible and optimize your workflow.
The editor contains a large white area where you can type and easily decide which elements you want to add. To quickly add a new element in your field, press /, and a pop-up will appear with various elements to choose from. You can quickly add, change, delete, or move elements in the publication field.
It also offers common text formatting options, such as headings, paragraphs, and social embeds, as well as more innovative fields such as publication links and assets with cropping and alignment.

The editor feels direct, like a What You See Is What You Get editor. Headings appear as headings immediately, paragraphs as paragraphs, and social embeds as social embeds. Adding, sorting, and removing elements happen smoothly and fast. [Learn more about modeling the dynamic content field](/content-modeling/field-types#dynamic-content-field).
Starting today, the dynamic content field will be released in phases to all Prepr environments and projects.
***
## Organize your publication with sections, columns, and the small publication view
Prepr offers a unique possibility to properly organize the view of a publication for your editors. By using sections and columns you determine the display of the fields in your publication. This is useful for grouping topics, for example.
**Columns**
Columns are used to properly divide fixed publication fields into one, two, or three columns. This is very user-friendly when you use several smaller fields, such as short text fields, list, color, or boolean fields. With columns, you can display those fields next to each other and organize your publication in a very clear manner.
**Small and wide view**
When you write and manage a lot of texts in Prepr, the readability of those texts can be an issue. Therefore we added the possibility to narrow and widen the view of the entire publication. In longer texts, this is an amazing improvement in readability!
[Learn more about how to organize your publication view with sections and columns](/content-modeling/managing-models#add-columns). Note that this option is only available for Prepr users with the new dynamic content field.
***
## Automize your content workflow (Deprecated)
*August 13th, 2021*
The Prepr automation tool allows you to let Prepr perform tasks for you fully automated. You can set up an automation by selecting a certain task and a certain trigger. For example, you want to delete an article when it's expired. Or let's say you want to create a tweet or a notification when you create a post. This means you don't have to do work twice if you work routinely. This tool will optimize your content workflow in no time.
To create an automation, just click through the three-step wizard. If - Where - Then.
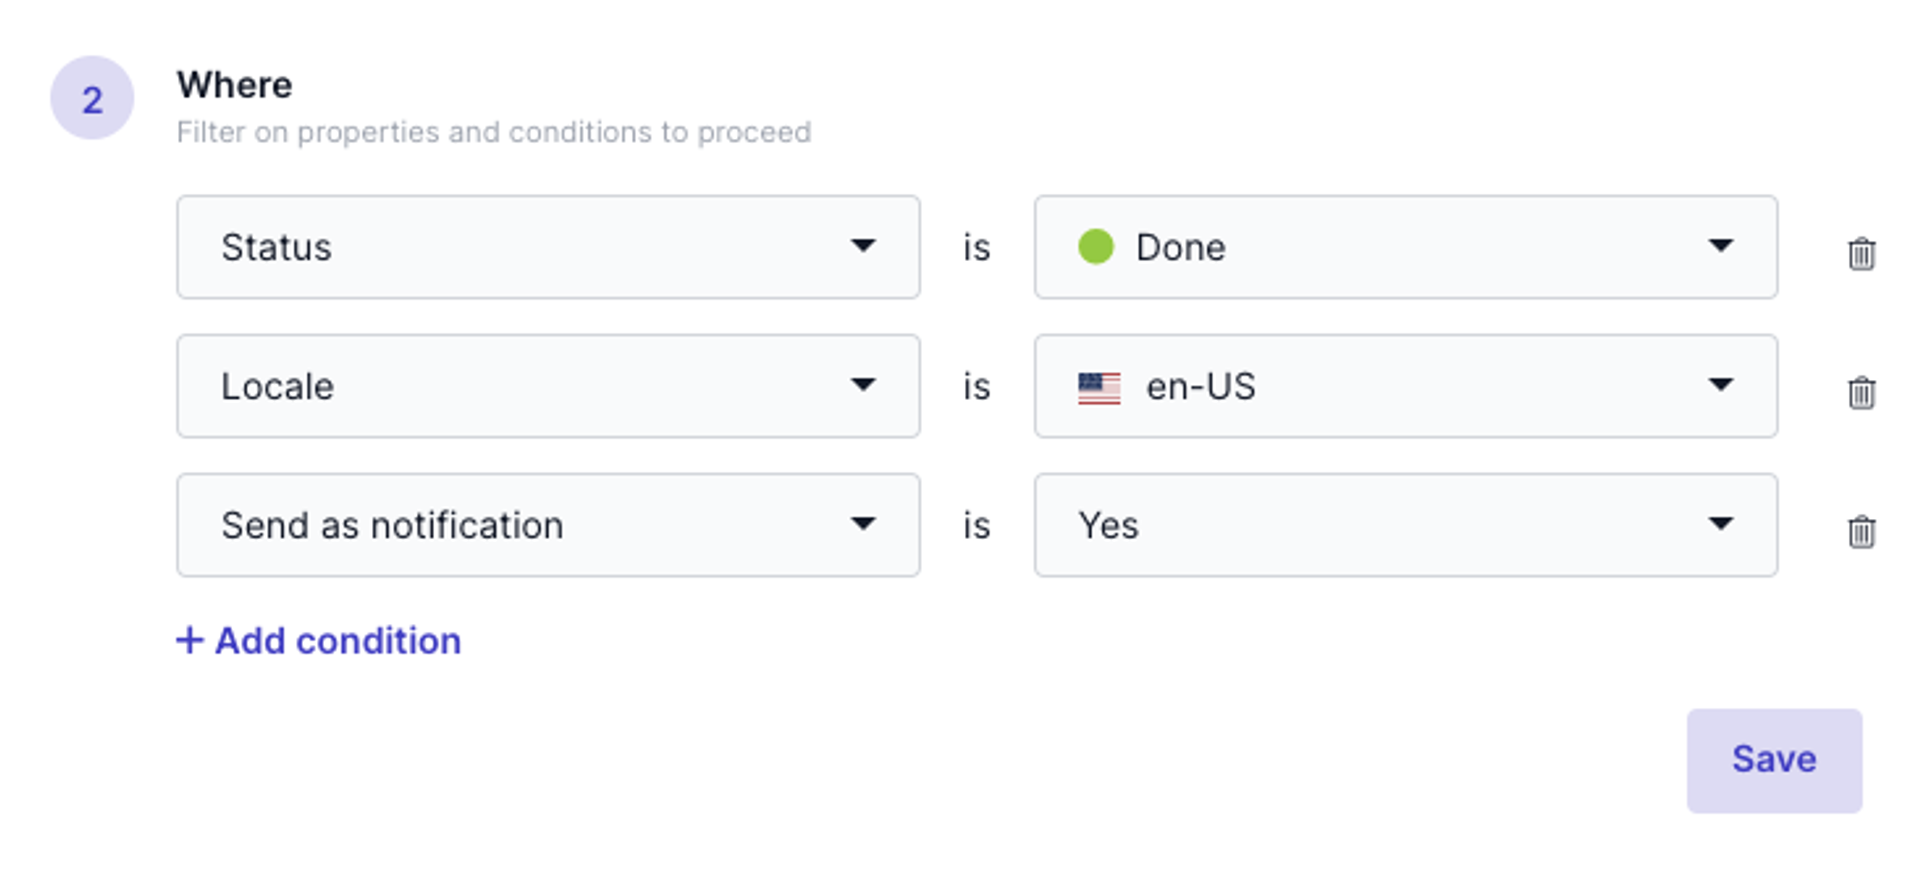
***
## Added support for Luxembourgish locales (lb-LU)
*August 12th,2021*
Luxembourgish locales are now available in Prepr. To set a locale, go to the environment details on the organization settings. You are able to select one or more locales for multi-language publications. This feature is only accessible for owners and users with the 'environments' permission. [Learn more about roles and permissions](/project-setup/managing-roles-and-permissions).
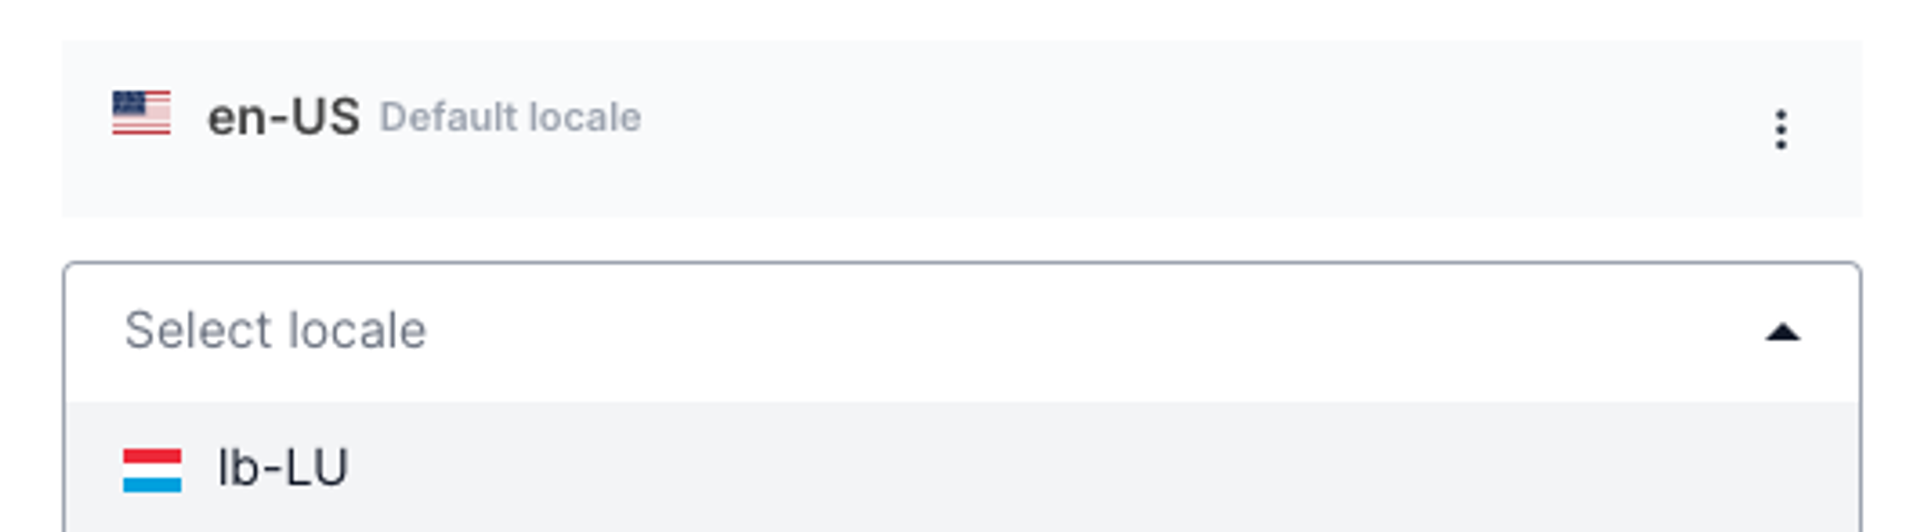
***
## Design update success notifications
*August 11th, 2021*
We recently updated the success and error notifications with a new design. This makes it even clearer what went right or wrong, and what action is expected of you.

***
## App list update: search your apps and filter by status
*August 10th, 2021*
Today we released an update of the app list (formerly known as integrations). With a design update of the app list, we have greatly improved the usability of this page. The app list is now categorized by type of apps, such as Publish, Engage, and ecommerce. You can search for apps and filter apps by status. [Check the user guides for more information about apps](/integrations).
***
## Design update disabled buttons
We appreciate all user input. So, thanks for all your comments! After the latest design update, we received some feedback that users sometimes clicked on disabled-buttons. Those buttons are visible when you (f.e.) reached the maximum number of publications, users, or environments. To increase clarity and usability, we made a design update on disabled buttons today. It is now clearer than ever that you cannot click on these buttons.

***
## Update model settings
*August 4th, 2021*
Today we updated the model settings, making managing model settings easier, clearer, and more user-friendly. When managing a model, your attention is now drawn to the part that is most important. Namely, managing the fields of a model. You can update GraphQL names, validations and review URL's via the button '**Edit settings**'.
***
## Row hover on Prepr tables
*July 28th, 2021*
Today's Prepr update includes an improvement on the data tables in the application. Every table now has a hover state, so you can easily see which row you have selected. This is especially useful in long tables, for example in the list of publications or customers.
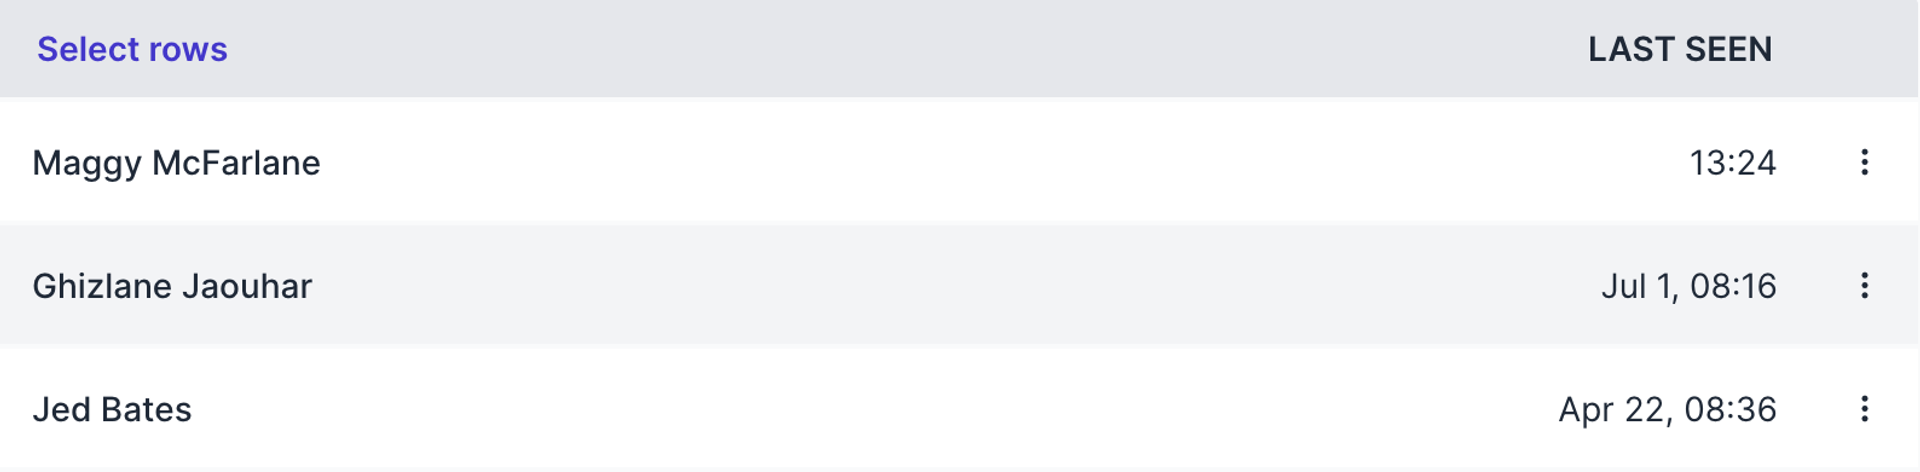
***
## Heading styling in the fixed HTLM-editor
From now on you can add heading styling to sections in our HTML-editor. We’ve added this feature to the fixed text fields with appearance set to HTML-editor.
You’ll find the paragraph-heading switch as the first option in the editor:
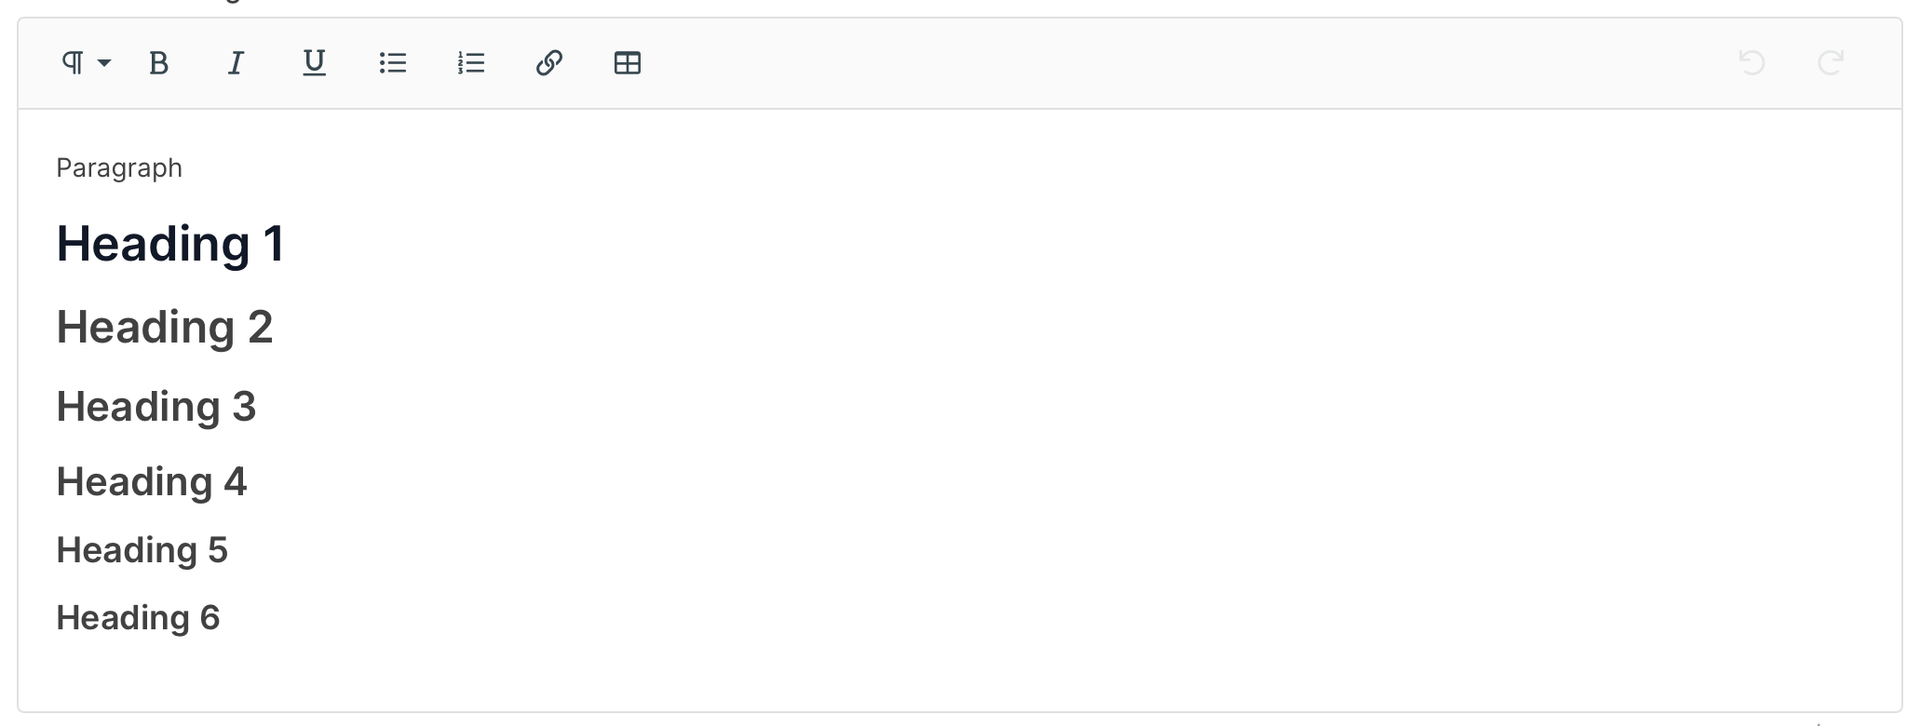
***
## Get real-time feedback on the strength of your password
*June 25th, 2021*
Your password is very important for the security of your Prepr user account. Today we have therefore added a password indicator so that you can see in real-time whether the password you are using is weak, strong, or very strong.
The password indicator can be found in the onboarding and on the page where you can change your password. [Learn more about account security, two-factor authentication, and single sign-on](/project-setup/managing-users).
***
## Narrow your search results by searching on titles, slugs, or by publication ID
*June 24th, 2021*
To quickly find specific publications in Prepr, you can stack filters and search results in the publication list. We've made it even easier to quickly find publications, now that we offer the option to search by title, slug, or ID. [Learn more about publication search](/content-management/managing-content/managing-content-items#find-your-content-items).
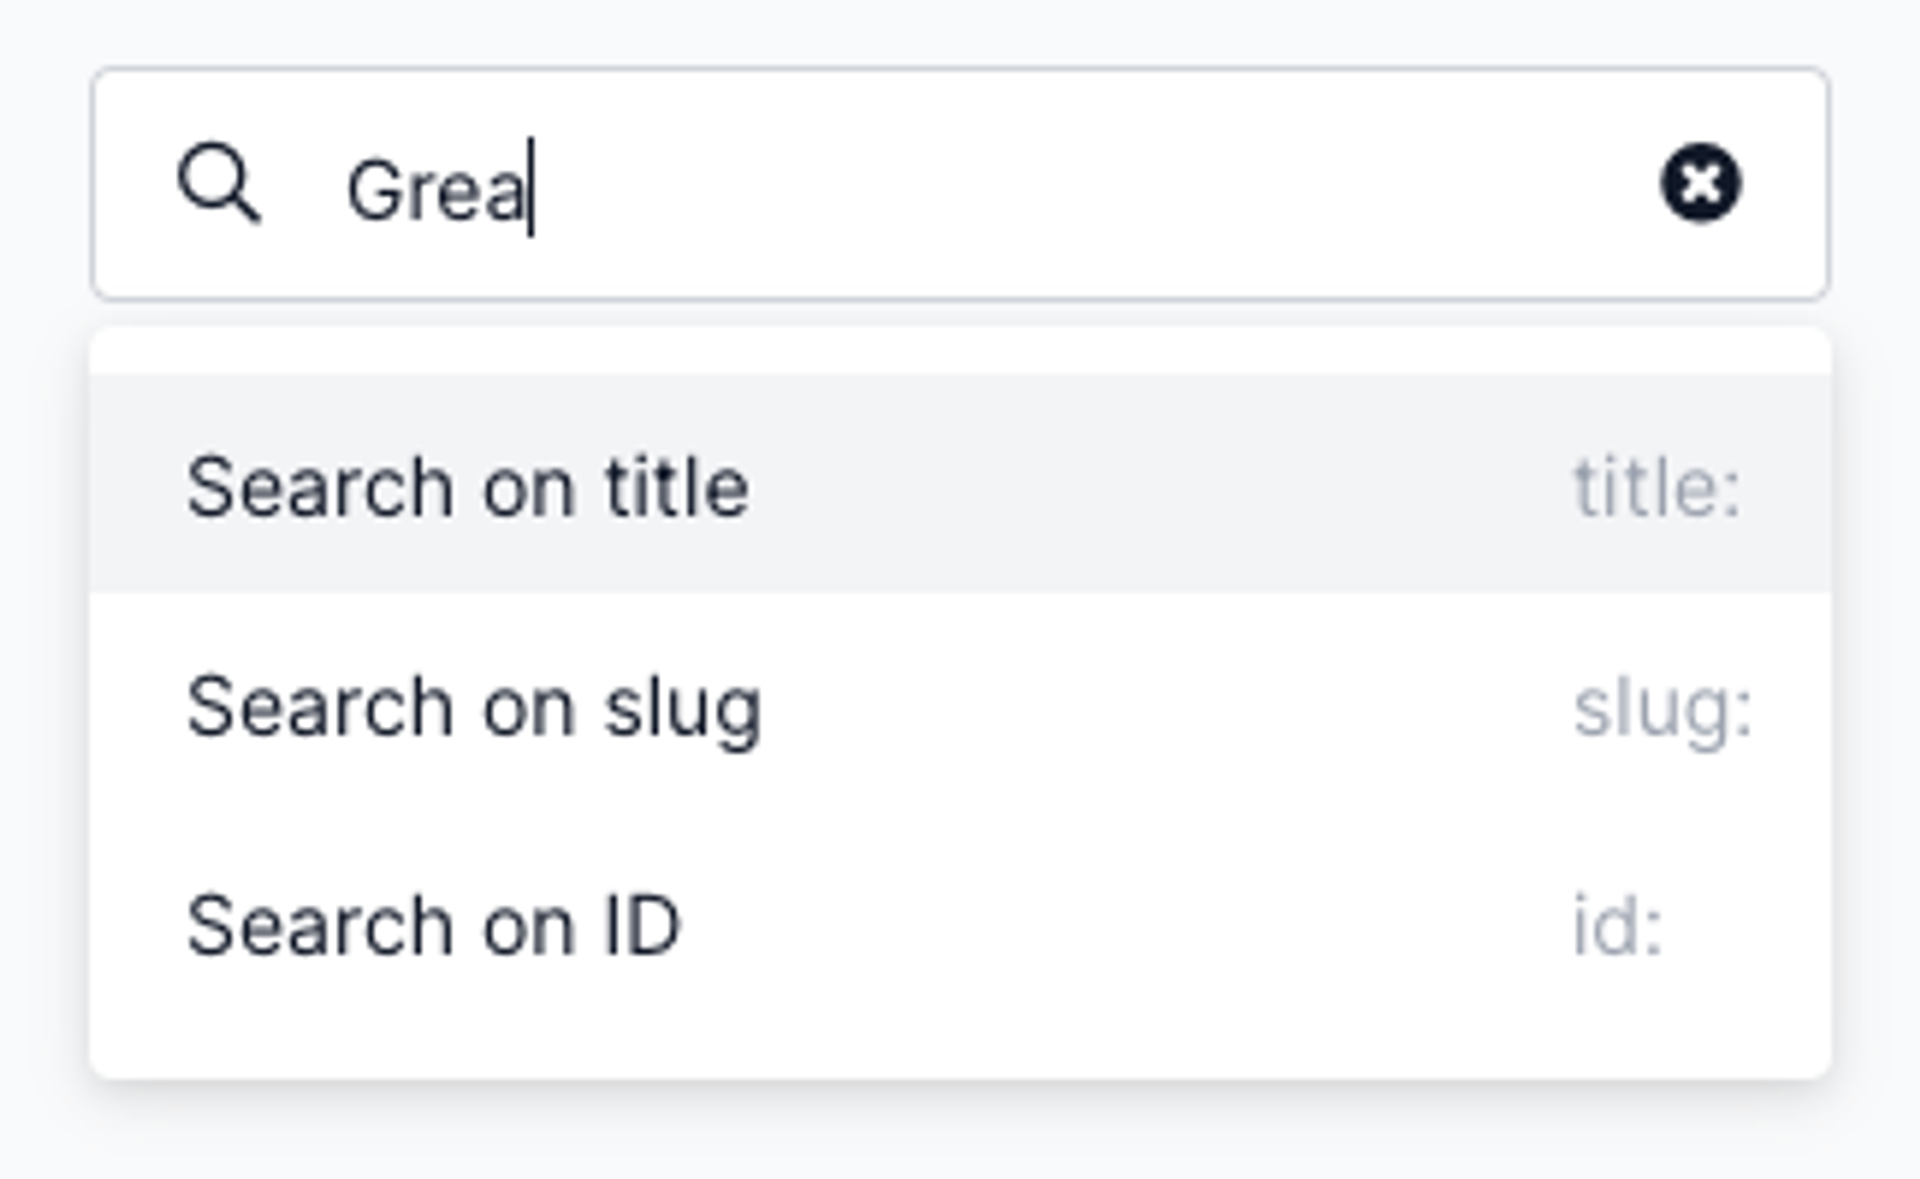
***
## Segment customers based on interaction with specific tags
Segments in Prepr are groups of customers based on one or more common details. You can use segments for engagement analysis purposes, sending notifications, or personalizing your content. Profiles can be grouped based on a variety of personal details, events, and engagement score.
Today, we added an extra feature to our segment builder. You can now group customers who interacted with a publication with one or more specific tags. So if you're looking for all the profiles that have bookmarked the Alaska publication, the segment builder makes those easy to find. [Learn more about our segment builder](/personalization/managing-segments).
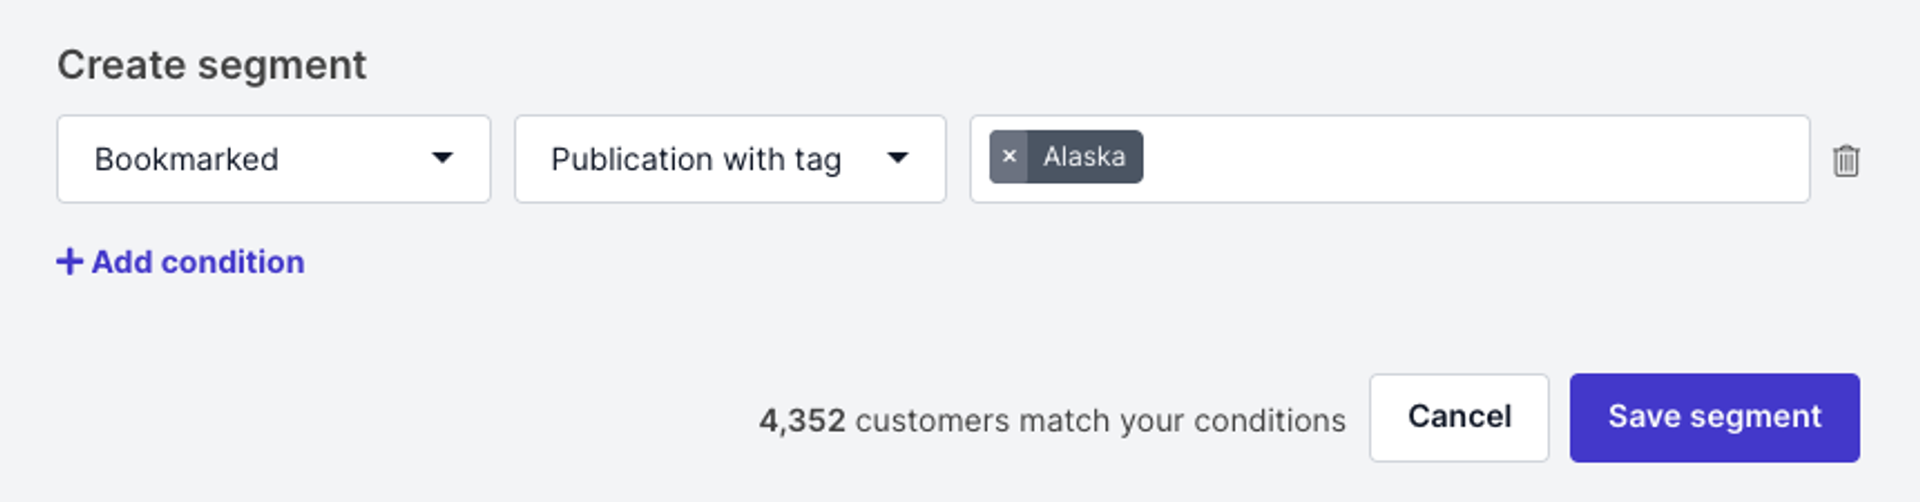
***
## Easy reuse of your most used publication filters
*June 15th, 2021*
Speed up your content workflow with saved publication filters! If you often use the same filters in your Prepr environment, you can now save publication filters for quick use in the future. Select one or more filters and save the filter. Now, just click the saved filter to activate.

***
## Added support for Vietnamese locales (vi-VN)
Vietnamese locales are now available in Prepr. To set a locale, go to the environment details on the organization settings. You are able to select one or more locales for multi-language publications. This feature is only accessible for owners and users with the 'environments' permission. [Learn more about roles and permissions](/project-setup/managing-roles-and-permissions).
***
## Copy the API ID of the story on the story page
*June 14th, 2021*
For the developers who use stories to bundle multiple publications, we've added a nice feature today. You can now easily view the story's API ID on the detail page (the list of publications in a story). In the sidebar, you will find the ID under the filters. Click on '**Copy**' to save the ID to your clipboard.
***
## Working with agency user accounts
*June 11th, 2021*
We see that many of our Prepr users have their website or app developed by a web agency. So, today we are releasing a new feature especially for them.
Agency accounts are user accounts of (web) agencies. As of today, these accounts no longer count toward the number of users you can add within your license. So you don't pay for agency accounts. To add an agency user account to your Prepr account, please [contact Prepr Support](https://prepr.io/support).
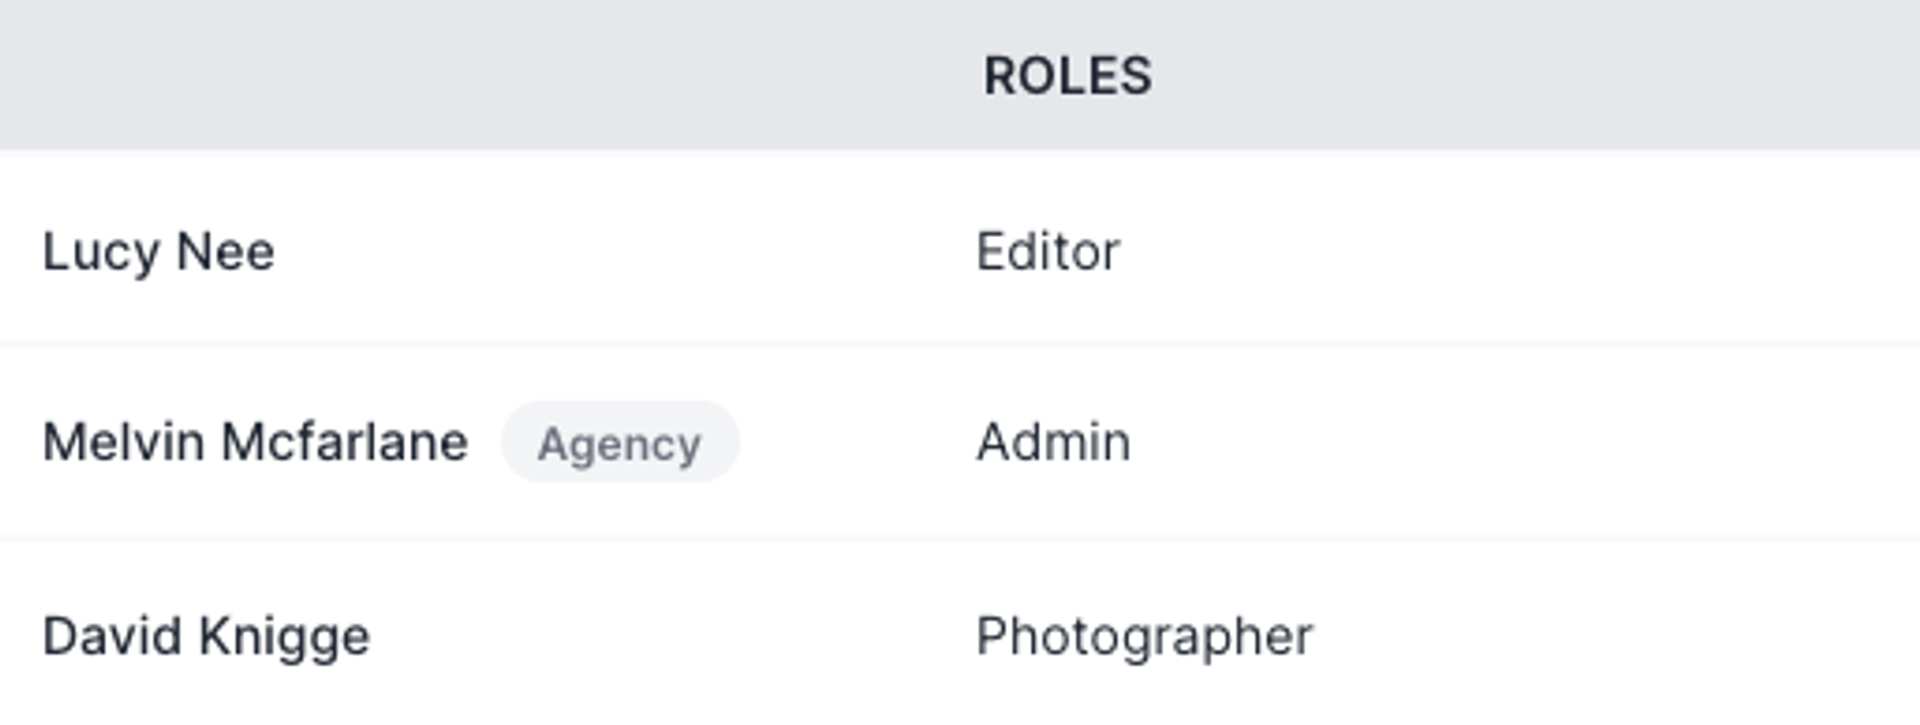
***
## Manage your model names for GraphQL
*June 10th, 2021*
When you use the GraphQL API to connect your front end to Prepr, you can now manage the GraphQL singular and plural type name in your publication model. For example, the model name 'News article' generates a type NewsArticle (singular) and a type NewsArticles (plural). [Learn more about Type names for GraphQL in publication models](/graphql-api/fetching-collections).
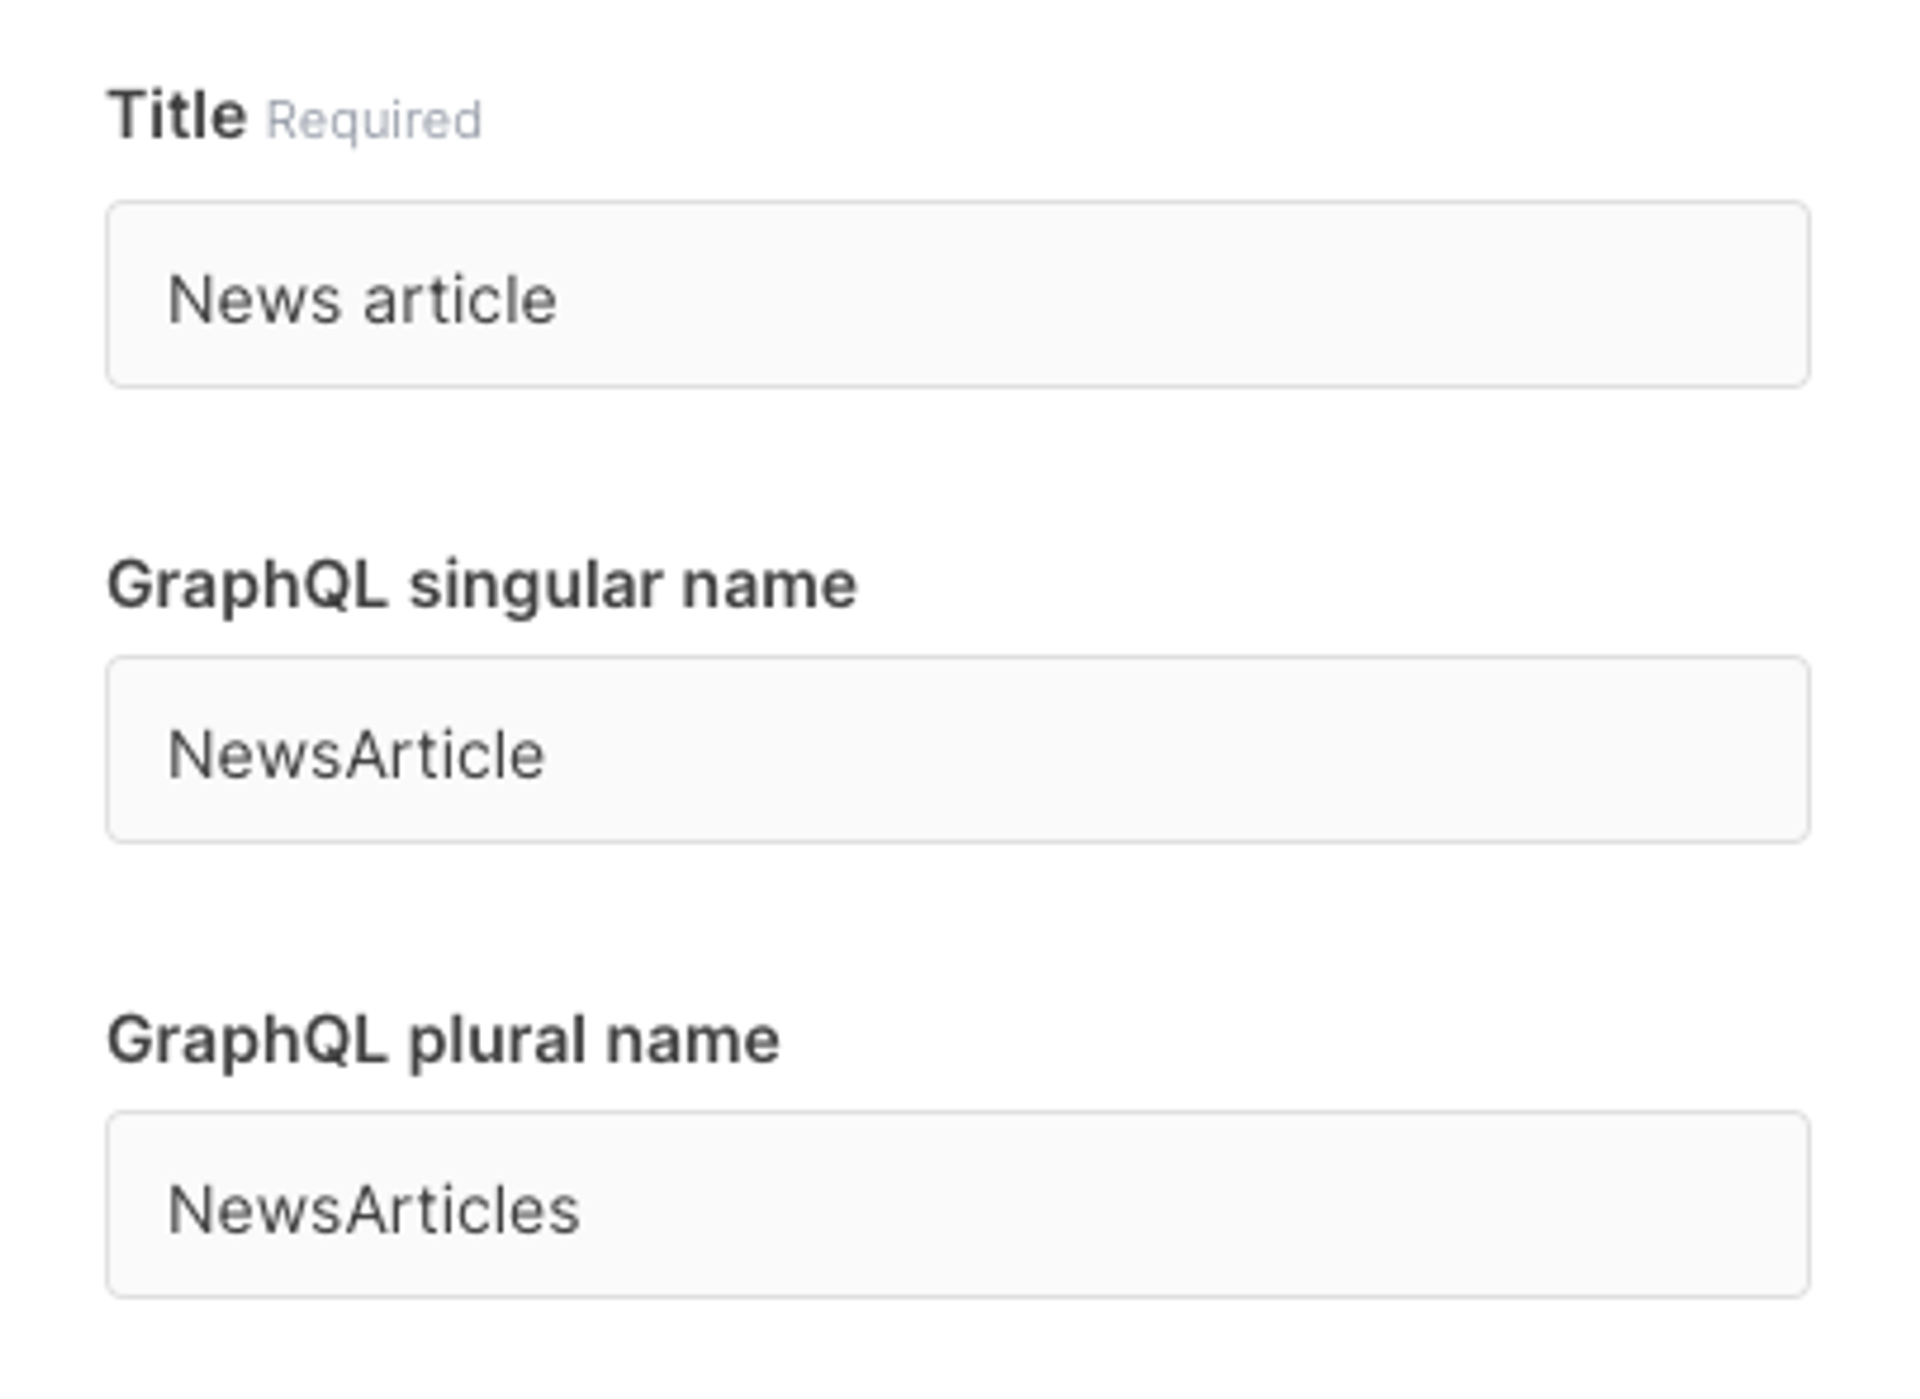
***
## Click your slug together
*June 9th, 2021*
A slug is part of a URL that usually describes the path to the specific publication: it is the part that comes after your domain name in the URL. You can use slug fields to auto-complete the slug construction.
We've made building a slug construct much easier by allowing you to click on the available slug fields. So no more copy-paste from your API names of the model, but simply click your construct together. [Learn more about working with slugs](/content-modeling/field-types#slug-field)
***
## Publication published? You can see it at a glance
*June 8th, 2021*
In a Prepr content workflow, a publication passes from initiation to publication. Content workflows are very powerful for collaborating on beautiful content for your brand. Prepr content can contain various statuses, such as To do - In progress - Review and Done.
The status alone does not say anything whether a publication has been published. A publication is published if the status is 'Done' and the publication time has expired.
As a result of user input, we are now offering an indication on the publication detail page, with which you can immediately see whether a publication has been published. [Learn more about working with content workflows](/content-management/collaboration).
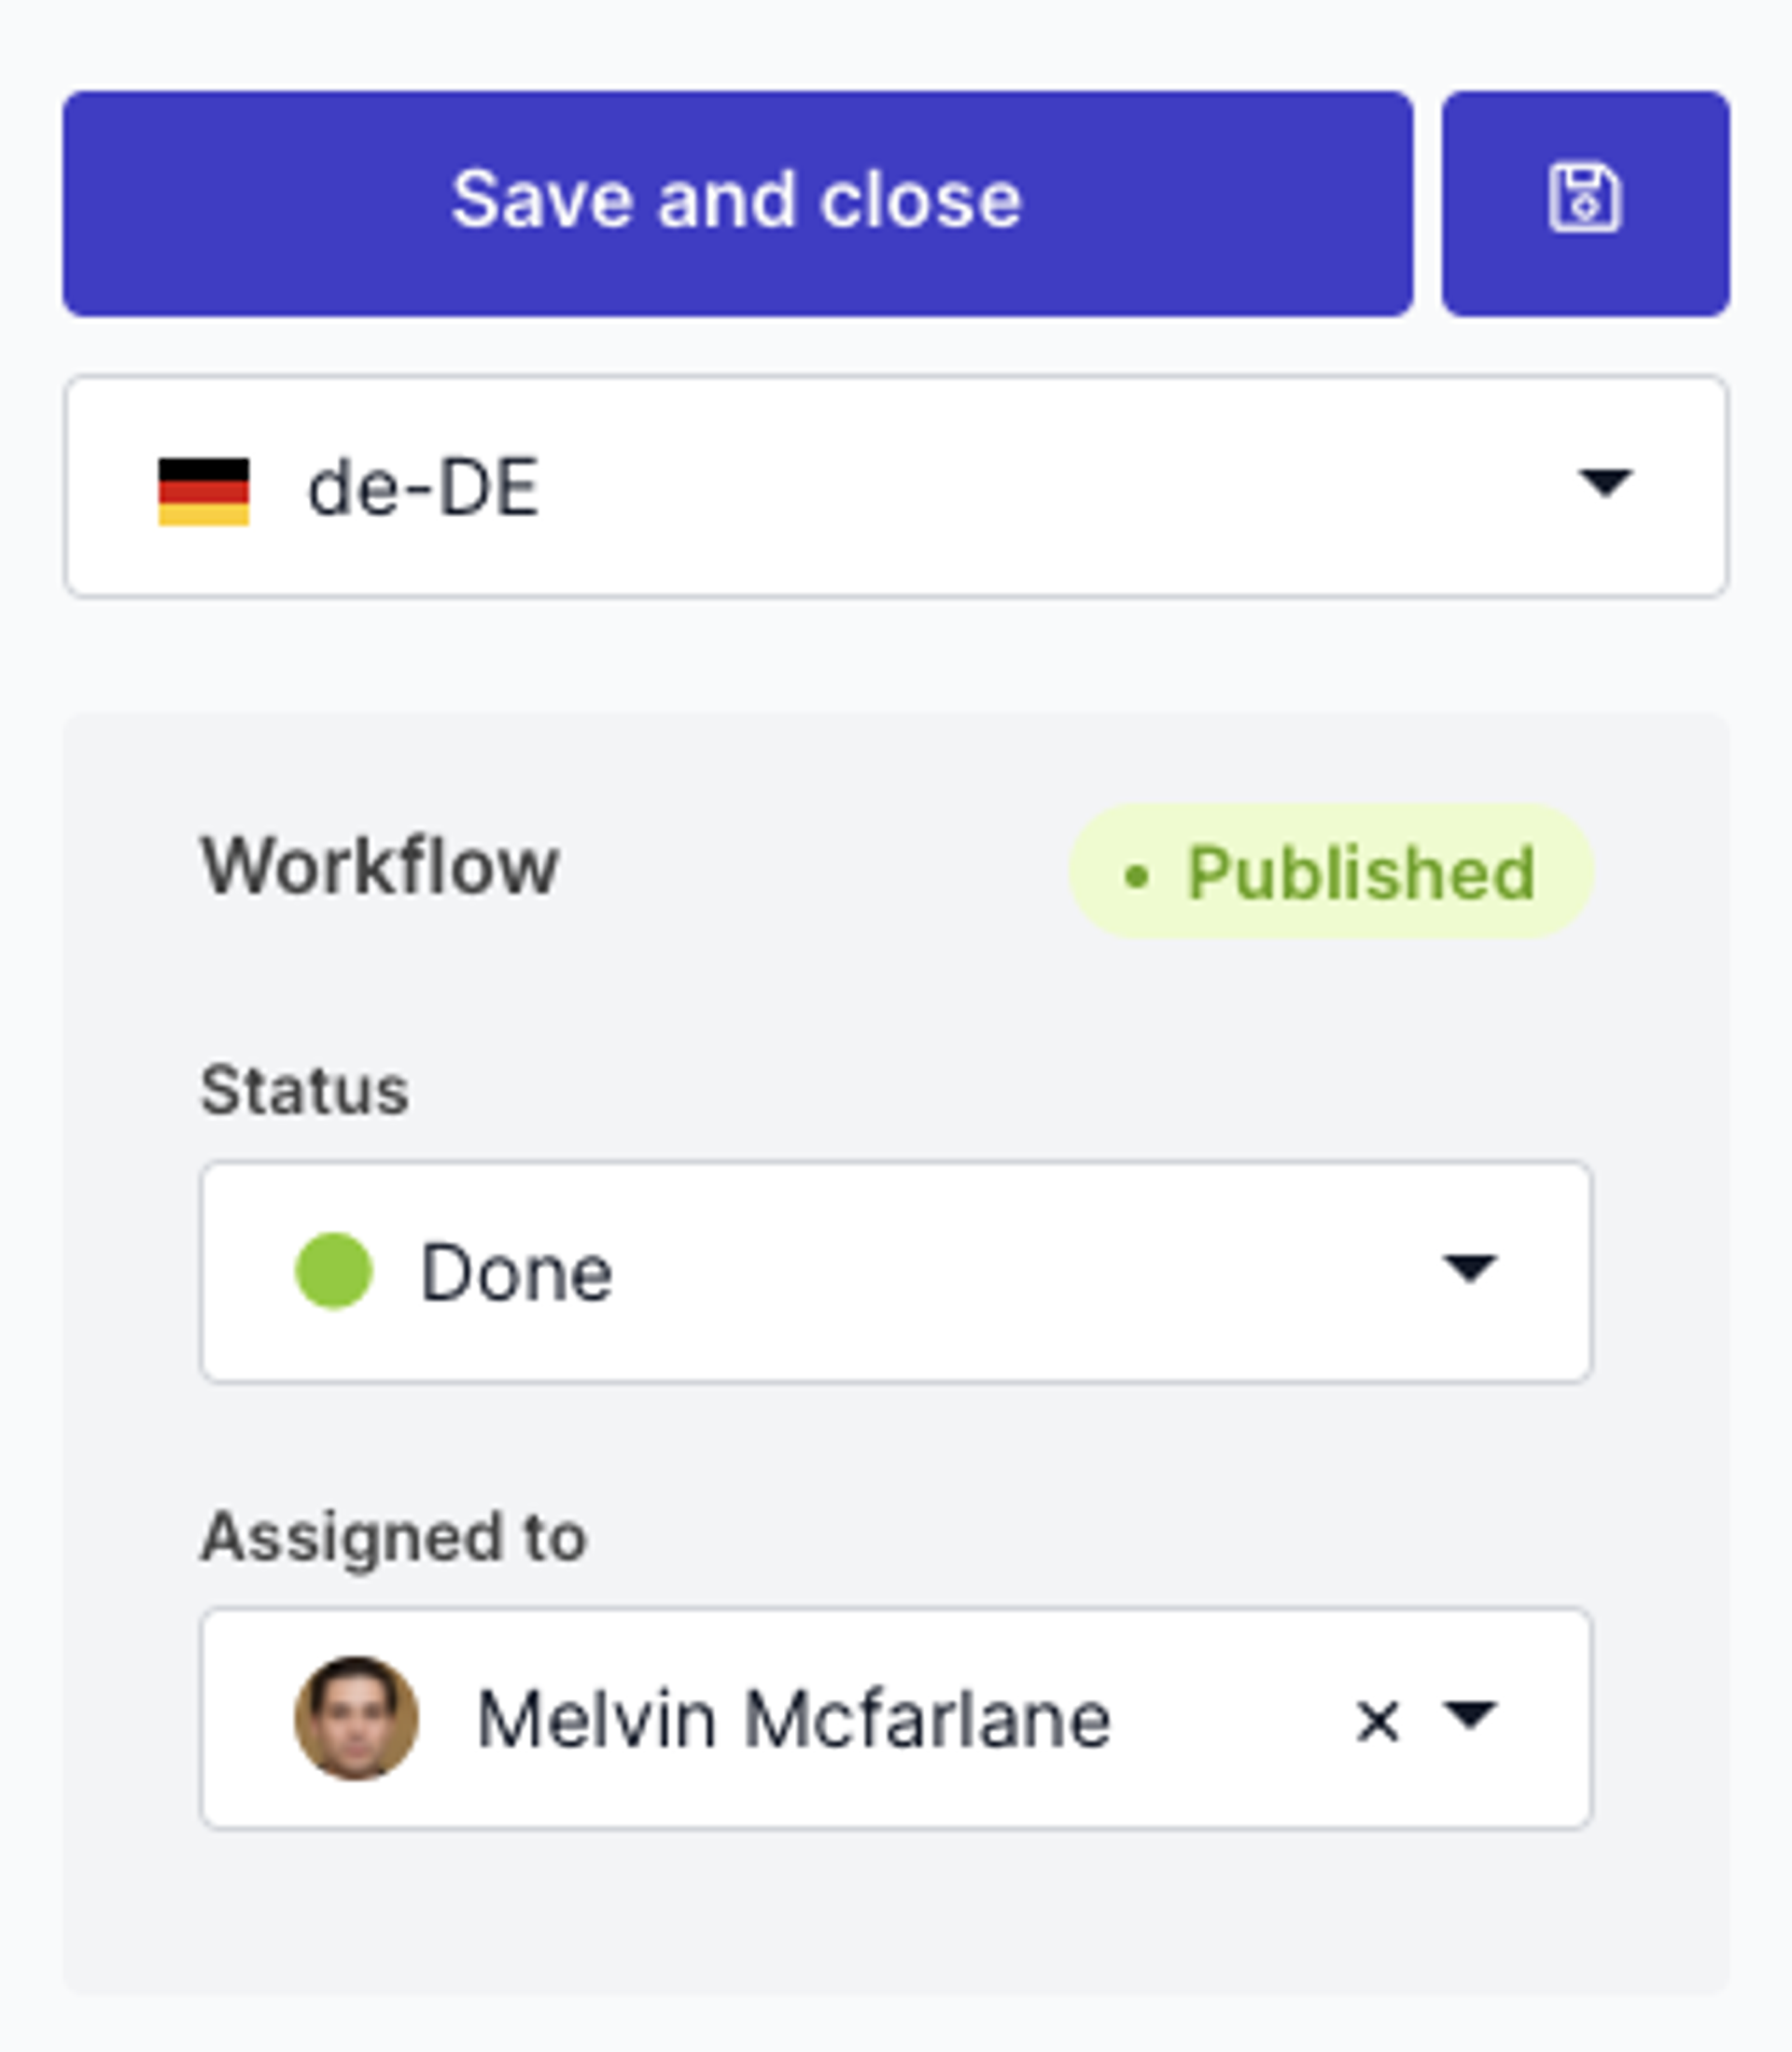
***
## Duplicate your publications to the current time
*June 7th, 2021*
Prepr contains the powerful possibility to duplicate publications. A small update today ensures that the publishing time of a duplicated publication is not copied over, but is set to the current time. This way you can immediately publish your content at the present moment.
***
## Added support for Lithuanian locales (lt-LT)
*June 1st, 2021*
Lithuanian locales are now available in Prepr. To set a locale, go to the environment details on the organization settings. You are able to select one or more locales for multi-language publications. This feature is only accessible for owners and users with the 'environments' permission. [Learn more about roles and permissions](/project-setup/managing-roles-and-permissions).
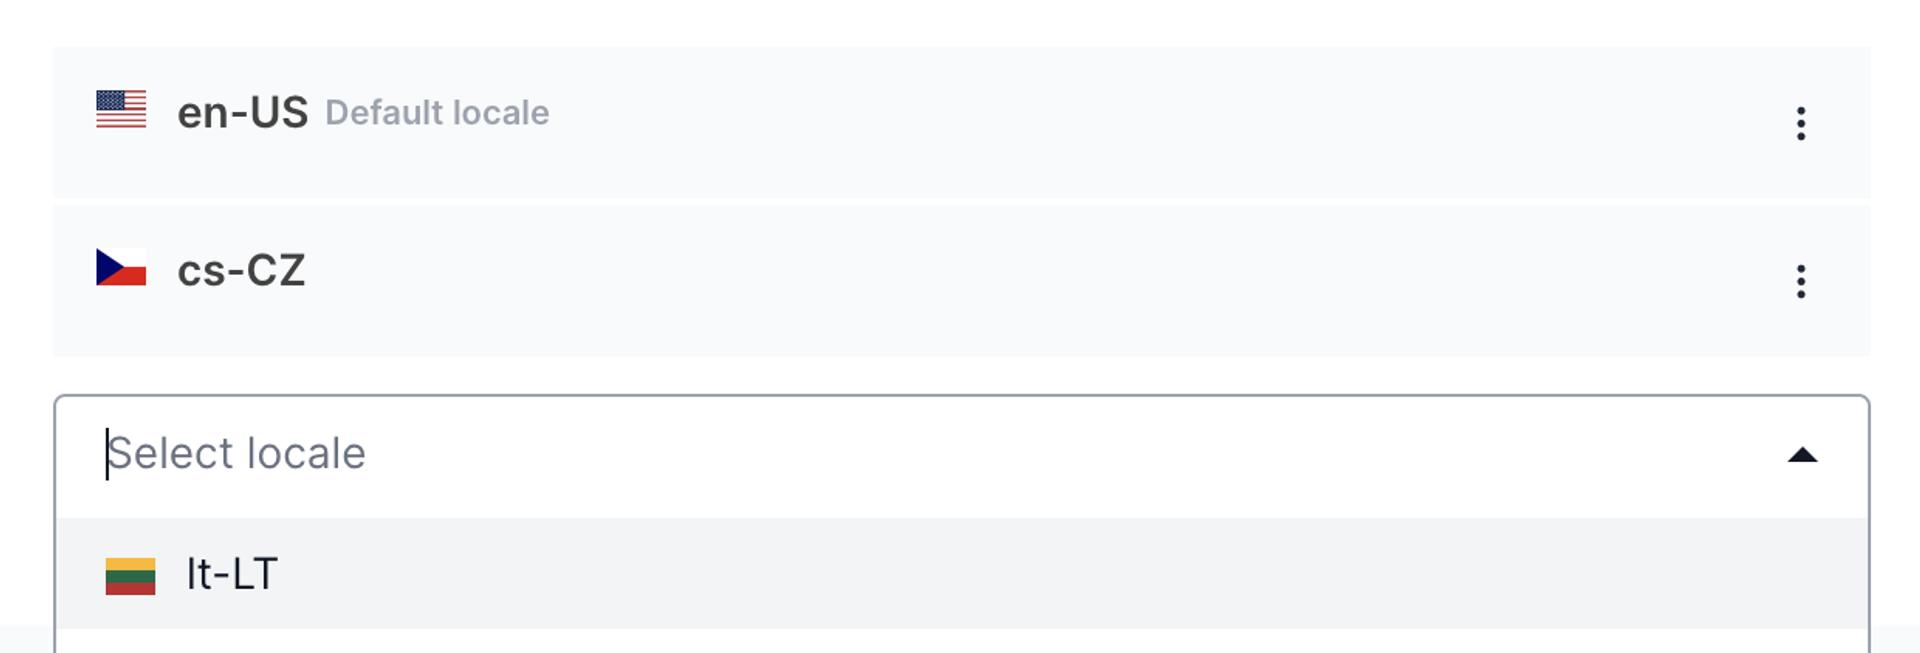
***
## Create your publications in a publication link instantly
*May 12th, 2021*
An exciting update to Prepr! Speedy publication linking that dramatically improves how you edit related publications. A publication in Prepr is often related to another publication. For example, an author linked to an article. Previously, it took an average of a whopping 12 clicks to add a new author to an article and change the data. The development team has found a solution for this: publication overlays.
Publication overlays allow you to add and edit related publications directly from the parent publication. So when you write an article, you can directly add an author and change his or her details without leaving the article. You now only need three clicks!
And the great thing is that you can do this endlessly. So no matter how deeply linked your publications are, you can always easily click through and change the data. With publication overlays, managing your content in Prepr has become simpler than ever before. Oh, and you can add roles and permissions to this function as well. For example, you can only allow editors to add a new article and edit existing articles. Boom! You just added a publication in a parent publication four times faster than you used to do.
***
## Manage segments on customers who open your email notifications
*May 5th, 2021*
Prepr keeps track of which of your customers opens and clicks through your e-mails. Since today's Prepr update it is possible to segment this group of customers. This way you can specifically reach this target groups, and also view engagement data from that selection. [Learn more about smart segments](/personalization/managing-segments).
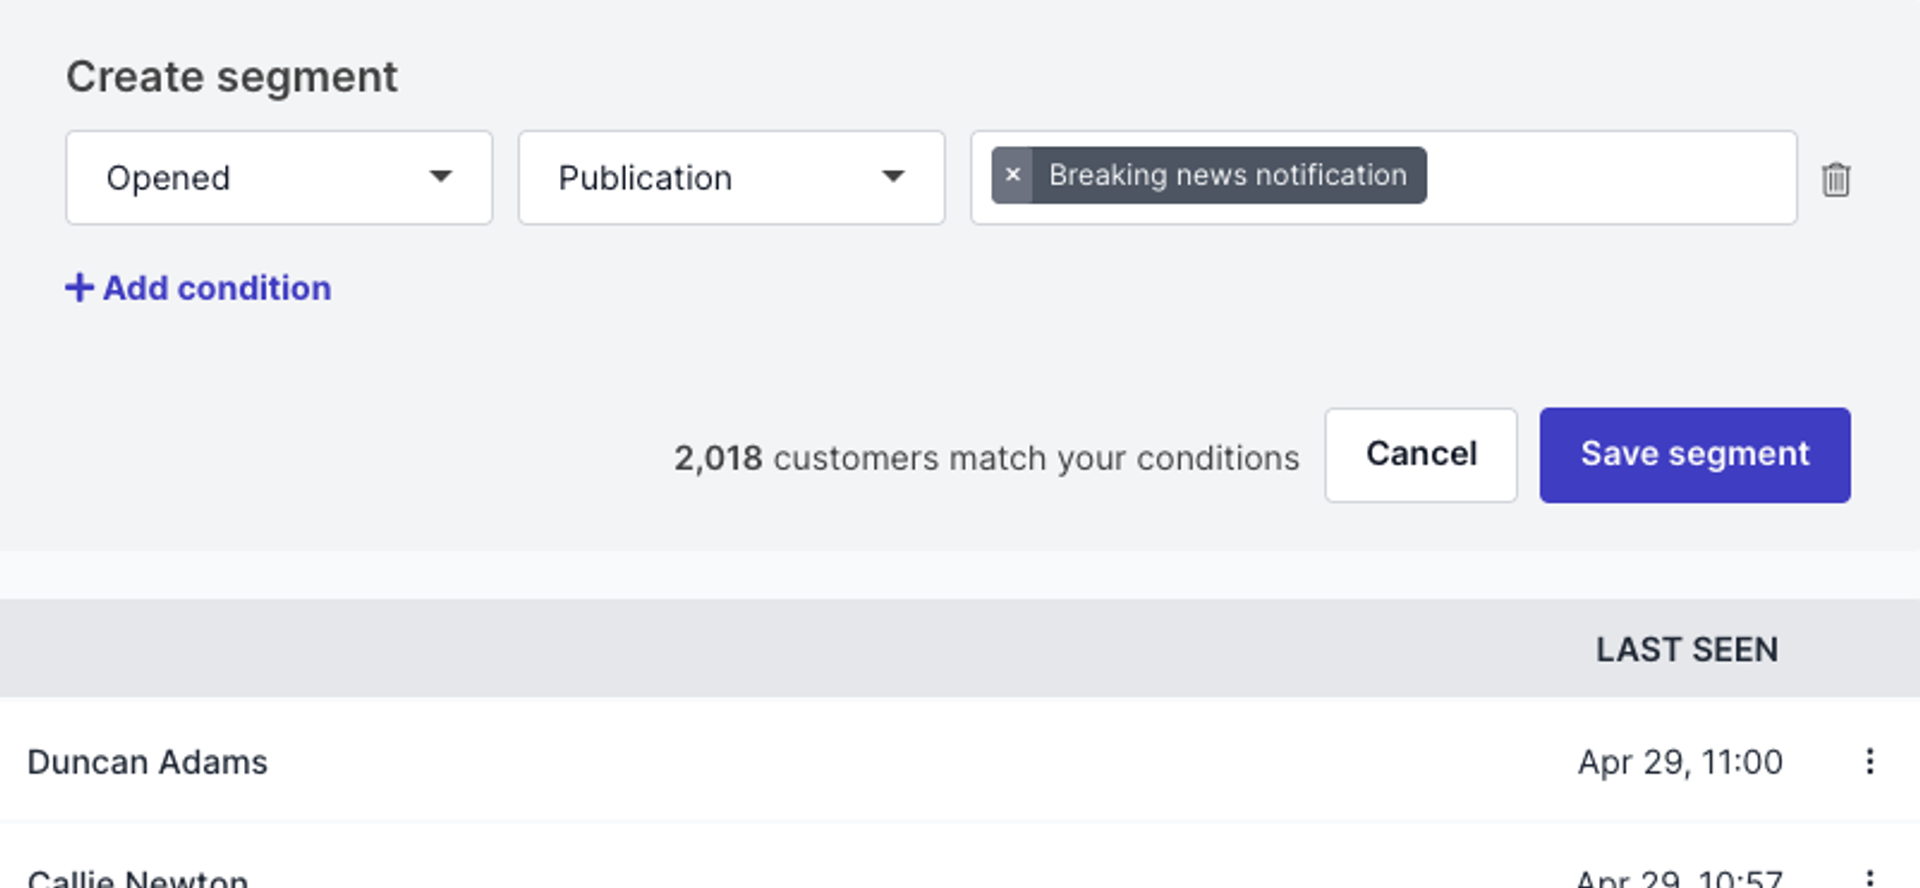
***
## Easily empty your customer lists
*April 29th, 2021*
There are several ways to remove customers from Prepr. You can delete a single customer or delete several at once. Today, we added the possibility to delete all customers in two easy steps.
If you want to remove all customers from your Prepr environment, select the '**Select rows**' option and choose to select all customers. Click the delete button and confirm. [Learn more about managing customers](/personalization/managing-segments#deleting-customer-profiles).
Of course, this is completely according to GDPR regulations. The bulk delete function is only available for roles with the bulk update permission.
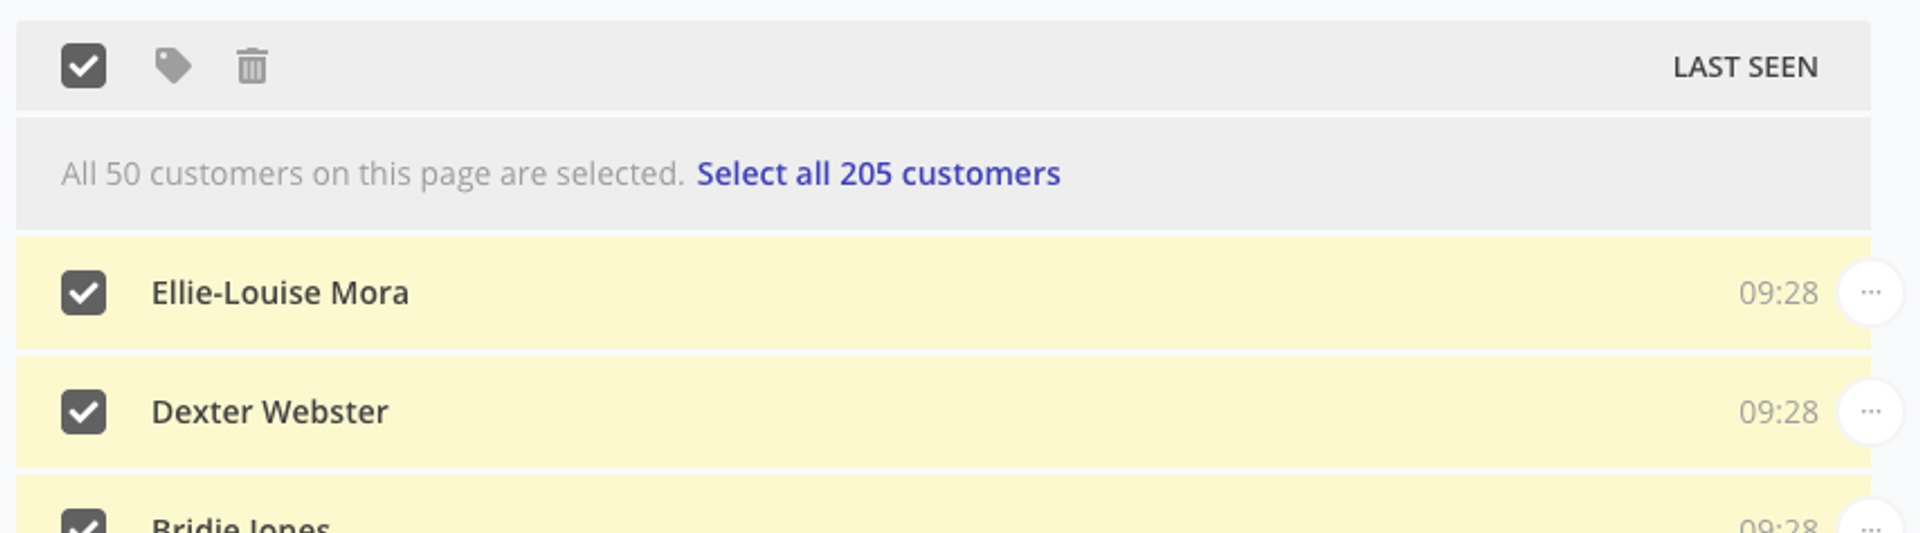
***
## Generate links to quickly preview your content
*April 28th, 2021*
Starting today, it is possible to manage one or more review URLs on your publication models. Review URLs are links to your own front-end domains, where you can see what your content will look like after publication. Typical review URLs are links to a production, acceptance, test, and development environment.
Review URLs need to be set once in the publication model. [Find it how you can manage review URLs](/project-setup/setting-up-previews-and-visual-editing). Nice to know: We regenerated all existing production URLs to the new review URLs.
***
## Design update Prepr tables
Step by step Prepr will be updated with a new, fresh and contemporary design. Today's release adds the new design to the content tables, such as publication lists and customer lists. We also add the new colors to dropdowns, date-time pickers, and autosuggestion input fields.
More to come in the coming weeks, like Prepr in dark mode!
***
## Embed Typeform surveys, questionnaires, and forms to your content
*April 22nd, 2021*
Typeform offers dynamic web forms and online surveys. Starting today, you can easily embed these web forms in your own publications.
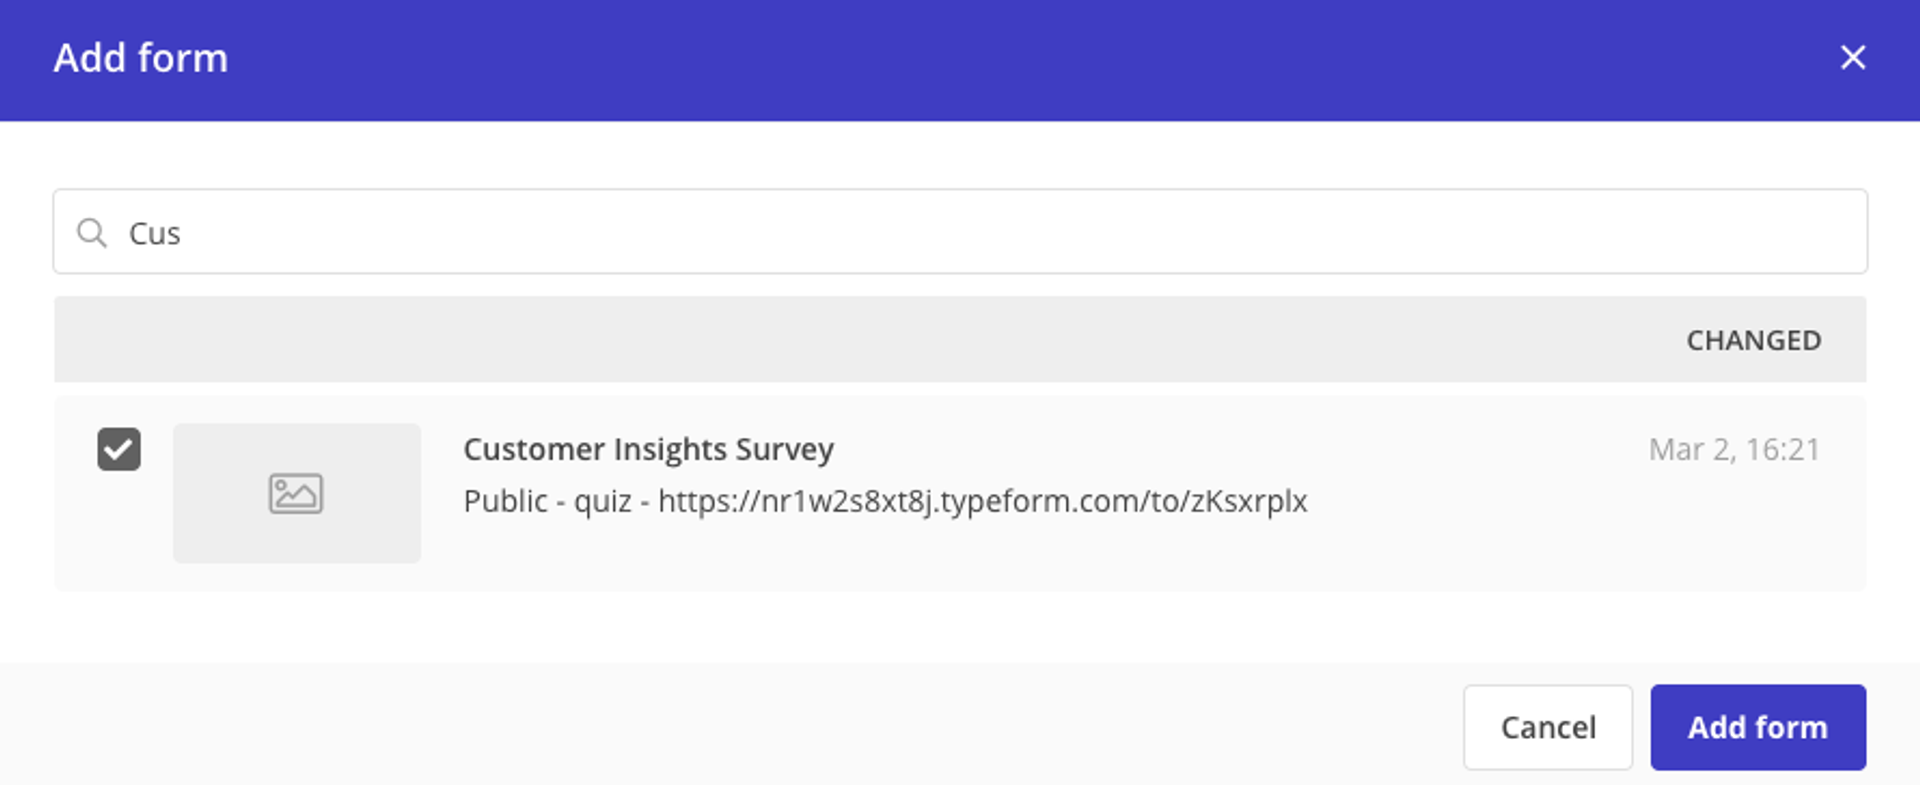
To use Typeform, it is important that you have activated a Typeform integration and added the content integration to one of your publication models first. [Learn more about the Typeform integration and form embeds](/integrations/typeform).
***
## Link your publications even more efficiently
*April 13th, 2021*
The publication link is the super-fast way to link from one publication to another. This feature is often used to refer to topics, authors, or as "read more" functionality.
Today's update makes it possible to determine the display of this field in a publication. You can show a link field as a pop-up, or display this field as an autosuggest, and as checkboxes/radio buttons. All three options have their own character:
- **Pop up.** This function, as we already offer it, can be used if you want to search for specific publications. In the pop-up, you can search for publications, filter by assignee or model, and scroll through all search results.
- **Autosuggest.** You can use the autosuggest if you need a specific publication quickly, without having to search extensively. Start typing in your input field and the results will appear immediately.
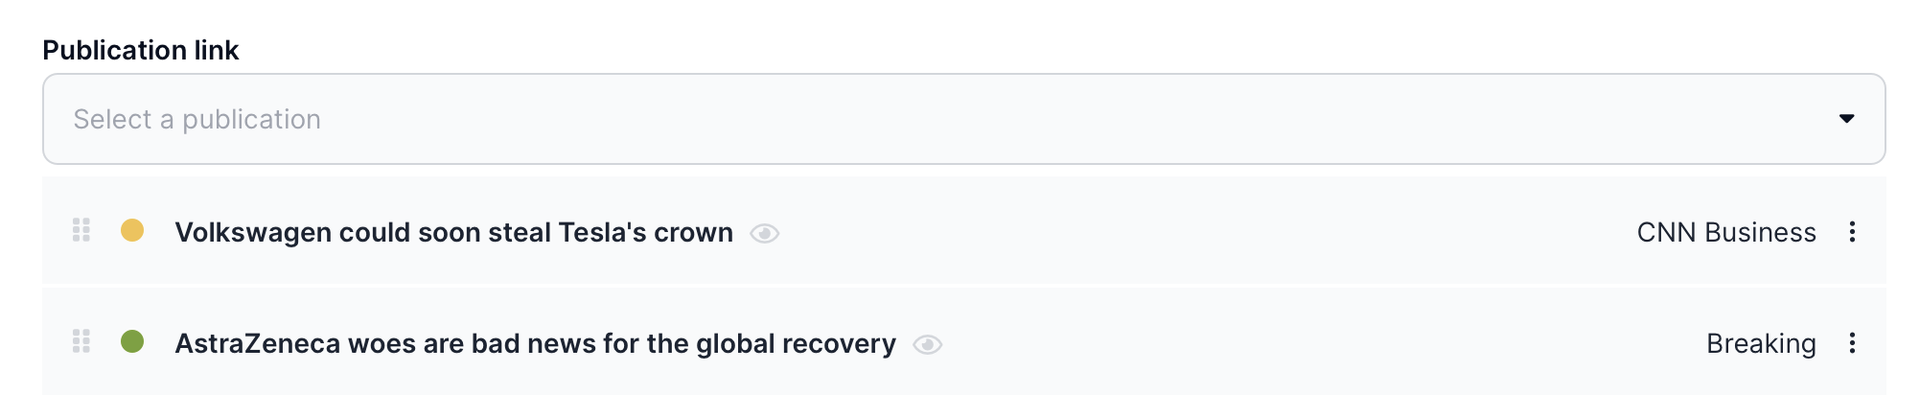
- **Checkboxes.** This option is best used if you only have a limited set of publications to choose from. An example is a topic or author you want to refer to. When you have indicated a maximum of 1 in your model, the options will be shown as a radio button.

**View publication**
Another trick we added today is the click-through to the publication. From the pop-up, as well as from the autosuggest, or from the checkbox options you can easily click through to the publication you want to link.
***
## Manage asset parameters per publication
*April 8th, 2021*
Do you want to use and describe one asset in different publications? That is now facilitated by Prepr. Today's update makes it possible for you to add a caption to the asset(s) per publication. In this way, you can have the caption in one publication deviate from the caption in the other publication. This is how you can describe the asset very precisely for your specific publication.
Working with multi-language assets
Do you work with publications in multiple languages? Then today's update is very helpful for you. The caption of an asset is language-dependent. This means you can have the caption in one language differ from the description in the other language.
Caption in English publication
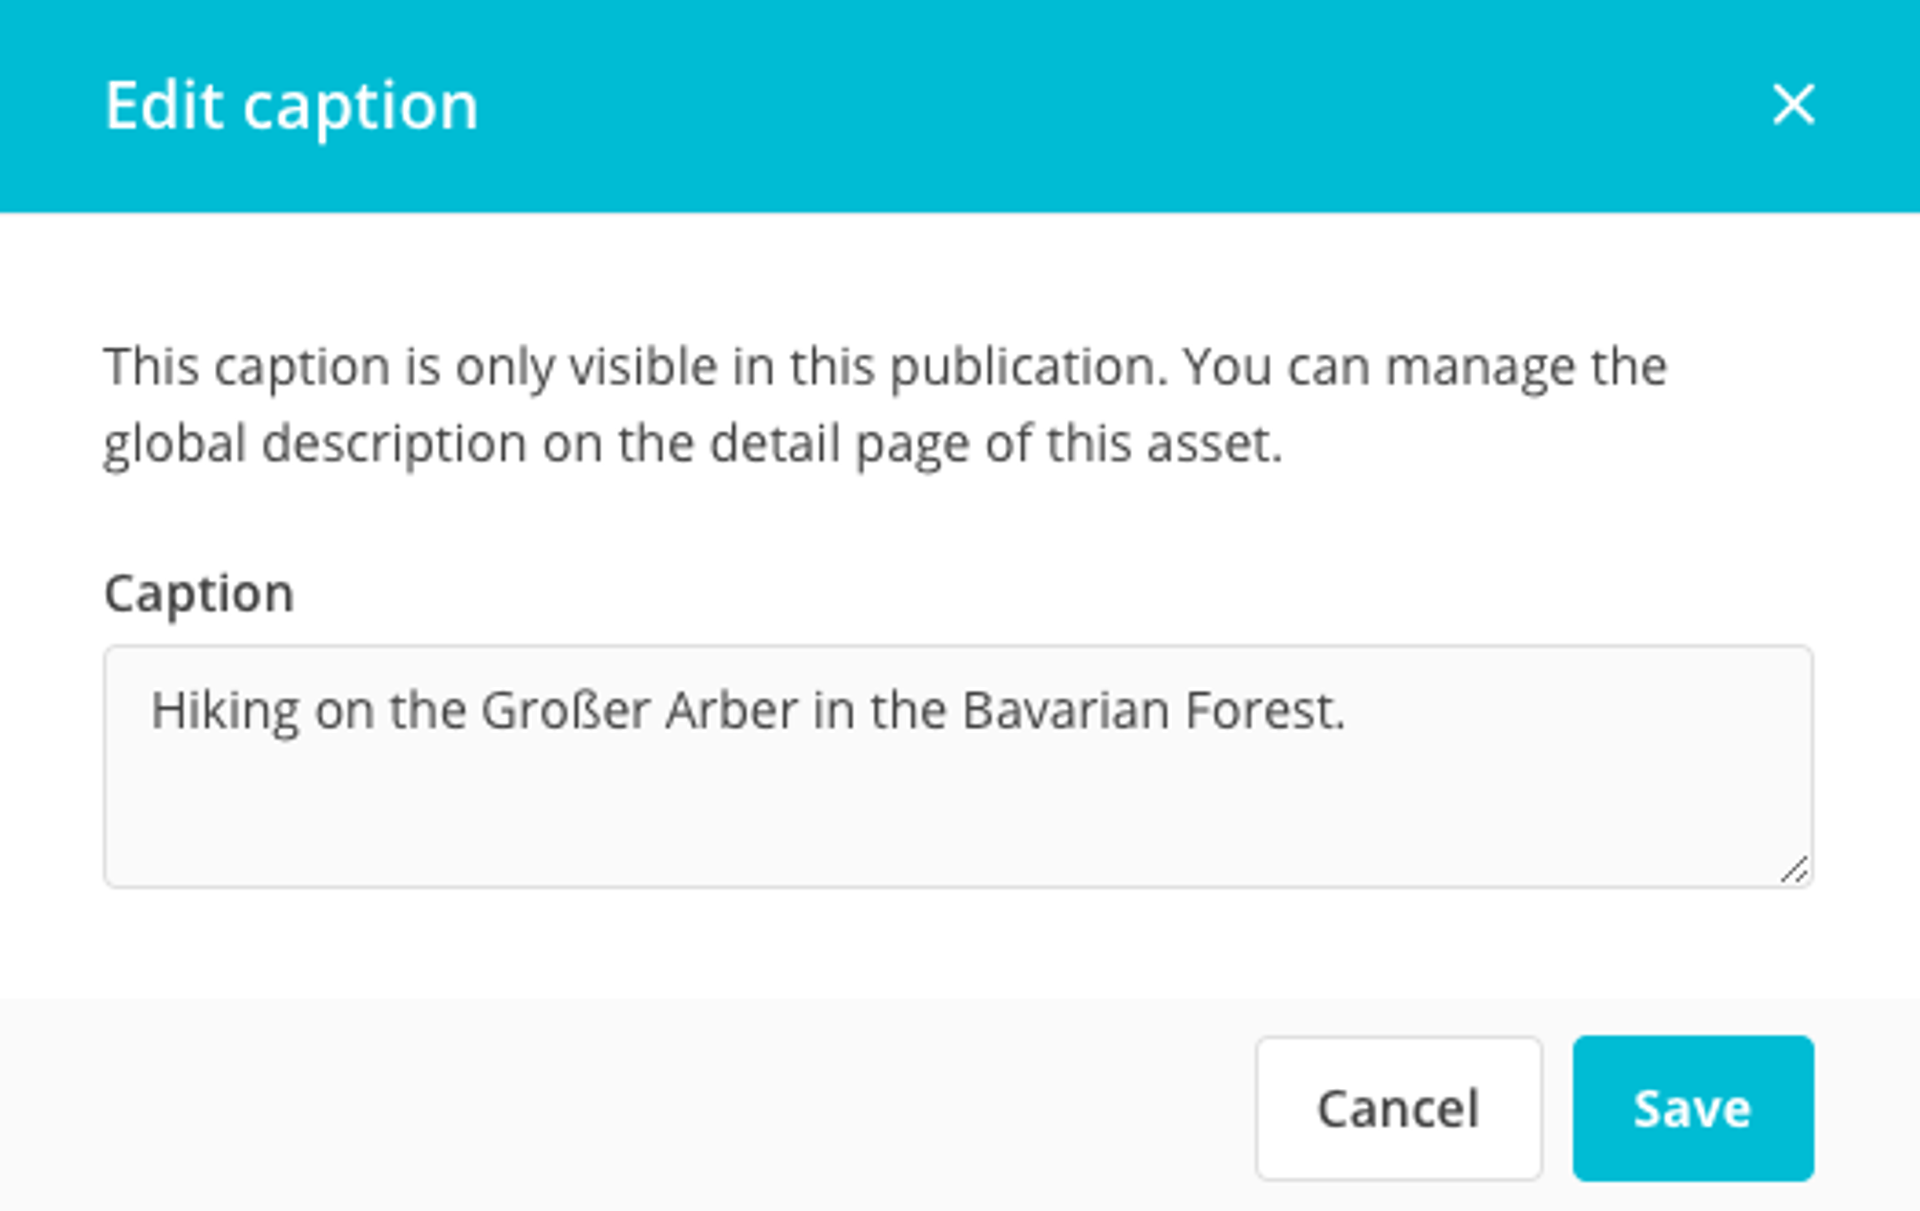
Caption in German publication
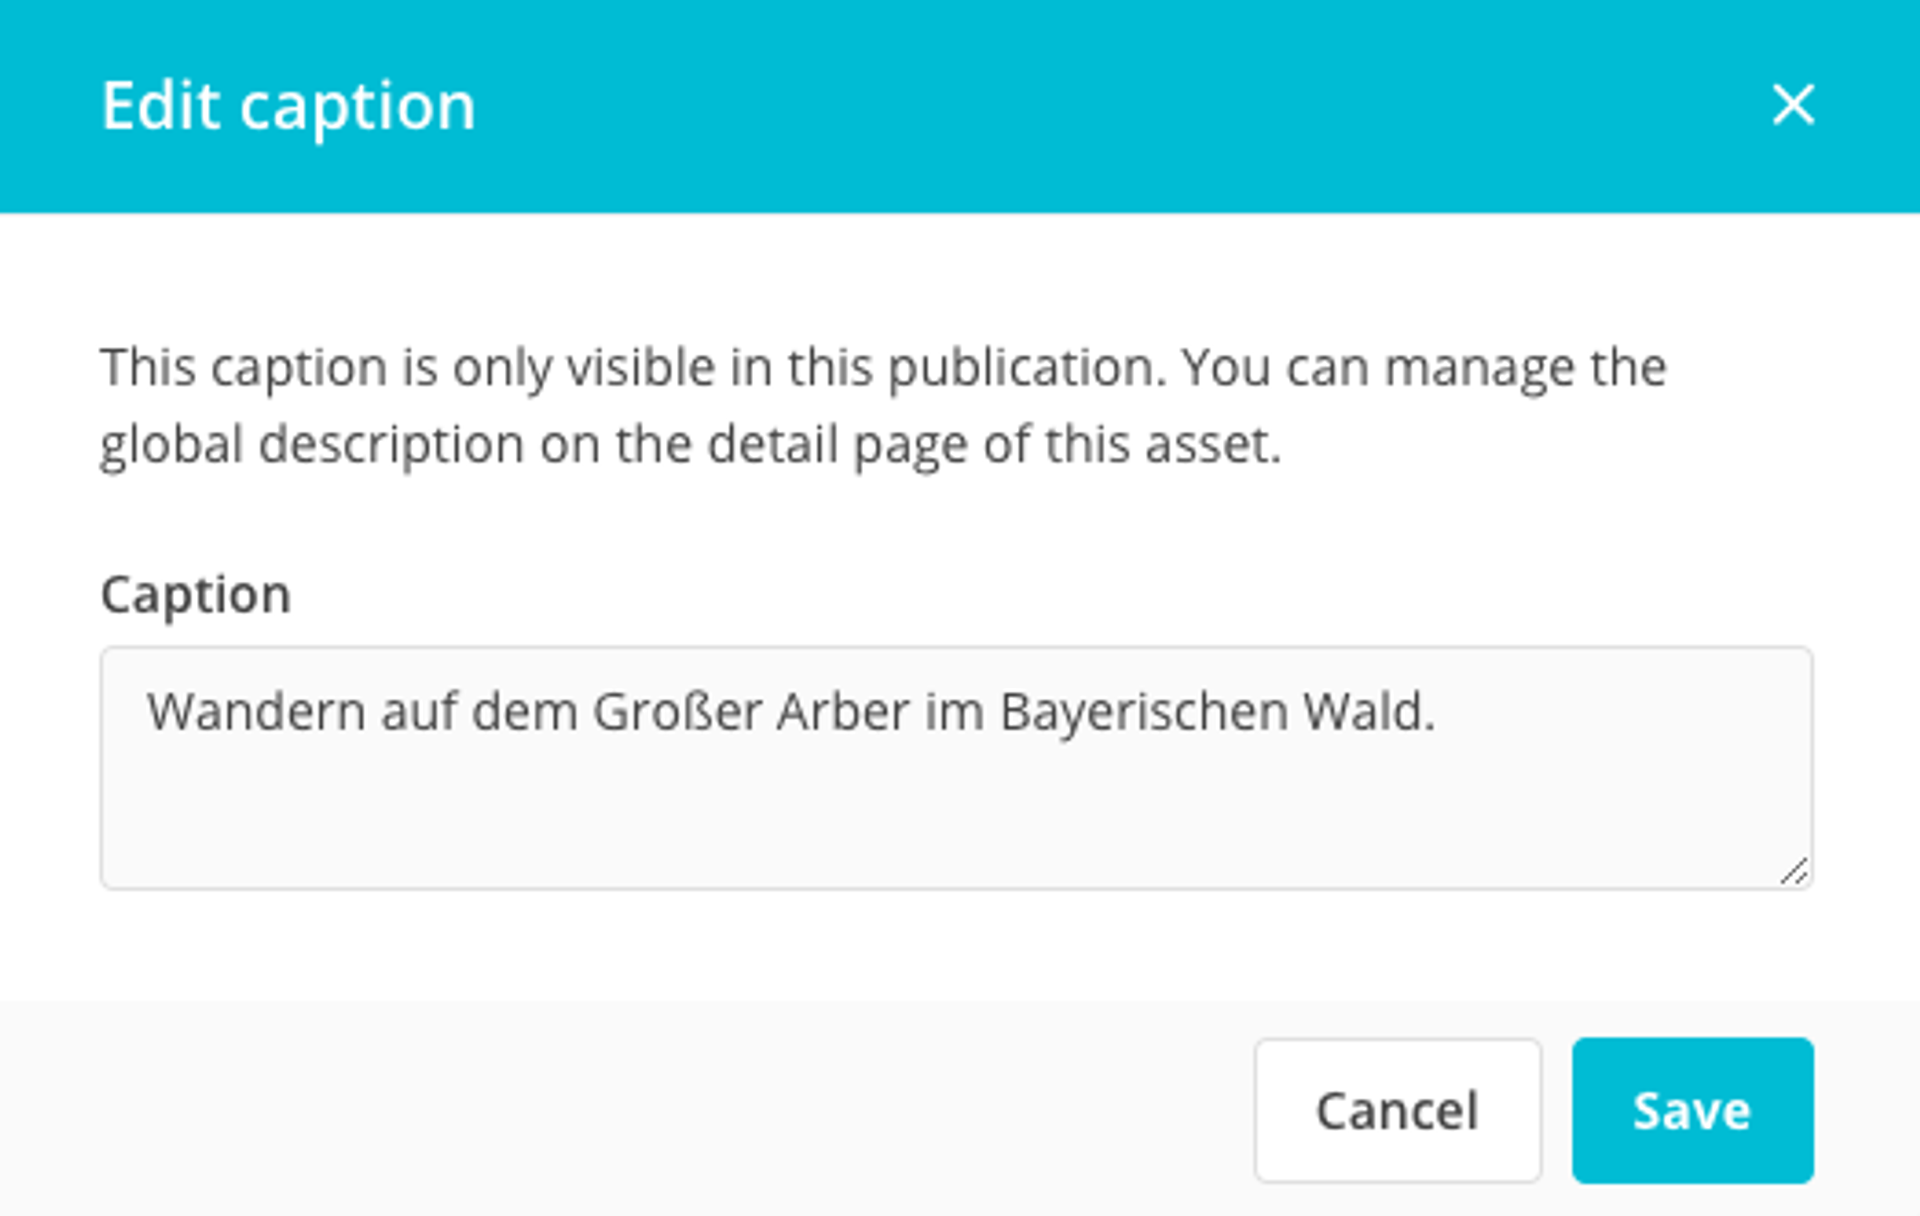
***
## Align images in text elements
It has also become possible to manage the alignment of assets in a publication. Set where an asset should be displayed between the text elements on your website: choose left, center, or right to determine the position of the image.
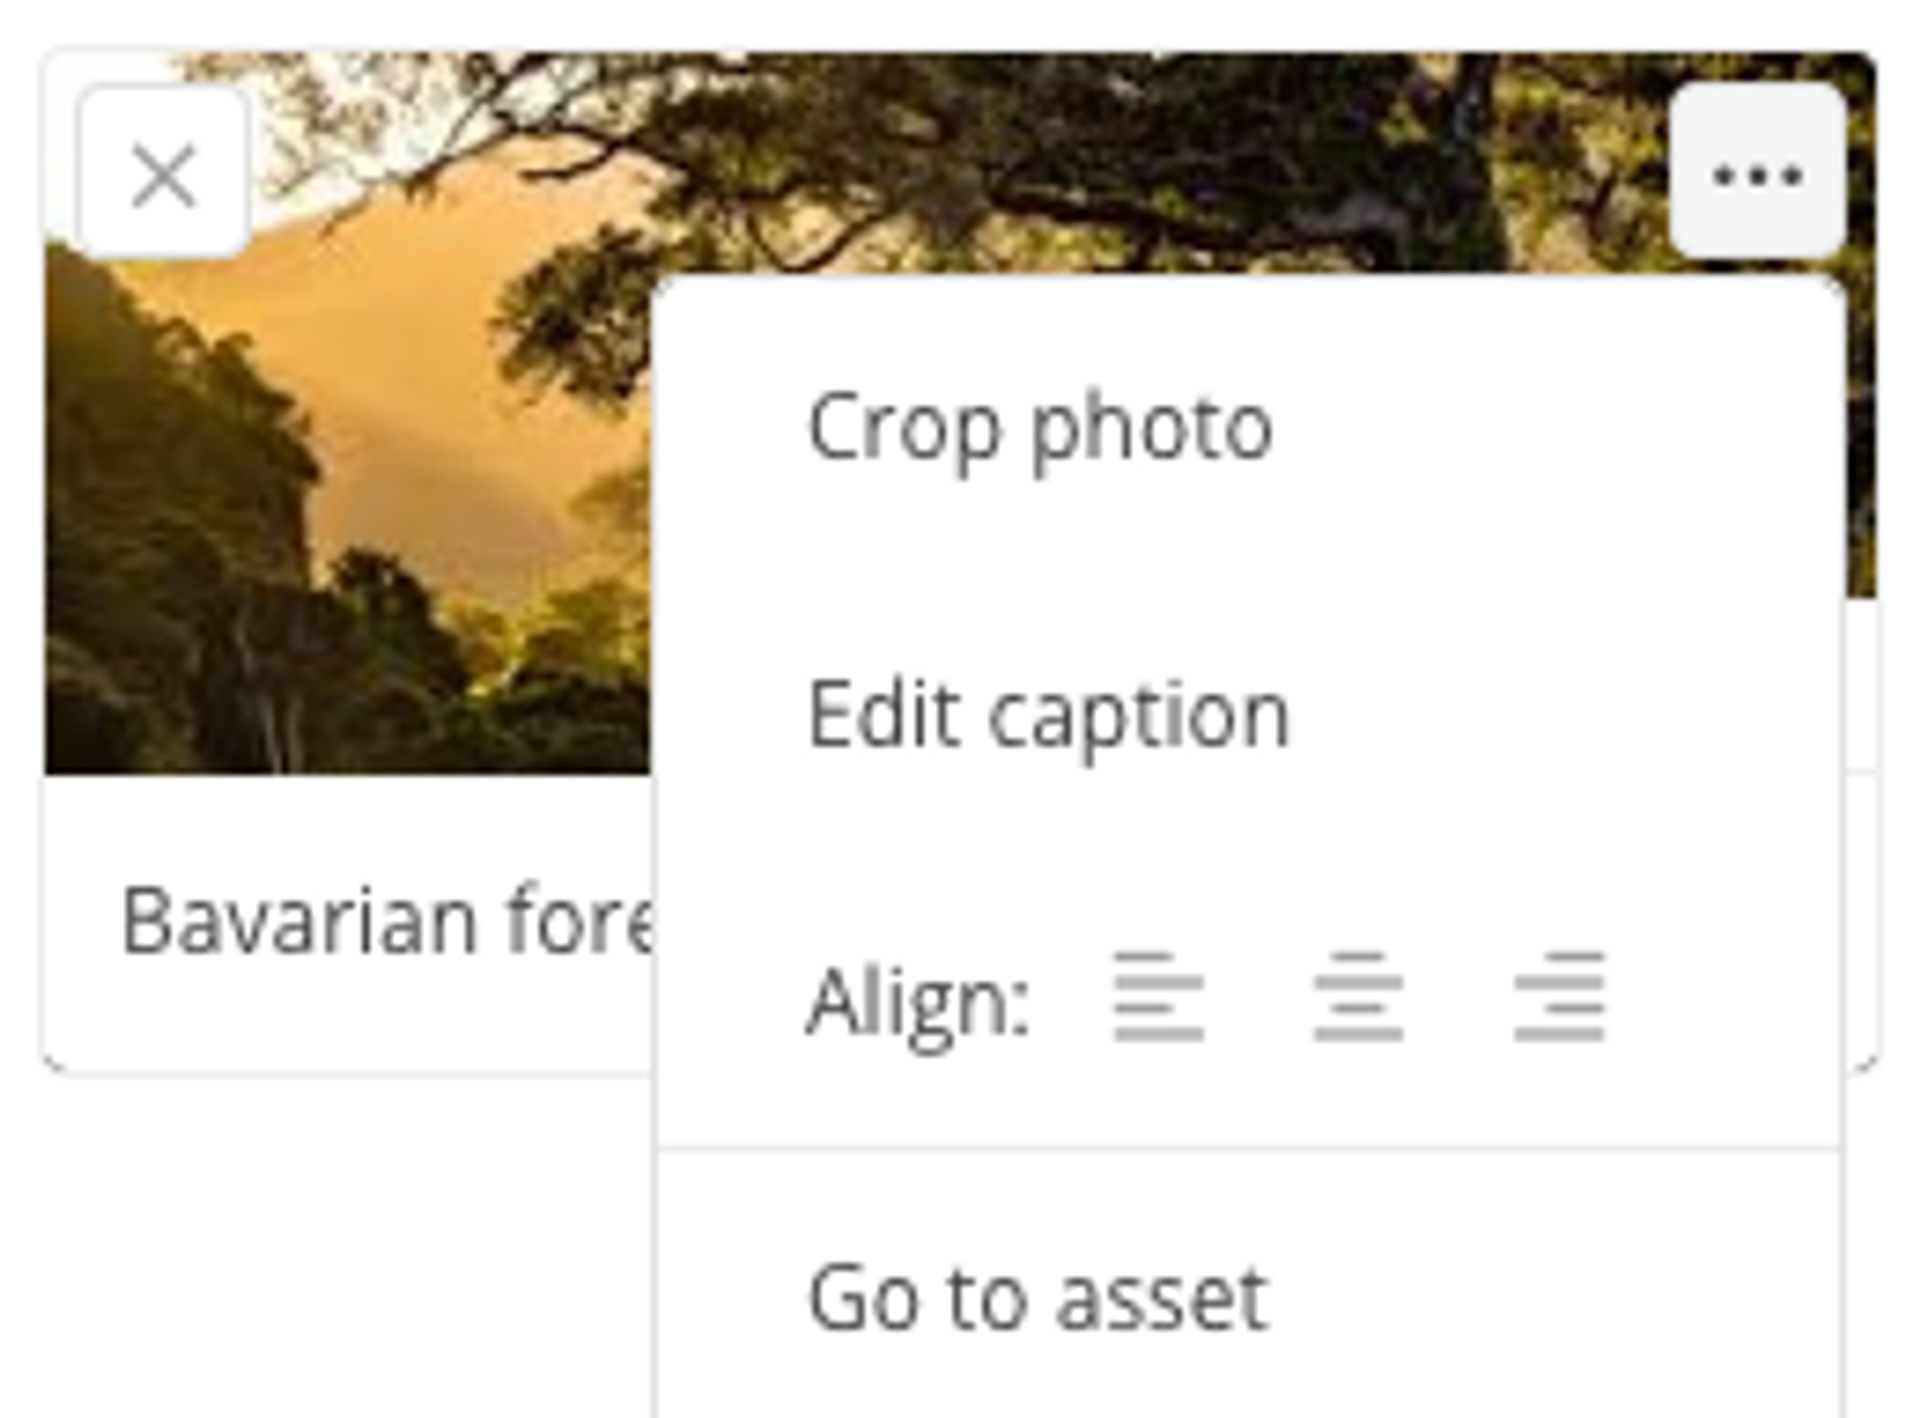
***
## Export and import publication elements
*April 2nd, 2021*
In Prepr you can easily export and import publication elements. This prevents a lot of duplication and saves an enormous amount of time. Duplicating or moving publication elements can be very useful in some cases, for example:
- When you also want to use a publication element from one environment in one of your other environments.
- Or if you want to turn publication elements into shared content elements.
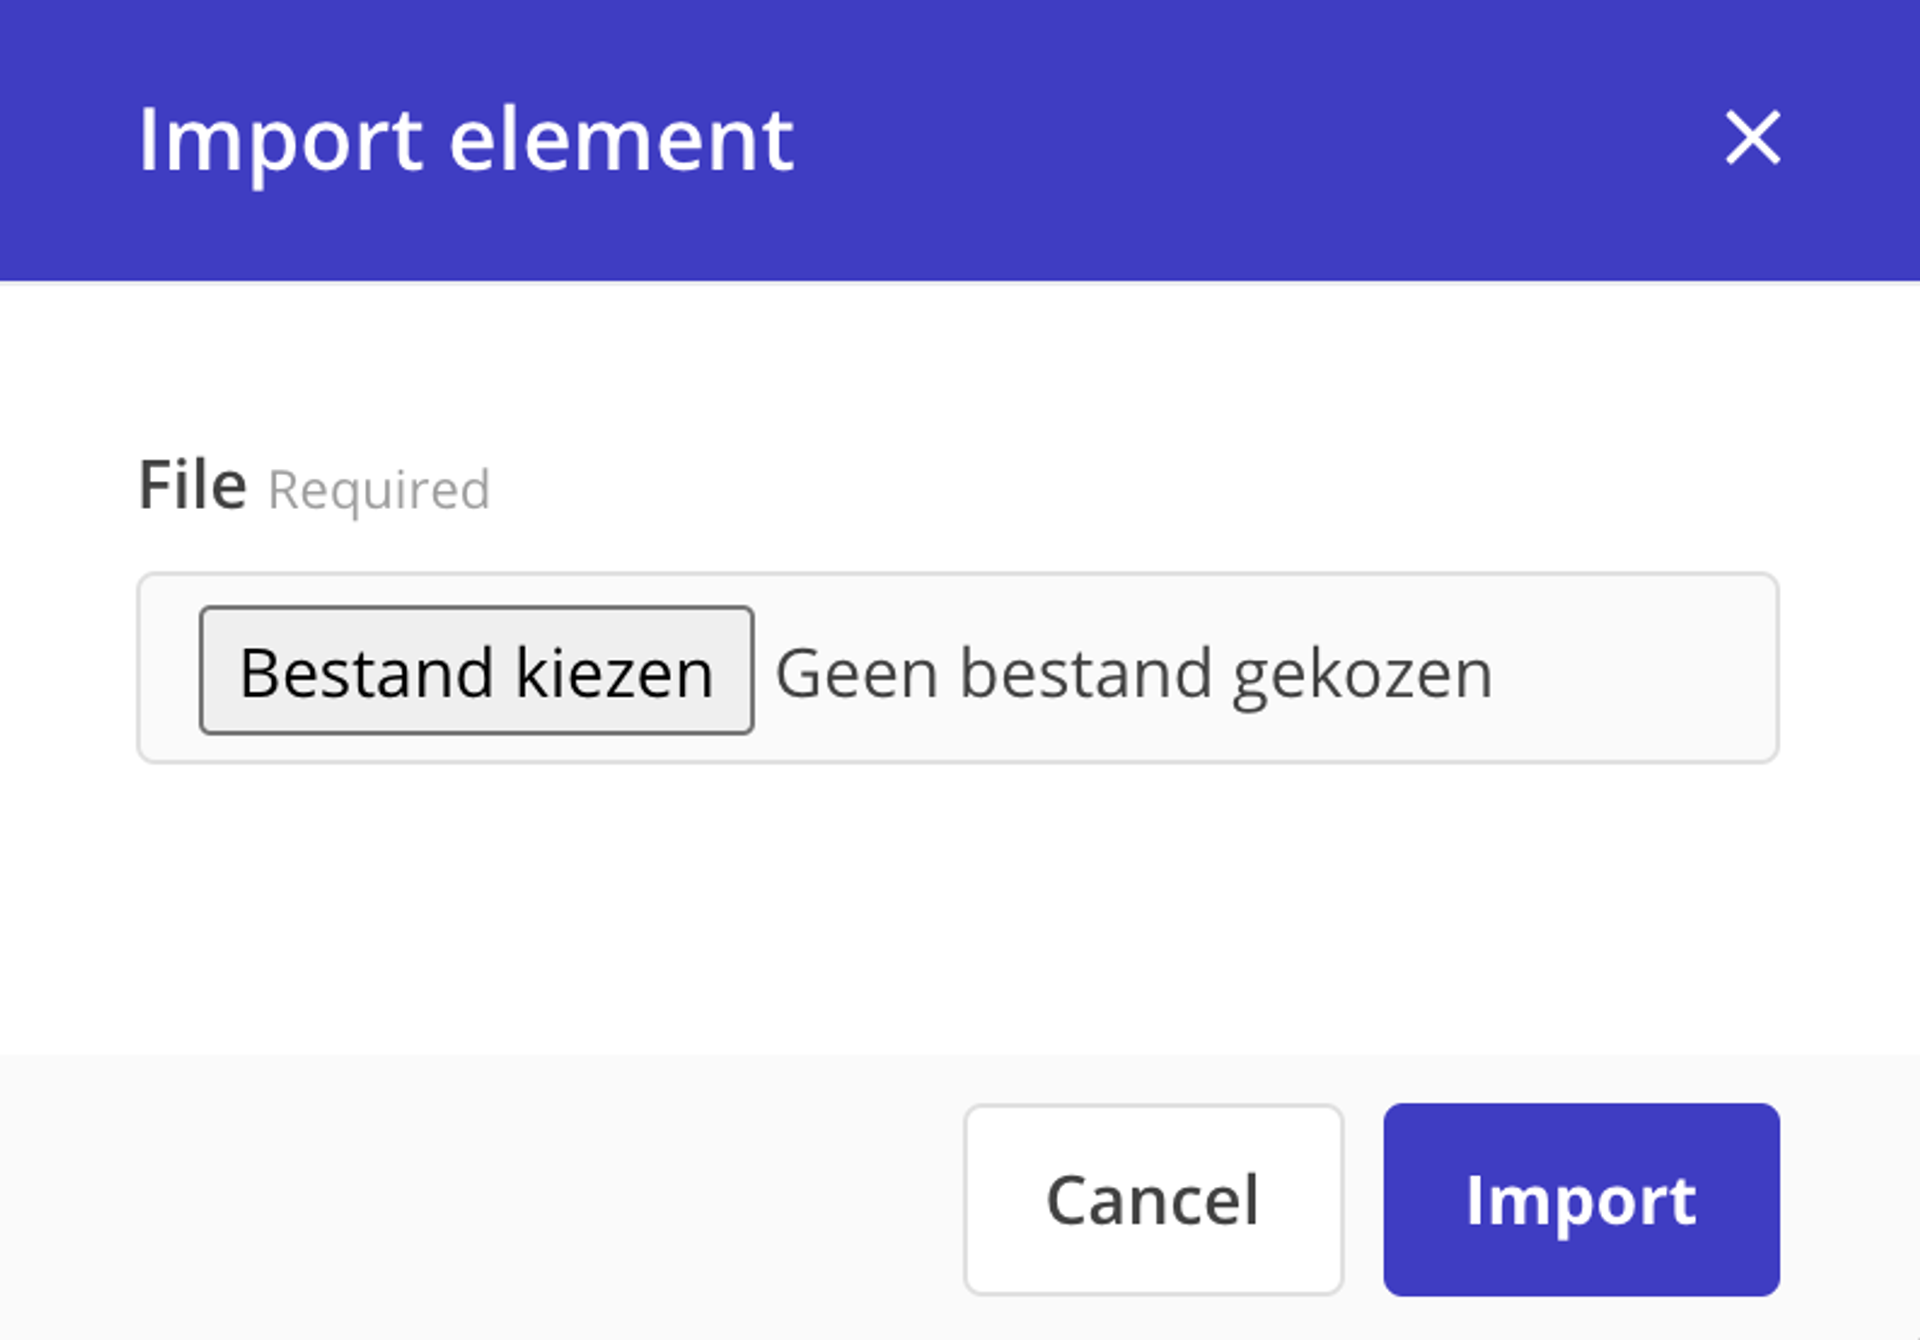
Learn more about [exporting and importing publication elements](/content-modeling/managing-components#export-and-import-a-component) or read our Prepr blog post about [Shared content models and elements](https://prepr.io/blog/minimize-errors-and-maximize-development-speed-with-shared-content-models).
***
## Sending Tweets with Prepr
*March 30th, 2021*
Writing and sending Tweets via Prepr is as easy as publishing a website article or web page. [Let us show how you can easily publish](/content-modeling/field-types#social-field) to this world-class social media platform. You can enter the Tweet text, and enrich the Tweet with photos, a video, and a link to another Prepr-publication. Multi-channel publishing, all from one platform.

**Note:** You need to link a Twitter account once and set up the publication model correctly. [Learn more about how to set up your Twitter integration](/content-modeling/field-types#social-field).
***
## New indigo color in Prepr application
*March 29th, 2021*
Step by step Prepr will be updated with a new, fresh and contemporary design. Today's release adds the new design to the Prepr menu bar. The action buttons (such as 'Add publication') are also provided with the new indigo corporate identity. More to come in the coming weeks, like Prepr in dark mode!

***
## Export customers with special export permission
*March 23rd, 2021*
Prepr has carried out an important update in GDPR compliance. As of today, Prepr users can only export customer lists if they have the special 'export' permission.
To add the permission to a role, go to **User management** → **Roles** in the organization settings and select a role. Select the option 'Allow user to export customers' to give users with this role access to the export function.

**Note:** All current Admin roles with the 'customers' permission have been given this export function.
***
## Auto-complete your publication slugs with parent publications
*March 22nd, 2021*
A slug is part of a URL that usually describes the path to the specific publication: it is the part that comes after your domain name in the URL. You can use different slug variables to auto-complete the slug construction, such as `id` and `title`.
From today, Prepr also offers the possibility to include linked parent publications in your slug construct. This is a huge asset for Prepr users who point through publication links to other publications in their Prepr account. [Learn more about working with publication slugs](/content-modeling/field-types#slug-field).

***
## Start using asset metadata (Exif)
*March 17th, 2021*
For many Prepr users, the default asset titles are not sufficient, as many file names are indefinable. That's why Prepr offers the Exif integration to automatically add metadata (Exif) of the photo, video, audio, or document. Go to **Integrations** → **General** → **Exif Integration** to specify which Exif-data of the asset you want to use. You can choose to replace the title, description and/or author. [Learn more about asset metadata](/integrations/image-processing/exif).
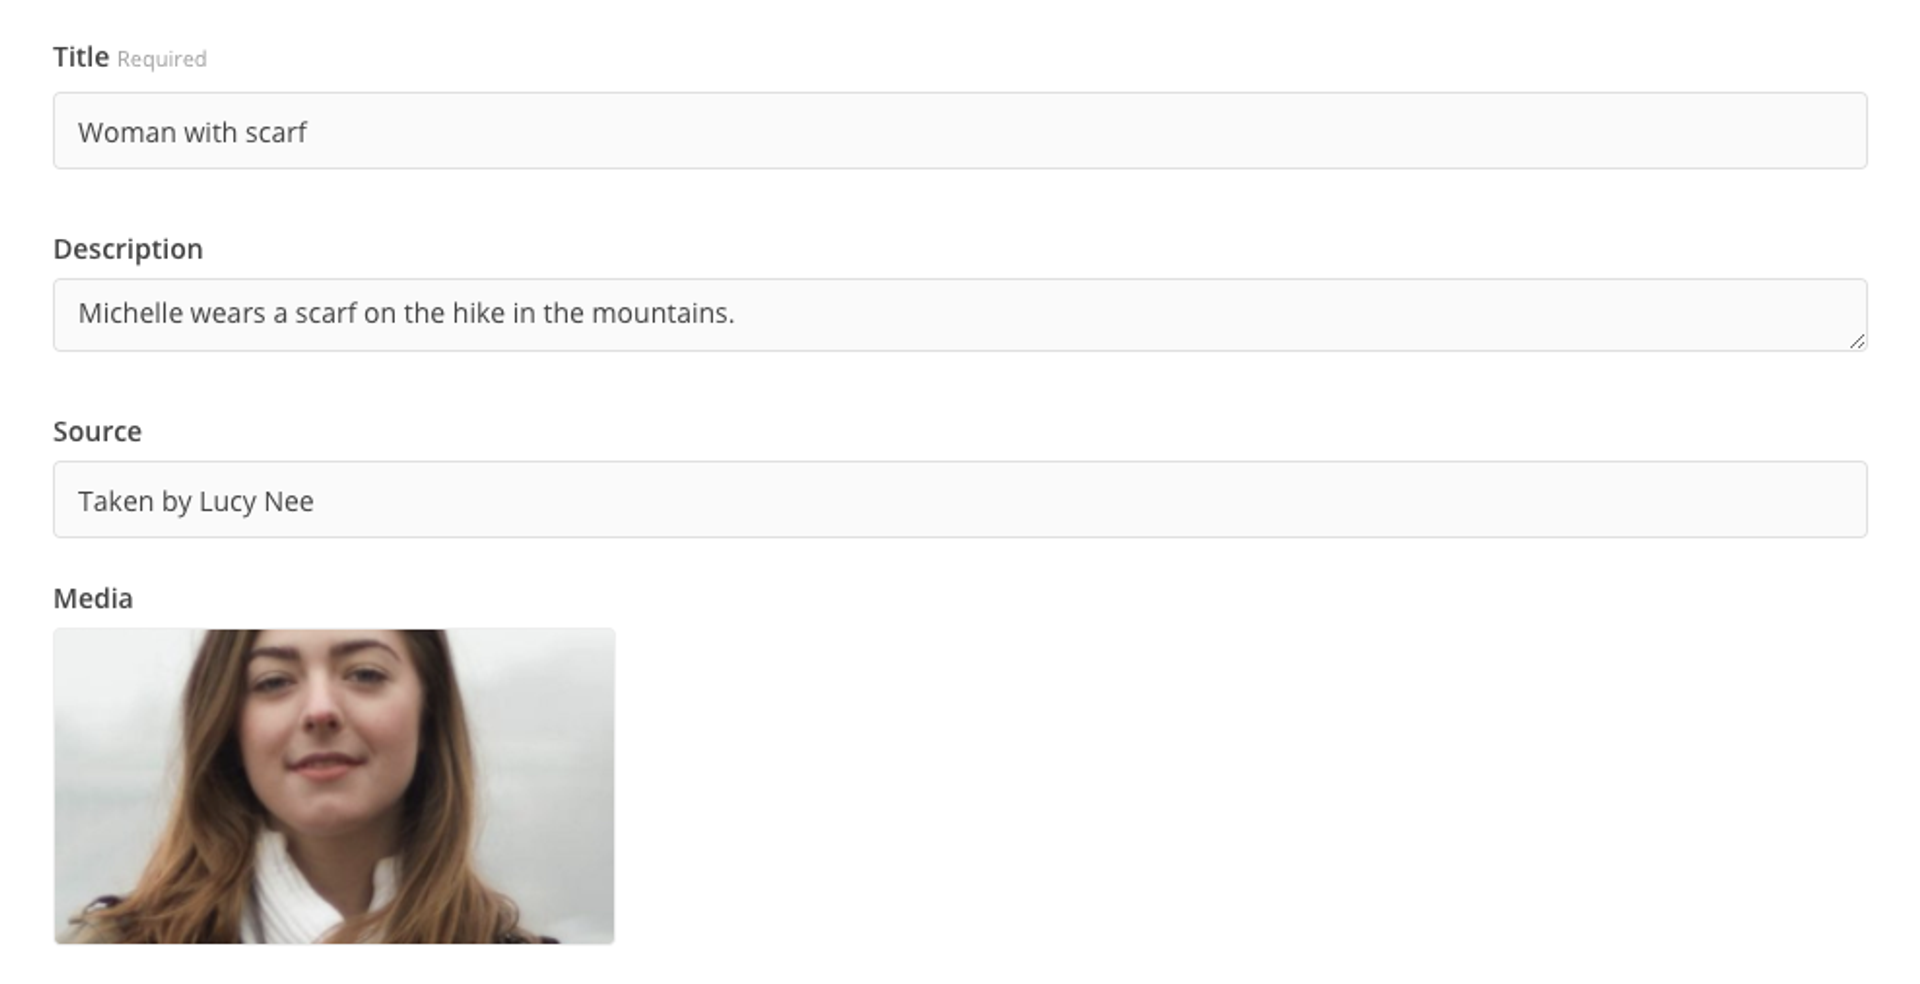
***
## A/B-test winner selection
*March 16th, 2021*
Prepr A/B tests give you the power to perform A/B tests with your content in an easy-to-implement way. By A/B-testing your content frequently, you increase CTR and time spent. Zoom in on retrieved metrics and learn what content works best – or improve the content that needs tweaking.
Since today's update, it is possible to choose the version you want to continue with. This is typically the version with the best CTR, the winner. Switch off the A/B test option and choose your winner. [Learn more about A/B-testing](/ab-testing/running-ab-tests).
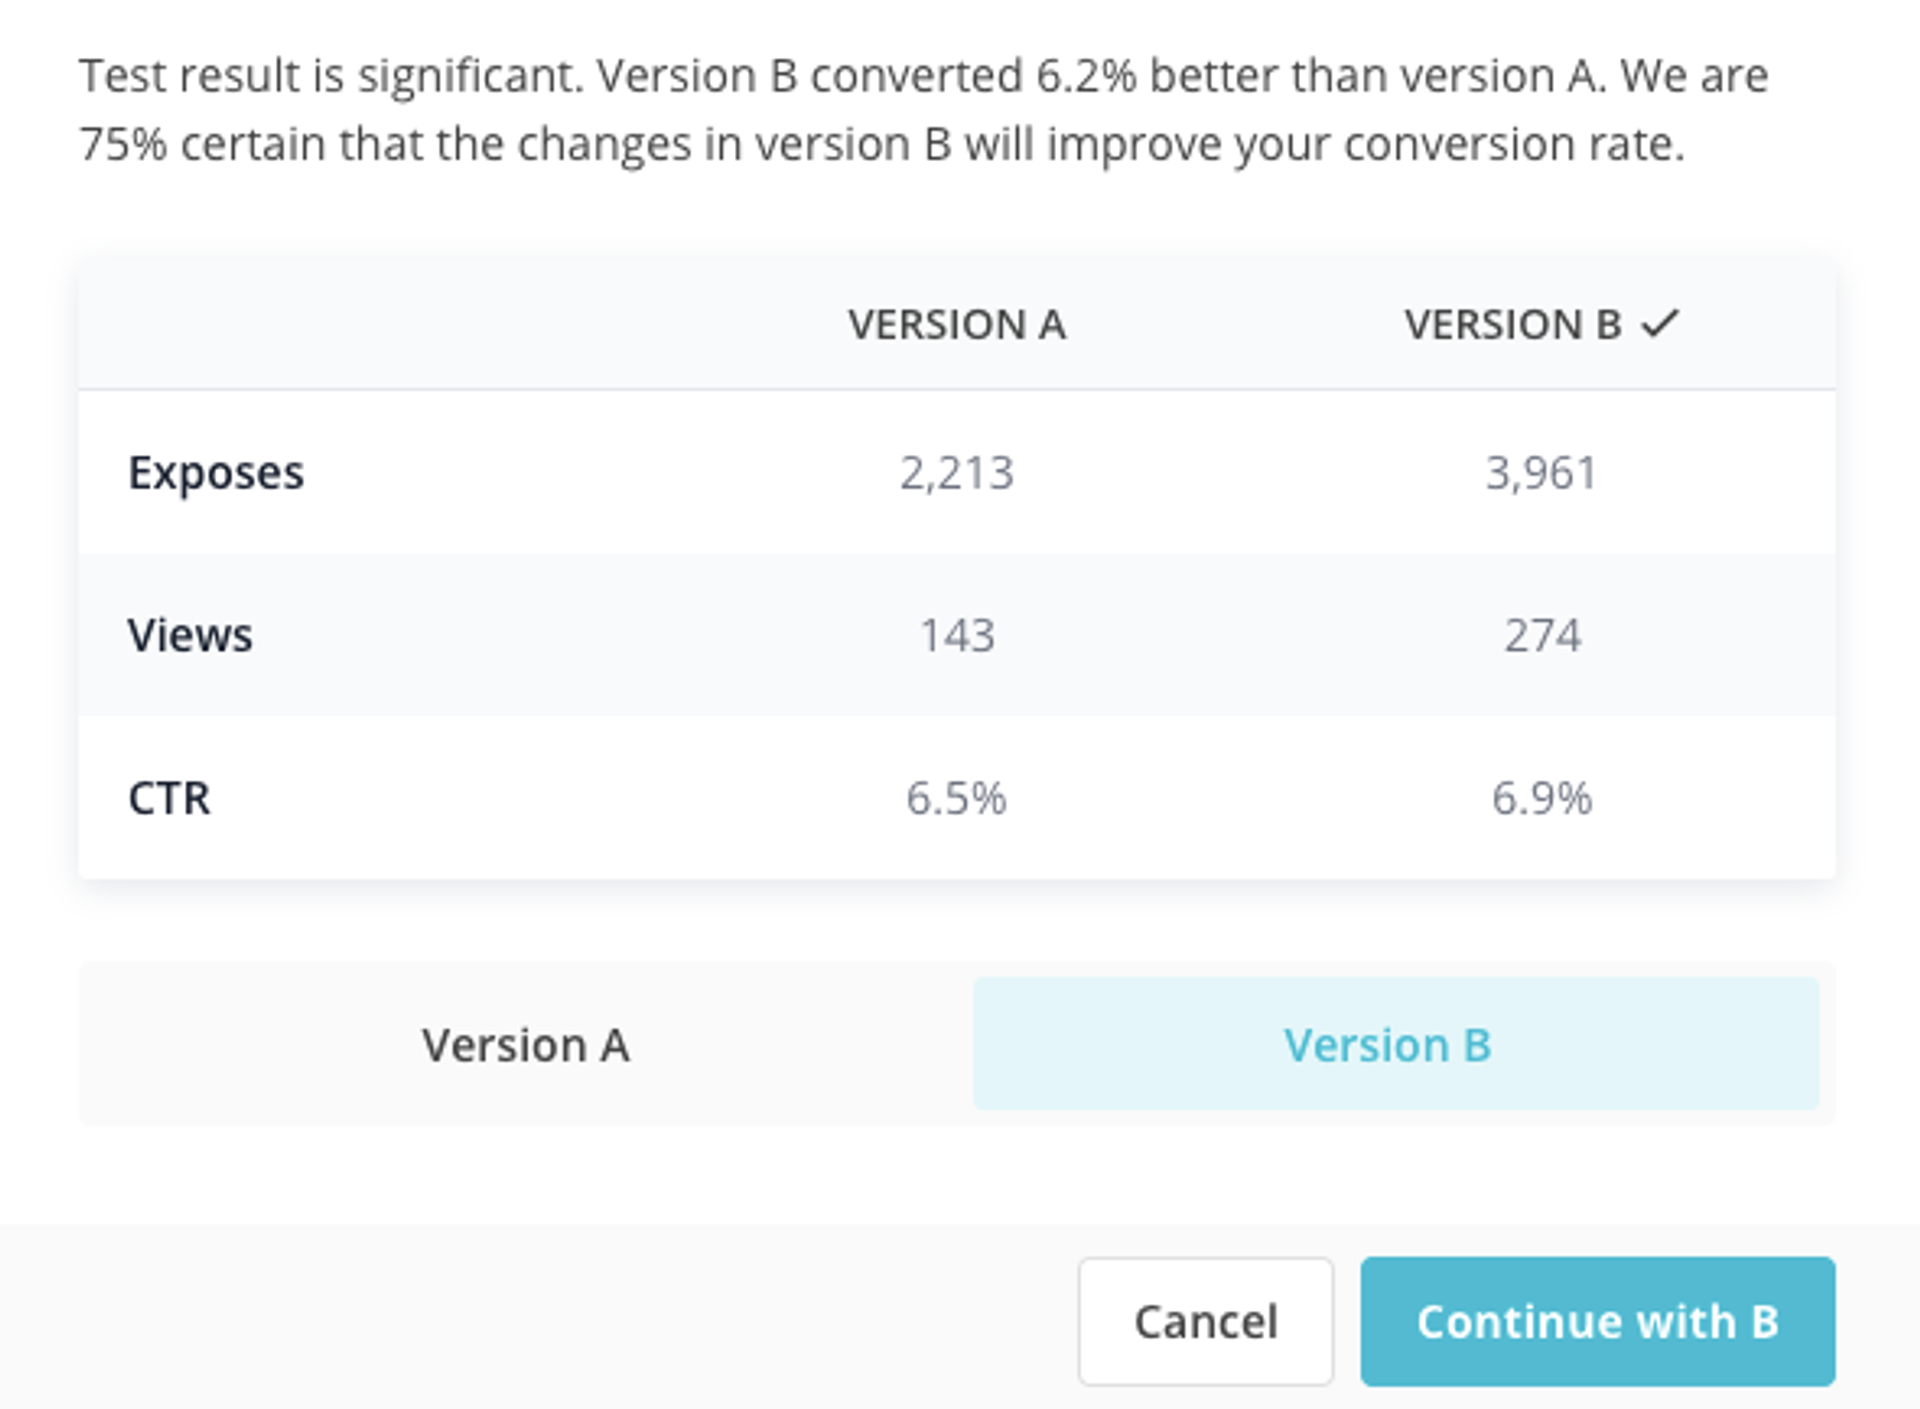
***
## Handling events from Mailgun
*March 11th, 2021*
The Mailgun integration in Prepr enables you to send email notifications and sign-in invitations with your own email domain settings. Today's update also makes it possible to register who views and clicks your emails: the events are stores in Prepr now. It is therefore important to select the right region and enter the Mailgun signing key.
When someone opens their email, Prepr registers an 'open' event, and with a click-through in the email, we record a 'click'. You can find detailed insights into the engagement score in the Analyze section.
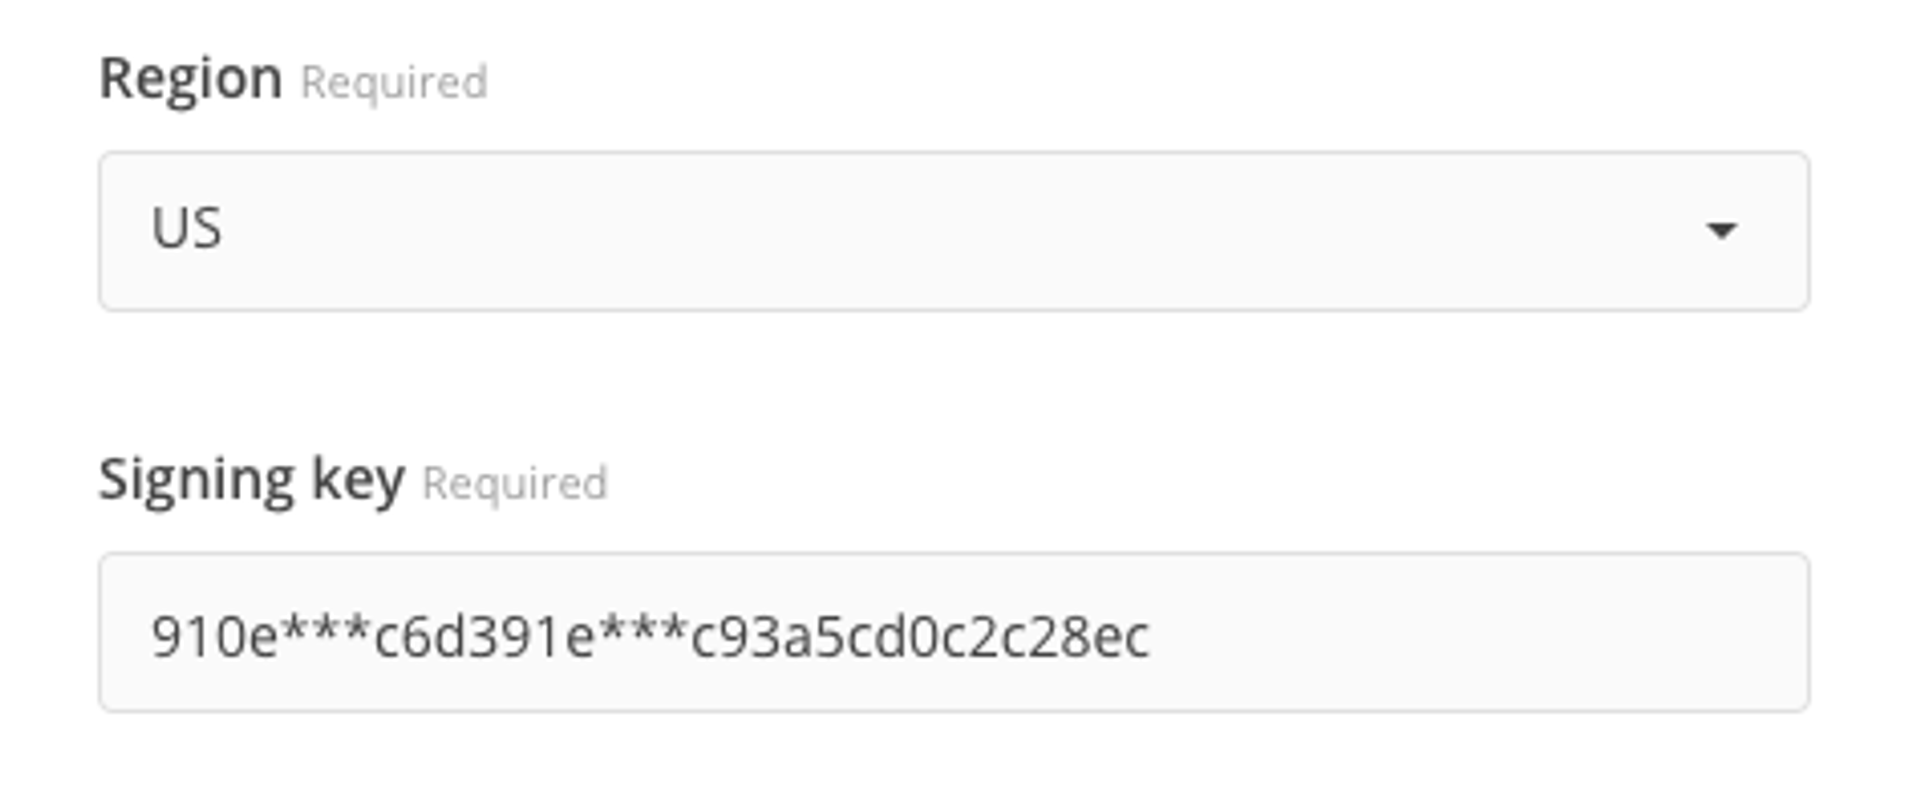
***
## Sort asset field in a publication element
A small update today on the asset field in Prepr. We have now made it possible to sort assets in a publication element asset field. Drag and drop the assets in the order you wish. This update aligns the operation of the asset field with the asset field in a publication model and the asset field in a drag-and-drop editor.

***
## Update Prepr menu and application URLs
*March 10th, 2022*
Last night a major update went live in the Prepr application.
**Changed menu items**
Prepr takes care of the entire workflow of publishing content, engaging customers, and analyzing data. For that reason, the terminology in the Prepr application has been aligned. The most eye-catching changes:
- Content has been updated to Publish
- Audience is converted to Engage
- People and profiles are now called Customers
- Interactions are named Events now
Most of our users will only see a small number of menu items, as their Prepr access has been defined with a custom user role. To increase the user-friendliness of Prepr, the menu items have been written out completely, so you can surf and find your content even faster!

**Updated URL structure**
Due to speed improvements and a better, consistent user experience, the URL structure of the Prepr application has been changed. The URL structure is now built in the same consistent manner throughout the application. As a result, some application URLs may be broken.
**Note:** This change may mean that users with browser bookmarks have to change their favorites.
***
## Filter on publication link fields
*March 9th, 2021*
A new filter on the publication list has been added today. In the current situation, there are publication filters on the publication status, assignee, publish time, and tags. You can stack filters and search queries in order to narrow your search results effectively.
Today's update enables you to specify the filter on publication model. When there is a 'Publication link' model field in the selected model, an extra filter shows up in the publication list. This filter shows all publications that are linked to in this model.
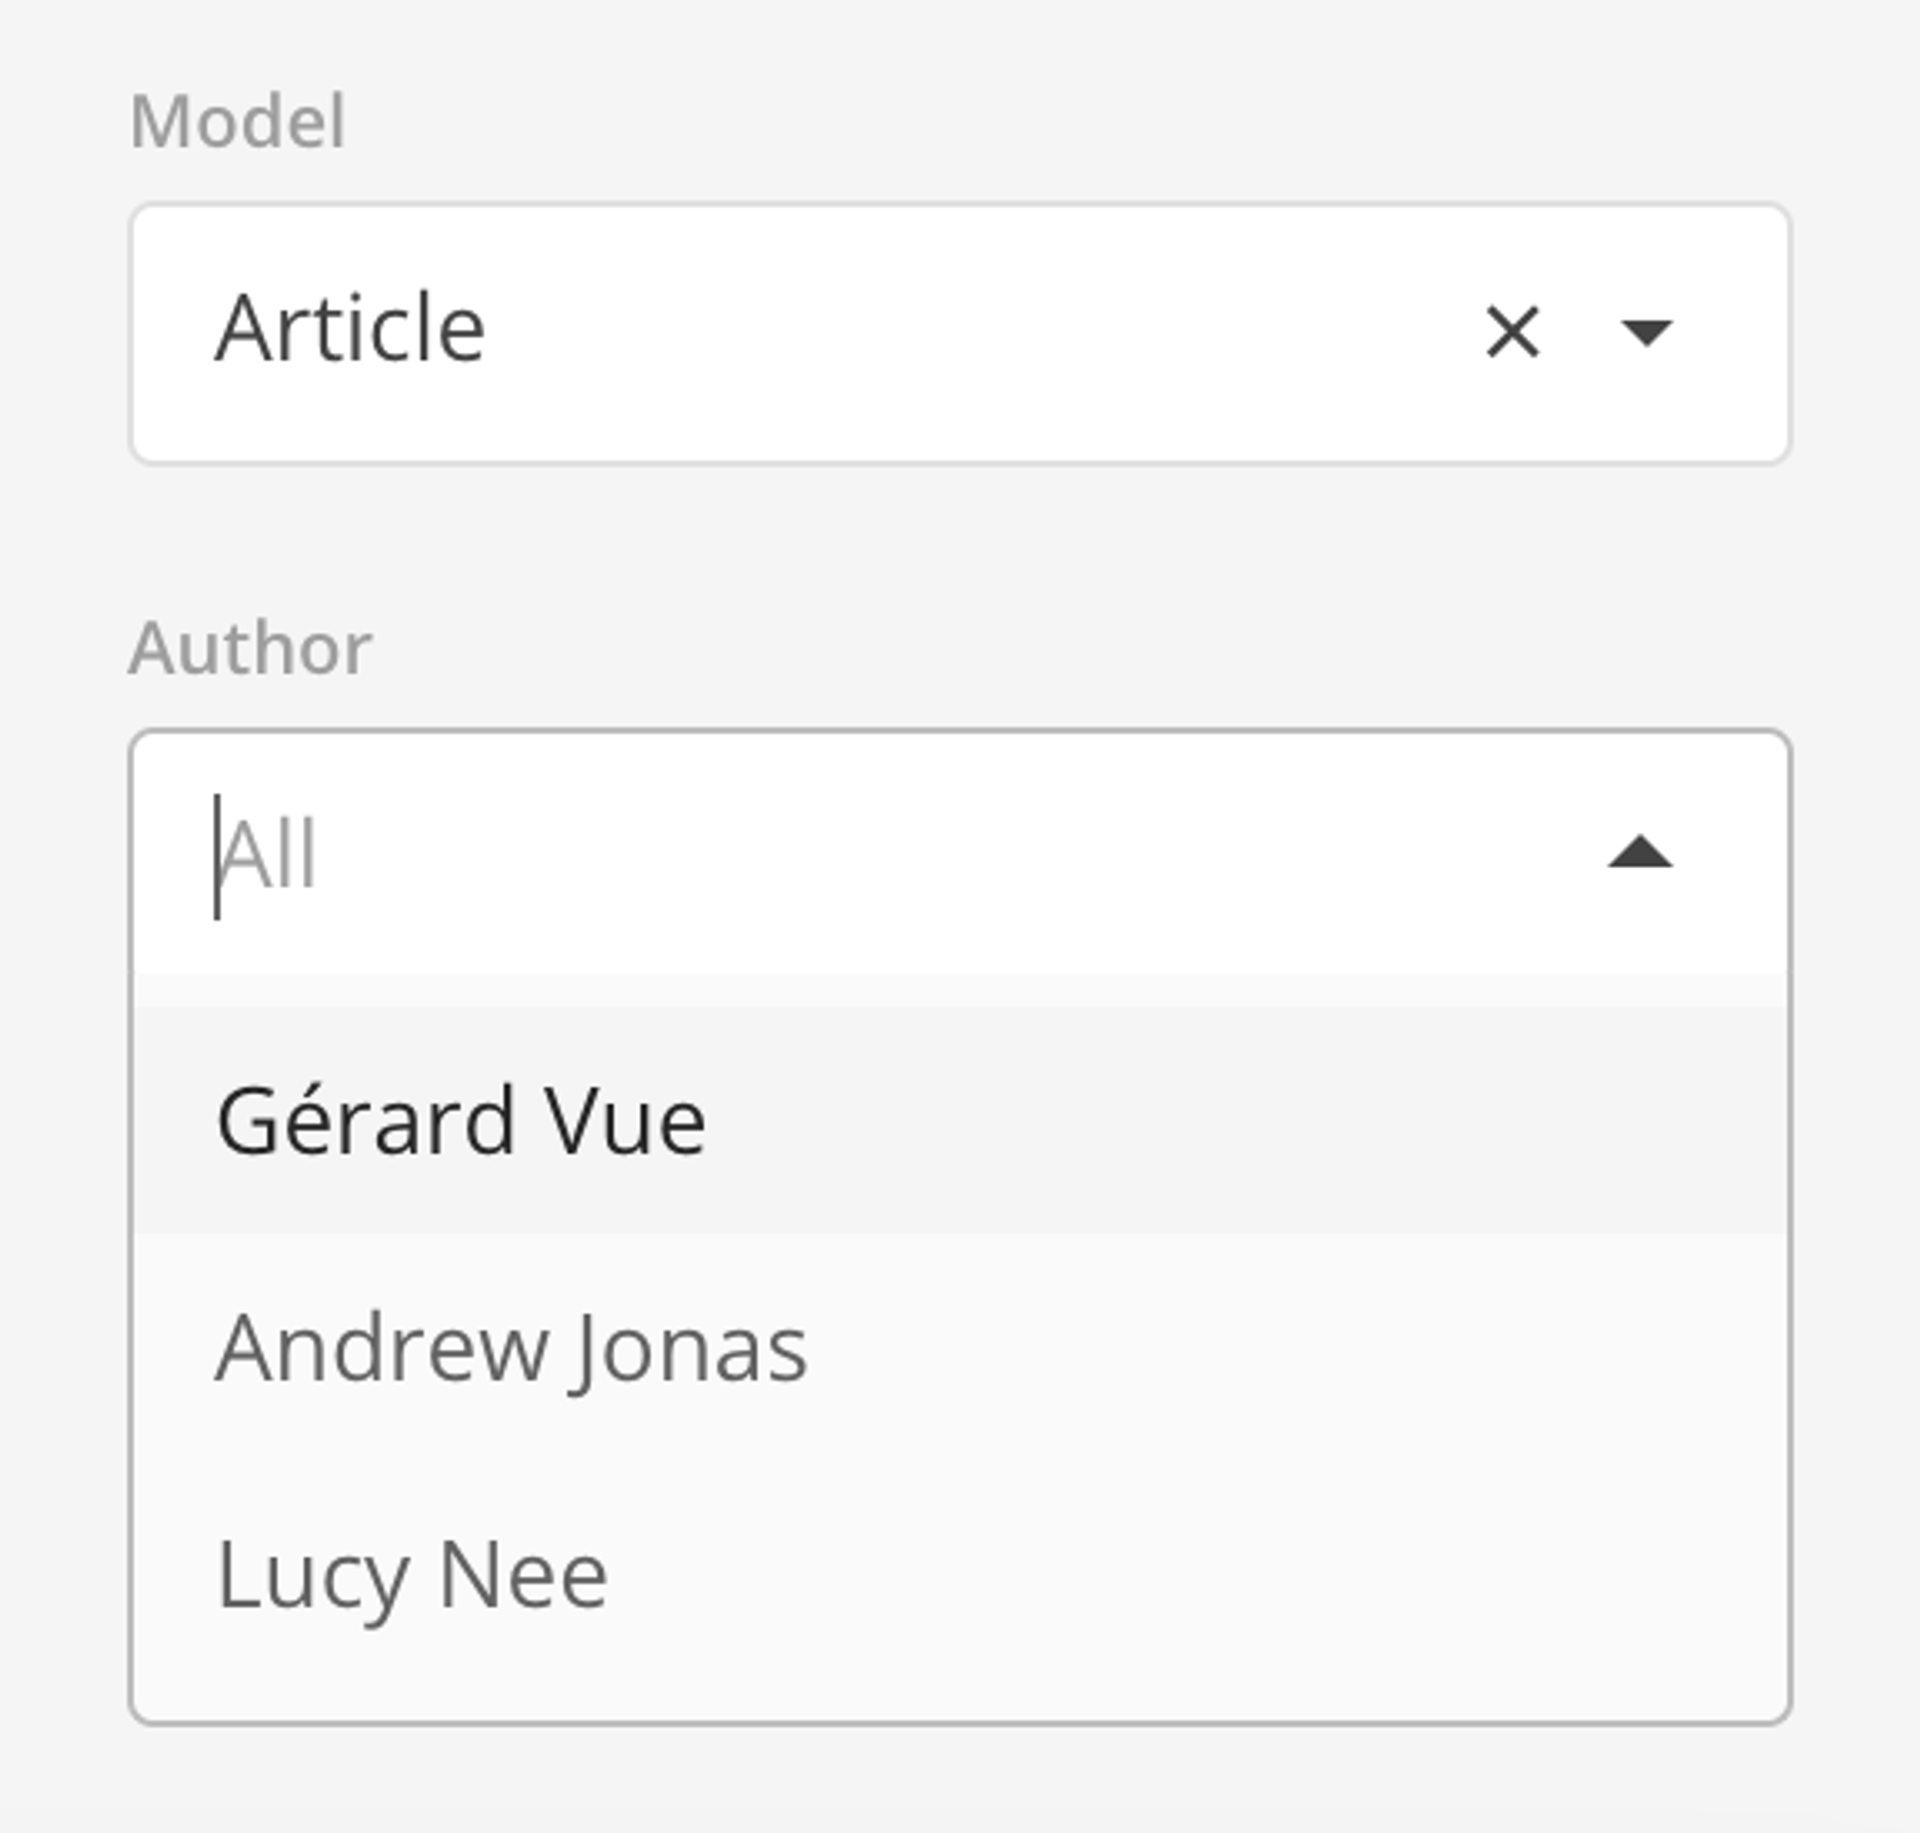
**Example: "Filter all articles by author Gérard Vue"**
You have created an 'Article' model with a publication link field to the 'Author' model. By selecting the model filter with 'Article' a new filter on 'Author' is made visible, containing all publications of the 'Author' model.
So now you are able to filter all publications with the 'Article' model, where the author is set on a specific author.
***
## Nofollow tags in publication editor
*March 8th, 2021*
Today's update contains an improvement in Search Engine Optimization. It is now possible to add nofollow HTML tags to links in the text editor.
Nofollow links are links with a rel=”nofollow” HTML tag applied to them. The nofollow tag tells search engines to ignore that link. Because nofollow links do not pass PageRank they likely don’t impact search engine rankings.
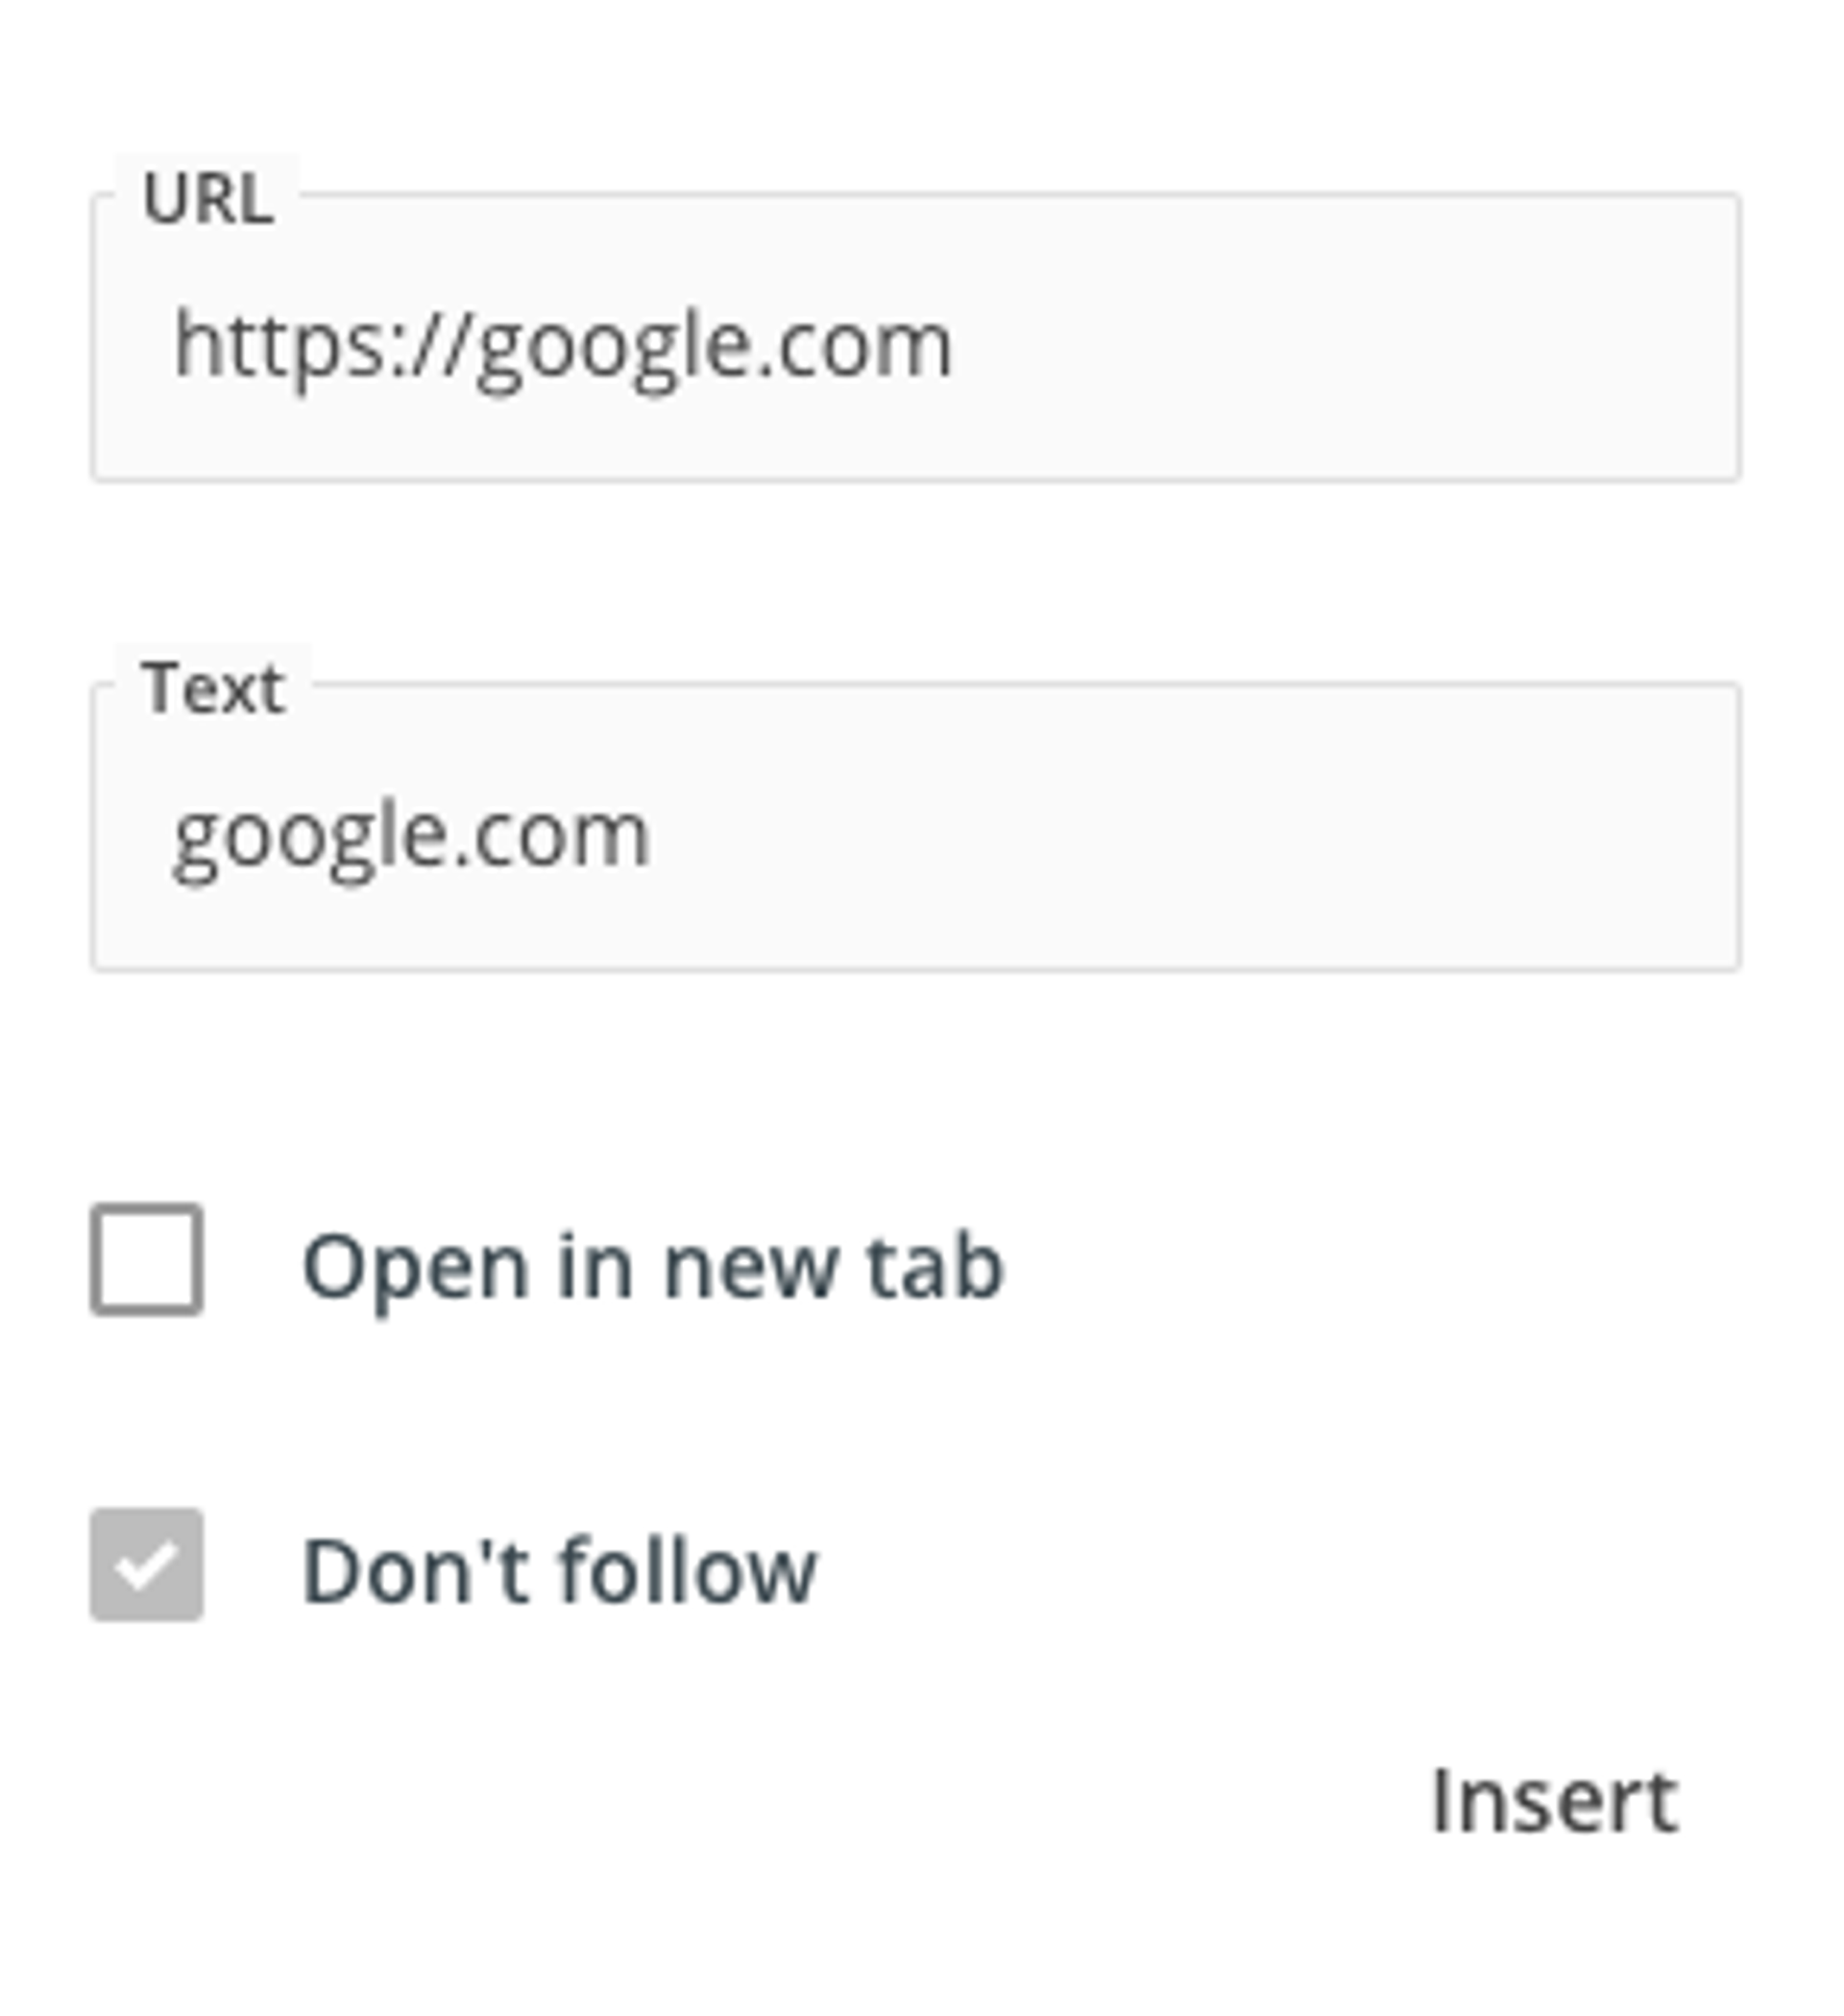
***
## Filter on publication model in webhook trigger
*March 4th, 2021*
When you have selected a publication event, you will receive notifications when a publication is created, (un)published, changed, or deleted. You can further specify which publications you want to receive notifications from. Select one or more publication models to receive webhook events for publications of that specific model. Selecting none will act as a wildcard. [Learn more about webhooks](/development/best-practices/webhooks).

***
## Select all days in schedule
*March 3rd, 2021*
A small update today improves the usability in the Prepr schedules. When you want to schedule a program on all days of the week, you can now click on 'Days'. All days of the week are then selected. As simple as that!
***
## Publication elements as predefined publication fields
*February 22nd, 2021*
Custom publication elements have been available for a long time in Prepr as a way to define your elements in the drag-and-drop editor. And now, these custom elements can also be used as a standard field in a content model. This allows you to define your content models even better, gives you more control over validation, and lets you retrieve data in a more structured way through the API.
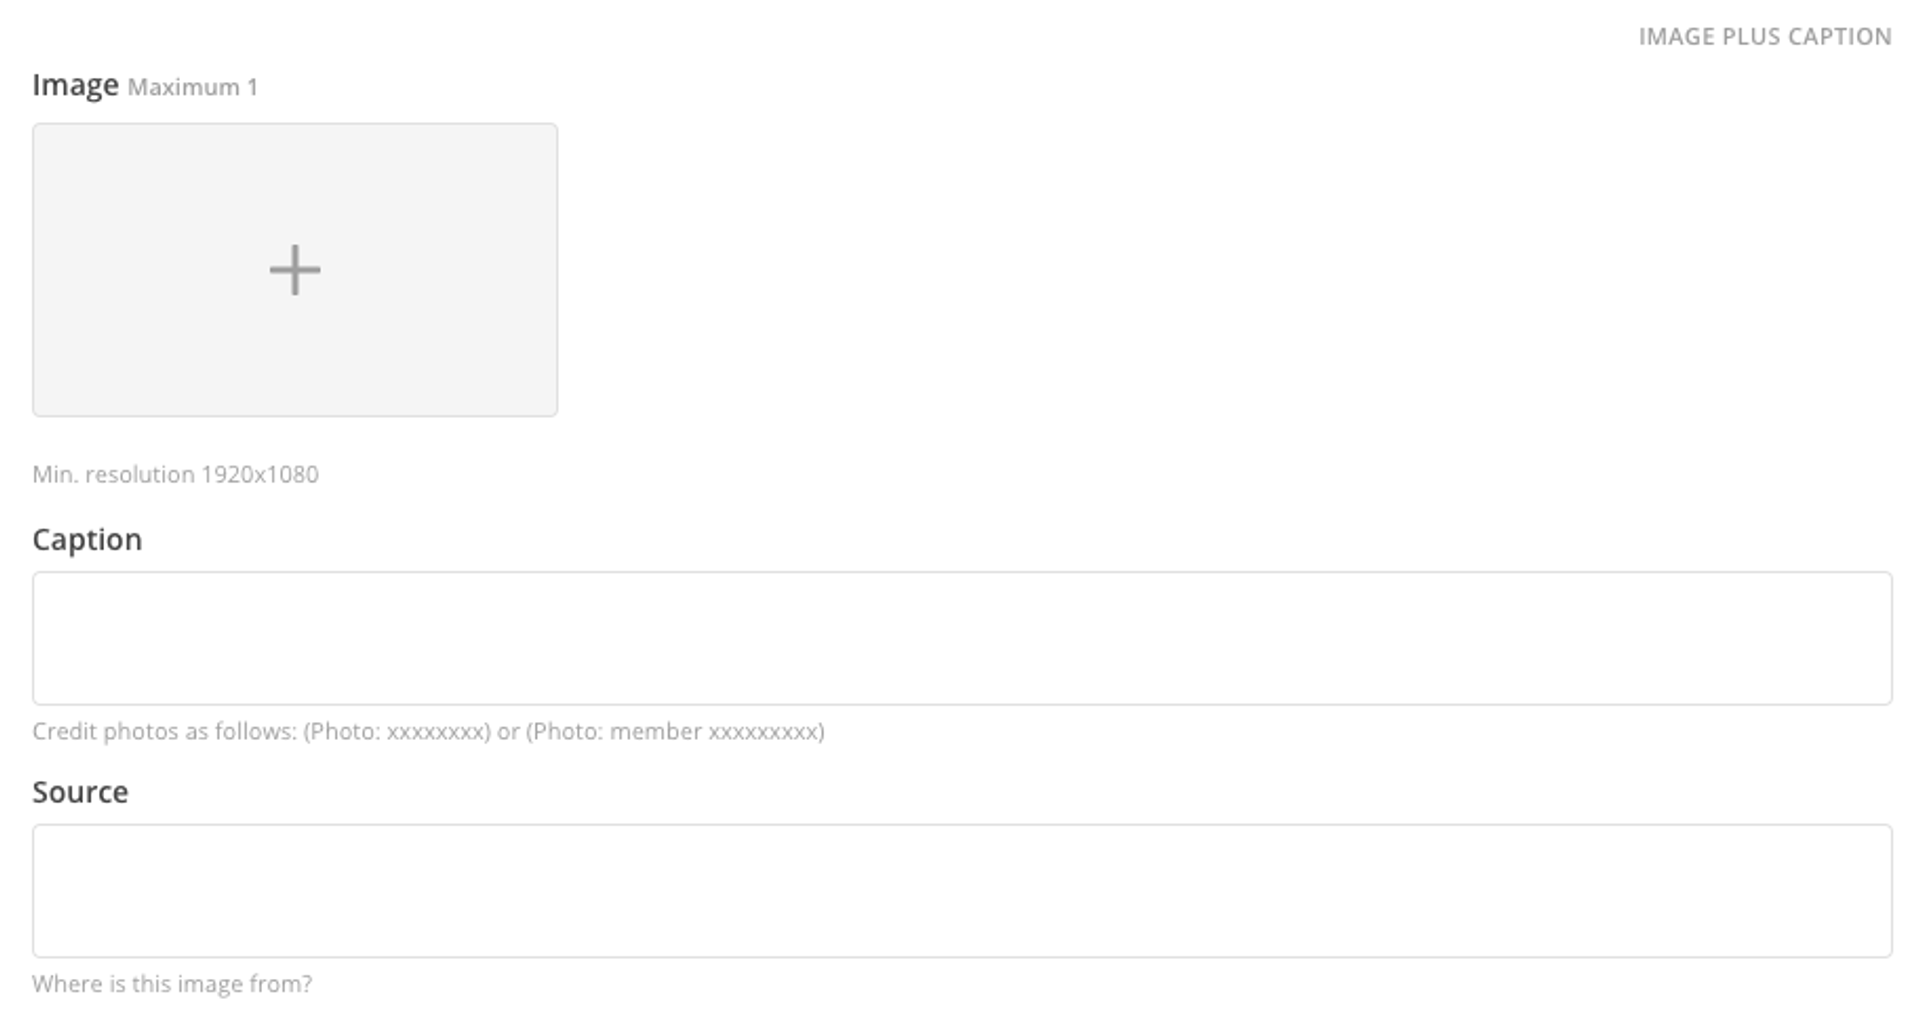
***
## Seamless ecommerce integrations
*February 17th, 2021*
We are proud to announce our new integrations for the headless commerce tools: CommerceTools and Commerce Layer. With two clicks you are now able to refer to the products on your website in an article. This integration helps you to work faster and get all the data that you need from one database. [Learn more on how to add ecommerce content integrations to Prepr publications](/integrations).
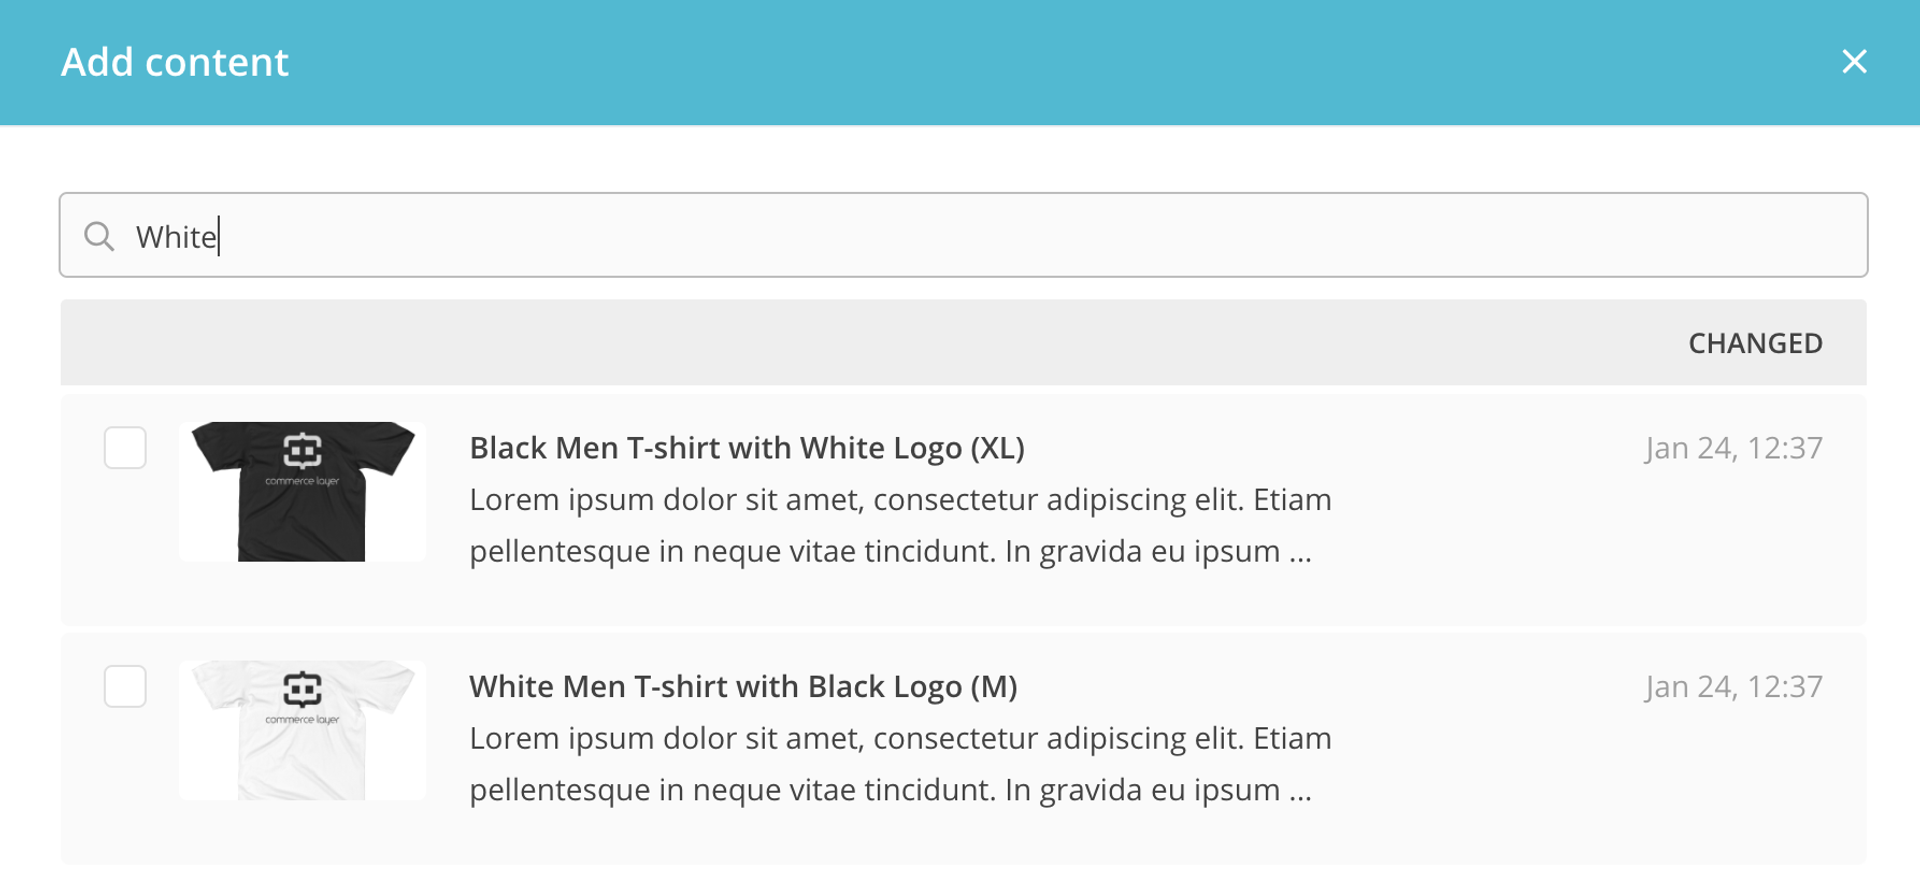
***
## Update publication scheduler
*10 February 19th, 2021*
We find an optimal and intuitive user experience very important. That's why we updated the publication scheduler, which was closed by default in the publication sidebar. The update ensures that the scheduler remains open when a publication date in the future has been entered, or an archive date has been added.
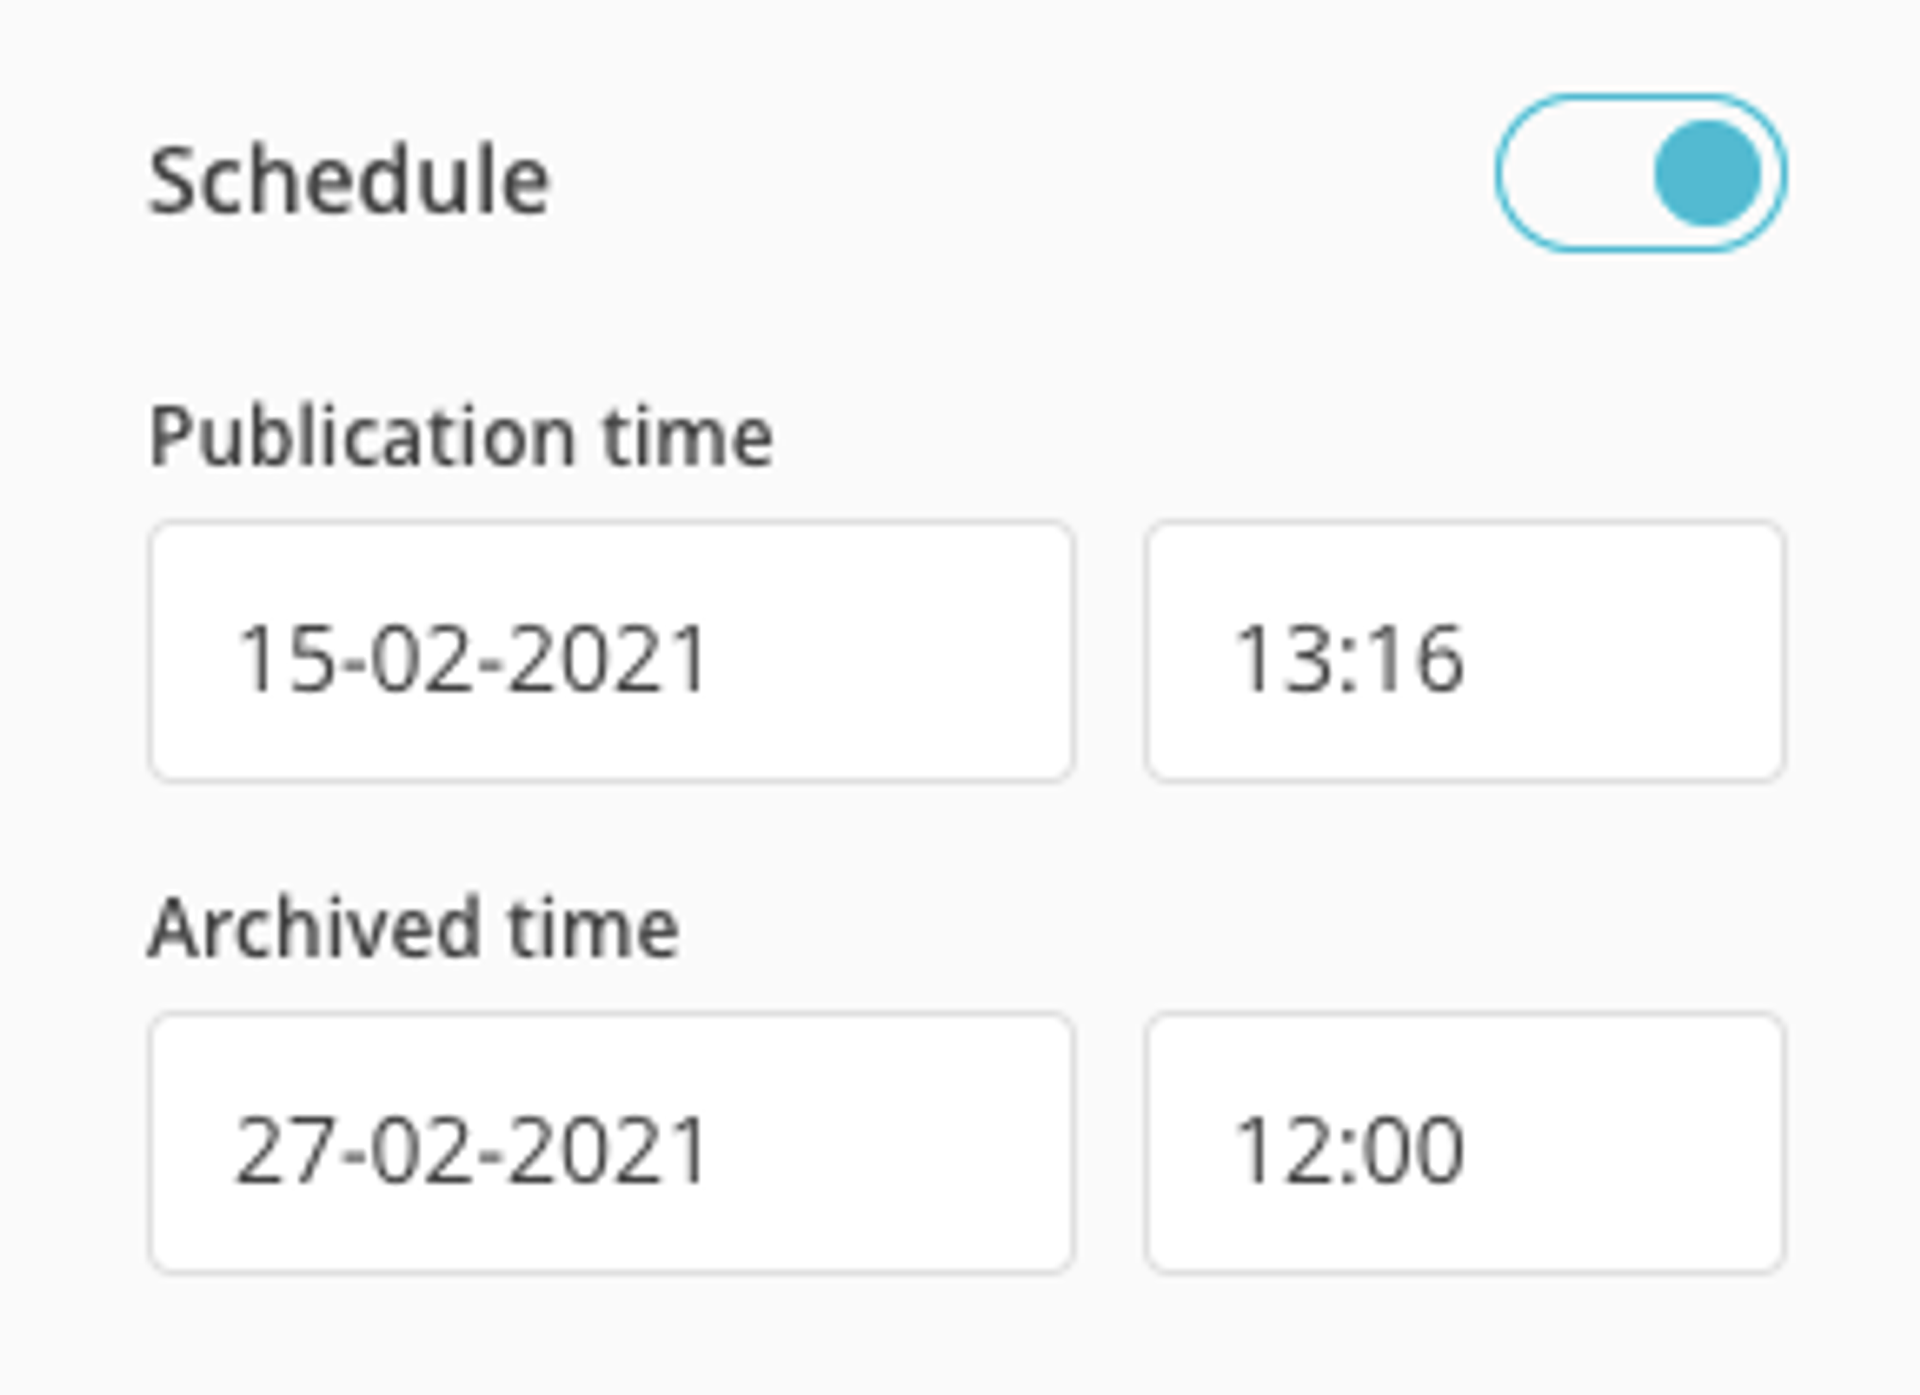
3 February
***
## A/B-test your way into success
*February 3rd, 2021*
Prepr A/B tests give you the power to perform A/B tests with your content in an easy to implement way. By A/B-testing your content frequently, you increase CTR and time spent. Zoom in on retrieved metrics and learn what content works best – or improve the content that needs tweaking.
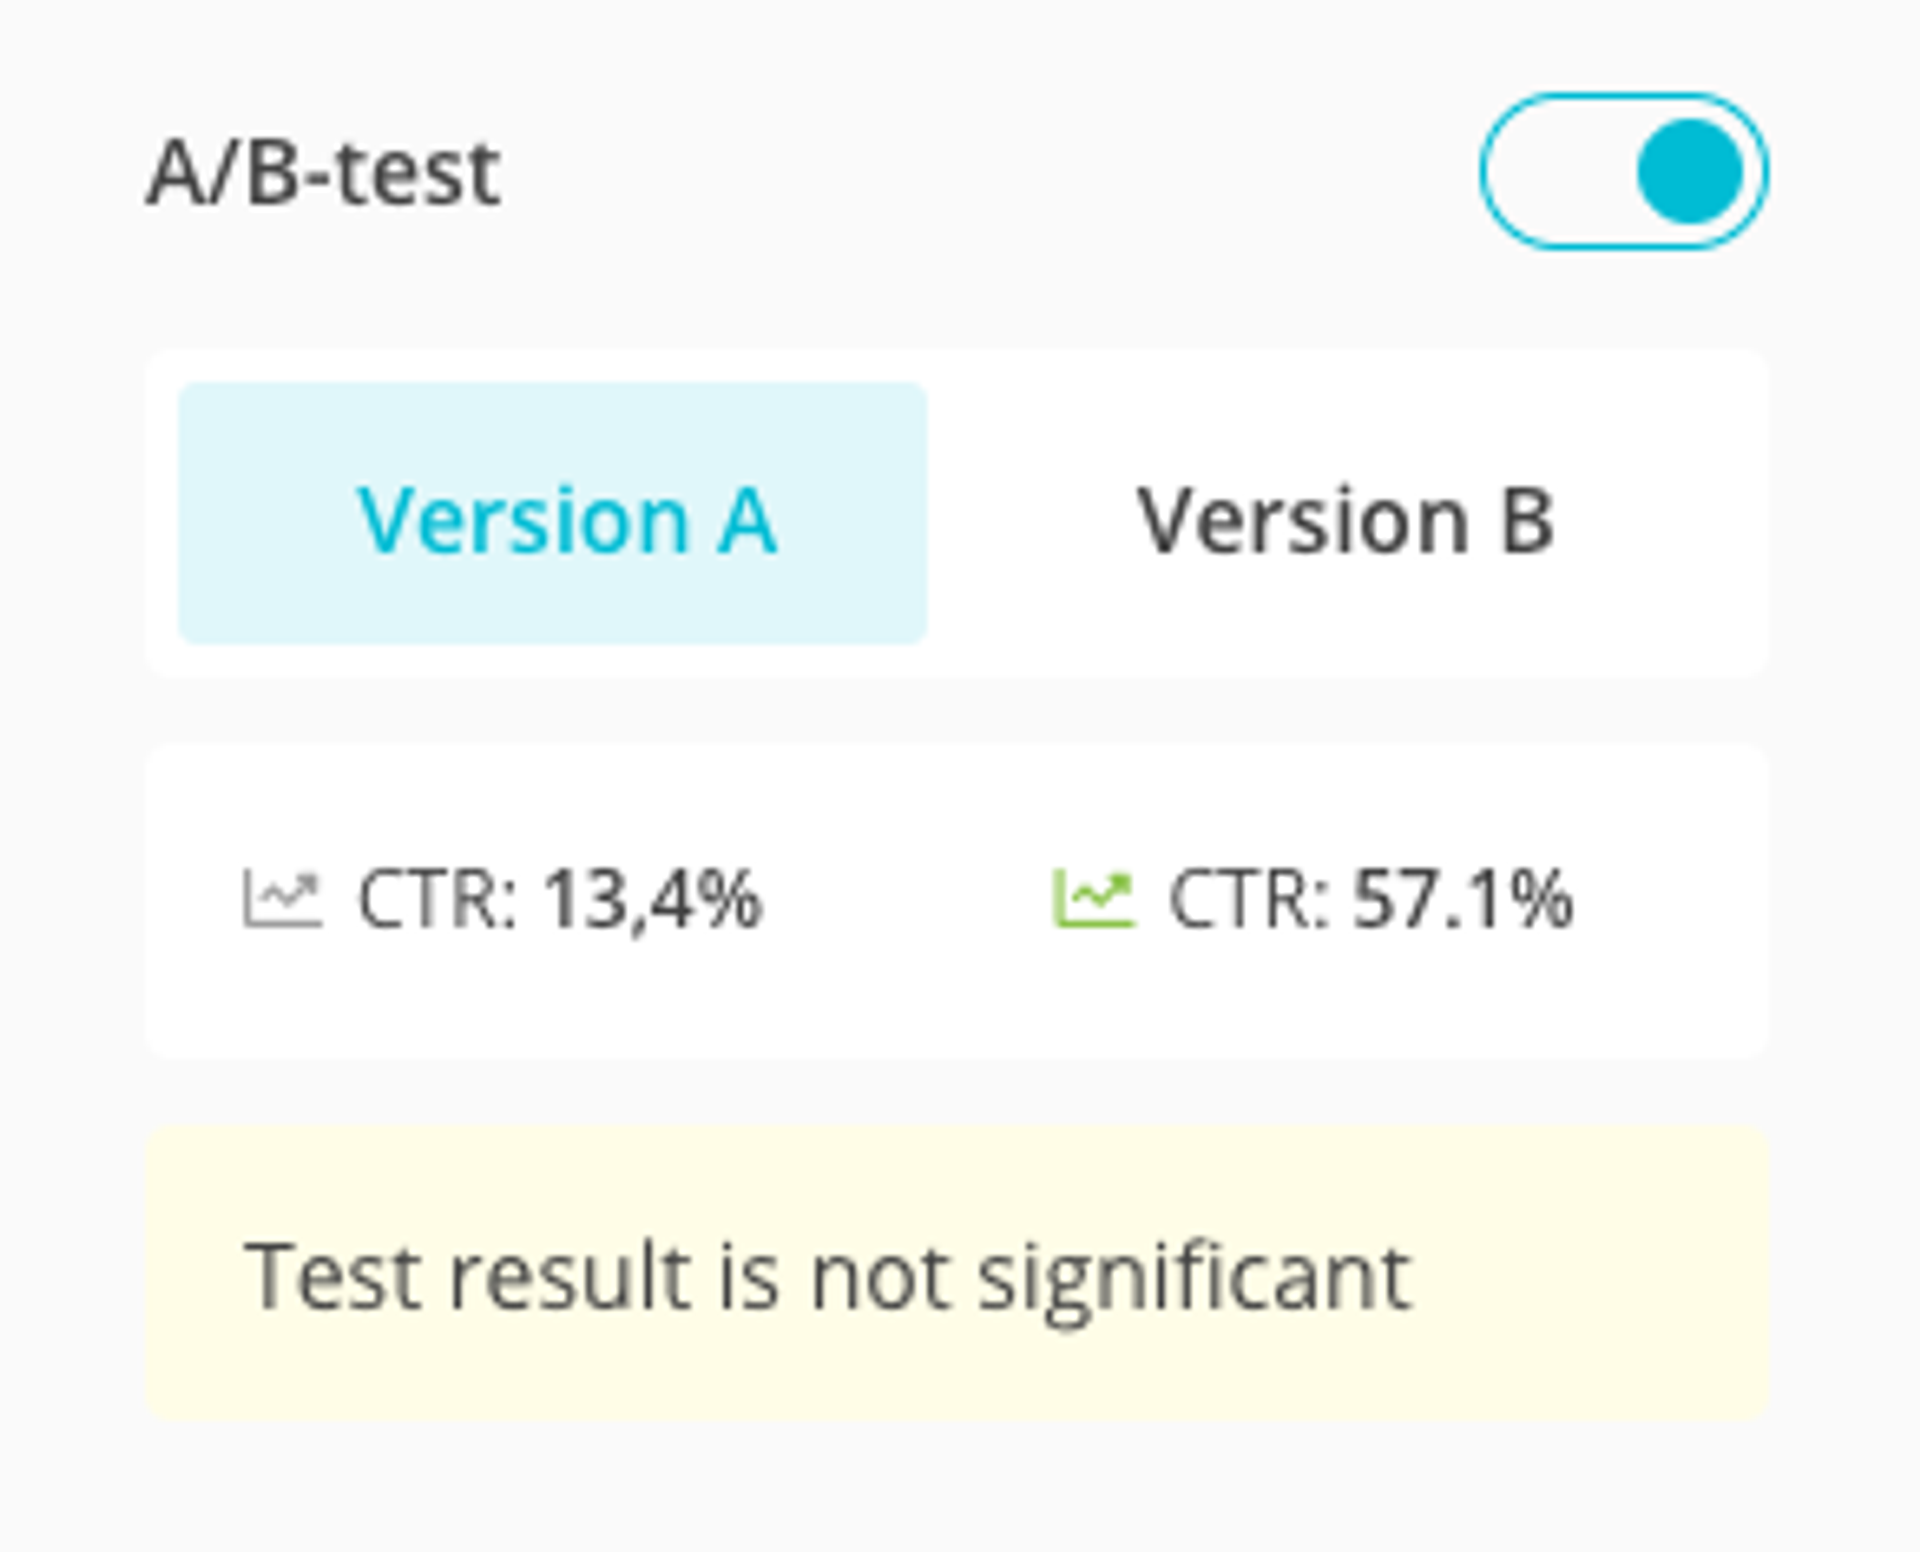
- Implementation of A/B-testing needs a configuration of your website or app as well. [Learn more on how to implement A/B-testing on your app or website](/ab-testing/setting-up-ab-testing).
- Once your website or app is optimized for A/B-testing, you can start A/B-testing in a single click. [Learn more about the A/B-test functionality in Prepr](/ab-testing/setting-up-ab-testing).
An A/B test is a randomized experiment using two variants of the same publication (A and B). Variant A is the original and variant B through n each contain at least one element that is modified from the original. Before you can start testing, you need to create at least one B version of a publication.
**Note:** A/B-testing is under a Limited Availability Program. Contact support@prepr.io for more information on how to join the program.
***
## Send email notification to prize winners
*February 2nd, 2021*
The Prepr Contest Module is a powerful and secure solution to manage prizes, contests, and winners. In addition to the ability to automatically send winners an email notification, we have now added the option to send notifications to winners that have been added manually. To send an email notification, simply select the checkbox on the prize detail page. Learn more about Prepr Contests.
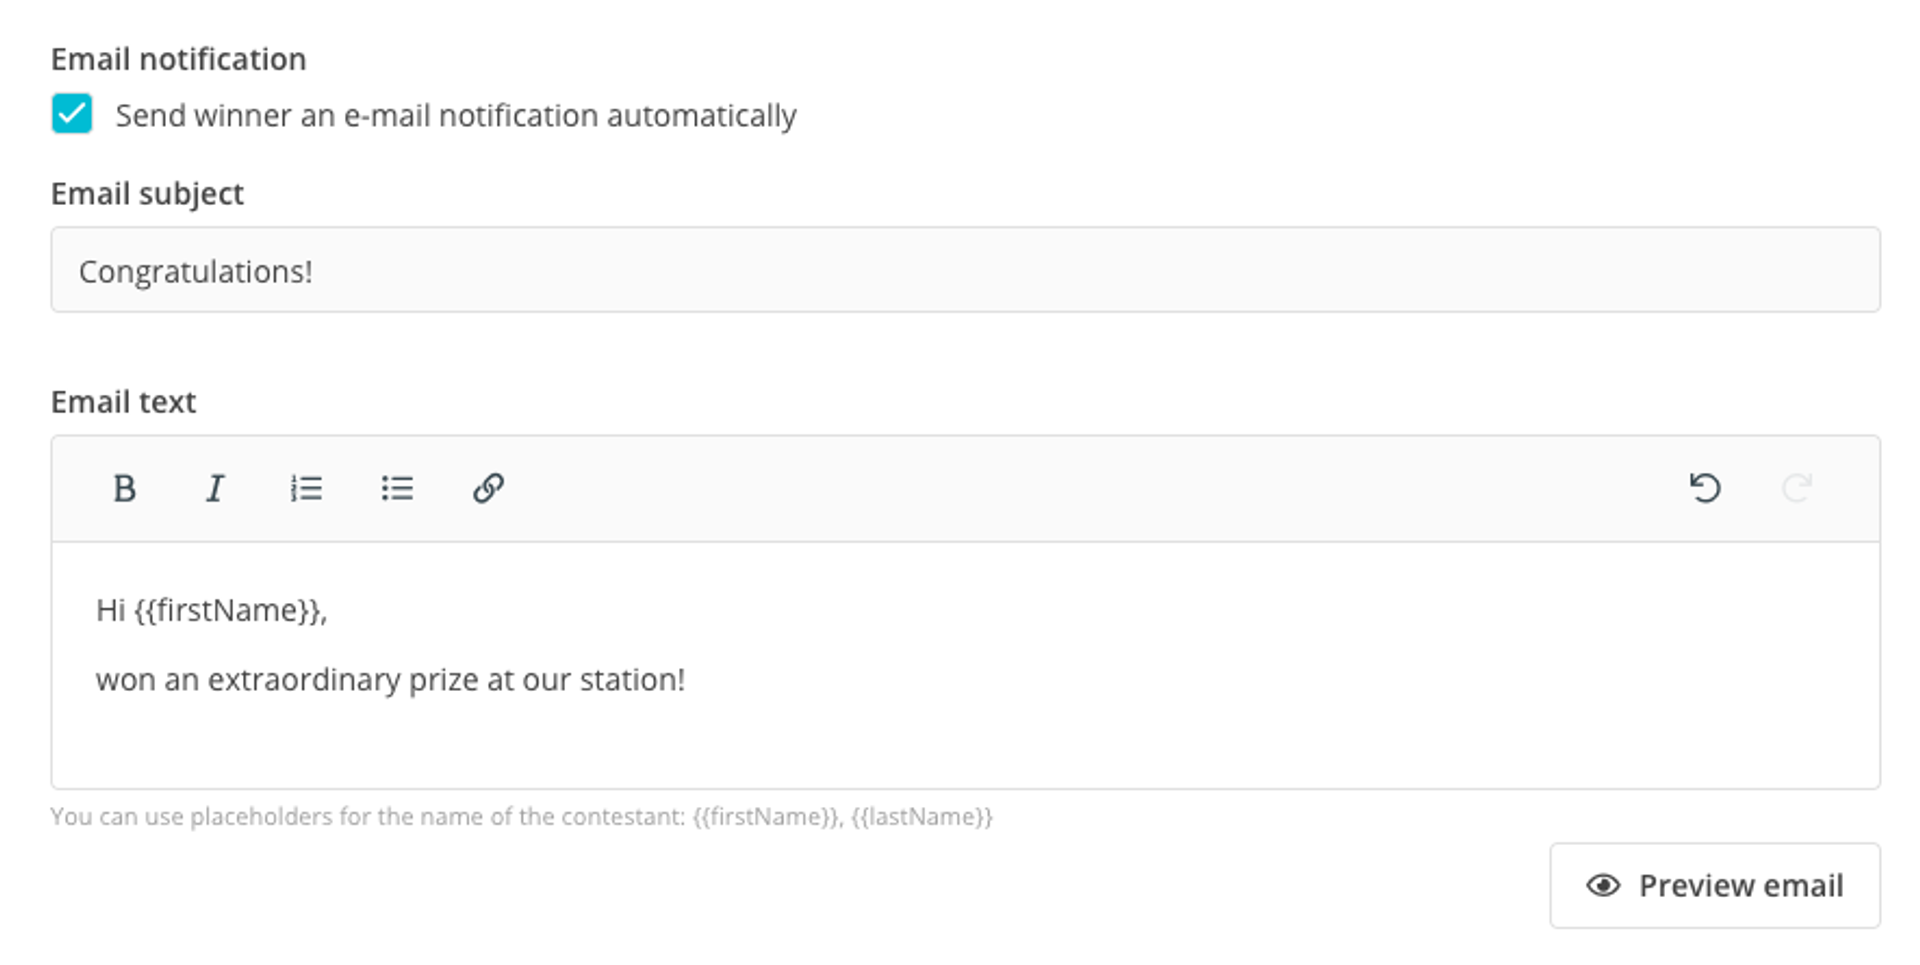
1 February
***
## Removed requirement if the status is not 'DONE'
*February 1st, 2021*
This update allows you to save a Prepr publication when the status of this publication is not set to DONE. This way you can save drafts or pending publications without entering the required fields.
***
## Replace old editor with Froala editor in timeline edit modal
*January 29th, 2021*
Some users experienced problems saving talks in their timeline. This update ensures that only one editor type is loaded when a timeline opens. This results in a significant improvement in the loading speed. Talks are therefore processed faster so that they are all saved correctly.
***
## Added support for Namibian locales (en-NA)
*January 28th, 2021*
Namibian locales are now available in Prepr. To set a locale, go to the environment details on the organization settings. You are able to select one or more locales for multi-language publications. This feature is only accessible for owners and users with the 'environments' permission. [Learn more about roles and permissions](/project-setup/managing-roles-and-permissions).
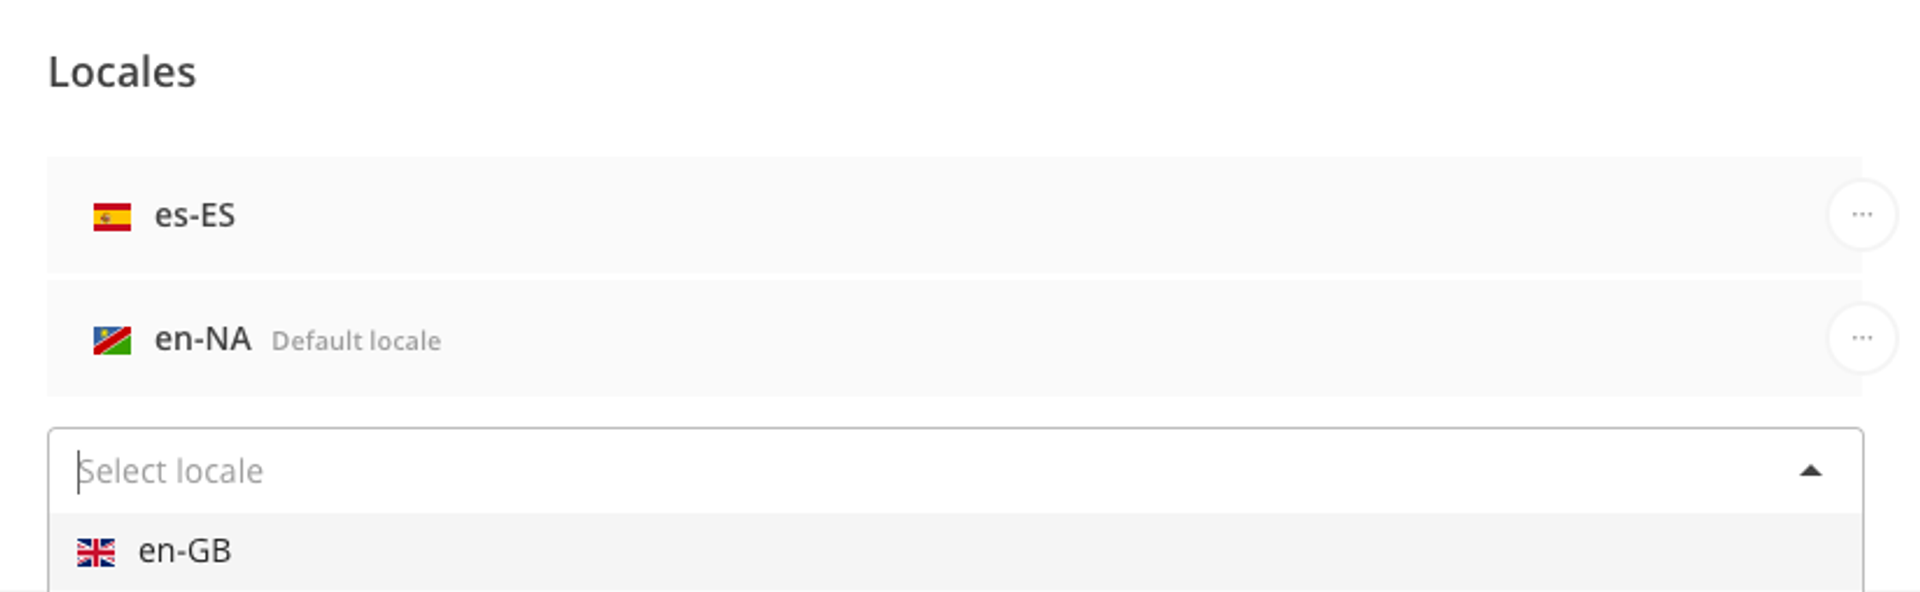
***
## Fix list item field in elements for accepting comma
Users experienced a bug when list options were added together, in case one of the list options contained a comma. A bug fix makes it possible to add list options with a comma again.

***
## Show and export multiple track break notes
*January 27th, 2021*
This update of Prepr for Radio allows you to display multiple columns of your playlist export in the Prepr timeline.

***
## New icons in publication elements
*January 26th, 2022*
This update also includes an update Font Awesome to the latest icons (version 5.15.2)
***
## Preview step in media browser
*January 22, 2022*
When you upload or select media in the media browser, it is now possible to view all selected assets. Click on 'Show selection' to see a preview of the media items. In this screen, you can confirm the assets, or make adjustments to the selection (such as removing an asset).

***
## Resource element show invalid URL only when type Webpage selected
*January 20th, 2021*
An error notification was visible when an invalid URL was entered and type was set to 'Audio' or 'Other'. We added extra validation for the resource element in a drag-and-drop editor: only webpage URLs are validated now.

***
## Add \*.svg to accept upload on select type "file" in field
We added support for SVG-files in the Prepr uploader in publications.
***
## Import profiles with CSV-import
*January 19th, 2021*
Prepr provides a solution for the manual import of profiles. This import takes place on the basis of predefined column titles in a CSV file. Check the user guides.
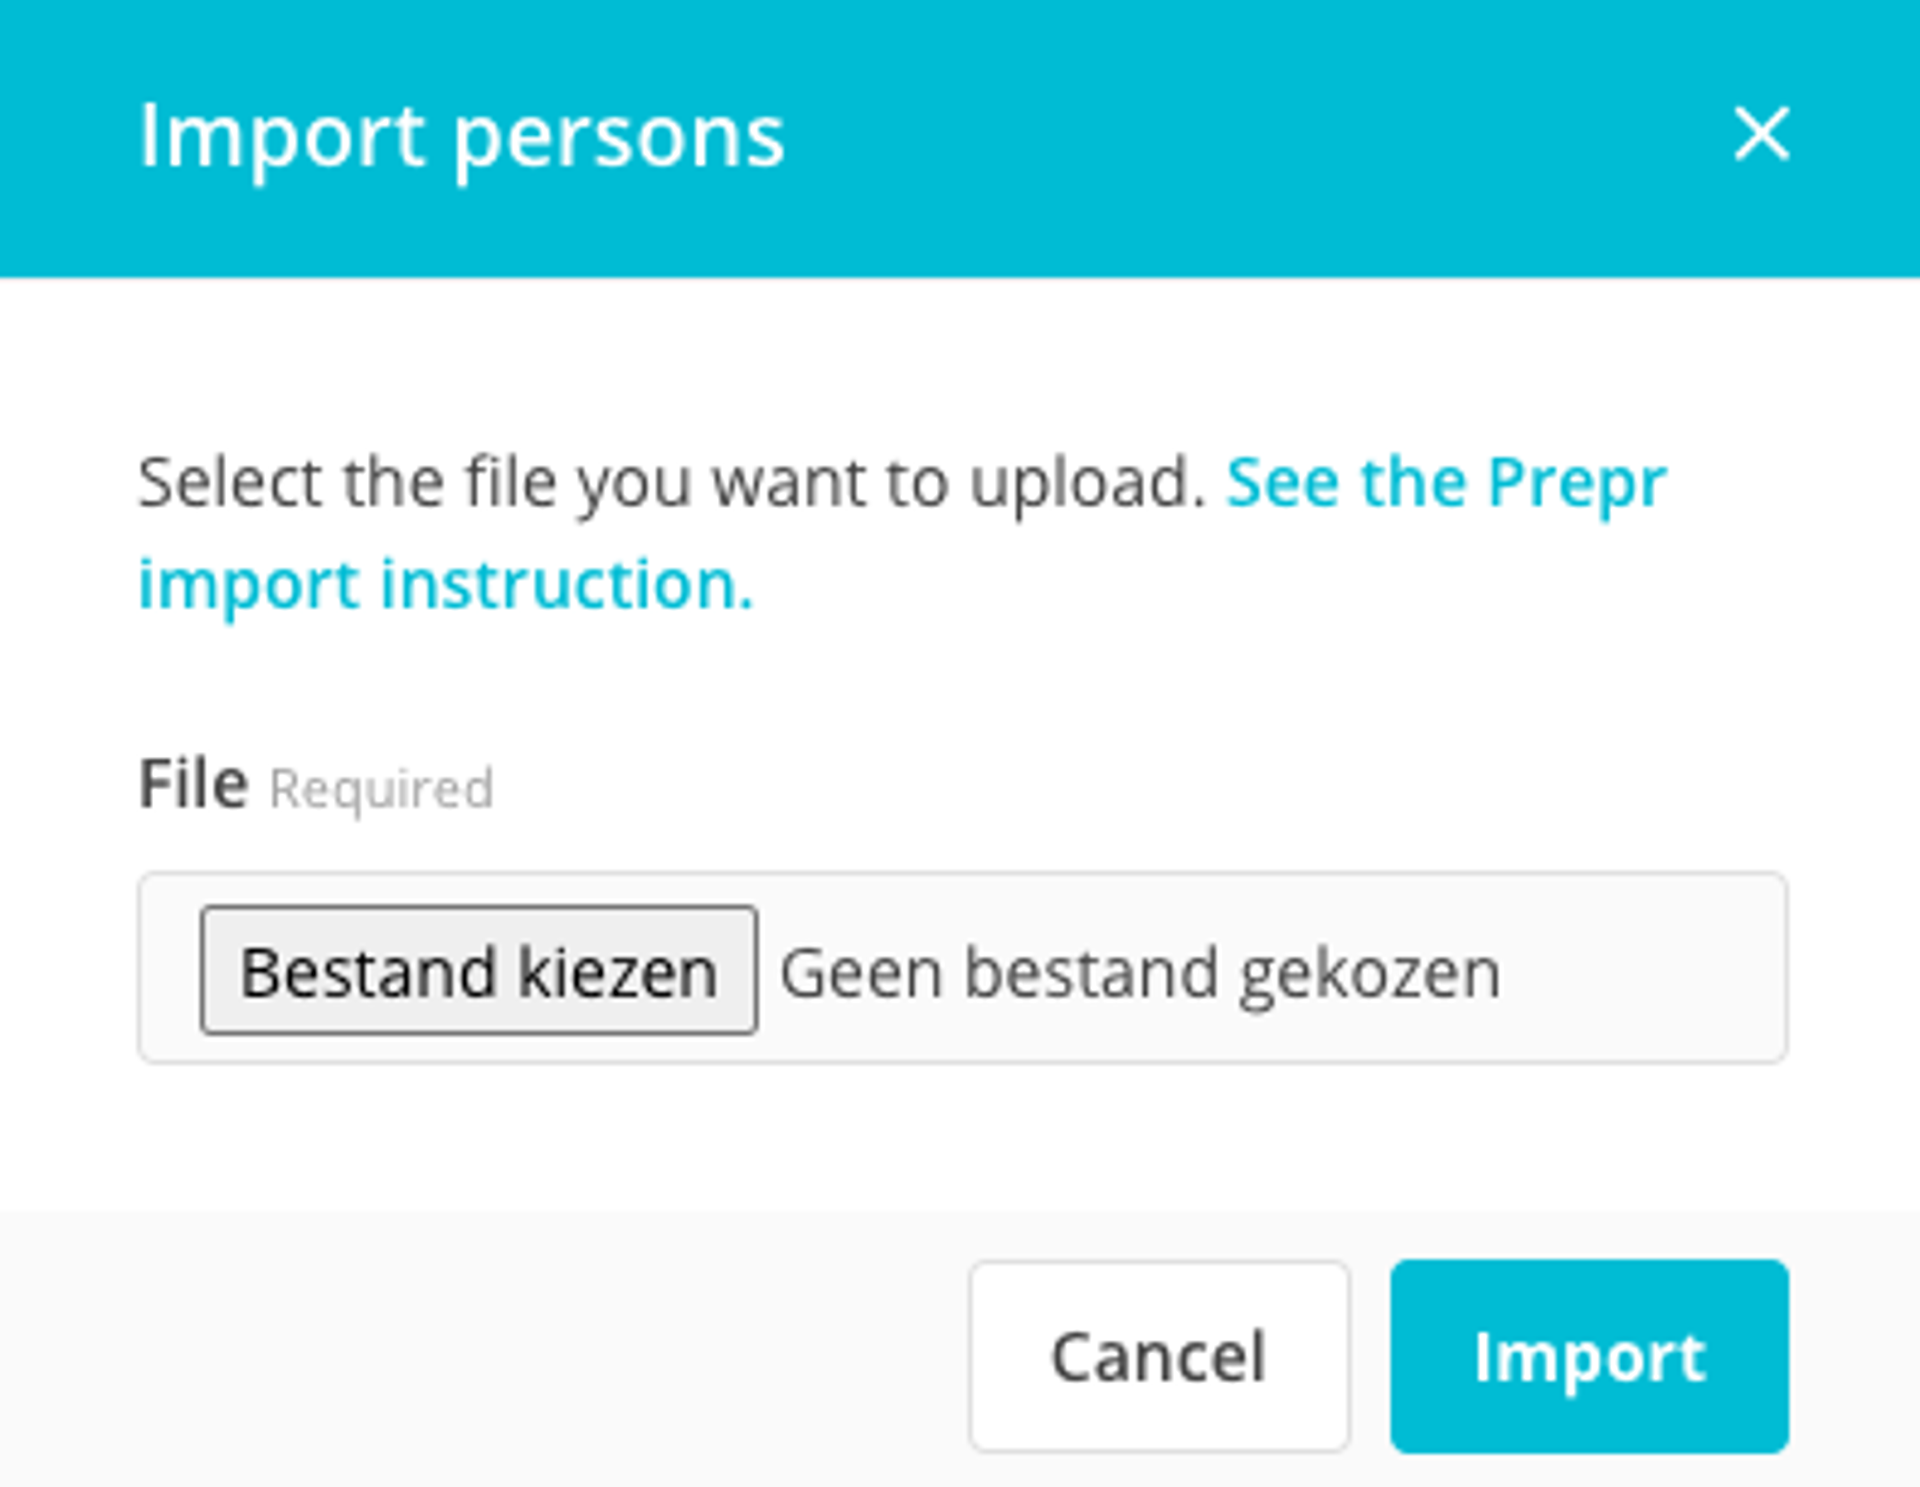
***
## Publication status in publication link
A little update on the publication link field contains the visibility of the publication's status. You can easily check if the linked publication has the DONE status, or whether the publication needs to be completed.

***
## Add segment rules for ‘has full name’ yes/no
*January 14th, 2021*

***
## Notification when the schedule is not conclusive
For optimal operation of the On Air functionality in Prepr, it is important to fill in the program guides and clock guides completely. We added a yellow notification bar in the guide when there are gaps in the schedule.

***
## Update search Prepr for Radio
*January 13th, 2021*
The search function has changed substantially. Here are some of the highlights:
- Update default search time range for speed improvements
- Update publication type filtering (removed unused publication types)
- We've added a click-through to the Tracks, TrackPlays and Memos
***
## Person webhook events added
*January 11th, 2021*
Webhooks allows your app to easily receive notifications whenever there are updates to a chosen set of events. Webhooks are often used for deploying a static website when content is changed or syncing data to an external search engine platform. We added person webhook events in the Prepr application, so you can subscribe to be notified whenever a new person (customer) is created, changed, or deleted. [Learn more about webhooks and webhook events](/development/best-practices/webhooks).
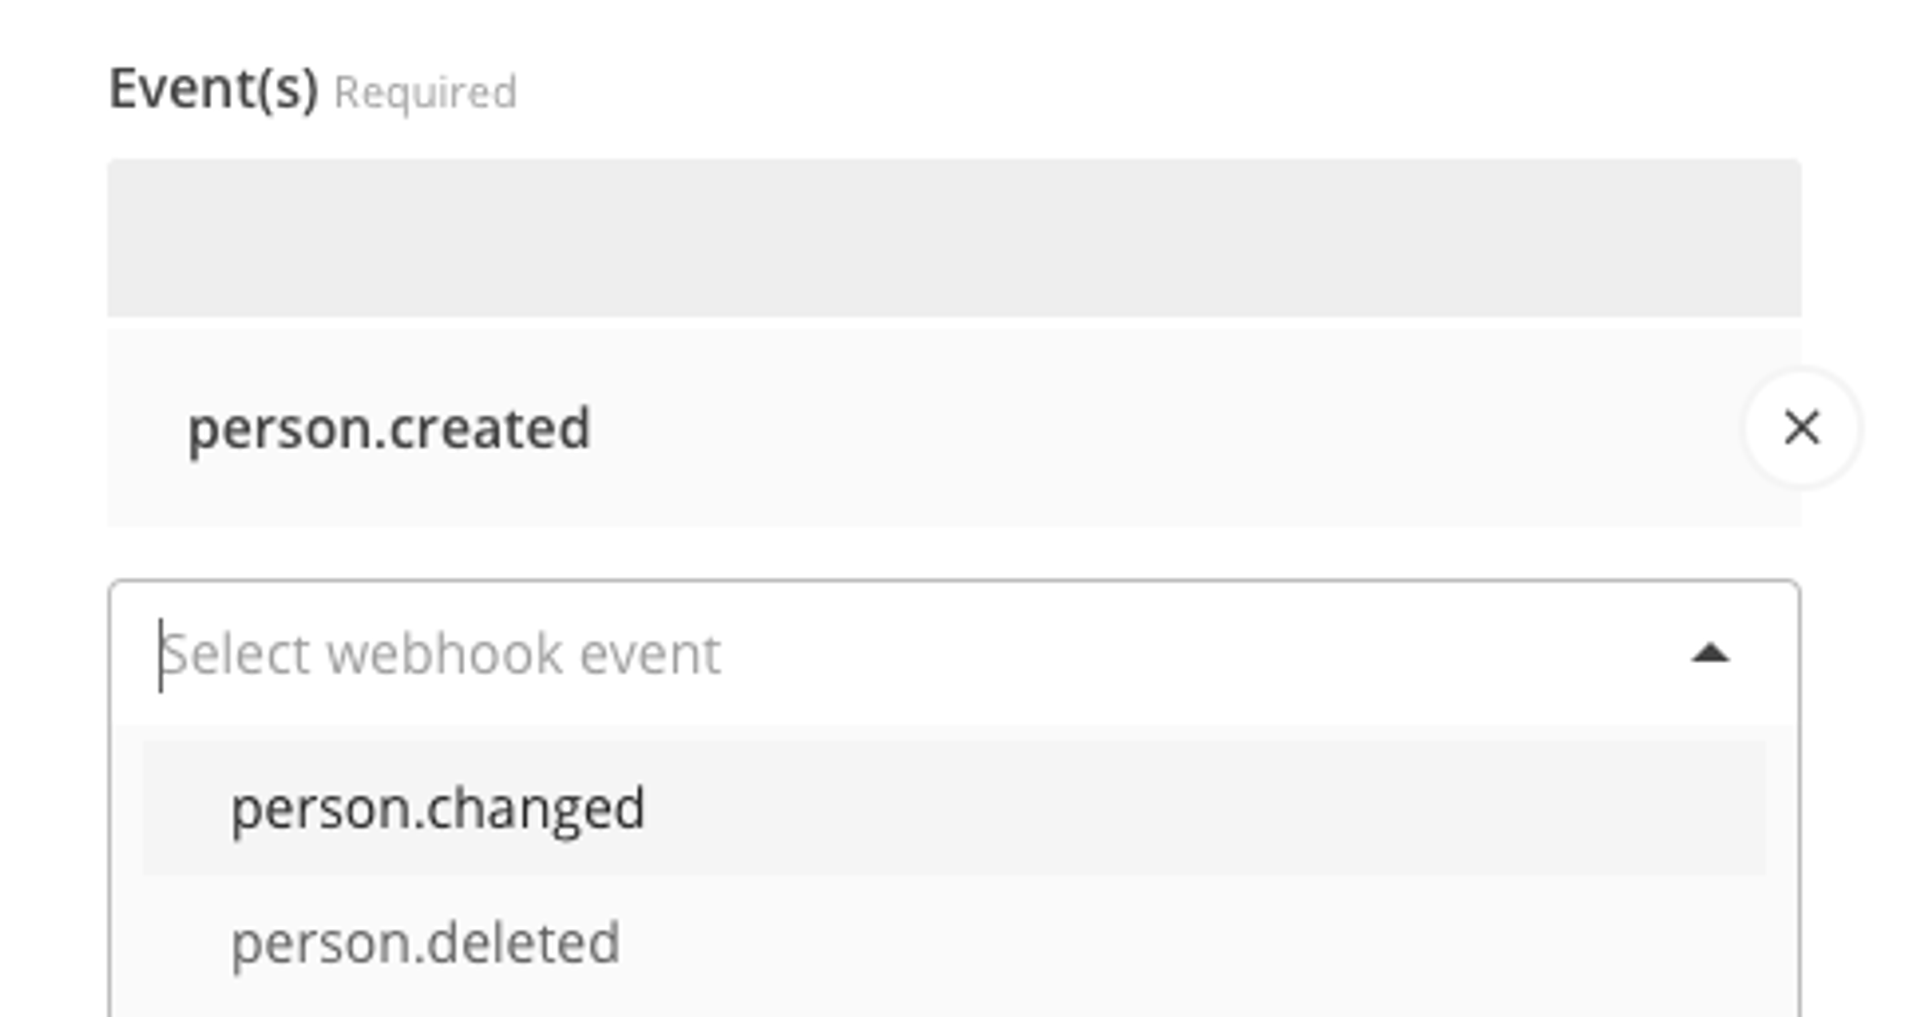
***
## Preview notification email in publication
*January 7th, 2021*
When you have added a notification field to a publication and selected an e-mail template, you can now view the example email notification via the 'preview' button.
***
## Move ‘Import model’ to ‘Add model' dropdown
To create a cleaner view in the publication model list, we moved the 'import model' button to the Add model dropdown.
***
## Various updates
*January 6th, 2021*
***
## # Add winner on prize detail
It is now even easier to add winners to the Prepr database. Simply click on 'Add winner' on any prize detail page to add one or more winners.

***
## # Add vote interaction on the profile page
Apps and websites can submit different event types via our pixel. We added support for event type 'Vote', which means that votes on publications are visible in Prepr. We also made the 'vote' type visible on a profile detail. [Check the various event types on our developers portal](/data-collection).

***
## # Add email template from template
Building an email template from scratch can be challenging. That is why we have added a default email template for notifications, so you can easily start sending email notifications.
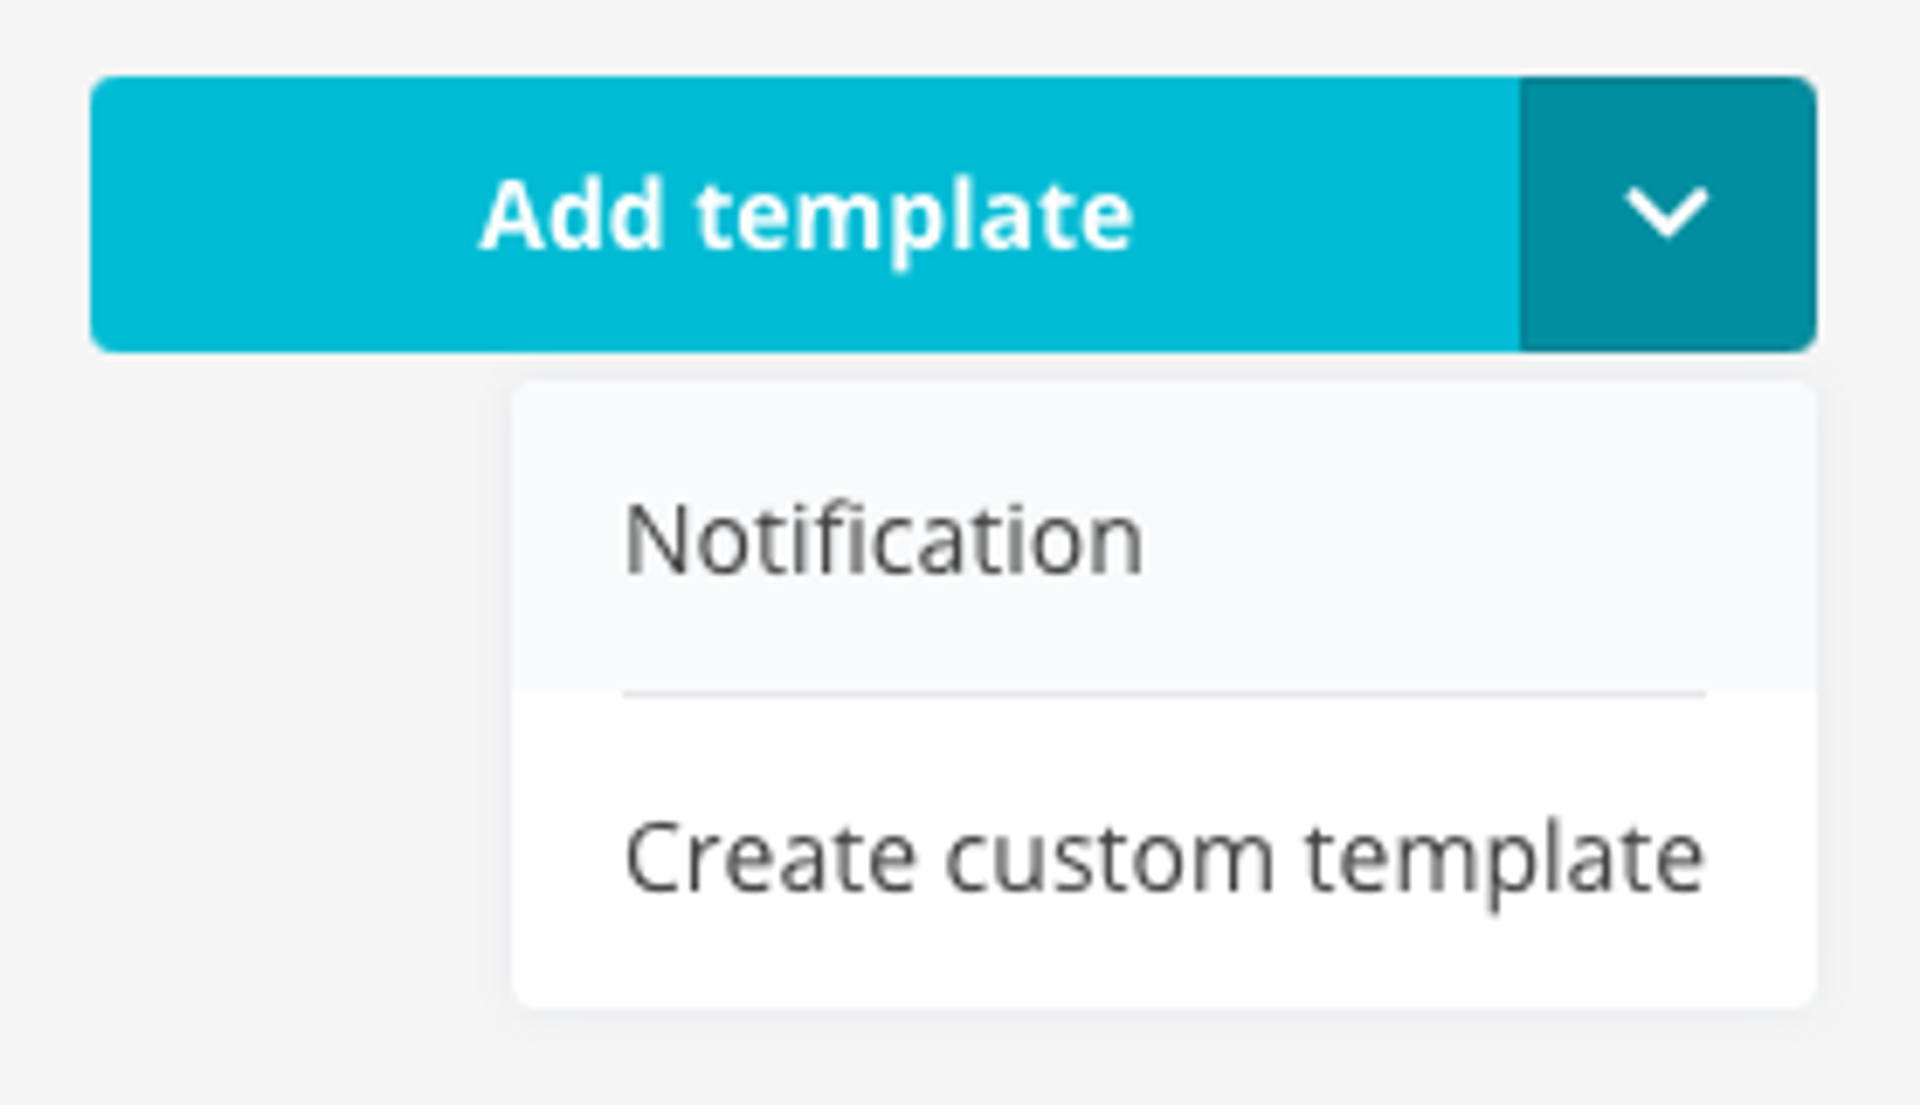
***
## # Add publication model from a template
Do you want to get started quickly with publication models? We added some default models, such as 'blog post' and 'page', so you won't need to get modeling yourself. [Learn more about publication models](/content-modeling/managing-models).
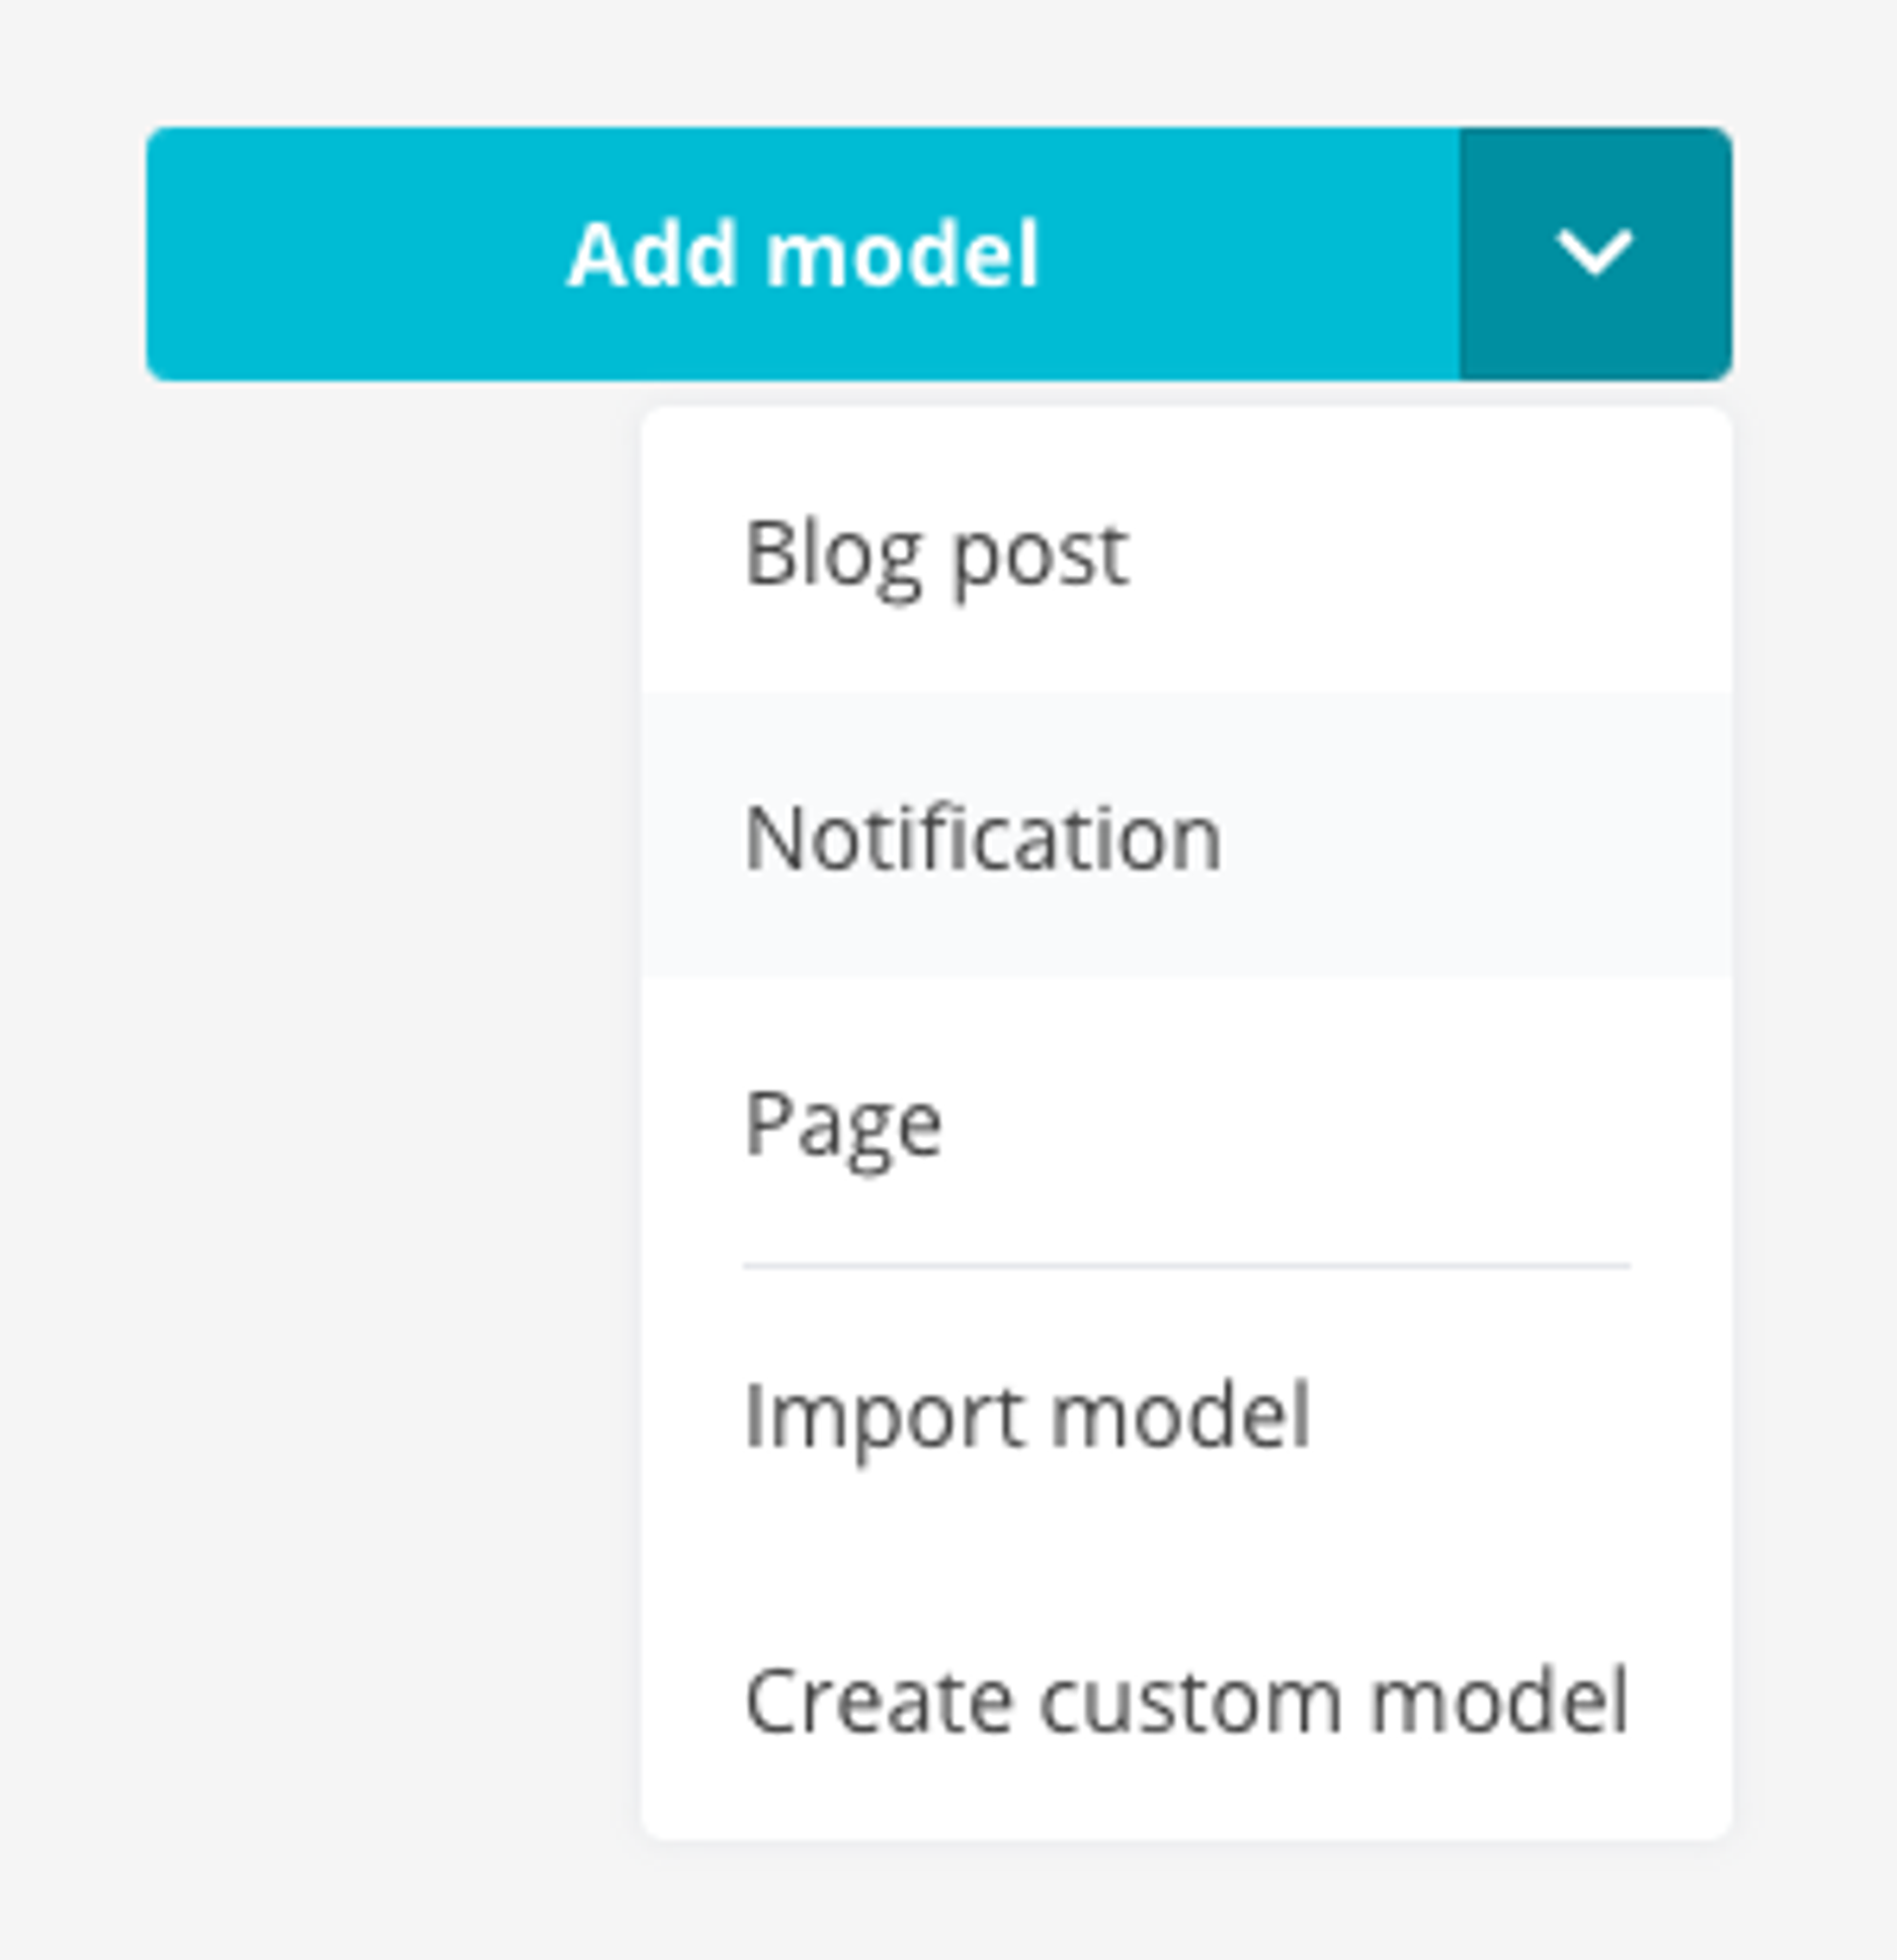
***
## # Fix content integration item in publication element
Bugfix for custom data in a content integration, used in a publication element in a drag-and-drop editor.
***
## Added support for multiple Publication Models in the Publication Link field
*January 4th, 2021*
Users noted that in a publication model field and in a publication element field, they can only use publication links to publications from one or all models. Thanks for this input! We have now added support for links to all, one or more models. [Learn more about publication links](/content-modeling/field-types#content-reference-field).
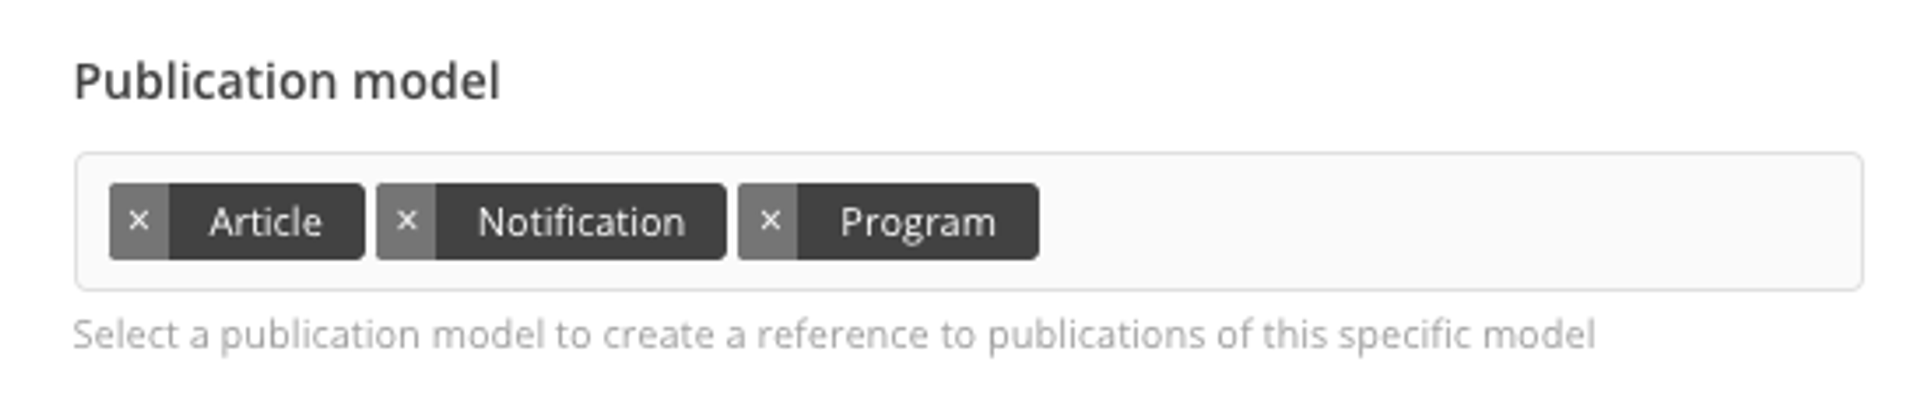
***
## Deprecated features
- Notifications
Source: https://docs.prepr.io/stay-updated/changelog2021
---
# Stay updated
We aim for full transparency and are always here to help out. Explore our newest features and [learn about improvements we're working on](/roadmap).
Source: https://docs.prepr.io/stay-updated
---
# Shared schema
*This article explains how you can create and use a shared schema in Prepr to keep the structure of your content consistent across multiple environments in an organization.*
## Use cases
The *Shared schema* feature lets organizations use the same structure for content across different brands.
While each brand might need unique content, it's smart to use the same overall structure for all brands.
In this case, create a shared schema to use the same schema across multiple environments with a shared schema.
Another use case is managing deployments across your development, testing, acceptance and production environments.
You can create entities in your non-production environment, test them, and then promote these to a shared schema when they're ready for production.
The shared schema can then be used across the whole DTAP setup.
In all use cases, the shared schema makes development faster and easier by keeping the code base leaner and more consistent.
## Create a shared schema
To create a *Shared schema*, follow the steps below.
1. Click the environment dropdown at the top right, choose your organization and click to open the environments overview.
2. Click the **Shared schema** tab to open the shared schema page.
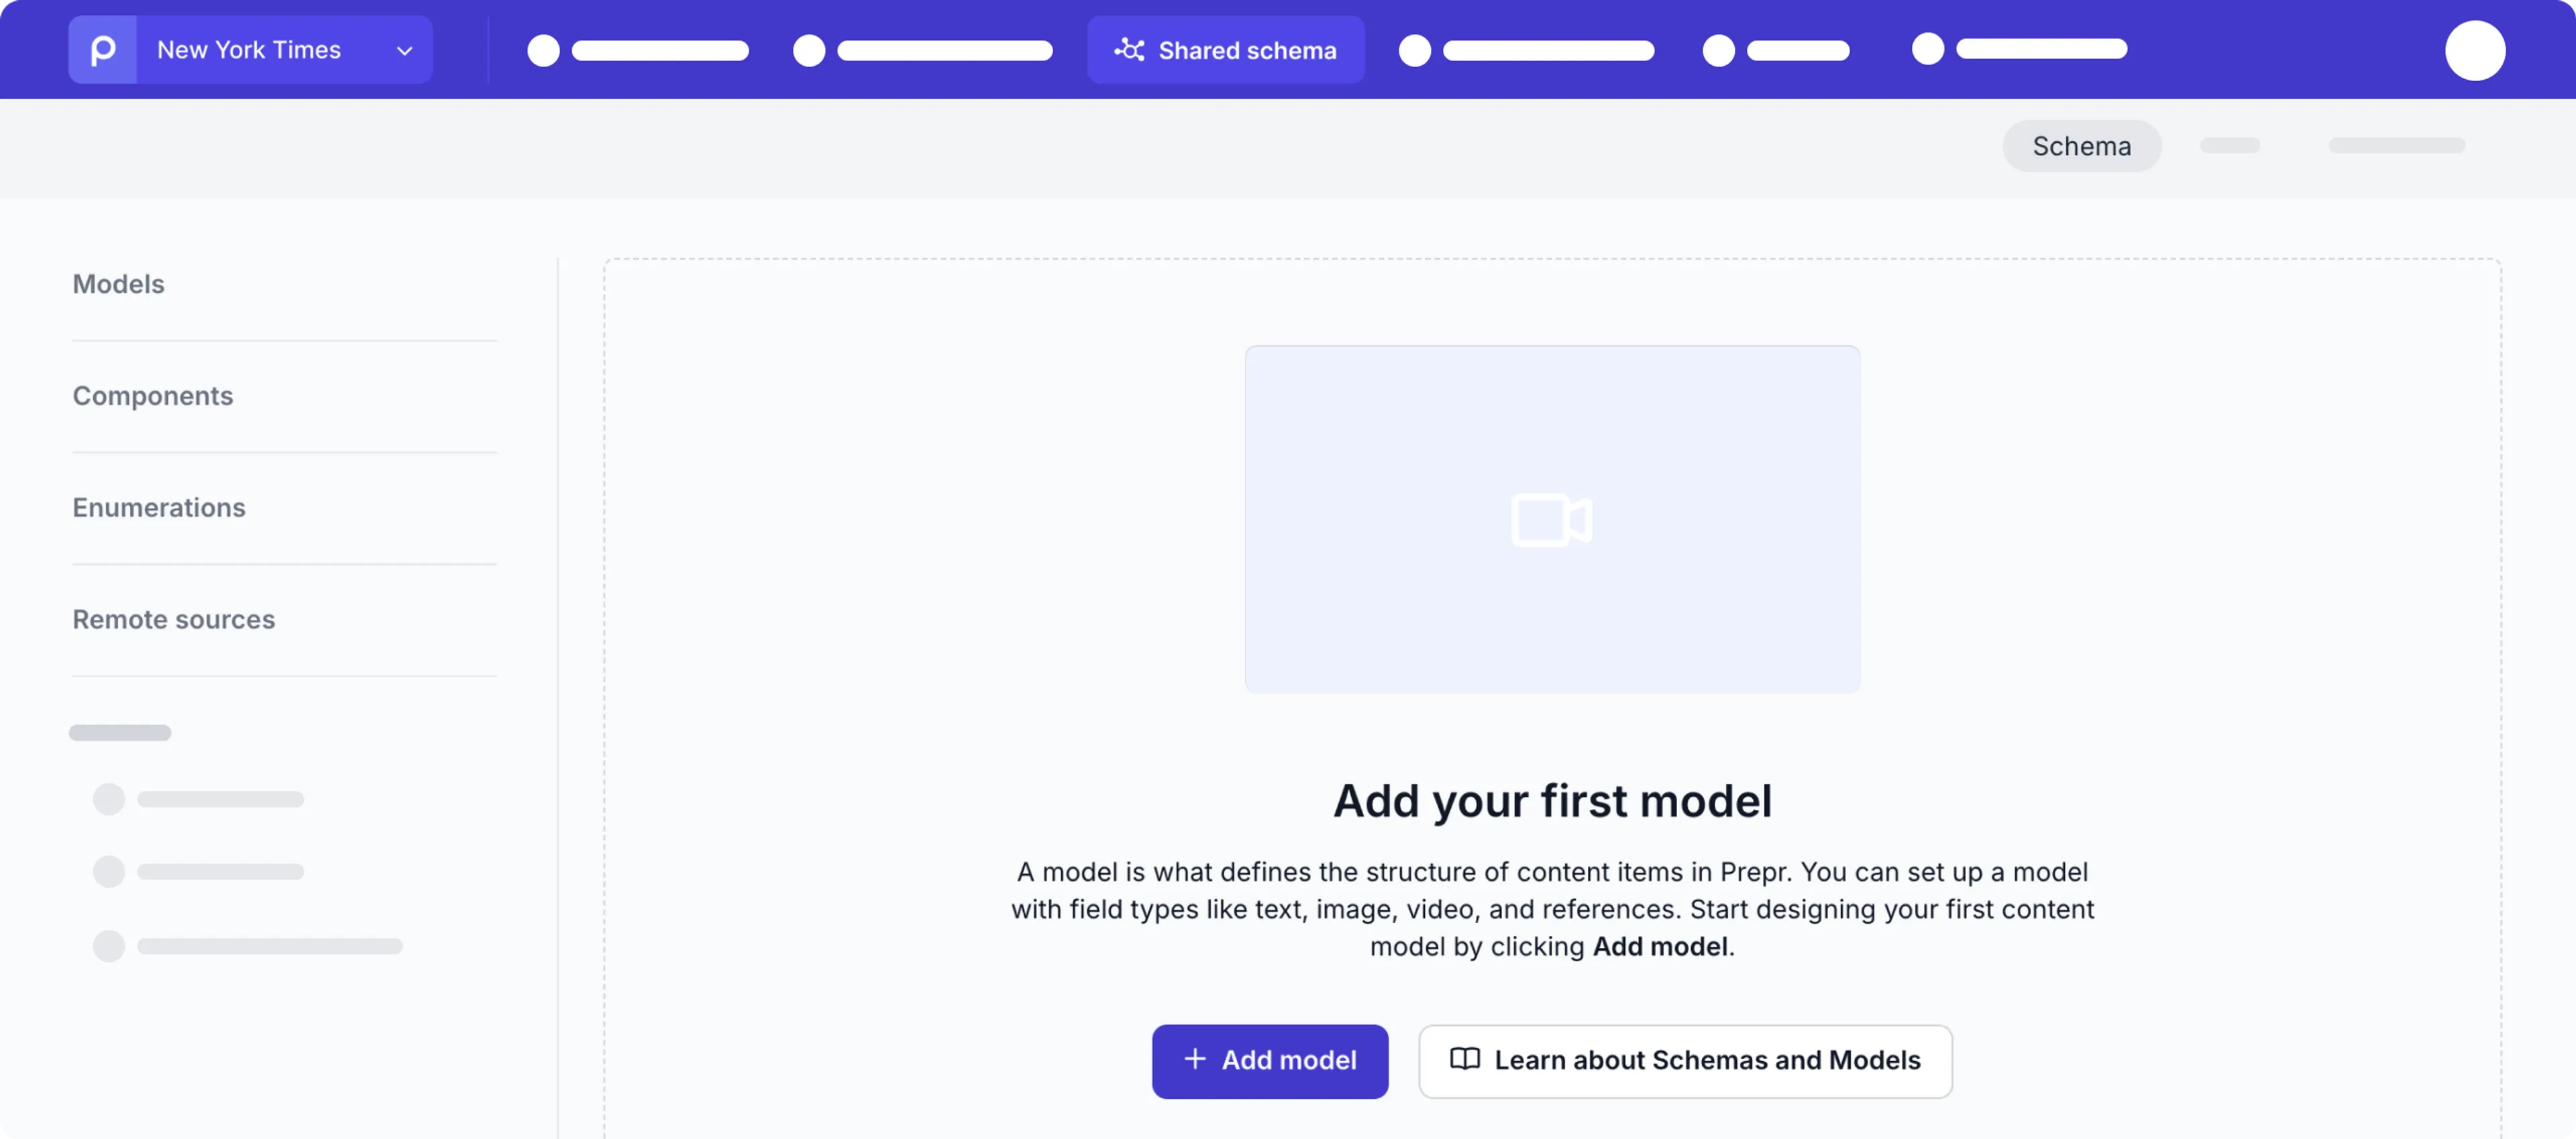
3. Add models, components, enumerations and remote sources to complete your schema.
Check out the [Create schema docs](/content-modeling) for more details.
When completed, each of the entities in the shared schema can be used in any environment in your organization.
## Promote entities to the shared schema
You can directly promote any model, component, enumeration, or remote source from an environment to the *Shared schema* at the organization level.
Once promoted, these entities can be accessed in any environment within the same organization.
To promote a schema entity to the shared schema, follow the steps below.
1. Go to the environment for the schema entity that you want to promote and click the *Schema* page.
2. Click the model, component, enumeration or the remote source that you want to promote to open it.

3. At the top of the detailed page of the entity, click the icon and choose the **Promote to shared schema** option.
4. If the entity has no linked entities that are not yet in the shared schema, your entity will become shared.
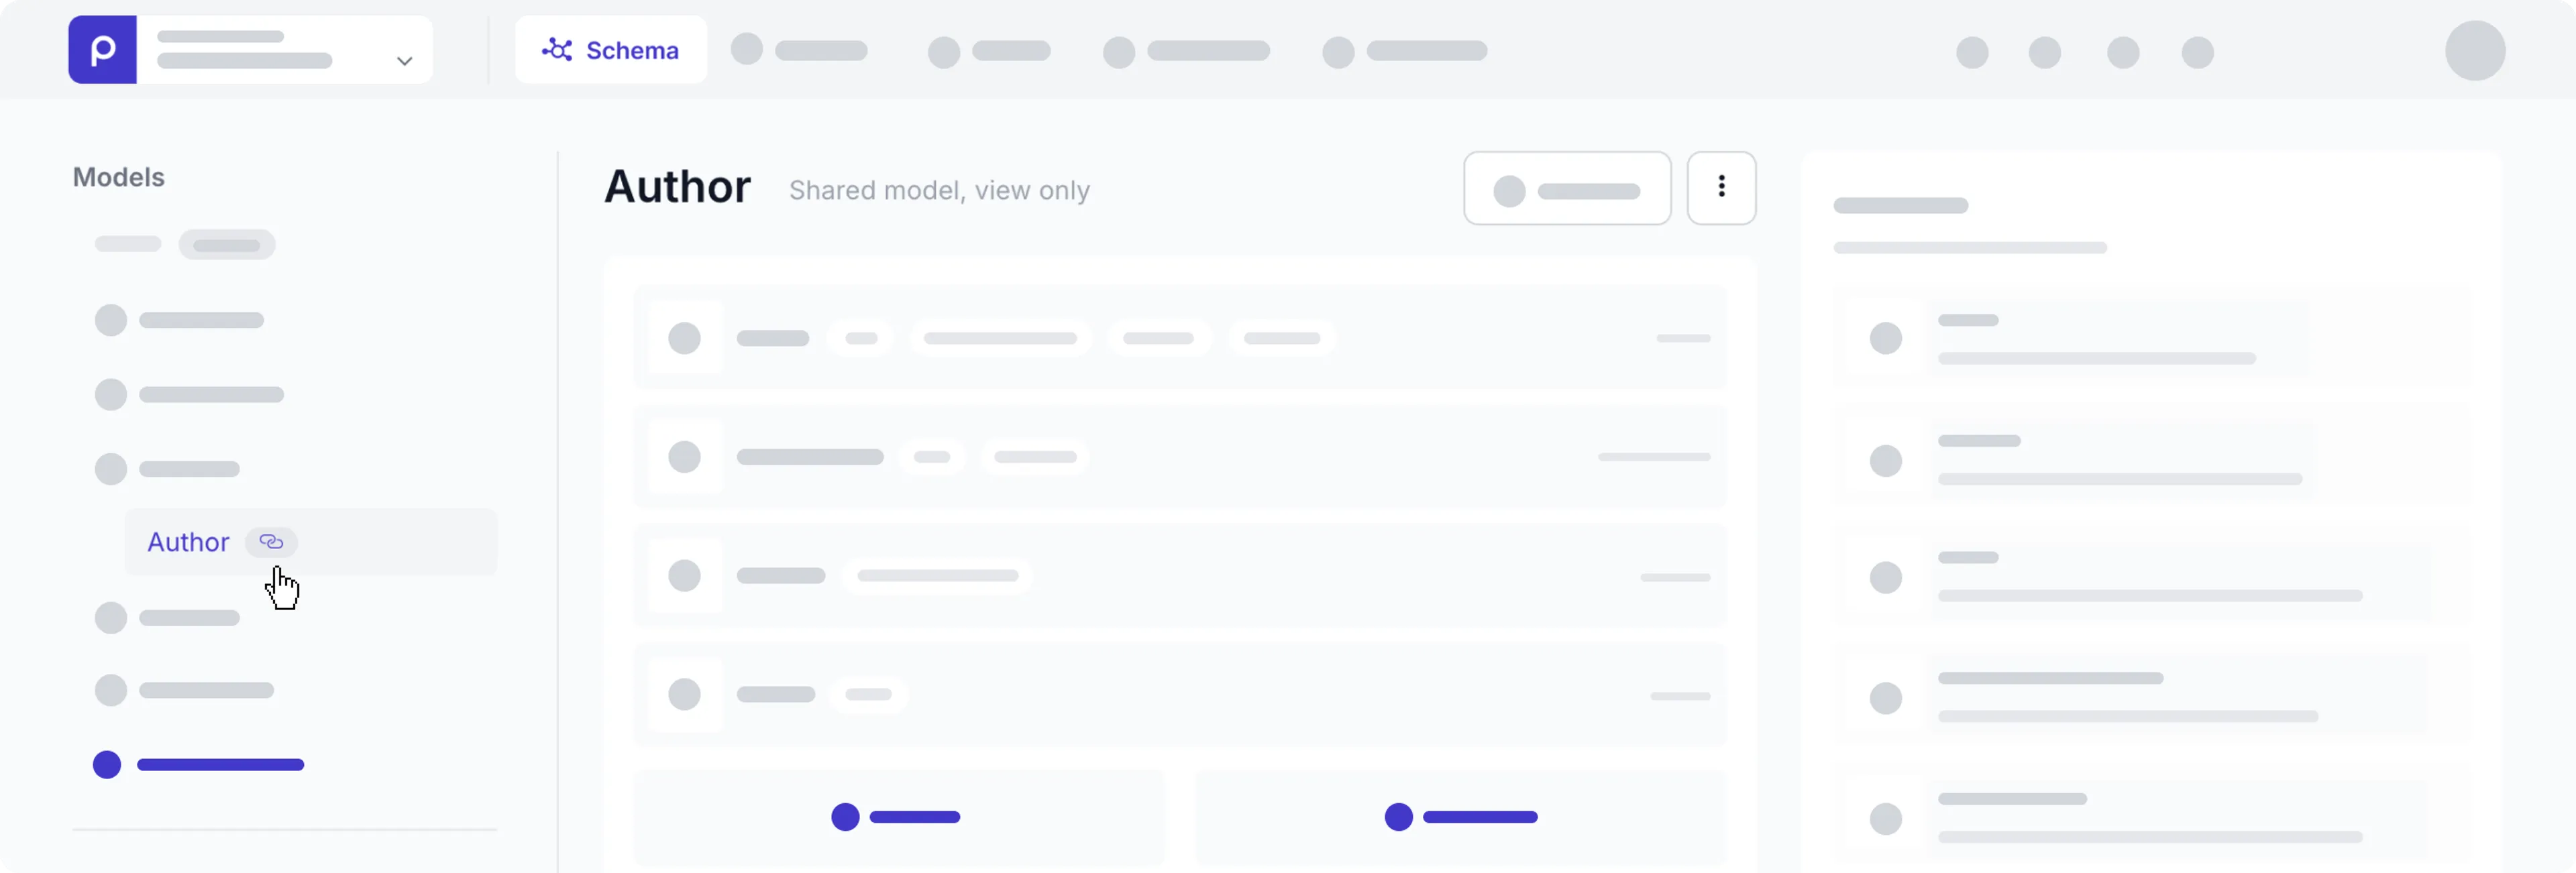
If you don't have the *Promote to shared schema* feature enabled, [contact our Sales team](https://prepr.io/contact-sales) for more details.
## Choose field visibility for environments
You can control field visibility per environment when using a shared schema, ideal for multi-site or multi-brand setups where fields differ slightly between environments.
To choose which environments a field can be visible for editing, follow the steps below.
1. In your shared schema, go to the relevant model or component and simply click the field to open the field settings.
2. Open the **Appearance** tab and go to the *Conditional visibility* section.

3. Select the **Show field based on environment name** option and choose all the environments where this field needs to be visible.
4. Click the **Save** button to save the settings.
Now, editors will only see this field if they're working in one of the environments you've chosen in the setting above.
## Define environments for allowed models
You can control which shared content items editors can access while searching content items they want to link to their item.
Define the environments you want to allow by choosing one of the following options:
- All environments
- Current environment (the environment the content editor is working in when linking a content item)
- Or choose specific environments from the list
To choose specific environments for included models in your *Stack* or *Content reference* field, in your shared model go to the relevant field and choose the specific environment each included model is allowed.
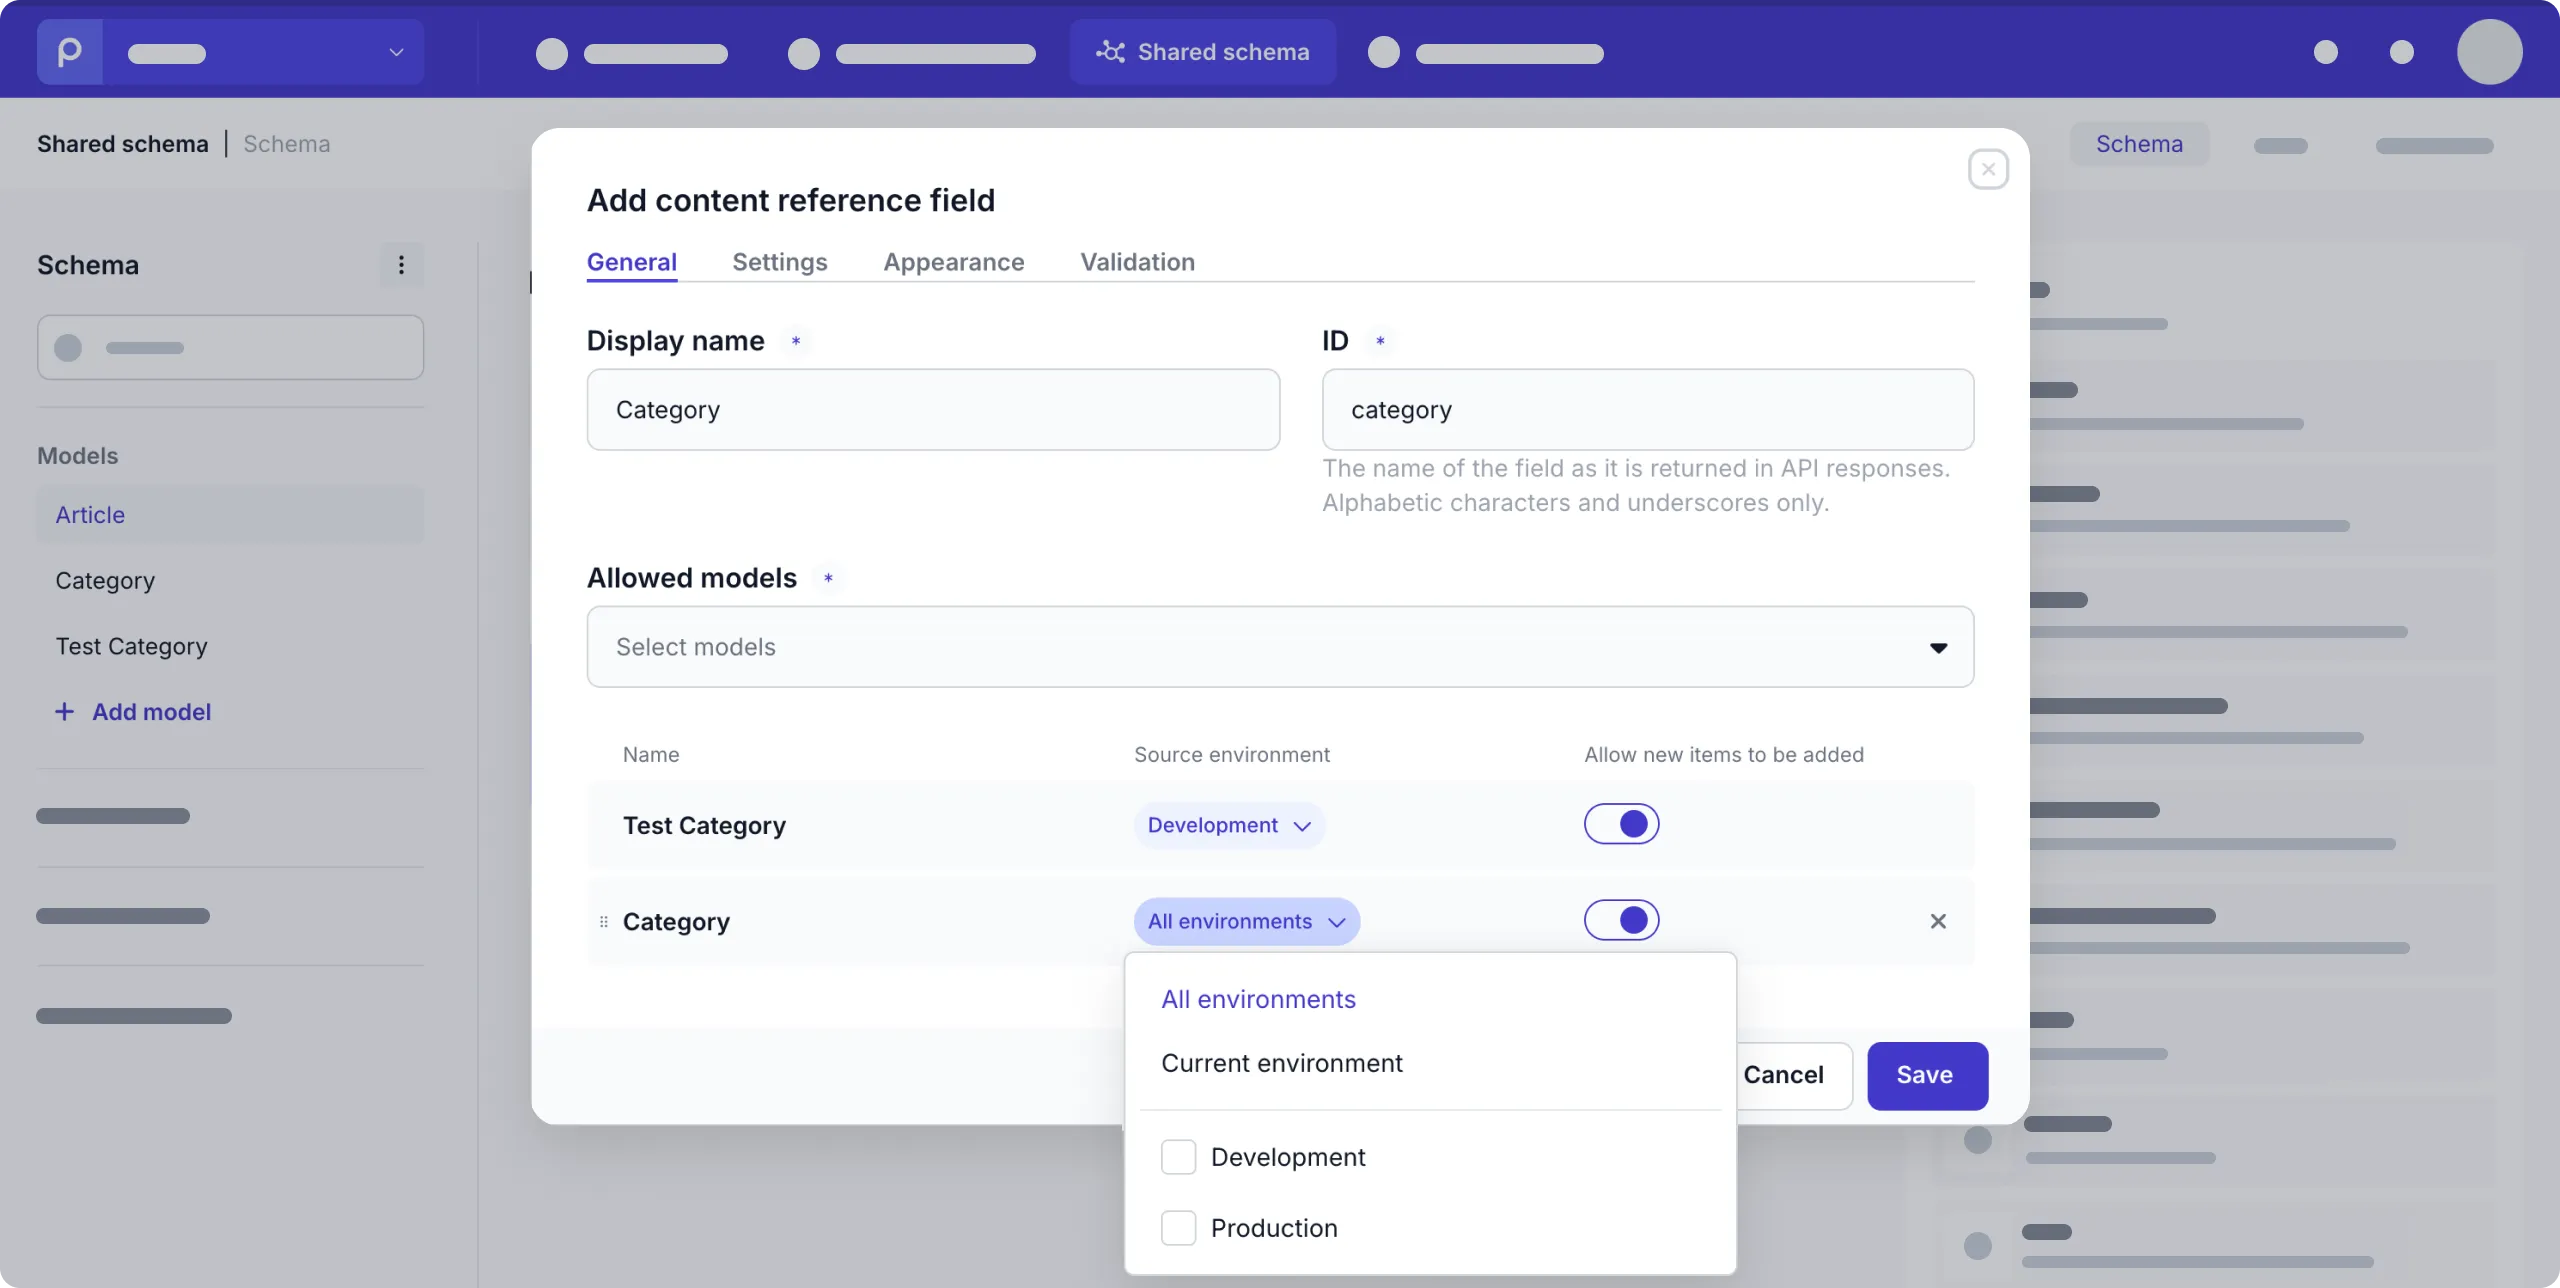
If you switch on the **Allow new items to be added** this means that editors can create a content item directly in one of the chosen environments if they have the access.
Source: https://docs.prepr.io/project-setup/architecture-scenarios/shared-schema
---
# Shared content
The shared content feature supports multiple brands in an organization.
Sometimes, different brands want to share content within the same organization.
For example, each brand creates their own articles, but these articles belong to common categories.
This can be done with shared content.
To enable sharing of specific content, follow the steps below.
1. Go to the **Shared schema** tab in your organization.
2. Open the content item with the relevant content reference for the content you want to share.
3. Click the existing content reference field or create a new [content reference field](/content-modeling/field-types#content-reference-field) to a model.
and in the *General* tab, enable the toggle **Allow items from all environments**.
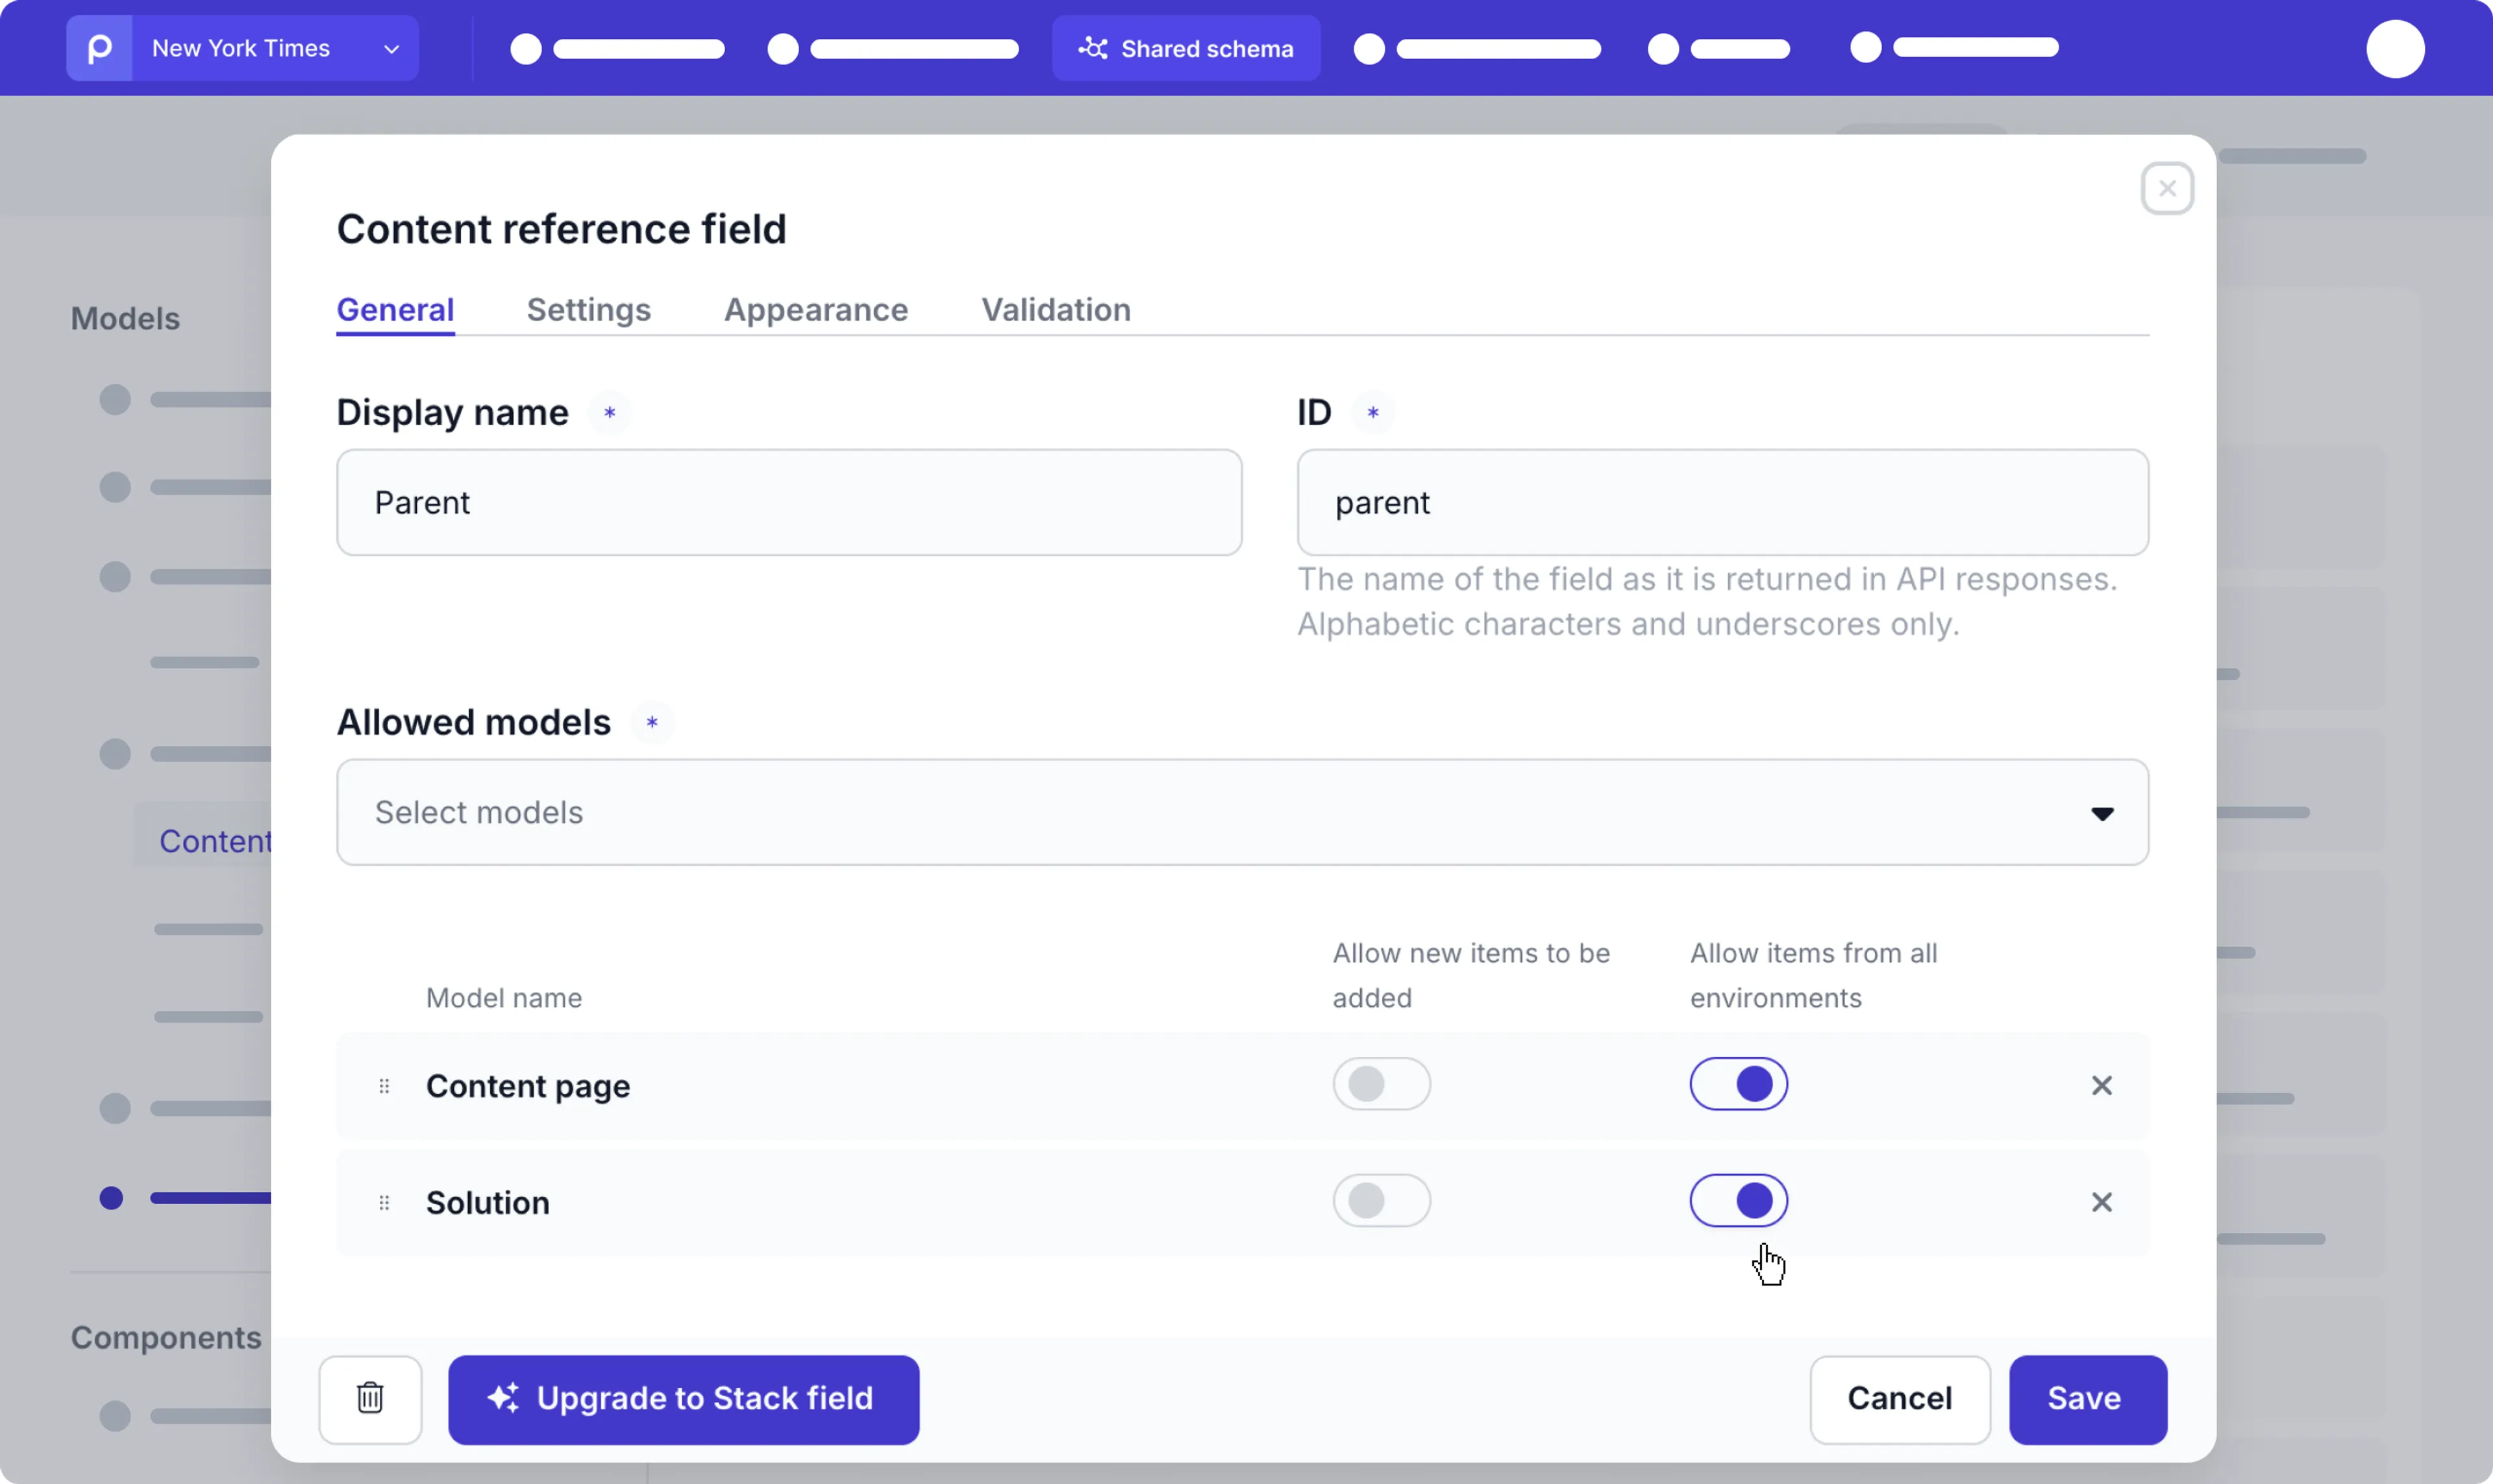
Check out the [Create schema docs](/content-modeling) for more details.
Source: https://docs.prepr.io/project-setup/architecture-scenarios/shared-content
---
# Architecture scenarios
Discover advanced Prepr CMS features tailored for more complex project structures and organizations.
Source: https://docs.prepr.io/project-setup/architecture-scenarios
---
# Blog
*This guide shows you how to model a typical blog, one of the most common patterns when implementing a web app.
Check out our [demo blog](https://acme-lease.prepr.io//blog) in action.*
## Introduction
A typical blog is made up of two key web pages, an overview page and a detailed page for each blog post.
### Overview page
In the example below, you can see the overview page includes a list of blog posts with some key content.
In this example, the list includes the post title, a cover image and an excerpt of the post.
This page also includes a list of categories that you can click to filter the posts to view similar posts.
The link in each post allows the visitor to navigate to the detailed blog post page.
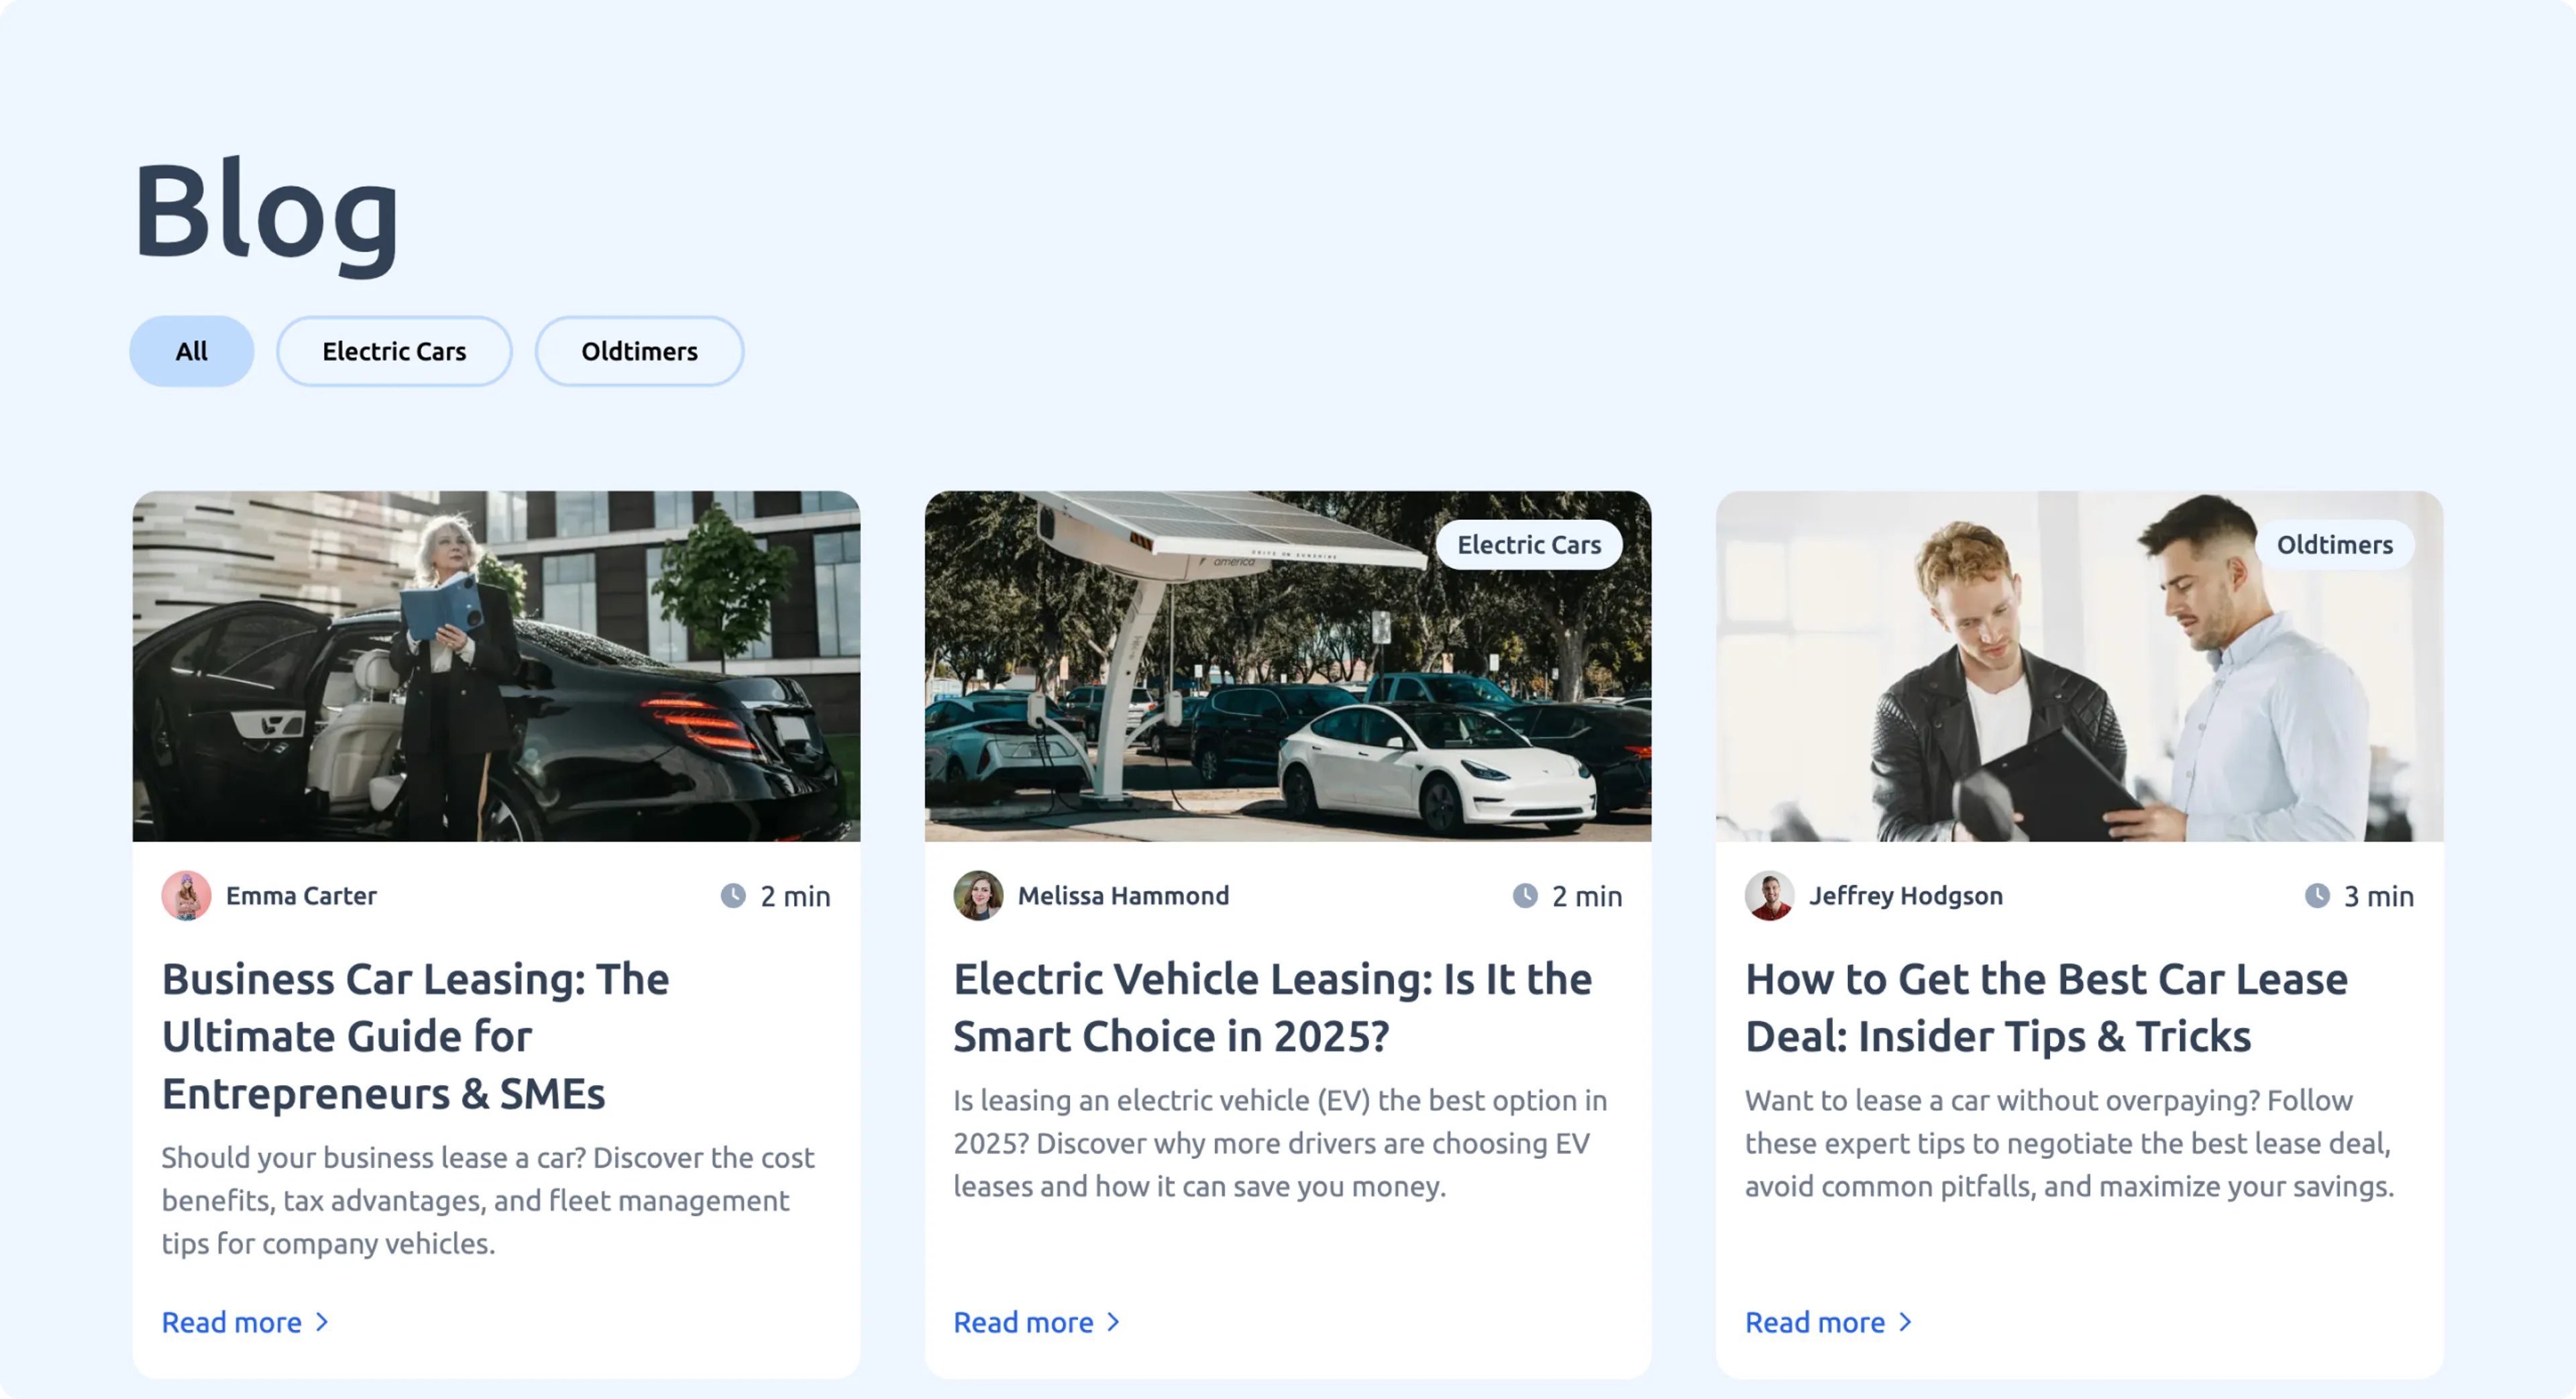
### Detailed blog post
In the example below, you can see more detail about a specific post, including the main content body of the post, and author information.

You can use these sample web pages as a basis when modeling the content you need in your web app.
Start by visualizing the *Post* model first.
## Post model
When modeling your content for the blog, you can start with the main model for each post, the *Post* model.
Check out the fields you can add to the *Post* model:
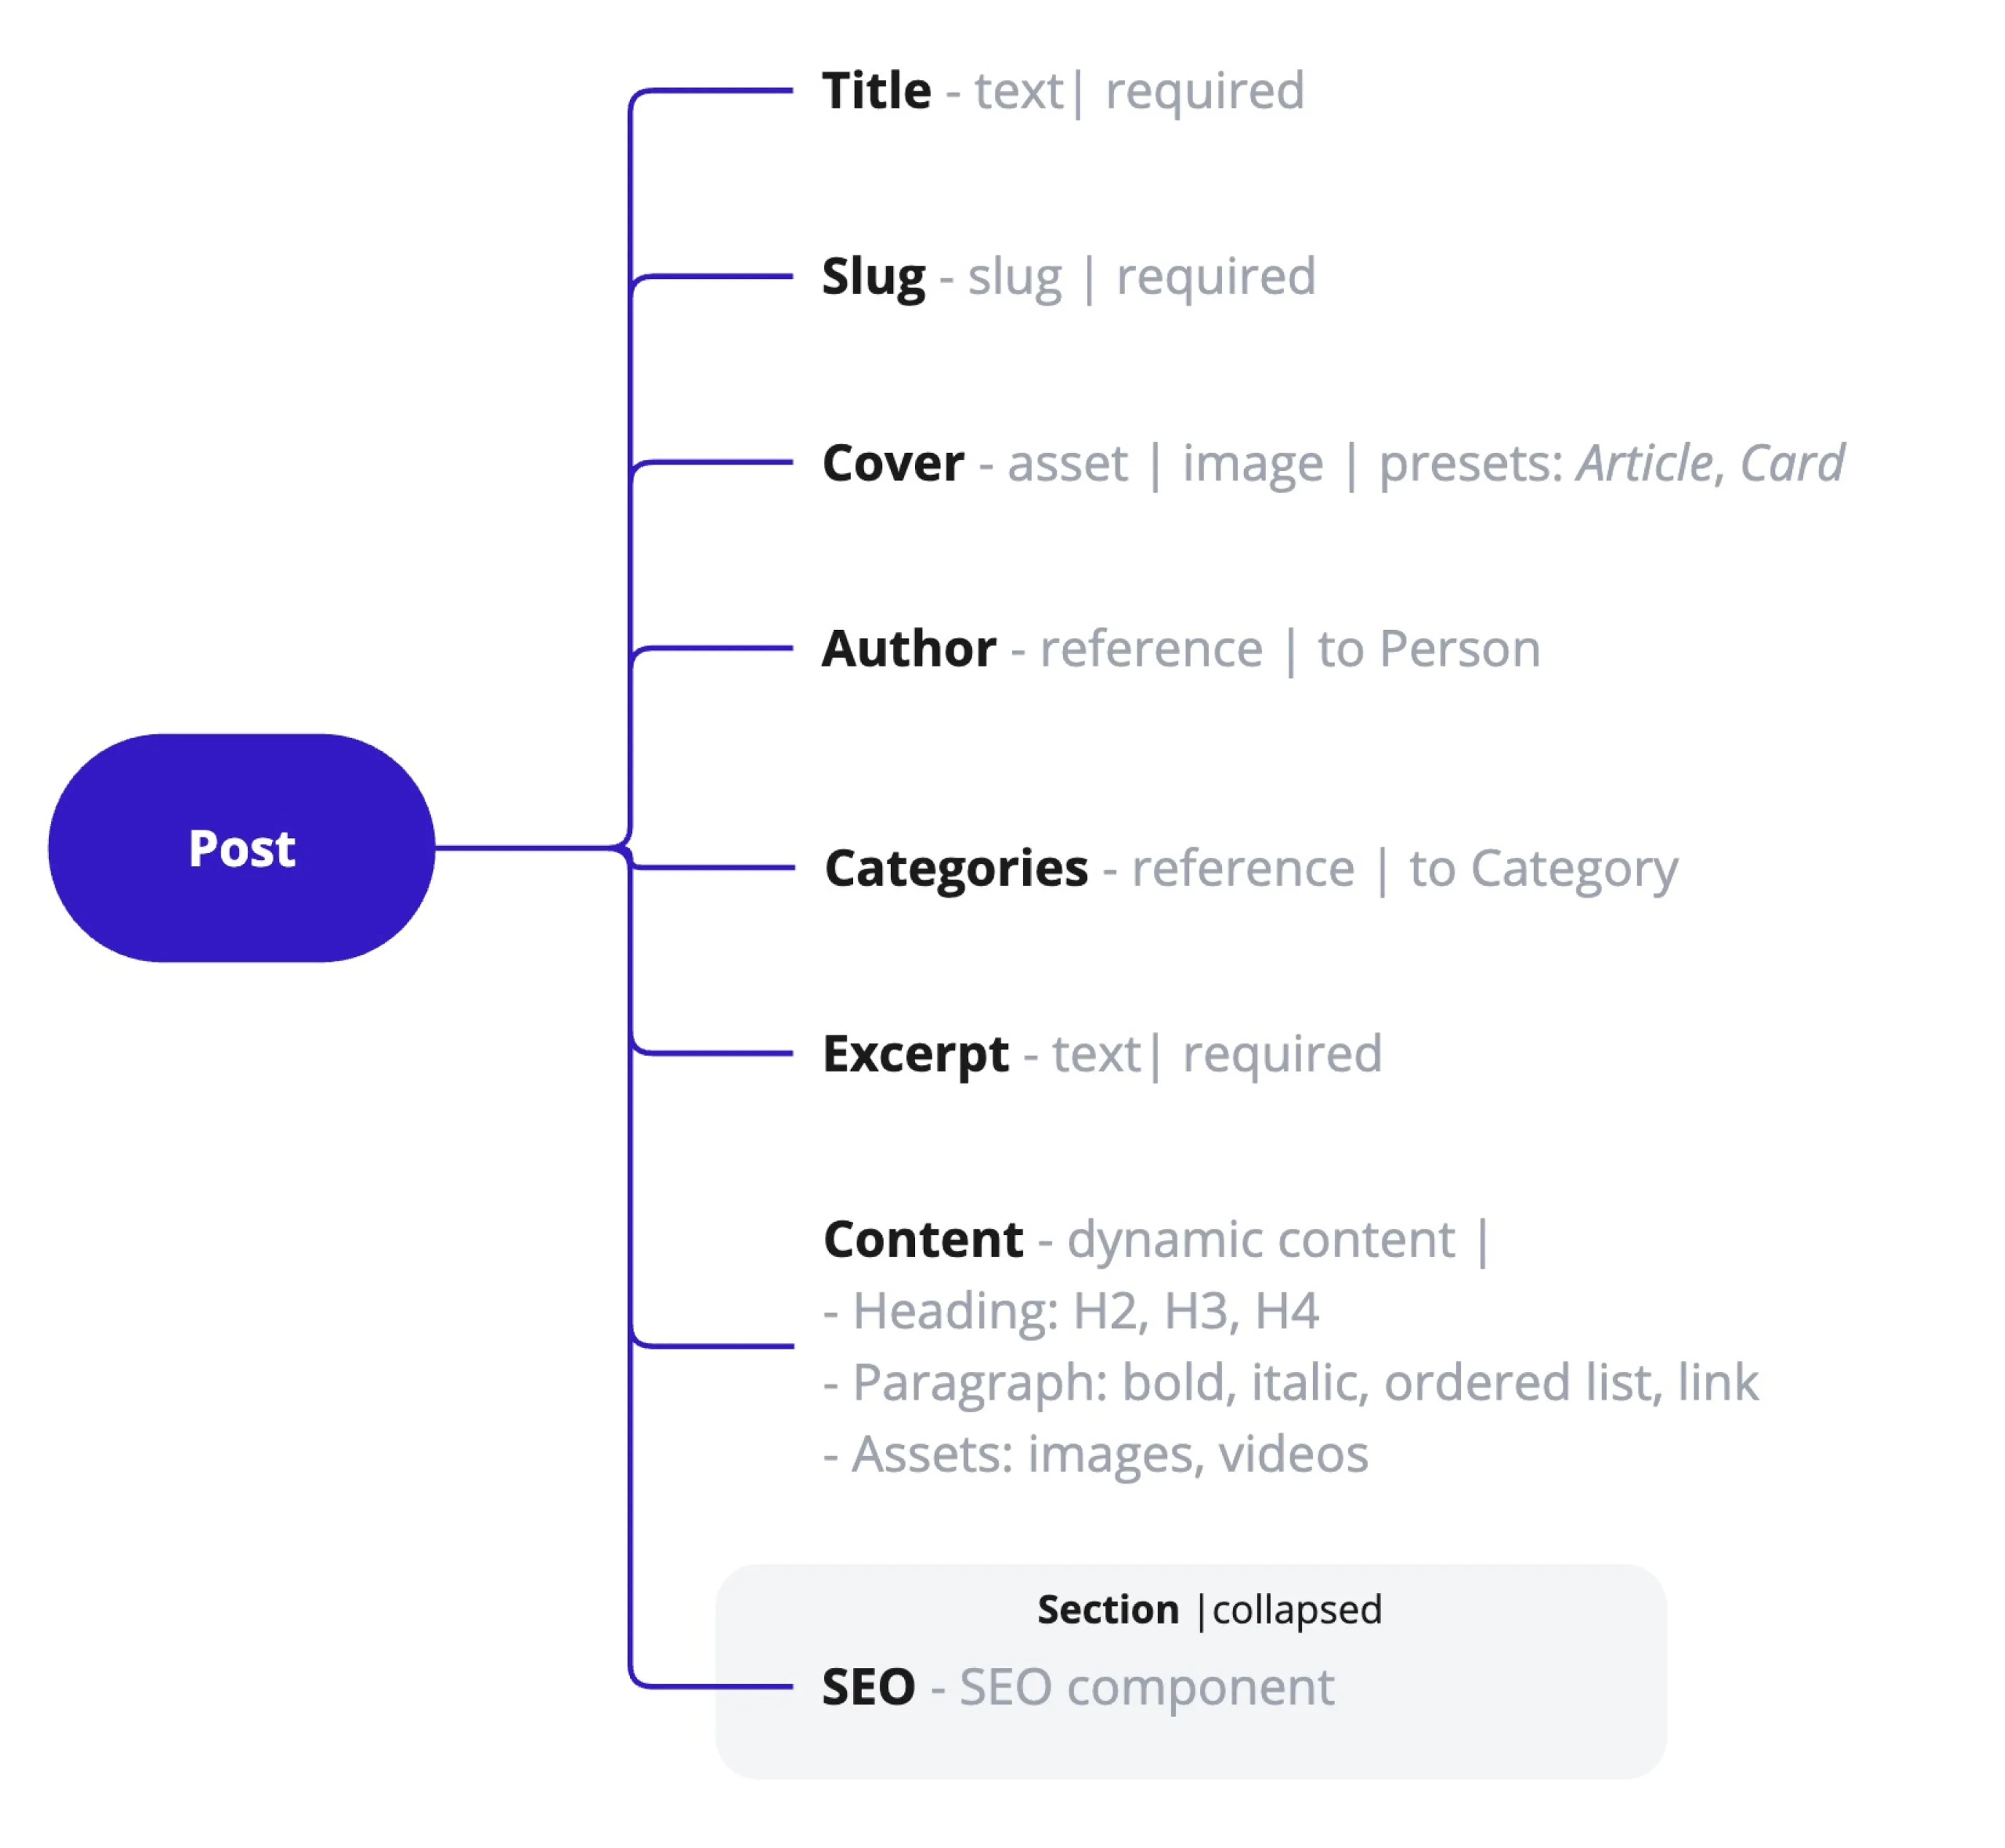
|Field name |Field type | Description|
|------------------|-------------|--------|
|**Title**| [Text](/content-modeling/field-types#text-field) |The title of a post visible on the web app. Required. This title can be used to query the post through the API. |\
|**Slug** | [Slug](/content-modeling/field-types#slug-field) |Part of the URL that is used to link to the detailed post page. Required. The slug is also useful as an internal field for API queries on this post. We set it to the *Title* of the post.|
|**Cover** | [Asset](/content-modeling/field-types#asset-field) |The cover image for the post. Required. Configure presets to cater for different dimensions in the web app, for example: to display the main cover in the detailed page and when displaying the image in a card.|
|**Categories**| [Content reference](/content-modeling/field-types#content-reference-field)|A reference to the [*Category*](#category) model. The category field allows the post to be grouped which can be used in the web app in different ways, for example, to filter posts by a category.|\
|**Author**| [Content reference](/content-modeling/field-types#content-reference-field)|Used to reference the [*Author*](#author) model which has content about the people who create the posts.|
|**Content**| [Dynamic content](/content-modeling/field-types#dynamic-content-field)| This field is the main body of the post and we define it to allow the content editor to include the following elements: - Heading2, Heading3, and Heading 4 - Paragraph: Allow bold, italic, and ordered list styles as well as links within the post.- Assets: For images and videos.|
|**SEO**|[Component](/content-modeling/field-types#component-field)|An embedded SEO component. This component has fields for finding this post through search engines. |
See a complete list of all other available [Prepr field types](/content-modeling/field-types).
You'll notice that some of the fields in the *Post* model are content references (link to items from another model) and components.
You can define those referenced models and components as follows:
### Author model
You can set up an *Author* field in the *Post* model. This field is a *Content reference* to a separate *Author* model.
*Author* is set up as a model to avoid duplication of person content. Check out the fields you can define in this model.
{/* The idea is that there could be content for persons with other functions and not only for article authors. For example, imagine that employees are shown in an *About us* page. The general *Person* model caters for this use case too and makes your schema more flexible and robust. */}
|Field name |Field type | Description|
|------------------|-------------|--------|
|**Name**| [Text](/content-modeling/field-types#text-field) |The name of a person. Required.|
|**Image**|[Assets](/content-modeling/field-types#assets-field)|The asset field allows the content editor to add a photo of the person to the *Author* content item.|
### Category model
You can define a *Categories* field in the *Post* model. This field is a *Content reference* to a separate *Category* model. This makes the category content reusable in the web app. For example, different posts can have the same categories.
Check out the fields you can add to the *Category* model.
|Field name |Field type | Description|
|------------------|-------------|--------|
|**Name**| [Text](/content-modeling/field-types#text-field) |The name of a category visible on the web app. Required. This name can be used to query the category through the API. |\
|**Slug** | [Slug](/content-modeling/field-types#slug-field) |Part of the URL that is used to link to this category. Required. The slug is also useful as an internal field for API queries on this category. We set it to the `{name}` of the category.|
### SEO component
You can set up the *SEO* field in the *Post* model. This field is an embedded *Component*. SEO is set up as a component because its field structure can be reused used in multiple content items from different models, namely, the *Post*, and *Page* models.
Within the *SEO* component we define the following fields:
|Field name |Field type | Description|
|------------------|-------------|--------|
|**Meta title**|[Text](/content-modeling/field-types#text-field)|The title tag. This title is the criterion for search engines to find a web page, for example. It is also the title that appears when an item is shared on social media. |
|**Meta description**| [Text](/content-modeling/field-types#text-field) | A brief description about a particular content item, for example, this description can be included in a summary view of a post in your front-end. This is also the description used when this item is shared on social media.|
|**Meta image**| [Assets](/content-modeling/field-types#assets-field) | This image is used when displaying a link to this item, for example, the Open Graph image that you see when sharing links within social media. |
## Other use cases
In conclusion, this is just one example of how you can model a blog pattern for your web app. Feel free to reuse this structure and amend it to your needs.
You could also consider including the following use cases in your schema.
- Add the author's social media info. You could set up social media info as a component and embed it in the *Author* model.
- Create a more generic *Person* model with a field for role information. If you need to show some employee information in your front-end, it's a good idea to allow their roles to be stored for this purpose.
## Want to learn more?
Check out the following guides:
- [More example patterns](/content-modeling/examples)
- [How to create a model in Prepr](/content-modeling/managing-models)
- [How to create a component in Prepr](/content-modeling/managing-components)
Source: https://docs.prepr.io/content-modeling/examples/blog
---
# Page
*A page is one of the basic parts of a web app.
Check out our [demo home page](https://acme-lease.prepr.io/) in action.*
## Introduction
This guide takes you through the content modeling process for a page pattern and explains the reasoning behind the modeling decisions. We'll look at how to model a feature-rich web page with a variety of elements. Here is a sample web page we used as a basis for the modeling:
Let's take a closer look at the modeling steps. Using this page as a basis, we see that a number of elements make up the page content. These include:
- **A hero section**
The hero section is the prominent part of the page usually at the top. It has a heading, a sub-heading, an image, and one or more buttons.
- **A feature section**
The feature section showcases important features to highlight and consists of a heading, a sub-heading, button, image and the image position.
- **CTA**
A call-to-action to encourage interaction from the web visitor.
- **Static**
Some static sections to showcase more static info like testimonials.
- **Cards**
Cards are used for things like a selection of blog posts or recommended products. It has a heading, sub-heading, a stack of cards for the items like posts or products.
- **FAQ section**
A FAQ section to show some common questions and the corresponding answers.
- **Contact section**
This section gives visitors the opportunity to contact the company.
Let's look at how to structure a page like this in more detail.
## Page model
In our schema, we've decided to create a generic *Page* model that can be used for different kinds of web pages, for example, a home page, marketing pages, landing pages, etc.
See an example *Page* model below:
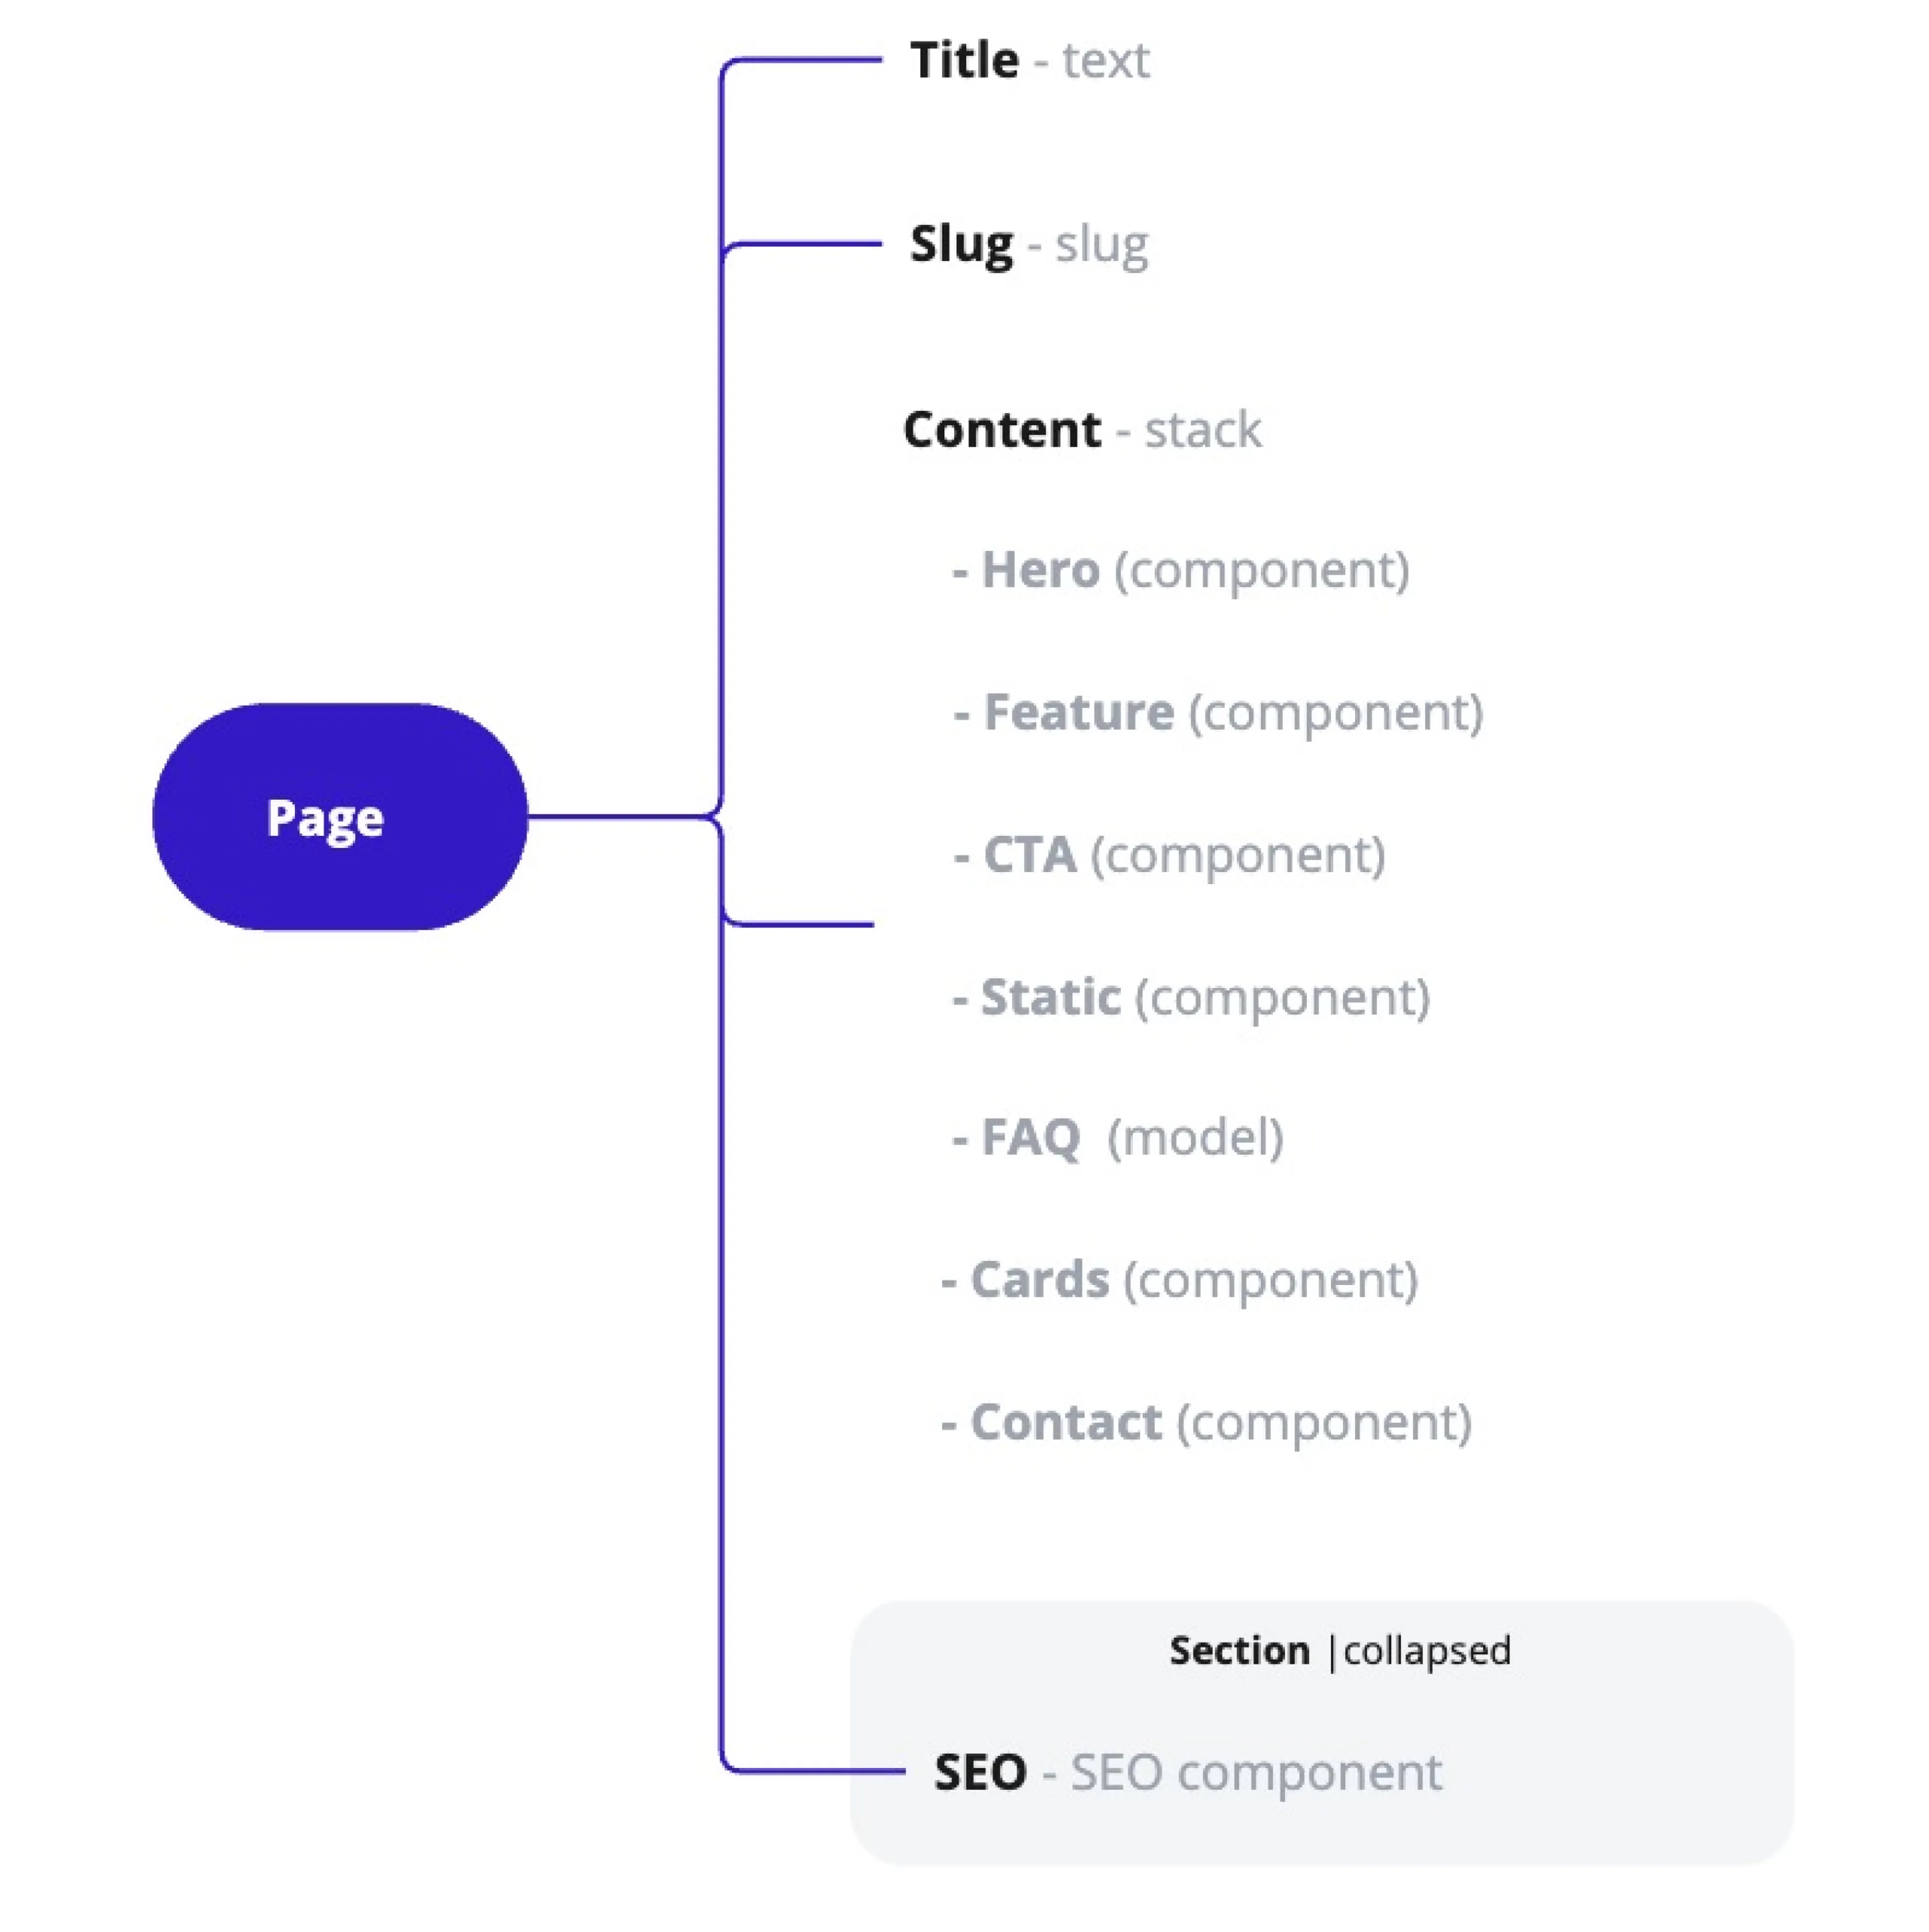
Within the *Page* model we define the following fields:
|Field name |Field type| Description|
|------------------|-------------|--------|
|**Title**| [Text](/content-modeling/field-types#text-field) |The title of the page. Required. This title is used internally to identify the page in Prepr.|
|**Slug**| [Slug](/content-modeling/field-types#slug-field) |Part of the URL that is used to link to this page. The slug can also be used for API queries to request this page and is automatically set to the title of the page in our example.|
|**Content**| [Stack](/content-modeling/field-types#stack-field)| The main content of the page. Using the Stack field allows editors to add the elements that make up the web page easily, for example, the hero section, a CTA, FAQ section, etc. |
|**SEO**| [Component](/content-modeling/field-types#component-field)| SEO is an embedded component which contains fields that are used by search engines and social media. We reuse the same SEO component defined in the [Blog pattern](/content-modeling/examples/blog) doc.|
See a complete list of all other available [Prepr field types](/content-modeling/field-types).
## How to model the elements on a page
In our example model above we put the main page content in a *Stack* field.
The *Stack* field allows content editors to easily create all the elements they need on a page.
They can add both components and content items to the stack.
The *Stack* field contains the following components and models in our *Page* model:
|Model/component |Type| Description|
|------------------|-------------|--------|
|**Hero**| Component|The hero component at the top of the page. |\
|**Feature**| Component| The feature component to allow editors to capture a heading, a sub-heading, button, image and the image position (left or right).|
|**CTA**| Component| The component for a call-to-action.|
|**Cards** | Component|The component to show recommendations or posts as cards. The editor can link existing *Product* or *Post* content items. Check out the [*Blog pattern*](/content-modeling/examples/blog#article-model) doc for more details.|
|**FAQ** | Model|A reference to existing reusable question and answer content. |
|**Contact**| Component| A component to allow editors to include a contact form in the page.|
Let's look at each element in detail.
### Hero
The *Hero* component is used to include the most prominent part of the page usually at the top.

The *Hero* component has the following typical fields:
|Field name |Field type| Description|
|------------------|-------------|--------|
|**Heading**| [Text](/content-modeling/field-types#text-field) |The heading usually at the top of the Hero section.|
|**Sub Heading**| [Text](/content-modeling/field-types#text-field) |More descriptive text just below the heading.|
|**Image**|[Assets](/content-modeling/field-types#assets-field)|An asset field that allows editors to include an image in the *Hero* section.|
|**Buttons**| [Stack](/content-modeling/field-types#stack-field) |One or more buttons with their respective fields.|
### Feature
The *Feature* component in a page can be used to highlight important features.

The *Feature* component typically has the following fields:
|Field name |Field type| Description|
|------------------|-------------|--------|
|**Heading**| [Text](/content-modeling/field-types#text-field) |The title of the *Image and text* block.|
|**Sub heading**| [Text](/content-modeling/field-types#text-field) |The text content.|
|**Button**|[Component](/content-modeling/field-types#component-field)|This component allows editors to label the button and to either link the button to a URL, another page in the website, or to another content item. Maximum of one button or link.|
|**Image**|[Assets](/content-modeling/field-types#assets-field)|An asset field that allows the editor to attach an image. Maximum of one asset with `image` asset type.|
|**Image position**| [List](/content-modeling/field-types#list-field)| The position of the image in relation to the text, for example, image to the left of the text or to the right of the text.|
### CTA
The *CTA* component can be used to encourage interaction from the web visitor.

The *Call to action* component typically has at least the following fields:
|Field name |Field type| Description|
|------------------|-------------|--------|
|**Heading**| [Text](/content-modeling/field-types#text-field) |The heading text for this call to action.|
|**Sub Heading**| [Text](/content-modeling/field-types#text-field) |More descriptive text for this call to action.|
### Static
The *Static* component can be used to showcase more static info such as testimonials.

The *Static* component can be made up of at least the following fields:
|Field name |Field type| Description|
|------------------|-------------|--------|
|**Title**| [Text](/content-modeling/field-types#text-field) |The title for this section.|
|**Static Type**| [List](/content-modeling/field-types#text-field) |Based on this value, the front end can determine how to display the static content, for example, testimonials or steps.|
### Cards
The *Cards* component can be used to show highlighted blog posts or recommended products.
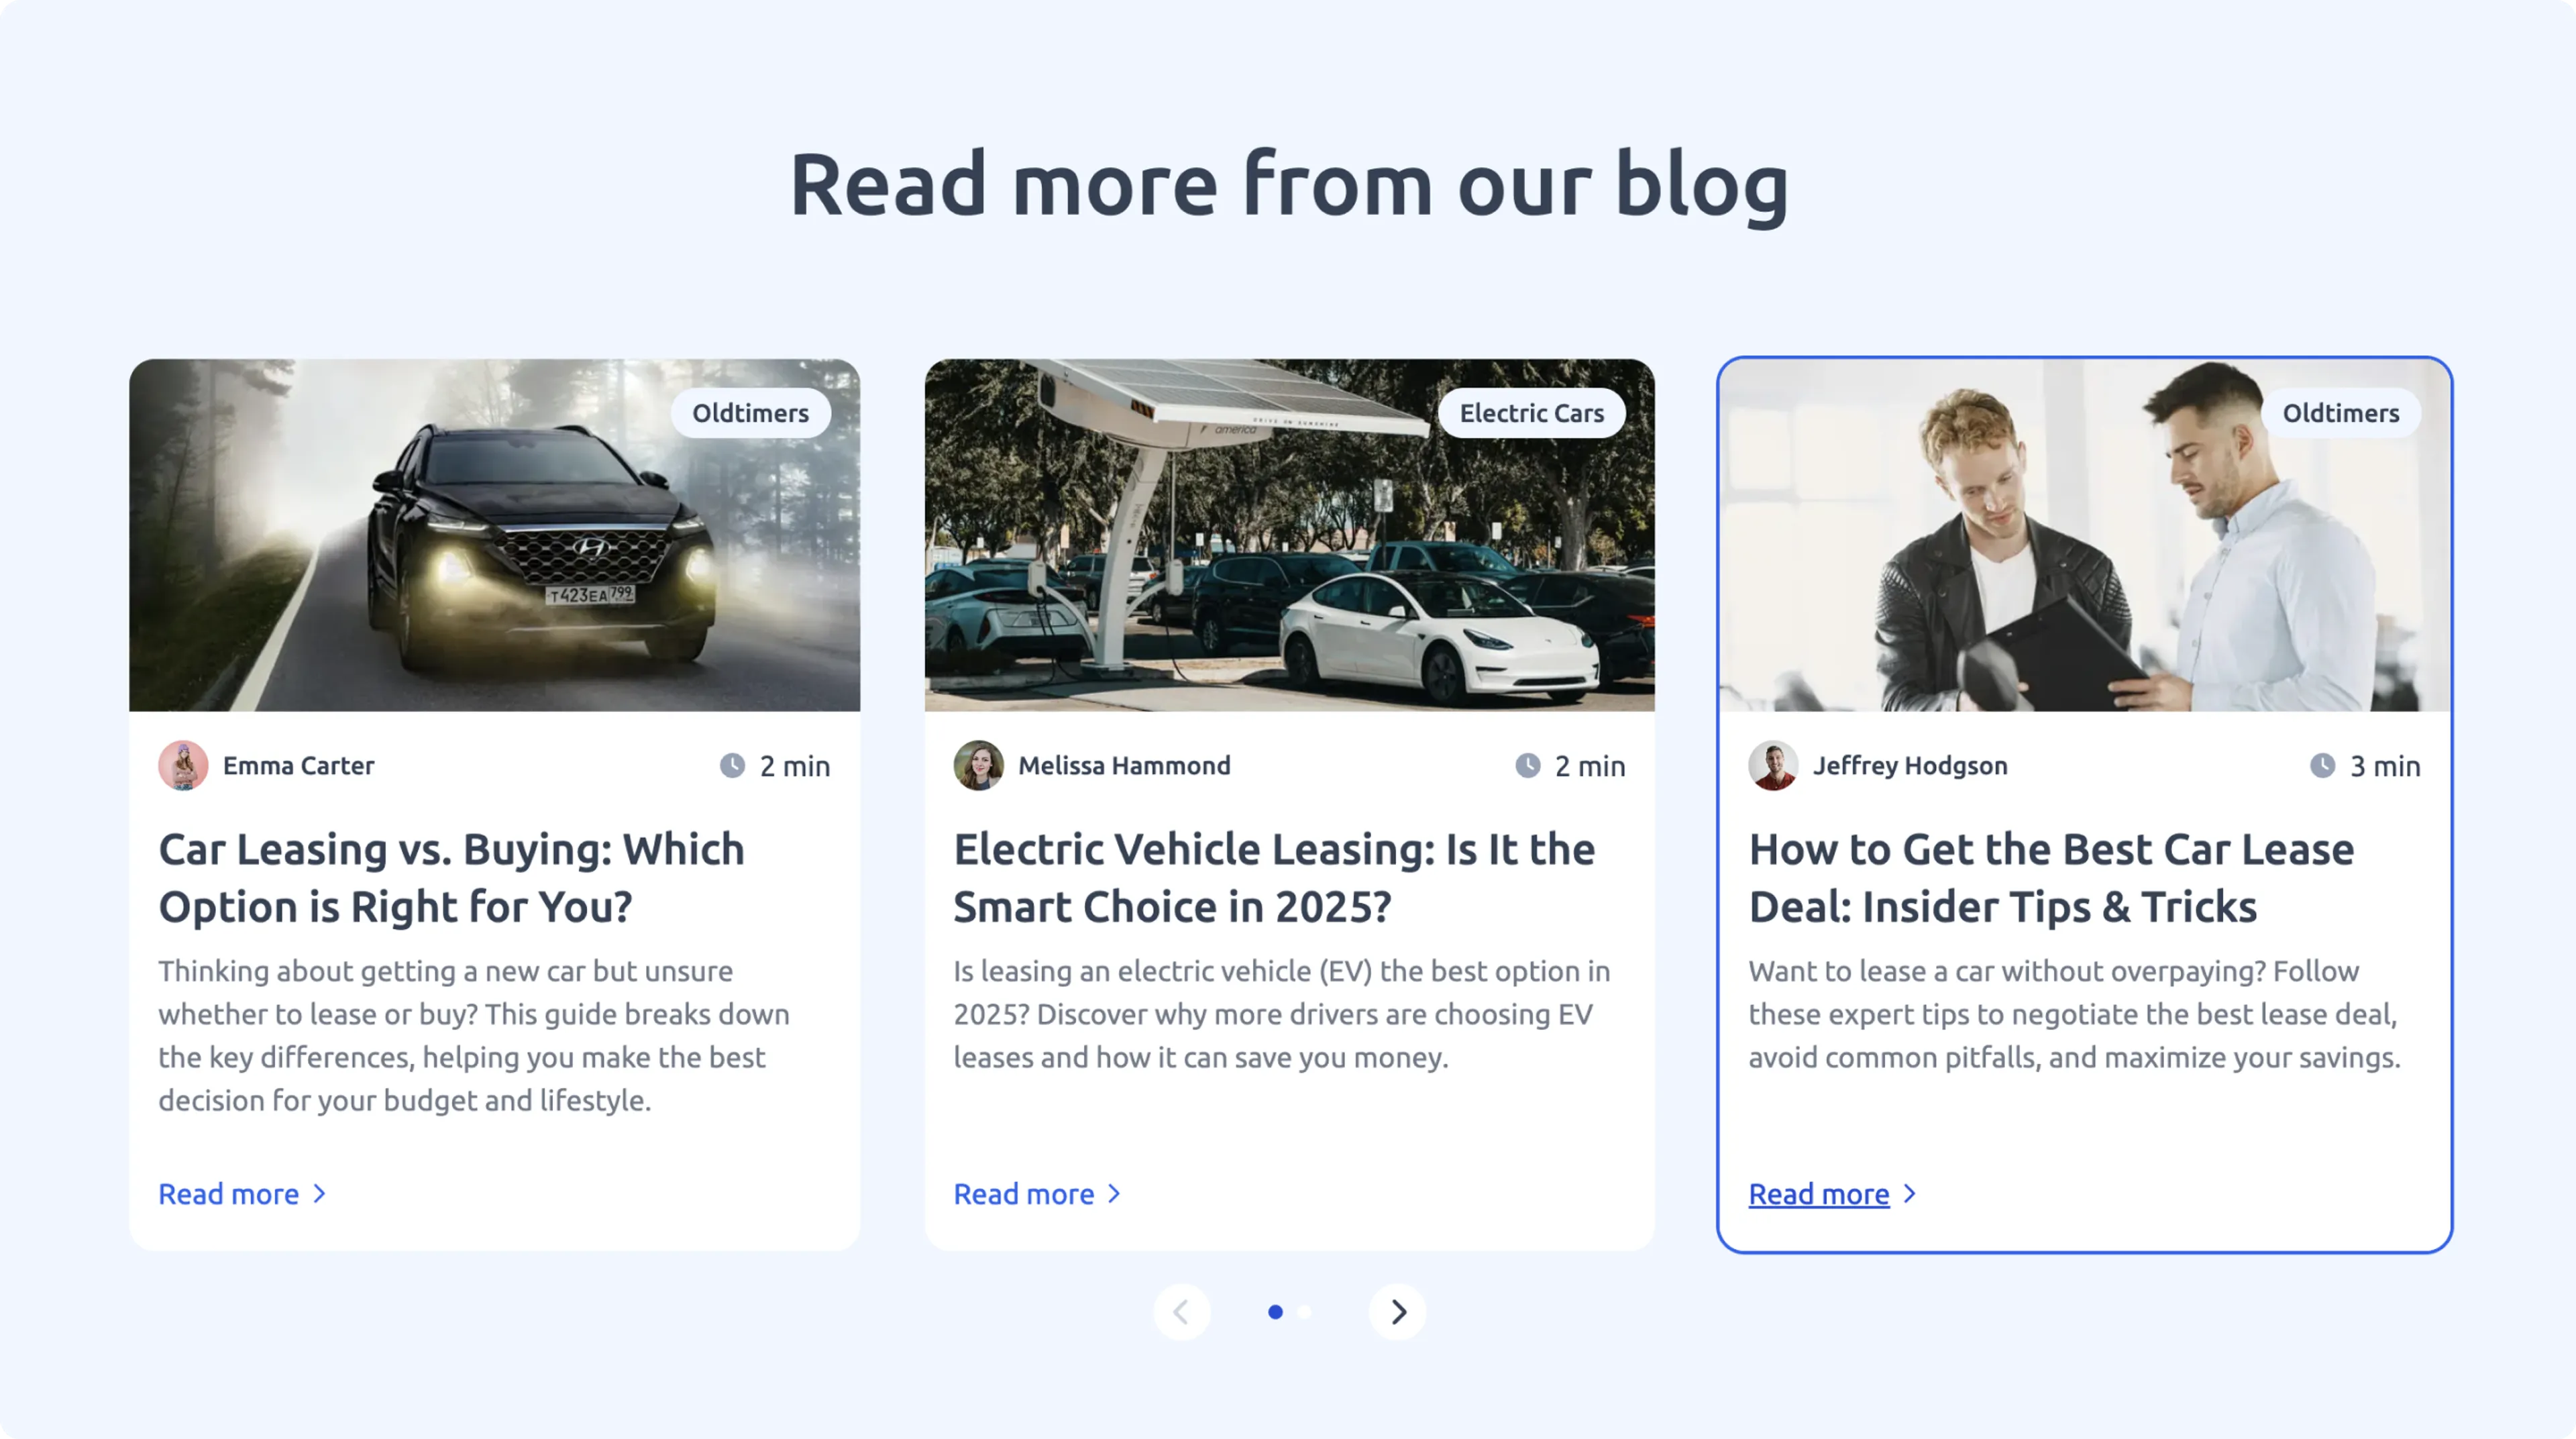
The *Cards* component is typically made up of the following fields:
|Field name |Field type| Description|
|------------------|-------------|--------|
|**Heading**| [Text](/content-modeling/field-types#text-field) |The heading text for the collection of cards.|
|**Sub heading**| [Text](/content-modeling/field-types#text-field) |More description text just below the heading.|
|**Cards**| [Stack](/content-modeling/field-types#stack-field) |Used to include several posts or product content items.|
|**Button**| [Component](/content-modeling/field-types#component-field) |This component allows editors to label the button and to either link the button to a URL, another page in the website, or to another content item. Maximum of one button or link.|
### FAQ
The *FAQ* model is useful to include some common questions and the corresponding answers.
By creating a model instead of a component, the content is reusable and the same questions and answers can be referenced in multiple pages.
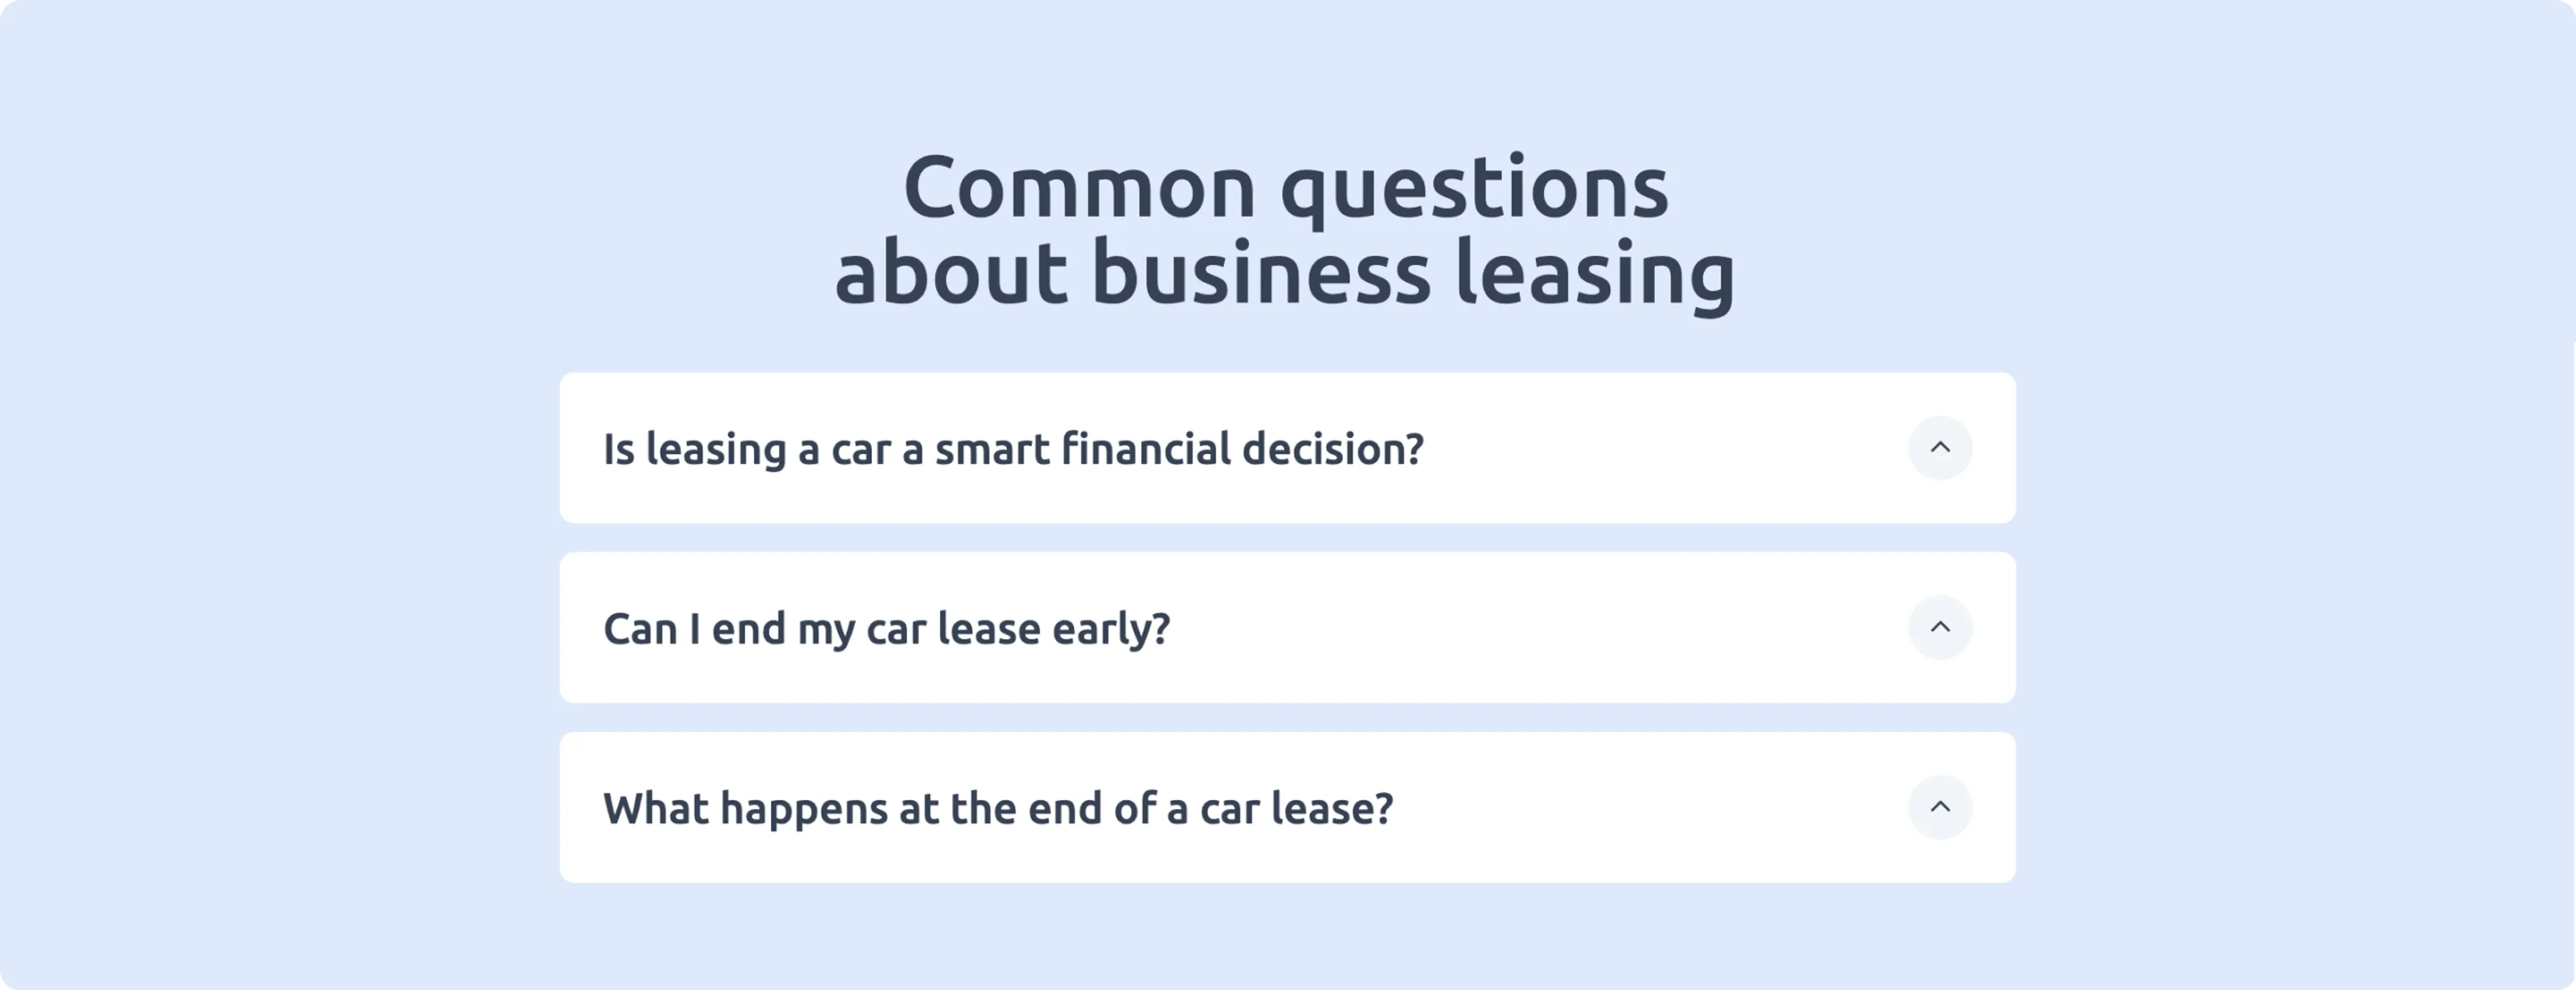
The *FAQ* model is made up of the following fields:
|Field name |Field type| Description|
|------------------|-------------|--------|
|**Internal Title**| [Text](/content-modeling/field-types#text-field) |The front end uses this field to link to the correct FAQ content item.|
|**Title**| [Text](/content-modeling/field-types#text-field) |The title for the section in the page.|
|**Questions**| [Stack](/content-modeling/field-types#text-field) |A list of questions and their corresponding answers.|
### Contact
The *Contact* component can be used to give website visitors the opportunity to contact the company.

The *Contact* component is typically made up of the following fields:
|Field name |Field type| Description|
|------------------|-------------|--------|
|**Heading**| [Text](/content-modeling/field-types#text-field) |The heading text for this contact form.|
|**Sub heading**| [Text](/content-modeling/field-types#text-field) |More descriptive text just below the heading.|
|**Form title**| [Text](/content-modeling/field-types#text-field) |The contact form title.|
|**Phone number**| [Text](/content-modeling/field-types#text-field) |Used for your company telephone number.|
|**Email**| [Text](/content-modeling/field-types#text-field) |Used to show the company email address.|
|**hubspot\_form\_id**| [Text](/content-modeling/field-types#text-field) |If you [add the HubSpot integration](/integrations/hubspot), you can use a matching `hubspot_form_id` to link to an existing HubSpot contact form.|
|**hubspot\_portal\_id**| [Text](/content-modeling/field-types#text-field) |If you [add the HubSpot integration](/integrations/hubspot), you can use a matching `hubspot_portal_id` to link to an existing HubSpot contact form.|
## What's next?
Now that you know how to model a page, let's go a step further and look at [how to set up personalization](/personalization/setting-up-personalization) doc.
## Other use cases
This guide explains how you can design just one example of a page for your web app. This page can be used for several types of pages, for example: home page or landing pages.
Feel free to use this structure and amend it to your needs.
Another use case we haven't covered could be a **Job postings** page.
In some cases, you may have to access content that is maintained in another system, for example, job postings information.
It makes sense that you may want to retrieve the items from the other system to ensure you have up to date information in Prepr.
In this example, you can include a job postings element on your page that references the job postings from the external system.
Prepr allows you to set up remote content in your model or component which is retrieved from a custom source.
Check out [how to set up a custom remote source](/content-modeling/creating-a-custom-remote-source) doc for more details.
## Want to learn more?
Check out the following guides:
- [More examples](/content-modeling/examples)
- [How to create a model in Prepr](/content-modeling/managing-models)
- [How to create a component in Prepr](/content-modeling/managing-components)
Source: https://docs.prepr.io/content-modeling/examples/page
---
# Navigation
*Navigation is a key structure that is implemented in every web app. In this article, we look at a typical navigation structure and explain the reasoning behind the modeling decisions.*
## Introduction
First, let's look at an example of a top navigation. This structure is the basis for our modeling process:
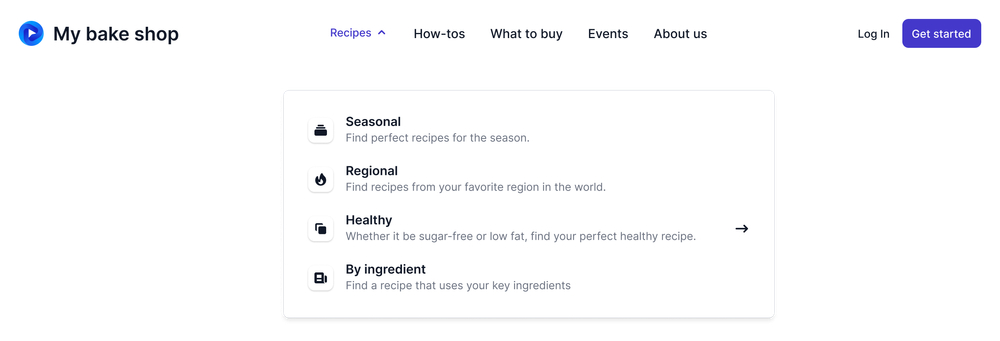
Using this example as a basis, we see that this navigation has a number of top-level (parent) menu items and these parent menu items have a number of child menu items. Prepr supports this type of nested items with the standard *content reference* field. It's possible for you to create content that references other content, even of the same *Model*. Check out the [Content reference field](/content-modeling/field-types#content-reference-field) docs for more details.
When a user clicks the lowest level child menu item, they are directed to a different page.
Let's look at the *Navigation* model in more detail.
## The navigation model
The *Navigation* model is a simple model, but is our starting point for this pattern.
See an example *Navigation* model below:
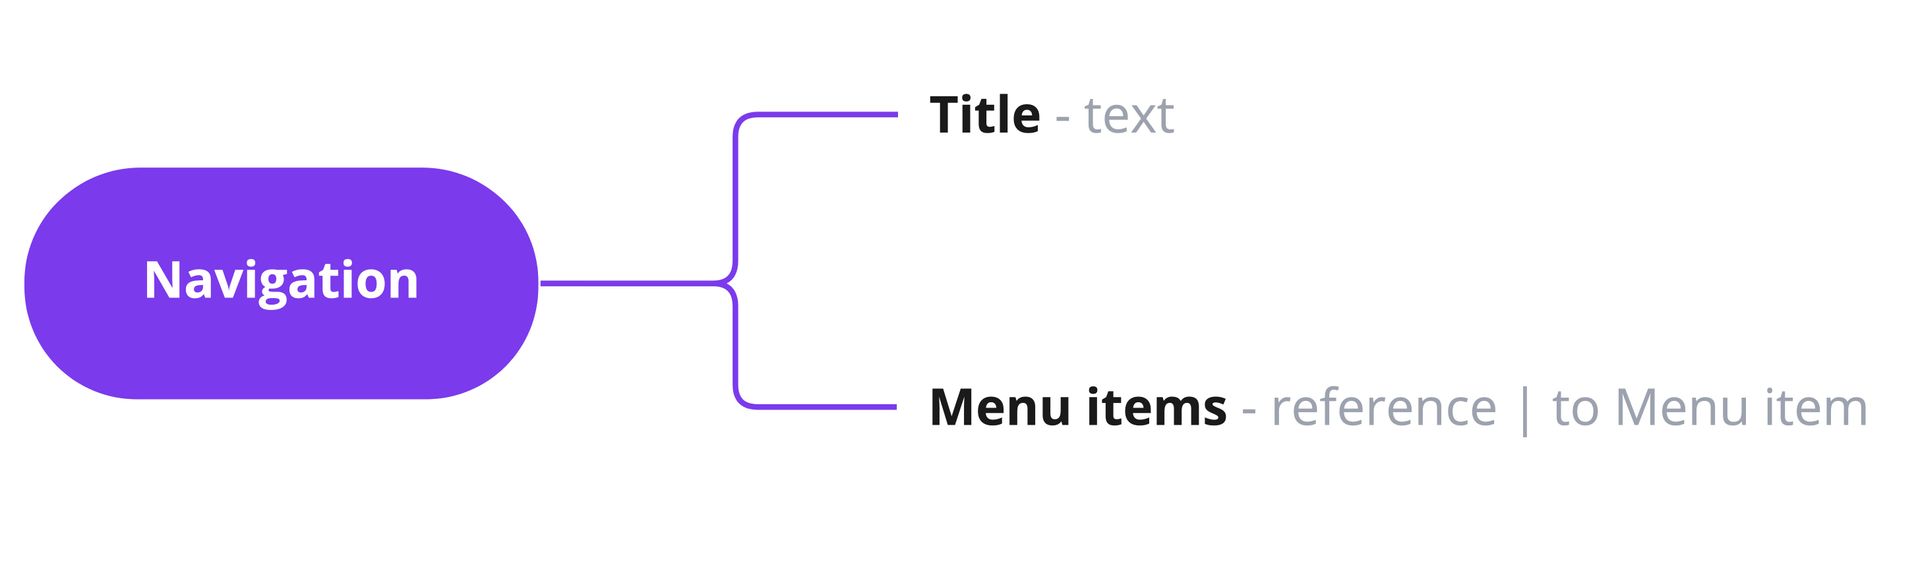
Within the *Navigation* model we define the following fields:
|Field name |Field type| Description|
|------------------|-------------|--------|
|**Title**|[Text](/content-modeling/field-types#text-field)|The title of the navigation, for example, *Top navigation*. Required. This title can be used to query the navigation through the API. |
|**Menu items**| [Content reference](/content-modeling/field-types#content-reference-field)|The navigation almost always has several menu items. This field makes a reference to the *Menu item* model. |
See a complete list of all other available [Prepr field types](/content-modeling/field-types).
Now, let's look at the *Menu items* field in more detail.
### Menu items
We set up a *Menu items* field in the *Navigation* model. This field references a *Menu item* model to avoid duplication of menu item content. The idea is that there could be content for the same menu items in different locations throughout the web app. For example, imagine that the same menu item appears in the top navigation as well as in the footer of a web page. This generic *Menu item* model caters for this situation and makes your schema more flexible and robust.

Within the *Menu item* model we define the following fields:
|Field name |Field type| Description|
|------------------|-------------|--------|
|**Title**|[Text](/content-modeling/field-types#text-field)|The title of the menu item visible on the navigation, for example, *Events*. Required. This title can also be used to query the menu item through the API. |
|**Link to page**| [Content reference](/content-modeling/field-types#content-reference-field) |When a user clicks a menu item, this field is used to open the correct internal page linked to this menu item. For more details on the Page model, check out the [Page pattern](/content-modeling/examples/page).|
|**Link to external page**| [Text](/content-modeling/field-types#text-field) |When a user clicks a menu item, this field is used to open an external page linked to this menu item. In Prepr, you can set this text field as HTML and enable the *Link* option.|
|**Description**|[Text](/content-modeling/field-types#text-field)| A short description for the menu item that is visible on the navigation, for example, *Check out our upcoming events*. |
|**Icon**|[Assets](/content-modeling/field-types#assets-field)|An optional icon that represents the menu item.|
|**Children**| [Content reference](/content-modeling/field-types#content-reference-field)|A reference to the *Menu item* model itself to create a parent-child hierarchy. The front-end queries this field to find all the children menu items for a particular parent.|
## Other use cases
In conclusion, this is just one example of how you can model any navigation for your web app. Feel free to use this structure and amend it to your needs.
- If you'd like to specify the display order of your children menu items in the content, consider adding a number field to the menu item model to specify the order. In this way, the front-end doesn't have to be updated when menu items need to be re-ordered.
## Want to learn more?
Check out the following guides:
- [More example patterns](/content-modeling/examples)
- [How to create a model in Prepr](/content-modeling/managing-models)
Source: https://docs.prepr.io/content-modeling/examples/navigation
---
# App config
*Application configuration is static information about a web app that seldom changes. In this article we look at an example of a typical application configuration model.*
{/*
You can create this pattern in Prepr automatically when you create a model. Choose the *App config pattern* template and the model described below will be created for you. */}
## Introducing the single-item-model
A lot of application configuration is not actually visible on a web app, but is essential to creating a working web app. Prepr supports this type of static once-off setup with the *single-item model*. The *single-item model* makes it much simpler for developers to query this type of content. Check out the [Single-item model](/content-modeling/managing-models#single-item-model) docs for more details.
Examples of app config content include, but is not limited to:
- *App name* - This is the name of the web app that is visible, for example when the app appears in a search list.
- *App description* - This is the brief description that is visible, for example when the app appears in a search list.
- *Company contact info* - This is information like the company's address and telephone number that is displayed on a web site.
- *Meta tags* - These are searchable tags at a web app level rather than at a page level.
- *Copyright information* - This is the static text that one often sees at the bottom of a web app to indicate copyright information.
Let's look at an *App config* model.
## An App config model
We define *App config* as a single-item model. This means that a content editor can only create one App config item. A single item also makes it easier for the front-end to query this content.
See an example *App config* model below:
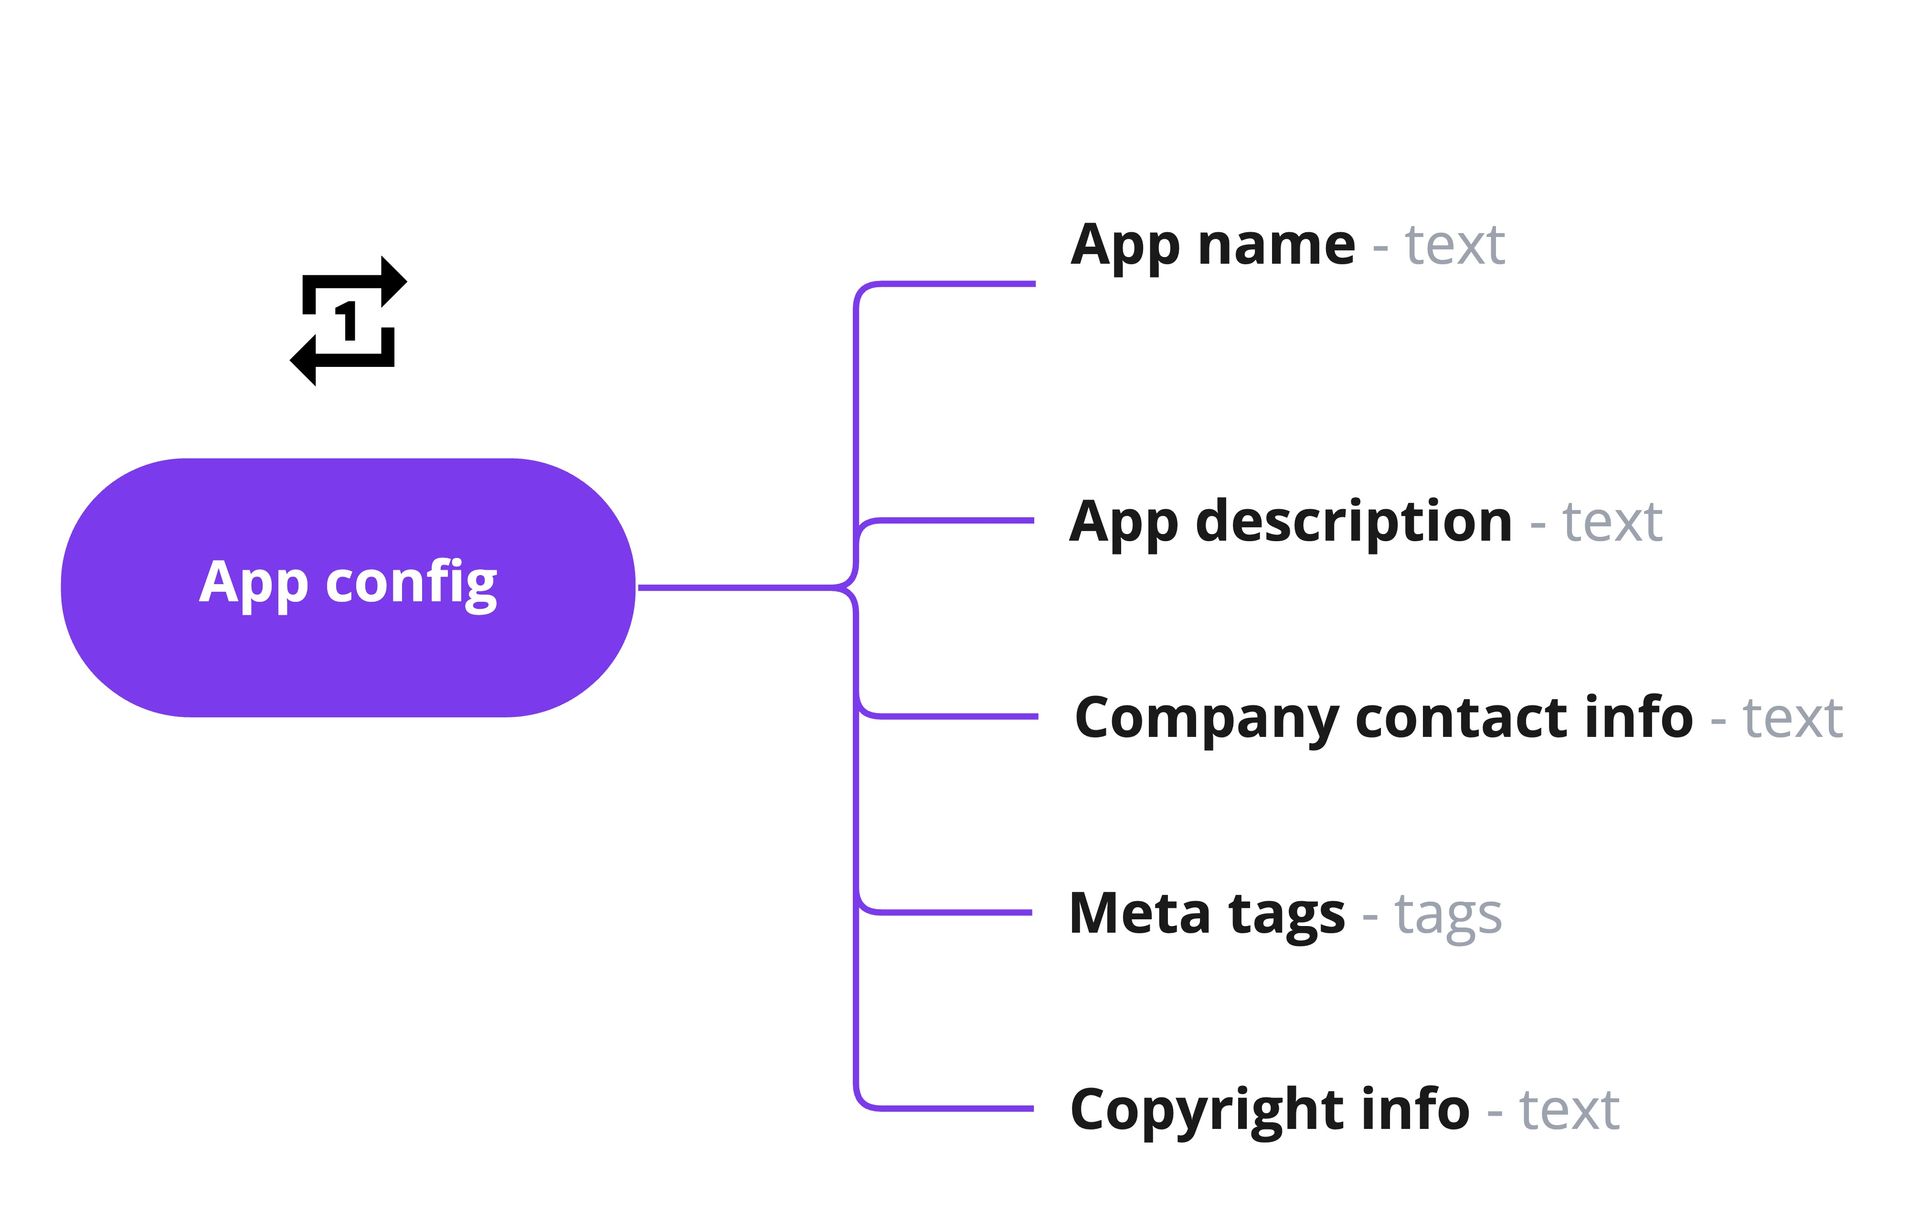
Within the *App config* model we define the following fields:
|Field name |Field type | Description|
|------------------|-------------|--------|
|**App name**|[Text](/content-modeling/field-types#text-field)|The app name is listed in internet searches or in the case of a mobile app is the name search in an app store. |
|**App description**| [Text](/content-modeling/field-types#text-field) | A brief description which is shown together with the *App name* in internet searches.|
|**Company contact info**| [Text](/content-modeling/field-types#text-field) | The company's address and telephone number. This content can then be displayed in the web app.|
|**Meta tags**| [Tags](/content-modeling/field-types#tags-field) | General tags for search engines to find the web app. These tags are not specific to particular pages.|
|**Copyright info**| [Text](/content-modeling/field-types#text-field) | The static text for copyright information on the web app.|
See a complete list of all other available [Prepr field types](/content-modeling/field-types).
## Other use cases
In conclusion, this is just one example of how you can structure app config. Feel free to use this structure and amend it to your needs.
- If you would like to include a *Follow us* box in your web app, you could also design a *Social media links* field that contains links to the company's social media profiles.
- It's possible that your website uses a default CSS other than special styling for specific pages. In this case, you can also include a *Default CSS* field in your App config model.
## Want to learn more?
Check out the following guides:
- [More example patterns](/content-modeling/examples)
- [How to create a model in Prepr](/content-modeling/managing-models).
Source: https://docs.prepr.io/content-modeling/examples/app-config
---
# Content modeling examples
These examples will help you gain a good sense on how to model your schema. They explain how to set up commonly used UX patterns. Feel free to copy these examples and adjust them according to your needs.
Source: https://docs.prepr.io/content-modeling/examples
---
# Acme Lease demo website
*This guide covers info about the Prepr CMS - Next.js demo website based on a fictional car leasing company, Acme Lease.*
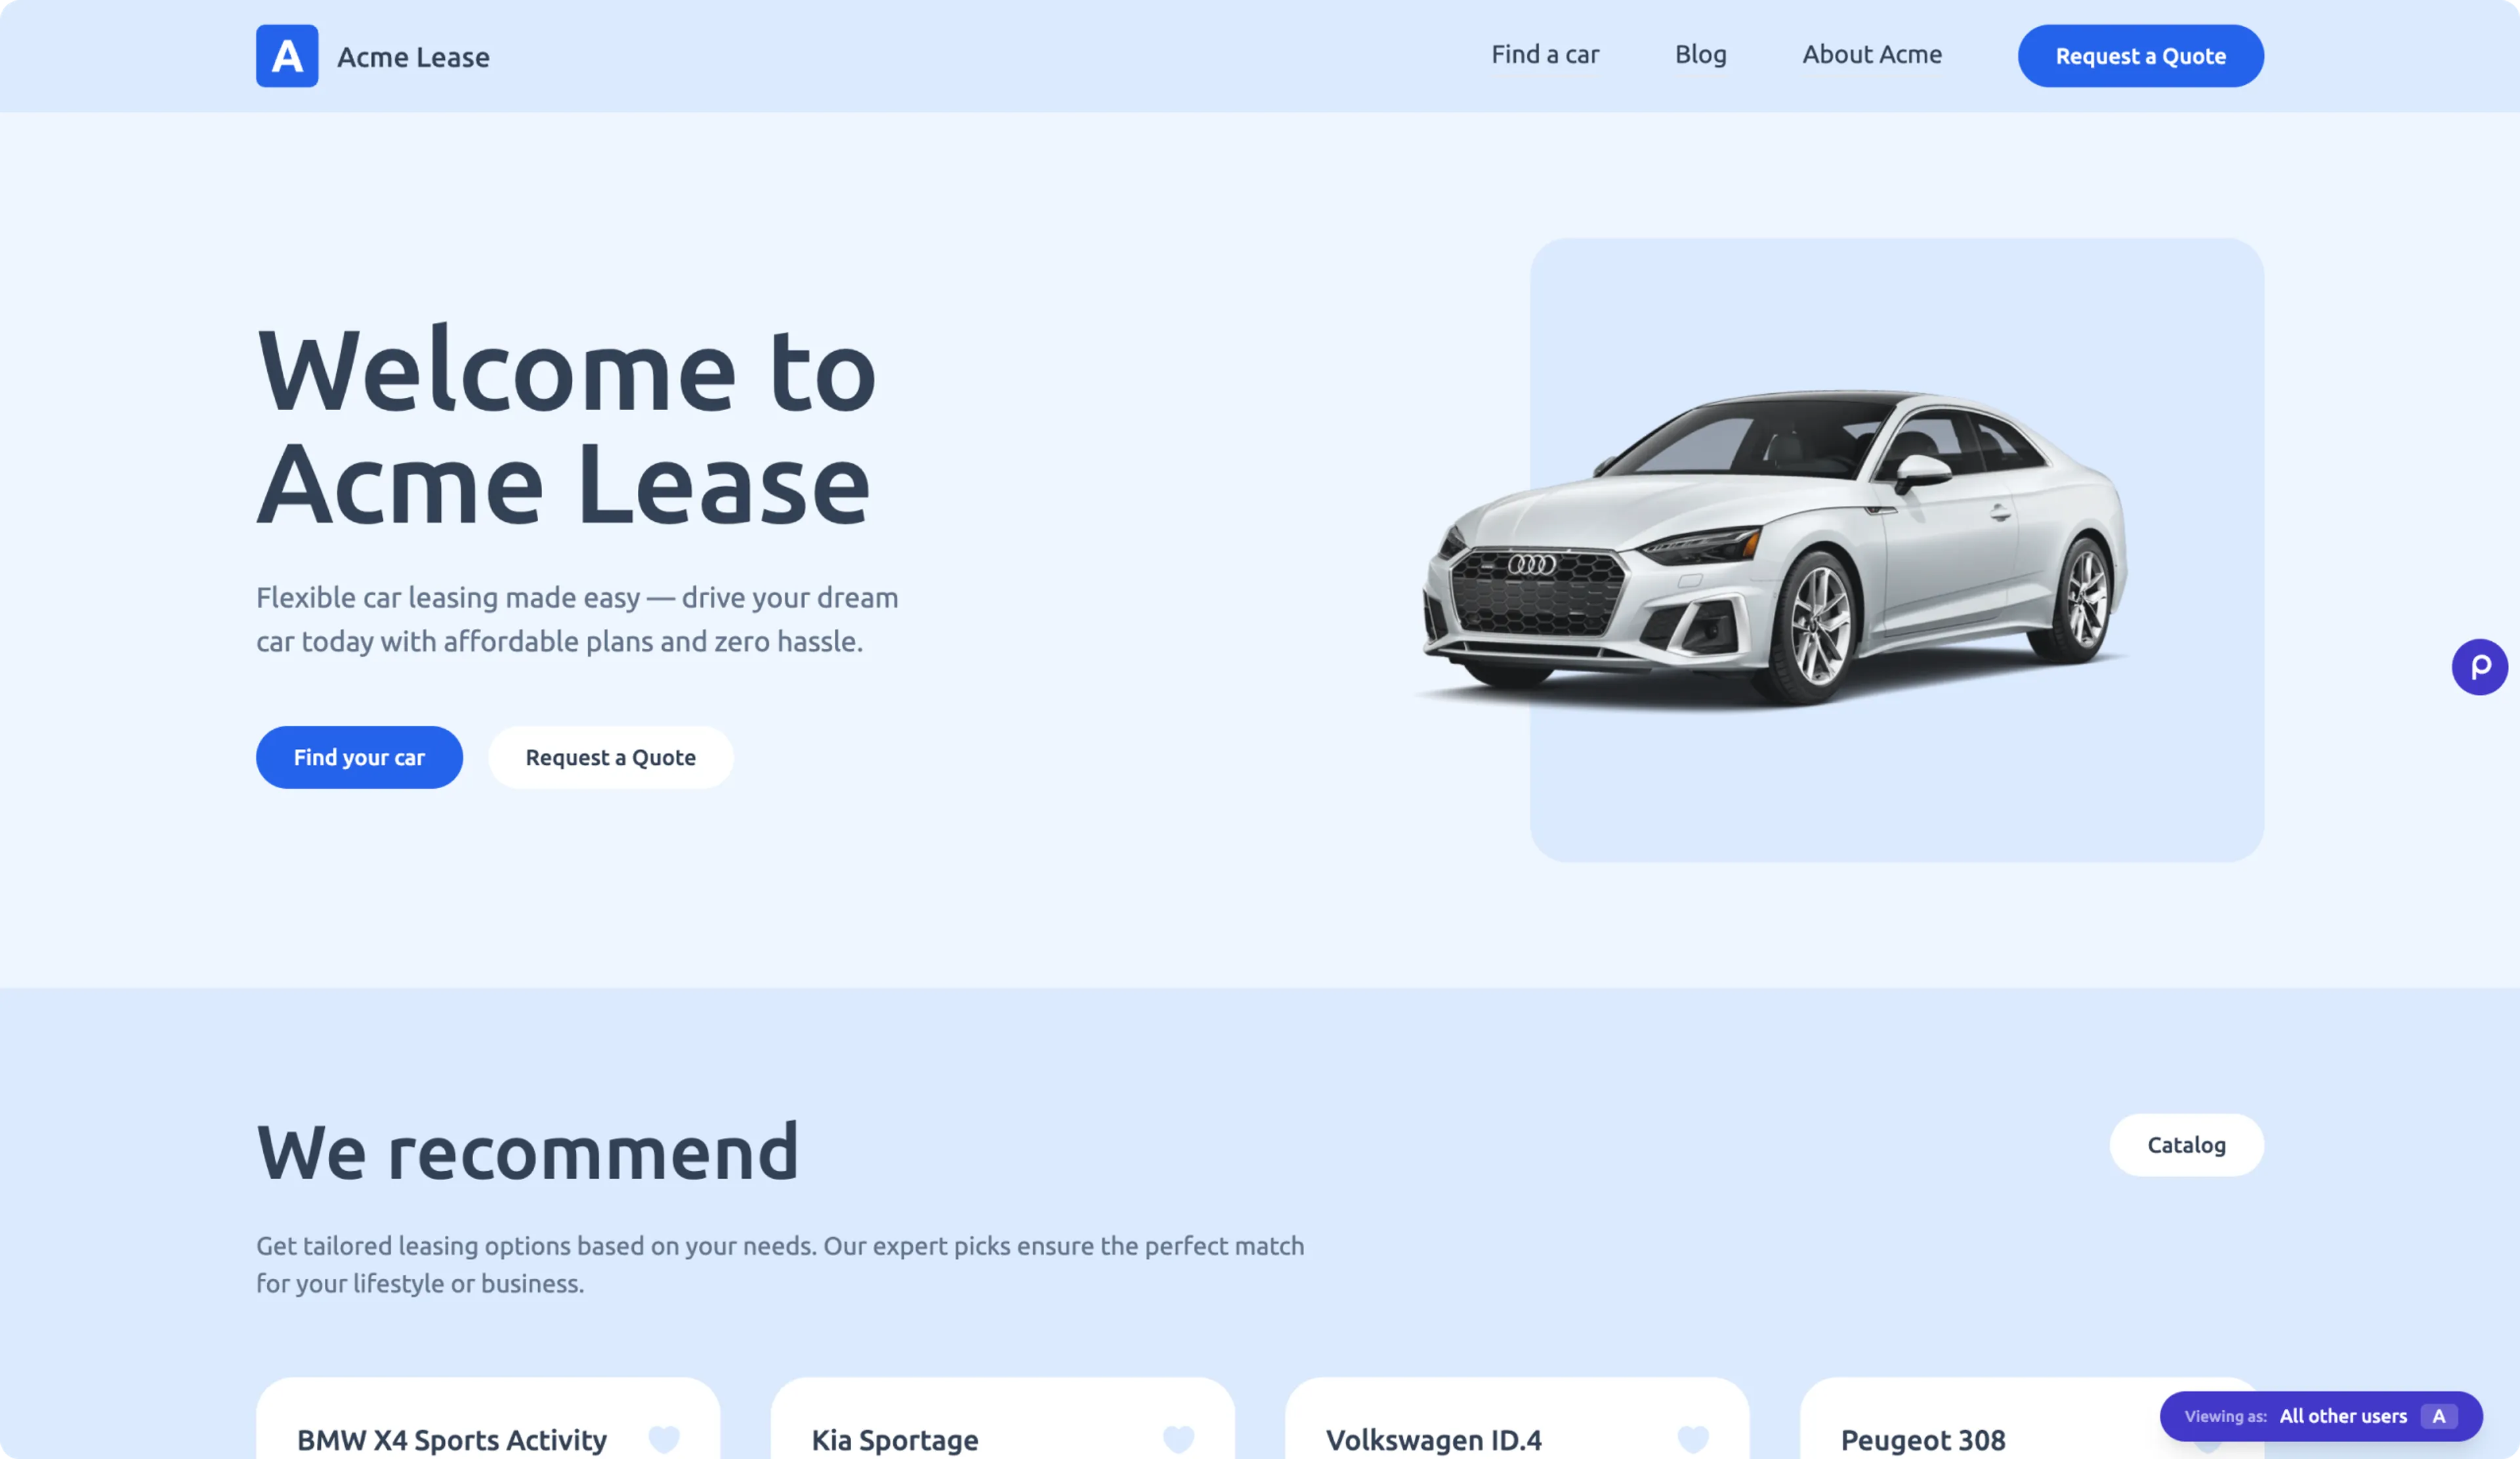
## Prerequisites
You need to have the following setup before you clone, run and deploy this website from the [GitHub repo](https://github.com/preprio/acme-lease).
- [A free Prepr account](https://signup.prepr.io) with an environment with [demo data](/project-setup/setting-up-environments#create-an-environment)
## About the Acme Lease Demo
This demo website is a real-world example built for Acme Lease, a fictional car leasing company.
It serves as a functional showcase of how to implement a staging website with Next.js and Prepr CMS including a personalized home page and conversion-focused landing pages.
Under the hood, the project leverages the following tech stack designed for speed and scalability:
- *Prepr CMS*
- *Next.js*
- *Apollo Client*
- [*Prepr Next.js package*](/prepr-nextjs-package)
Beyond dynamically rendered content, the demo website highlights Prepr's key marketing features.
You can explore personalized pages tailored to visitor behavior and observe active A/B tests designed to optimize conversion rates.
The site includes an accessible Prepr icon, granting instant access to preview options and experiment testing, to make sure every update is perfect before it goes live.
## Features
The Acme Lease demo website includes the following Prepr CMS features:
### Dynamic content
The [*Dynamic content* field](/content-modeling/field-types#dynamic-content-field) is a flexible editor designed for rich storytelling.
It allows editors to mix and match various elements, such as structured text, headings, tables, embedded assets and components.
It's commonly used for blog articles where you need to intersperse text with images, videos or social media embeds.
The Acme Lease demo website gives you an example on how to render various [dynamic content elements](https://github.com/preprio/acme-lease/blob/main/src/components/blog/blog-content.tsx) to display blog posts.
### Adaptive content
The core personalization engine in Prepr CMS allows marketers to create [adaptive content](/personalization/managing-adaptive-content).
Marketers can create multiple versions of a content element tailored to specific visitor segments, like *Electric Car Lovers*.
Instead of a "one-size-fits-all" approach, the CMS automatically serves the most relevant content variant in real-time based on visitor behavior, location, or data from external CRMs.
Explore how we enable the [Prepr tracking pixel](https://github.com/preprio/acme-lease/blob/main/src/app/%5Blocale%5D/layout.tsx) to show adaptive content to the right segments, like the personalized home page.
The relevant components of the page include [HTML attributes](https://github.com/preprio/acme-lease/blob/main/src/components/sections/hero-section.tsx) to trigger Prepr to calculate metrics for each personalized variant.
### A/B tests
The [A/B test](/ab-testing/running-ab-tests) feature allows marketers to test different versions of a component or text field (Variant A vs. Variant B) directly in Prepr.
By tracking impressions and conversion events (like button clicks) for each variant, marketers can identify which headlines, images, or CTAs perform better before committing to a content variant.
Explore how we enable the [Prepr tracking pixel](https://github.com/preprio/acme-lease/blob/main/src/app/%5Blocale%5D/layout.tsx) to show either the A or B variant to website visitors, like the *Electric lease* landing page.
The relevant components of the page include [HTML attributes](https://github.com/preprio/acme-lease/blob/main/src/components/sections/hero-section.tsx) to trigger Prepr to calculate metrics for each variant.
### Preview toolbar
The [*Preview toolbar*](/prepr-nextjs-package) is a powerful tool included in the Prepr Next.js package.
Content editors and marketers can use it to validate their work.
It appears as a floating Prepr icon on your staging site, allowing them to:
- Switch segments: Manually toggle between visitor segments to see how personalized content looks for each segment.
- Preview A/B Tests: Quickly swap between variant A and B in a page with an A/B test.
- Direct edit links: Click through from the preview page directly to the specific content item in your Prepr environment for instant updates.
### Coding best practices
Based on our experience and discussions with our partners, we've accumulated knowledge on some best practices when coding front-end web apps with Prepr CMS and have included the following practices in this project:
- [GraphQL *Codegen*](https://the-guild.dev/graphql/codegen) - We use this tool to automatically generate code from the the Prepr GraphQL schema and operations.
- [Section *Type* mapping](https://github.com/preprio/acme-lease/blob/main/src/types/sections.ts) - To make sure only developed sections are rendered and each section is rendered in a type safe way.
- [Query fragments](https://github.com/preprio/acme-lease/tree/main/src/queries/fragments) - To remove duplication in queries. Using fragments result in smaller queries and makes it is easier to map to component props.
## Deployment
Go to the public Acme Lease demo [GitHub repo](https://github.com/preprio/acme-lease) to clone this project and follow the installation instructions in the readme.
You can also follow the deployment instructions to deploy to Vercel in one click.
## Next steps
To learn more on how to expand your project, check out the following resources:
- [Create a Next.js complete website from scratch](/connecting-a-front-end-framework/nextjs/next-complete-guide)
- [Draft more queries for components and other field types](/graphql-api)
- [Understand the Prepr Next.js package](/prepr-nextjs-package)
Source: https://docs.prepr.io/connecting-a-front-end-framework/nextjs/acme-lease-demo
---
# Next.js Quick start guide
*Estimated duration: 10 minutes*
*This guide shows you how to connect Prepr to a Next.js project to get data from Prepr CMS. You'll learn how to make a simple blog with Next.js and Prepr CMS. By the end of this guide, you'll have a working app that looks like the image below.*
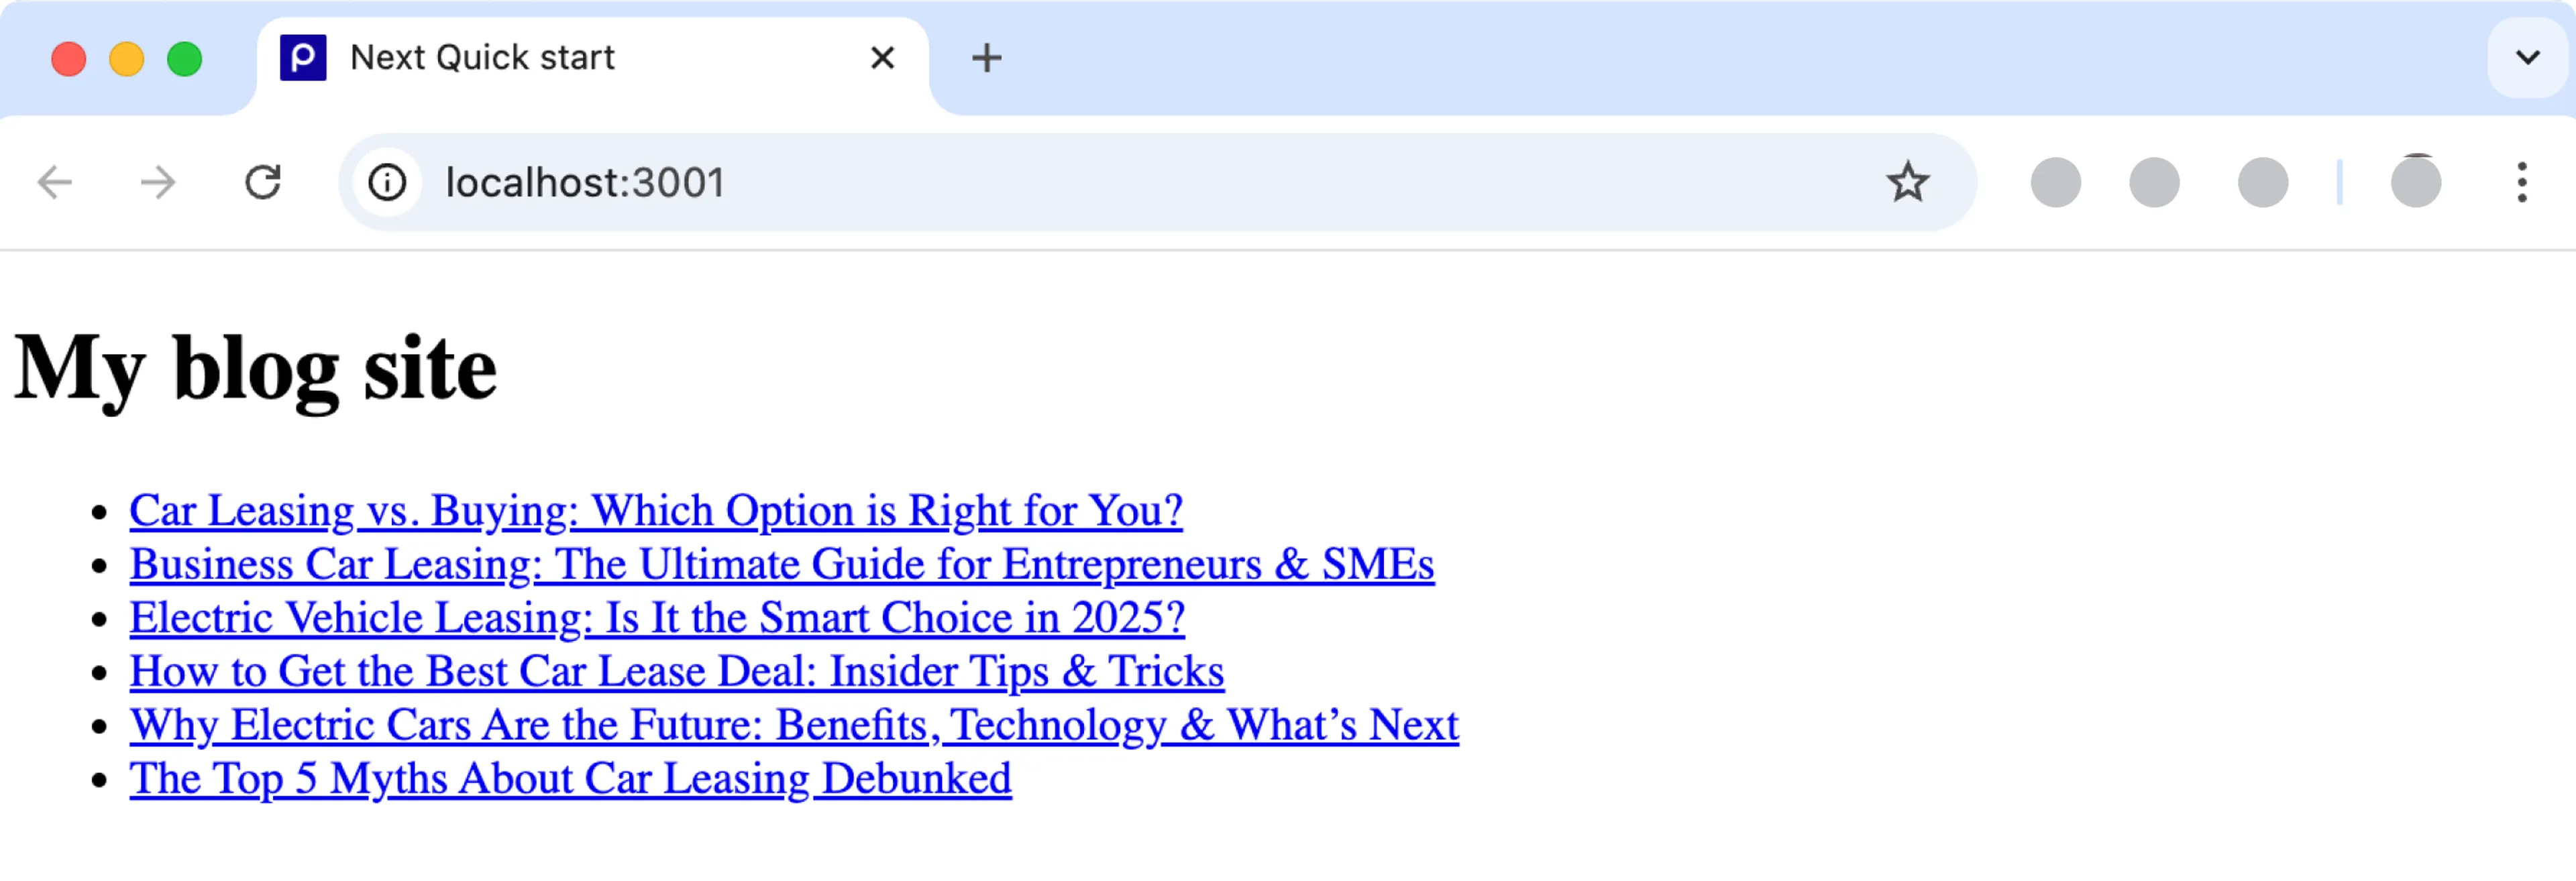
## Prerequisites
You need to have the following setup before you connect your Next.js project to Prepr.
- [A free Prepr account](https://signup.prepr.io)
- [An environment with demo data in Prepr](/project-setup/setting-up-environments#create-an-environment)
- [The latest version of Node.js](https://nodejs.org/en)
## Create a simple Blog website with Next.js and Prepr CMS
## All done
Congratulations! You have successfully connected a Next project to Prepr for a simple Blog app.
## Next steps
To learn more on how to expand your project, check out the following resources:
- [Add A/B testing and Prepr personalization to your Next app](/connecting-a-front-end-framework/nextjs/next-complete-guide)
- [Draft more queries for components and other field types](/graphql-api)
- [How to install and use the Next Tailwind module](https://nextjs.org/docs/app/building-your-application/styling/tailwind-css)
- [Deploy your Next app with Vercel](https://nextjs.org/learn-pages-router/basics/deploying-nextjs-app)
Source: https://docs.prepr.io/connecting-a-front-end-framework/nextjs/next-quick-start-guide
---
# Complete guide to Next.js and Prepr
*This guide shows you how to connect Prepr to a Next.js project including styling, adaptive content, A/B testing and a preview bar.*
Follow the steps below in the recommended order to set up your own working Next.js website with adaptive content, A/B testing and a preview bar.
You can also customize this project to fit the requirements for your web app.
Source: https://docs.prepr.io/connecting-a-front-end-framework/nextjs/next-complete-guide
---
# Caching strategies for Next.js and Apollo Client
*This article gives you insight into caching strategies and our recommendation when connecting your Next.js web app with Prepr CMS using Apollo Client.*
## Introduction
Caching is the process of storing copies of data in a temporary storage layer so that future requests for that data can be served faster.
Instead of fetching data from the CMS every time, cached data can be retrieved quickly from a nearby location like memory, a server, or a CDN.
## Caching layers
When connecting your Next.js front end to Prepr CMS using Apollo Client, caching happens at several layers.
### Next.js
There are different caching mechanisms in Next.js, each serving their own purpose:
- *Request Memorization* is only persistent per request cycle and isn’t relevant for Prepr caching strategies.
- *Data Cache* is turned off by default and can be opted in using `{ cache: 'force-cache' }` with the native `fetch` API.
- *Full Route Cache* is enabled by default, but if a route has a `fetch` request that is not cached then this will opt you out of the *Full Route Cache*. Since caching of the data cache is turned off by default, you will also not use the full route cache.
- *Router Cache* is responsible for caching layouts, loading states and pages on backwards and forward navigation.
In your front end you can configure the caching behavior for individual routes and data requests.
If you don't set any caching options when fetching from the API, both the *Data Cache* and the *Full Route Cache* are not active and data is refetched on every request.
For more details, check out the [Next.js caching docs](https://nextjs.org/docs/app/deep-dive/caching).
### Apollo Client
Apollo Client stores the results of your GraphQL queries in a local, normalized, in-memory cache.
This enables Apollo Client to respond almost immediately to queries for already-cached data, without even sending a network request.
For more details, check out the [Apollo Client caching docs](https://www.apollographql.com/docs/react/caching/overview).
### Prepr CDN
All Prepr content is served by a globally distributed content delivery network (CDN).
When you send your first API request to fetch data from Prepr, the response is cached in an edge cache location.
For more details, checkout the [GraphQL API caching doc](/graphql-api/caching).
## Recommendation
To make the most out of the dynamic Prepr features, personalization and A/B testing, we recommend setting up your front end for [SSR (server-side rendering)](/development/best-practices/csr-ssr-ssg#server-side-rendering-ssr).
Check out the [Next.js complete guide](/connecting-a-front-end-framework/nextjs/next-complete-guide/step-2-make-the-project-dynamic) for an example Next.js project using Apollo Client.
## Prepr Next.js SSG example
If you choose not to use Prepr personalization or A/B testing, you can implement a caching strategy in Next.js and Apollo Client to build an SSG (statically generated) website.
Check out the [Prepr Next.js static GitHub repo](https://github.com/preprio/prepr-nextjs-static) for example `page.tsx` code to view the Next.js and Apollo Client cache setup.
This project also includes two webhooks, `api/post-published` and `api/post-updated` which reset the cache if triggered.
To create a simple SSG blog site, follow the steps below.
1. Clone the [Prepr Next.js static GitHub repo](https://github.com/preprio/prepr-nextjs-static).
2. Copy the `.env.example` file to a new `.env` file by running the following command:
```bash
cp .env.example .env
```
3. In the .env file, replace `{YOUR_GRAPHQL_URL}` with the *API URL* of the Prepr *GraphQL* access token from your Acme Lease demo environment.
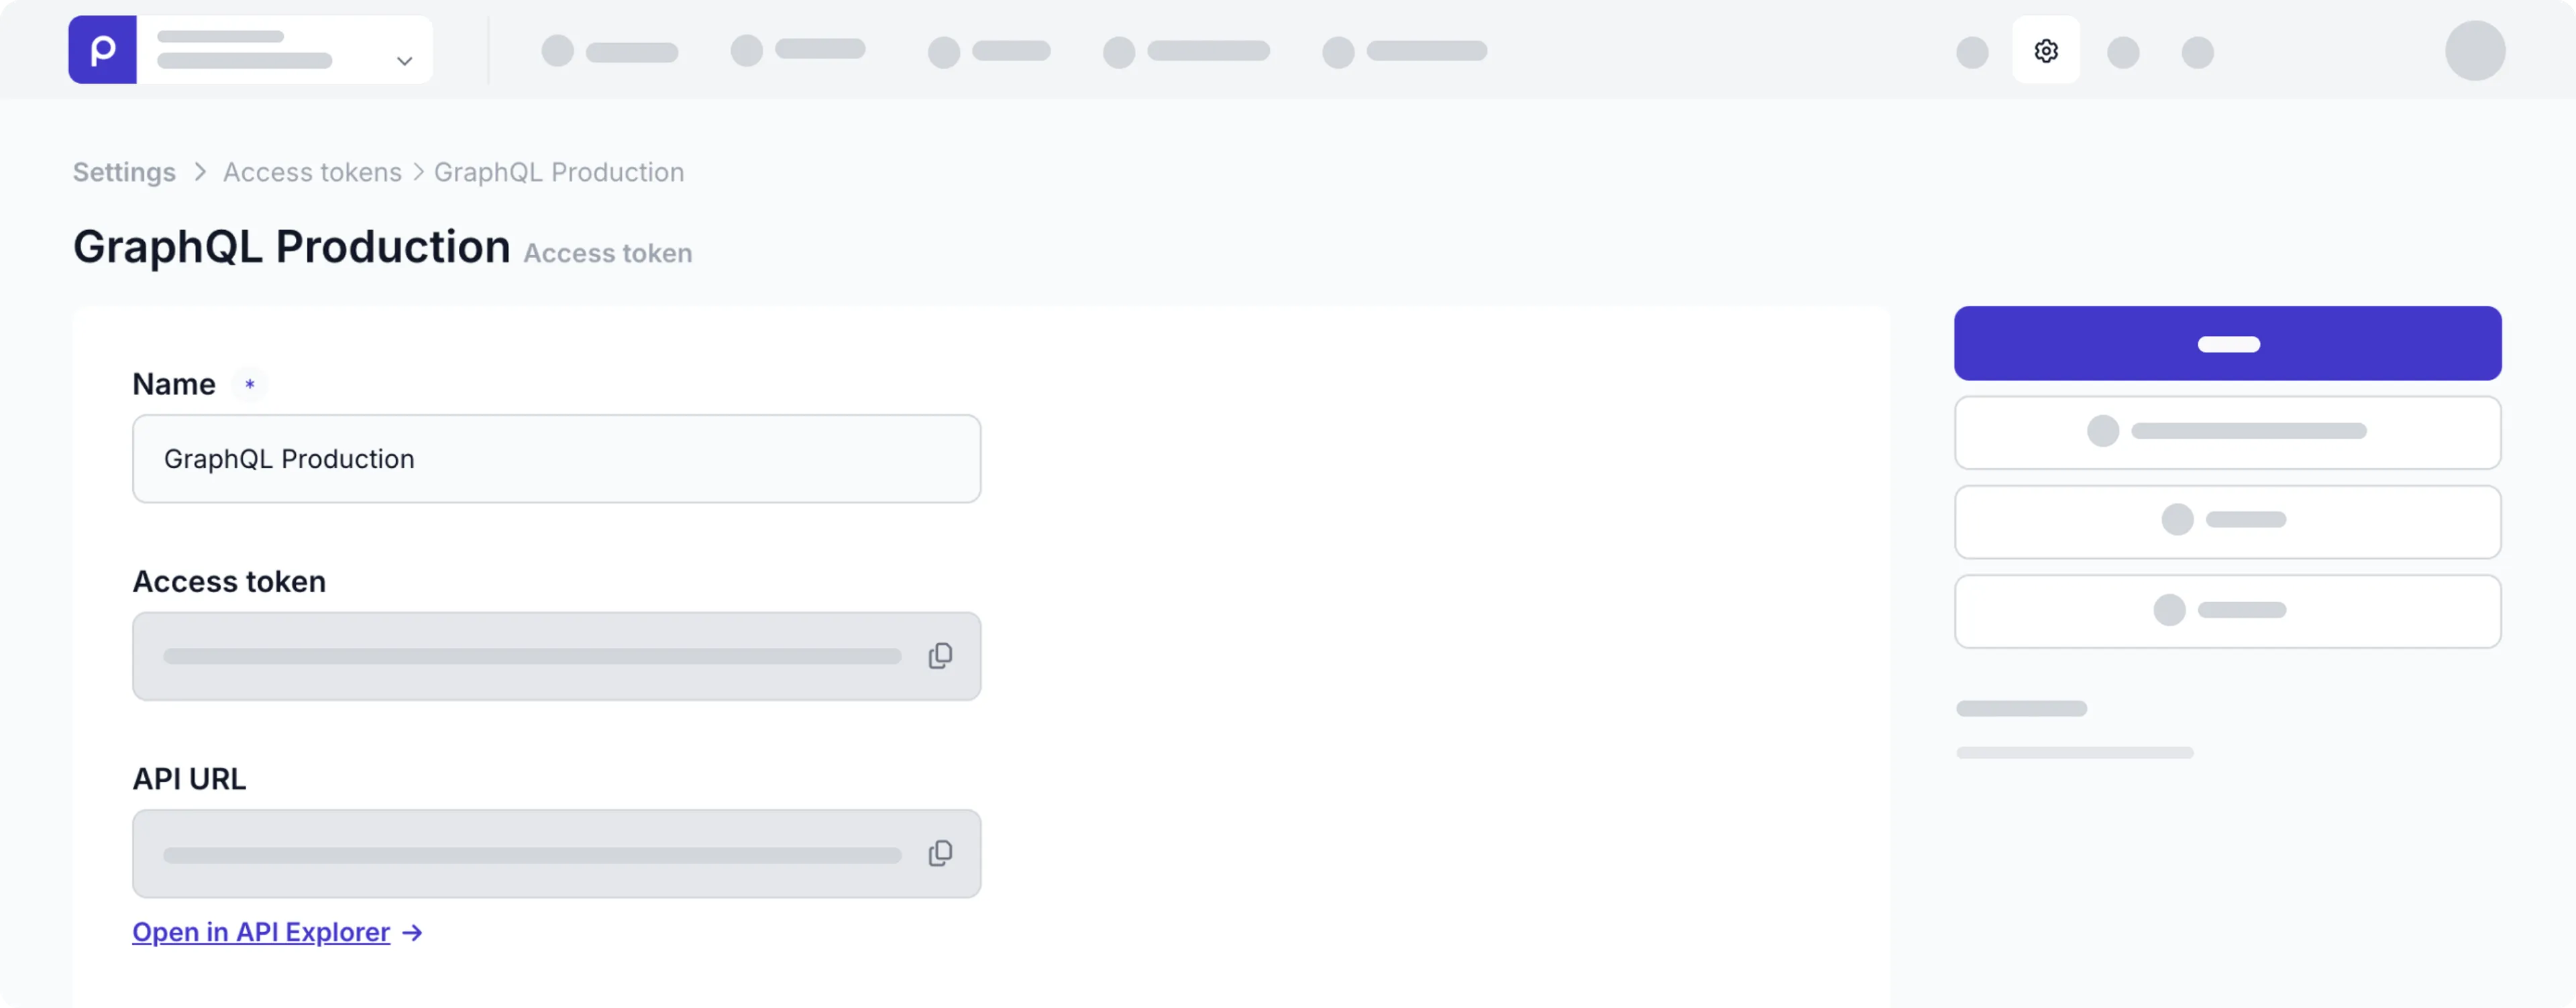
4. Deploy the app in your preferred deployment tool. You need the deployed URL to set up the webhooks in Prepr in the next step.
5. Configure two webhooks in Prepr to listen for changed and published content and trigger your site to reset the cache.
- Set the **URL** value to `{YOUR_DEPLOYMENT_URL}/api/post-updated`, choose `content-item.changed` for **Events** and choose `Post` for **Models**.

- Set the **URL** value to `{YOUR_DEPLOYMENT_URL}/api/post-published`, choose `content-item.published` for **Events**, and choose `Post` for **Models**.
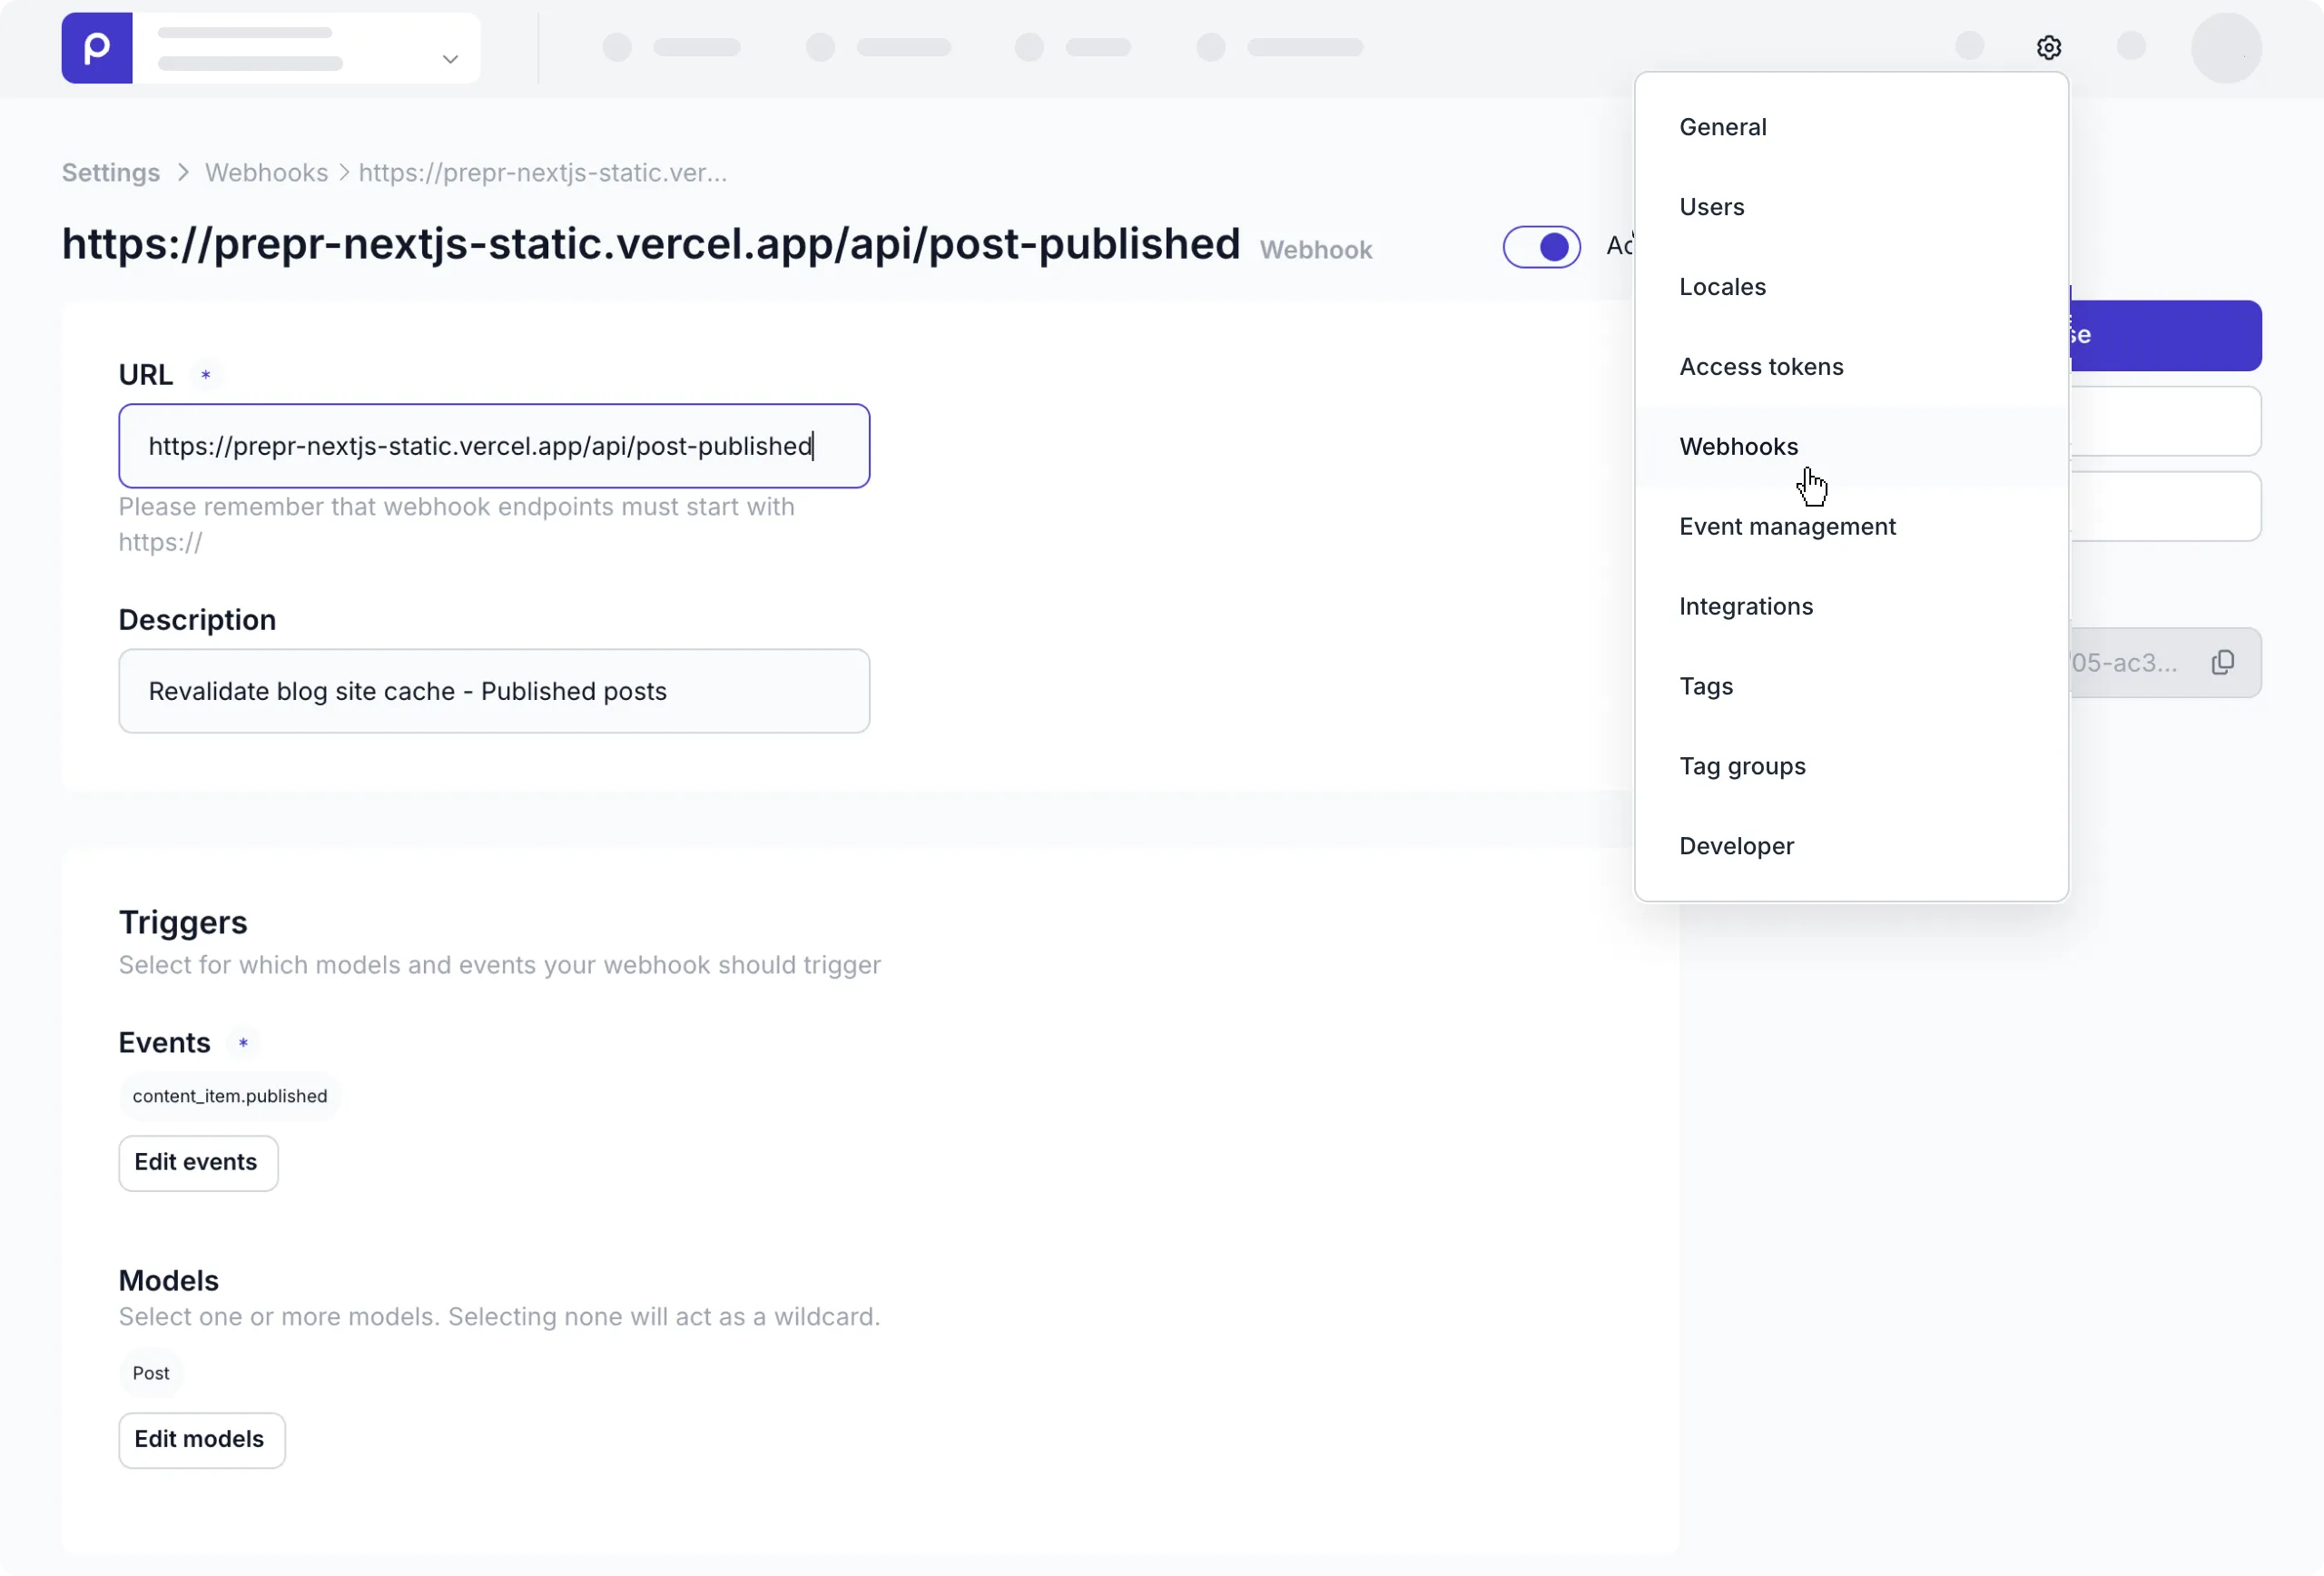
All done! Now you have a simple SSG blog post site that renders updated content whenever content is changed or published.
## Next steps
To learn more on how to expand your Next.js project, check out the following resources:
- [More data collection details](/data-collection)
- [More about A/B testing](/ab-testing)
- [More about personalization](/personalization)
Source: https://docs.prepr.io/connecting-a-front-end-framework/nextjs/caching-strategies
---
# Next.js + Prepr CMS
Need info on Prepr for a Next.js app?
Look no further.
This all-in-one page gives you all the resources you need to connect your project to Prepr and to set up pages exactly the way your marketers want them.
## Acme Lease demo website
## Next.js Quick start guide
## Next.js Complete guide
## Prepr Next.js package
The Prepr Next.js package enables you to set up A/B testing, personalization, and a preview bar - allowing you to seamlessly test and optimize content for different audience segments in your staging environment.
## Next.js blog examples
## Other resources
- [Rendering strategies, SSR or SSG?](/development/best-practices/csr-ssr-ssg)
- [How to set up personalization](/personalization/setting-up-personalization)
- [How to set up A/B testing](/ab-testing/setting-up-ab-testing)
Source: https://docs.prepr.io/connecting-a-front-end-framework/nextjs
---
# Nuxt Quick start guide
*Estimated duration: 10 minutes*
*This guide shows you how to connect Prepr to a Nuxt project to get data from Prepr CMS. You'll learn how to make a simple blog with Nuxt and Prepr CMS. By the end of this guide, you'll have a working app that looks like the image below.*
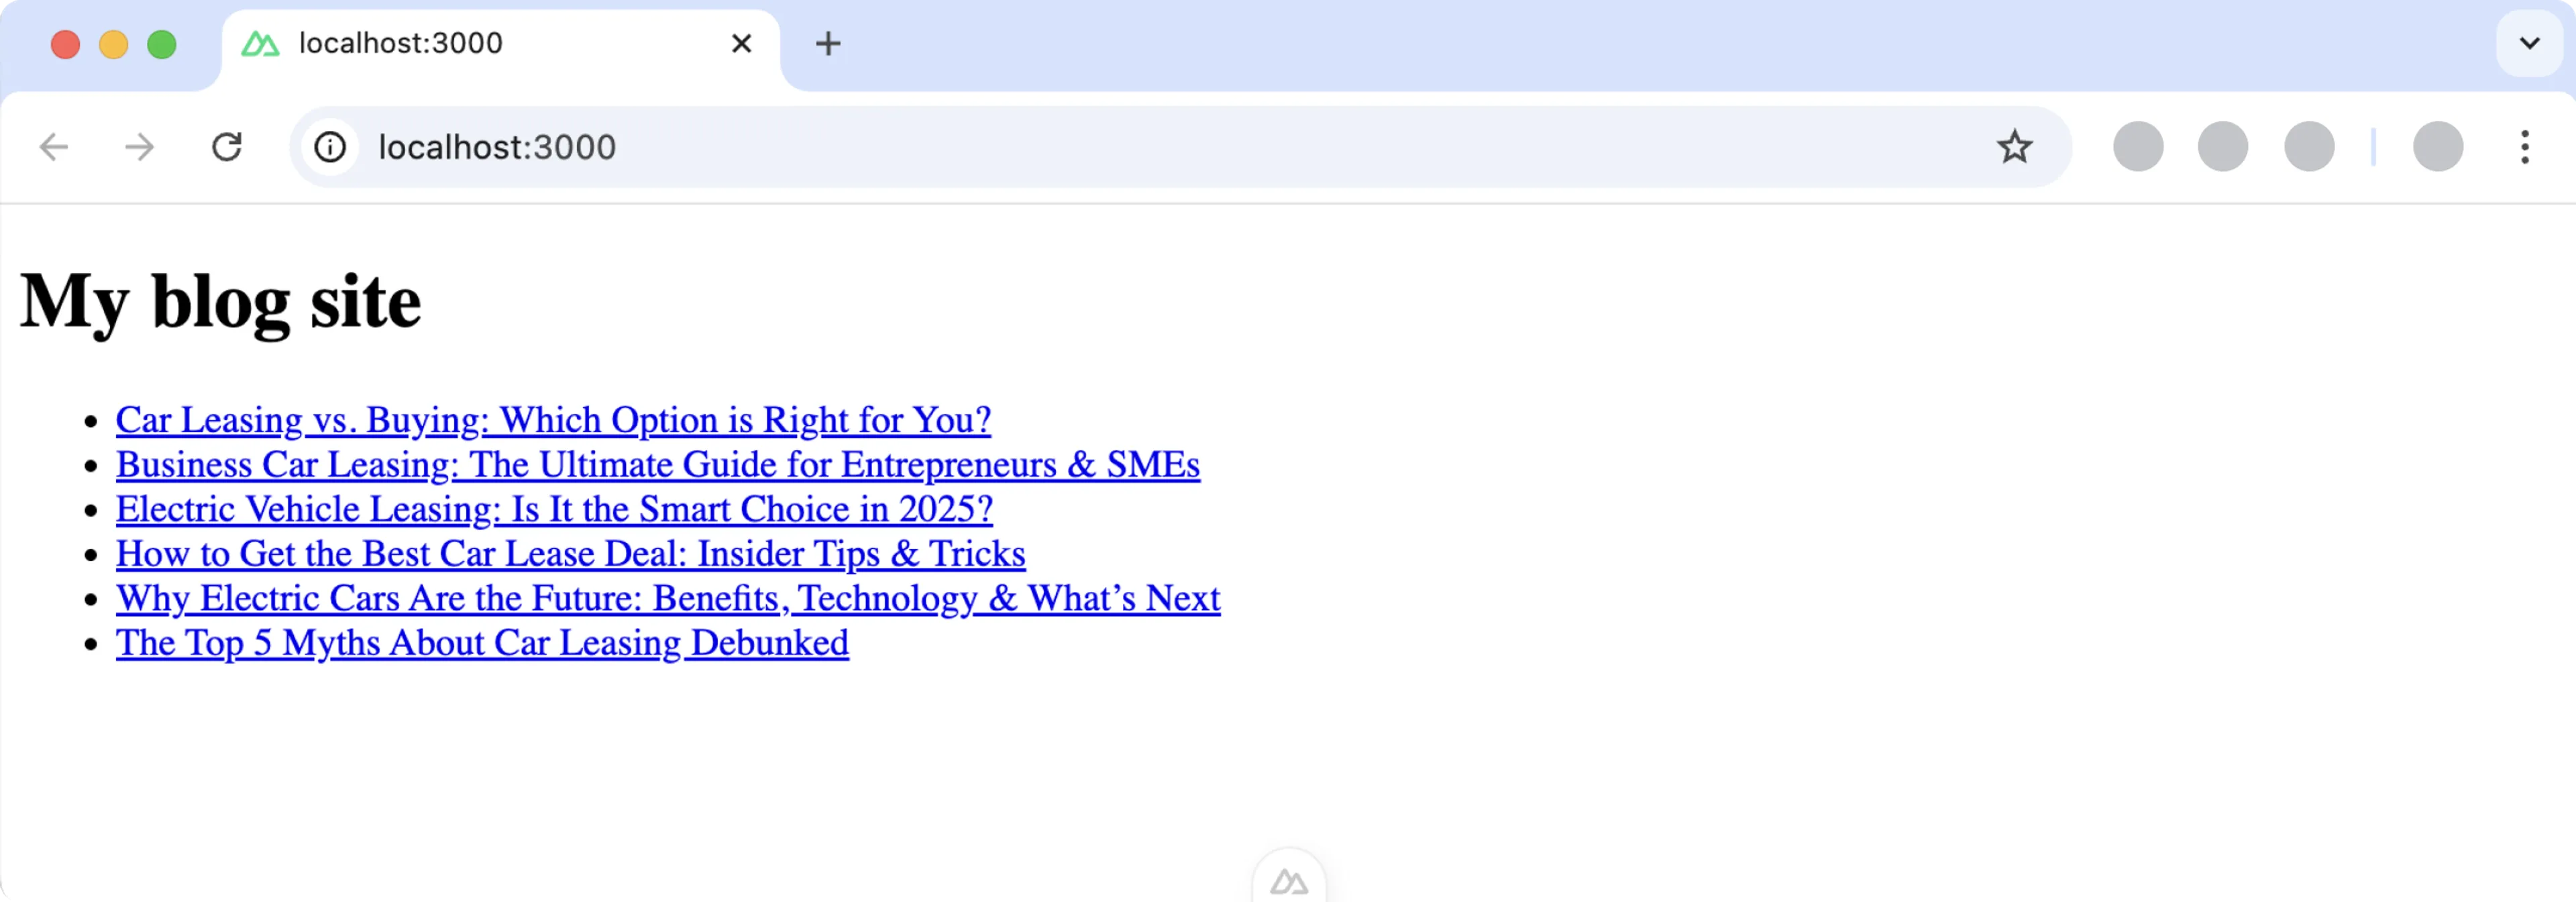
## Prerequisites
You need to have the following setup before you connect your Nuxt project to Prepr.
- [A free Prepr account](https://signup.prepr.io)
- [An environment with demo data in Prepr](/project-setup/setting-up-environments#create-an-environment)
- [The latest version of Node.js](https://nodejs.org/en)
## Create a simple Blog website with Nuxt and Prepr CMS
## All done
Congratulations! You have successfully connected a Nuxt project to Prepr for a simple Blog app.
## Next steps
To learn more on how to expand your project, check out the following resources:
- [Add styling and Prepr personalization to your Nuxt app](/connecting-a-front-end-framework/nuxtjs/nuxt-complete-guide)
- [Draft more queries for components and other field types](/graphql-api)
- [How to install and use the Nuxt Tailwind module](https://nuxt.com/modules/tailwindcss)
- [Deploy your Nuxt app with Vercel](https://vercel.com/docs/frameworks/nuxt)
Source: https://docs.prepr.io/connecting-a-front-end-framework/nuxtjs/nuxt-quick-start-guide
---
# Complete guide to Nuxt and Prepr
*This guide shows you how to connect Prepr to a Nuxt project including styling, adaptive content, and A/B testing.*
Follow the steps below in the recommended order to set up your own working Nuxt website with adaptive content, A/B testing and a preview bar.
You can also customize this project to fit the requirements for your web app.
Source: https://docs.prepr.io/connecting-a-front-end-framework/nuxtjs/nuxt-complete-guide
---
# Nuxt + Prepr CMS
Need info on Prepr for a Nuxt app?
Look no further.
This all-in-one page gives you all the resources you need to connect your project to Prepr and to set up personalized pages exactly the way your marketers want them.
## Nuxt Quick start guide
## Nuxt Complete guide
## Other resources
- [Rendering strategies, SSR or SSG?](/development/best-practices/csr-ssr-ssg)
- [How to set up personalization](/personalization/setting-up-personalization)
- [How to measure A/B testing](/ab-testing/setting-up-ab-testing)
Source: https://docs.prepr.io/connecting-a-front-end-framework/nuxtjs
---
# Laravel Quick start guide
*Estimated duration: 10 minutes*
*This guide shows you how to connect Prepr to a Laravel project to get data from Prepr CMS. You'll learn how to make a simple blog with Laravel and Prepr CMS. By the end of this guide, you'll have a working app that looks like the image below.*

## Prerequisites
You need to have the following setup before you connect your Laravel project to Prepr.
- [A free Prepr account](https://signup.prepr.io)
- [An environment with demo data in Prepr](/project-setup/setting-up-environments#create-an-environment)
## Create a simple Blog website with Next.js and Prepr CMS
## All done
Congratulations! You have successfully connected a Laravel project to Prepr for a simple Blog app.
## Next steps
To learn more on how to expand your project, check out the following resources:
- [Add styling and Prepr personalization to your Laravel app](/connecting-a-front-end-framework/laravel/laravel-complete-guide)
- [Draft more queries for components and other field types](/graphql-api)
- [Check out the Laravel GraphQL SDK repo](https://github.com/preprio/laravel-graphql-sdk)
- [Deploy your Laravel app](https://devcenter.heroku.com/articles/getting-started-with-laravel#deploying-to-heroku)
Source: https://docs.prepr.io/connecting-a-front-end-framework/laravel/laravel-quick-start-guide
---
# Complete guide to Laravel and Prepr
*This guide shows you how to connect Prepr to a Laravel project including styling, adaptive content, and A/B testing.*
Follow the steps below in the recommended order to set up your own working Laravel website with adaptive content, A/B testing and a preview bar.
You can also customize this project to fit the requirements for your web app.
Source: https://docs.prepr.io/connecting-a-front-end-framework/laravel/laravel-complete-guide
---
# Laravel + Prepr CMS
Need info on Prepr for a Laravel app?
Look no further.
This all-in-one page gives you all the resources you need to connect your project to Prepr and to set up personalized pages exactly the way your marketers want them.
## Laravel Quick start guide
## Laravel Complete guide
## Laravel SDKs
## Other resources
- [How to set up personalization](/personalization/setting-up-personalization)
- [How to measure A/B testing](/ab-testing/setting-up-ab-testing)
Source: https://docs.prepr.io/connecting-a-front-end-framework/laravel
---
# React + Prepr CMS
This overview page gives you the resources you need to connect your React project to Prepr.
## Other resources
- [Rendering strategies, SSR or SSG?](/development/best-practices/csr-ssr-ssg)
- [How to set up personalization](/personalization/setting-up-personalization)
- [How to measure A/B testing](/ab-testing/setting-up-ab-testing)
Source: https://docs.prepr.io/connecting-a-front-end-framework/react
---
# Vue Quick start guide
*Estimated duration: 10 minutes*
*This guide shows you how to connect Prepr to a Vue project to get data from Prepr CMS. You'll learn how to make a simple blog with Vue and Prepr CMS. By the end of this guide, you'll have a working app that looks like the image below.*
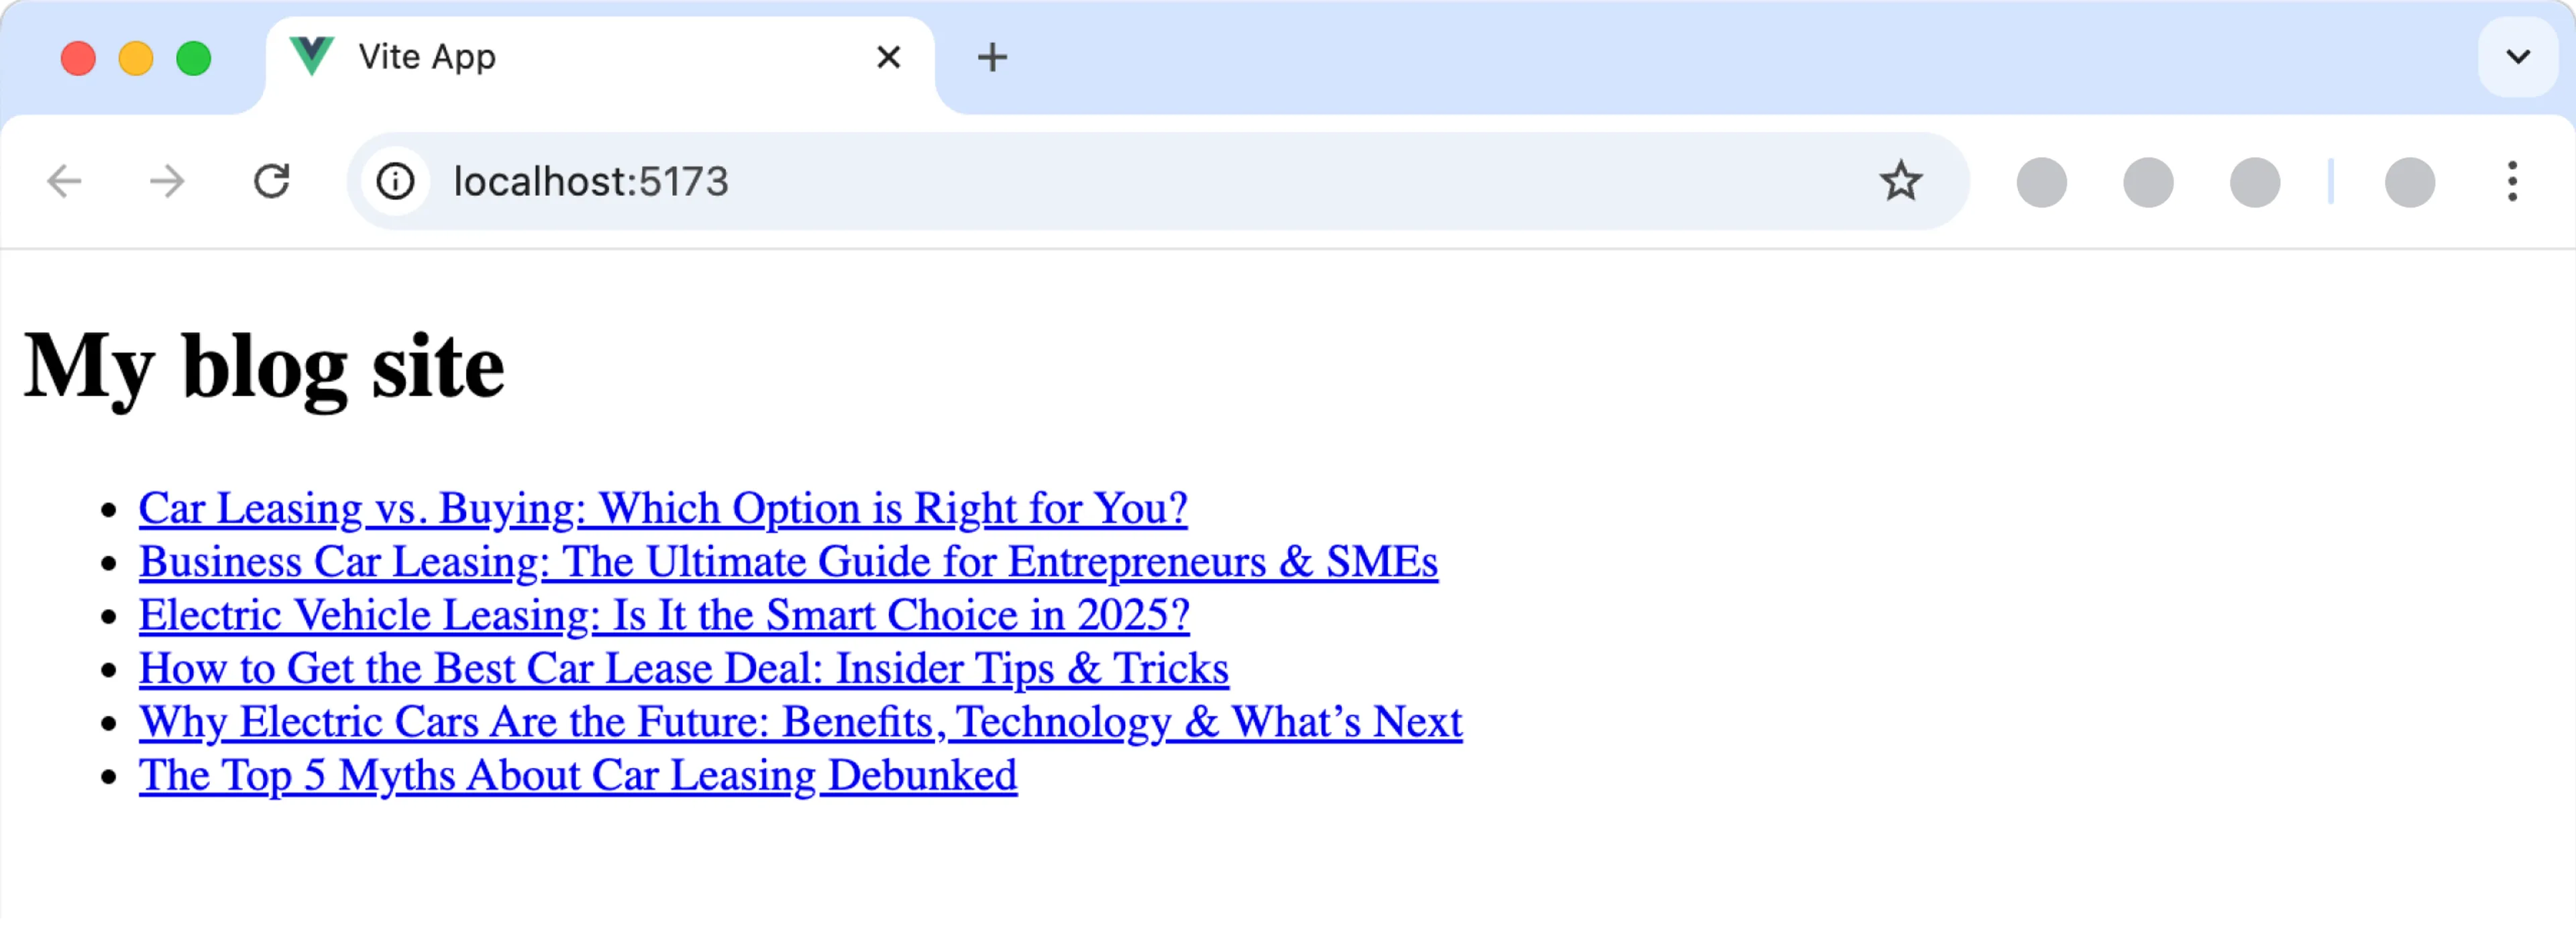
## Prerequisites
You need to have the following setup before you connect your Vue project to Prepr.
- [A free Prepr account](https://signup.prepr.io)
- [An environment with demo data in Prepr](/project-setup/setting-up-environments#create-an-environment)
- [The latest version of Node.js](https://nodejs.org/en)
## Create a simple Blog website with Vue.js and Prepr CMS
## All done
Congratulations! You have successfully connected a Vue project to Prepr for a simple Blog app.
## Next steps
To learn more on how to expand your project, check out the following resources:
- [Draft more queries for components and other field types](/graphql-api)
- [How to install and use Tailwind CSS](https://tailwindcss.com/docs/guides/vite)
Source: https://docs.prepr.io/connecting-a-front-end-framework/vuejs/vue-quick-start-guide
---
# Vue.js + Prepr CMS
Need info on Prepr for a Vue app?
Look no further.
This all-in-one page gives you all the resources you need to connect your project to Prepr.
## Vue.js Quick start guide
## Other resources
- [Rendering strategies, SSR or SSG?](/development/best-practices/csr-ssr-ssg)
- [How to set up personalization](/personalization/setting-up-personalization)
- [How to measure A/B testing](/ab-testing/setting-up-ab-testing)
Source: https://docs.prepr.io/connecting-a-front-end-framework/vuejs
---
# Angular Quick start guide
*Estimated duration: 10 minutes*
*This guide shows you how to connect Prepr to an Angular project to get data from Prepr CMS. You'll learn how to make a simple blog with Angular and Prepr CMS. By the end of this guide, you'll have a working app that looks like the image below.*
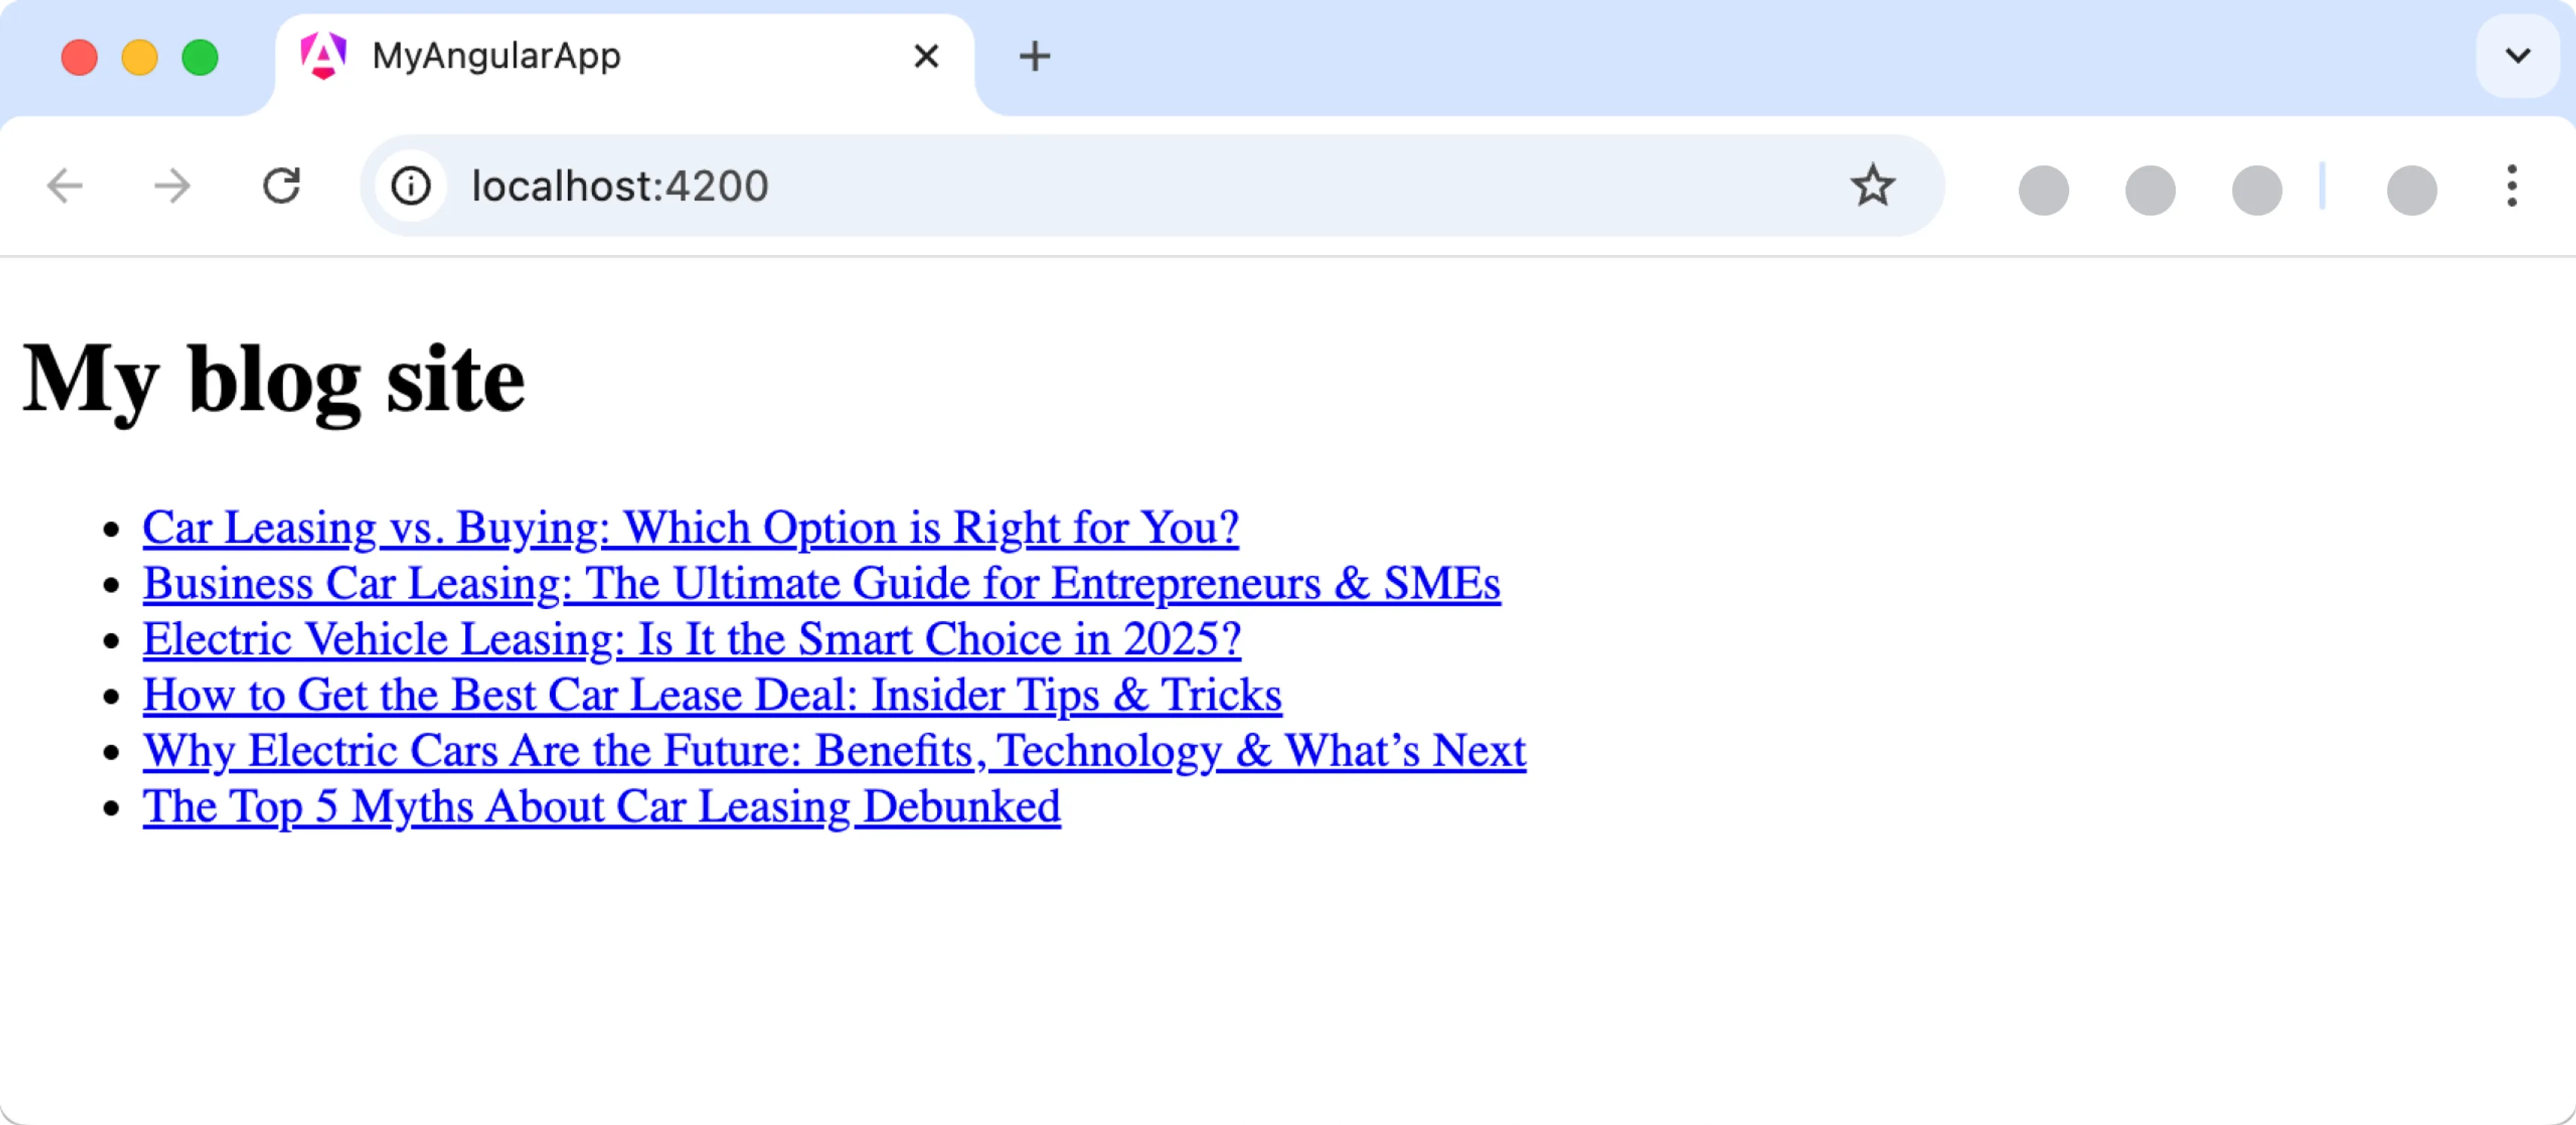
## Prerequisites
You need to have the following setup before you connect your Angular project to Prepr.
- [A free Prepr account](https://signup.prepr.io)
- [An environment with the demo content in Prepr](/project-setup/setting-up-environments#create-an-environment)
- [The latest version of Node.js](https://nodejs.org/en)
## Create a simple Blog website with Angular and Prepr CMS
## All done
Congratulations! You have successfully connected an Angular project to Prepr for a simple Blog app.
## Next steps
To learn more on how to expand your project, check out the following resources:
- [Draft more queries for components and other field types](/graphql-api)
- [How to install and use Tailwind](https://tailwindcss.com/docs/installation/framework-guides/angular)
- [Deploy your Angular app with Vercel](https://vercel.com/guides/deploying-angular-with-vercel)
Source: https://docs.prepr.io/connecting-a-front-end-framework/angular/angular-quick-start-guide
---
# Angular + Prepr CMS
Need info on Prepr for an Angular app?
Look no further.
This all-in-one page gives you all the resources you need to connect your project to Prepr.
## Angular Quick start guide
## Other resources
- [Rendering strategies, SSR or SSG?](/development/best-practices/csr-ssr-ssg)
- [How to set up personalization](/personalization/setting-up-personalization)
- [How to measure A/B testing](/ab-testing/setting-up-ab-testing)
Source: https://docs.prepr.io/connecting-a-front-end-framework/angular
---
# PHP Quick start guide
*Estimated duration: 10 minutes*
*This guide shows you how to connect Prepr to a PHP project to get data from Prepr CMS. You’ll learn how to build a simple blog with PHP and Prepr CMS. When you reach the end of this guide, you'll have a working app that looks something like the image below.*
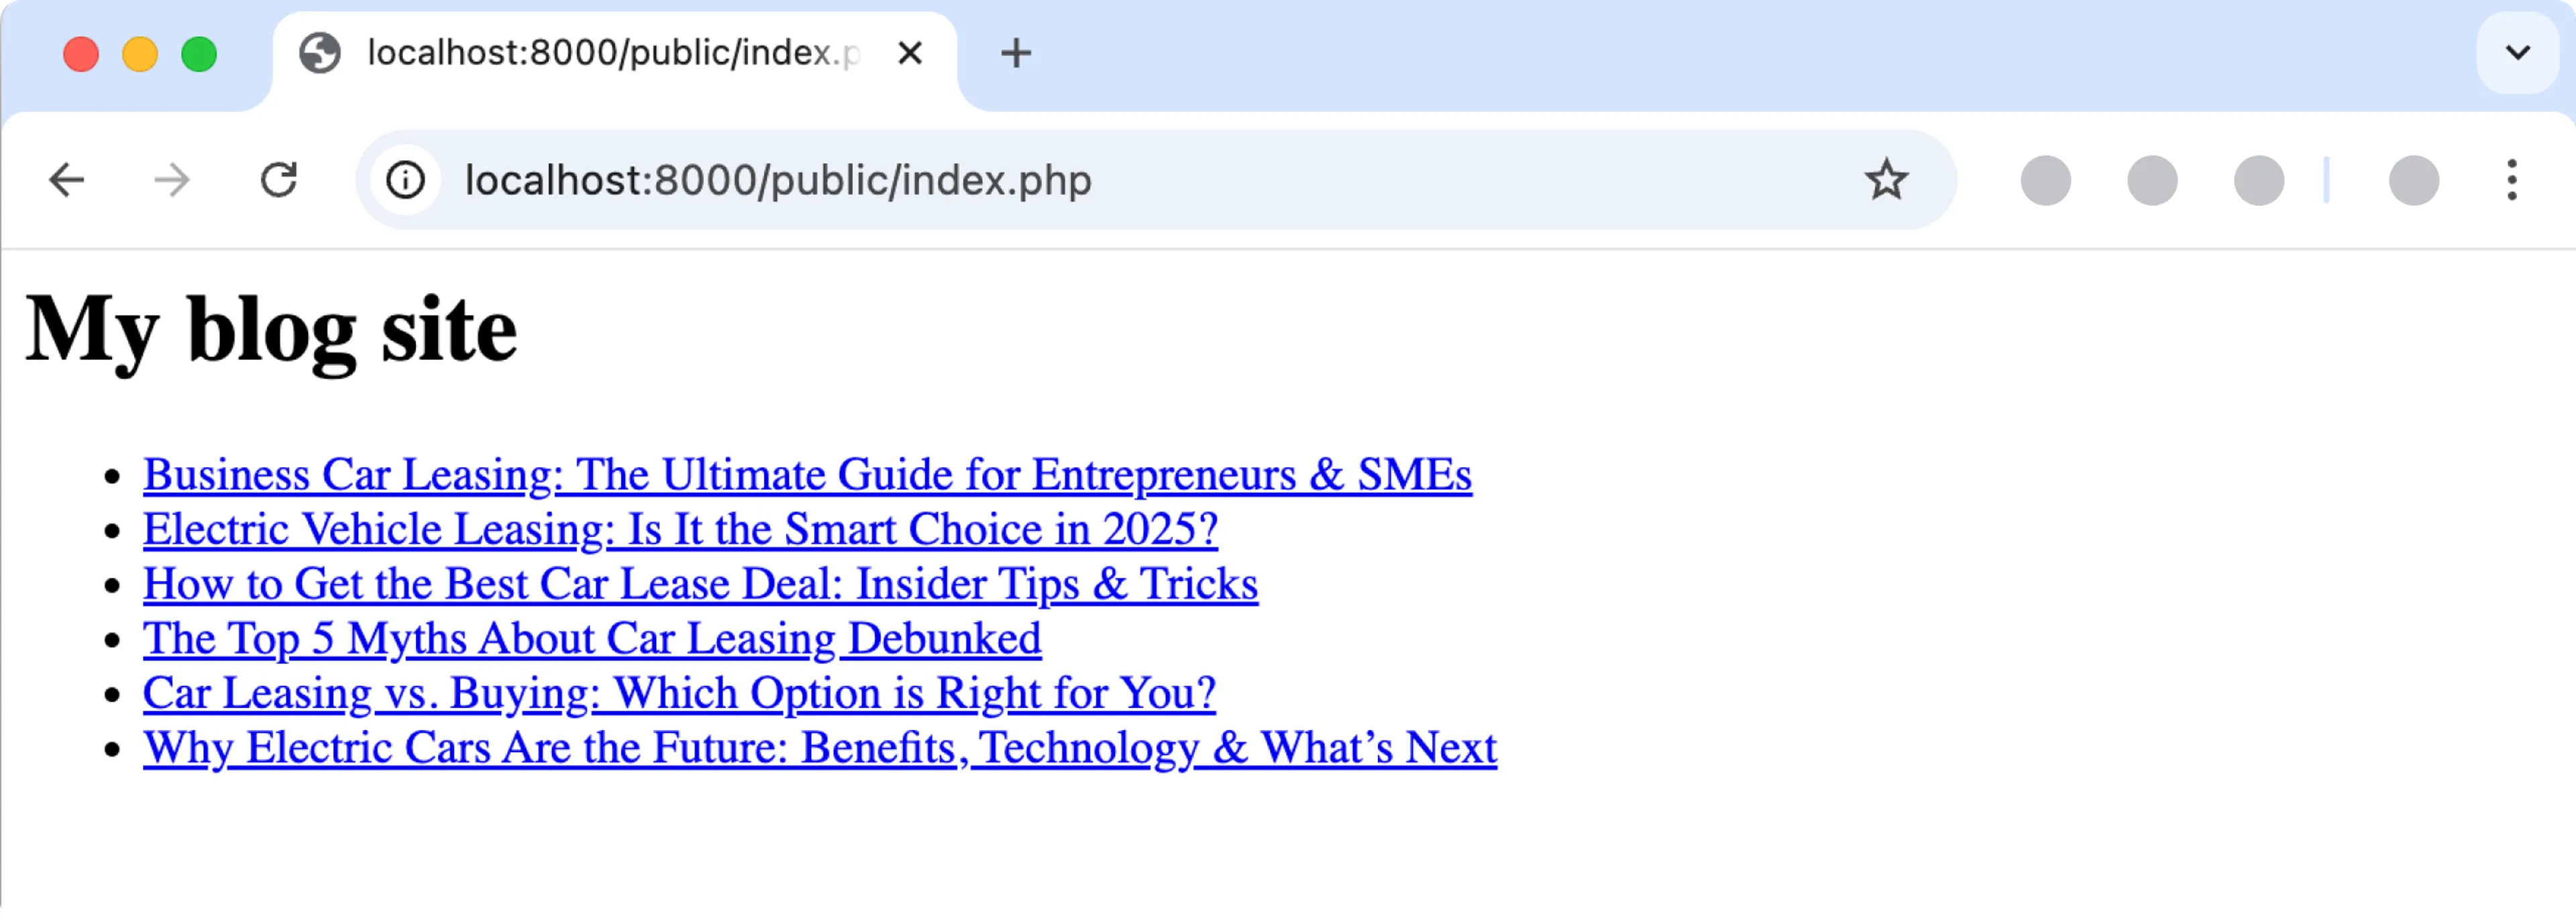
## Prerequisites
You need to have the following setup before you connect your PHP project to Prepr.
- [A free Prepr account](https://signup.prepr.io)
- [An environment with demo data in Prepr](/project-setup/setting-up-environments#create-an-environment)
## Create a simple Blog website with PHP and Prepr CMS
## All done
Congratulations! You have successfully connected a PHP project to Prepr for a simple Blog app.
## Next steps
To learn more on how to expand your project, check out the following resources:
- [Draft more queries for components and other field types](/graphql-api)
- [How to install and use Tailwind CSS](https://tailwindcss.com/docs/installation)
Source: https://docs.prepr.io/connecting-a-front-end-framework/php/php-quick-start-guide
---
# PHP + Prepr CMS
Need info on Prepr for a PHP app?
Look no further.
This all-in-one page gives you all the resources you need to connect your project to Prepr.
## PHP Quick start guide
## PHP SDKs
## Other resources
- [How to set up personalization](/personalization/setting-up-personalization)
- [How to measure A/B testing](/ab-testing/setting-up-ab-testing)
Source: https://docs.prepr.io/connecting-a-front-end-framework/php
---
# Astro Quick start guide
*Estimated duration: 10 minutes*
*This guide shows you how to connect Prepr to an Astro project to get data from Prepr CMS. You'll learn how to make a simple blog with Astro and Prepr CMS. By the end of this guide, you'll have a working app that looks like the image below.*
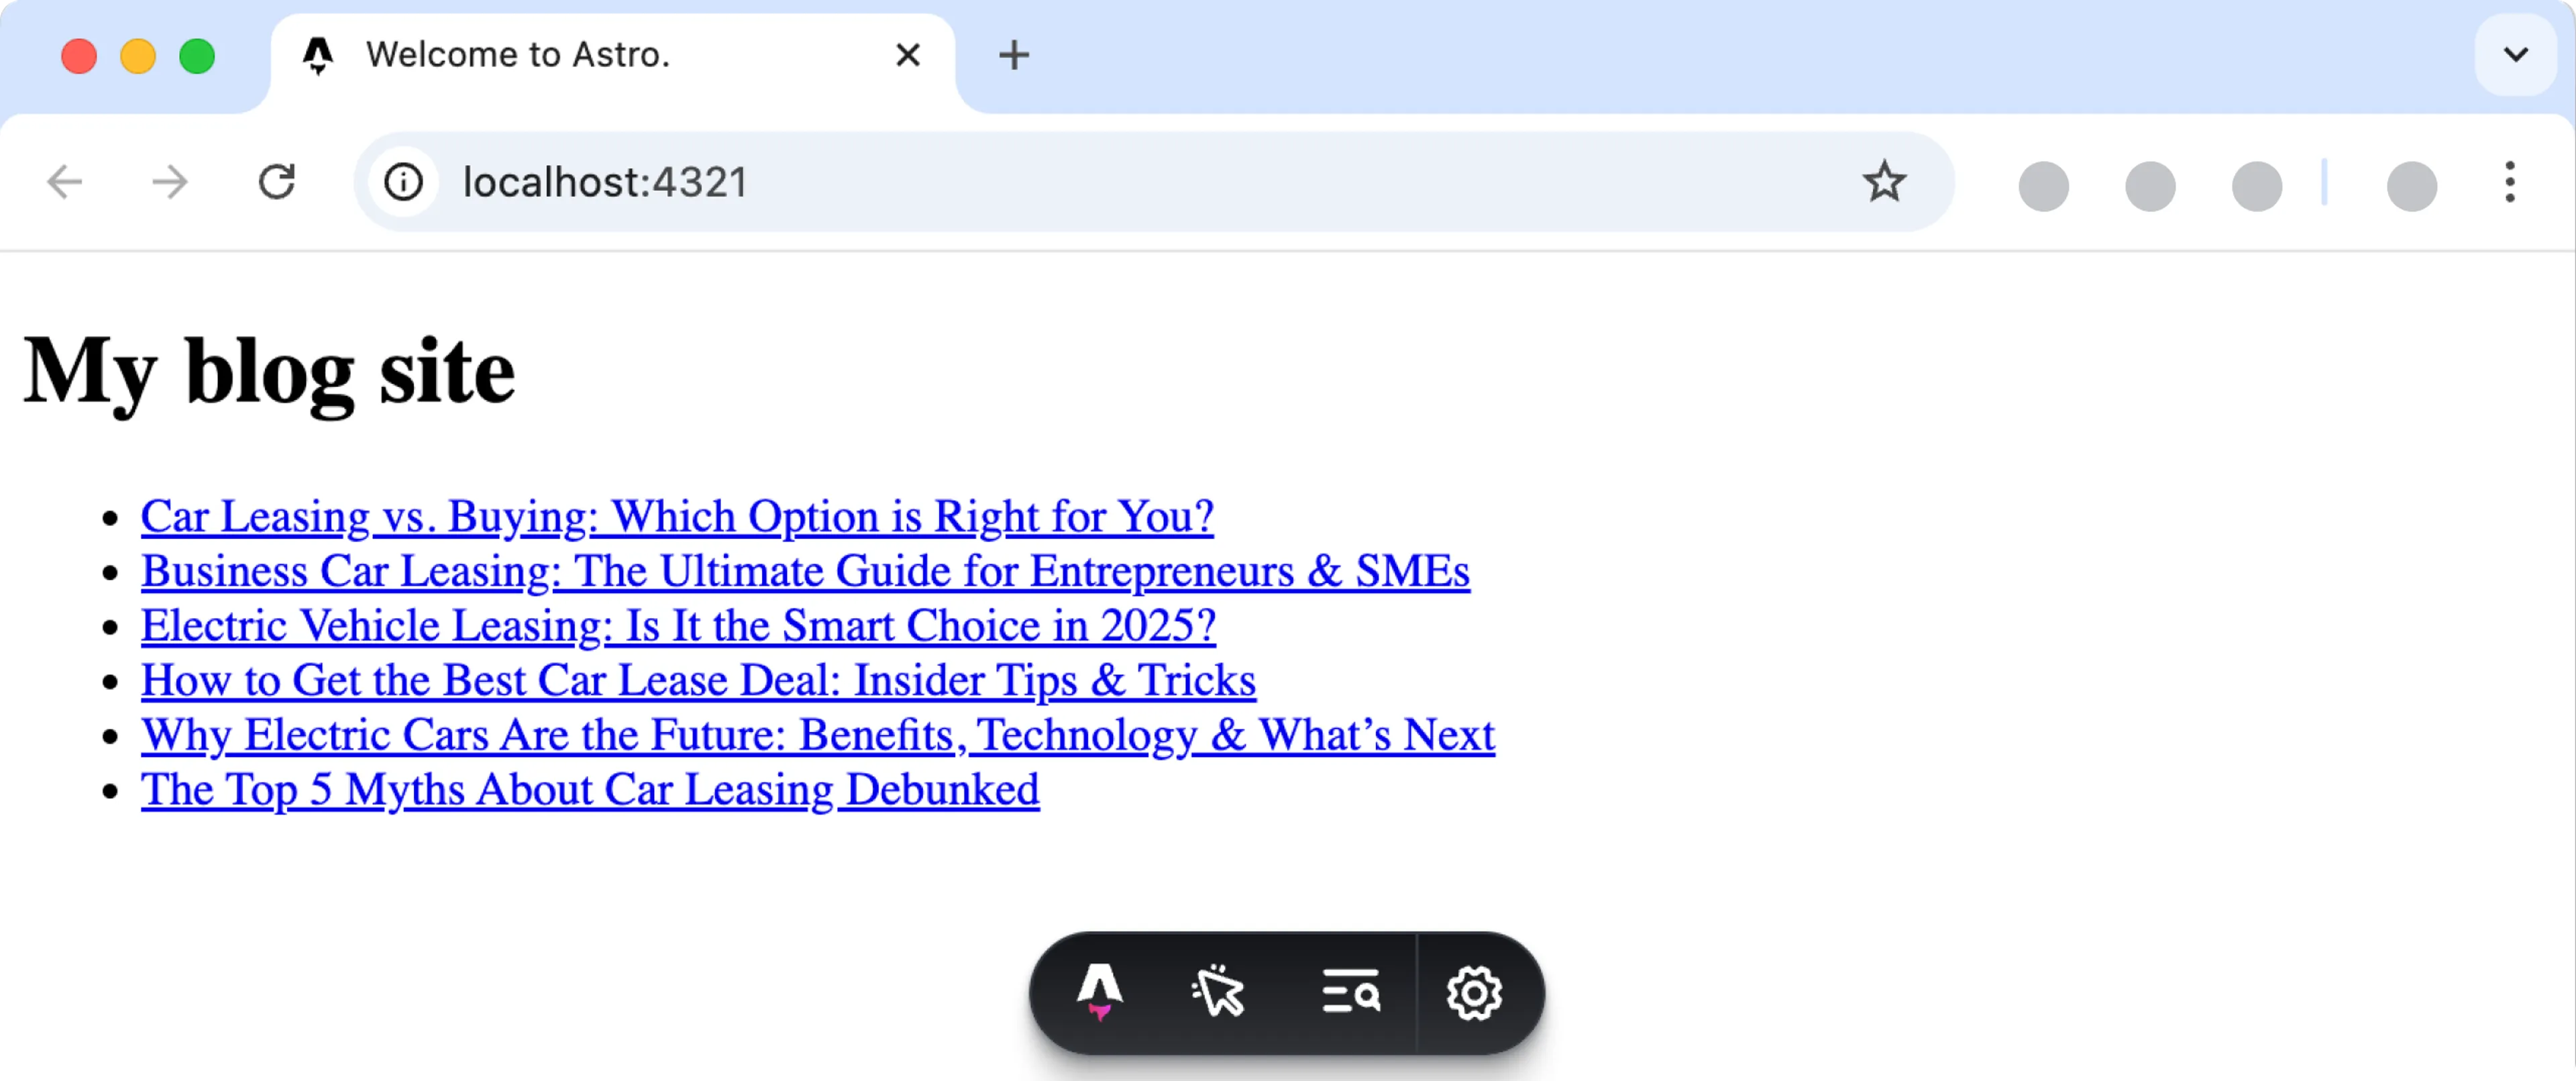
## Prerequisites
You need to have the following setup before you connect your Astro project to Prepr.
- [A free Prepr account](https://signup.prepr.io)
- [An environment with demo data in Prepr](/project-setup/setting-up-environments#create-an-environment)
- [The latest version of Node.js](https://nodejs.org/en)
## Create a simple Blog website with Astro and Prepr CMS
## All done
Congratulations! You have successfully connected an Astro project to Prepr for a simple Blog app.
## Next steps
To learn more on how to expand your project, check out the following resources:
- [Draft more queries for components and other field types](/graphql-api)
- [How to install and use Tailwind](https://tailwindcss.com/docs/guides/vite)
- [Deploy your Astro app with Vercel](https://docs.astro.build/en/guides/deploy/vercel/#adapter-for-ssr)
Source: https://docs.prepr.io/connecting-a-front-end-framework/astro/astro-quick-start-guide
---
# Astro + Prepr CMS
Need info on Prepr for an Astro app?
Look no further.
This all-in-one page gives you all the resources you need to connect your project to Prepr.
## Astro Quick start guide
## Other resources
- [Rendering strategies, SSR or SSG?](/development/best-practices/csr-ssr-ssg)
- [How to set up personalization](/personalization/setting-up-personalization)
- [How to measure A/B testing](/ab-testing/setting-up-ab-testing)
Source: https://docs.prepr.io/connecting-a-front-end-framework/astro
---
# Svelte Quick start guide
*Estimated duration: 10 minutes*
*This guide shows you how to connect Prepr to a Svelte project to get data from Prepr CMS. You'll learn how to make a simple blog with Svelte and Prepr CMS. By the end of this guide, you'll have a working app that looks like the image below.*
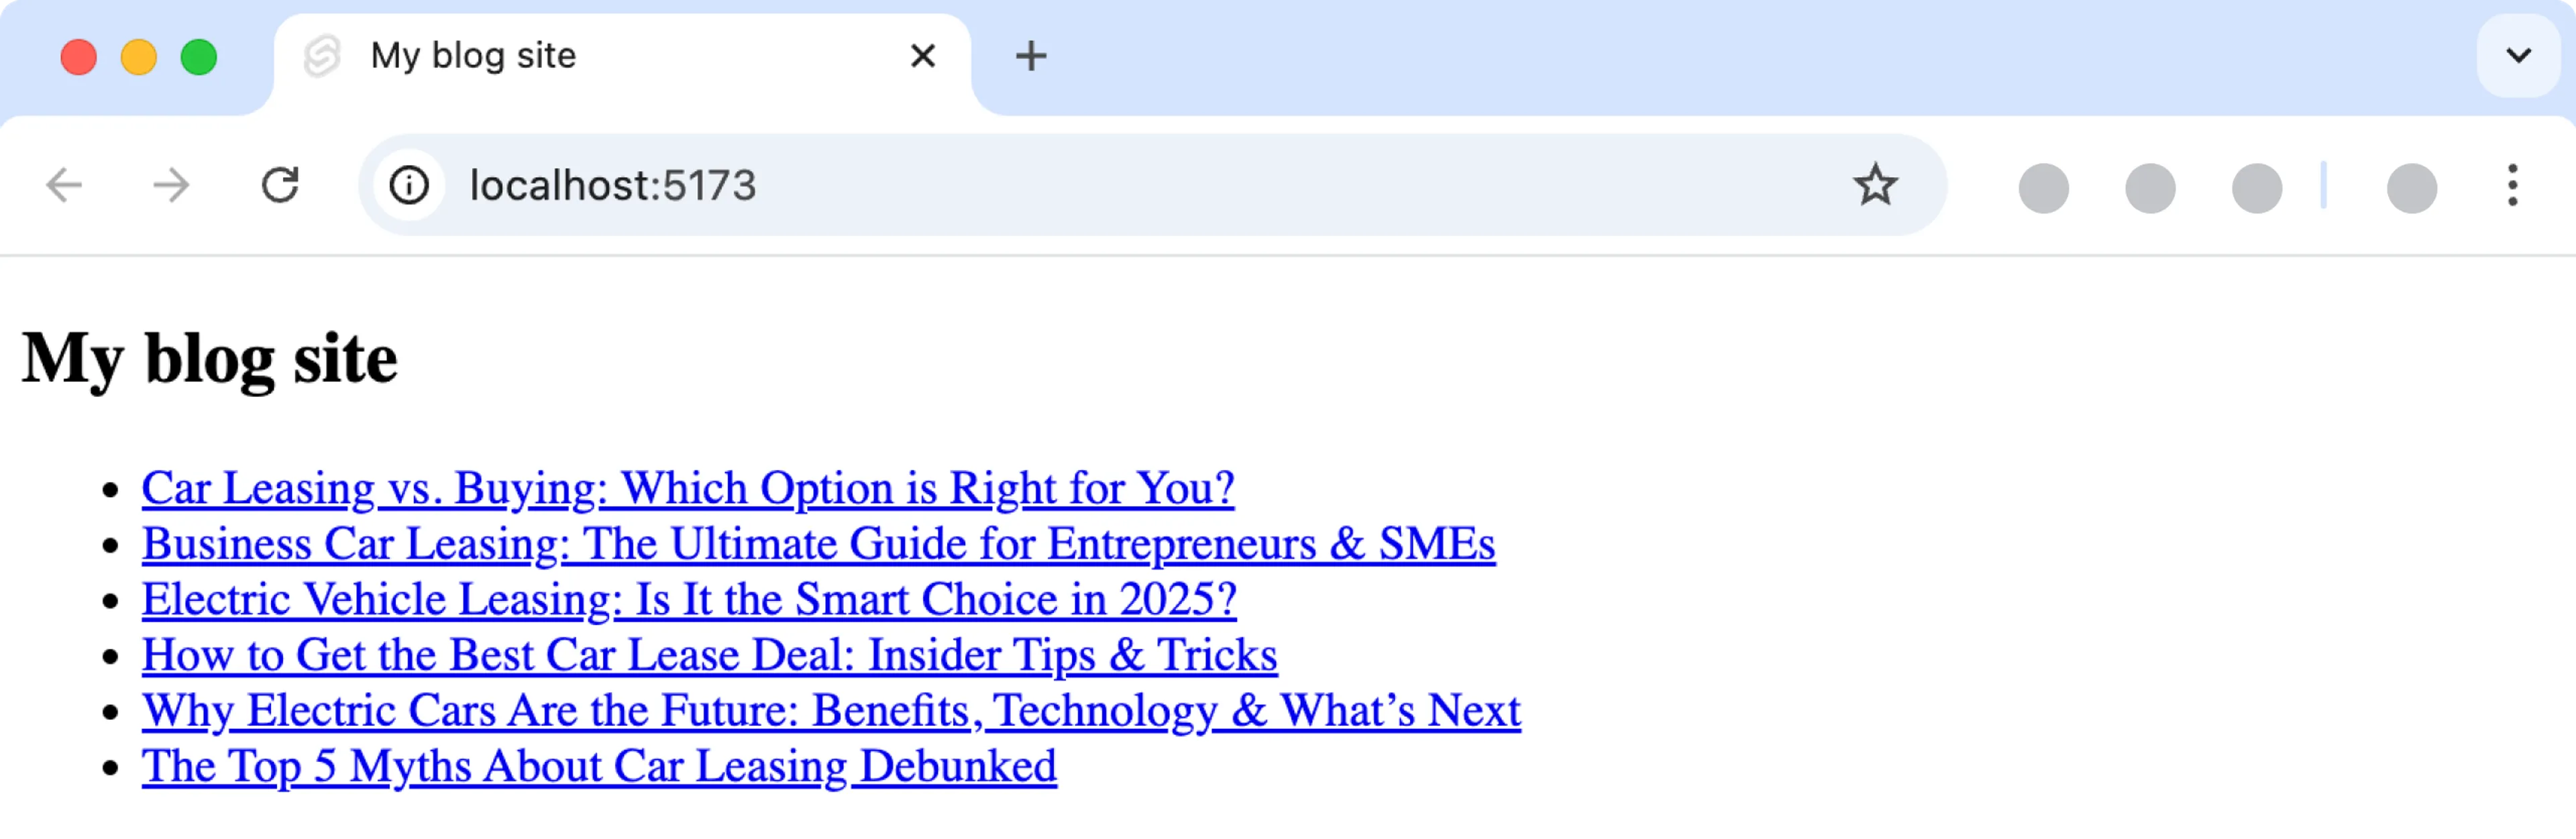
## Prerequisites
You need to have the following setup before you connect your Svelte project to Prepr.
- [A free Prepr account](https://signup.prepr.io)
- [An environment with demo data in Prepr](/project-setup/setting-up-environments#create-an-environment)
- [The latest version of Node.js](https://nodejs.org/en)
## Create a simple Blog website with Svelte and Prepr CMS
## All done
Congratulations! You have successfully connected a Svelte project to Prepr for a simple Blog app.
## Next steps
To learn more on how to expand your project, check out the following resources:
- [Draft more queries for components and other field types](/graphql-api)
- [How to install and use Tailwind CSS](https://tailwindcss.com/docs/guides/vite)
- [Deploy your Svelte app with Vercel](https://svelte.dev/docs/kit/adapter-vercel)
Source: https://docs.prepr.io/connecting-a-front-end-framework/svelte/svelte-quick-start-guide
---
# Gatsby Quick start guide
*Estimated duration: 10 minutes*
*This guide shows you how to connect Prepr to a Gatsby project to get data from Prepr CMS. You'll learn how to make a simple blog with Gatsby and Prepr CMS. By the end of this guide, you'll have a working app that looks like the image below.*
## Prerequisites
You need to have the following setup before you connect your Gatsby project to Prepr.
- [A free Prepr account](https://signup.prepr.io)
- [An environment with demo data in Prepr](/project-setup/setting-up-environments#create-an-environment)
- [The latest version of Node.js](https://nodejs.org/en)
## Create a simple Blog website with Gatsby and Prepr CMS
## All done
Congratulations! You have successfully connected a Gatsby project to Prepr for a simple Blog app.
## Next steps
To learn more on how to expand your project, check out the following resources:
- [Draft more queries for components and other field types](/graphql-api)
- [How to install and use Tailwind](https://tailwindcss.com/docs/guides/vite)
Source: https://docs.prepr.io/connecting-a-front-end-framework/gatsby/gatsby-quick-start-guide
---
# Svelte + Prepr CMS
Need info on Prepr for a Svelte app?
Look no further.
This all-in-one page gives you all the resources you need to connect your project to Prepr and to set up personalized pages exactly the way your marketers want them.
## Svelte Quick start guide
## Other resources
- [Rendering strategies, SSR or SSG?](/development/best-practices/csr-ssr-ssg)
- [How to set up personalization](/personalization/setting-up-personalization)
- [How to measure A/B testing](/ab-testing/setting-up-ab-testing)
Source: https://docs.prepr.io/connecting-a-front-end-framework/svelte
---
# Working with assets
Follow these guidelines to help you include images, videos, audios, and files in your web applications.
Source: https://docs.prepr.io/development/best-practices/assets
---
# CSR/SSR/SSG Rendering strategies
*This article explains different rendering strategies for front-end apps and makes recommendations on how to implement your strategy with Prepr.*
## Introduction
It's important to decide on a rendering strategy for your front-end apps in the early stages of your implementation. The strategy you choose should match the type of content that your front end renders. For example, do you need to render a lot of static content such as documentation or urgent dynamic content like on an ecommerce site. We look at different types of rendering and any special considerations when implementing your front end alongside Prepr.
## Rendering types
|Rendering type| Applicable Technologies |
|-------------------------------------------------|-----------------------------------------------------------------------------------------------------------------------------------------------------------------------------------------------------------------------------------------------------------------------------------------------------------------------------------------------------------------------------------------------------------------------------------------------------------------------------------------------------------------------------------------------------------------------------------------|
|[Client-side rendering (CSR)](#client-side-rendering-csr) The original way to render web pages with dynamic content when JavaScript was first introduced. When a user visits a page, they see it only after the script has finished.| [React](/connecting-a-front-end-framework/react), [Vue.js](/connecting-a-front-end-framework/vuejs), [Angular](/connecting-a-front-end-framework/angular), [Next.js](/connecting-a-front-end-framework/nextjs), [Nuxt](/connecting-a-front-end-framework/nuxtjs). |
|[Server-side rendering (SSR)](#server-side-rendering-ssr) The server generates the HTML on a request for a page. This means that when a user navigates to a page, they will see a fully rendered UI immediately.| [React](/connecting-a-front-end-framework/react), [Vue.js](/connecting-a-front-end-framework/vuejs), [Angular](/connecting-a-front-end-framework/angular), [Next.js](/connecting-a-front-end-framework/nextjs), [Nuxt](/connecting-a-front-end-framework/nuxtjs), [Node.js](/connecting-a-front-end-framework/nodejs). |
|[Static site generation (SSG)](#static-site-generation-ssg) A bunch of static files for the entire site are generated during deployment. This means that a visitor can see and interact with the pages immediately.| [React](/connecting-a-front-end-framework/react), [Vue.js](/connecting-a-front-end-framework/vuejs), [Angular](/connecting-a-front-end-framework/angular), [Next.js](/connecting-a-front-end-framework/nextjs), [Nuxt](/connecting-a-front-end-framework/nuxtjs), [Node.js](/connecting-a-front-end-framework/nodejs). |
|[Hybrid rendering solutions](#hybrid-rendering-solutions) Some frameworks offer a hybrid rendering solution that uses the best of both SSR and SSG. | [See below](#hybrid-rendering-solutions) for more details on the hybrid solutions offered by [Next.js](/connecting-a-front-end-framework/nextjs), [Nuxt](/connecting-a-front-end-framework/nuxtjs). |
## How to choose a rendering type
It is important to think about how frequently your content changes and how urgent these content changes are. For example, a blog site does not usually require multiple updates in a day, so static generation is a good option. On the other hand, product information on an ecommerce site needs frequent updates, so rendering needs to happen more dynamically.
Below are other metrics to consider when you choose a rendering strategy.
|Metric|CSR|SSR|SSG|Hybrid|
|----------|-------|-------|-------|-------|
|**Data integrity** How up to date the data is when a page loads.| | | | |
|**SEO** How easy it is for search engines to find the page content.| | | | |
|**Performance** How quickly a page loads. | | | | |
|**Build Time** How quick it is to build an app. | | | | |
Watch the video below for the key differences betweens SSG and SSR.
## Client-side rendering (CSR)
Client-side rendering (CSR) is rendering pages directly in the browser for every page request using JavaScript. This type of rendering is mainly used for single-page applications (SPA) because the single page needs to be refreshed each time it's loaded. This means the data is always up to date, but large payloads will slow down the loading of a page.
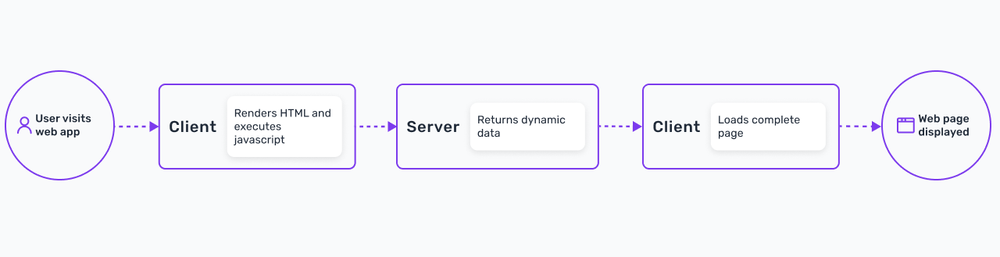
## Server-side rendering (SSR)
Server Side Rendering (SSR), also known as dynamic rendering, is when the HTML of a site is generated on the server, then sent to the browser. This type of rendering is faster than CSR for large payloads and is useful for SEO purposes, because search engines can access the content. See a simple SSR process flow below.
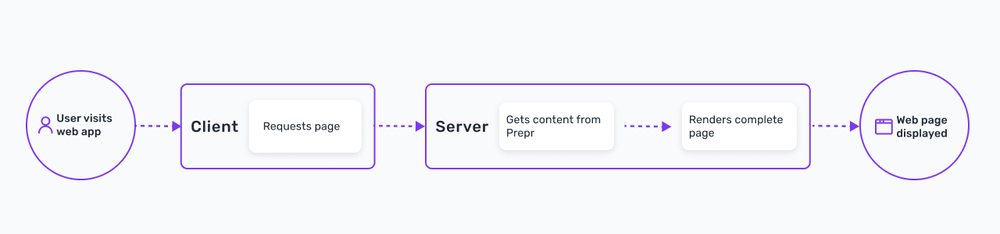
## Static site generation (SSG)
SSG is a type of pre-rendering where the process of compiling and rendering a web app happens during the build time. The output of the build is a bunch of static files, including the HTML file as well as assets like JavaScript and CSS. Updates to pages are not rendered until a new build. Because all the pages are pre-rendered, the page load is faster than SSR, but any changes to content will not be re-rendered on the fly.
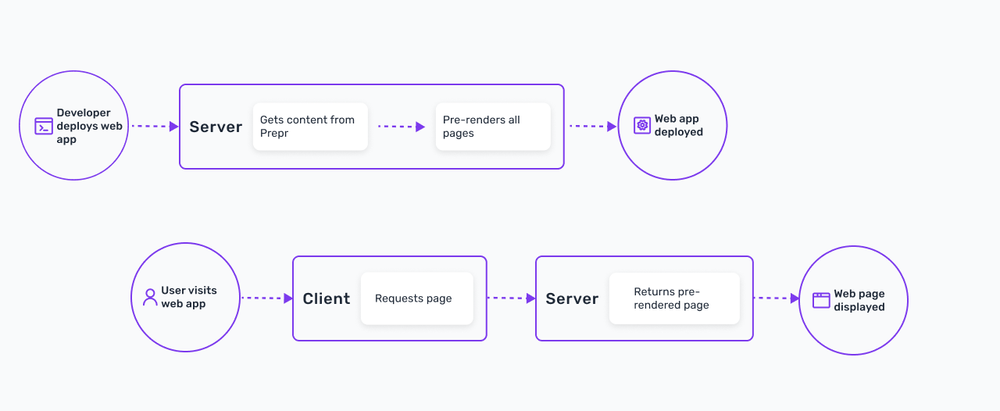
## Hybrid rendering solutions
A hybrid rendering solution gives developers the option to get benefits from both SSR and SSG. The following solutions are available in a few frameworks:
- **Page-by-page**: This means that each page of your project can be rendered either statically or dynamically. This method is available in Next.js. Check out the [Next.js](https://nextjs.org/docs/pages/building-your-application/rendering) docs for more details.
- **Route-based rendering**: This solution allows you to render specific routes (URL paths) statically or dynamically. The route can be at subdomain level which means that groups of pages can be rendered statically or dynamically. Check out the [Next.js docs](https://nextjs.org/learn-pages-router/basics/dynamic-routes) and the [Nuxt docs](https://nuxtjs.org/docs/features/rendering-modes) for more details.
- **Incremental static regeneration (ISR)** and **Deferred static generation (DSG)**: These hybrid solutions aim to use the best of both SSR and SSG. When a user visits a page, the front end triggers the regeneration (also known as revalidation) of the page, but the user sees the *static page* immediately. If the user or another user visits the same page a few seconds later, the newer page is rendered. Unlike SSG, you can choose the number of pages to build to reduce the build time and performance is better than SSR because the request does not wait for the rendering of a page to complete. ISR was developed by Next.js on Vercel while DSG is the Gatsby solution. Another version of this solution is possible in Nuxt deployed on Layer0. See a simple process flow below: 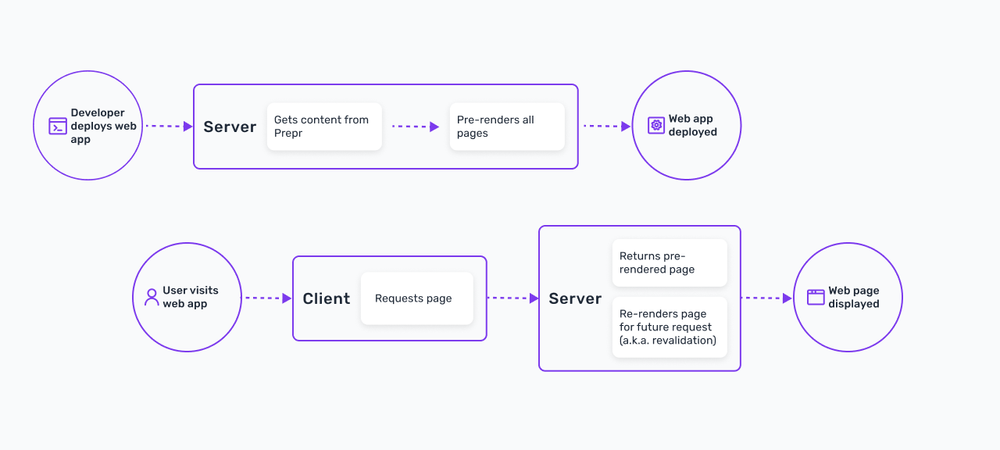
## Schedule a free consultation
Do you still have questions on rendering strategies in relation to Prepr? Book a 15-minute call with a Prepr solution engineer right away. [Schedule a call](https://prepr.io/get-a-demo)
Source: https://docs.prepr.io/development/best-practices/csr-ssr-ssg
---
# Handling redirects
*This article explains how to handle redirects for your content items in Prepr CMS*
## Introduction
Redirects send visitors from a requested URL to another. You often set up redirects in your framework-specific front-end app or in a redirects file for a hosting provider for pages that are broken or pages that were moved to new URLs to ensure visitors and search engines access the most relevant or current page.
## Handle redirects with a headless CMS
It's only natural that content items can change. When the changes include the URL that links to the content item, this results in a broken link. To prevent this situation, a developer sets up a redirect to display a working page when an outdated link is visited.
In the case where you have content items that could potentially have changes to the URL that links to it, for example, when updating an existing article with fresher content including the name of the link to the article, follow the steps below to reduce the number of broken links in your front end.
## Step 1: Model the redirect in Prepr CMS
The first step is to model the redirect to make it possible to manage redirect entries directly in Prepr CMS.
The *Redirect* model includes the following fields:
- The outdated URL, often known as the *Source*.
- The new target URL, known as the *Destination*.
- An indicator to choose the type of redirect, for example, `permanent` or `temporary`.
See the examples below for typical redirect config in a front-end framework like Next.js and for server redirect config like a Vercel deployment.
A slug is the end part of a URL after the last backslash and identifies a unique page in a front end.
In Prepr CMS, you can create a [slug field](/content-modeling/field-types#slug-field) in a model to maintain a unique value for each content item.
This slug value is then used in your front-end app to set up page routing to that content item. Check out the [Next Quick start guide](/connecting-a-front-end-framework/nextjs/next-quick-start-guide#step-4-fetch-individual-articles) for an example implementation.
With this in mind, follow the steps below to create a *Redirect* model.
1. Click the **Schema** tab to open the **Schema Editor**.
2. Then, click the **+ Add model** button.
3. Click **Multi-item model** and **Next** again.
4. Enter *Redirect* as the *Name* and click **Save**.
5. Add a *Text* field type to save the *Internal title* to easily identify a redirect record.
6. Drag and drop the *Slug* field type into your model.
Switch to the **Validation** tab and enable the **This field is required** toggle.
7. Drag and drop the *Content reference* field type, from the list on the right into your model.
a. Enter *Destination* as the *Name*.
b. Select the models you want to allow to have redirects.
c. Switch to the **Validation** tab and enable the **This field is required** toggle.
d. Click the **Save** button.
8. Drag and drop the *Boolean* field type into your model and enter *Permanent* as the *Name*, set a *Default value* of **True** and click the **Save** button.
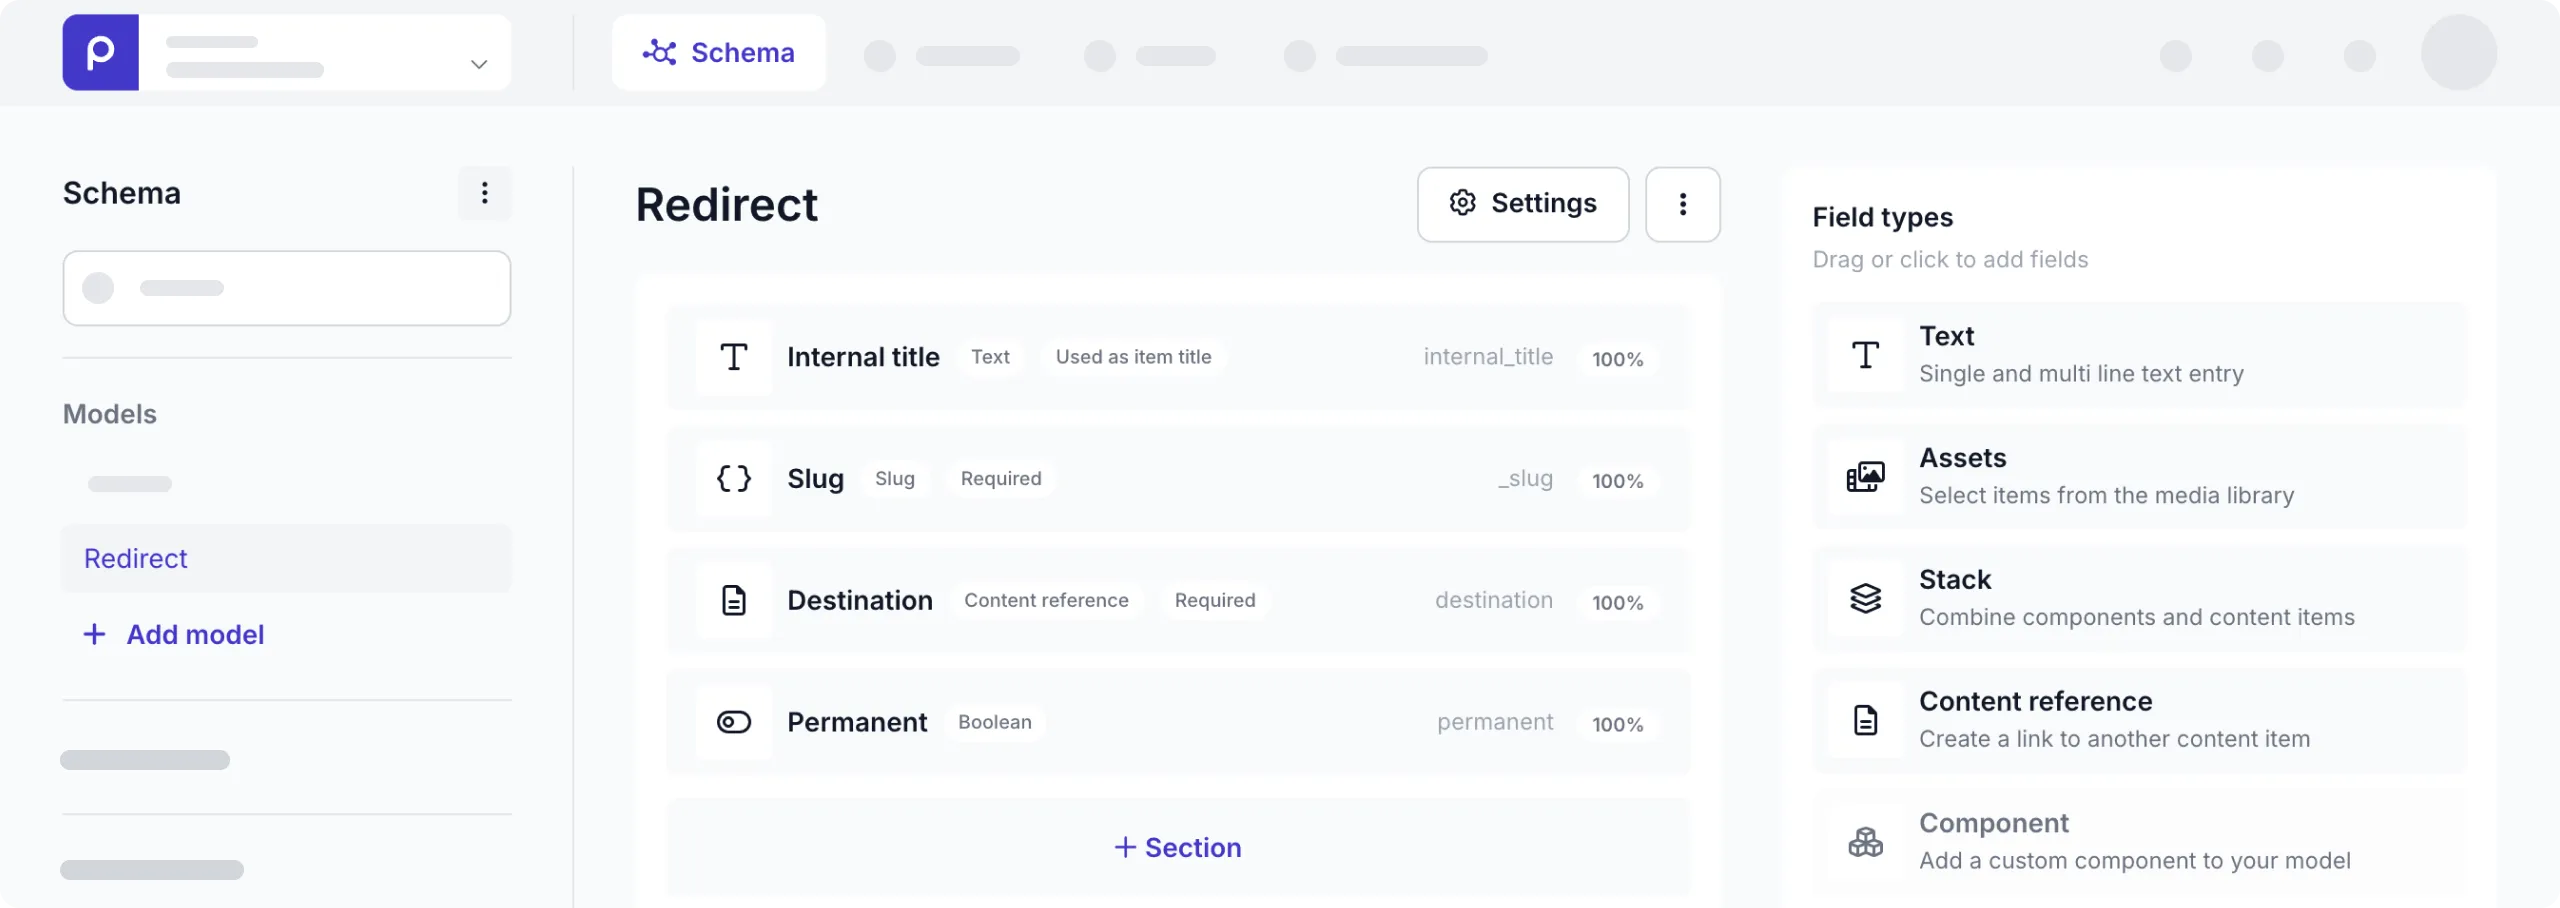
Now that the *Redirect* model is done, move on to the next step to add redirect entries in Prepr CMS.
## Step 2: Create a redirect in Prepr CMS
Follow the instructions below to add a redirect entry manually.
1. Go to the **Content** tab.
2. Click **Add item** and select the **Redirect** model created in the previous step.
3. Enter the *Slug* of the outdated URL in the format expected by your framework or host redirects file.
4. For the *Destination* field, choose the relevant content item for which the slug was changed.
5. Enable the permanent field, if applicable, and click the **Publish** button.
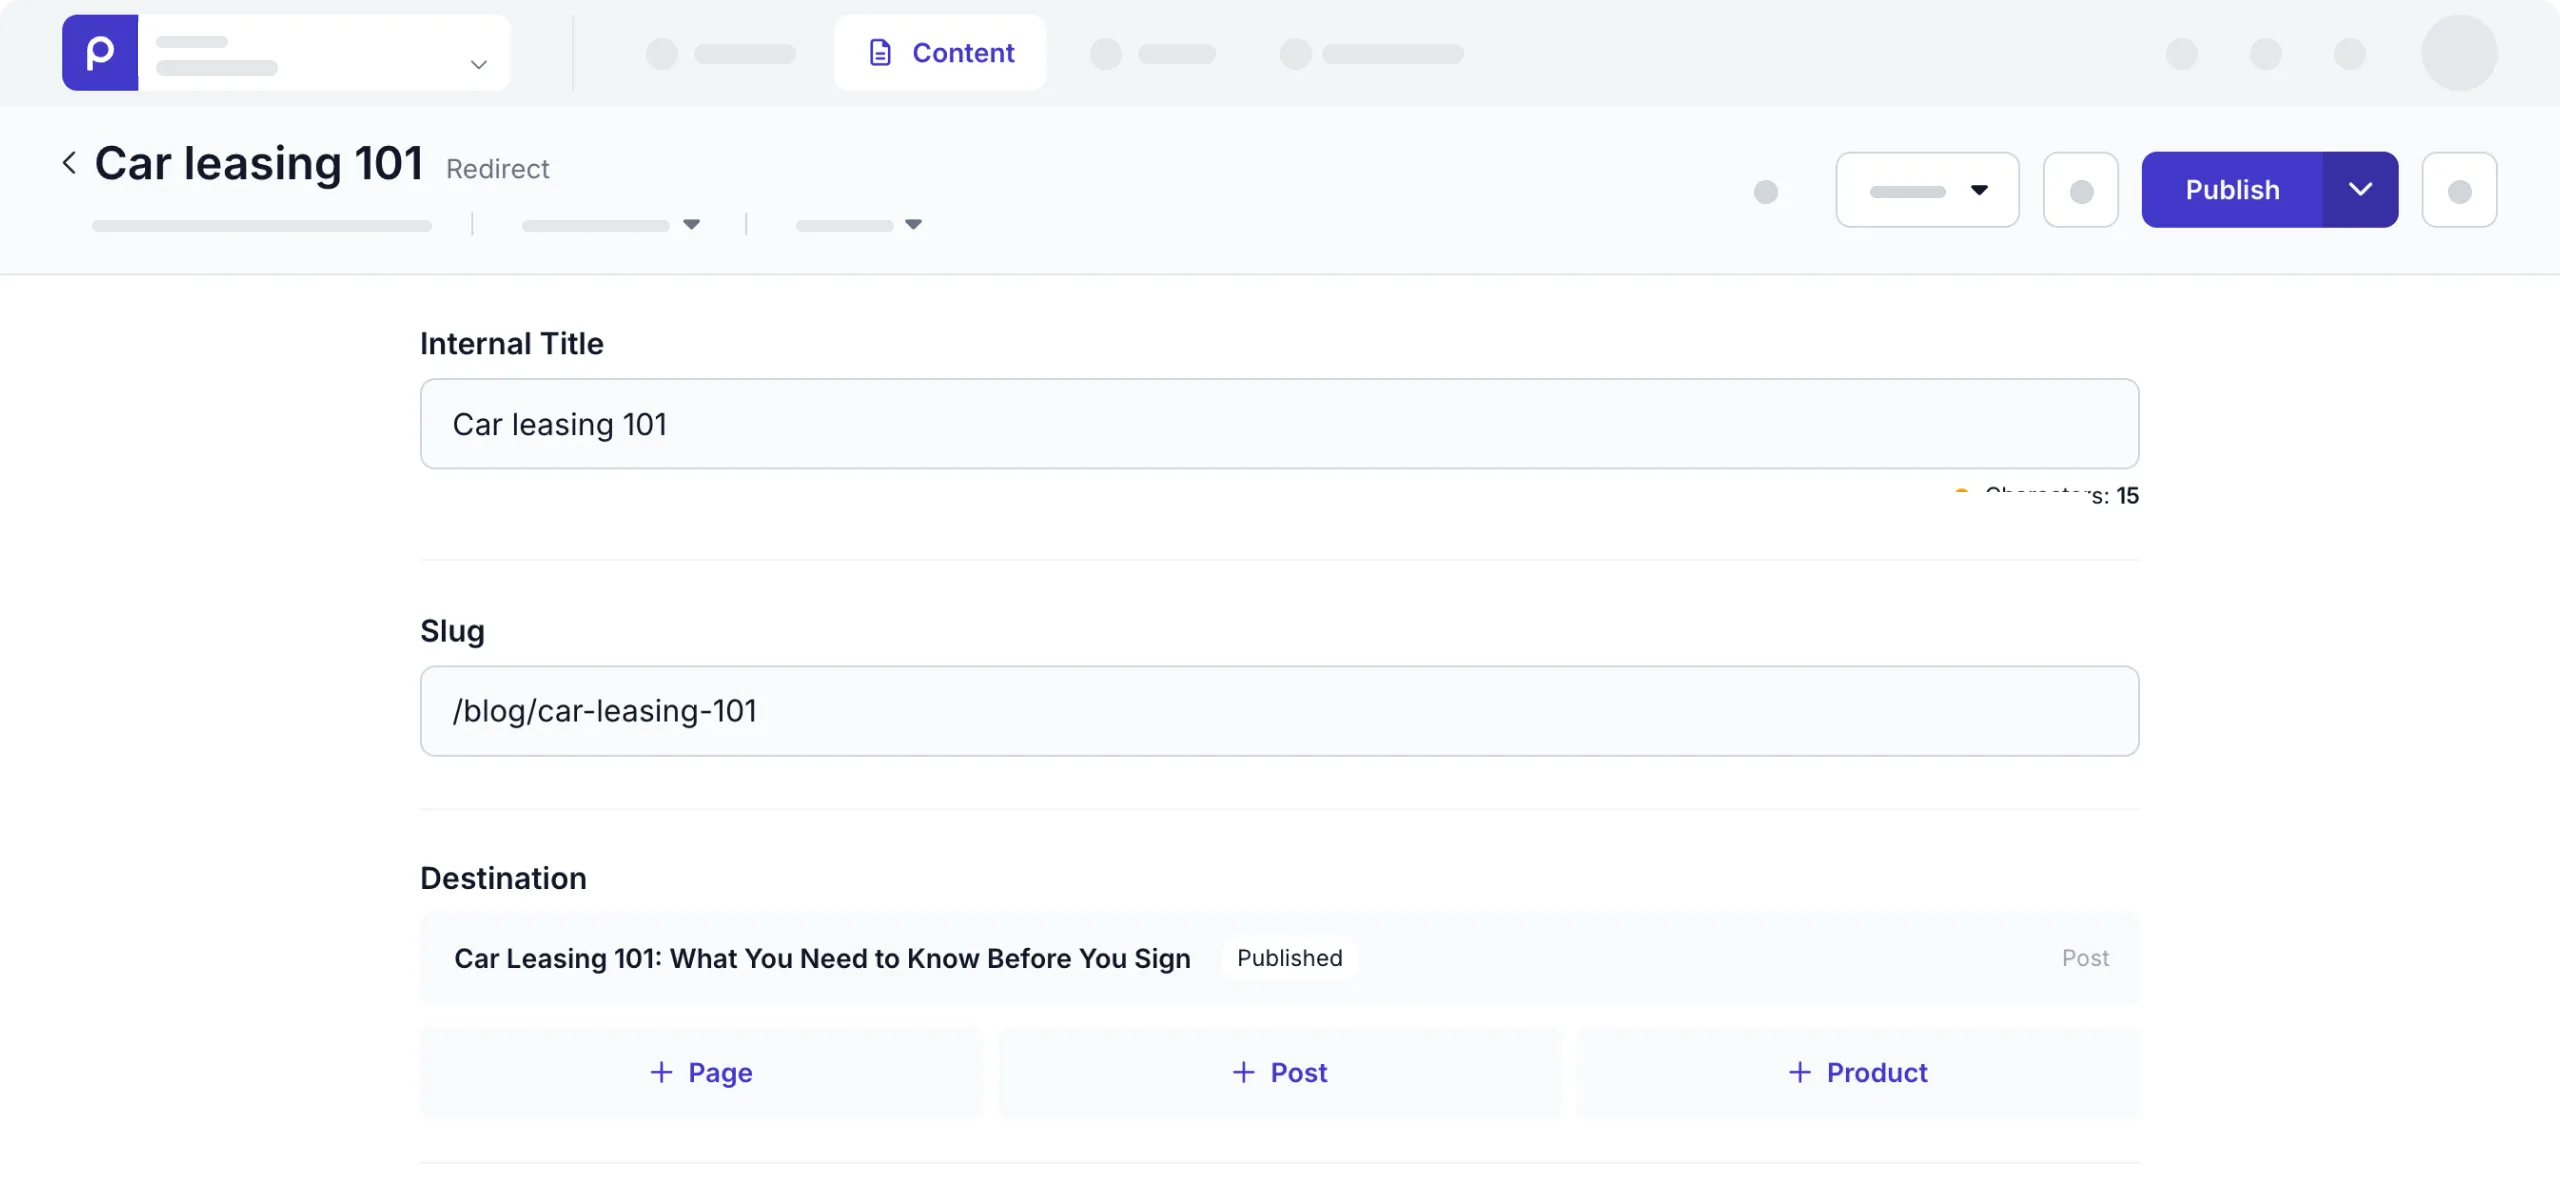
That's it! Once the redirect entries are added to Prepr, you can then fetch the entries and process them.
## Step 3: Handle redirects
This guide outlines two methods to handle redirects. One is based on handling redirects in a Next.js project by dynamically adding the redirects to the `next.config.js` file. The other is handling redirects in an Astro project by adding the redirects to the `vercel.json` which gets picked up and processed when the project is deployed in Vercel.
Follow the steps below to create a script to fetch the redirects info from Prepr CMS and generate the redirects to either be included in the `next.config.js` or written to the `vercel.json`.
1. Create the script `getRedirects` to fetch the redirects like in the code snippets below. Set the placeholder value for `` to the API URL from a [Prepr access token](/graphql-api/authorization#access-tokens).
2) Use one of two methods to update the configuration file to handle the redirects.
- **Redirect with Next.js**: Add the redirects from Prepr to the built-in `next.config.js` file.
- **Redirect with Vercel**: Add the redirects from Prepr to the `vercel.json` file during build time so that Vercel processes them after deployment.
That's it! Once you successfully build and deploy your project, the redirects are processed and can be tested by navigating to the outdated links.
## What's next?
Check out our other best practice guides from the list below:
- [Rendering strategies](/development/best-practices/csr-ssr-ssg)
- [Using TypeScript with the GraphQL API](/development/best-practices/typescript)
- [How to set up content item previews](/project-setup/setting-up-previews-and-visual-editing)
Source: https://docs.prepr.io/development/best-practices/redirects
---
# Handling SEO in a headless CMS
*This article details how to solve SEO challenges when implementing a headless CMS.*
## Introduction
SEO is the process of making a website easy to find through search engines like Google.
So, setting up SEO measures is a necessary activity when implementing a front end.
And this process has been made easier with the introduction of the CMS.
Headless CMSs are becoming the more popular choice over traditional CMSs because of consistency across multiple platforms, flexibility, improved performance, and scalability.
Despite these benefits, the very nature of a headless CMS that decouples the front end from the content means that there are some challenges when taking measures to improve SEO.
## SEO challenges with a headless CMS
Traditional CMS platforms often come with built-in SEO tools that headless CMSs don't usually have. This means that developers need to implement an SEO strategy in the front-end application to deal with challenges when implementing a headless CMS.
When you prepare an SEO strategy, consider the following topics:
- Managing metadata
- Setting up URLs
- Managing redirects
- Generating a sitemap
- Reviewing content for SEO
Let's look at each of these SEO topics in detail and how to handle them in Prepr CMS.
### Managing Metadata
Metadata are elements like title and meta description with keywords that provide information about a webpage to search engines and web browsers. These elements are placed in the head HTML of a webpage and are used to help search engines understand the content and context of the page.
Unlike headless CMSs, traditional CMSs usually include plugins that can customize and update meta tags for pages. So, some once-off development effort is needed to set these up dynamically in a headless CMS.
#### How to manage metadata in a headless CMS
Headless CMSs decouple content from the front-end presentation. Before implementing a headless CMS project, you will typically model the content first. During this stage you will model the SEO metadata.
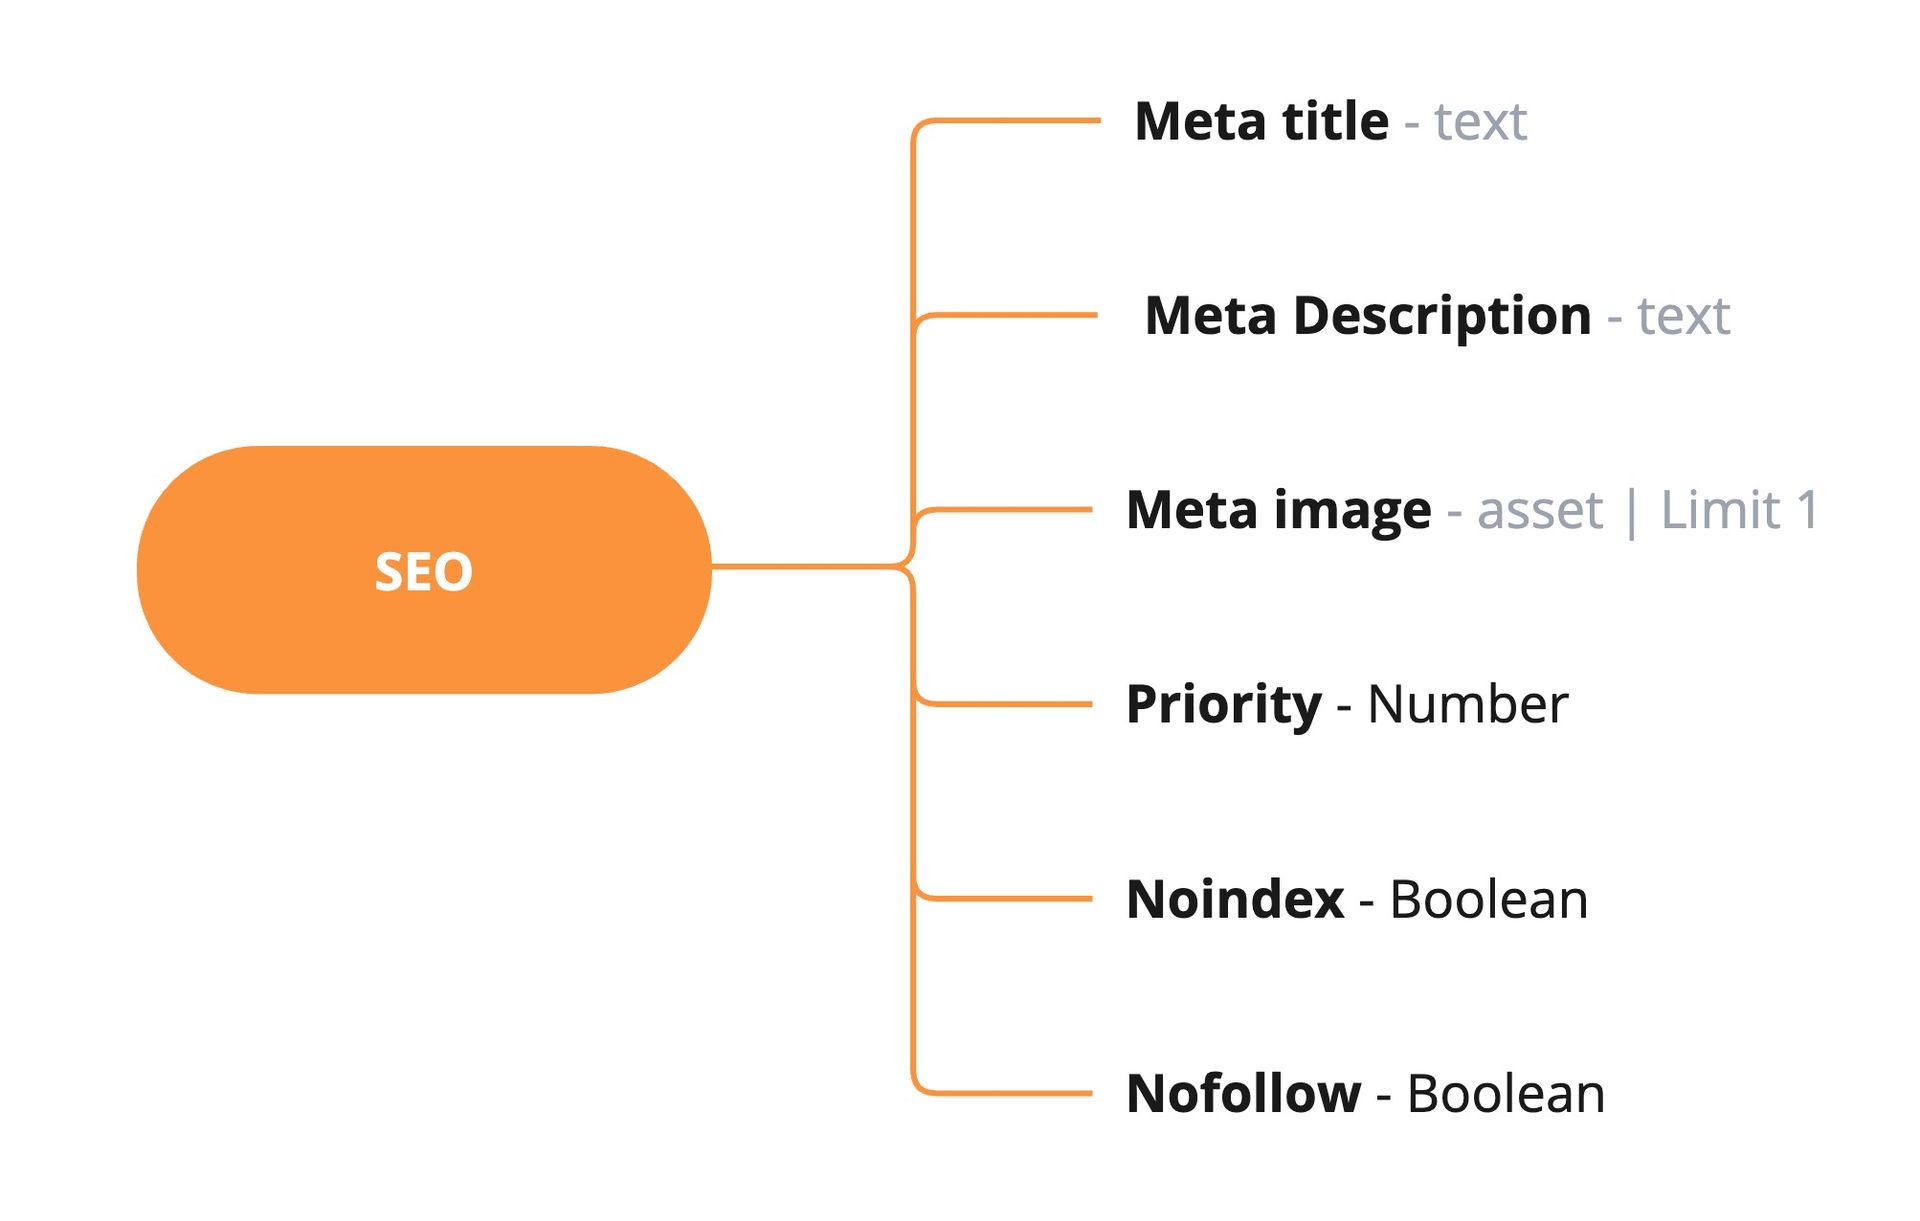
Important metadata include fields like the `Meta title` and `Meta description` like in the example above. For the purposes of sharing content on social media, you could also include a `Meta image`. You could even include a `priority` to indicate the pages that are most important for crawling and indexing. Use indicators like `nofollow` and `noindex` for content that should be ignored by searchbots.
Use the guidelines below to set up the SEO metadata structure:
- Keep the title tag short. Restrict the number of characters to 60.
- Keep the metadata description to under 140 characters.
- Use [robots metadata](https://developers.google.com/search/docs/crawling-indexing/robots-meta-tag#xrobotstag-implementation) to tell search engines which pages to avoid and not index. By default, Googlebot will index a page and follow links to it.
- Prevent content editors from using the same metadata description for multiple pages in your website
- Include some help text on the SEO fields to guide content editors with the following tips:
- Use a persuasive metadata description to get searchers to click your page.
- Include keywords in your metadata description.
- Set the metadata title tag to the H1 (title) of the page where it makes sense to do so.
- Show intent in the metadata title tag.
- Marketers should revise the title and meta description on pages based on the CTR for those pages.
Once your structure is defined in the CMS, it's available to content editors and marketers to fill in values for fields like the title and the description. In the front end, it's then possible to retrieve the metadata to set the necessary tags for each page.
#### How to set up metadata in Prepr CMS
You can easily manage SEO metadata in Prepr CMS in a few steps.
1. Set up a template structure for the SEO metadata by creating an SEO component.
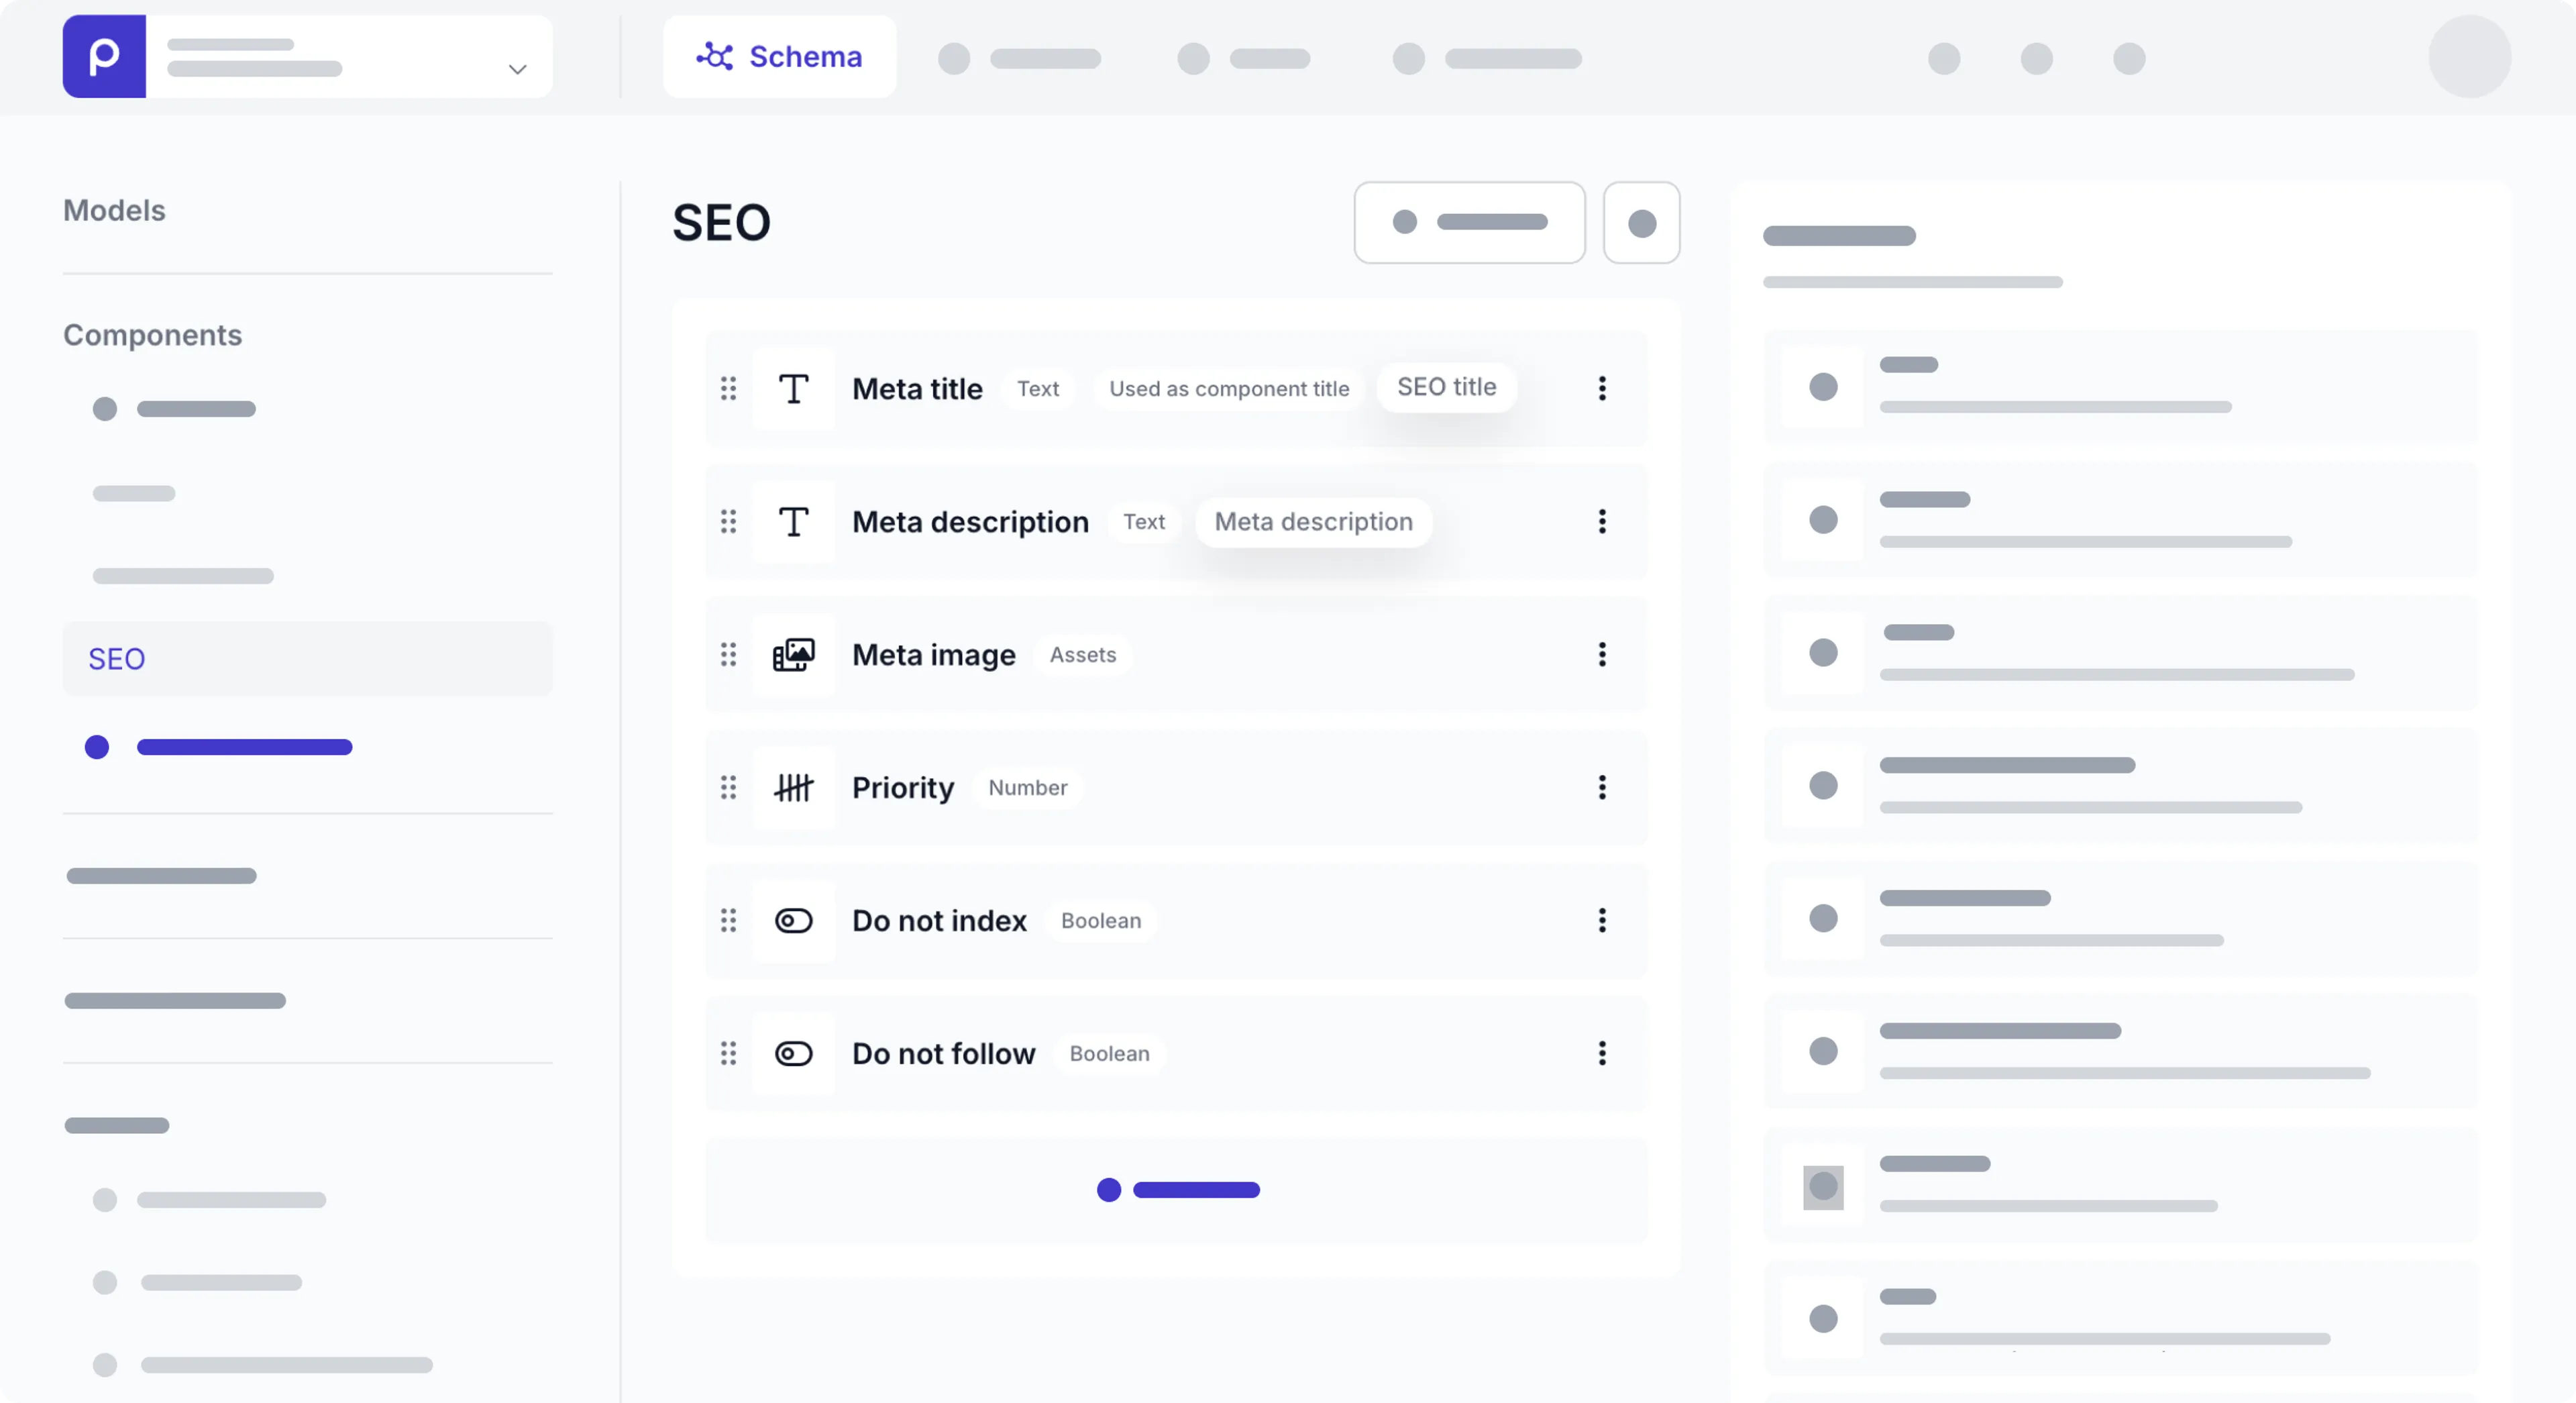
2. Include the SEO component in relevant models. These are the models that need to be rendered as pages in the front end.
3. The content editor can then store SEO metadata like the title, meta description, and set `Noindex` and `Nofollow` tags.
4. In the front end, include code that makes a [GraphQL API](/graphql-api) request to get the SEO metadata for the relevant page and map the values to their relevant HTML meta tags. Check out the [Google meta tags and attributes doc](https://developers.google.com/search/docs/crawling-indexing/special-tags) for attributes that are relevant to search engines.
It's useful to know that many front-end frameworks abstract the creation of the meta tags and allow you to set meta tags dynamically. See the example code snippets below on how to set meta tags.
### Setting up URLs
Search engines like Google use URLs as one of the factors for website ranking and to understand what the content of a page is about. SEO-friendly URLs improve indexing by search engines.
Also, when visitors see a URL, they are more likely to click a URL they understand compared to a URL that has a bunch of numbers.
Unlike headless CMSs, traditional CMSs include plugins that set URLs automatically. For instance, they offer built-in support for creating language-specific URLs, which is crucial for SEO. This can be easier to manage because the system automatically handles URL structures based on language settings. On the other hand, headless CMSs need custom development to manage URLs. You need to explicitly configure and maintain URL structures which is a more flexible solution but needs more technical input.
#### How to set up URLs in a headless CMS
Many headless CMSs allow editors to include a URL or slug for the page. The slug is the last part of the URL address that uniquely identifies a page. If possible, auto-generate this slug field value based on existing fields in the page content such as the page `name` or an article `headline`. The front end can then get this slug value to set up the URL for a page.
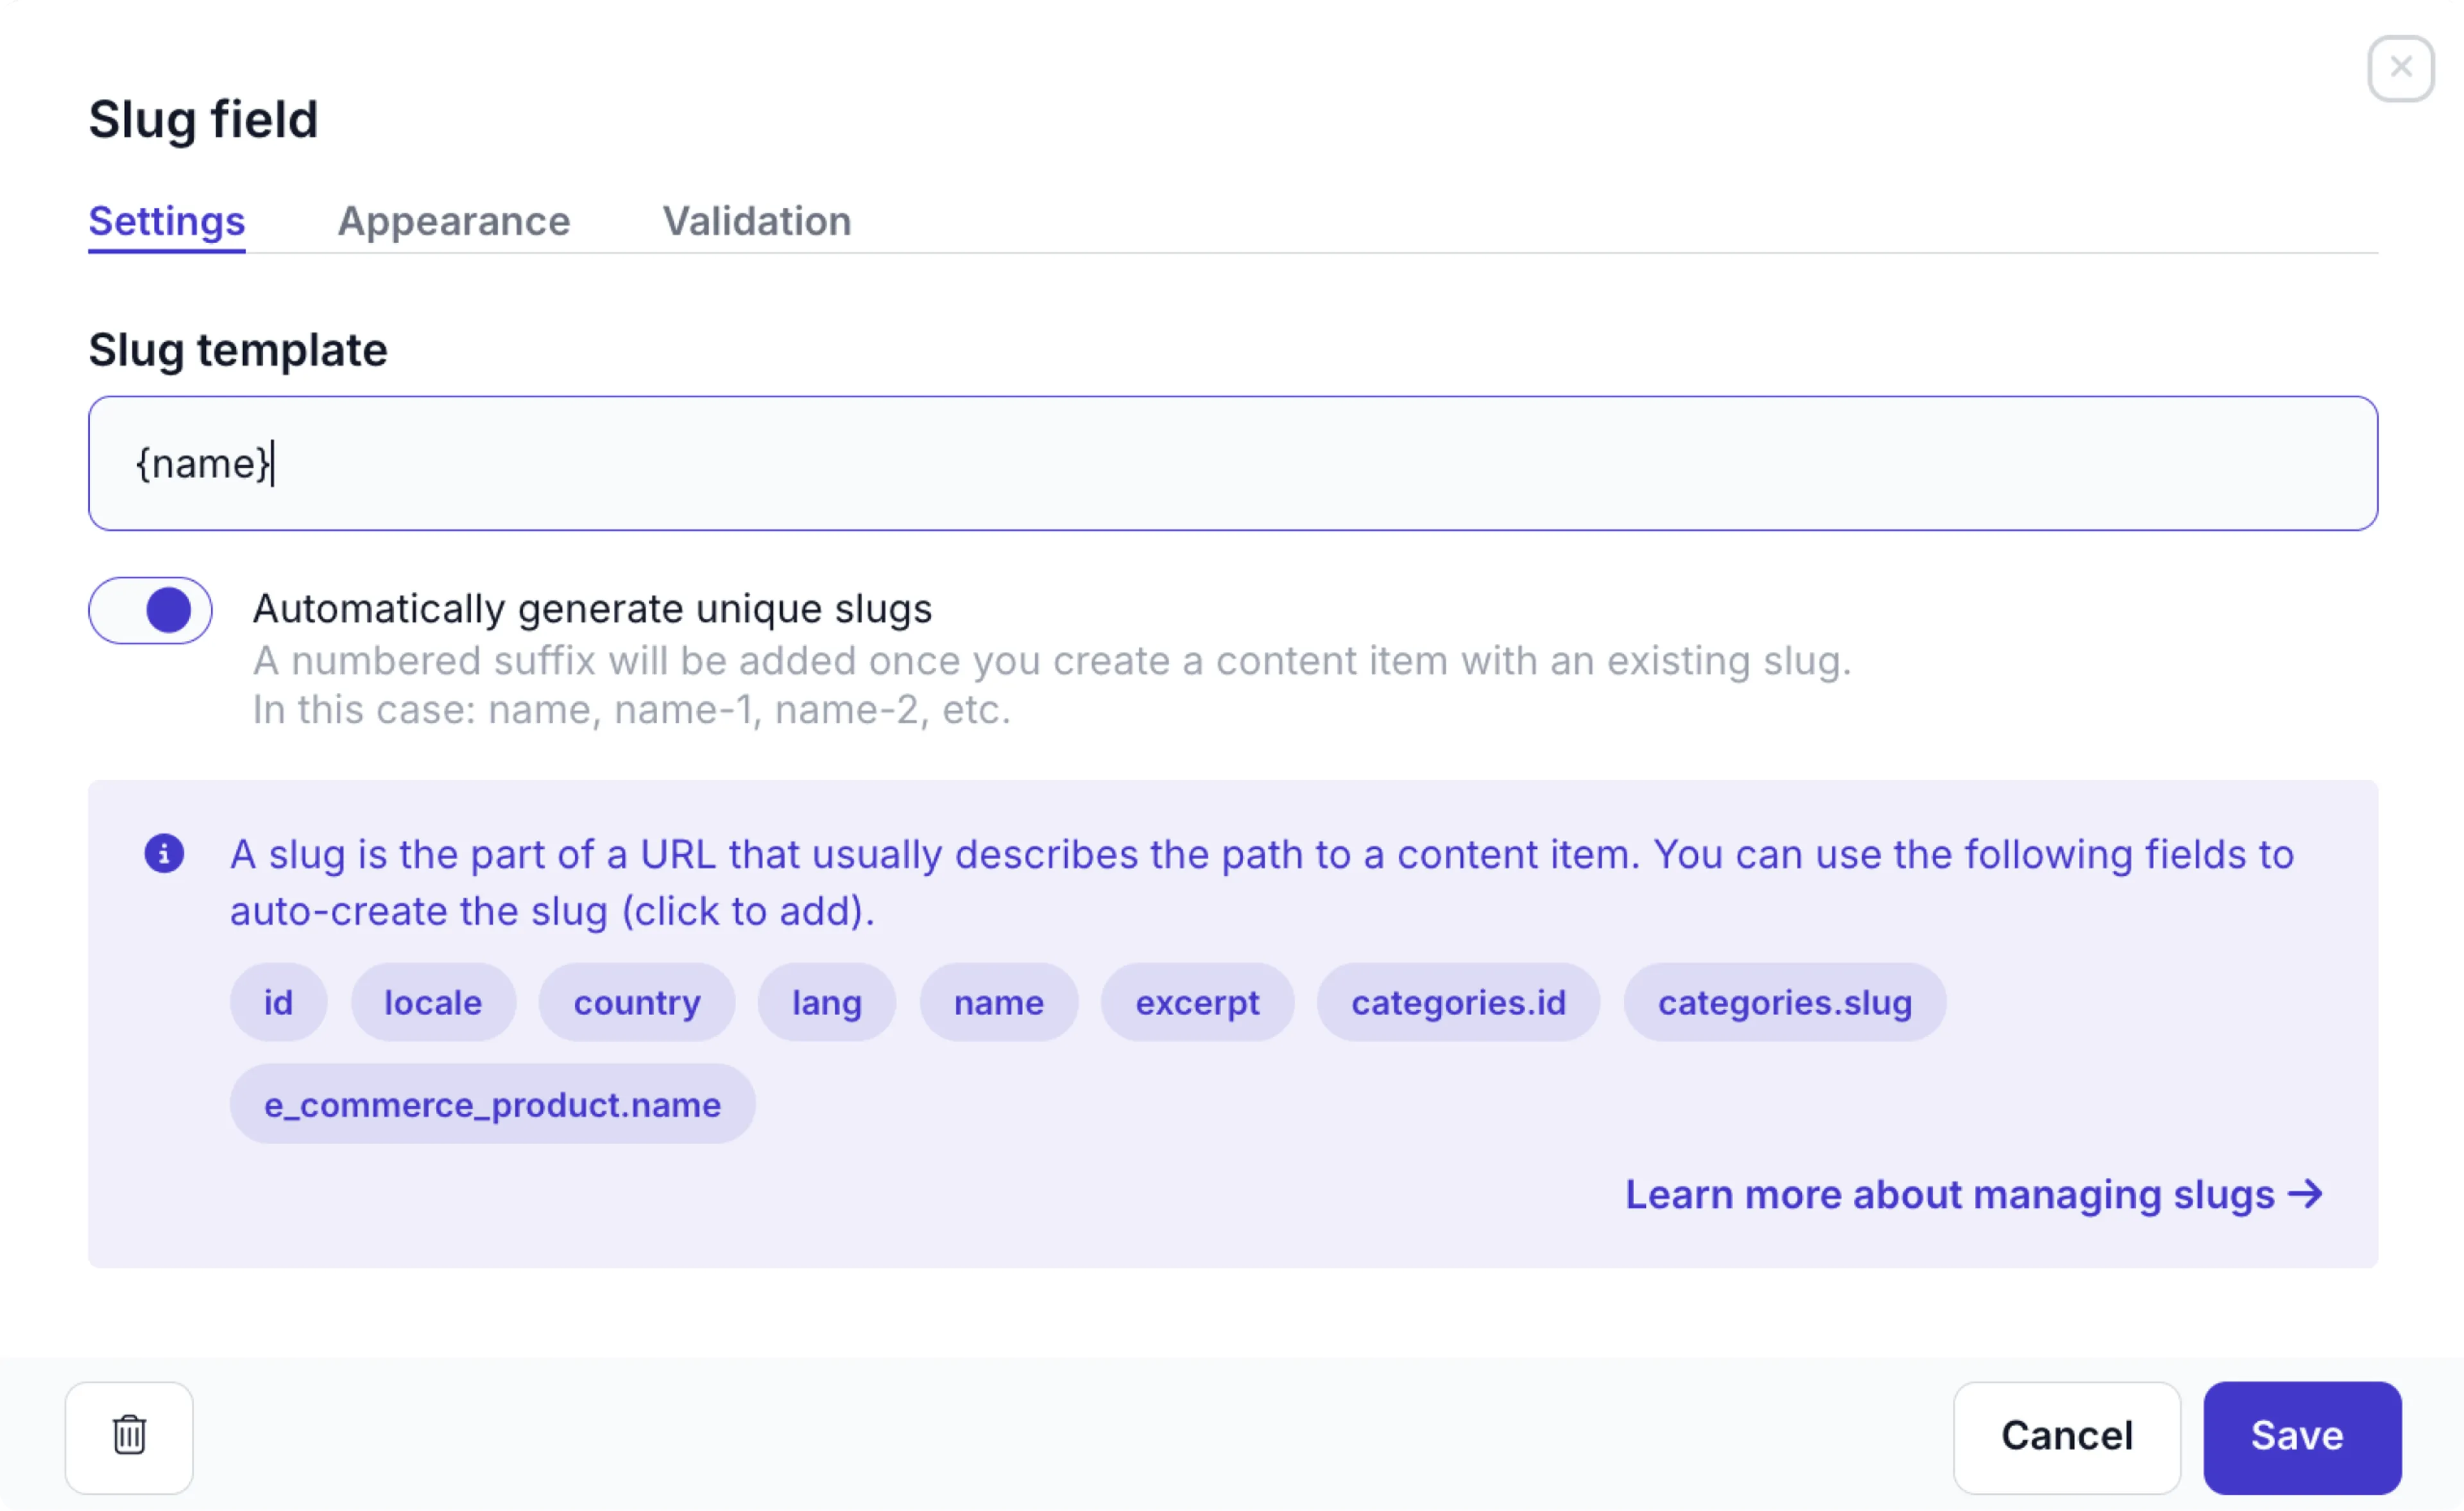
To improve SEO, make sure that the generation of the slug follows the guidelines below.
- Use short descriptive URLs that are easy to read like `example.com/best-practices/how-to-handle-SEO`.
- Avoid complicated URLs with unrecognizable words or numbers like `example.com/products/page-id-1231/2019-09`.
- Keep URLs constant. Search engines consider a new URL to be a link to a new page. If a URL changes for an existing page, the ranking of the page starts from scratch and it will take time for the page to regain its ranking in searches.
- Use hyphens '-' in URLs and not underscores '\_' as separators.
- Only use lowercase in URLs.
- Use primary keywords in the URL, but don't repeat the keyword.
Follow the guidelines below for SEO when setting up URLs in the front-end.
- Organize your URLs into categories and sub-categories like `blog` or `best–practices` to improve content ranking.
- Handle not-found pages and use [redirects](#managing-redirects).
In the case of language-specific URLs, it's useful to note that many front-end frameworks include dynamic routing for internationalization. Check out the [Next.js docs](https://nextjs.org/docs/pages/building-your-application/routing/internationalization) for an example.
### Managing Redirects
Redirects send visitors from a requested URL to another. You need redirects for pages that are broken or pages that were moved to ensure visitors and search engines access the most relevant or current page.
Without the usual front-end management that you find in a traditional CMS, handling redirects can be more complex for a headless CMS.
#### How to handle redirects in a headless CMS
You can set up a simple content structure in the CMS to hold the original URL and the new URL for a page that needs to be redirected. In this structure, include an indicator field to define the redirect as `permanent` or `temporary`.
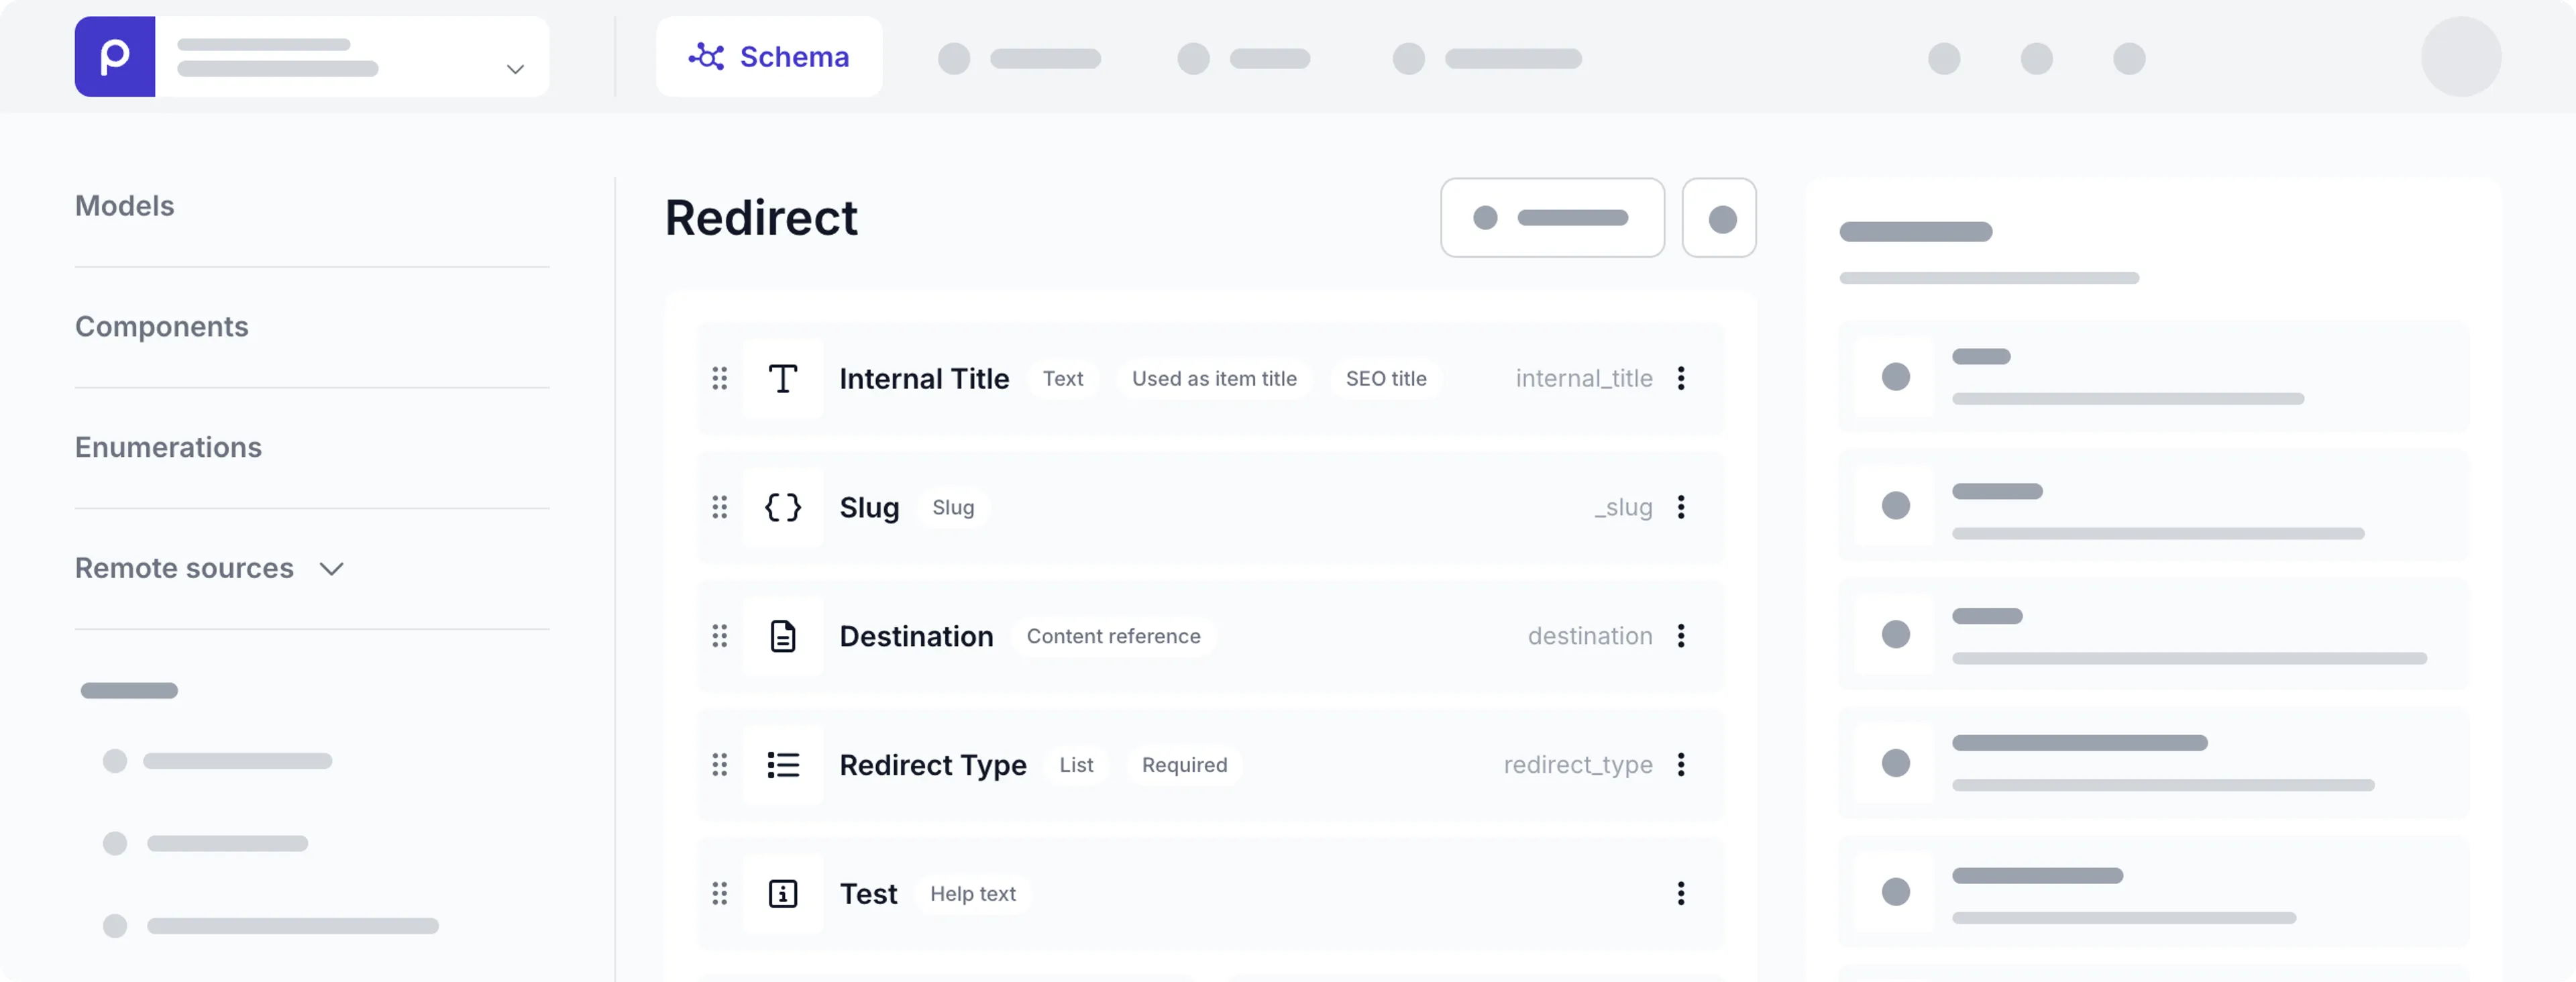
Once the redirect structure is modeled, add a list of redirects to the CMS content. The front end can then query and send the redirect info to the deployment service.
Check out the [Prepr Redirects guide](/development/best-practices/redirects) for example code snippets on how to handle redirects using Prepr CMS.
### Generating a sitemap
A sitemap is a file that helps visitors and web crawlers navigate your website to discover and index pages. With a sitemap, you can ensure that search engines can discover your pages quickly and when a crawler finds a URL in your sitemap, it knows you want it in the search results.
Traditional CMSs often include built-in support to generate a sitemap automatically. While headless CMSs don't include automatic sitemap generation for search engine crawling. Additional development effort is therefore needed for a headless setup.
#### How to generate a sitemap in a headless CMS
The sitemap structure should follow the guidelines below:
- The XML sitemap format provides additional information about images, video, and localized versions of your pages.
- The sitemap should include fully-qualified, absolute URLs.
- The `` tag must be consistently updated to indicate when the content last changed.
A sitemap for a project contains a list of all the pages that it wants the search engine to find like in the example below.
```xml filename="sitemap.xml" copy
https://www.xmlsitemapgenerator.org/en/
2005-01-01
monthly
0.8
```
Headless CMSs allow you to include URL or slug info for each content page. The front end application can then retrieve this info for each page and compile the sitemap structure dynamically during deployment.
#### Generate a sitemap dynamically from Prepr CMS
You can make use of the available page content in Prepr CMS to generate the sitemap with the steps below.
1. Make the `base URL` available in an environment variable.
2. Query the slugs for each of your page content items.
3. Loop through these items and assign them to an array.
4. For each page in the array, set the URL in the sitemap to the `base URL` + `slug` and set the `lastmod` value to the system date field `_changed_on` of the content item.
See the simple Next.js code snippet example below that automatically generates a sitemap from Prepr CMS during the build of the web app.
```js filename="sitemap.js" copy
let pages = []
const { data } = await client.query({
query: gql`
query {
Pages {
items {
_slug
_changed_on
}
}
}
`,
})
data.Pages.items.map((page) => {
pages.push({
url: process.env.SITE_URL + '/' + page._slug,
lastModified: new Date(page._changed_on),
changeFrequency: 'monthly',
priority: 1.0,
})
})
return pages
}
```
### Reviewing Content for SEO
Search engines prioritize fresh and relevant content, so outdated content loses visibility in search engine results. This leads to a decline in organic traffic and a diminished online presence. When using a headless CMS, you can easily publish content updates to the front end whenever the changes are needed.
However, a headless CMS usually lacks a WYSIWYG editor and SEO plugins to measure content performance. This makes it difficult to preview how content changes will look and perform before the front end goes live.
#### How to review content in headless CMSs
Most CMSs do not include tools to review the content for SEO impact. In these cases, you need separate monitoring software to review the content for SEO performance in search engines.
#### How to review content in Prepr CMS
Prepr CMS includes an [automatic SEO review feature](/content-management/managing-content/optimizing-content-for-seo) and the ability to include a [front end preview](/project-setup/setting-up-previews-and-visual-editing) for each piece of content.
For more advanced SEO performance criteria, consider a dedicated marketing monitoring tool or SEO website crawler software.
## Schedule a free consultation
Do you still have questions on SEO in relation to Prepr? Book a 15-minute call with a Prepr solution engineer right away. [Schedule a call](https://prepr.io/get-a-demo)
Source: https://docs.prepr.io/development/best-practices/seo
---
# Using TypeScript with the GraphQL API
*This article explains how to make the most out of Prepr GraphQL API features when using TypeScript in your front-end app.*
## Introduction
TypeScript is a strongly typed programming language that builds on JavaScript.
Developers choose to use TypeScript instead of JavaScript in their projects to take advantage of cleaner and more scalable code, better code readability, type safety, and code that's easier to debug and test.
By using TypeScript in *Strict Mode*, you get stronger guarantees of program correctness for types and null checks.
You can use a GraphQL code generator to generate TypeScript types and keep these up to date with any schema changes.
Prepr delivers strict types in the GraphQL API schema so that TypeScript in [strict mode](https://www.typescriptlang.org/tsconfig#strict) can support the following situations in the front end:
- To process content fields in their expected data types.
- To make sure that some fields in content items are not null before rendering the content in the front end.
## Enable strict mode and generate TypeScript types
Follow the steps below to use the strict mode feature in Prepr CMS, generate TypeScript in your front end and process an API response with strong TypeScript types.
Let's start with the setup in your Prepr environment.
And that's it! You've successfully implemented TypeScript strict mode in your front-end.
If you found this article useful and would like to explore other similar topics in the Prepr docs, [please let us know](mailto:feedback@prepr.io).
Source: https://docs.prepr.io/development/best-practices/typescript
---
# Integrating with webhooks
*This guide shows you how to configure, implement and secure webhooks to enable real-time data sync from Prepr CMS to external applications.*
## Introduction
Webhooks in Prepr CMS let you receive real-time updates for any events.
Whenever a content item, asset, segment, visitor, schema or tag changes, Prepr sends a secure HTTP `POST` request to your webhook endpoint.
This allows your application to respond to an event triggered in Prepr — whether that's syncing data, triggering notification or other automation, or keeping your UI in sync with content changes.
## Creating a webhook
Webhooks in Prepr send notifications as `POST` requests and include a `JSON` payload with Prepr headers and custom headers, if defined in the webhook.
Follow the steps below to add a new webhook.
1. Log in to your Prepr account with a user that has *Owner*, *Admin* or *Developer* rights.
2. Click the icon and choose the **Webhooks** option.
3. Create a new webhook by clicking the **Add webhook** button.
4. Add the URL of the endpoint where the notifications will be sent.
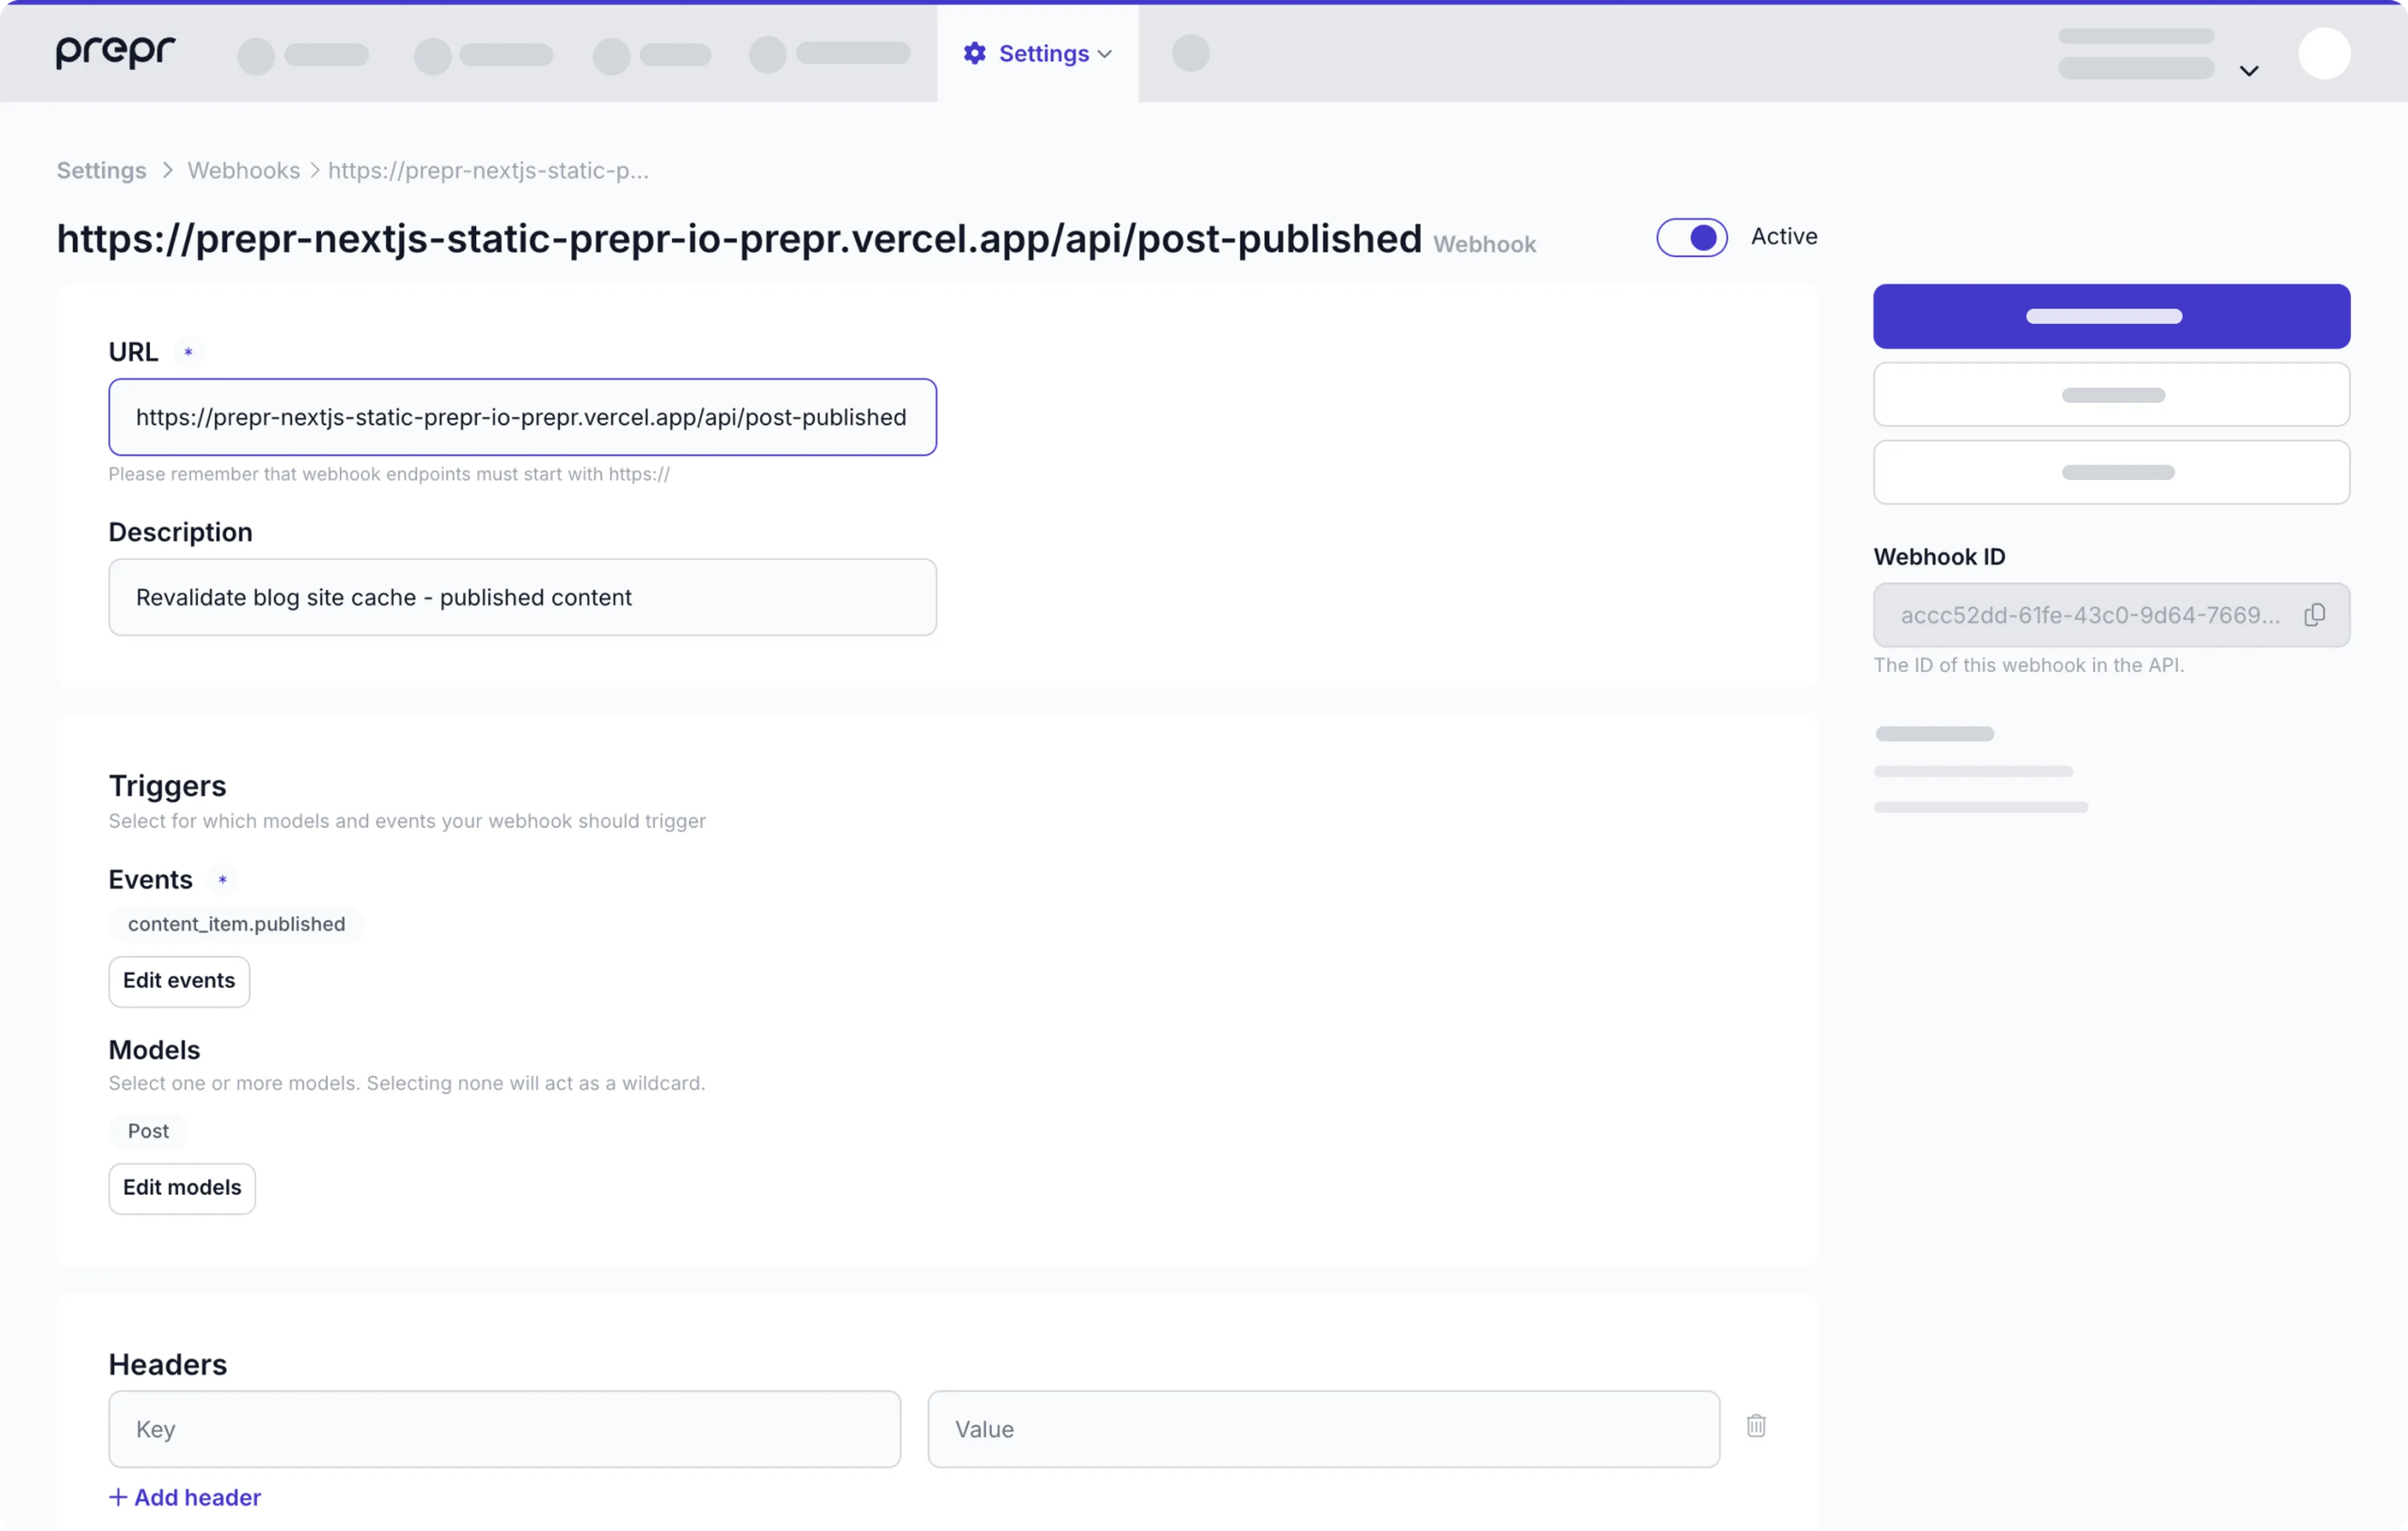
5. Select one or more of the [supported events](#supported-events) to trigger the request.
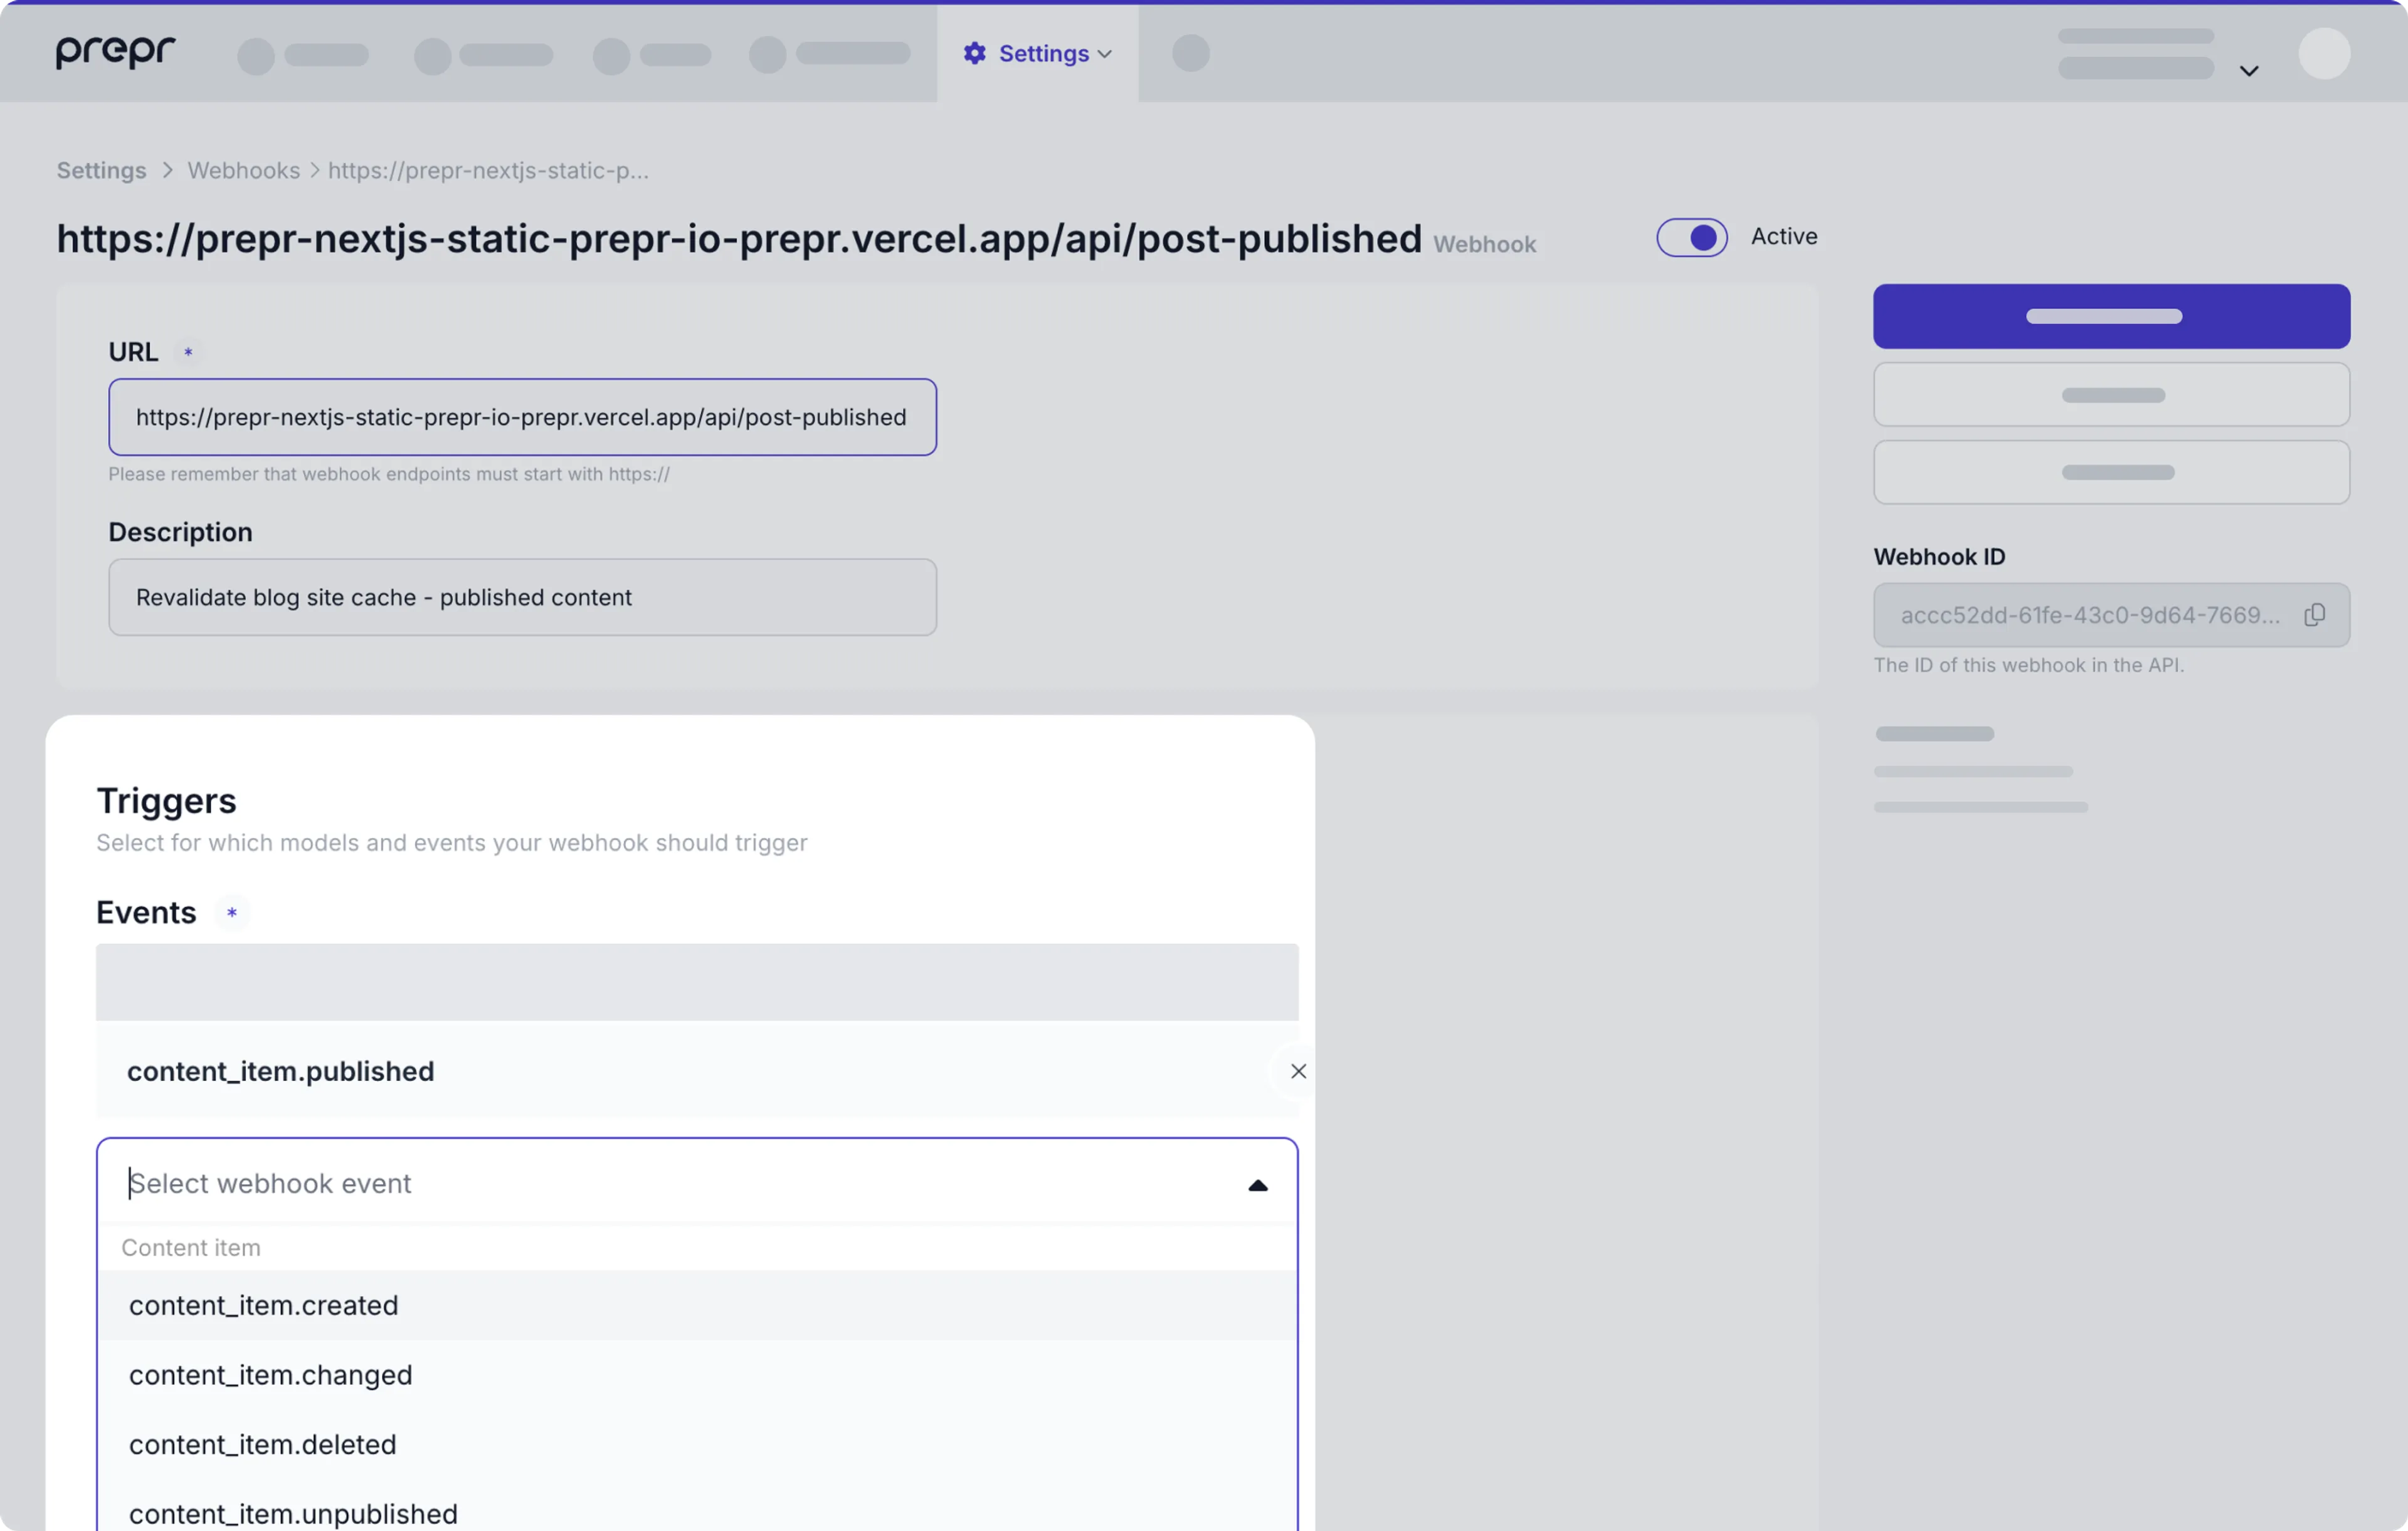
6. Click the **Save and close** button.
Check out the list below for additional info you can include in your webhook.
### Filtering by model
When you select a content item event, you will receive notifications when any content item is created, published, unpublished, changed, or deleted.
You can further specify which content items you want to receive notifications from.
Select one or more models to receive webhook events for content items of that specific model.
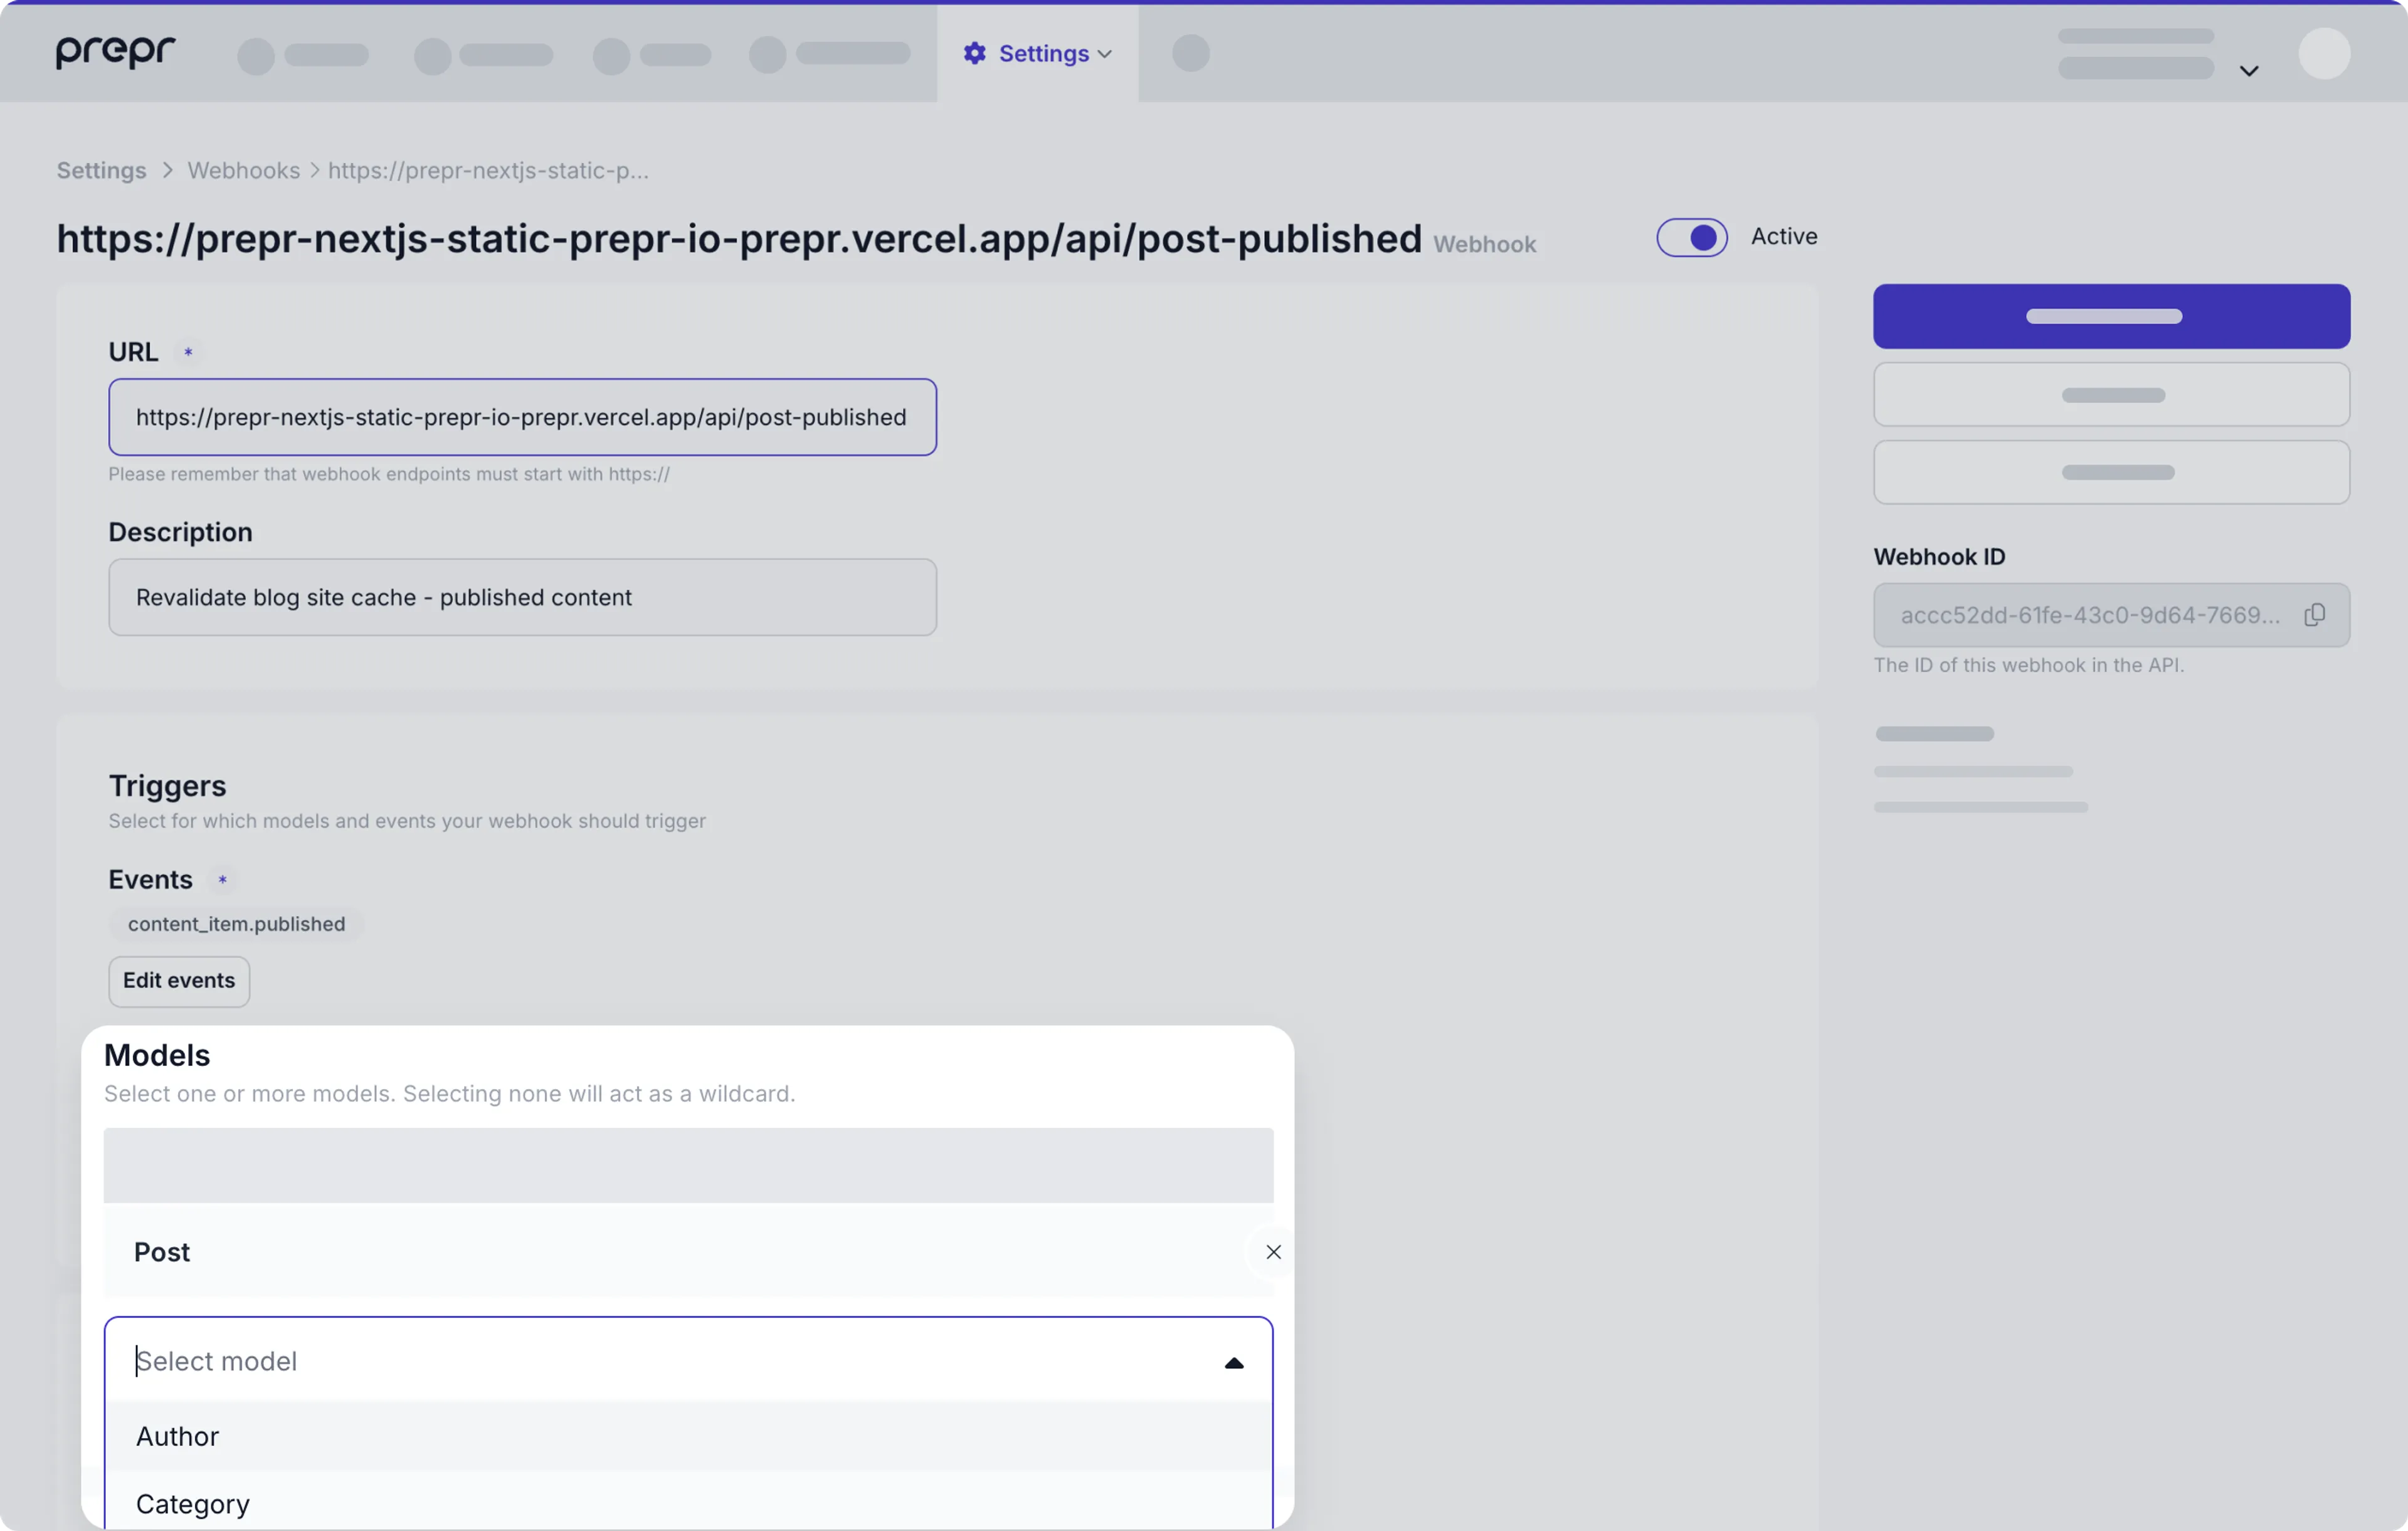
### Custom headers
There are some use cases where an application requires some fields to be added in the header of the webhook payload.
For example, for access tokens. To add a custom header, enter a header key and value.
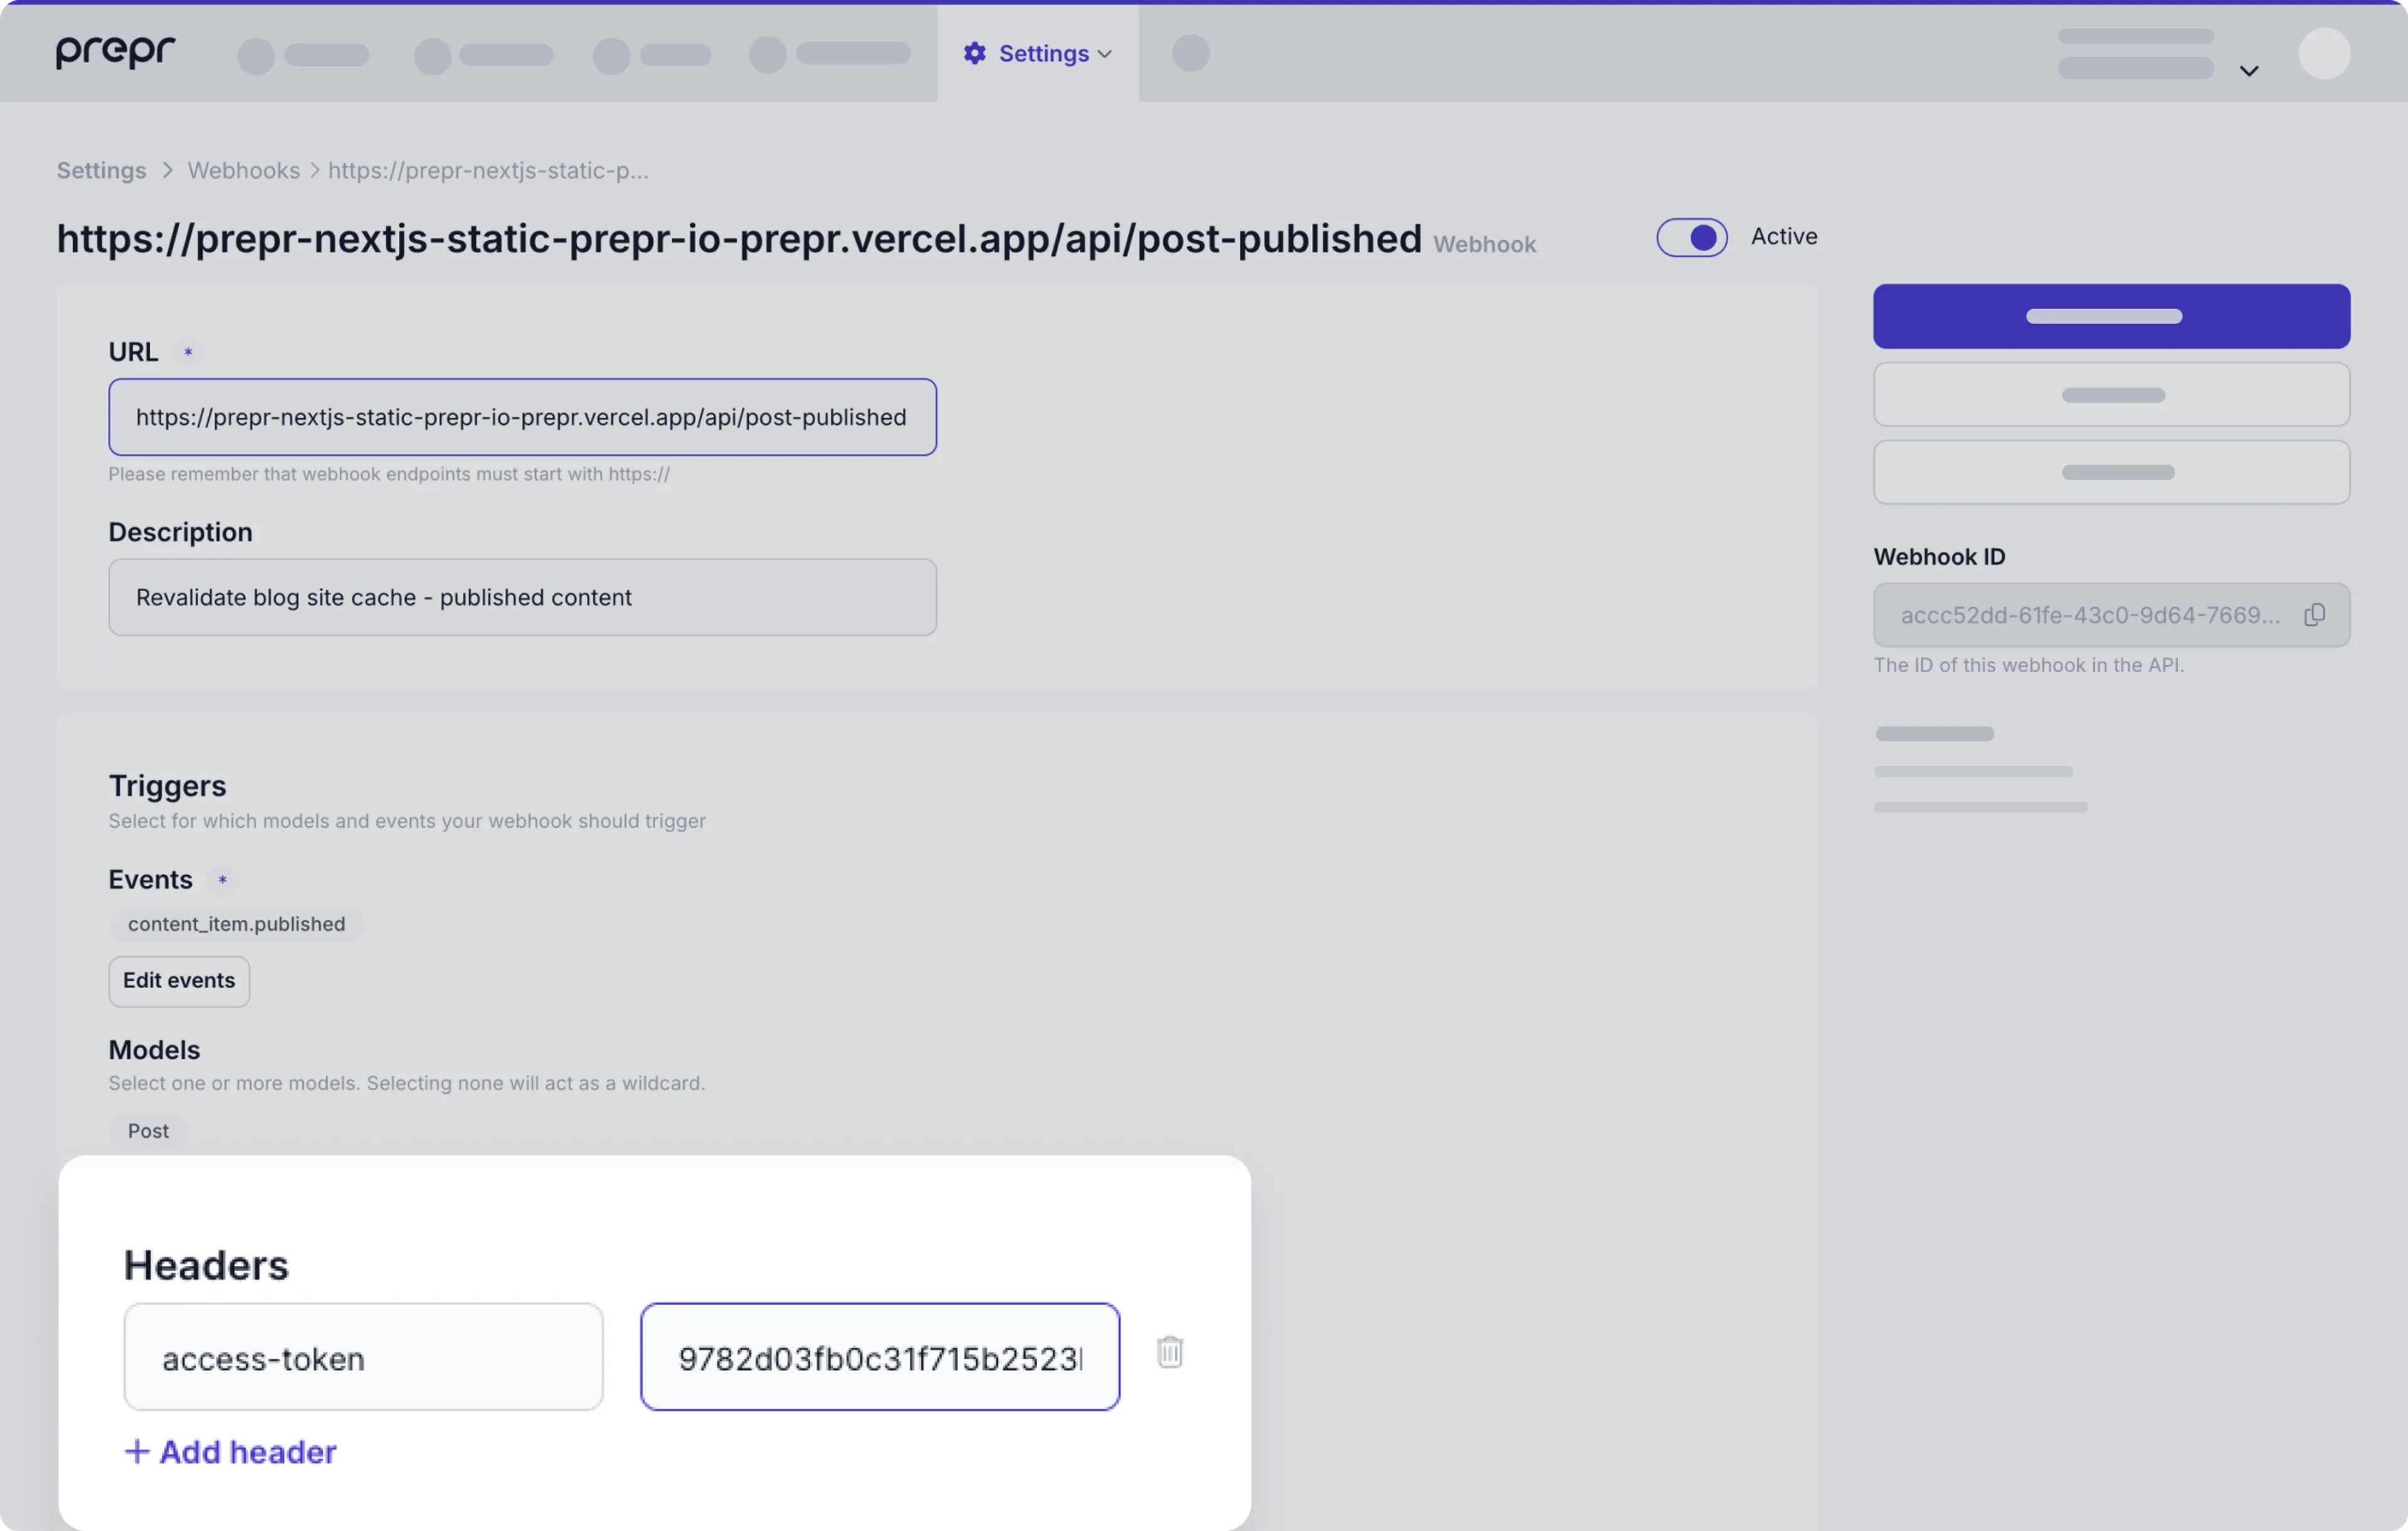
## Supported events
The events below can be used to trigger a webhook notification.
Depending on your plan some options may not be available.
### Content item events
| Event Name | Description | Example follow-up action |
| :--- | :--- | :--- |
| `content_item.published` | When a user publishes a content item. | Trigger a static website to rebuild. |
| `content_item.unpublished` | When a content item is moved to *Unpublished* status. | Remove an article from a *Featured* list. |
| `content_item.created` | When a new content item is created. | Send a notification to the content production manager. |
| `content_item.changed` | When a content item is changed. | Notify a developer when web app config is changed and might have impact on the front end. |
| `content_item.deleted` | When a content item is moved to the *Deleted items* list. | Notify a developer when system-related content items are deleted and will impact the front-end. |
| `content_item.invalidated` | 1. When the remote source item used in a content item has changed in the external system. 2. When an [API `PATCH`](/mutation-api/content-items-create-update-and-destroy#patch-a-content-item) is requested for a published content item. | Trigger the front end to clear the UI cache to track *Out of stock* products. |
### Asset events
| Event Name | Description | Example follow-up action |
| :--- | :--- | :--- |
| `asset.created` | When an image, file or video is initially created in the *Media library*. (Not yet uploaded) | Send the asset ID to automatically link to a migrated content item. |
| `asset.uploaded` | When an image, file or video is uploaded to the *Media library*. | Trigger an AI service to generate alt-text. |
| `asset.changed` | When the meta-data of the image, file or video is updated like the title, description or the video thumbnail is changed. | Trigger an AI service to regenerate alt-text. |
| `asset.deleted` | The image, file or video is removed from the *Media library*. | Send a notification to the content production manager. |
| `storage_file.deleted` | The uploaded file is deleted from storage. | Trigger removal from your own storage. |
| `cdn_file.deleted` | File is purged from the CDN. | Trigger removal from your own CDN. |
### Schema events
| Event Name | Definition | Example follow-up action |
| :--- | :--- | :--- |
| `schema.changed` | The data model or field types changed. | Trigger TypeScript regeneration in the front end. |
### Segment events
| Event Name | Definition | Example follow-up action |
| :--- | :--- | :--- |
| `segment.created` | When a segment is created. | Create a new corresponding target audience in your CRM. |
| `segment.changed` | When a segment is changed, such as the name, description or conditions. | Sync the updated info to your CRM. |
| `segment.deleted` | When a segment is removed. | Stop all automated workflows associated with this segment. |
### Visitor events
| Event Name | Definition | Example follow-up action |
| :--- | :--- | :--- |
| `person.created` | When a new profile is added to the list of web app visitors. | Trigger a *Welcome* email to the new visitor. |
| `person.changed` | When the visitor data like the email or name is modified. | Sync the updated info to your CRM. |
| `person.deleted` | When a profile is deleted. | Invoke "Right to be Forgotten" protocols for GDPR compliance. |
| `person.segment.added` | When the profile is added to a segment. | Trigger a campaign email the qualifying visitor. |
| `person.segment.removed` | When the profile is removed from a segment. | Revoke a discount code or move them to a different list. |
### Tag events
| Event Name | Definition | Example follow-up action |
| :--- | :--- | :--- |
| `tag.created` | When a new tag is added. | Add the tag to the global filter list in the front end. |
| `tag.changed` | A tag name or property is updated. | Bulk-update the display label on all tagged items. |
| `tag.deleted` | A tag is removed. | Remove the tag from the global filter list in the front end. |
## Payload examples
The table below outlines the structure of the webhook request, detailing key parameters and their associated data.
Each parameter represents an aspect of the event, including metadata.
| Field name | Field type | Description |
|-------------------------|------------|----------------------------------------------------------|
| `id` | string | The event unique identifier. |
| `created_on` | string | The timestamp in UTC when the event is created. |
| `event` | string | The triggered event, for example `content_item.published`.|
| `payload` | object | Object with info about the resource that triggered the event.|
| `performed_by` | string | The Prepr user who triggered the event.|
| `first_publish` | boolean | A value of `true` or `false` is filled when the event is `content_item.published`. |
| `locale` | string | The language such as `en-US` is filled when the event is `content_item.changed`, `content_item.deleted`, `content_item.published`, `content_item.unpublished` or `content_item.invalidated`.|
| `scope` | string | Filled when the event is `content_item.deleted`. The value is either `item` for a full content item deletion or `locale` for a partial delete.|
The sections below describe the payload for each resource in more detail.
### Content item example
The below example request is the payload object when a `content_item.published` event triggers for a `Post` model.
```json copy
{
"id": "75ec2d8c-e5ba-452e-be08-3524af2e1f49",
"created_on": "2025-03-19T14:30:49+00:00",
"changed_on": "2025-05-28T09:01:45+00:00",
"label": "Publication",
"read_time": {
"en-US": 2,
"nl-NL": 2
},
"publish_on": {
"en-US": "2025-05-28T09:01:00+00:00",
"nl-NL": "2025-02-19T12:33:00+00:00"
},
"slug": {
"nl-NL": "de-top-5-mythes-over-autoleasing-ontkracht",
"en-US": "the-top-5-myths-about-car-leasing-debunked"
},
"model": {
"id": "4a8b8f49-b5cd-412f-97e0-5b04a072688d",
"body_singular": "Post",
"body_plural": "Posts"
}
}
```
| Field name | Field type | Description |
|-------------------------|------------|----------------------------------------------------------|
| `id` | string | The content item unique identifier. |
| `created_on` | string | The timestamp in UTC when the item is created. |
| `changed_on` | string | The timestamp in UTC when the item is changed. |
| `label` | string | Type of resource. For content items, this value is `Publication`.|
| `read-time.{locale}` |integer| Values are listed for each locale, for example `en-US`. The calculated time a user reads an article in minutes.|
| `publish_on.{locale}` |string |Values are listed for each locale, for example `en-US`. The timestamp in UTC when the item is published. |
| `slug.{locale}` |string|Values are listed for each locale, for example `en-US`. The slug value of the content item, if applicable.|
| `model.id` |string|The internal id of the model.|
| `model.body_singular` |string|The singular name of the model, for example `Post`.|
| `model.body_plural` |string|The plural name of the model, for example `Posts`.|
### Asset example
The below example request is the payload for an `asset.changed` event.
```json copy
{
"id": "c8580913-bbac-4309-9f74-95a6835930b8",
"created_on": "2025-03-19T16:01:14+00:00",
"changed_on": "2025-05-27T15:23:33+00:00",
"label": "Photo",
"name": "bmw",
"body": "",
"author": "",
"status": null,
"replaceable": true,
"reference_id": "b773b7b3-97ce-40c3-ae1f-b1369d0516e1",
"reference": null,
"original_name": "img",
"mime_type": "image/png",
"extension": "png",
"height": 250,
"width": 496
}
```
| Field name | Field type | Description |
|-------------------------|------------|----------------------------------------------------------|
| `id` | string | The asset unique identifier. |
| `created_on` | string | The timestamp in UTC when the asset is created. |
| `changed_on` | string | The timestamp in UTC when the asset is changed. |
| `label` | string | Type of resource. For assets, this value is `Photo`, `Video` or `Document`.|
| `name` | string | The name of the asset. |
| `body` | string | Additional information about the asset. |
| `author` | string | The person who created the asset such as the photographer.|
| `reference_id` | string | The external id of the asset. |
### Segments example
The below example request is the payload for a `segments.deleted` event.
```json copy
{
"id": "sgm_5g4820qaz70",
"created_on": "2025-05-28T08:52:19+00:00",
"changed_on": "2025-05-28T08:52:19+00:00",
"synced_on": "2025-05-28T08:52:19+00:00",
"label": "Segment",
"body": "New segment",
"description": null,
"reference_id": "new-segment",
"query": {
"conditions": [
{
"type": "event",
"event_name": "View",
"result": true
}
]
},
"mode": 2,
"count": null
}
```
| Field name | Field type | Description |
|-----------------------|------------|----------------------------------------------------------|
| `id` | string | The segment unique identifier. |
| `created_on` | string | The timestamp in UTC when the segment is created. |
| `changed_on` | string | The timestamp in UTC when the segment is changed. |
| `label` | string | Type of resource. For segments, this value is `Segment`.|
|`body` | string | The name of the segment as it's displayed in the CMS.|
|`reference_id` |string | An external id for the segment. This value can be used to identify the segment in an external CRM system, if applicable.|
|`query.conditions` |array | A list of condition objects for this segment. The object fields depend on the condition options saved for this segment. For a complete list, check out the [segments doc](/personalization/managing-segments).|
### Visitor example
The below example request is the payload for a `person.changed` event.
```json copy
{
"id": "3b0e2f5e-5b06-4563-828d-13ce49252672",
"created_on": "2024-08-23T07:20:45+00:00",
"changed_on": "2025-05-27T15:48:20+00:00",
"last_seen": "2024-08-23T07:20:45+00:00",
"label": "Person",
"reference_id": null,
"first_name": "Braylen",
"last_name": "Nash",
"full_name": "Braylen Nash"
}
```
| Field name | Field type | Description |
|--------------|------------|--------------------------------------------------------------------------------------------------------------------------------------------------------------------------------------------------|
| `id` | string | The visitor unique identifier. |
| `created_on` | string | The timestamp in UTC when the visitor is created. |
| `changed_on` | string | The timestamp in UTC when the visitor is changed. |
| `label` | string | Type of resource. For visitors, this value is `Person`. |
| `full-name` | string | The full name of the visitor. For a full list of available visitor characteristics, checkout the [managing visitors guide](/data-collection/managing-visitor-data-manually#updating-visitor-profiles). |
### Tag example
The below example request is the payload for a `tag.created` event.
```json copy
{
"id": "c921ef1e-b8e5-4e8a-8cfa-2914665c3bf1",
"created_on": "2025-09-03T12:40:49+00:00",
"changed_on": "2025-09-03T12:40:49+00:00",
"label": "Tag",
"color": null,
"body": "subscriber",
"slug": "subscriber"
}
```
| Field name | Field type | Description |
|--------------|------------|--------------------------------------------------------------------------------------------------------------------------------------------------------------------------------------------------|
| `id` | string | The visitor unique identifier. |
| `created_on` | string | The timestamp in UTC when the tag is created. |
| `changed_on` | string | The timestamp in UTC when the tag is changed. |
| `label` | string | Type of resource. For tags, this value is `Tag`. |
| `body` | string | The value of the tag. |
## Response
View the full list of notifications sent to your webhook on the *Webhook detail* page in your Prepr account.
From here you can view the response the Prepr server received from your endpoint.

Your endpoint must respond with a `2xx` status code within 12 seconds. Any other status code or a
request timeout is treated as a failure and triggered for a retry.
Check out the options below on how to handle responses with errors.
### Retry behavior
Prepr attempts multiple times to deliver a given notification to your webhook endpoint with an exponential back off.
You can configure a maximum number of retries.
If your endpoint has been disabled you can still expect to see future retry attempts.
### Disable behaviour
Prepr will actively notify the account owner and any [*Technical contact*](/project-setup/managing-roles-and-permissions#technical-contact) users when the webhook is misconfigured or the error rate is 100%.
The email also states when the endpoint will be automatically disabled.
### View attempts
To manage an existing webhook, go to **Settings → Webhooks** and click the specific webhook in the list.
All attempts of this webhook of the last three days can be viewed and retried here.
You can also view the response the Prepr server received from your endpoint.
### Resend webhooks
You can resend a webhook event by clicking the icon.
### Disable webhooks
You can easily switch off your webhook temporarily.
Go to **Settings → Webhooks** and click the specific webhook in the list.
Switch it off by disabling the **Active** toggle.
## Security guidelines
We recommend you protect the endpoints configured in each webhook. This prevents unauthorized actions on your app.
### Authorization headers
When configuring your webhook in Prepr, add an authorization *Header* with a secret access token only your incoming webhook server knows.
Prepr will send all of the custom headers you added when sending a notification, including authorization.
If the values don't match, you can ignore the request.
### Whitelisting Prepr server IPs
You can ensure your app is always communicating with Prepr through one of our IP addresses.
```http copy
87.233.165.0/26
2001:9a8:0:4b:: 64 bits
```
### Webhook signatures
Prepr will sign the webhook events it sends to your endpoints. We do so by
including a signature in each event’s `Prepr-Signature` header. This allows
you to validate that the events were sent by Prepr, not by a third party.
Before you can verify signatures, you need to store your endpoint’s ID
when creating a new Webhook. Each ID is unique to the endpoint to which
it corresponds. If you use multiple endpoints, you must obtain an ID for each one.
**Verifying signatures**\
The `Prepr-Signature` header contains the full json payload you receive.
Prepr generates signatures using a hash-based message authentication code (HMAC) with SHA-256.
Compute an `HMAC` with the `SHA256` hash function. Use the endpoint’s signing ID
as the key, and use the json payload string as the message.
Compare the signature in the header to the expected signature. If a signature matches,
compute the difference between the current timestamp and the received timestamp,
then decide if the difference is within your tolerance.
To protect against timing attacks, use a constant-time string comparison to
compare the expected signature to each of the received signatures.
### Preventing replay attacks
A replay attack is when an attacker intercepts a valid payload and its signature,
then re-transmits them. To mitigate such attacks, Prepr includes a timestamp in
the `Prepr-Signature` header. Because this timestamp is part of the signed payload,
it is also verified by the signature, so an attacker cannot change the timestamp
without invalidating the signature. If the signature is valid but the timestamp is too old,
you can have your application reject the payload.
We recommend a tolerance of five minutes between the timestamp and the current time.
We advise that you use Network Time Protocol (NTP) to ensure that your server’s
clock is accurate and synchronizes with the time on Prepr servers.
Prepr generates the timestamp and signature each time we send an event to your endpoint.
If Prepr retries an event, for example: your endpoint previously replied with a non-2xx status code,
then we generate a new signature and timestamp for the next delivery attempt.
Source: https://docs.prepr.io/development/best-practices/webhooks
---
# Best practices for developers
*Check out our offering of best practices to develop streamlined and robust code for a headless CMS.*
Source: https://docs.prepr.io/development/best-practices
---
# Environment-to-environment content export
*This article explains how to export content from one environment to another,
for example, when you want to do system testing in your development environment with realistic content from the production environment.*
## Prerequisites
Make sure that the **Allow Developer actions** and **Allow bulk update content items and assets** permissions are enabled for users who need to export content.
The **Export to** action is available in the Content items list page for [*Developer*](/project-setup/managing-roles-and-permissions#developer) users only.
## Export content from one environment to another
The process below shows you how to export content from one environment to another in the same organization.
Source: https://docs.prepr.io/development/working-with-cicd/syncing-content
---
# Sync schemas between two environments
*This guide shows you how to update one schema with the other, for example, when you have a development and production environment with the same schema that is out of sync.*
## Introduction
In the event that you have separate environments, for example, *Development*, *Testing*, *Acceptance*, and *Production*, you may need to sync the schemas in these environments.
You can do this automatically by running a schema sync in Prepr.
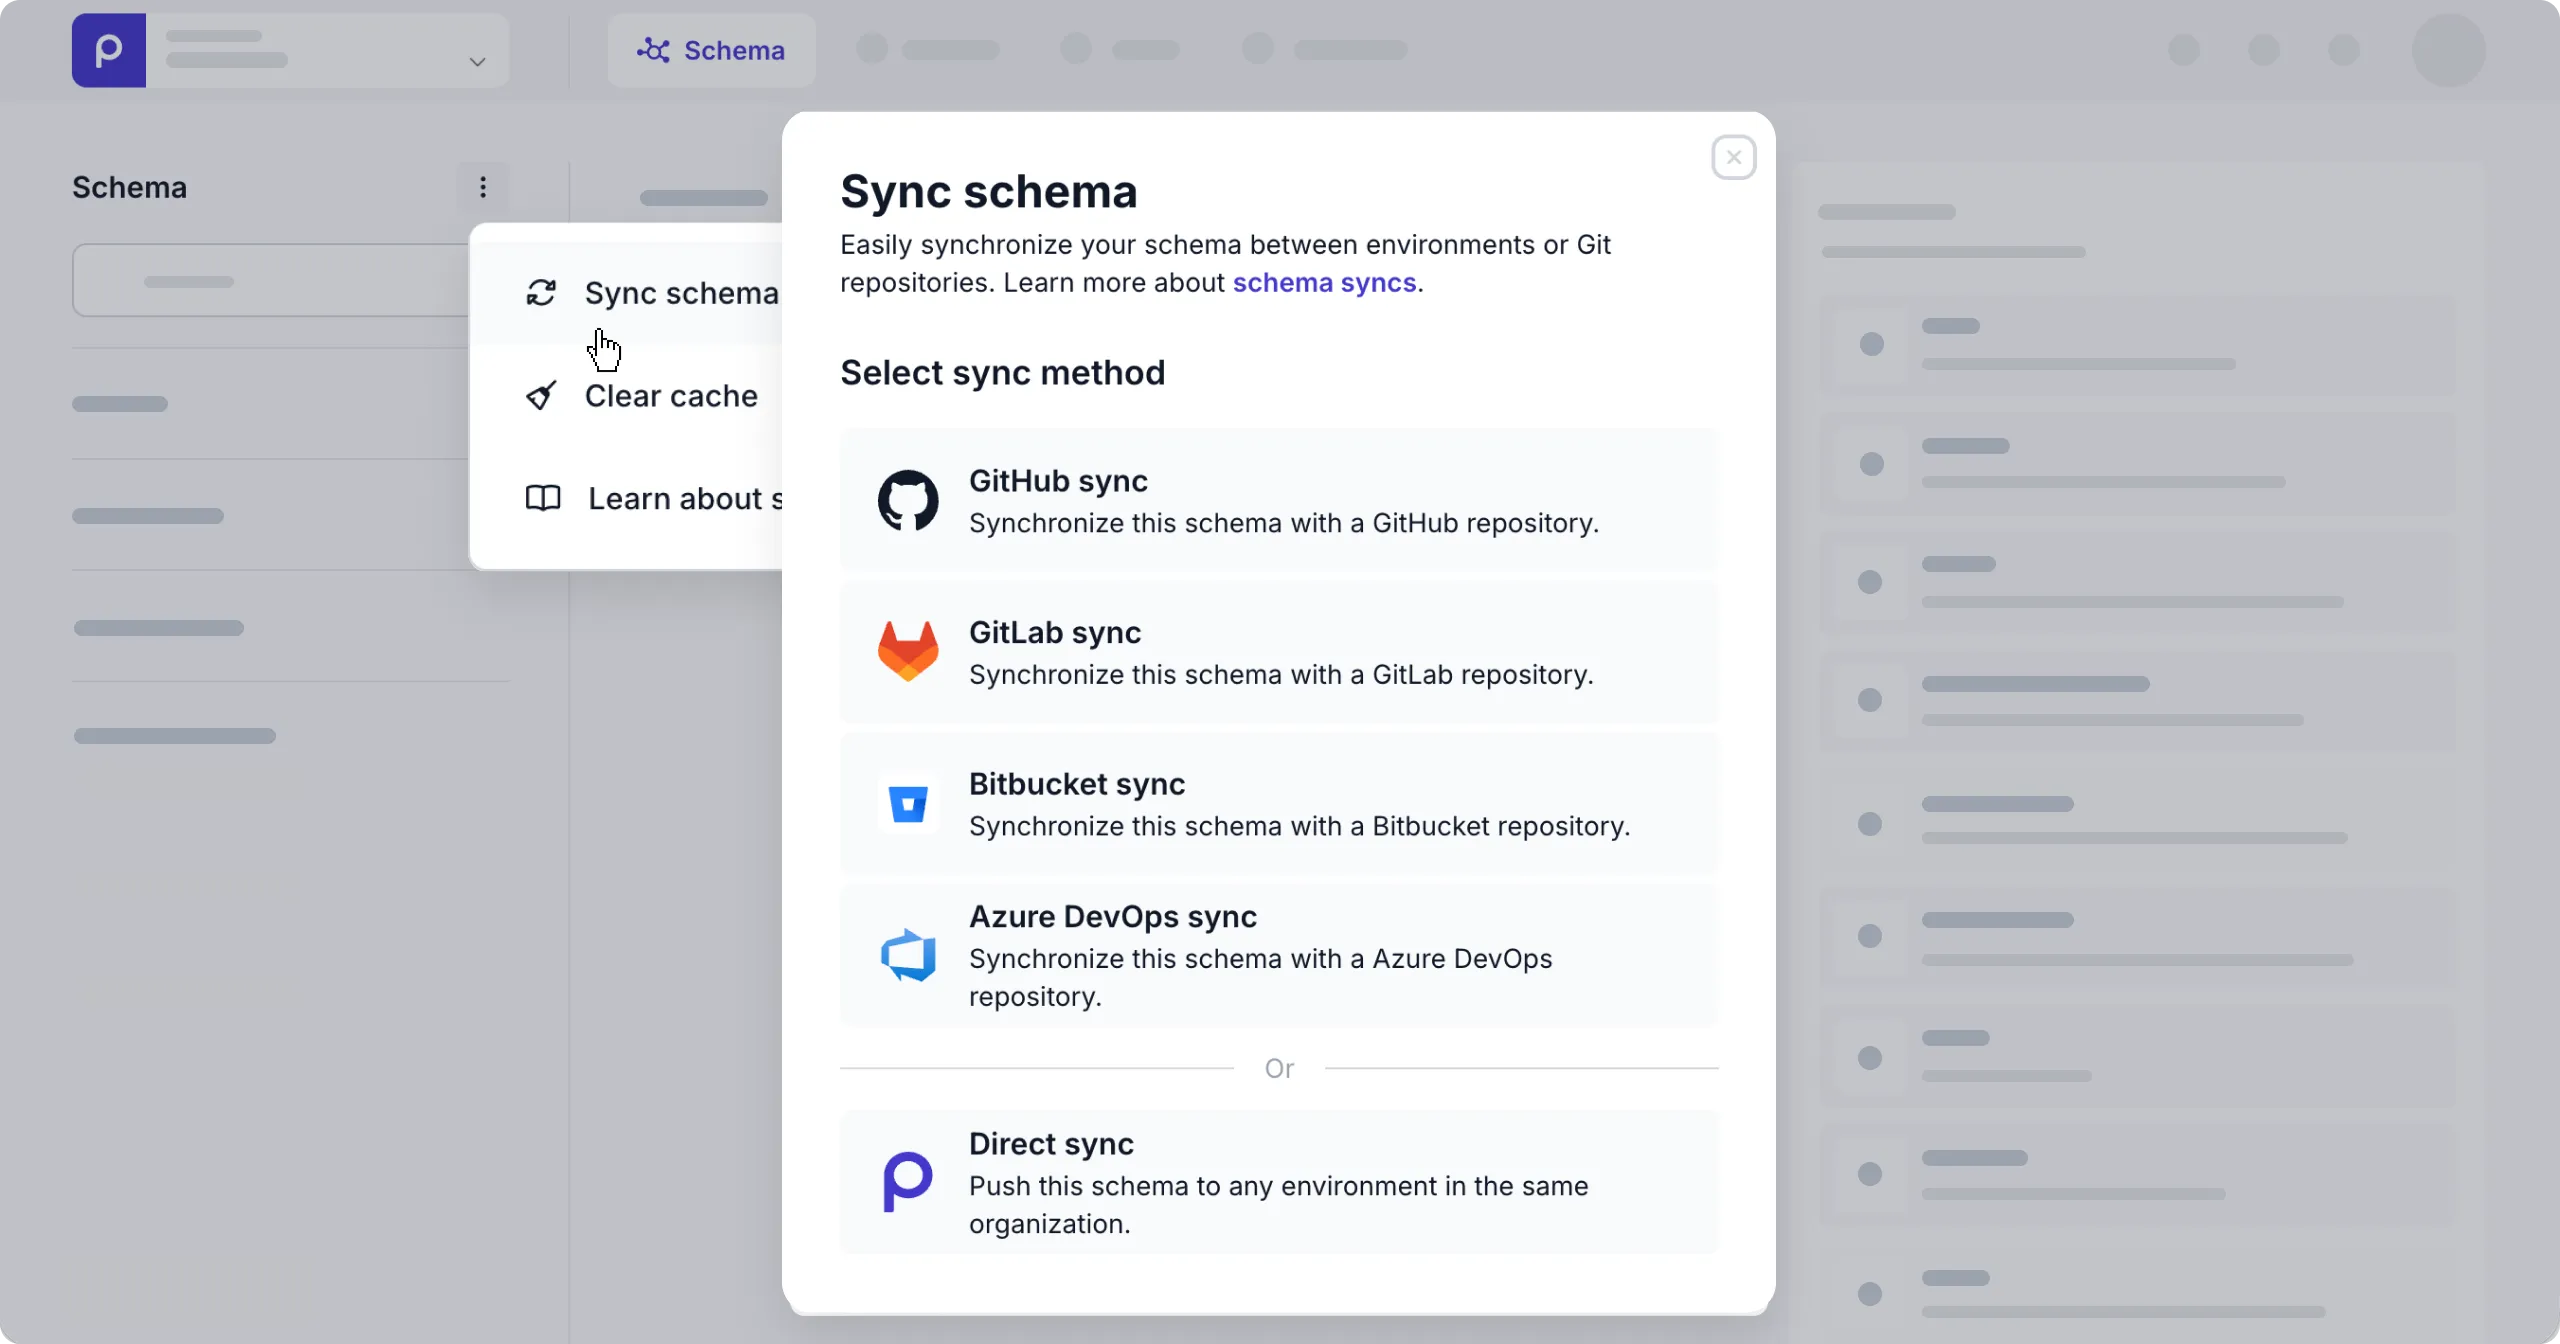
There are a few schema sync processes you can choose from:
- [*GitHub schema sync*](#github-schema-sync) - Export to a GitHub repository or import from a GitHub repository to keep your schema in sync between environments.
- [*GitLab schema sync*](#gitlab-schema-sync) - Export to a GitLab project or import from a GitLab project to keep your schema in sync between environments.
- [*Bitbucket schema sync*](#bitbucket-schema-sync) - Export to a Bitbucket repository or import from a Bitbucket repository to keep your schema in sync between environments.
- [*Azure DevOps schema sync*](#azure-devops-schema-sync) - Export to a Azure DevOps repository or import from a Azure DevOps repository to keep your schema in sync between environments.
- [*Direct schema sync*](#direct-schema-sync) - Use this process to compare and sync your schema directly in Prepr between two environments in the same organization.
## Use cases
See the following use cases for when you may need to synchronize your schema:
- **Sync production to development**
An example *DTAP strategy* is to maintain the schema in the *Production* environment and when the same content structure is needed for realistic test cases this schema needs to be copied to the *Development*, *Test*, or *Acceptance* environment. Learn more on [how to set up a DTAP configuration](/project-setup/setting-up-environments#set-up-a-dtap-configuration).
- **Sync development to production**
After testing your development on the latest schema version in the *Development* or *Test* environments, it's possible that you may need to make changes to the live schema. In this case, you could copy these changes to the *Production* environment.
- **Share a schema between environments**
Use the *Shared schema* feature to maintain one schema across multiple environments, for example, for multiple brands. Check out more details in the [environments doc](/project-setup/setting-up-environments#environment-setup-for-multiple-brands).
A shared schema can also be imported from GitHub or GitLab or exported to GitHub or GitLab. This could be useful for agencies when you want to do testing with client's shared schema in your own organization instead of in the client organization.
## Prerequisites
You need to have a role, such as the *Developer* or *Admin* role, with the **Schema** permission enabled to have access to the **Sync schema** action.
If you need to sync a shared schema, then you need the organization **Schema** permission enabled.
Check out [roles and permissions in Prepr](/project-setup/managing-roles-and-permissions#add-or-edit-roles) for more details.
## GitHub schema sync
The process below shows you how to connect to your GitHub account and sync a schema using a GitHub repository.
## GitLab schema sync
The process below shows you how to connect to your GitLab account and sync a schema using a GitLab repository.
## Bitbucket schema sync
The process below shows you how to connect to your Bitbucket account and sync a schema using a Bitbucket cloud repository.
## Azure DevOps schema sync
The process below shows you how to connect to your Azure DevOps account and sync a schema using an Azure DevOps repository.
## Direct schema sync
Use the direct schema sync process if you choose not to use an external service like [*GitHub sync*](#github-schema-sync), [*GitLab sync*](#gitlab-schema-sync), [*Bitbucket sync*](#bitbucket-schema-sync), or [*Azure DevOps*](#azure-devops-schema-sync).
The direct schema sync needs no external tools, whereas using an external service gives you more flexibility and the added benefit of version control.
Note the list of constraints below before triggering the direct schema sync process.
### Constraints
- This process only works between environments in the same organization.
- Models in your target environment will be overwritten with the models from the current environment if their *Singular names* match.
Fields will be added or deleted to match the updated structure.
* Components, enumerations and remote sources in your target environment will be overwritten with the components, enumerations and remote sources from the current environment if their *Type name* values match.
Fields will be added or deleted to match the updated structure.
- Models, components, enumerations or remote sources that are not in the current environment, but present in the target environment will be deleted if they are unused.
The process below shows you how to sync your schema from one environment (*current environment*) to another (*target environment*).
If you have any questions about schema synchronization, please [reach out to our Support team](https://prepr.io/support).
Source: https://docs.prepr.io/development/working-with-cicd/syncing-a-schema
---
# Validating Prepr schema JSON files
*This guide shows you how to validate schema JSON files using a GitHub validation action and the Prepr schema spec.*
## Introduction
In the event that you want to maintain your Prepr schema through a code editor, you can validate these schema JSON files before performing a [schema import](/development/working-with-cicd/syncing-a-schema#import-from-github).
## Validating your schema using the Prepr schema spec
Follow the steps below to [validate schema JSON files](https://github.com/preprio/action-schema-validation/tree/main) against the [Prepr schema spec](https://github.com/preprio/action-schema-validation/blob/main/spec/2026-03-05.json5).
If you have any questions or encounter issues with the [schema validation](https://github.com/preprio/action-schema-validation/tree/main), please [reach out to our Support team](https://prepr.io/support).
Source: https://docs.prepr.io/development/working-with-cicd/validating-a-schema
---
# Manually exporting and importing a schema
*This guide shows you how to manually export and import parts of a schema, namely, models, components, enumerations and remote sources.*
## Introduction
In the event that you have separate environments and you want to copy parts of the schema from one environment to another, you can export and import the parts you need, namely, [a model](#export-and-import-a-model), [a component](#export-and-import-a-component), [an enumeration](#export-and-import-an-enumeration), or [a remote source](#export-and-import-a-remote-source).
## Export and import a model
Use the export and import if you only need a couple of models copied from one environment to another. For example, export a model from your staging environment and import the model into your production environment.
To sync a schema with models, components, enumerations and remote sources from another environment then follow the process detailed in the [Sync schema doc](/development/working-with-cicd/syncing-a-schema) instead.
To share the same models across multiple environments, for example when an organization has different brands, but needs content in separate environments, you can create a shared schema as detailed in the [Shared schemas doc](/project-setup/architecture-scenarios/shared-schema).
To export a model, follow these steps:
1. Click the **Schema** tab to open the *Schema Editor*.
2. Click a model from the list of models on the left.
3. Click the button at the top of the model.
4. Click **Export model** to download a JSON file of the model.

To import a model, follow these steps:
1. Click the **Schema** tab to open the *Schema Editor*.
2. Then, click the **+ Add model** button.
3. Click **Or import a model**.
4. Choose the JSON file of the model that you want to import. When you import a model, the settings are also copied across.

## Export and import a component
Use the export and import if you only need a couple of components copied from one environment to another. For example, export a component from your staging environment and import the component into your production environment.
To sync a schema with models, components, enumerations and remote sources from another environment then follow the process detailed in the [Sync schema doc](/development/working-with-cicd/syncing-a-schema) instead.
To share the same components across multiple environments, for example when an organization has different brands, but needs content in separate environments, you can create a shared schema as detailed in the [Shared schemas doc](/project-setup/architecture-scenarios/shared-schema).
To export a component, follow these steps:
1. Click the **Schema** tab to open the **Schema Editor**.
2. Click the component that you want to export from the list of components on the left.
3. Click the button at the top of the component.
4. Click **Export component** to download a JSON file of the component.

To import a component, follow these steps:
1. Click the **Schema** tab to open the **Schema Editor**.
2. Then, click the **+ Add component** button.
3. Click **Or import a component**.
4. Choose the JSON file of the component that you want to import.

## Export and import an enumeration
Use the export and import if you only need a couple of enumerations copied from one environment to another. For example, export an enumeration from your production environment and import it into your development environment.
To sync a schema with models, components, enumerations and remote sources from another environment then follow the process detailed in the [Sync schema doc](/development/working-with-cicd/syncing-a-schema) instead.
To share the same enumerations across multiple environments, for example when an organization has different brands, but needs content in separate environments, you can create a shared schema as detailed in the [Shared schemas doc](/project-setup/architecture-scenarios/shared-schema).
To export an enumeration, follow these steps:
1. Click the **Schema** tab to open the **Schema Editor**.
2. Click the enumeration that you want to export from the list of enumerations on the left.
3. Click the button at the top of the enumeration.
4. Click the **Export enumeration** option to download a JSON file of the enumeration.
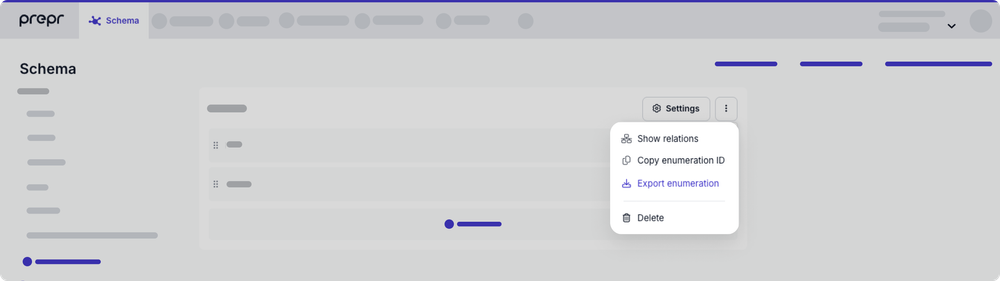
When the export is successful, you'll find the JSON file in the location you selected.
To import an enumeration, follow these steps:
1. Click the **Schema** tab to open the **Schema Editor**.
2. Then, click the **+ Add enumeration** button.
3. Click the **Import enumeration** link.
4. Choose the JSON file of the enumeration that you want to import.
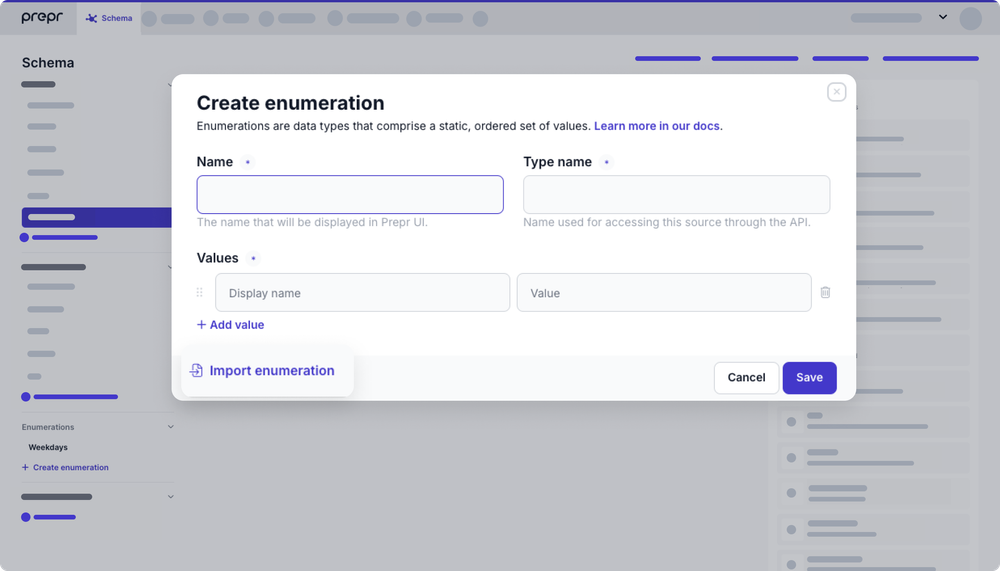
When the import is successful, you'll see the detailed enumeration in your schema.
## Export and import a remote source
Use the export and import if you only need a couple of remote sources copied from one environment to another. For example, export a remote source from your production environment and import it into your development environment.
To sync a schema with models, components, enumerations and remote sources from another environment then follow the process detailed in the [Sync schema doc](/development/working-with-cicd/syncing-a-schema) instead.
To share the same remote sources across multiple environments, for example when an organization has different brands, but needs content in separate environments, you can create a shared schema as detailed in the [Shared schemas doc](/project-setup/architecture-scenarios/shared-schema).
To export a remote source, follow these steps:
1. Click the **Schema** tab to open the **Schema Editor**.
2. Click the remote source that you want to export from the list of remote sources on the left.
3. Click the button at the top of the remote source.
4. Click the **Export remote source** option to download a JSON file of the remote source.
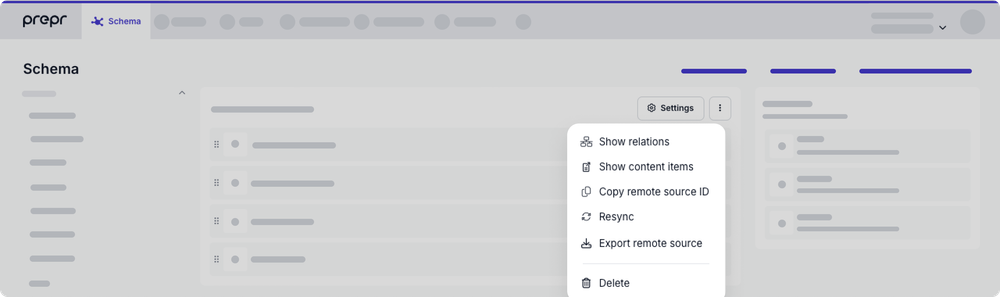
When the export is successful, you'll find the JSON file in the location you selected.
To import a remote source, follow these steps:
1. Click the **Schema** tab to open the **Schema Editor**.
2. Then, click the **+ Add remote source** button.
3. Click the **Import custom source** link.
4. Choose the JSON file of the remote source that you want to import.
When the import is successful, you'll see the detailed remote source in your schema.
If you have any questions about exporting and importing parts of your schema, please [reach out to our Support team](https://prepr.io/support).
Source: https://docs.prepr.io/development/working-with-cicd/exporting-and-importing-a-schema
---
# Working with CI/CD
Discover advanced Prepr CMS features designed to support your CI/CD processes.
Source: https://docs.prepr.io/development/working-with-cicd
---
# Managing content items
*Easily manage your content items by using some basic features in Prepr.*
## Introduction
This article shows you how to perform the following core tasks to manage your content:
- [Create a content item](#create-a-content-item)
- [Publish a content item](#publish-a-content-item)
- [Manage versions](#manage-versions)
- [Delete a content item](#delete-a-content-item)
- [Find your content items](#find-your-content-items)
## Create a content item
To add a new content item:
1. Go to the **Content** tab. Here you'll find a list of all content items in your Prepr environment.
2. Click the **Add item** button. The availability of models depends on the user role and permissions you have.
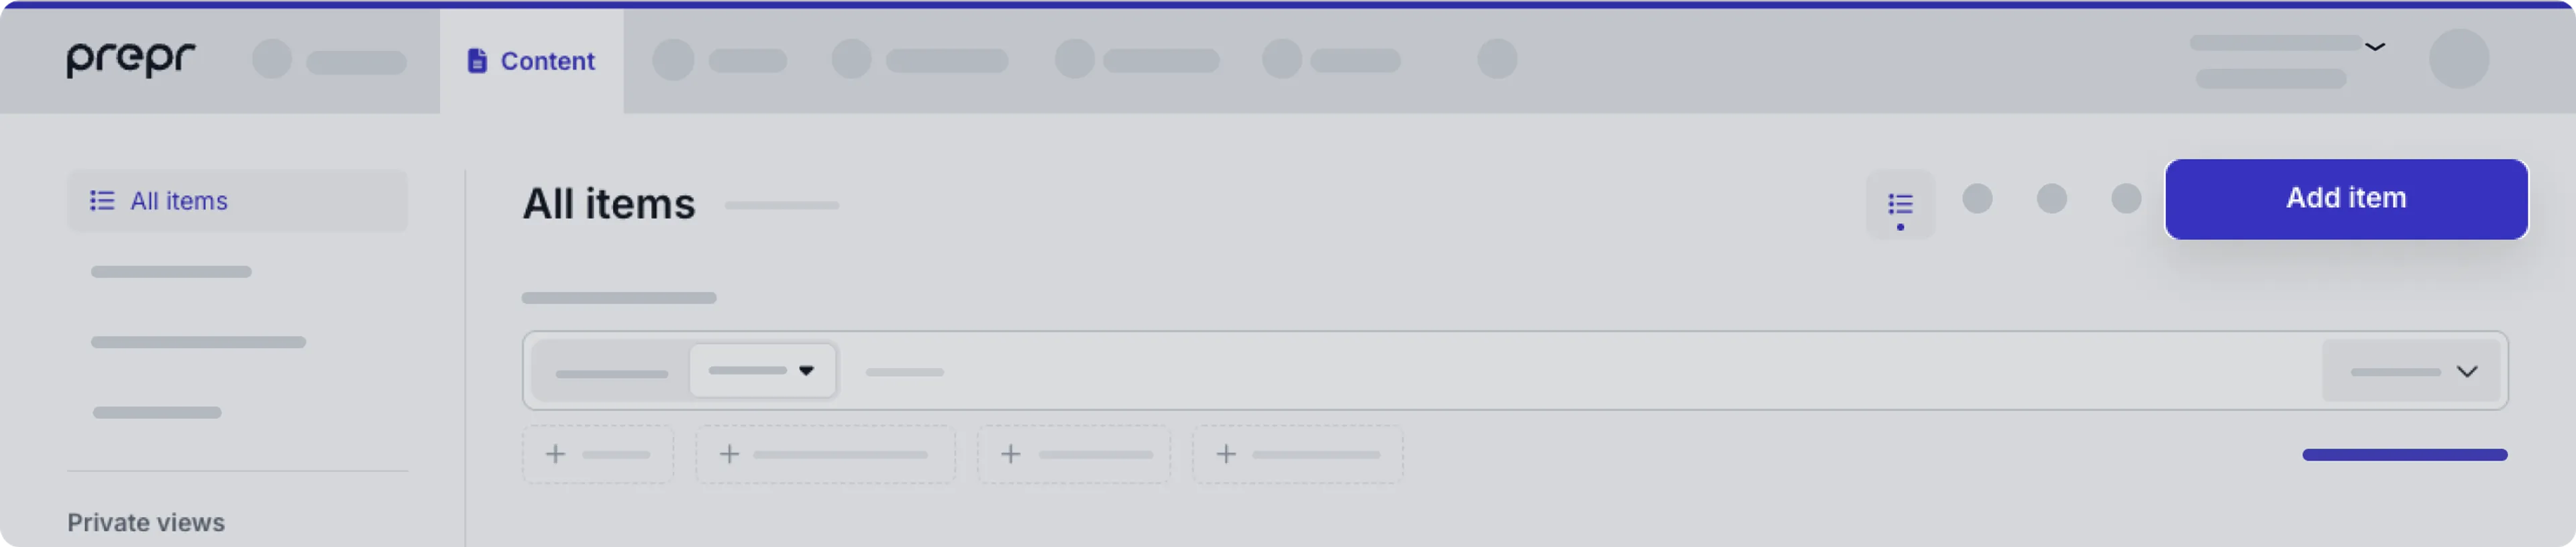
3. Select a model.
Now the content item is created and you can start composing your content.
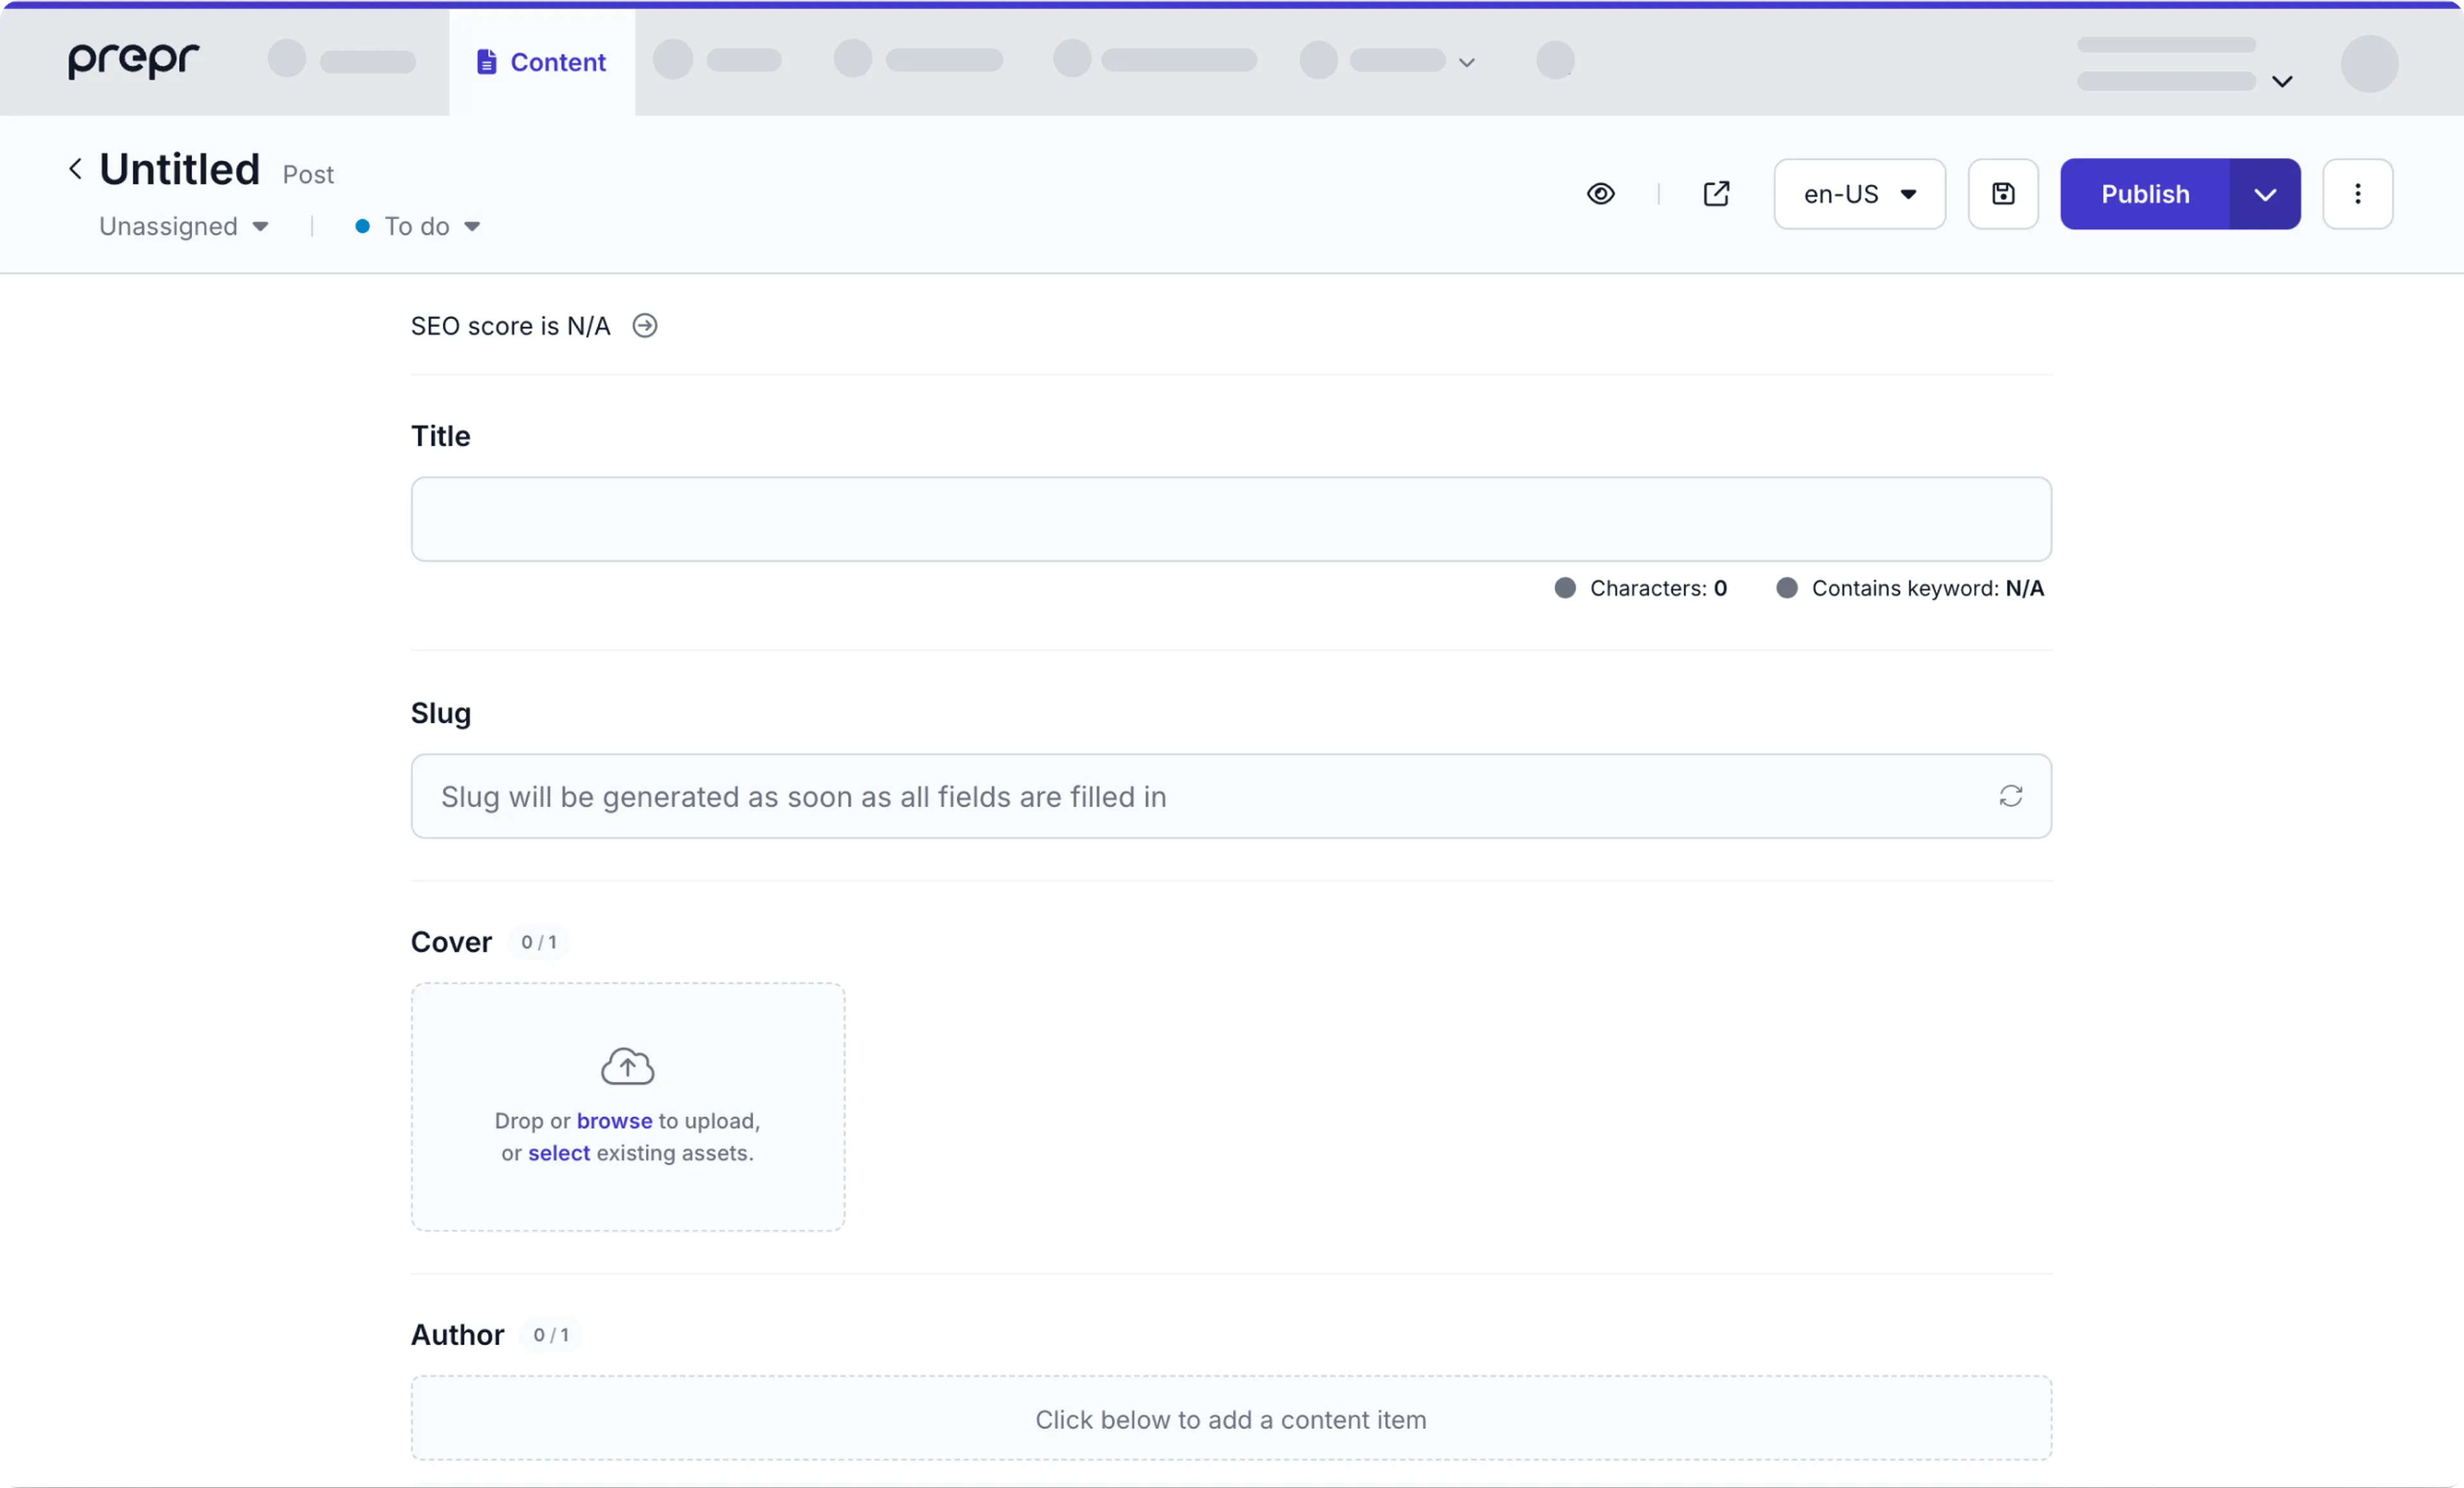
The shown fields depend on the [model settings](/content-modeling/managing-models) in the *Schema*. The fields marked with an `*` are required.
### Guidance and help text
Depending on the setup of each field, you might see some help text for additional information about the content you need to create.
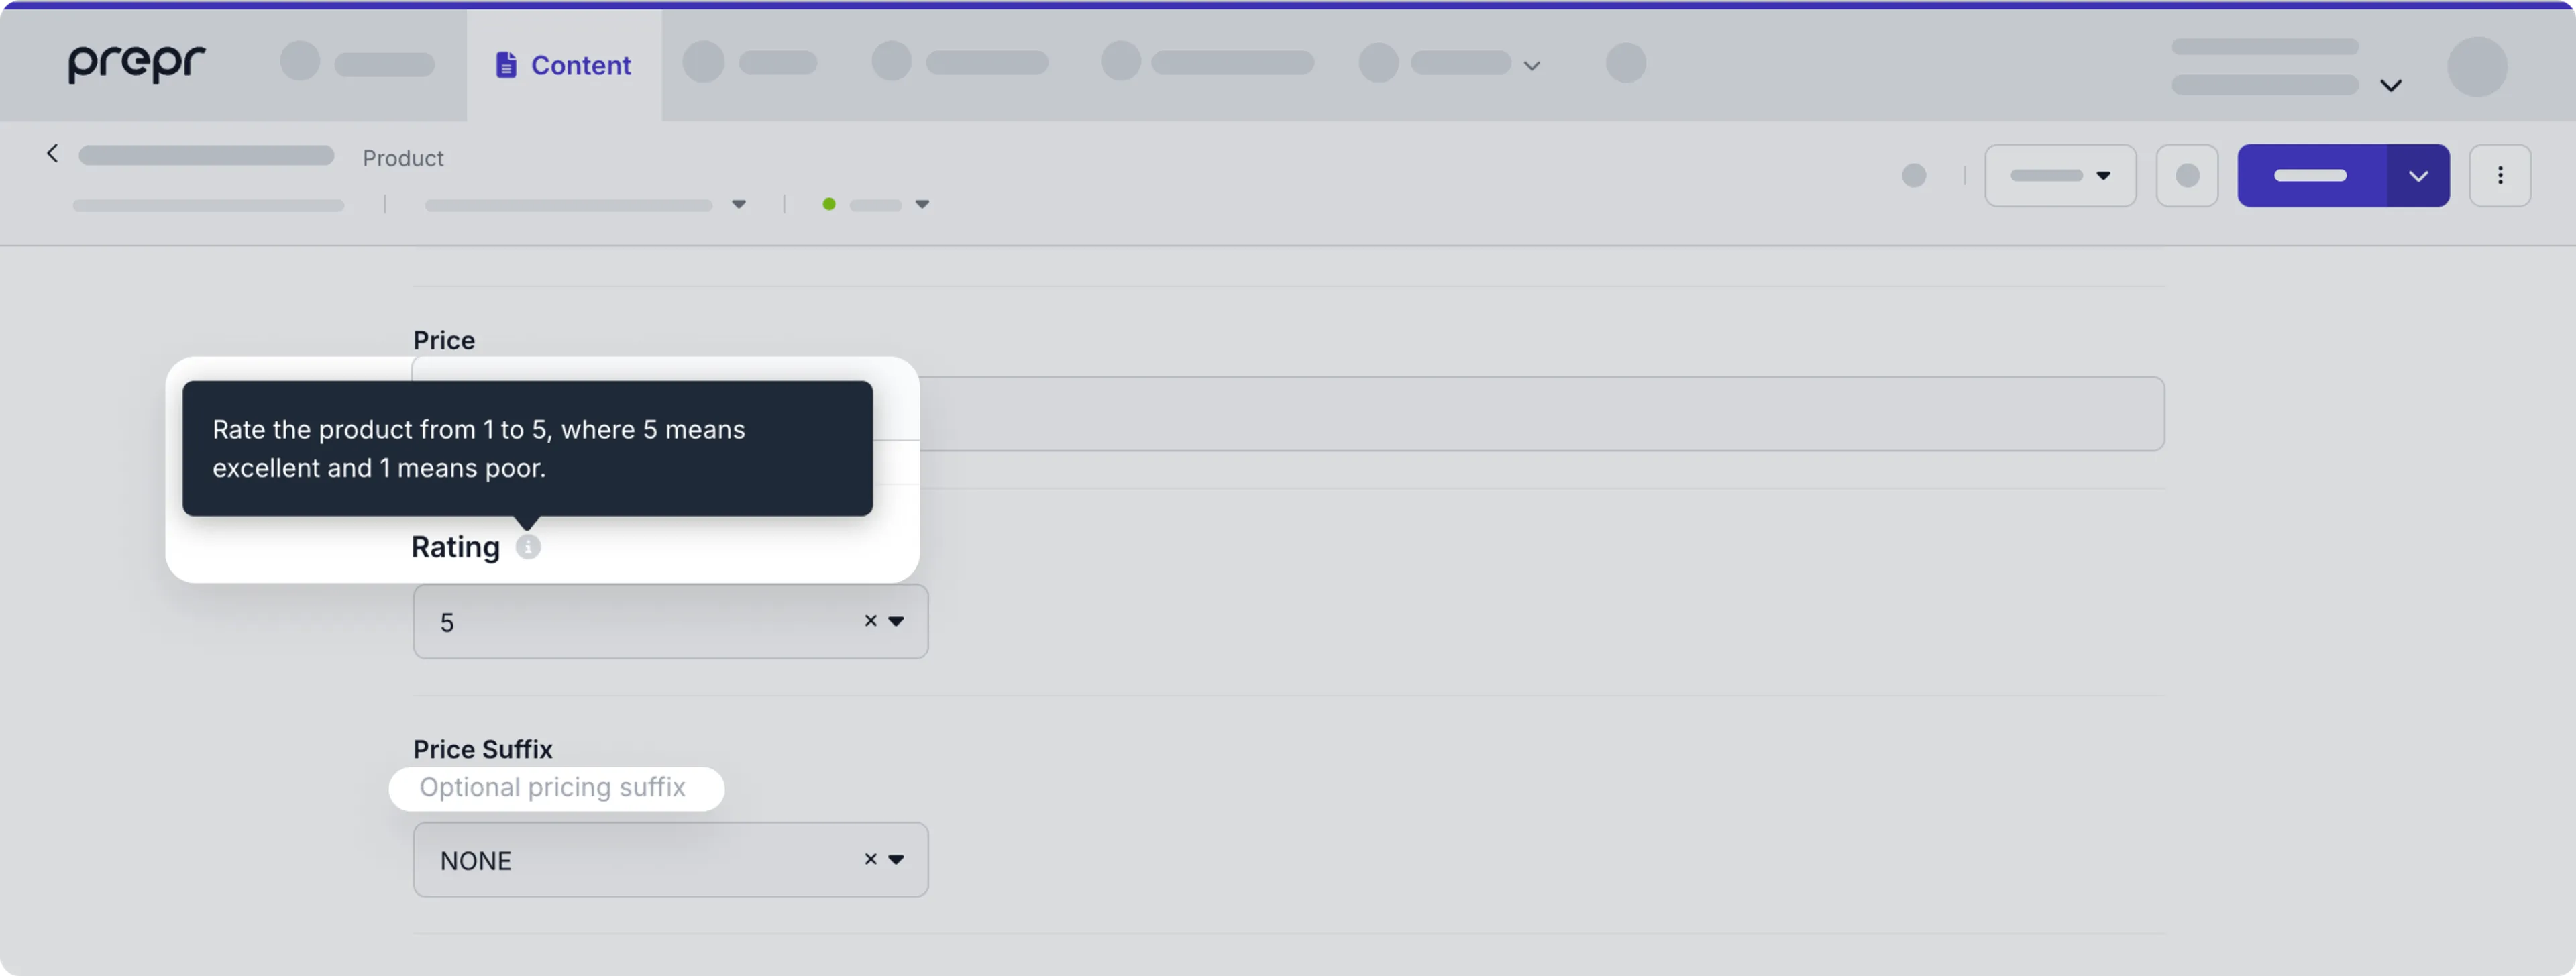
You might also see some additional highlighted guidance. Check out the [*Help text* field](/content-modeling/field-types#help-text-field) for setup details.

You can also create language variants of your content item in a multi-lingual setup. Check out the [Localization doc](/content-management/localizing-content#create-a-language-variant) for more details.
### Use AI to generate or optimize text
If enabled for your content text fields, you can **Ask AI** to generate or optimize content using different options.
- **Enter your own prompt**
You can enter your own prompt to generate new content or to adjust existing text like in the example below.

- **Optimize using quick actions**
You can simply choose from the list of available actions to request AI to optimize your text quickly.

- **Generate new text using predefined prompts**
You can choose to quickly generate text for a field based on a predefined prompt. For example, to generate an SEO title based on the main title of an article.

For setup details, check out the [AI text assistant guide](/ai-text-assistant#generating-text).
## Duplicate a content item
When you need to duplicate a content item, you can do so in a couple ways:
**From the Content items list**
1. Go to the **Content** tab.
2. Hover over the content item you want to duplicate to make the actions visible, and click the icon.
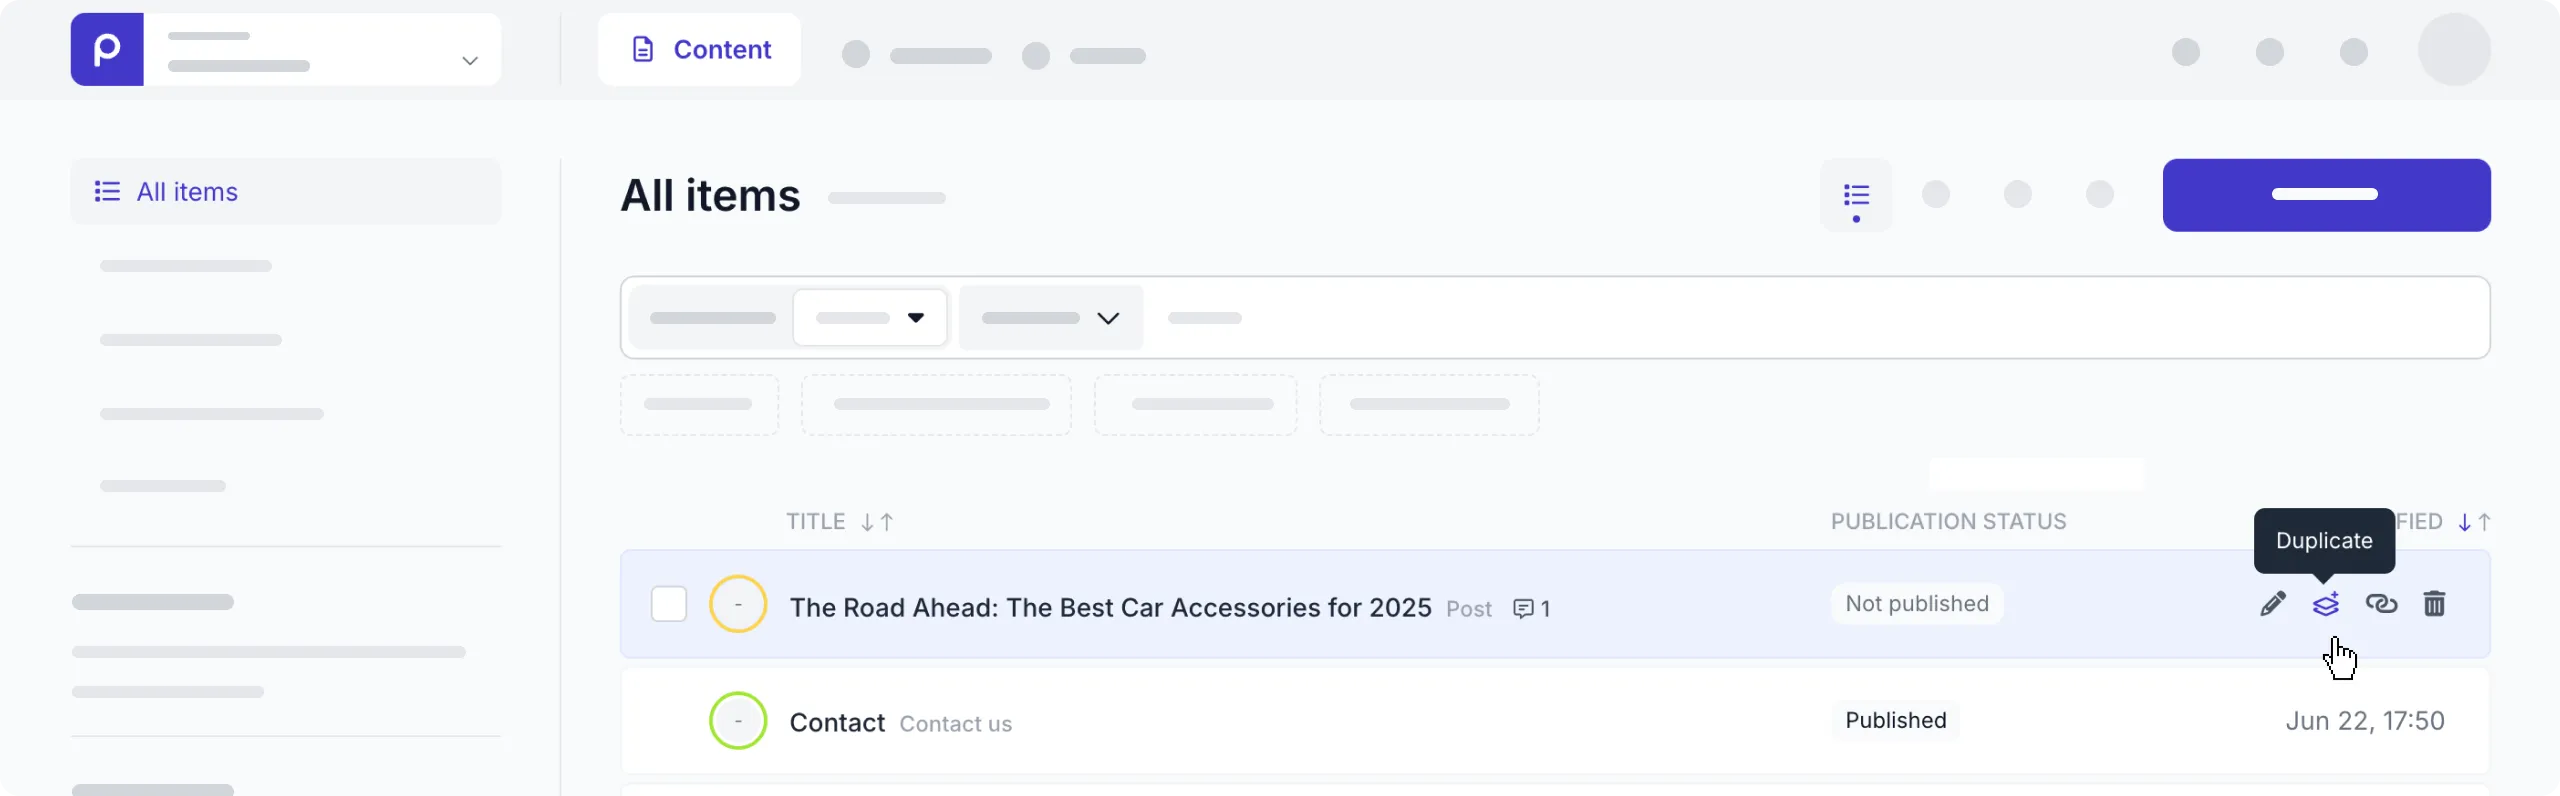
- **From the Content item page**
1. Go to the **Content** tab.
2. Click to open a content item you want to duplicate.
3. Click the button to open the drop-down list and choose the **Duplicate item** option.
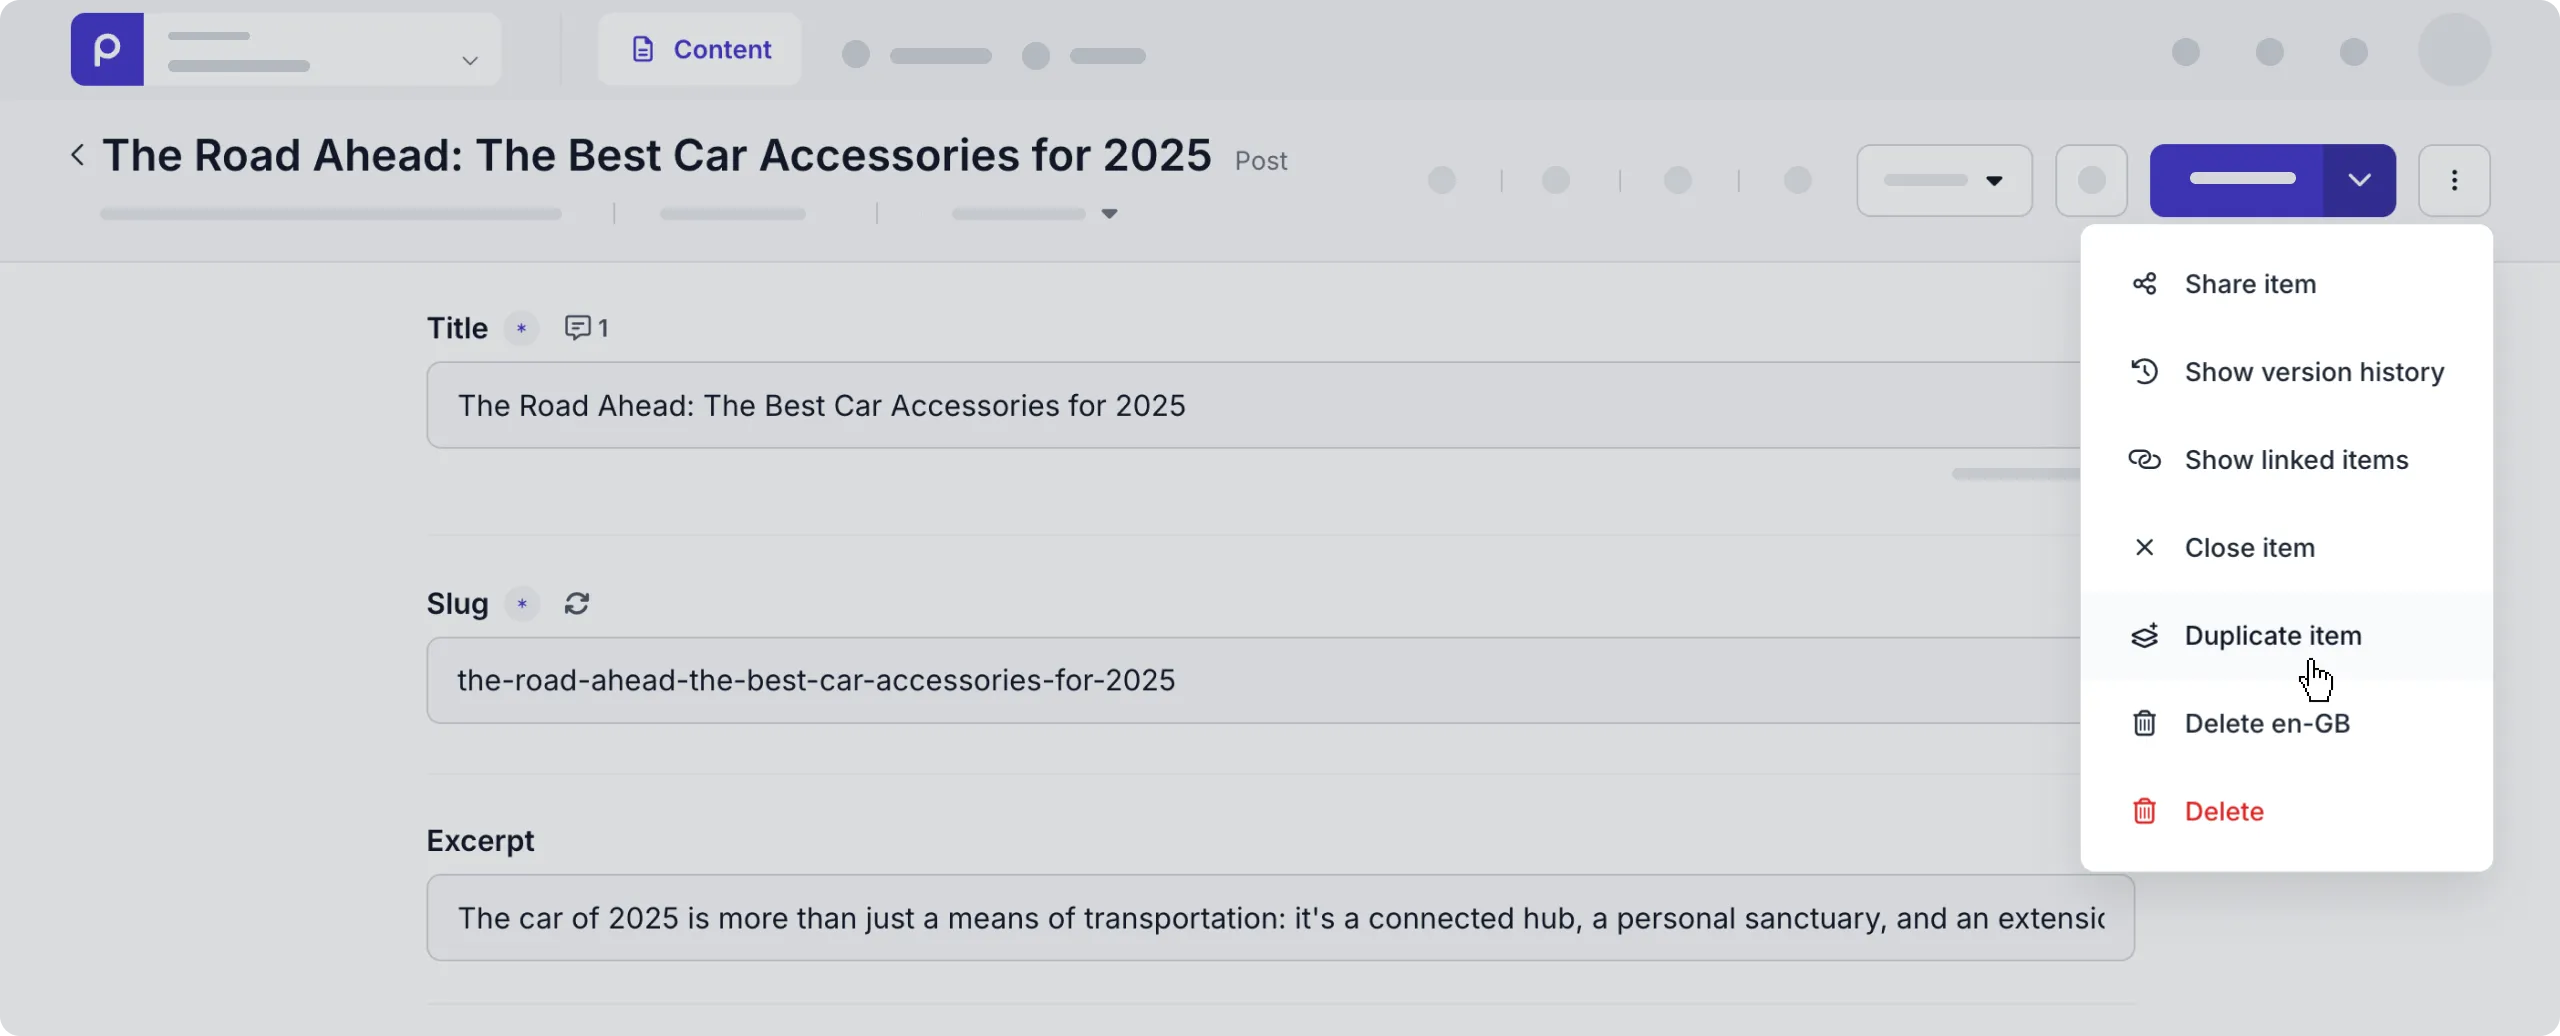
## Publish a content item
When you're happy with the content item that you created and want it to be used and displayed in the web app, all you need to do is publish the content item.

You can publish a content item directly by clicking the **Publish** button or selecting one of the other publish options in the drop-down list,
or by using shortcut keys to publish the content item.
If your content item has any unpublished child content items, either content references or in a stack field,
you need to choose to either publish all content items including the unpublished child items or only the parent content item.

When you publish the content item directly, the *Workflow stage* of the content item is automatically changed to *Done*.
Check out the [Collaboration and workflows doc](/content-management/collaboration) for more details on workflow stages.
If you want to make changes to a published content item, edit the content item and click the icon to save the changes without publishing them.
This means there'll be two versions; your saved version and the published version.
You can then publish the saved version of the content item after making your changes.
## Schedule a content item
When you want content item changes to be published in the future, you can schedule a content item.
To schedule a content item, simply click to open the **Publish** actions list and click the **Schedule** option.
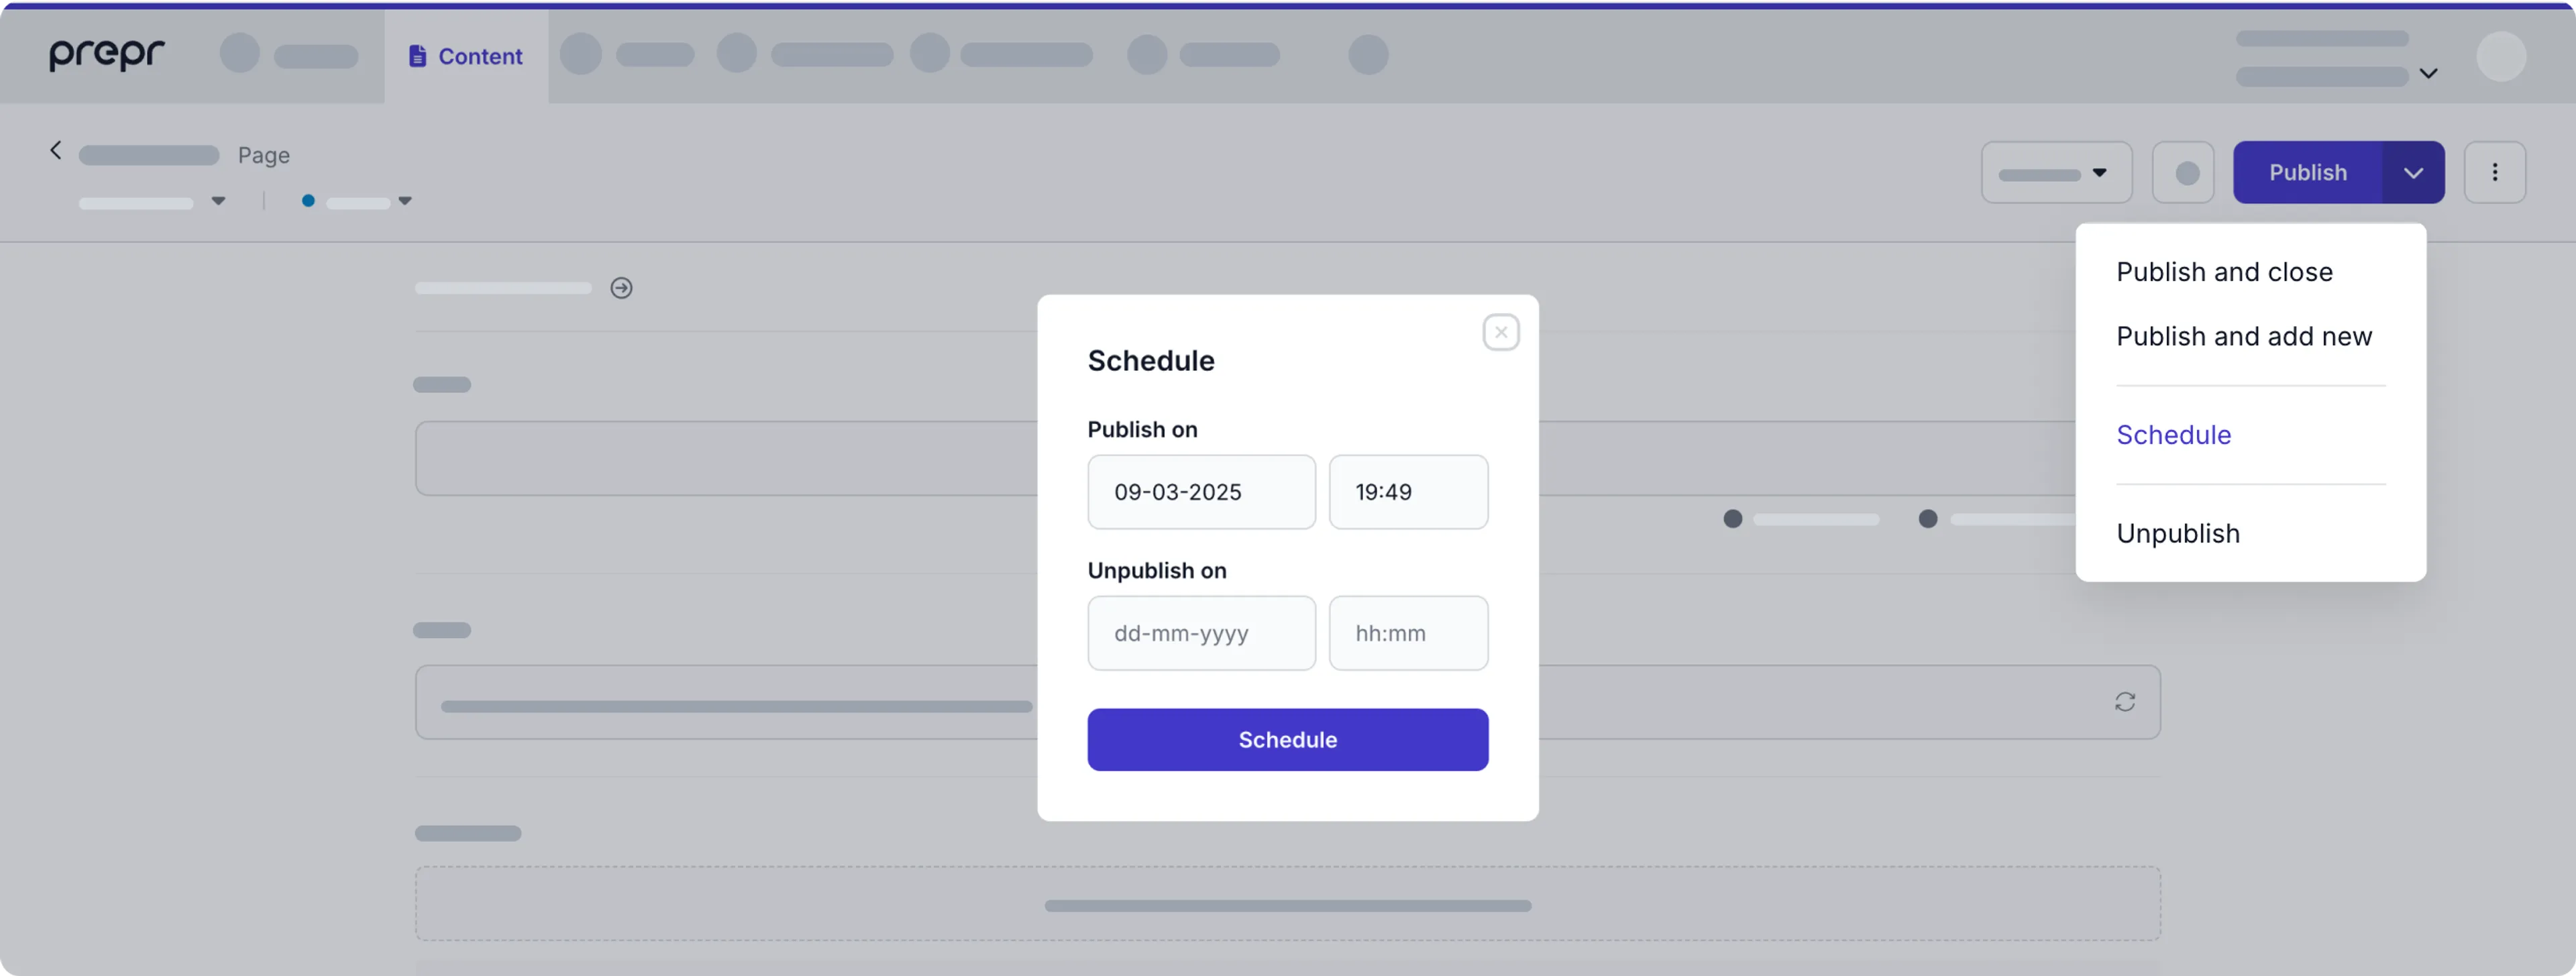
Then select the date and time for when you want the content item to be published by the web app. The content item will be marked as *Scheduled* until the date and time that you selected.
You can update the scheduled content item any time before the scheduled date and time without needing to reschedule the content item.
Check out the [Calendar view](#calendar) to get a clear overview of scheduled items.
To reschedule a content item in the calendar view, you can simply drag and drop the item to the desired date or click the icon and choose the **Reschedule** option.

Alternatively, you can click the **Reschedule** option in the content item when it's already published or scheduled.
When you reschedule a published content item, the *First Published at* date and time is set to the new date and time you choose.

This means you can order the content items in the front end when they're ordered by the *First Published at* date and time.
When you choose to schedule a content item, you can also enter the *Unpublish on* date and time for temporary content. When this date and time is reached the content item will be *Archived* and no longer available to the web app.
You can see all scheduled content items in the *List view* by filtering on the **Publication status** or the *Kanban view* by viewing the **Done** column for *Scheduled* items.
You can remove a schedule from a scheduled content item by opening the **Publish** drop-down list and choosing the **Remove schedule** option.
When you remove the schedule the workflow stage of the content item is set to *In progress*.
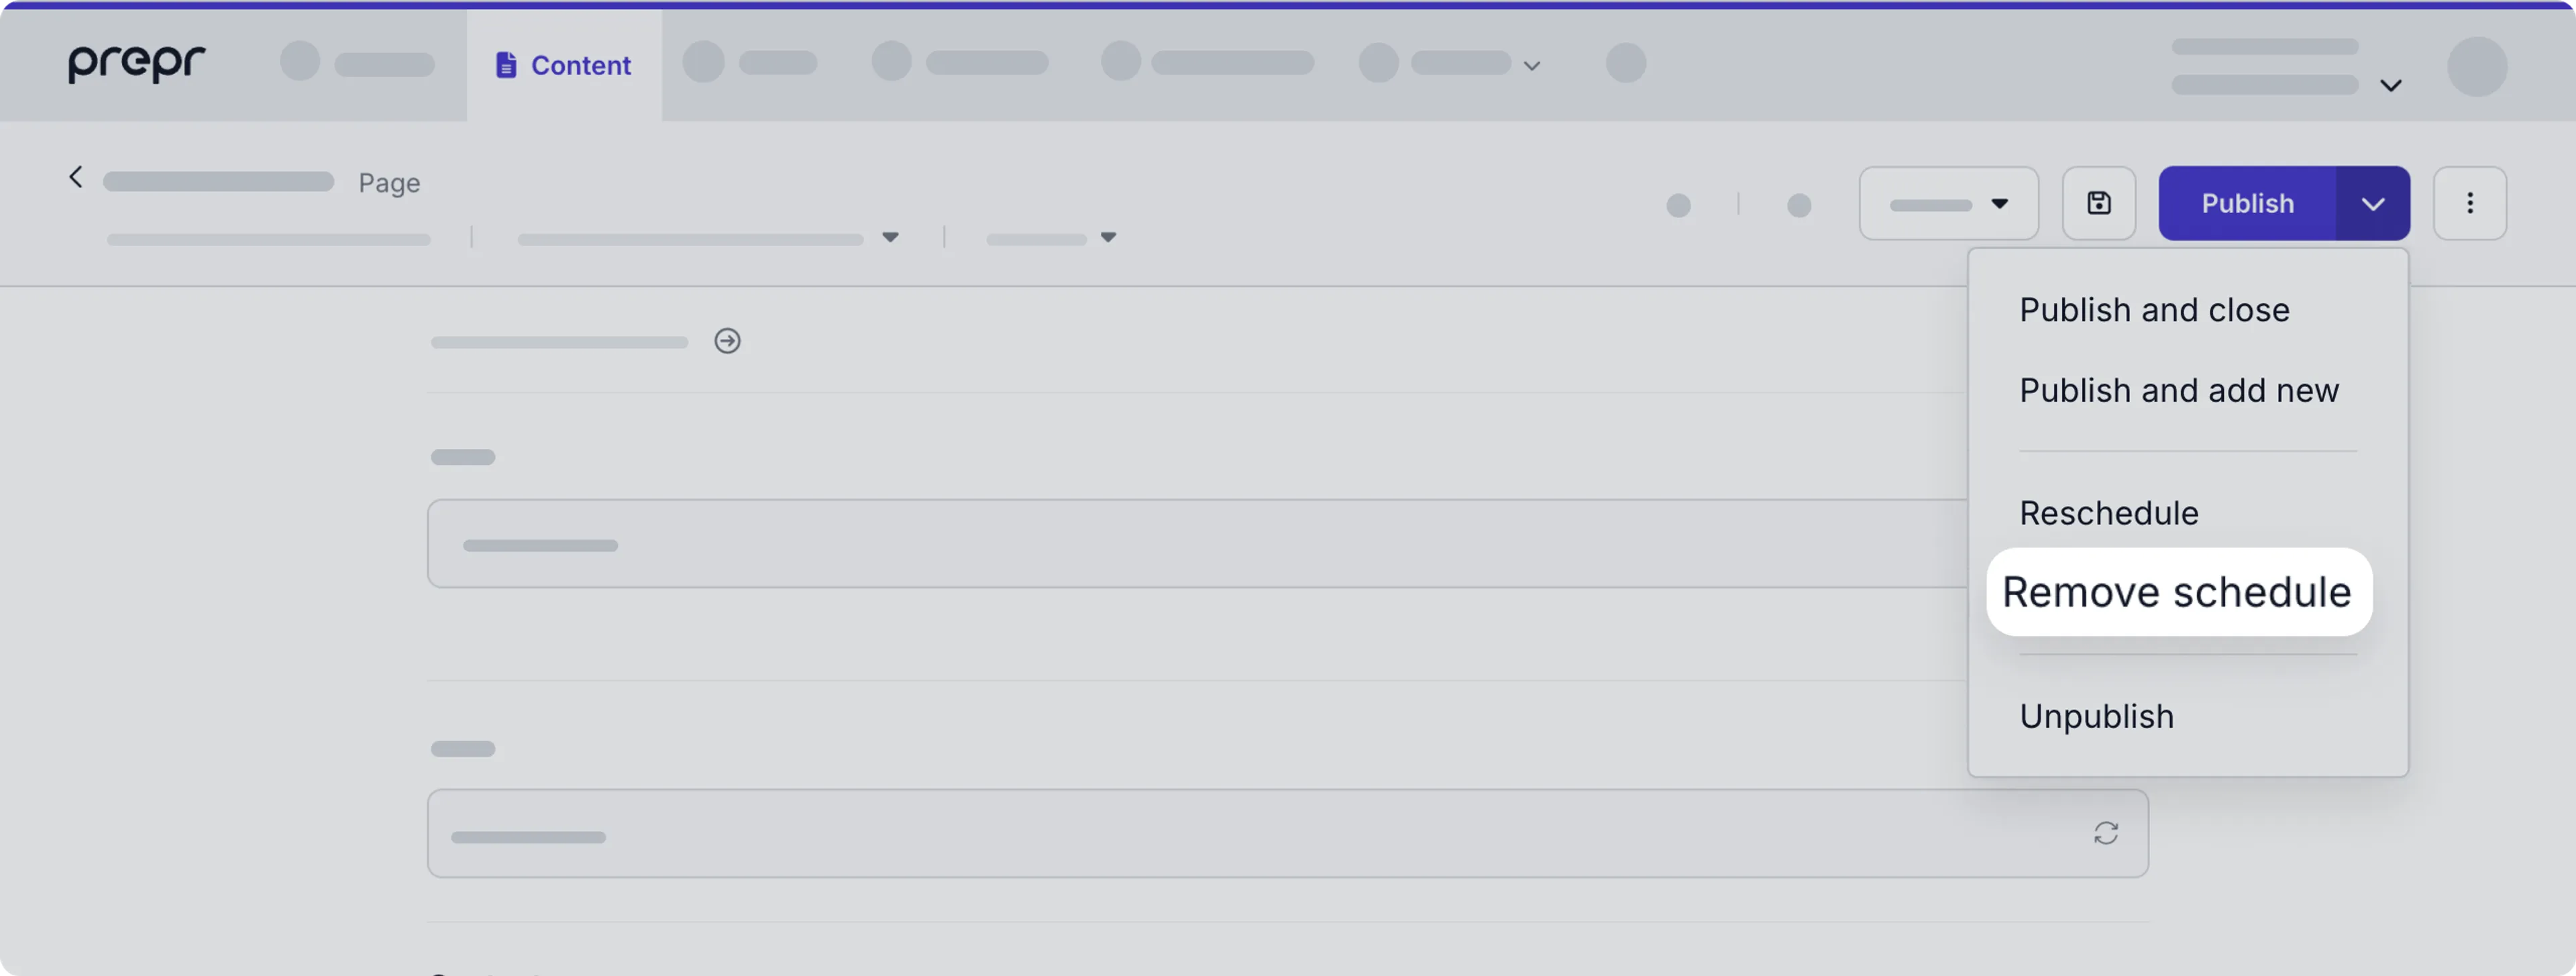
## Preview content items
You have a couple of options to preview content items to check what your content changes look like in the web app directly from Prepr.
### Visual Editing
You can click the icon to open Visual Editing.
Visual Editing is a live preview of a content item in a side-by-side view.
Simply save the content item to see your content changes instantly in this view.
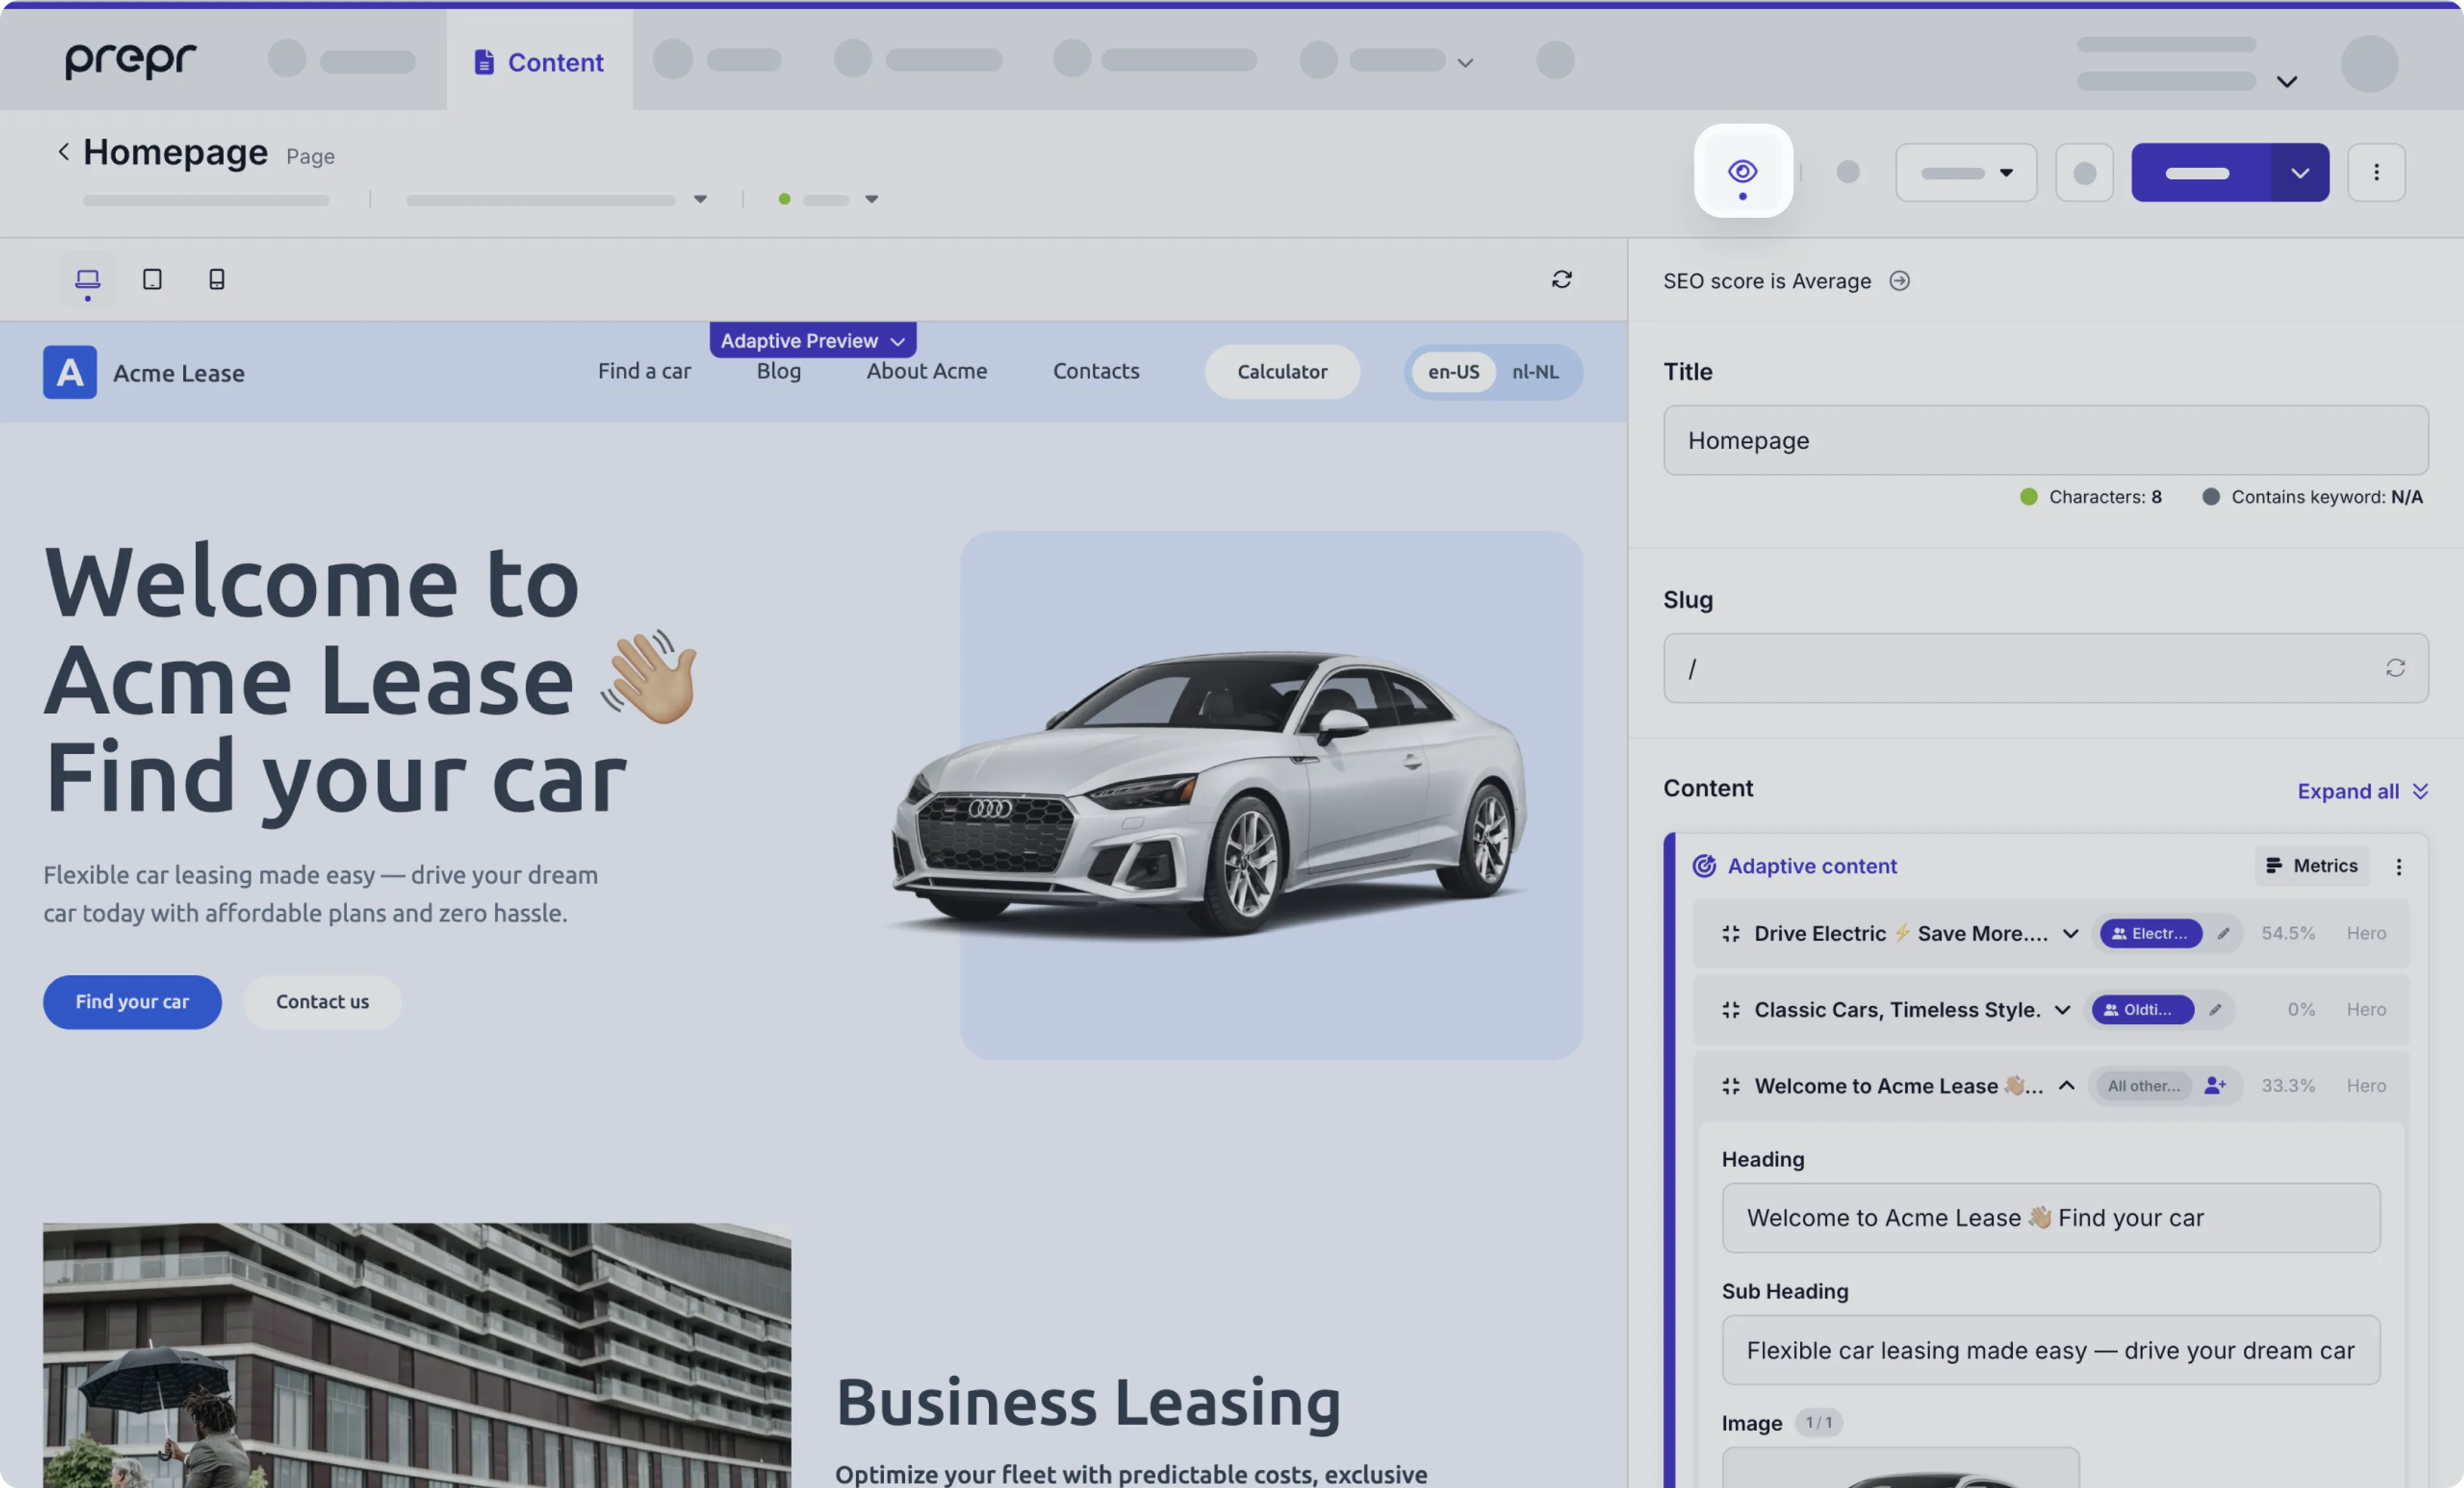
When editing content in this live preview mode, you'll notice the following additional options:
- You can choose different screen sizes to get an accurate view of the page on different devices.
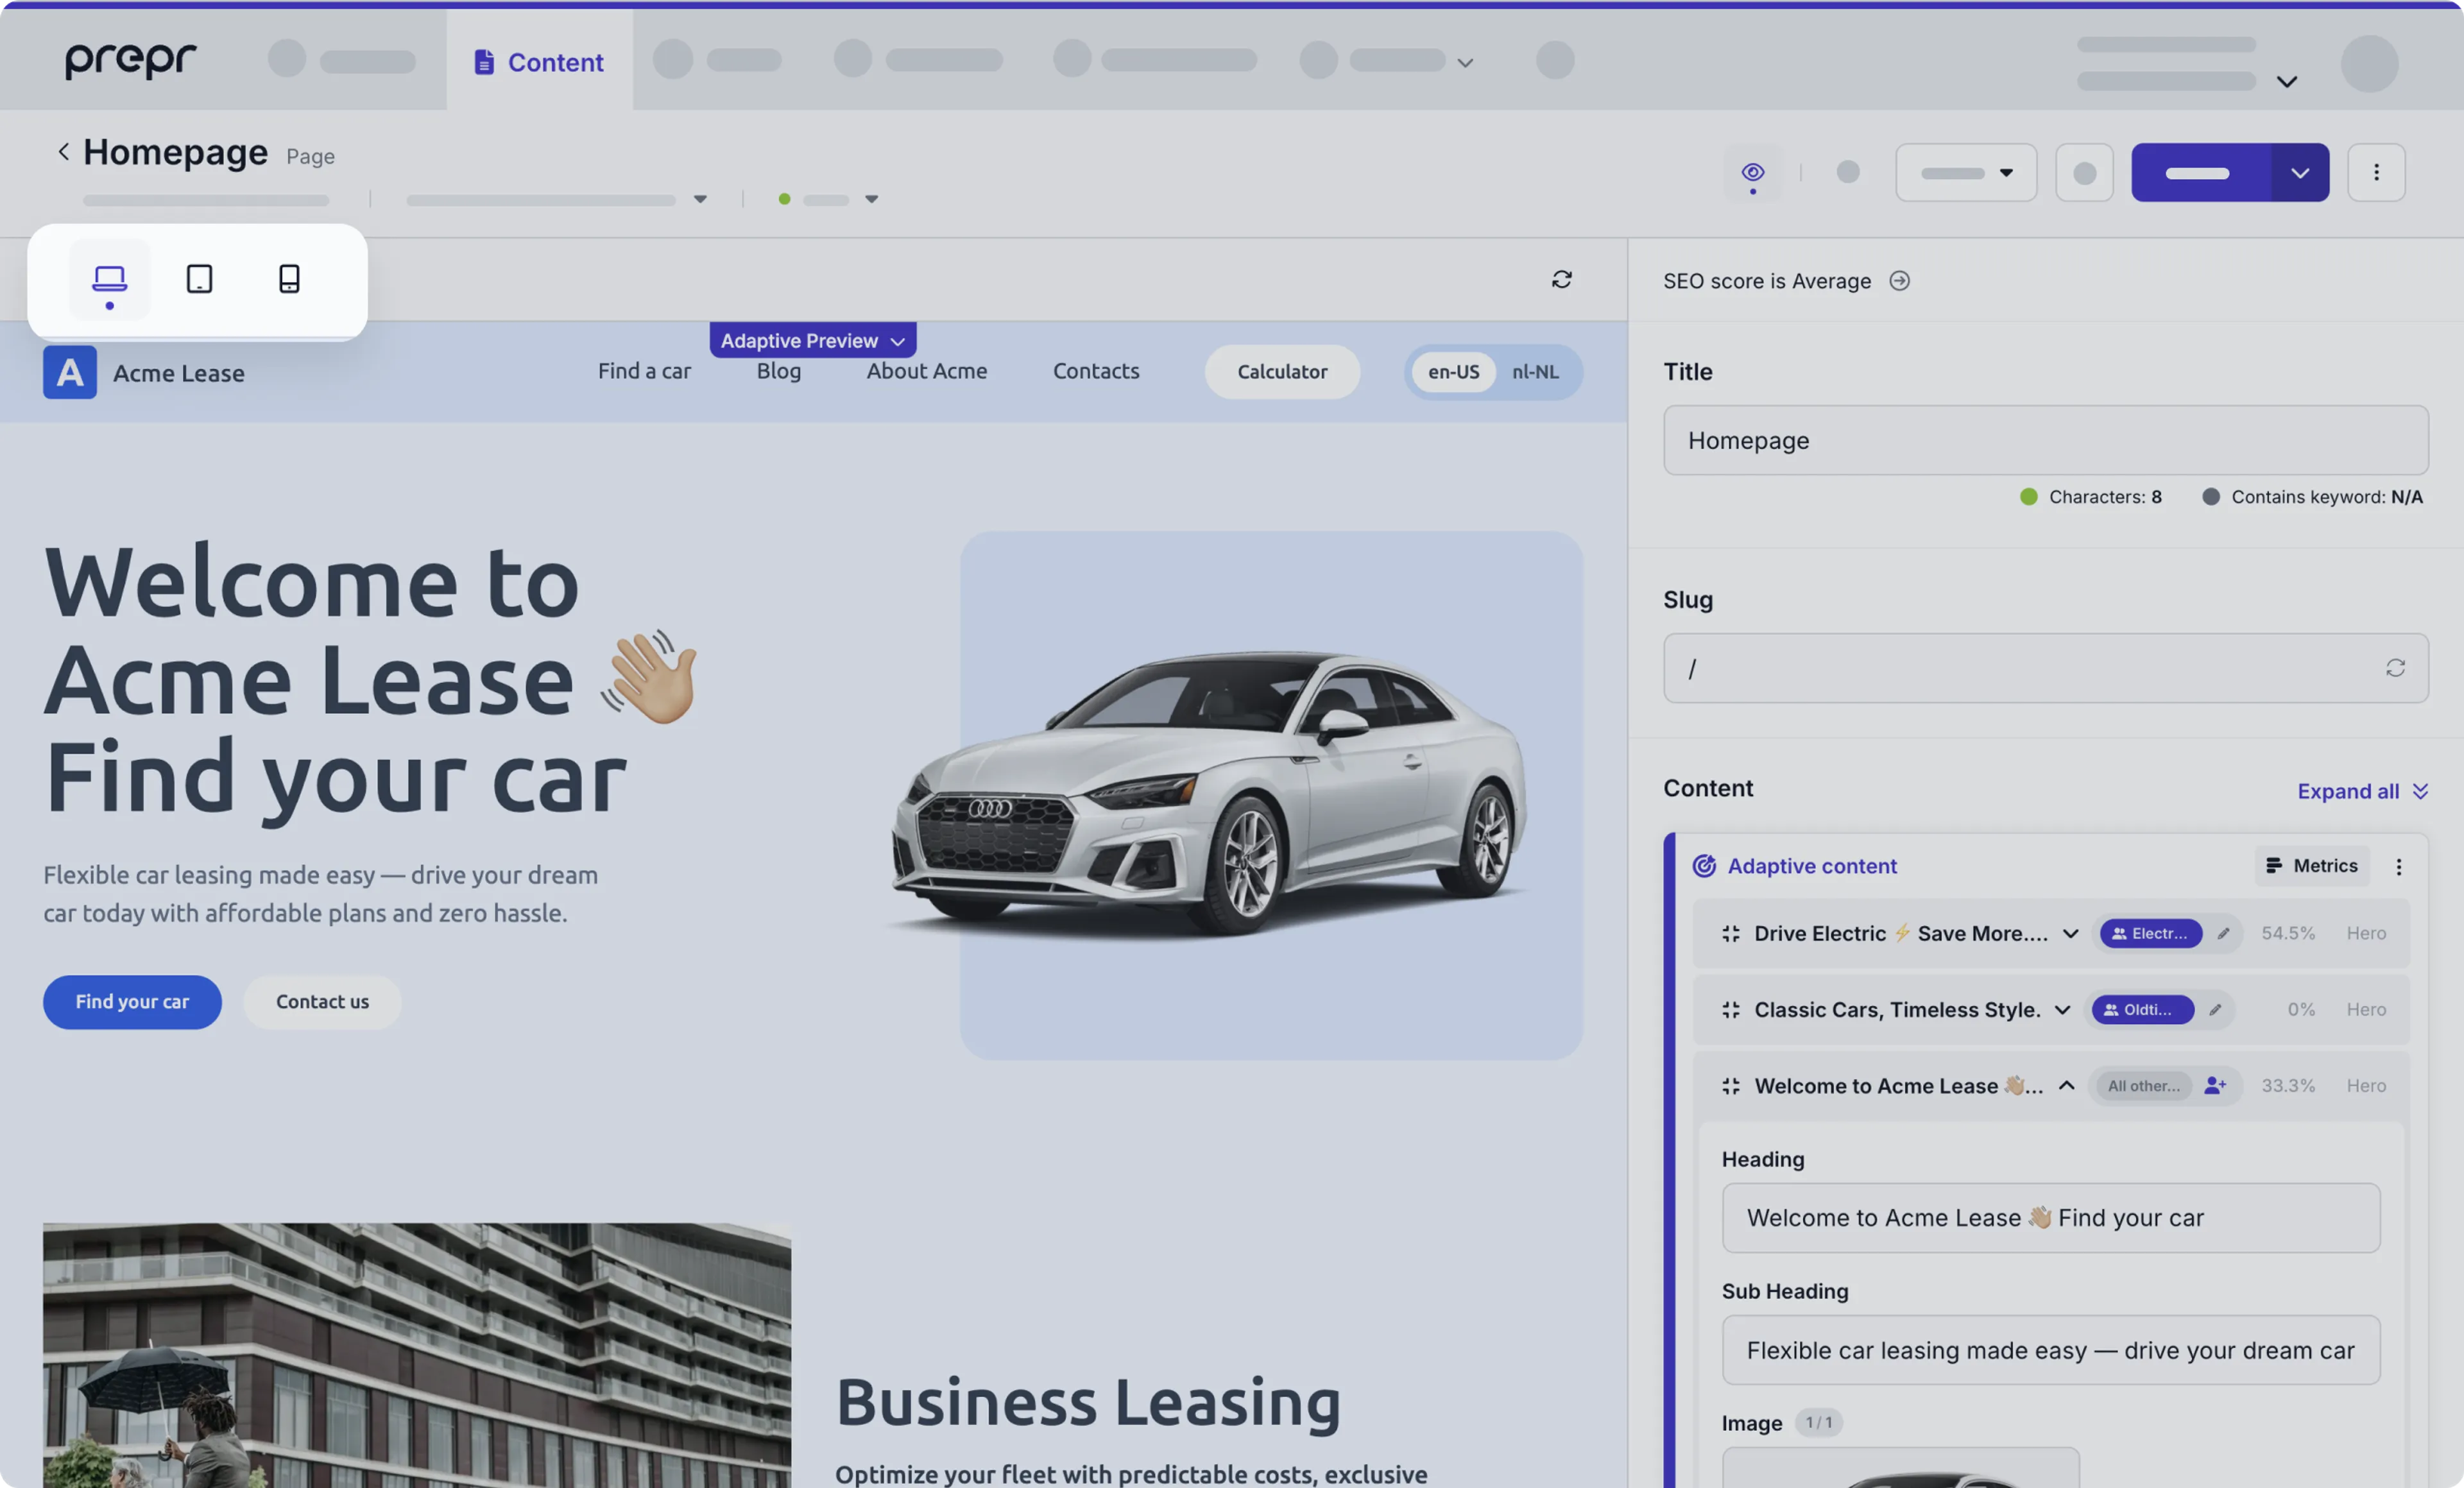
- When multiple URLs are enabled for Visual editing, for example, for test and development environments, you can switch to a different environment.
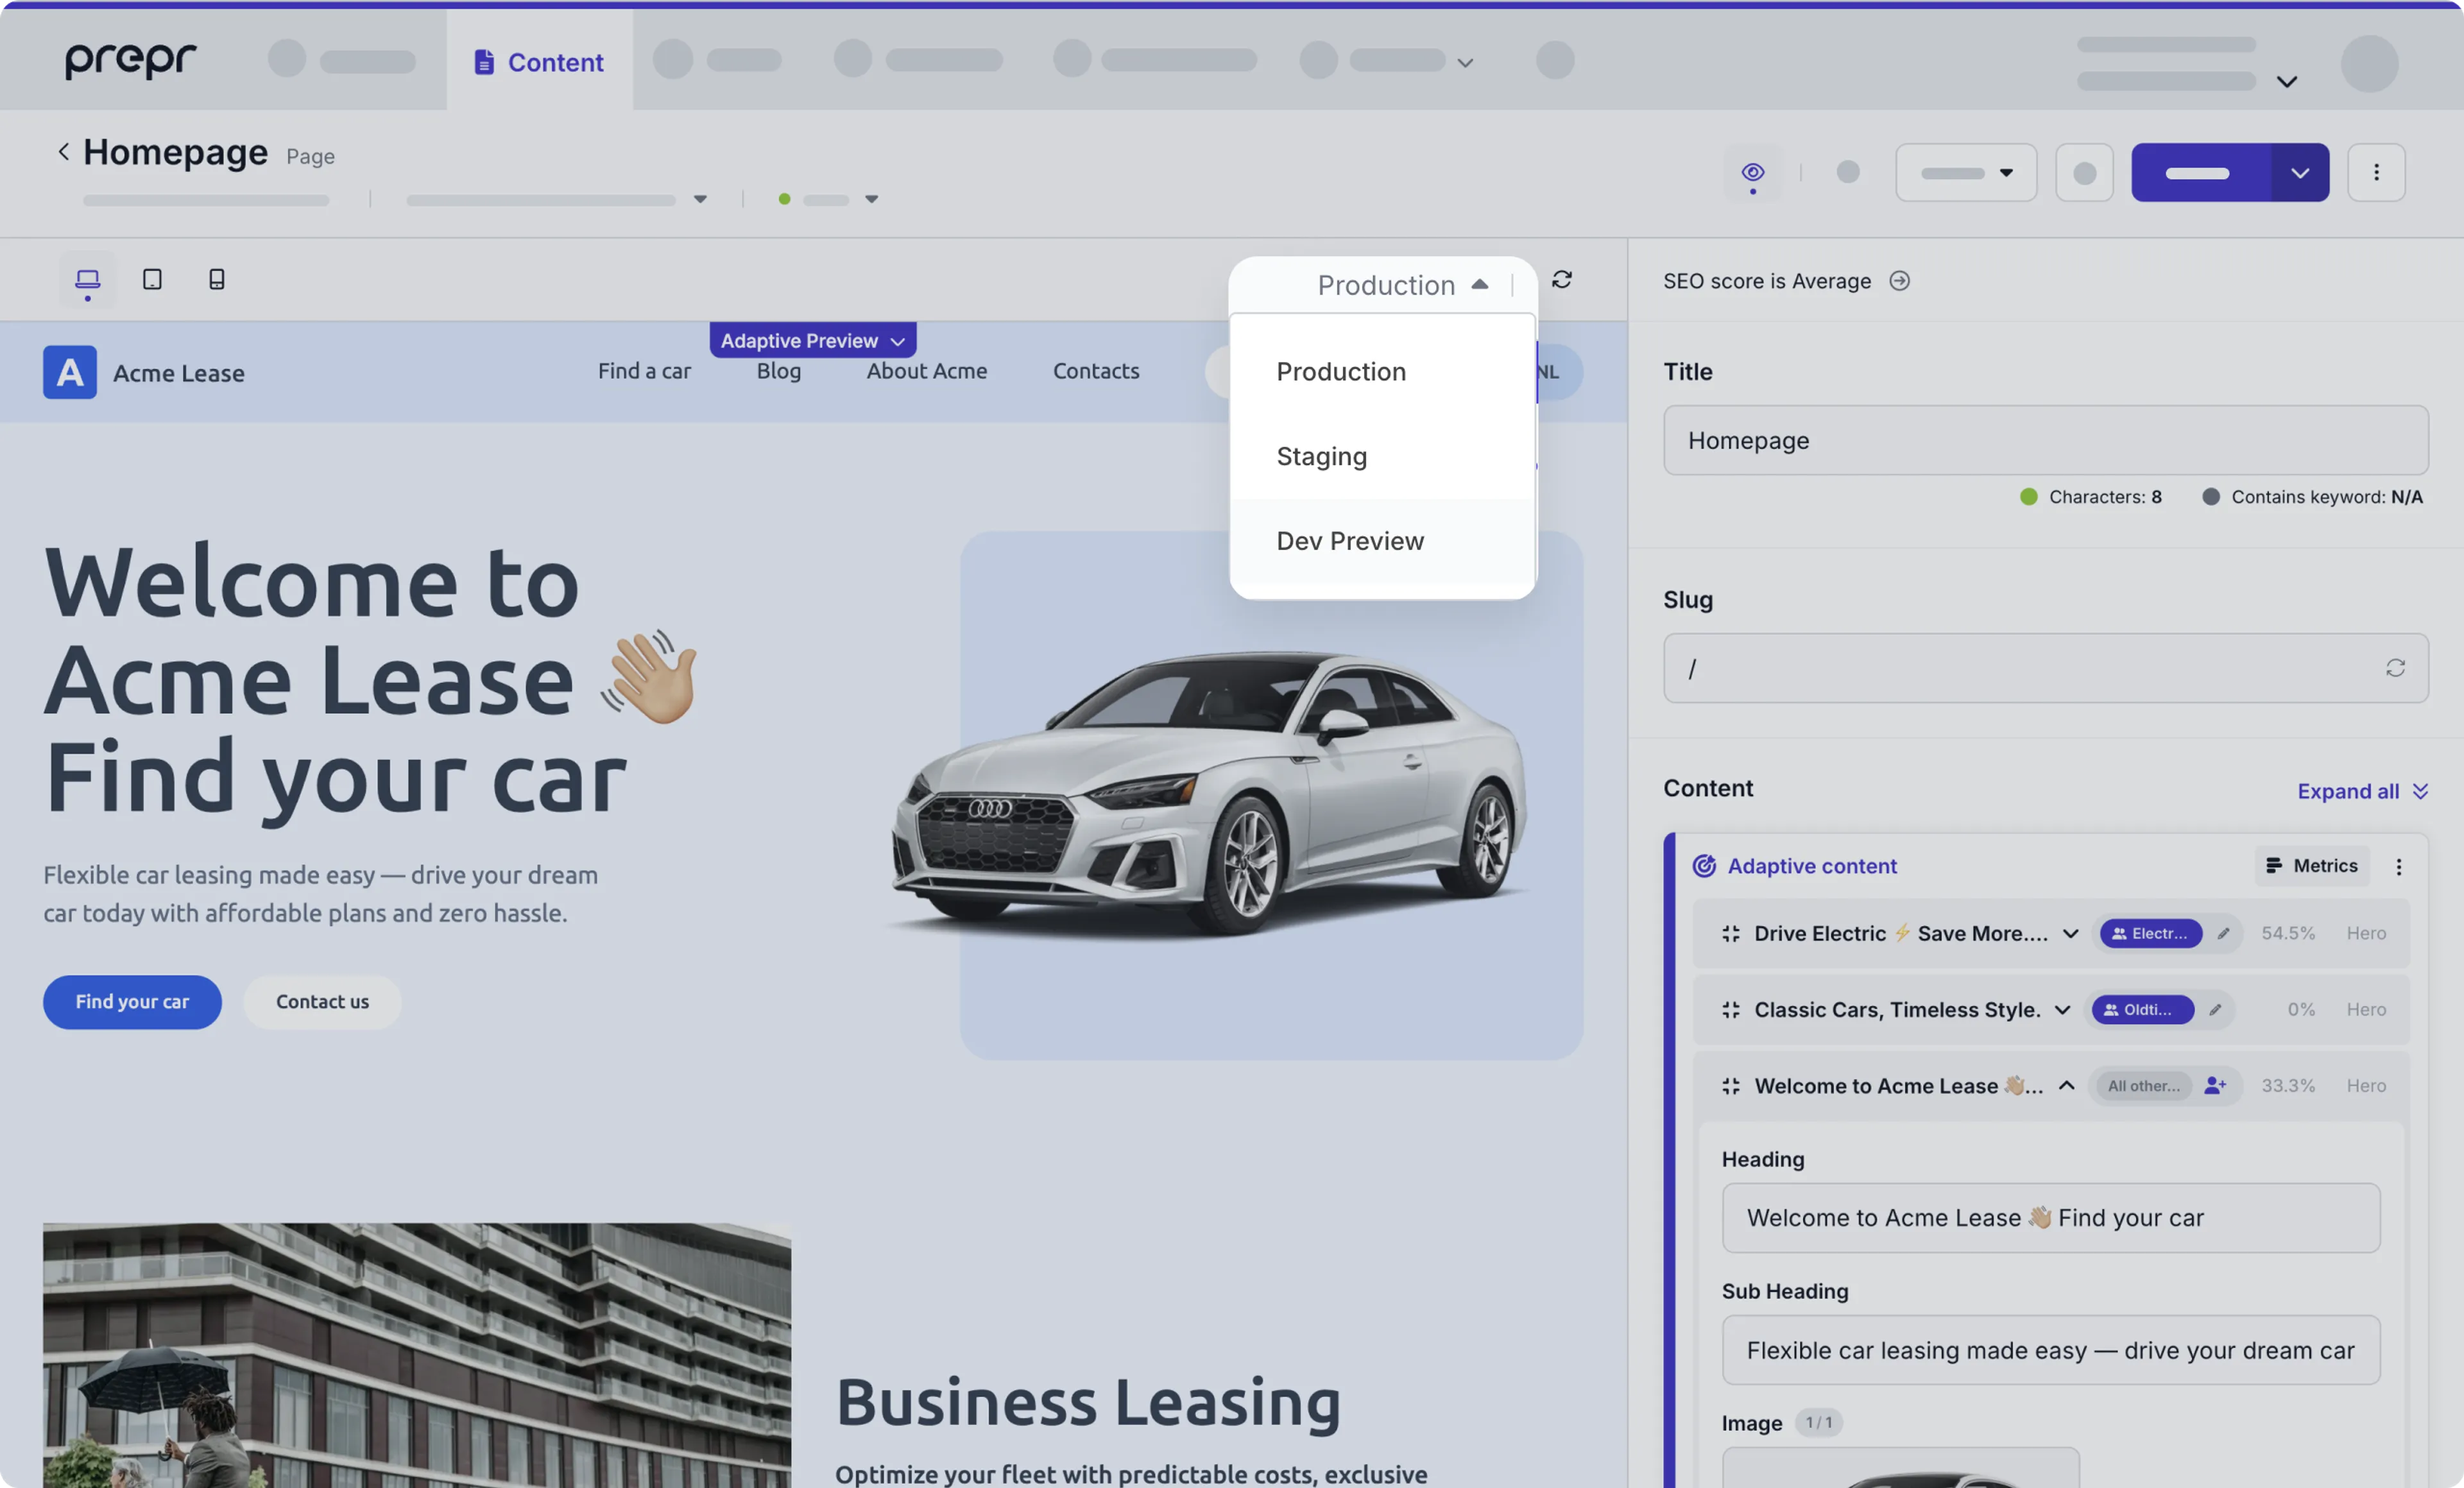
To set up Visual Editing, check out the [setup doc](/project-setup/setting-up-previews-and-visual-editing).
### Preview in a separate tab
Another option to preview your content item is to click the icon to open the preview in a separate tab.
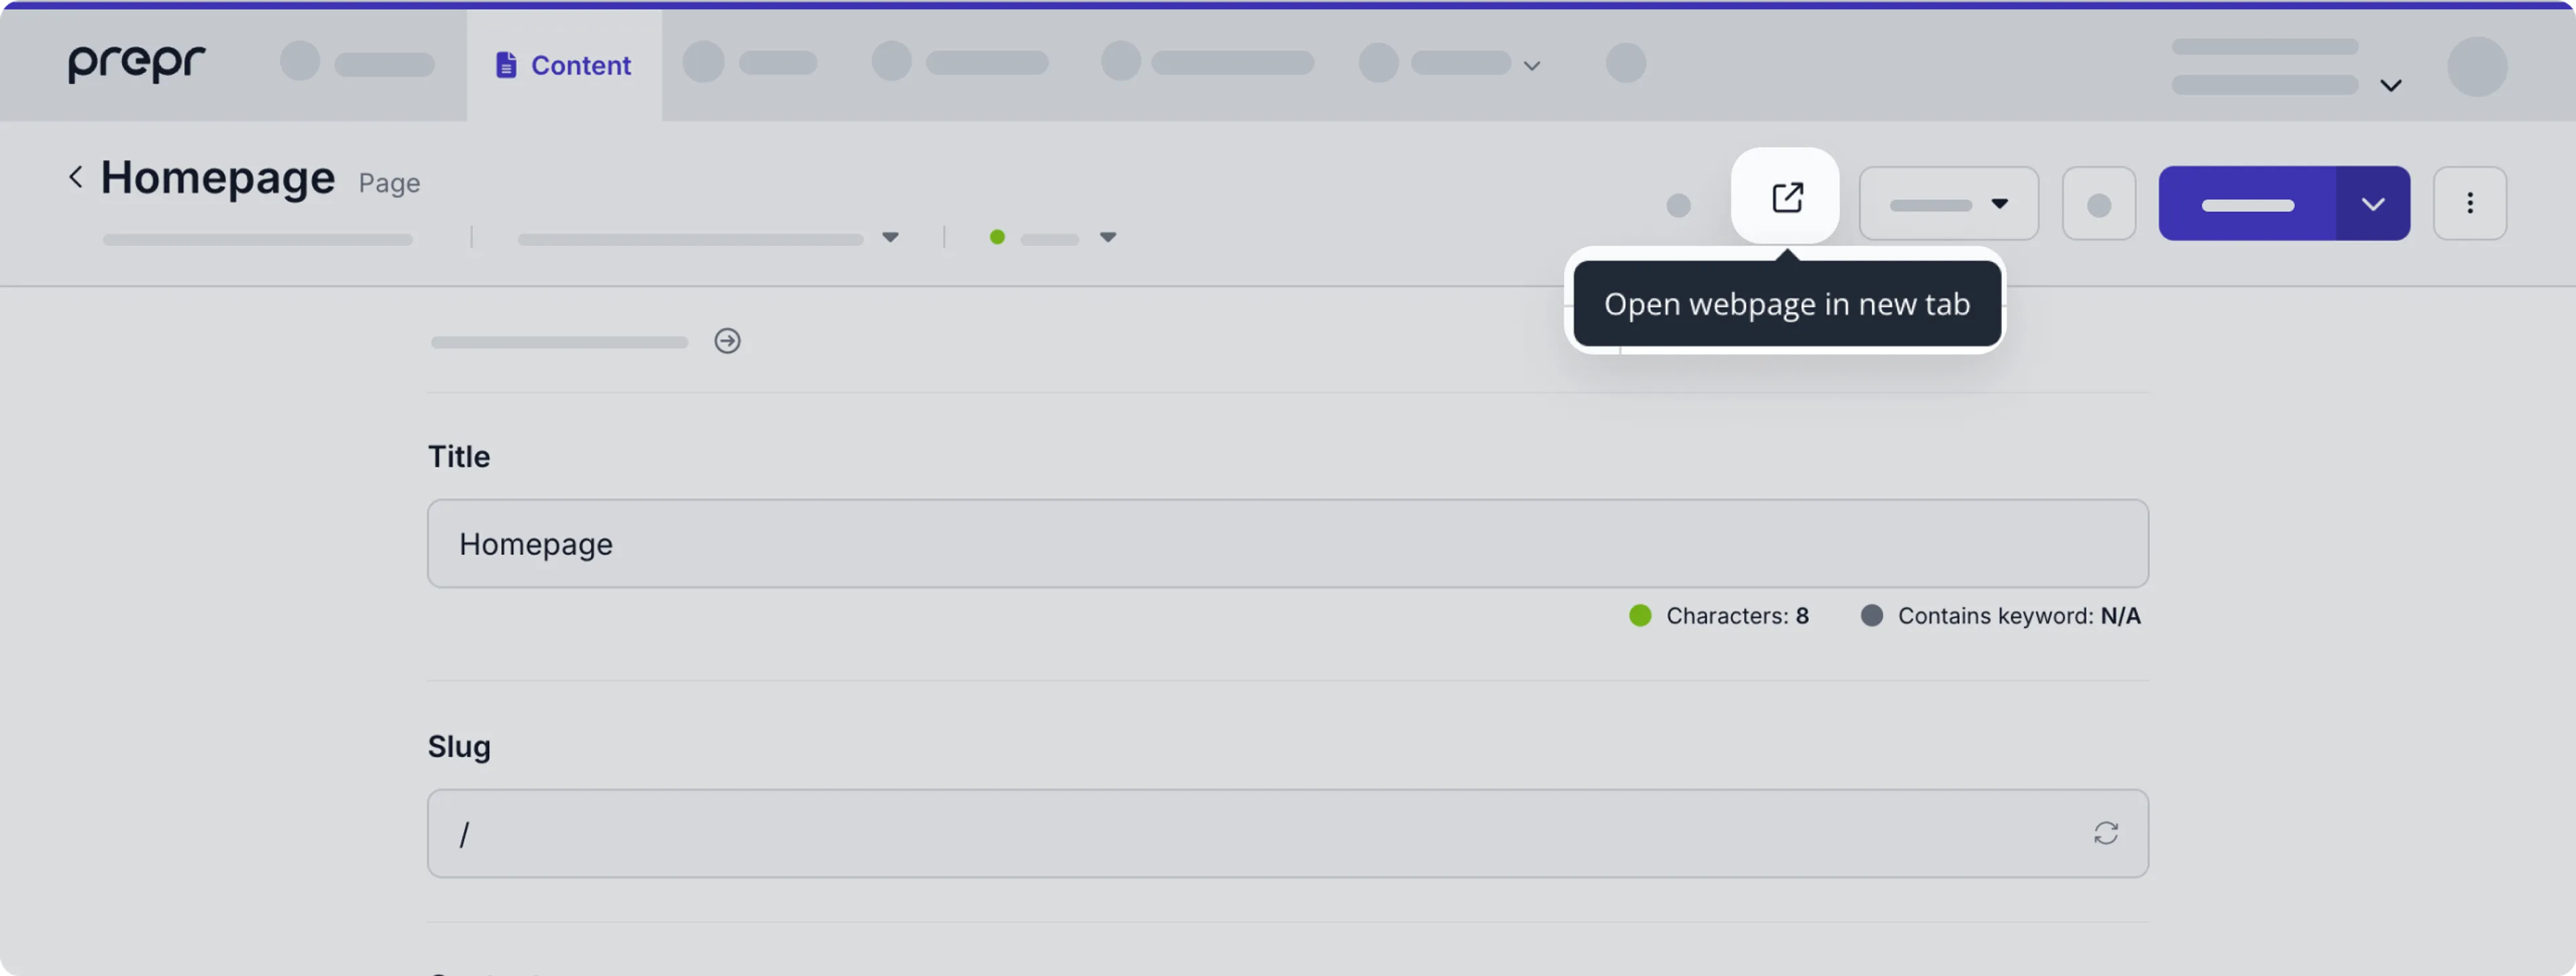
To set up one or more preview URLs, check out the [setup doc](/project-setup/setting-up-previews-and-visual-editing).
## Manage versions
Content item versioning enables you to do the following tasks:
- Reset your last content item edits.
- Keep track of all the changes in a content item.
- Revert to a previous version when needed.
- Look for older versions in your content item.
- See every change made in a content item.
You can find content item versions in one of the following ways:
- Click the date link in the publish info text at the top left to open the activity log. And click the **Show earlier versions** link.

- Or click the button to open the drop-down list and choose the **Show version history** option.
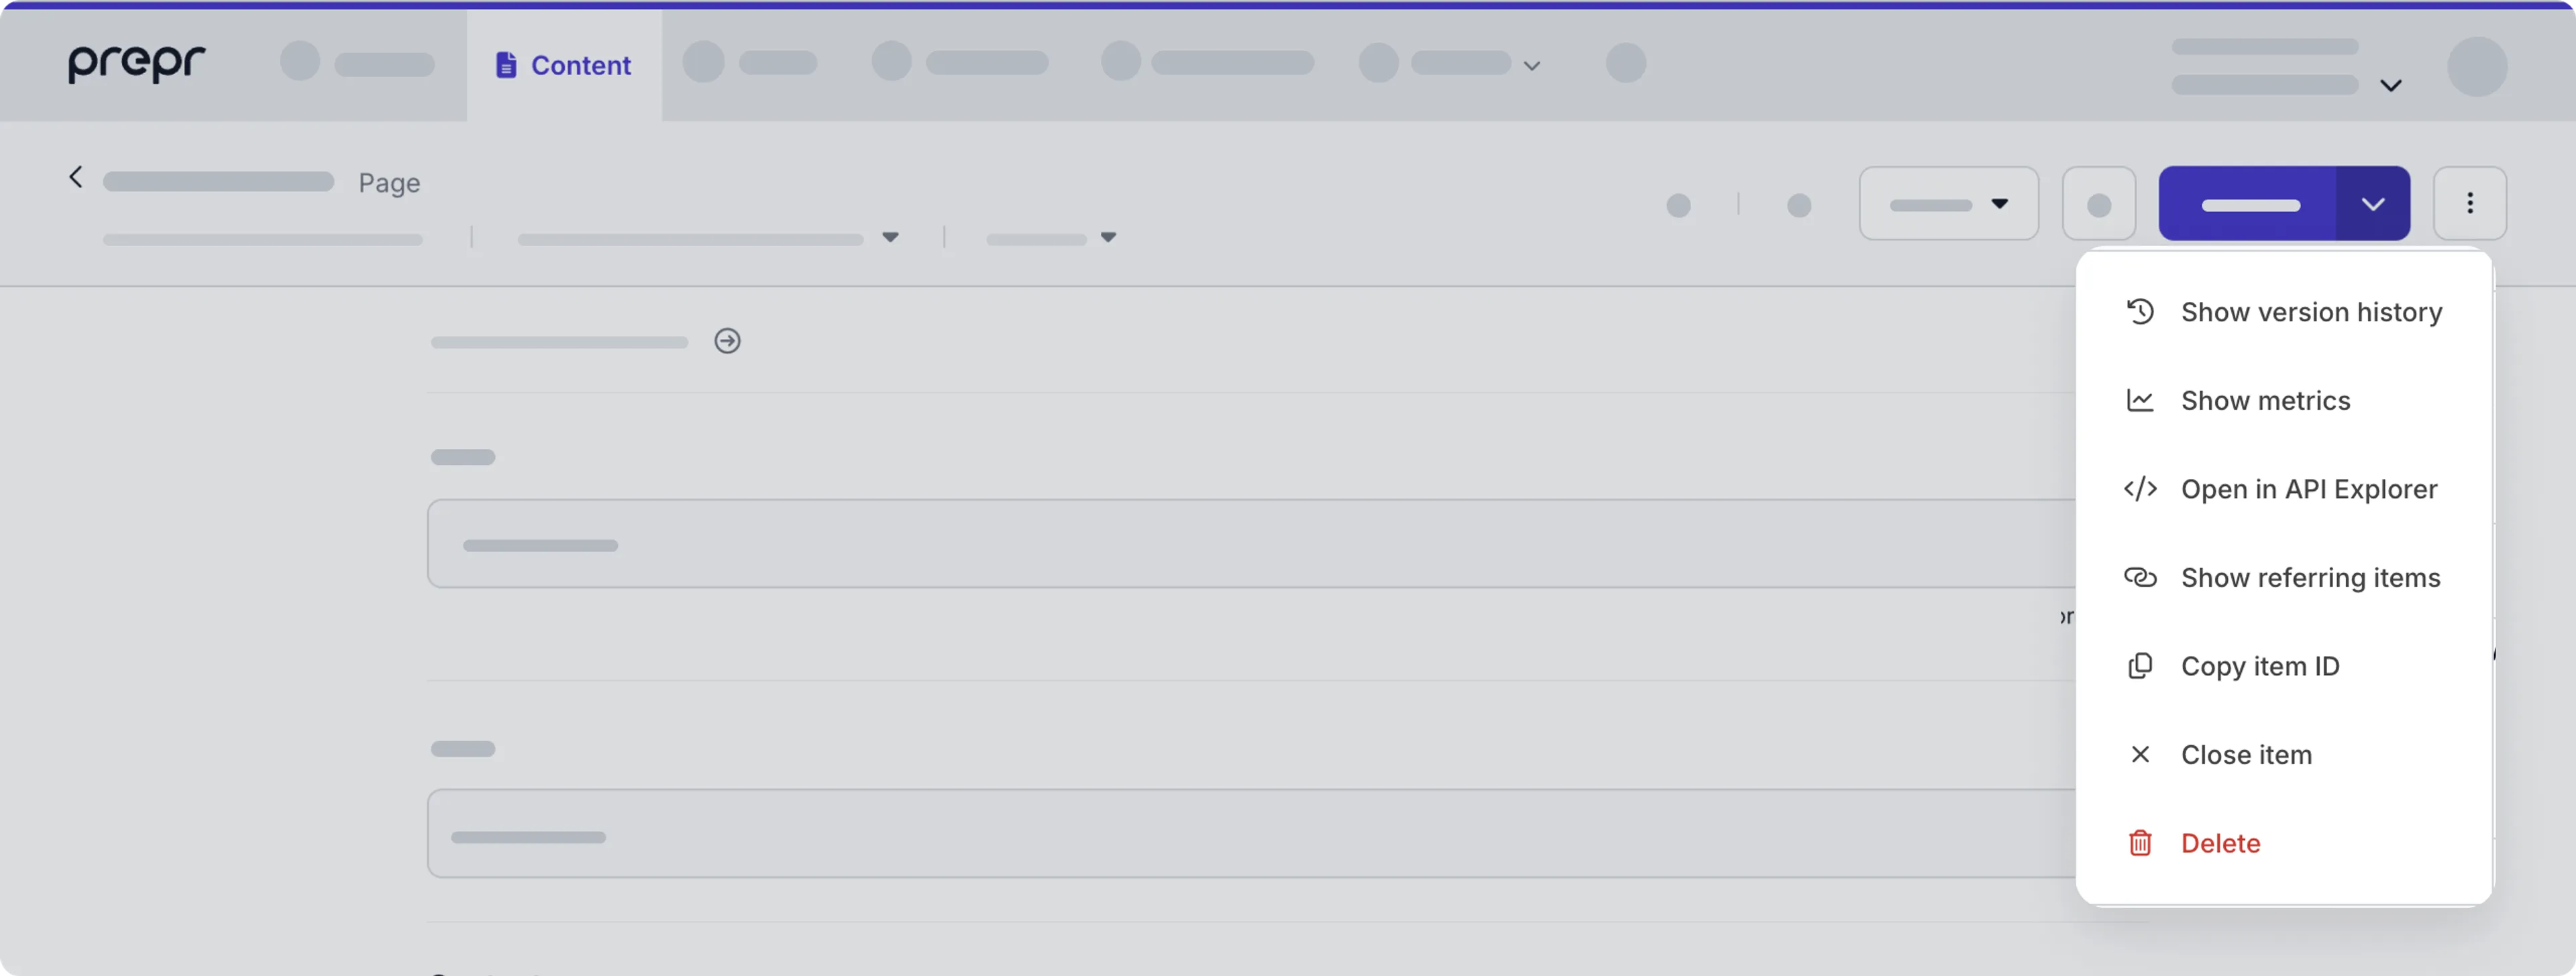
You can then see the list of previous versions for this content item.
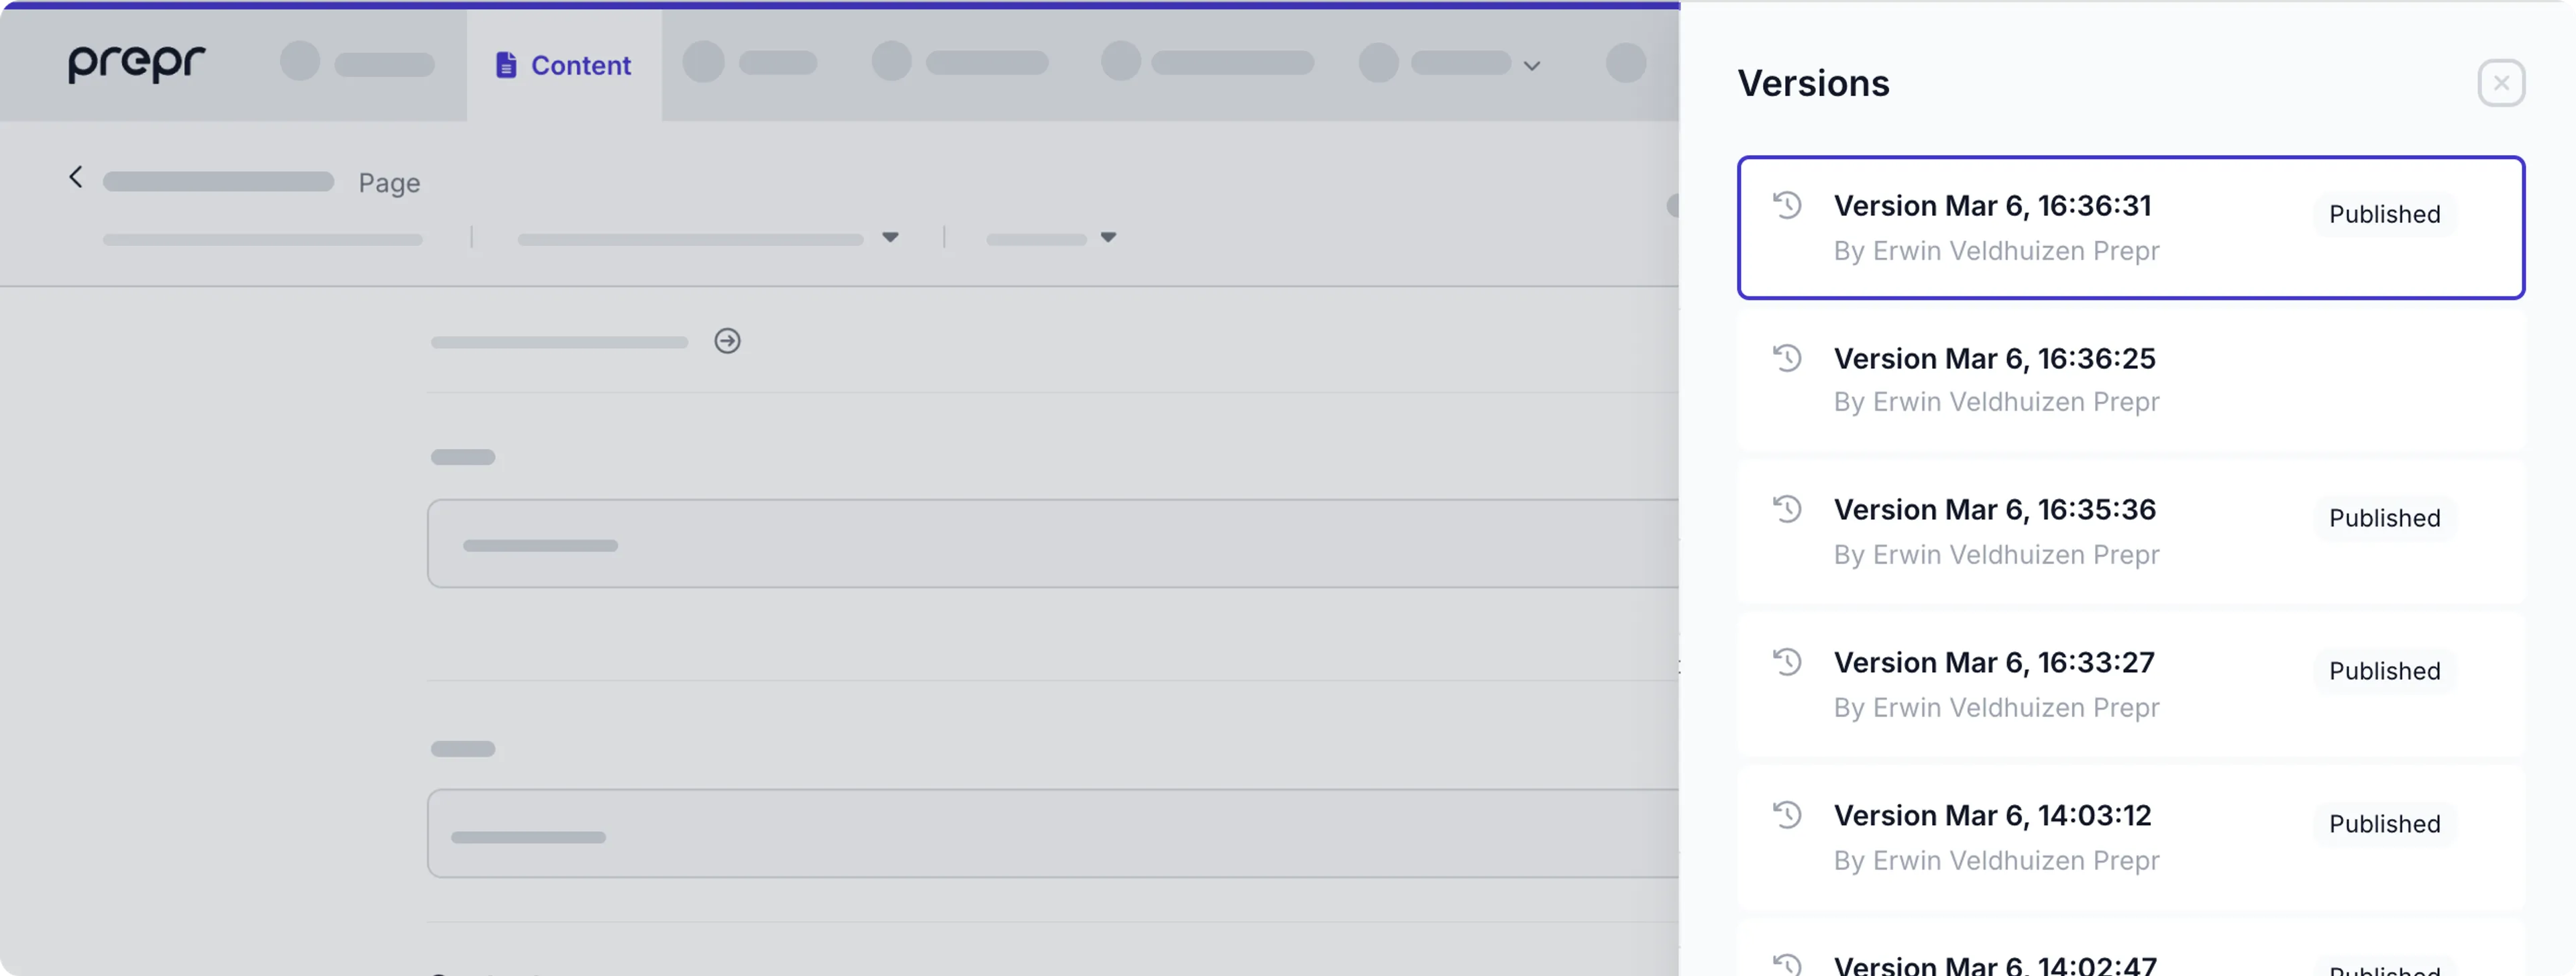
Select one of the versions and click **View** to open the specific content item version.
The yellow notification bar at the bottom of the page indicates that you are viewing an older content item version.
To restore a previous version, click **Restore** to open this version for further editing.
Take note of the following when viewing earlier versions:
- All fields and drag-and-drop elements are versioned.
- There is no version history of the slug and workflow settings.
- Content item versioning is available per locale.
## View linked content items
You can view all the linked items for a content item by following the steps below.

1. In the *Content* page, hover over the content item for which you want to view all linked items and click the icon.
2. Or open a content item and click the button to open the drop-down list and choose the **Show linked items** option.
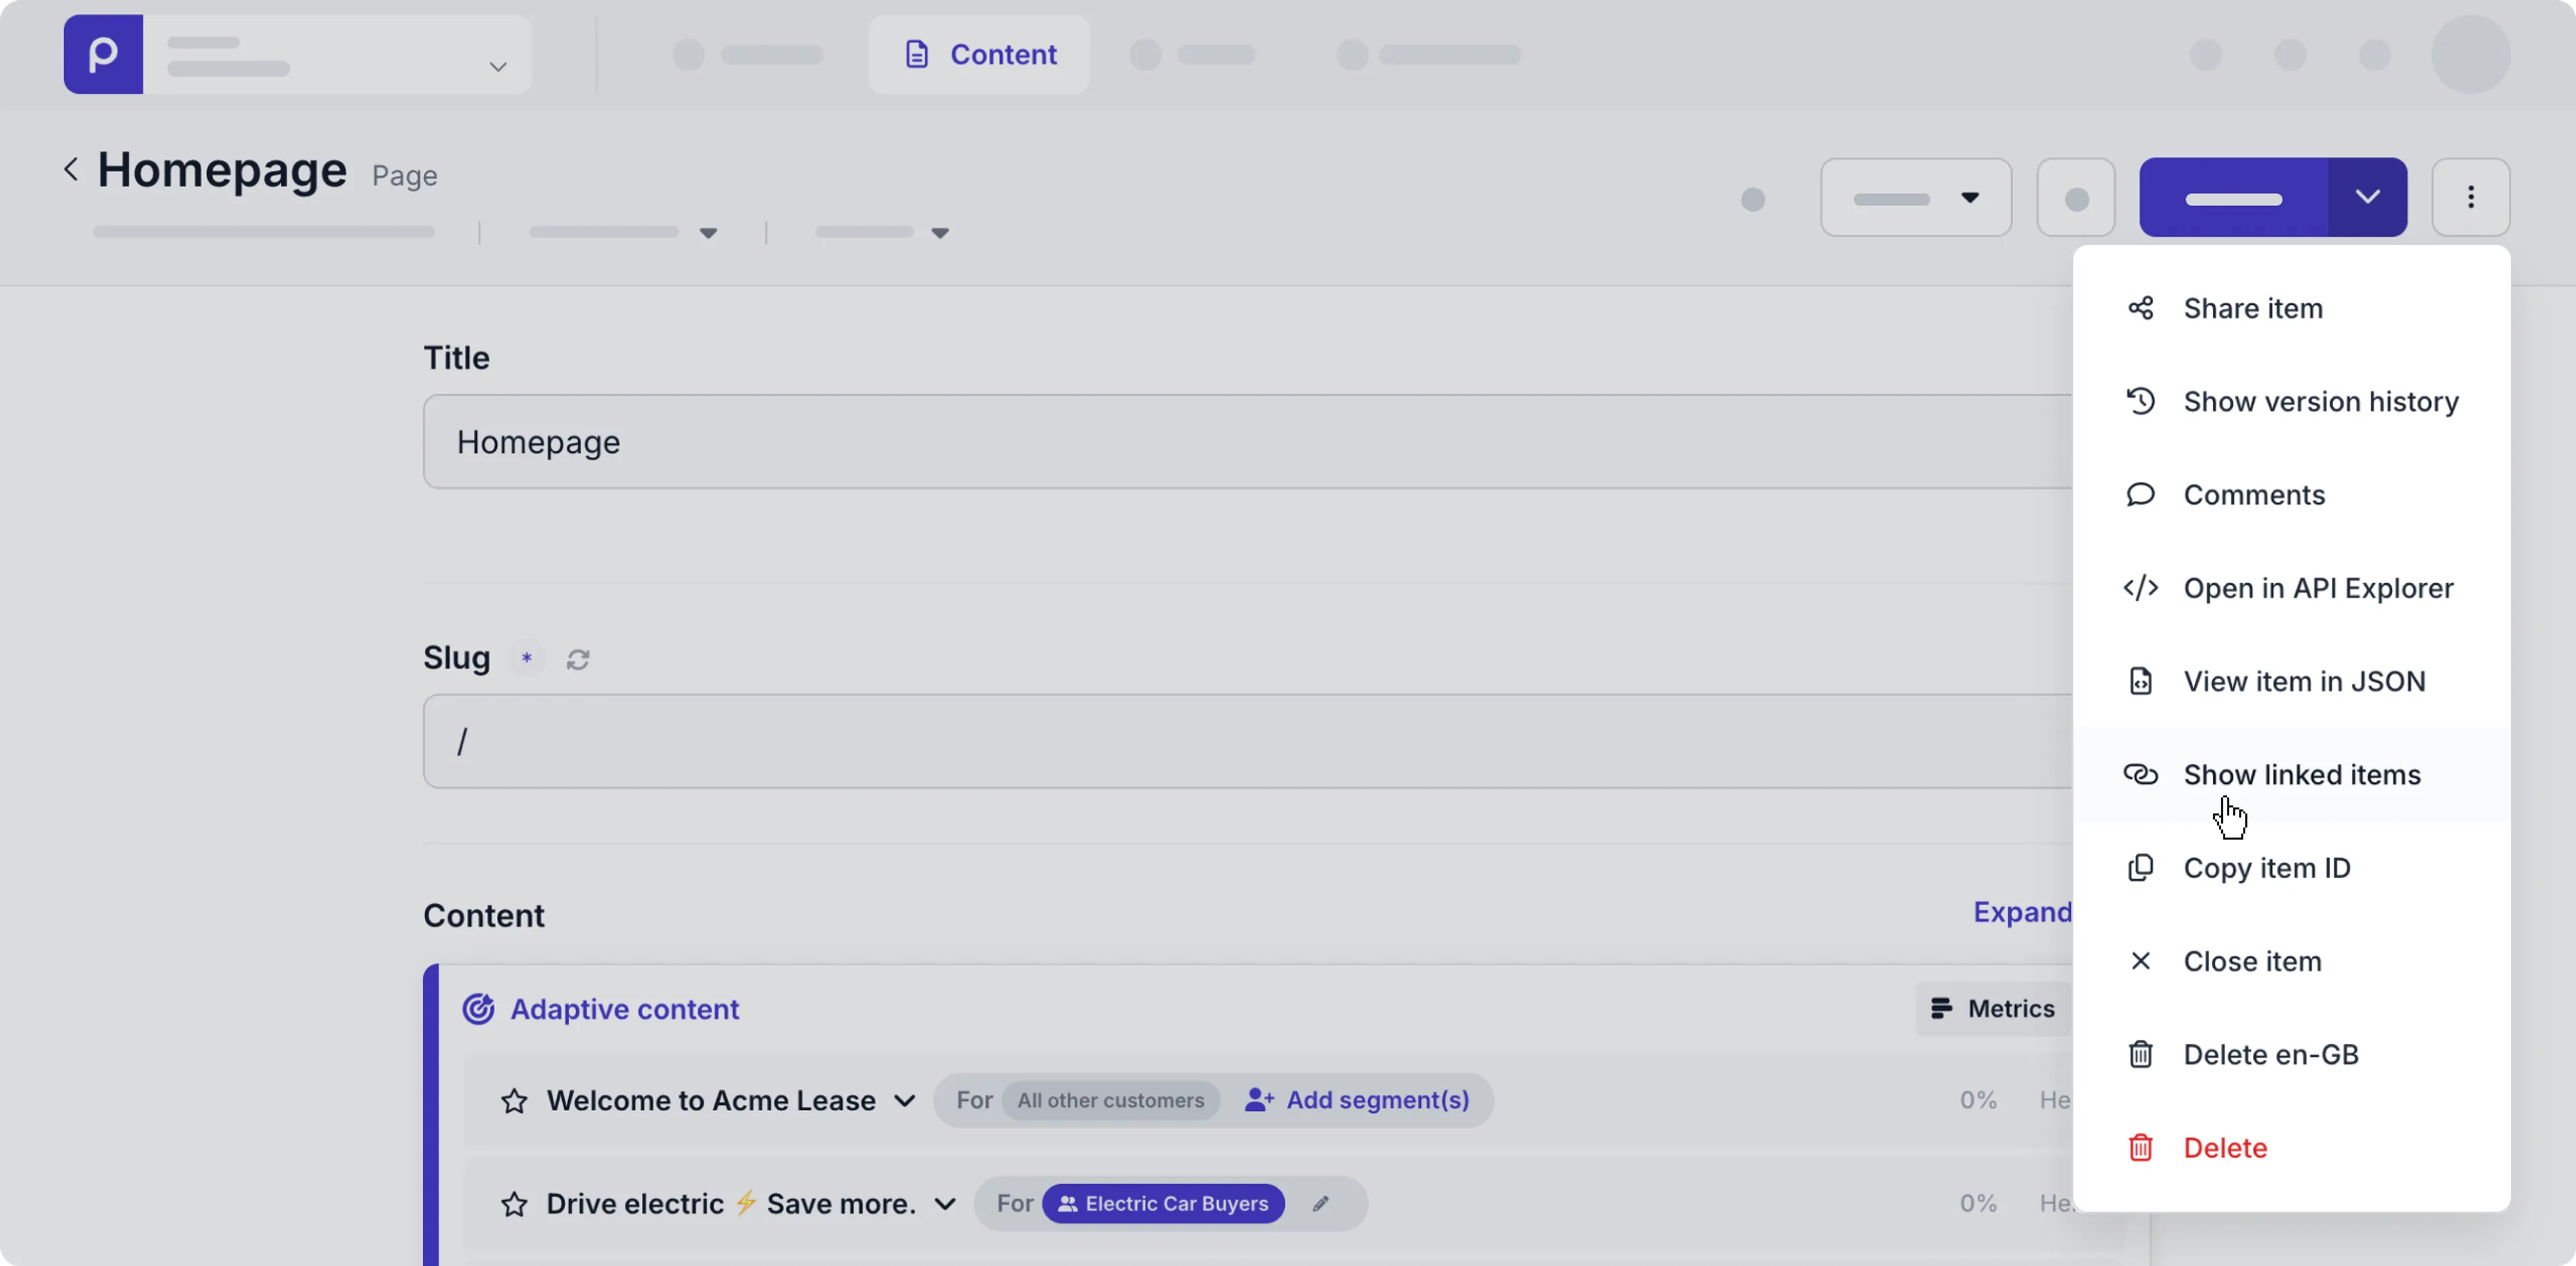
3. In the updated filter criteria, you can choose either:
- **From**: to view all content items that includes this content item as a content reference.
- **To**: to view all content items this content item links to.
## Share a content item
You can share a content item with one or more users who have limited access to content items by following the steps below.
1. Go to the **Content** tab.
2. Click to open a content item you want to share.
3. Click the button to open the drop-down list and choose the **Share item** option.
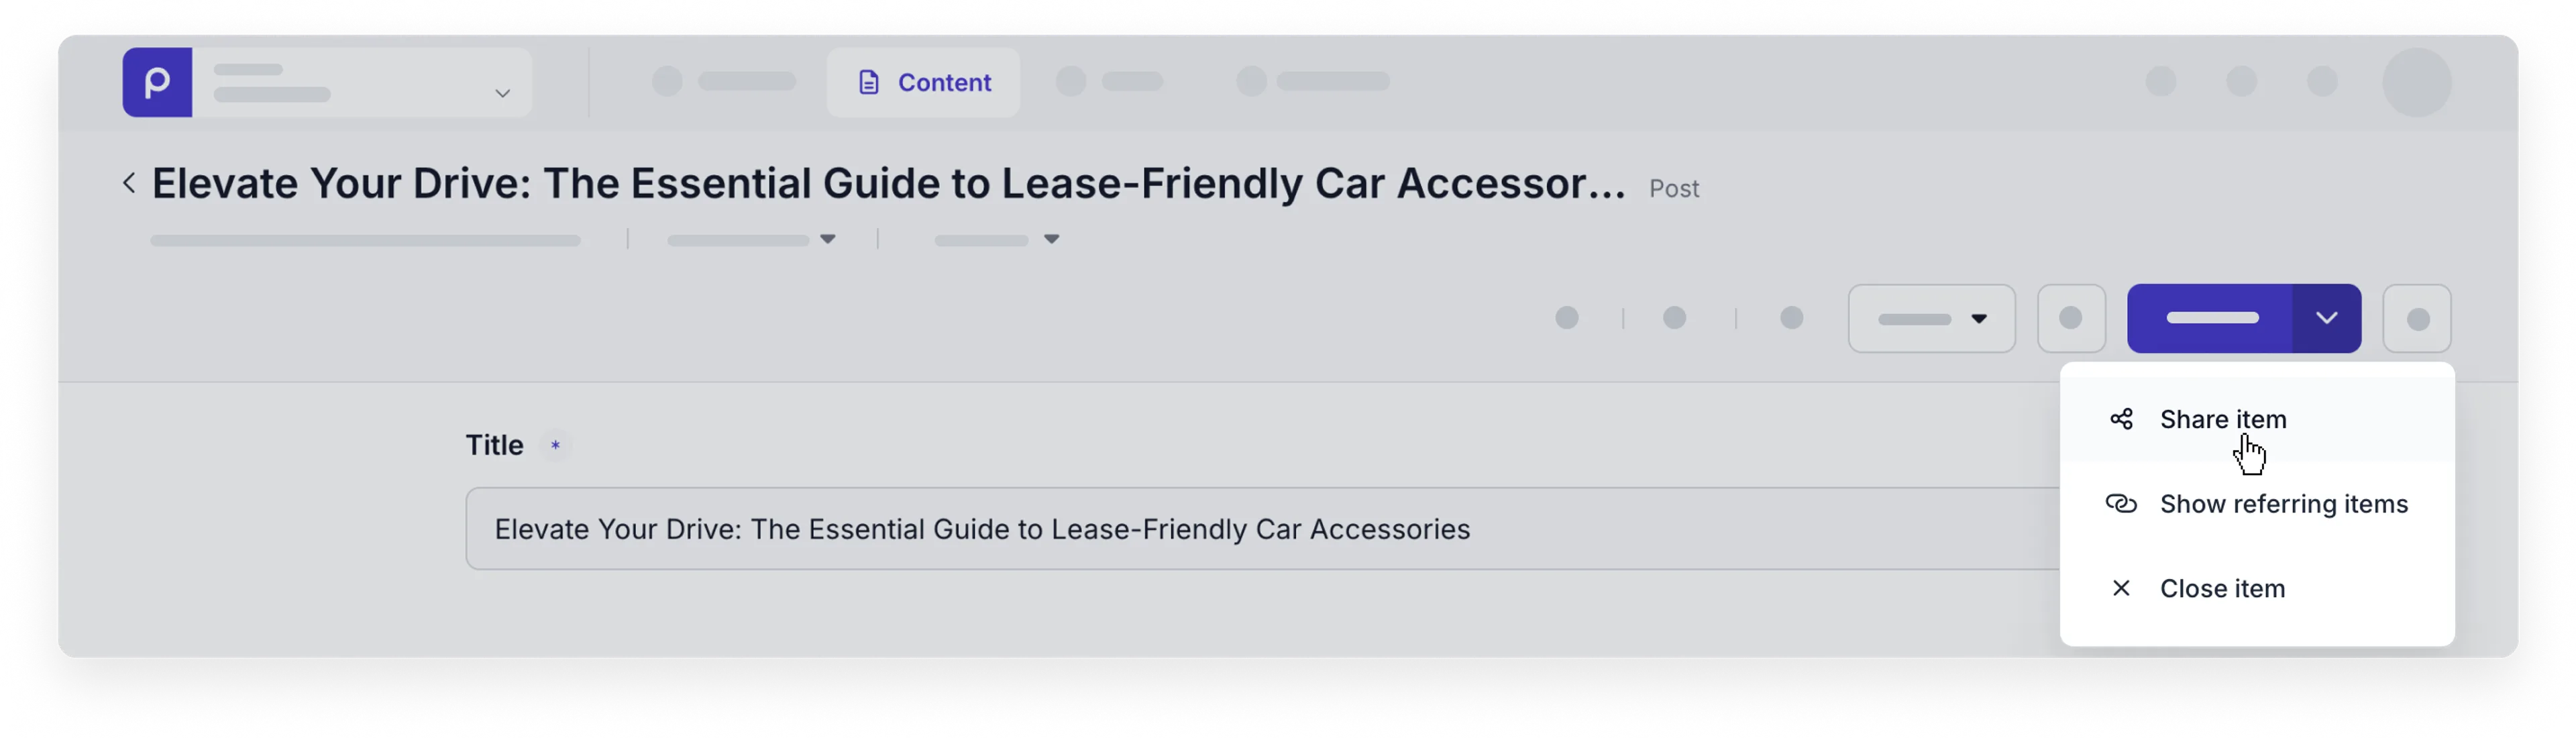
4. In the pop-up window, choose one or more users you want to share the content item with and click the **Save** button.
Once shared, the users you selected will see the content item in their content item list.
## Delete a content item
When you need to delete a content item, you can do so in a couple ways:
**From the Content items list**
1. Go to the **Content** tab.
2. Hover over the content item you want to delete to make the actions visible, and click the icon.
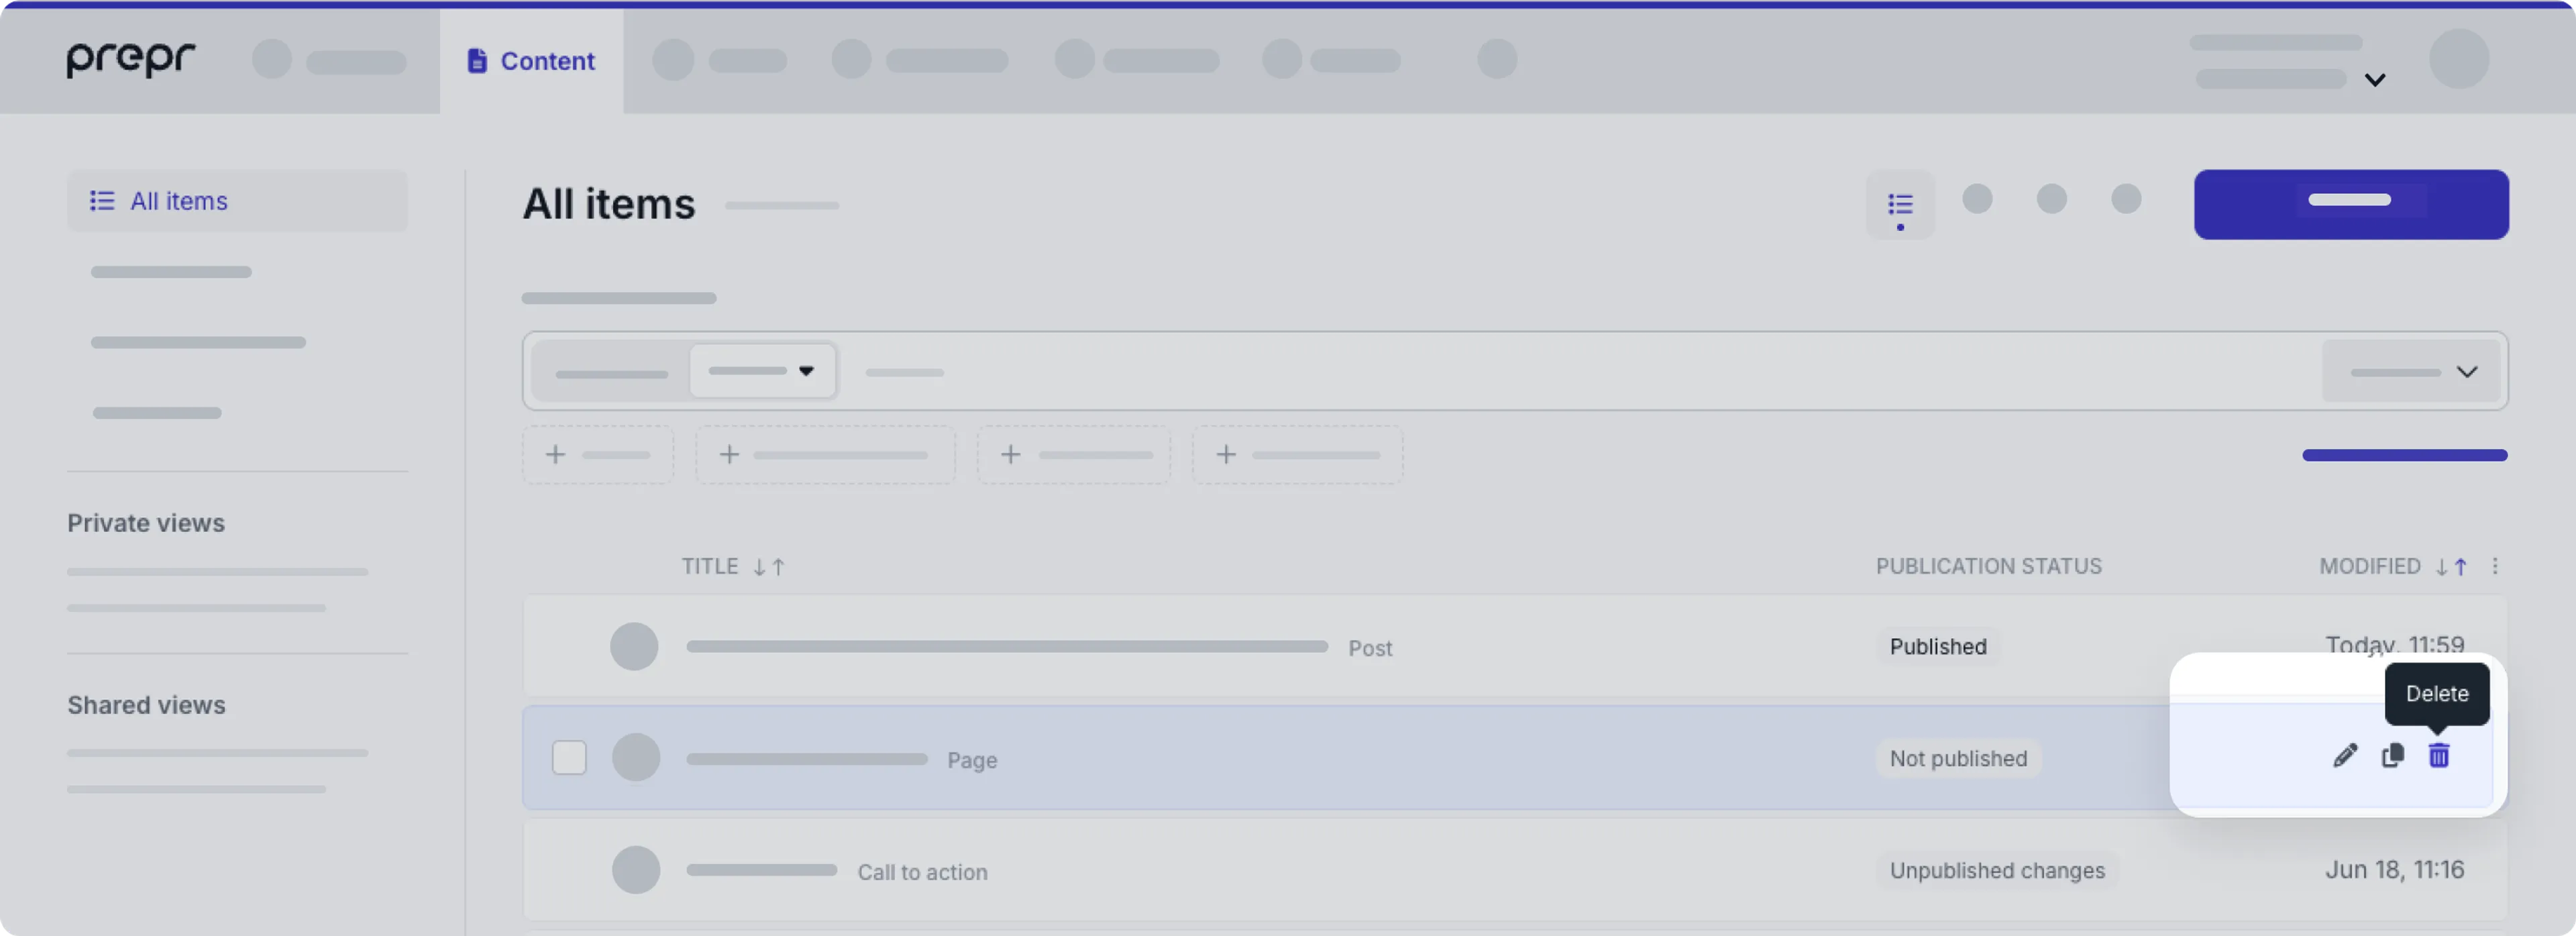
3. In the pop-up window, click **Delete** again to confirm the action.
- **From the Content item page**
1. Go to the **Content** tab.
2. Click to open a content item you want to delete.
3. Click the button to open the drop-down list and choose the **Delete** option.

4. In the pop-up window, click **Delete** again to confirm the action.
### Delete a language variant
If you [manage multi-language content](/content-management/localizing-content), then you also have the option to delete a specific language variant. Click to delete a content item and then choose a preferred option:
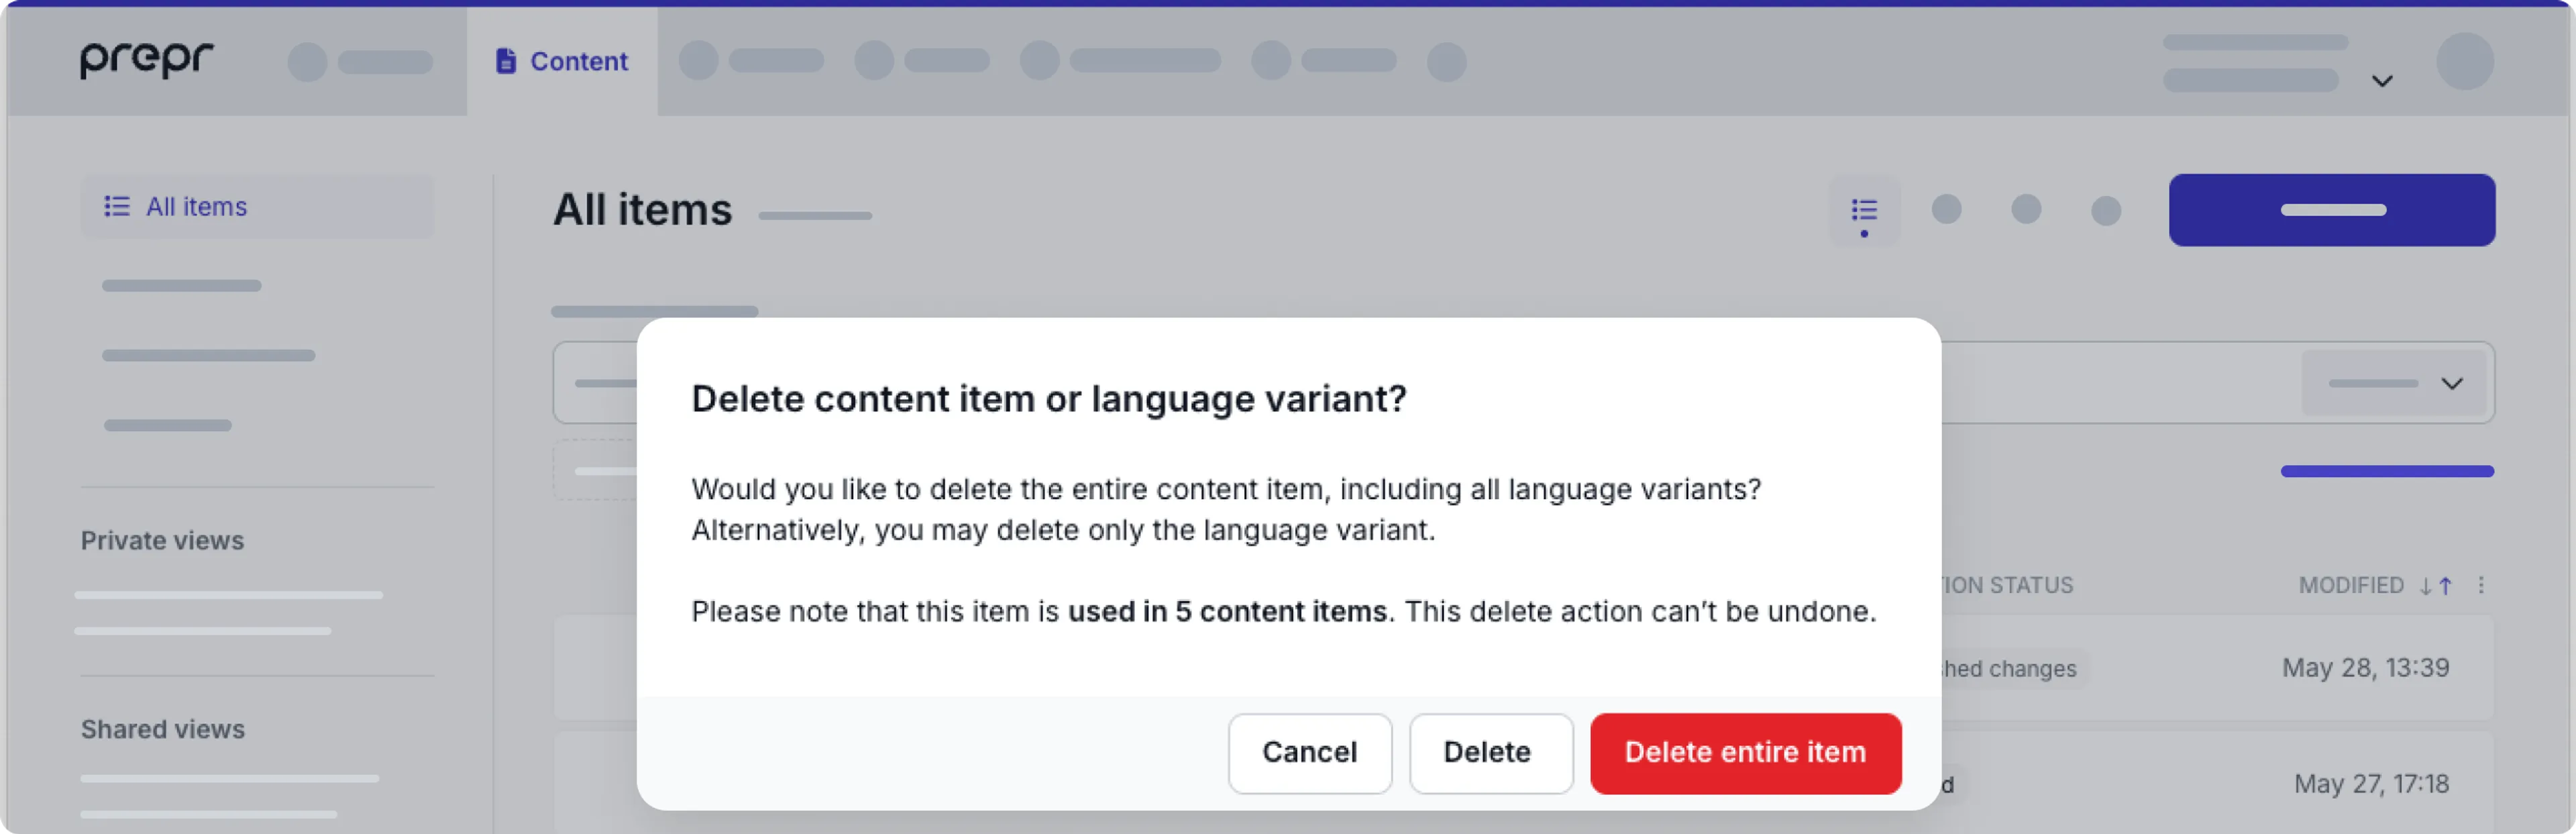
### Recover a deleted item
You can recover a deleted item by clicking the *Deleted* view to list all the deleted content items.
Hover over the content item you want to recover and click the **Recover** link.

When the **Recover item?** pop-up window appears, click the **Yes, recover** button to confirm.
The restored content item no longer appears in the list of deleted items. Click the **All items** view to see your recovered item.
## Bulk actions on content items
In some cases you may want to perform certain actions on multiple content items at once.
To view and trigger bulk actions, go to the **Content** tab.
Hover over the content items and select the checkbox for the content items on which you want to perform the bulk action.
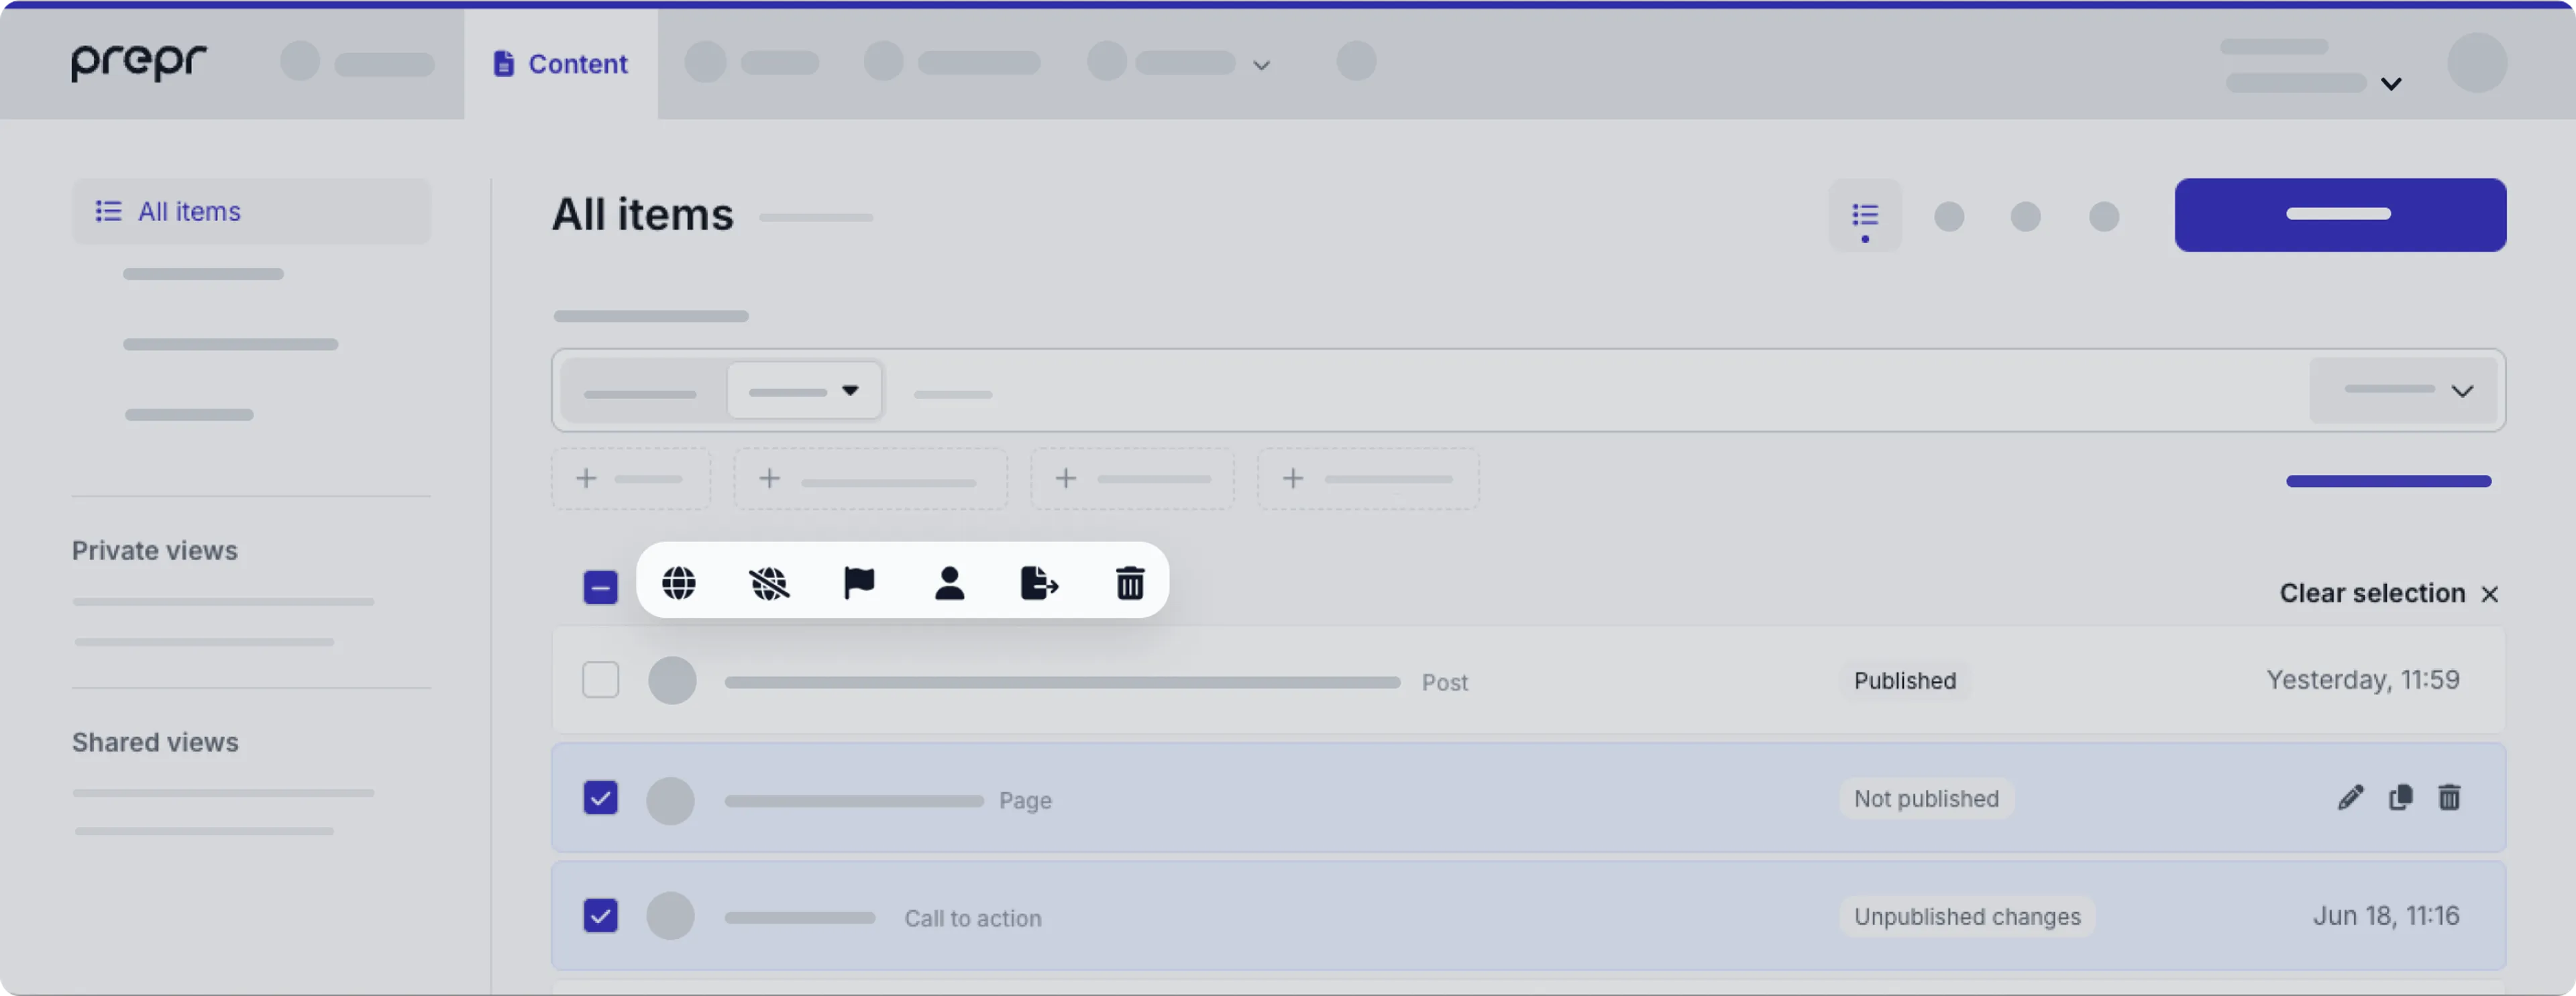
Let's look at each of these actions in more detail.
### Publish now or later
In some cases you might want to publish large batches of content items, such as campaigns or updates that span several pieces of content.
You can do this by following the steps below.

1. Choose the content items that you want to publish in the content item list.
2. Click the icon to **Publish now or later**.
3. Click the **Publish** button to publish the content items right away.
4. Or if you want to schedule the content items to be published later, choose a future date and time and click the **Schedule** button.
5. Check the number of content items in the confirmation message and click the **Yes, publish** button or the **Yes, schedule** button.
And that's it, you've published multiple content items simultaneously.
### Unpublish now or later
In some cases you might want to unpublish large batches of content items, such as outdated articles.
You can do this by following the steps below.

1. Choose the content items that you want to unpublish in the content item list.
2. Click the icon to **Unpublish now or later**.
3. Click the **Unpublish** button to unpublish the content items right away.
4. Or if you want to schedule the content items to be unpublished later, choose a future date and time and click the **Schedule** button.
5. Check the number of content items in the confirmation message and click the **Yes, unpublish** button or the **Yes, schedule** button.
And that's it, you've unpublished multiple content items simultaneously.
### Change workflow stage to
In some cases you might want to change the workflow stage of multiple content items, for example, when you've created a batch of content items and need to move them to the *Review* stage.
You can do this by following the steps below.
1. Choose the content items in the content item list for which you want to change the workflow stage.
2. Click the icon to **Change workflow stage to**.
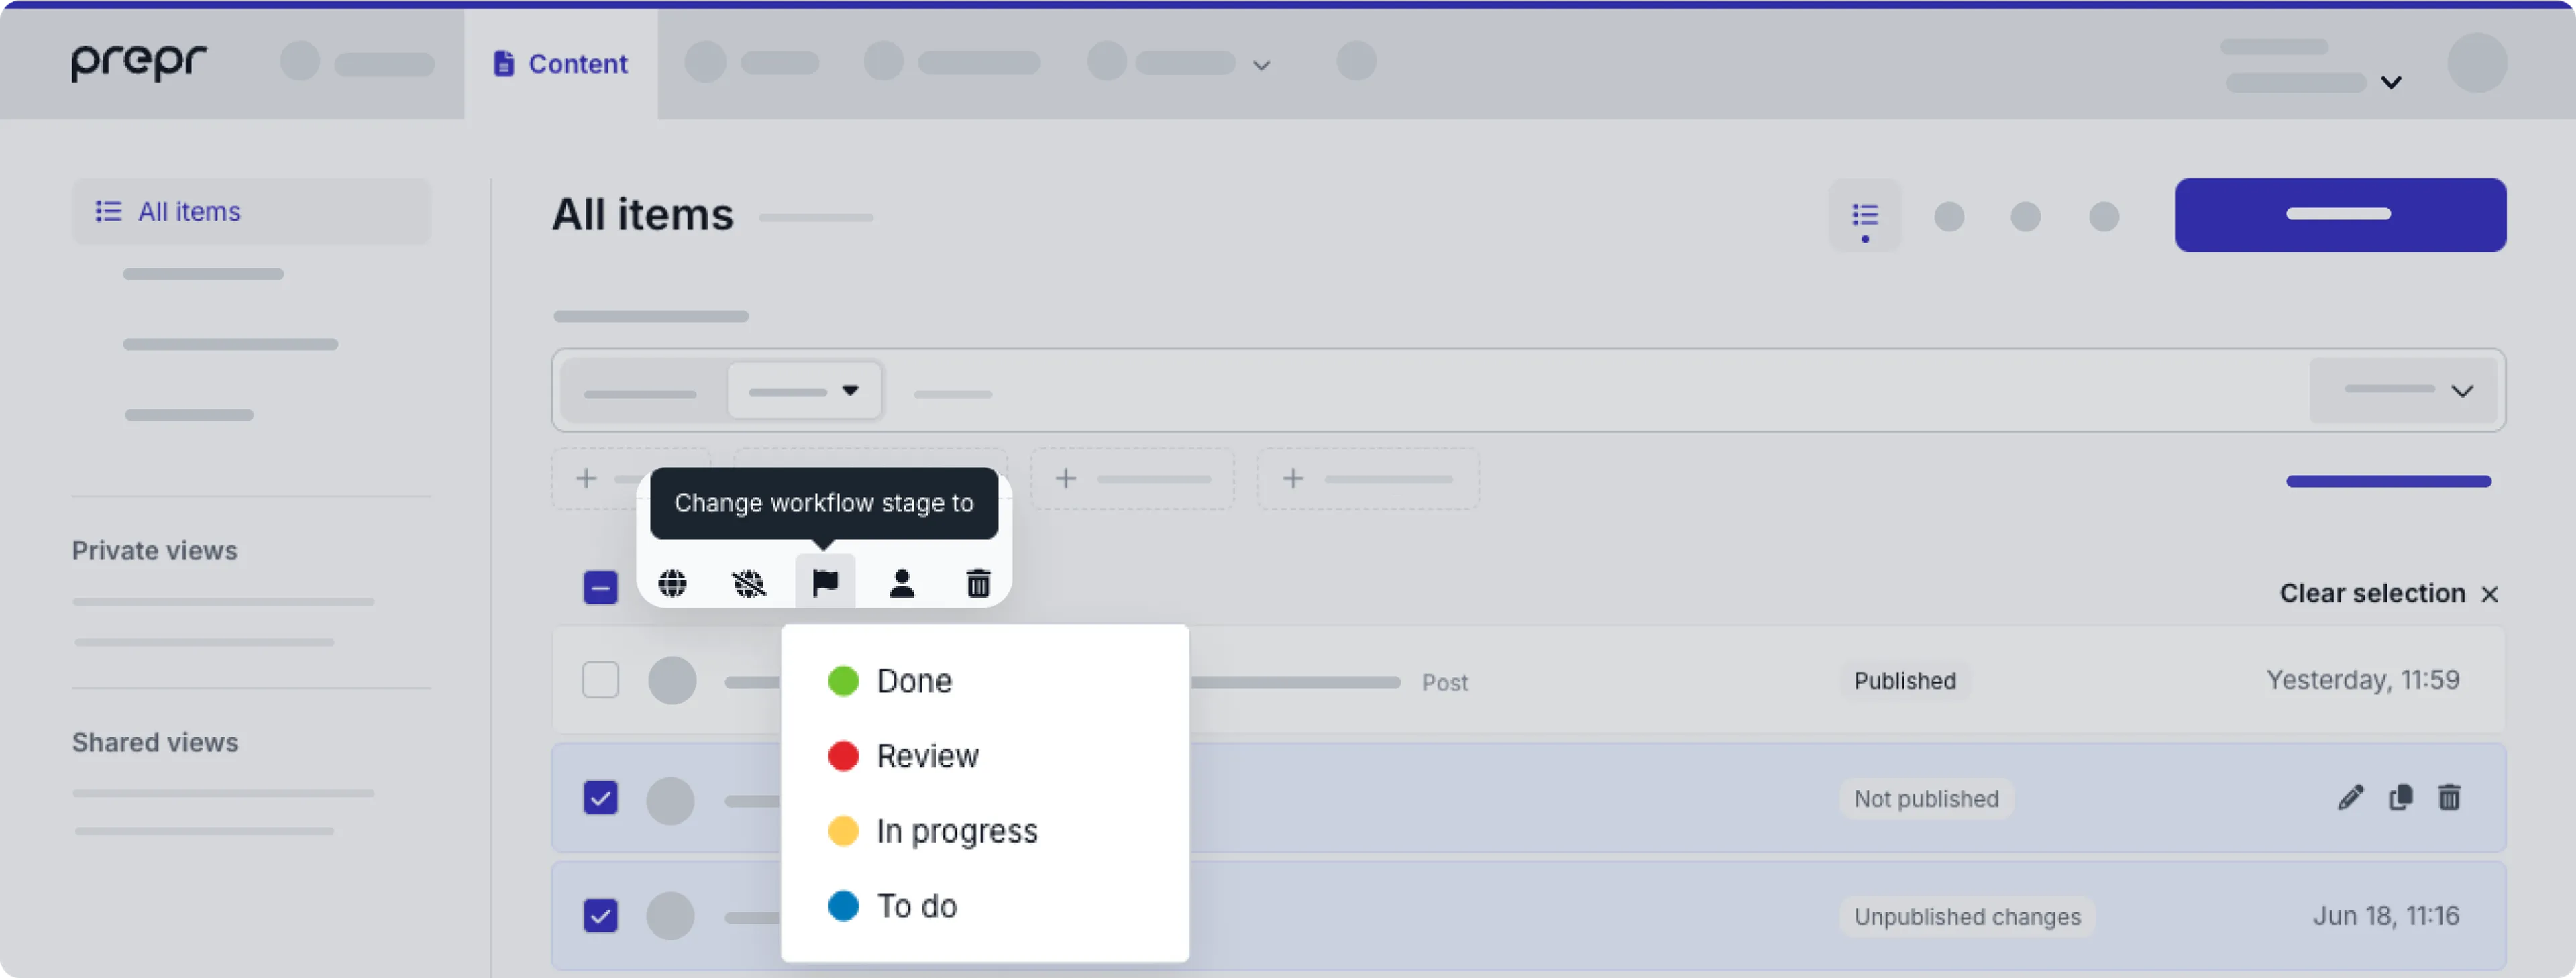
3. Choose your desired stage, for example *Review* from the drop-down list.
And that's it, you've change the workflow stage for multiple content items simultaneously.
### Assign to
In some cases you might want to assign multiple content items to the same user, for example, when you've created a batch of content items and need someone to review them.
You can do this by following the steps below.
1. Choose the content items in the content item list you want to assign.
2. Click the icon to **Assign to**.
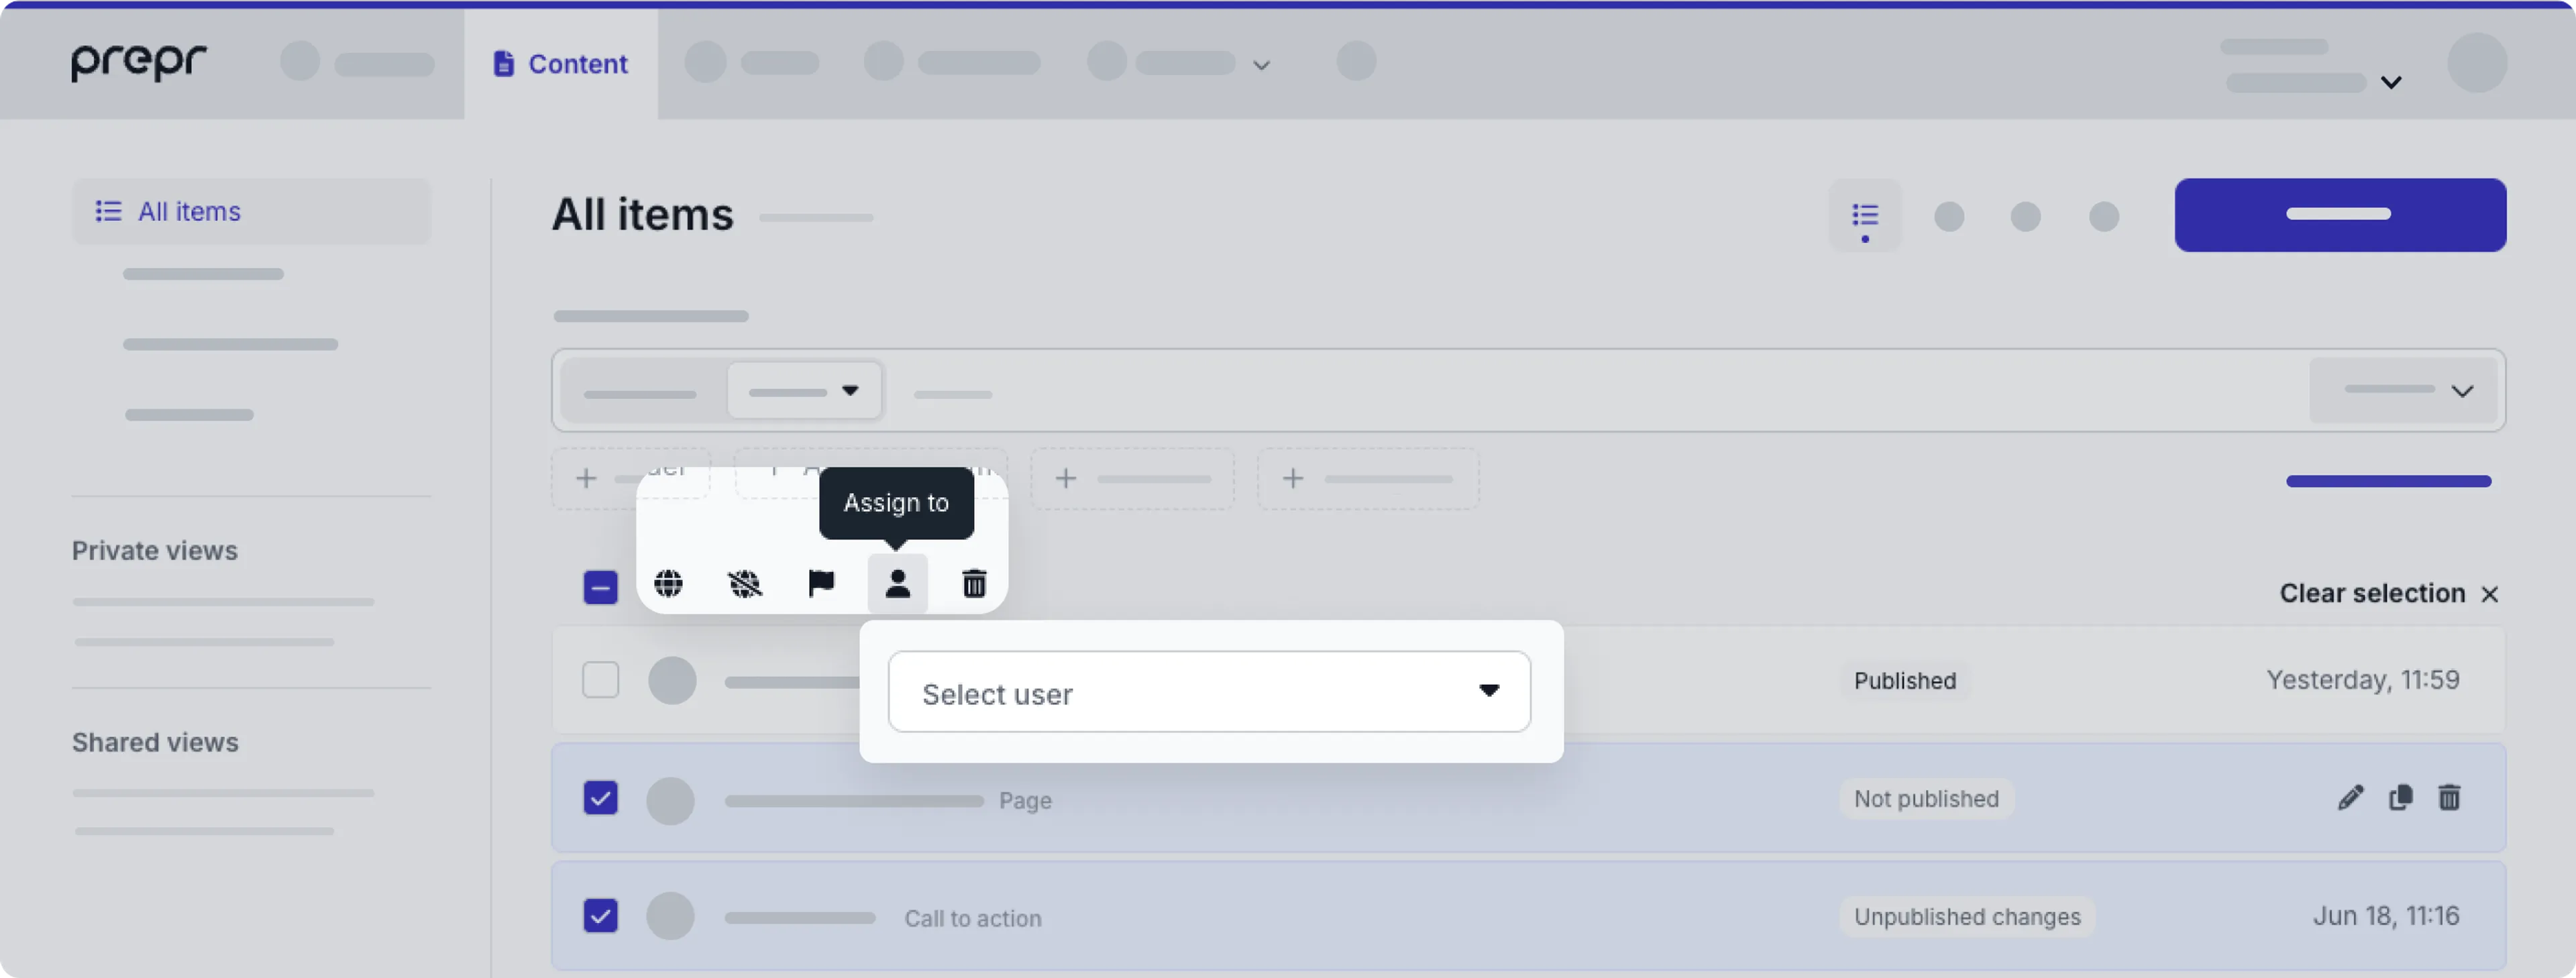
3. Choose the user from the drop-down list.
And that's it, you've assigned multiple content items to a single user simultaneously.
### Export to
In some cases it's necessary to export content from one environment to another, for example, when you want to do system testing in your development environment with realistic content from the production environment.
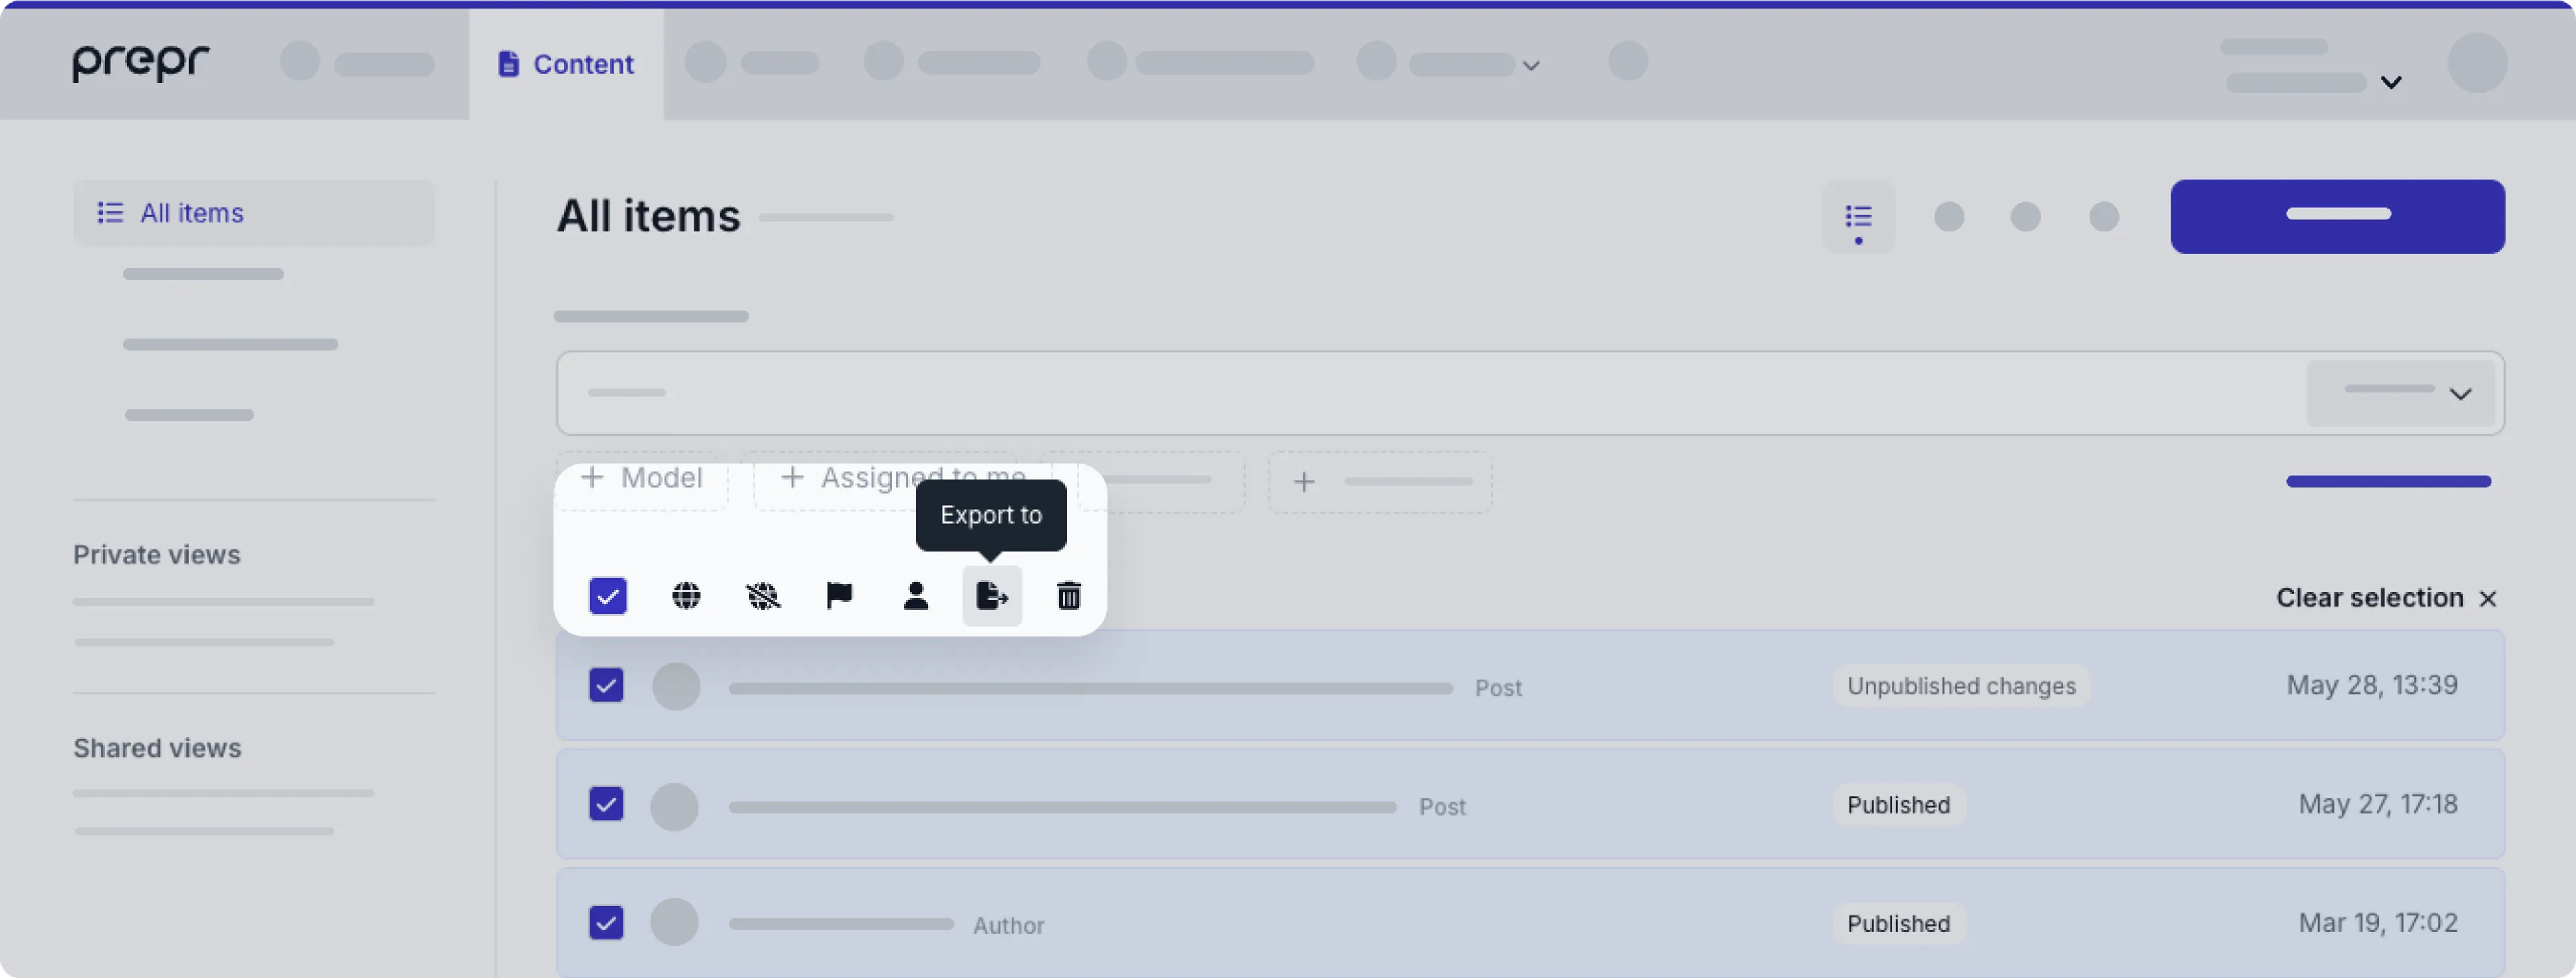
### Share
You can share multiple content items with specific users by following the steps below.
1. Choose the content items you want to share with a user, by hovering over each content item and clicking each checkbox.
2. To select all content items, click the icon at the top of the list.

3. Click the icon at the top of the list to share all the selected content items.
4. Choose the user you want to share the content items with.
Once shared, the user you selected will see the content items in their content item list.
### Delete
To delete multiple content items at once follow the steps below.
1. Choose the content items you want to delete, by hovering over each content item and clicking each checkbox.
2. To select all content items, click the icon at the top of the list.
3. Click the icon at the top of the list to delete all the selected content items.
4. In the pop-up window, click **Delete** again to confirm the action.
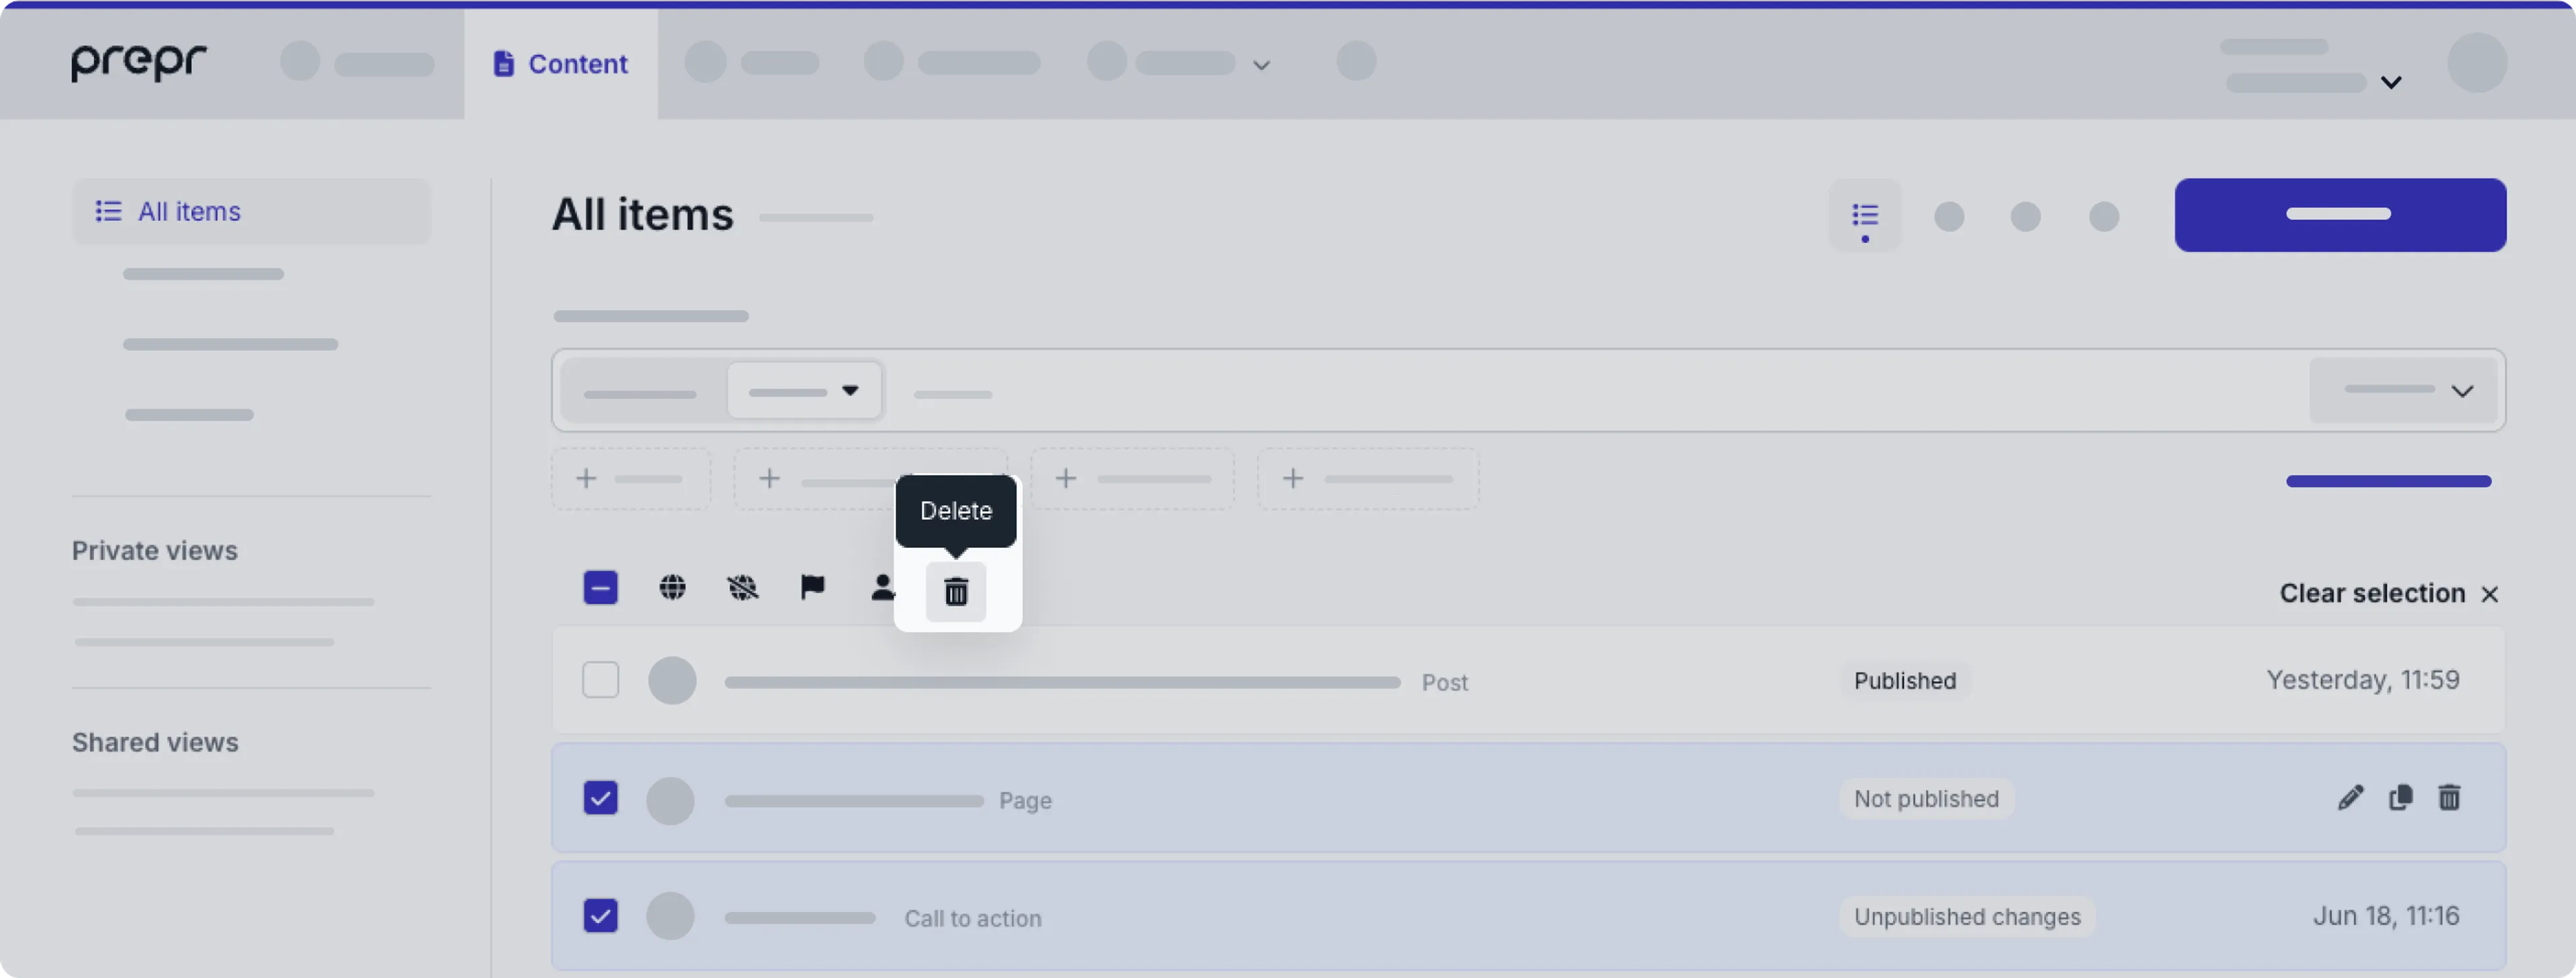
## Find your content items
There are several features listed below to help you find your content items easily.
### Layout options
You can use one of the layout options at the top of the *Content* page to find content items easily depending on your needs.
#### List
When you go to the **Content** tab, the *List* layout opens by default to show a complete list of all of your content items.
You can [filter the content items](#filter-options) to narrow down the list.
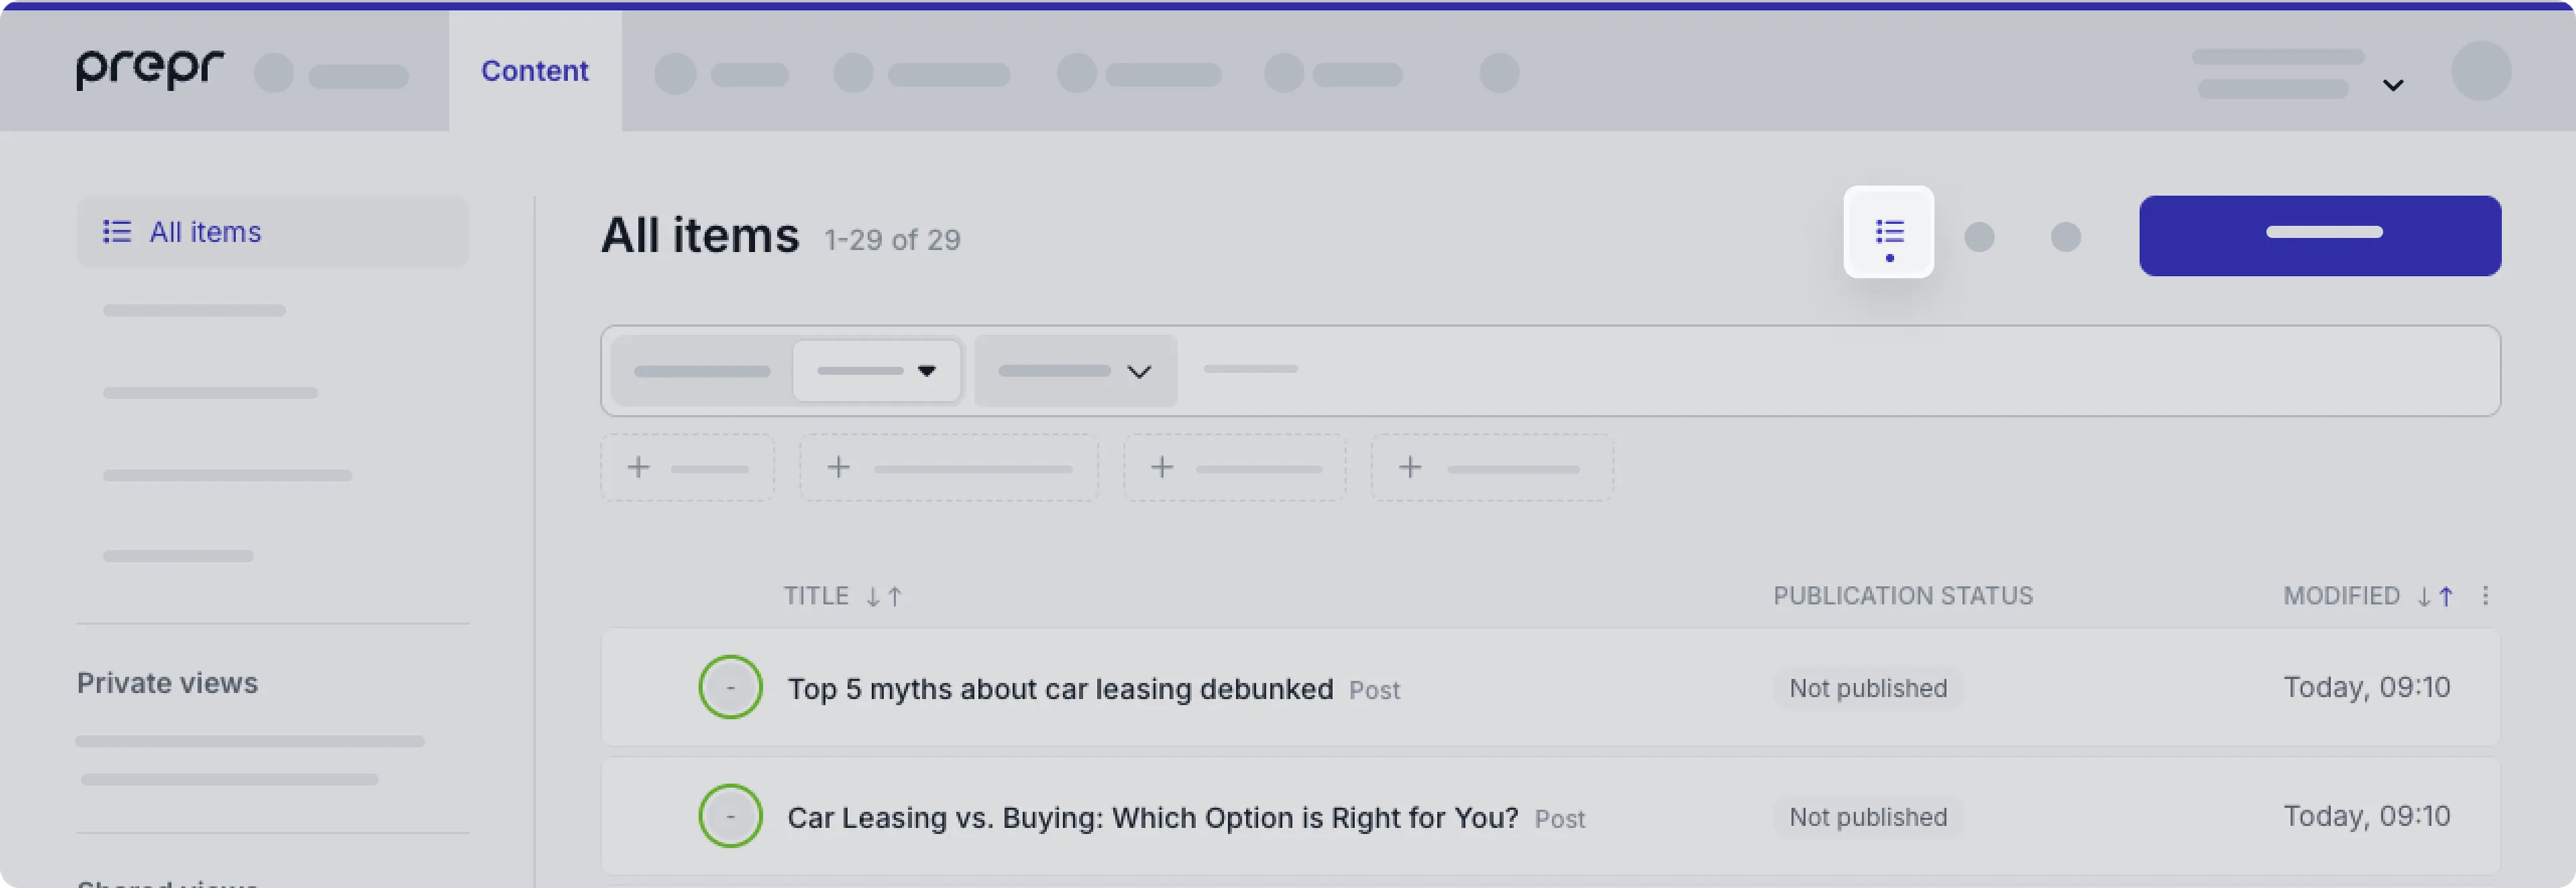
#### Calendar
Click the *Calendar* icon to get a clear visual overview of all your scheduled items to help you plan upcoming articles or campaigns to avoid overlap.
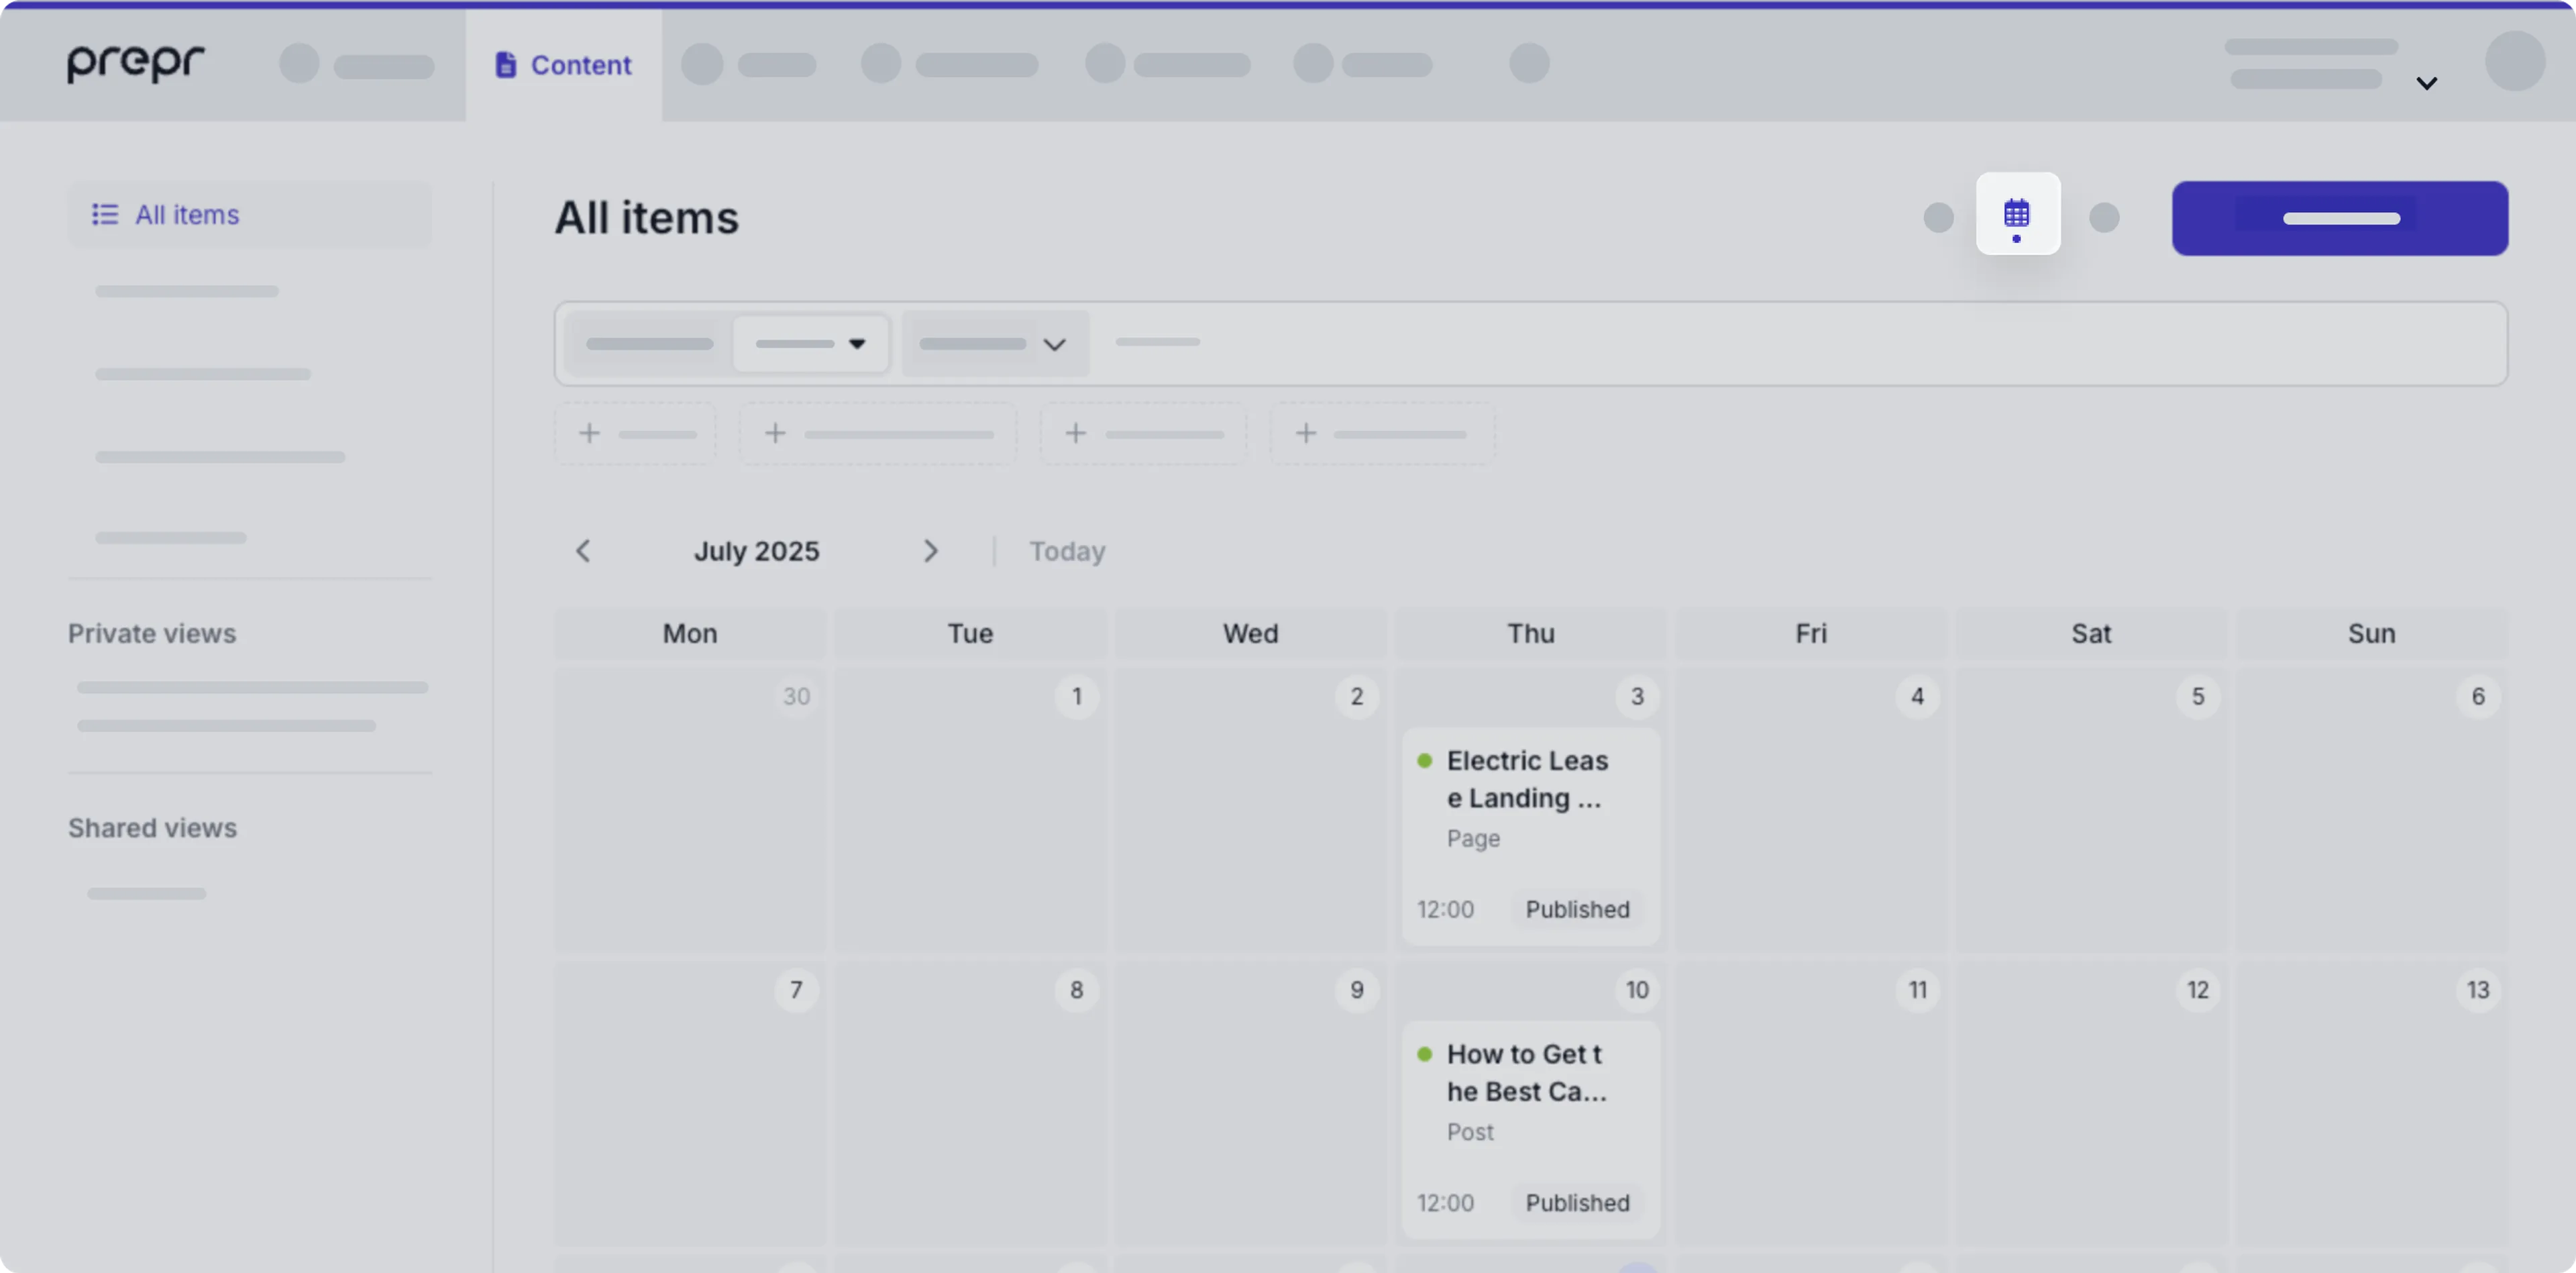
#### Kanban
Click the *Kanban* icon when you want to see a clear overview of content items by their status.
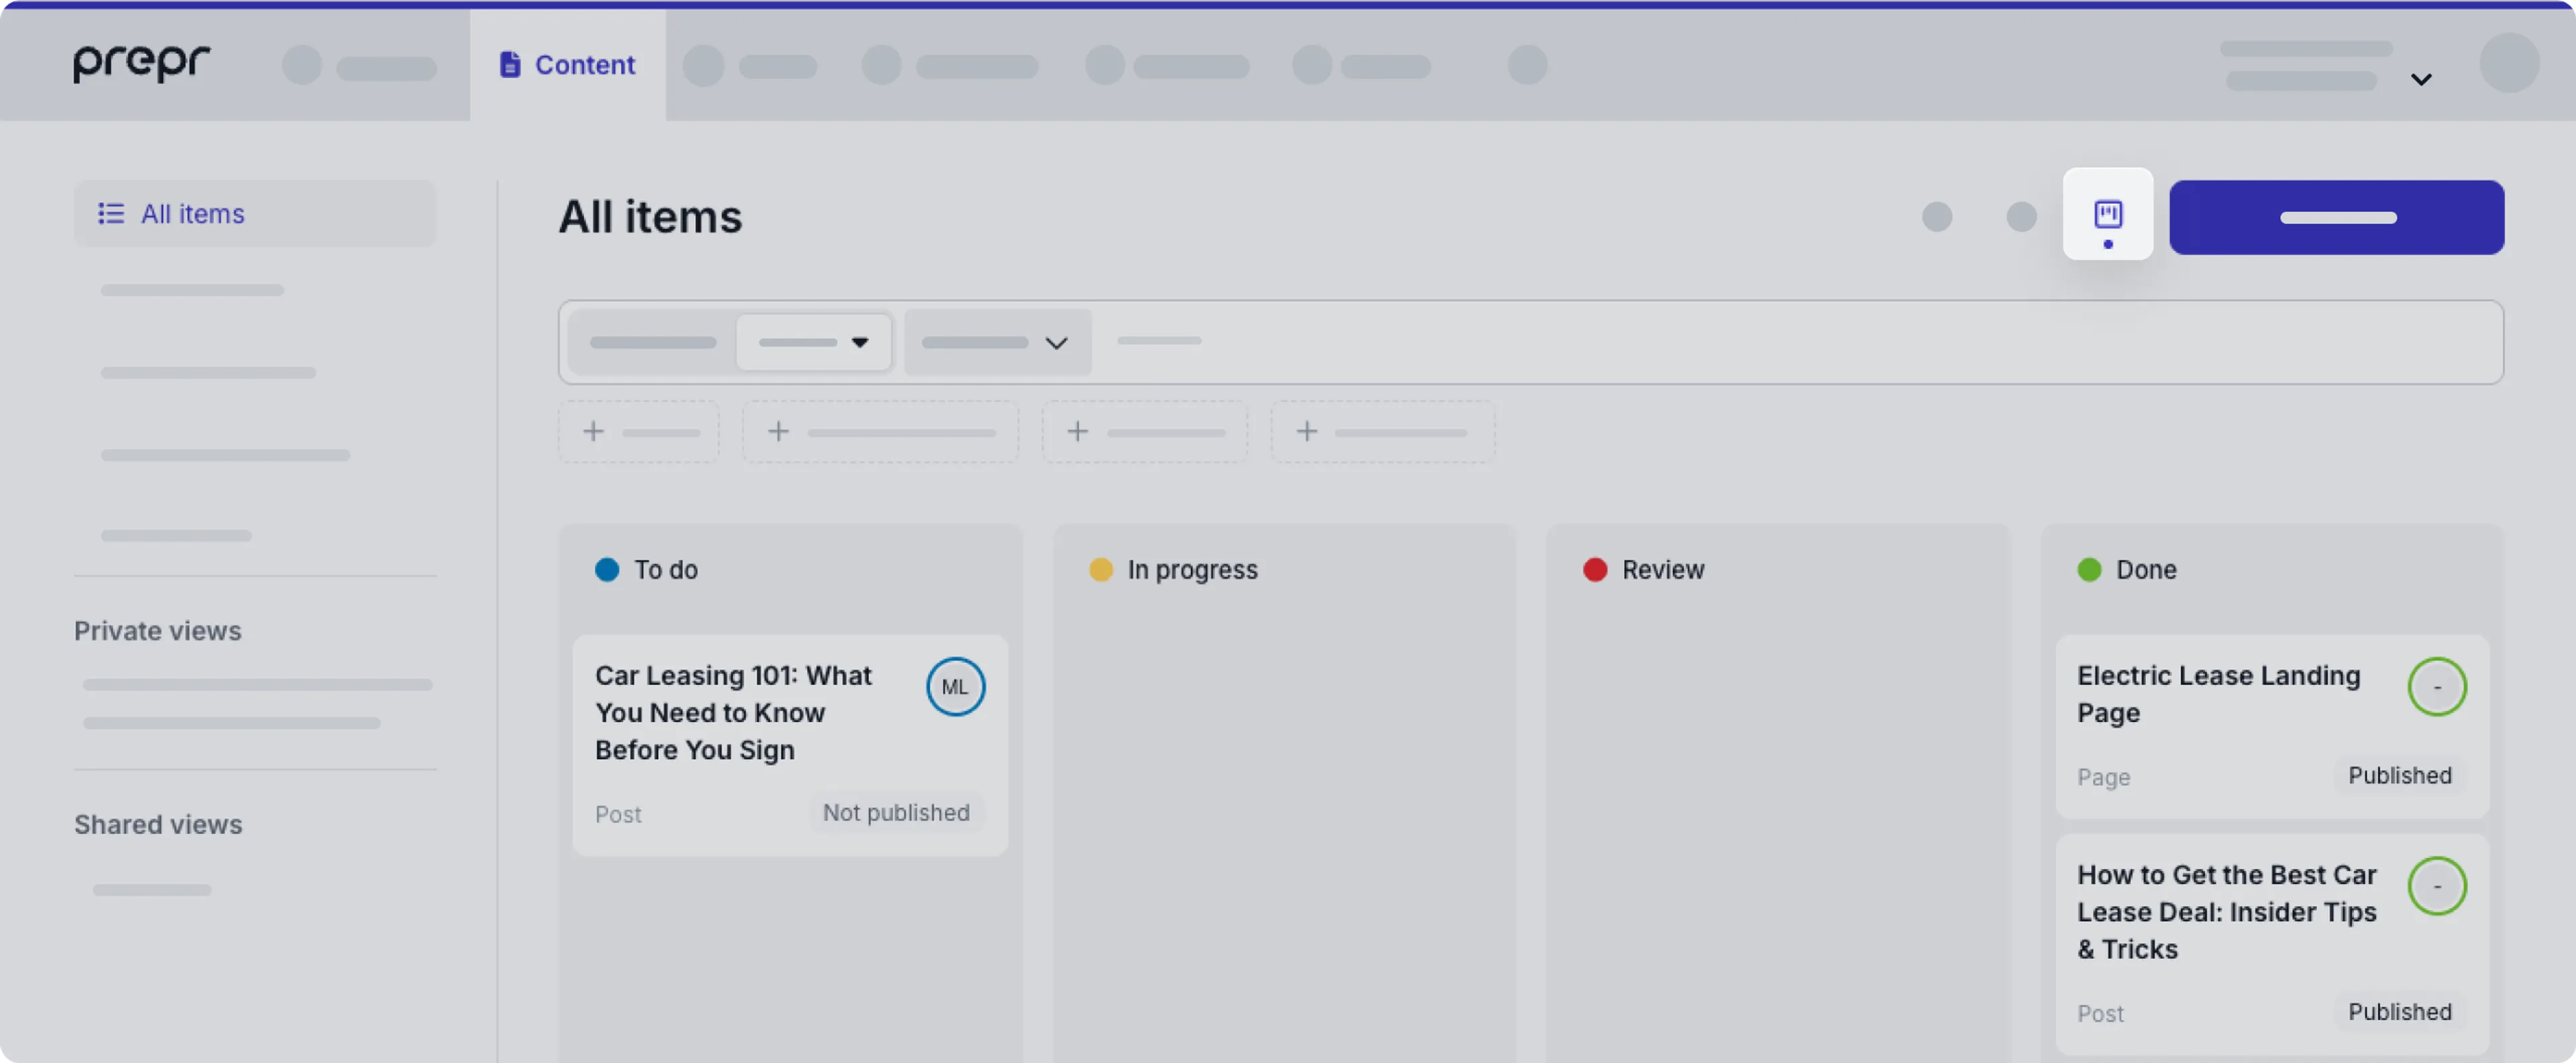
#### Content tree
Click the *Content tree* icon when you want to see an overview of the relationship between content items in a tree-like hierarchy.
The content tree is based on the slug value of content items.

If the content tree layout is not visible, request an admin user to [define the parent slug format](/project-setup/setting-up-environments#content-tree-parent-slug-format).
### Filter options
Prepr makes it even easier to filter precisely the content you're looking for with **Advanced Content Filters**.
You can choose multiple filters to narrow down your search for specific content items.
See the complete list of filters below.
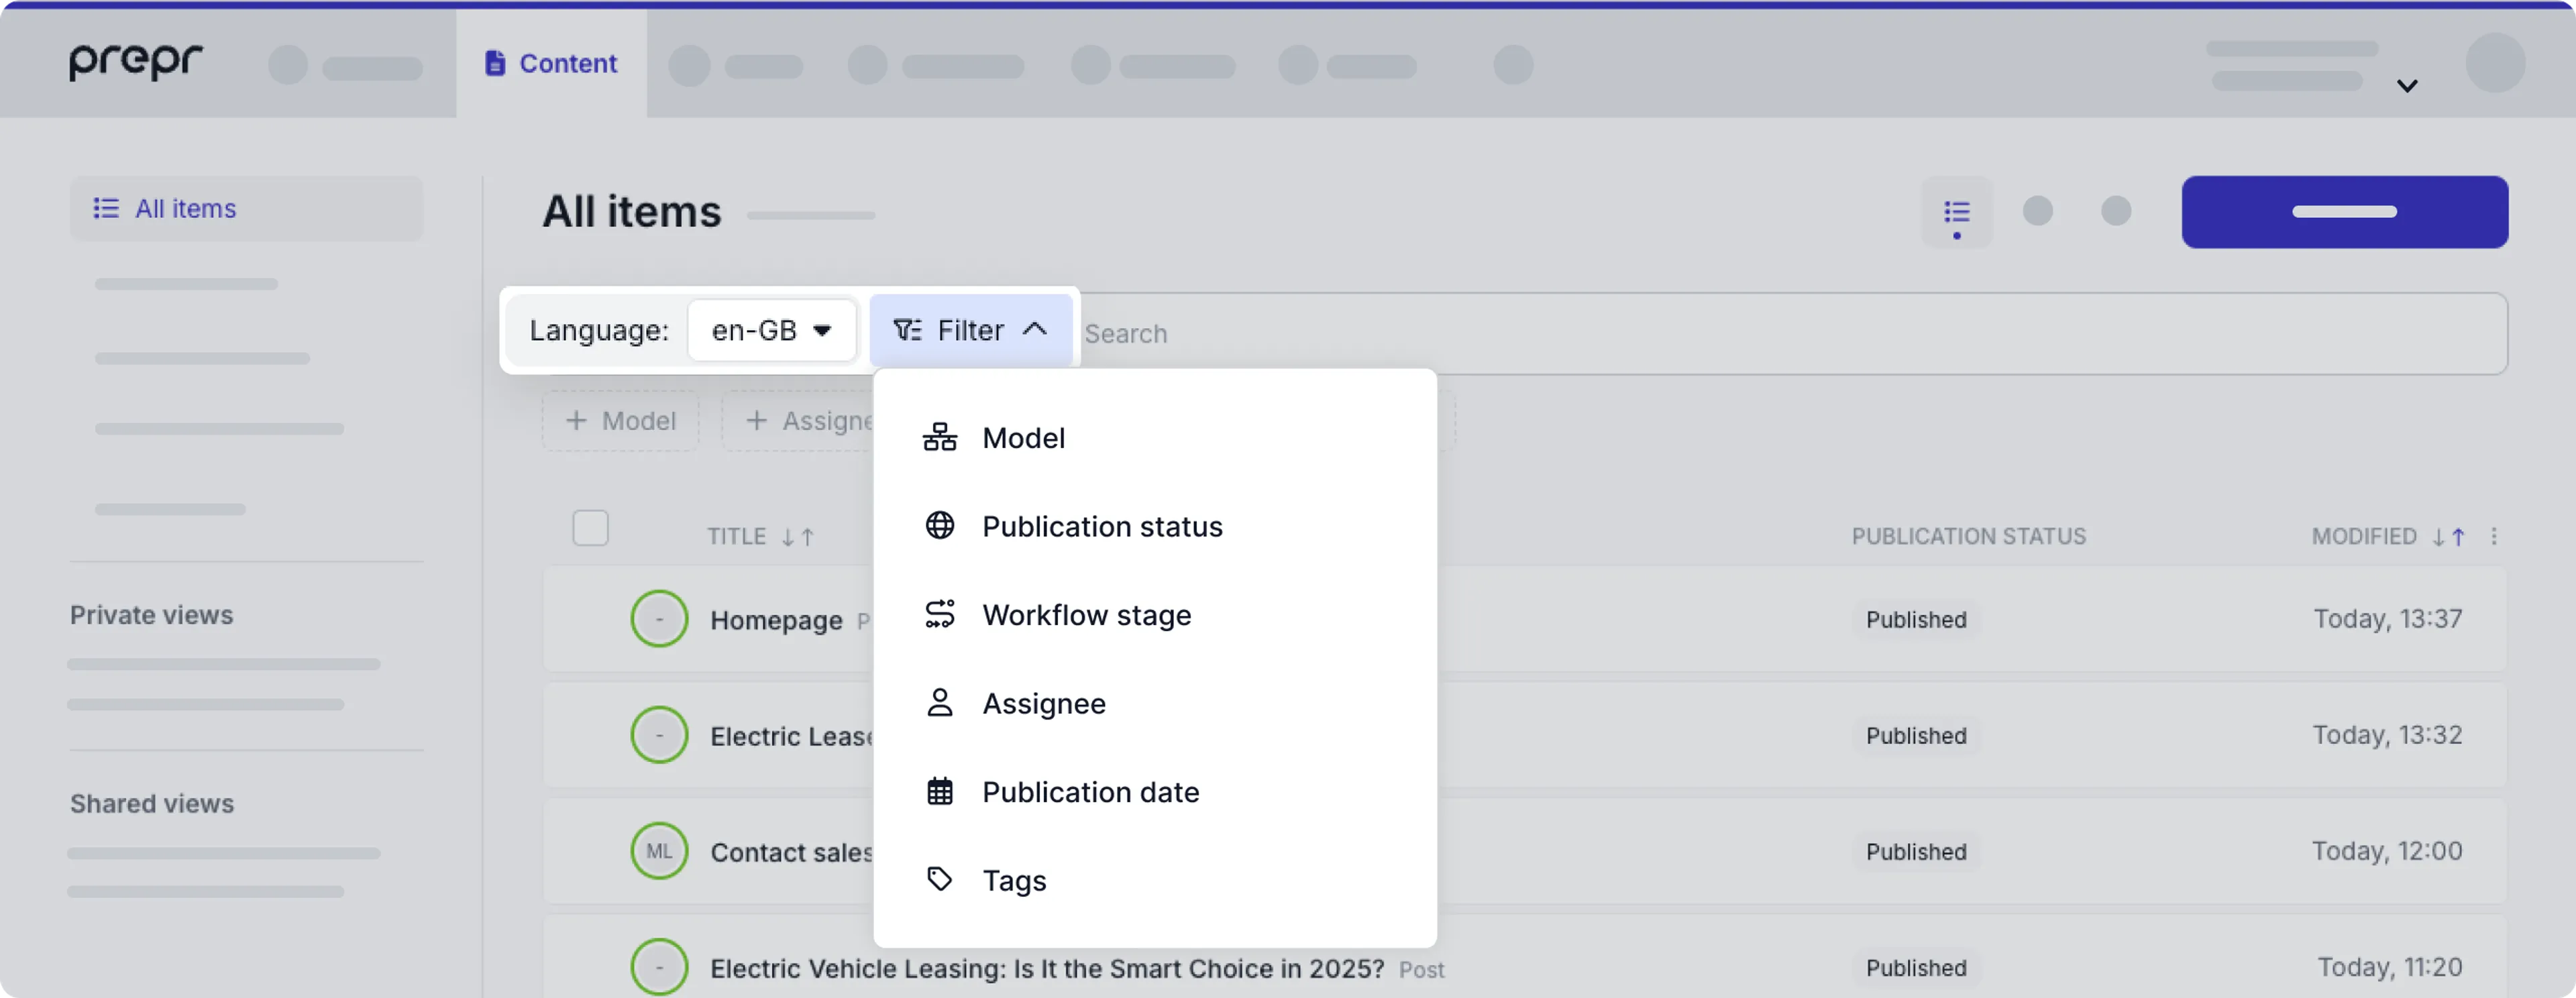
#### Locale
You can filter content items by a specific locale, for example, `en-US` to select the list of American English versions of content.
#### Model
You can filter your content by one or more models. For example, to only list the blog posts or to view a list of pages and blog posts.
- *Supporting model* - When you choose a model, additional filters are available for all supporting models. You can choose from a list of models that are defined as content references, for example, the **Category** of the *Car* model.
- *Stack* - When you choose a model, additional filters are available for any stack fields defined in the model. The filter name matches the name of the [*Stack* field](/content-modeling/field-types#stack-field).
- *Enumeration* - When you choose a model, additional filters are available for any enumeration used in the model. The filter name matches the enumeration name, for example the **Size** for the *Product* model.
#### Publication status
You can filter your content by one or more publication statuses. For example, to list published and scheduled content items.
The possible filter values are *Published*, *Scheduled*, *Unpublished changes* and *Not Published*.
#### Workflow stage
You can filter your content by one or more workflow stages. For example, to list the content items that are in *To do* or *In progress*.
The possible filter values are *Done*, *Review*, *In progress*, *To do*, and *Archived*.
#### Assignee
You can filter your content by one or more assignees.
#### Publication date
You can filter content items by selecting a date range, including future dates, for example, to filter items scheduled to be published in the future.
#### Tags
You can filter content items by one or more tags.
### Views
You can see the list of views in the left sidebar of the **Content** page.
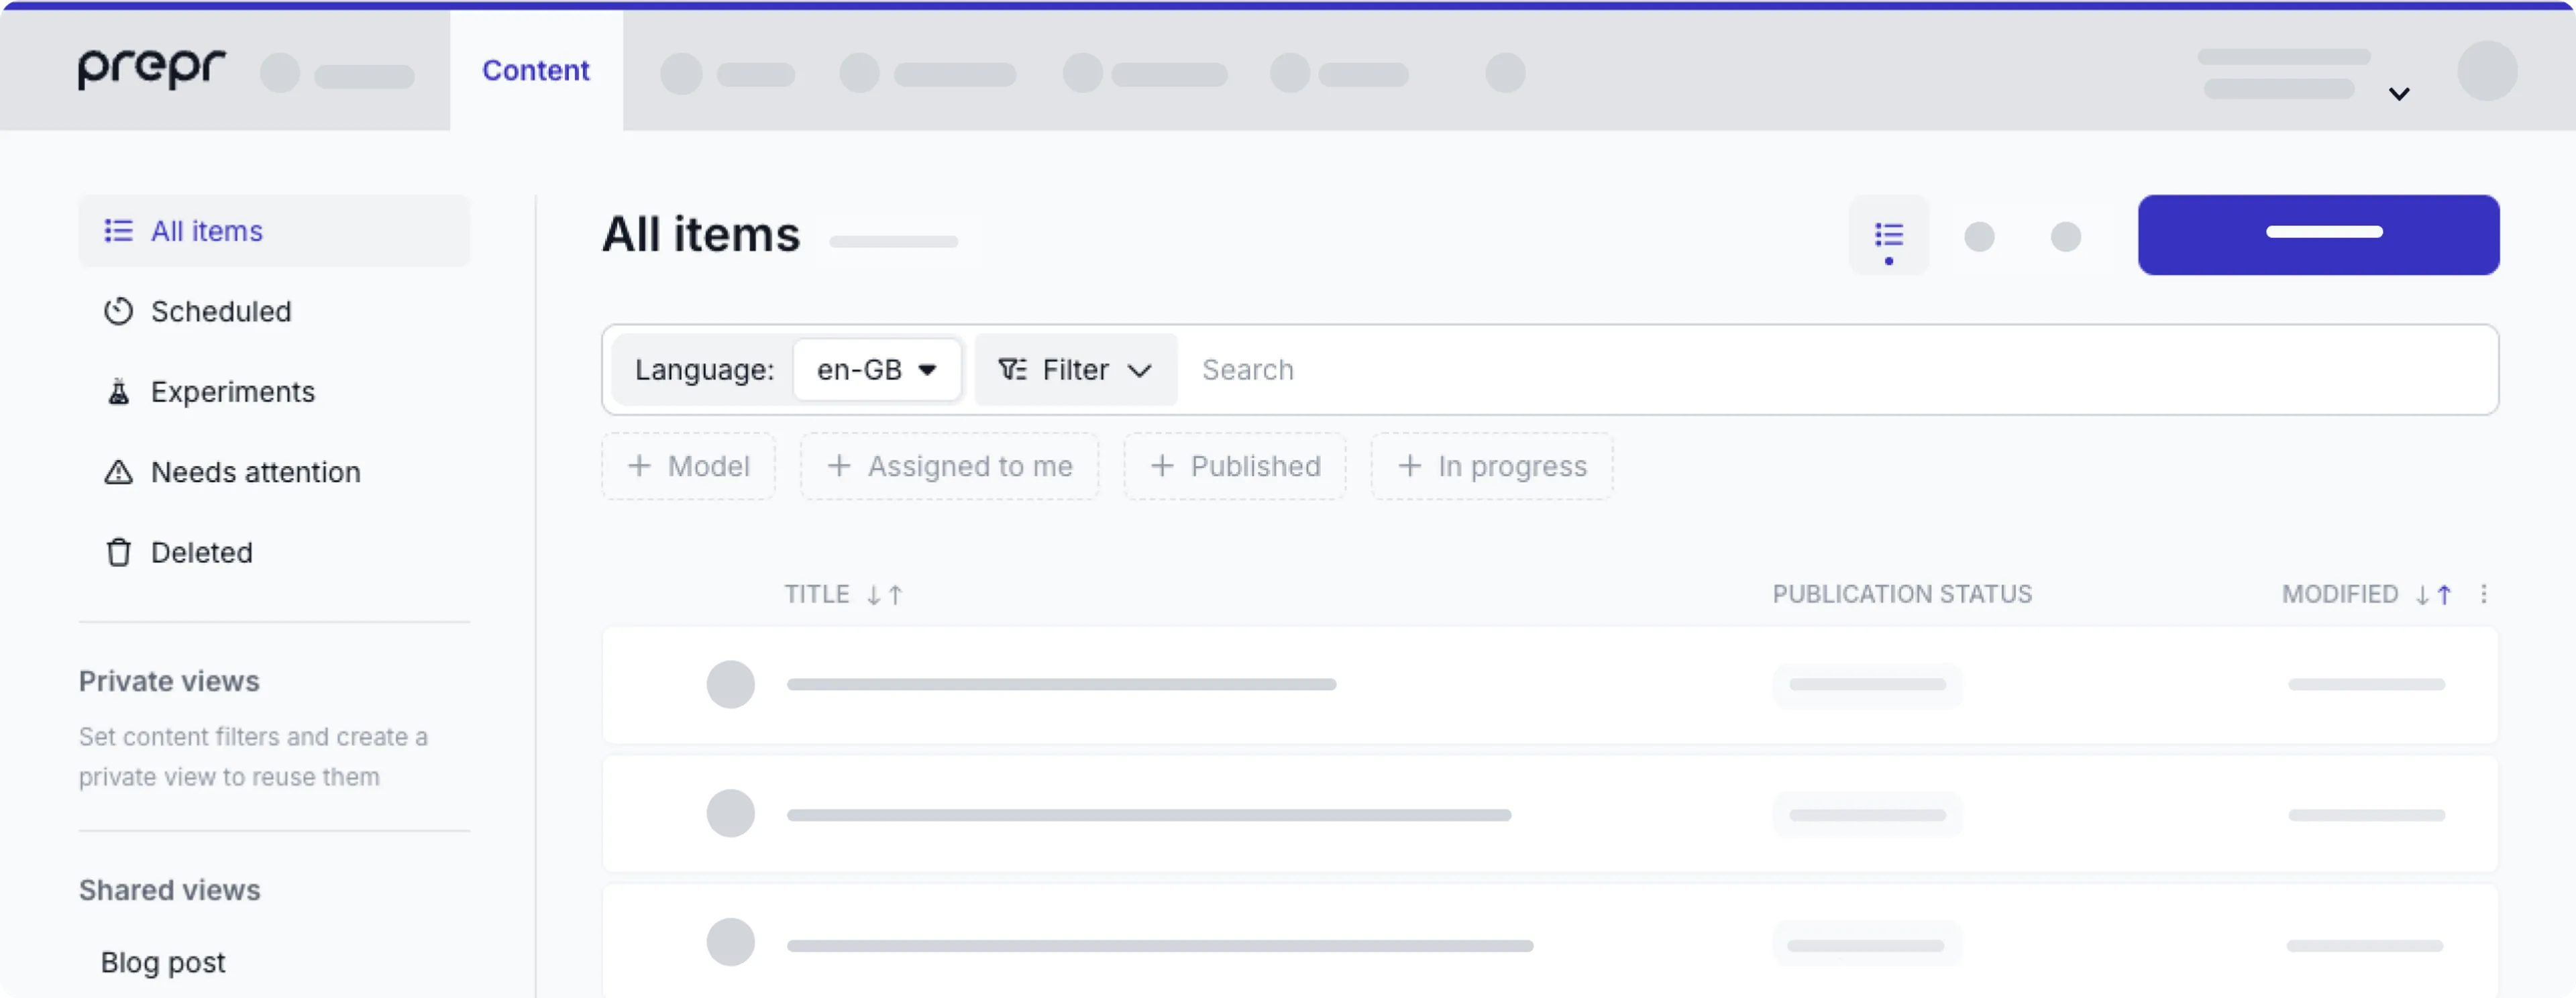
The following views are available out of the box and cannot be updated:
- *All items* - The default view of all content items without any filter criteria.
- *Scheduled* - The list of content items that are scheduled for a future date.
- *Experiments* - A view of all content items with adaptive content and A/B tests, in other words a complete list of all your experiments.
- *Needs attention* - The list of content items with broken links or could not be published. In this view, you can go to the relevant content
- *Deleted* - The list of deleted content items. In this view, you can recover content items that were deleted by mistake, for example.
Apart from these views, you can create your own *Shared view* or *Private view*.
A *Private view* will only be visible to you, while a *Shared view* will be visible to all users of this environment.
When you're viewing all content items and choose some filter criteria, these are retained for a session.
So the next time you visit the overview of the content items, the last selected filters will be active.
If you often use the same filters in your Prepr environment, you can save these as a view.
Make the filter selection and click the **Save as new view** link.
Give the view a name and save it. You can also group similar views by moving them into folders.

### Search content items
When you type any keyword in the search bar, Prepr performs a fuzzy search on the *Title* field of content items, by default.
When you click the search bar, a drop-down list appears with the following additional search options:
- *Search on full-text* - Prepr performs a fuzzy search on all text fields and text elements.
- *Search on slug* - Enter a partial or exact keyword for this fuzzy search on the *Slug field*.
- *Search on ID* - Enter the exact ID of the content item you are looking for.
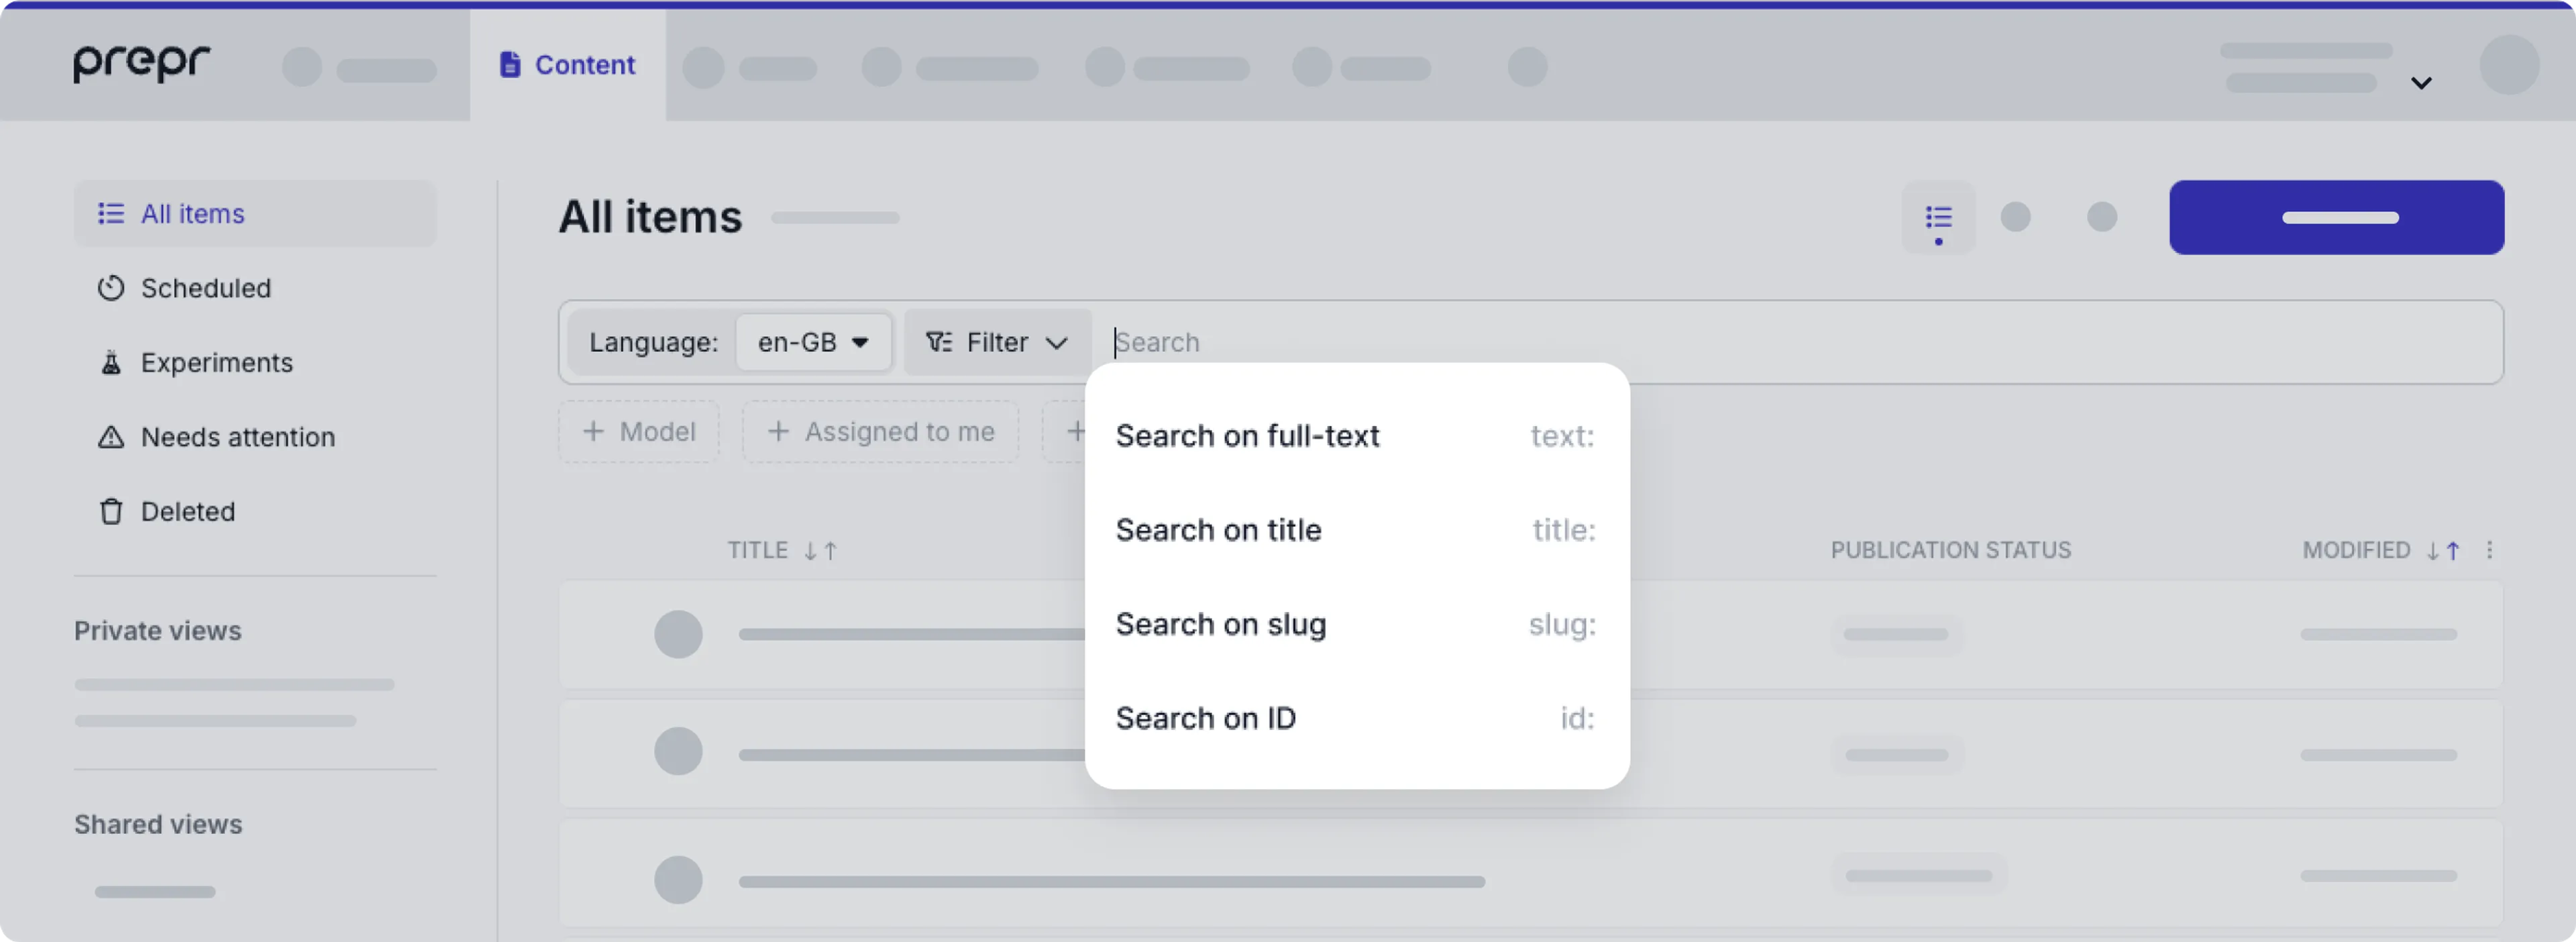
Now that you understand each of the core tasks in more detail, review the handy shortcuts below to manage content.
## Manage content items with shortcut keys
You can use a number of shortcut keys to manage content items more efficiently.
Go to the **Content** tab to view the content item list.
From this view, you can use the following shortcuts:
- Add a new content item with . If the content item list is filtered by a specific model, this shortcut creates a content item for that model directly.
- Select all content items in the list with .
- Simply press the `esc` key to deselect any selected content items.
- Delete selected content items from the list by pressing the key.
Choose and click a content item in the list to make changes to that content item.
From a specific content item, you can use the following shortcuts:
- Publish the content item with .
- Save the content item with .
- Close the content item with .
From any other page in Prepr, you can press `/` to open the launchbar. The launchbar allows you to do quick searches on content items or any other page you have access to in your Prepr environment.
Source: https://docs.prepr.io/content-management/managing-content/managing-content-items
---
# Optimizing content for SEO with *Content check*
*This article explains how to optimize your content items for SEO (search engine optimization).*
## Search engine optimization
SEO (search engine optimization) is the practice of improving your website's content to increase visibility and ranking in a search engine's results with the goal of driving more relevant traffic.
You don't need to be an SEO expert to create high-ranking content in search engines when using Prepr.
When you want to create optimal SEO values, simply run the *Content check* feature while editing a content item.
## *Content check*
The [*Content check*](/content-management/reviewing-content#content-check) feature automatically checks a content item for nonoptimal SEO values and makes suggestions you can choose to apply, adjust or ignore.
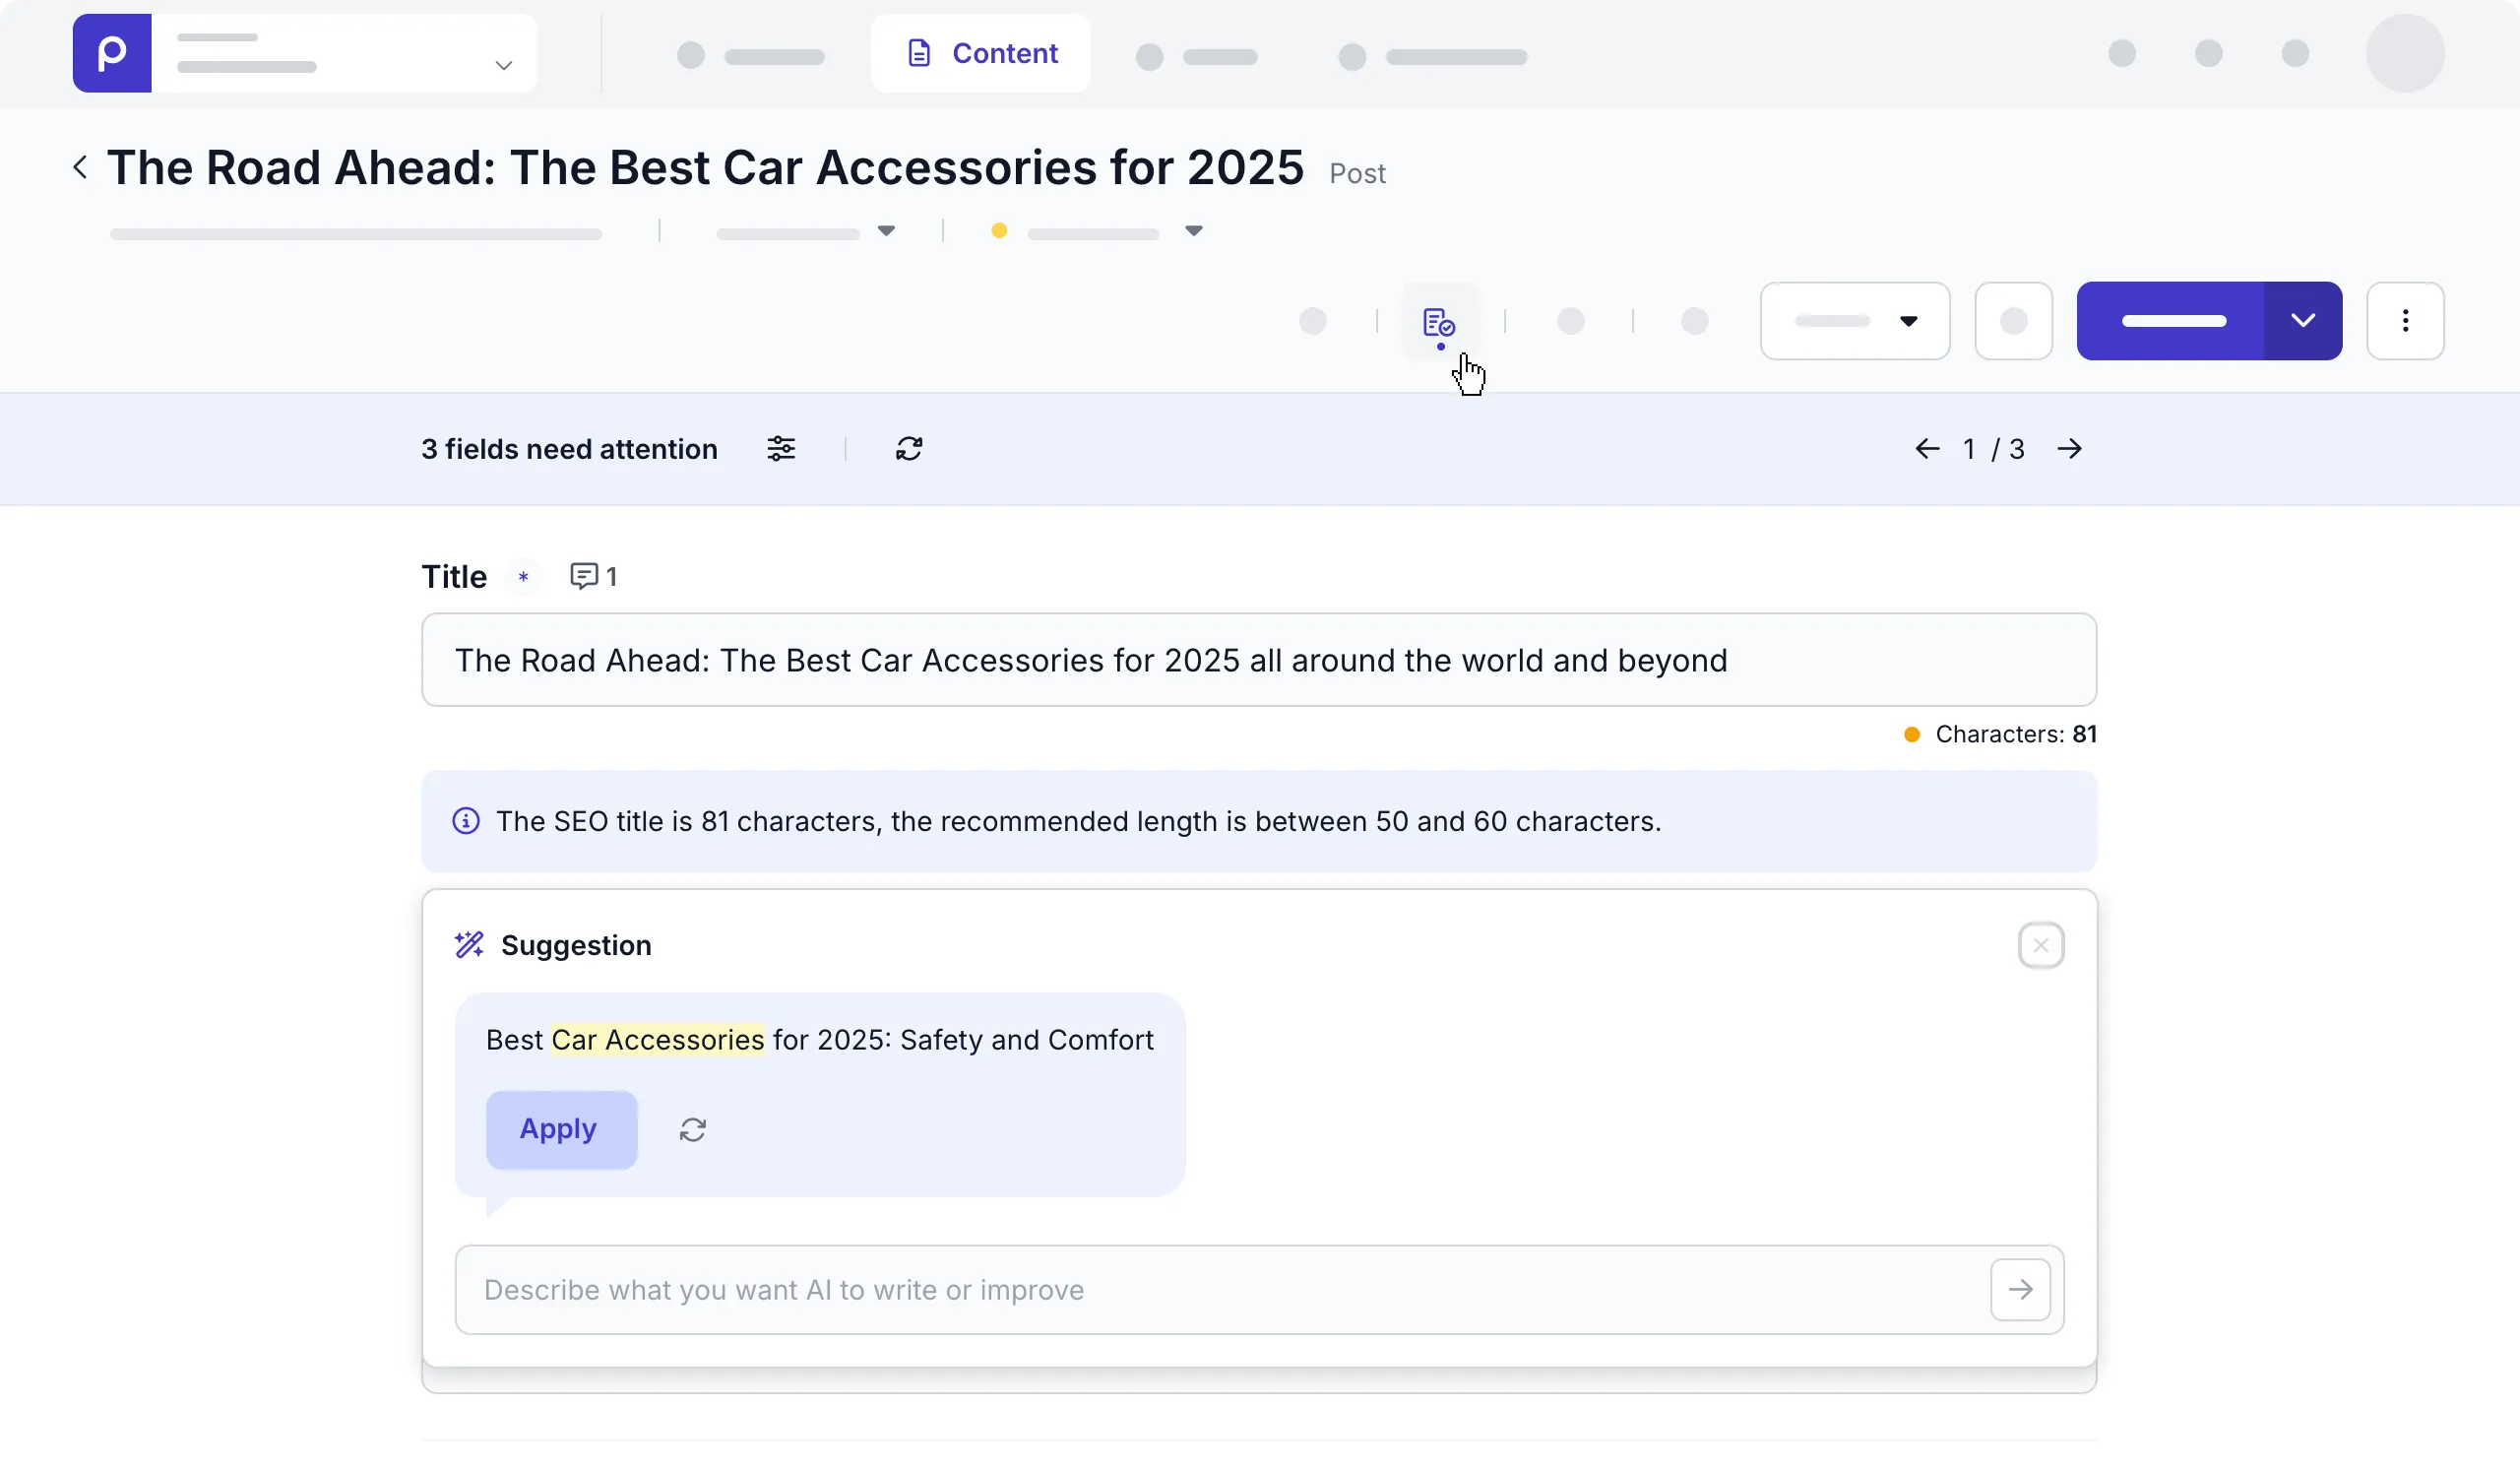
For setup details, check out the [model settings](/ai-text-assistant#checking-seo-values).
## SEO values
Prepr checks the following SEO values when you run the *Content check* feature:
- SEO title
- Meta description
- Keywords
The SEO title and meta description values come from fields in a model or component that are marked as the **SEO title** and **Meta description**.
Check out the [field setup guide](/content-modeling/field-types#item-title-and-seo-fields) for more details.
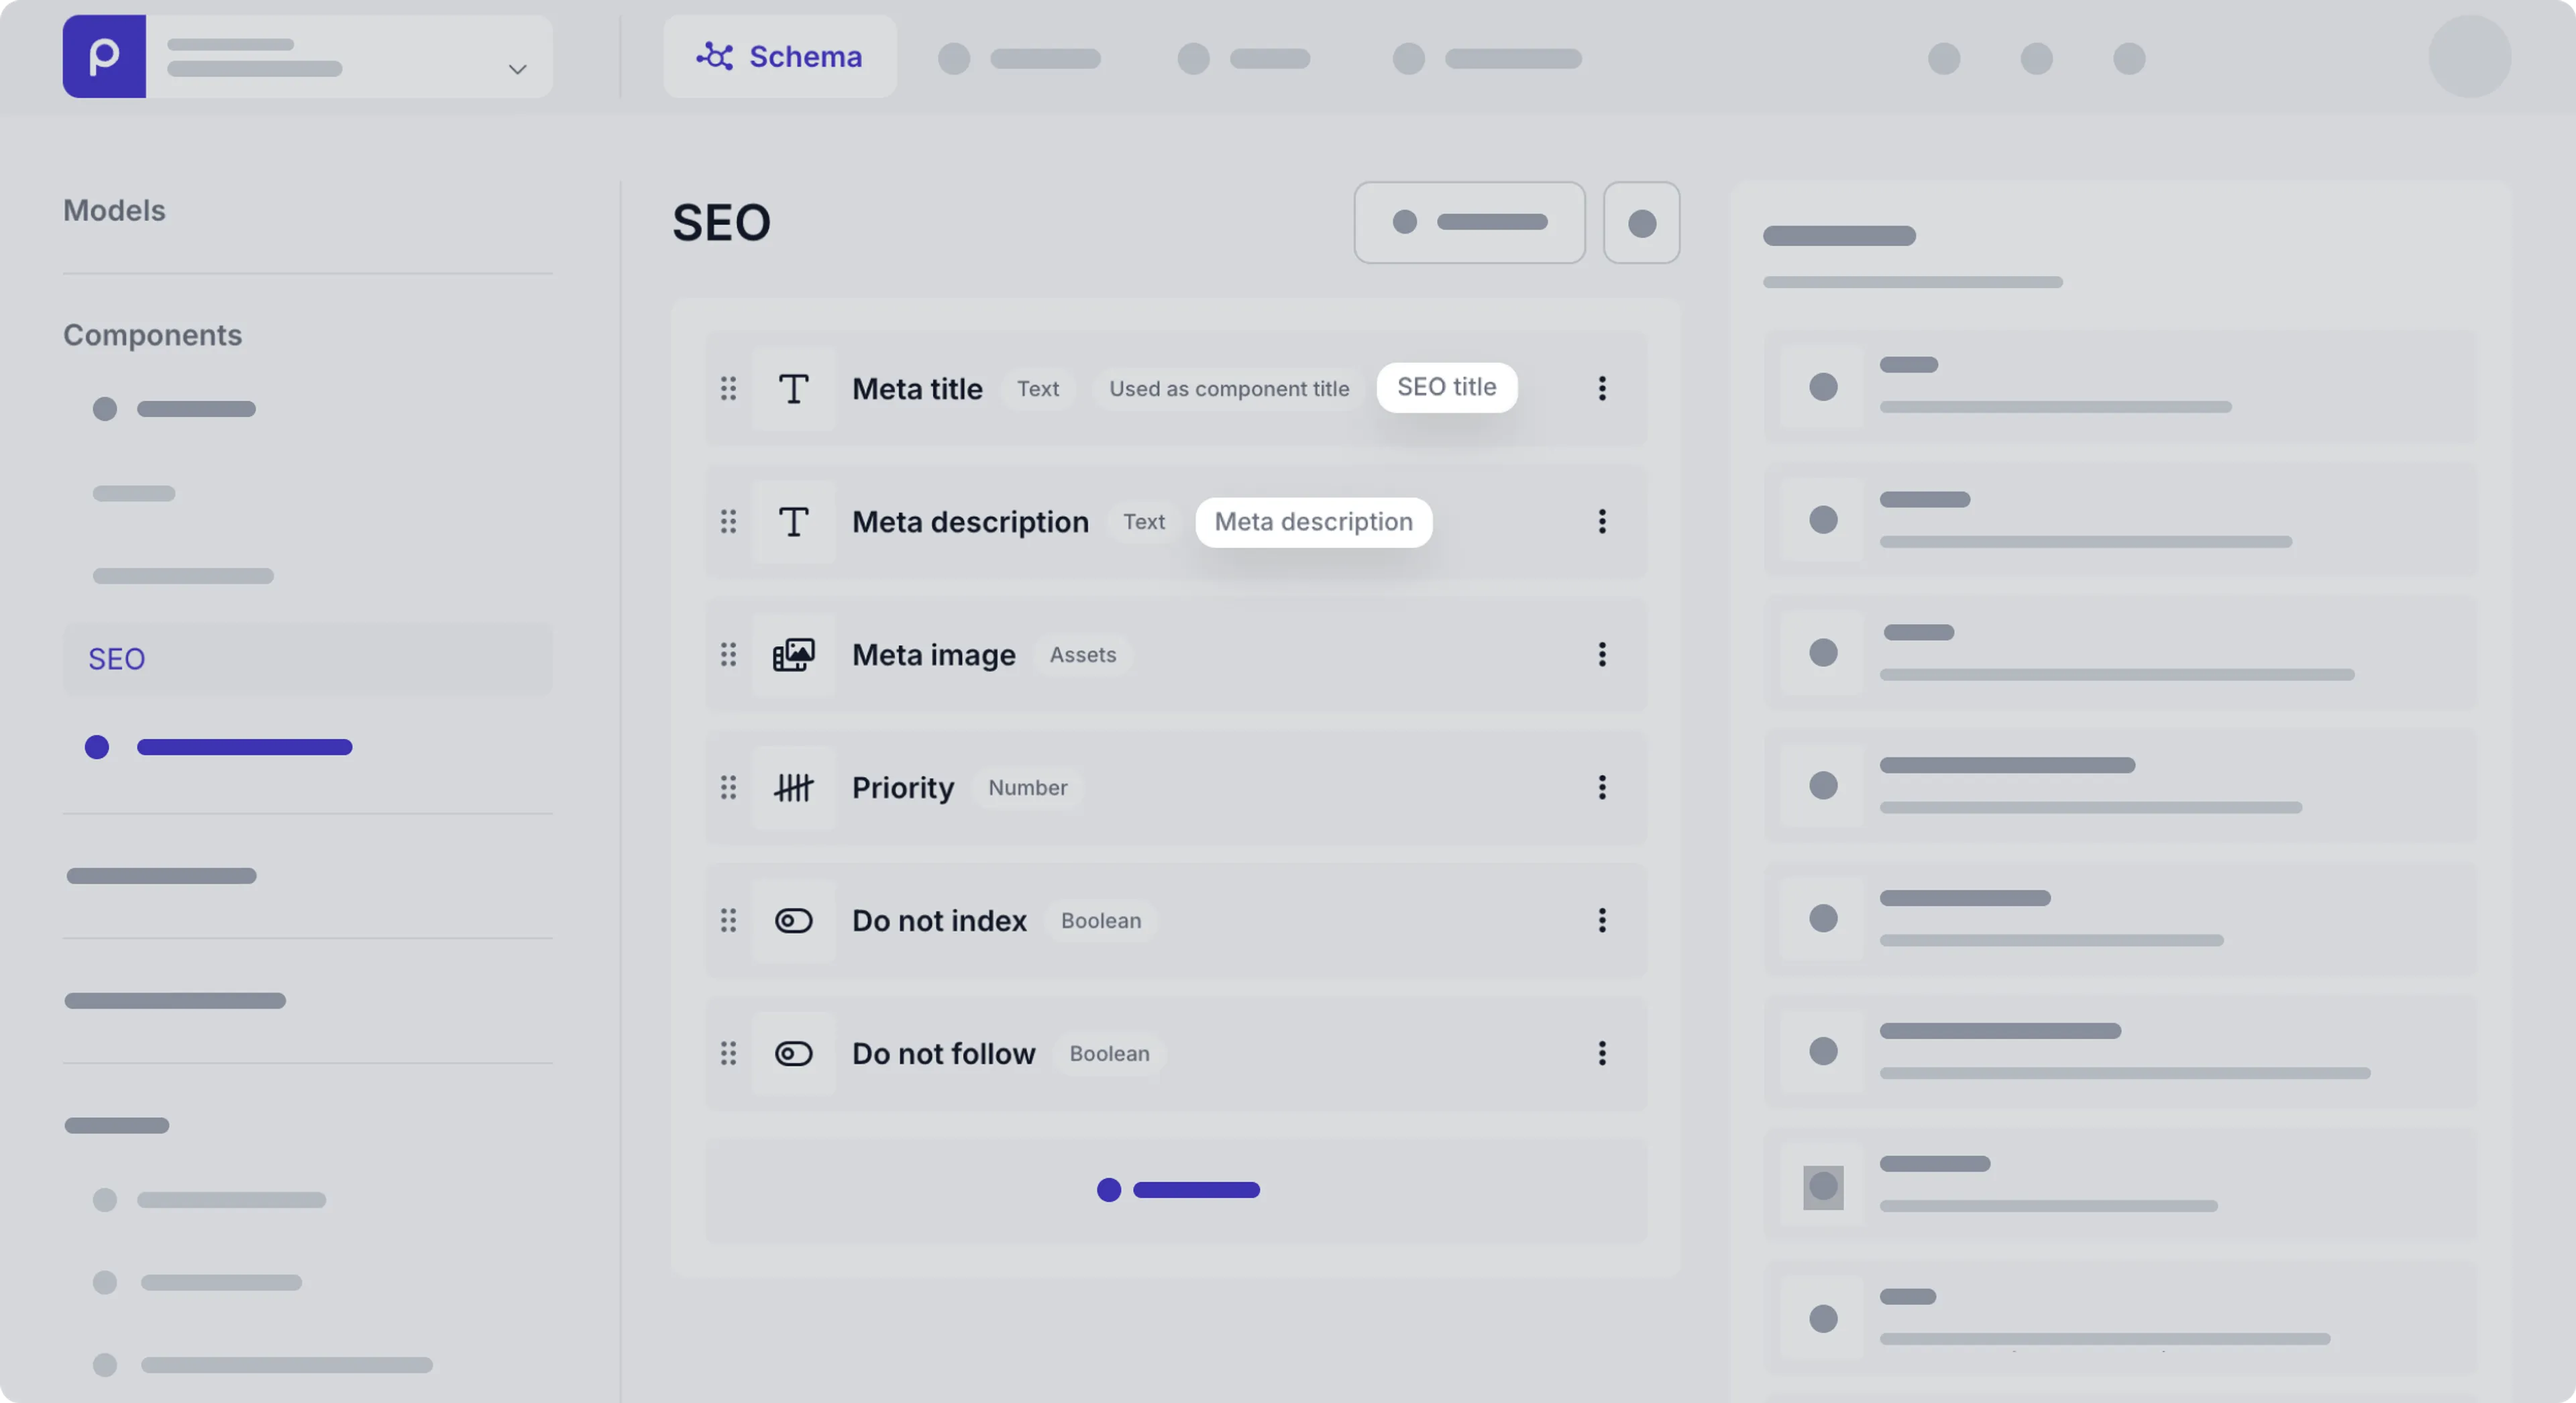
In addition to checking the length of the SEO title and meta description, the *Content check* makes AI suggestions for alternative values
that meet the guidelines:
- SEO title - Recommended length between 50 and 60 characters
- Meta description - Recommended length between 120 and 160 characters
- Keywords - If keywords exist, they should exist in the SEO title or meta description, or they shouldn't be duplicated too many times in the SEO title or meta description.
## Adding keywords
When you run the *Content check* for a content item, and there are no keywords, you can add keywords to improve the SEO for this content item by clicking the **Add keywords** link.
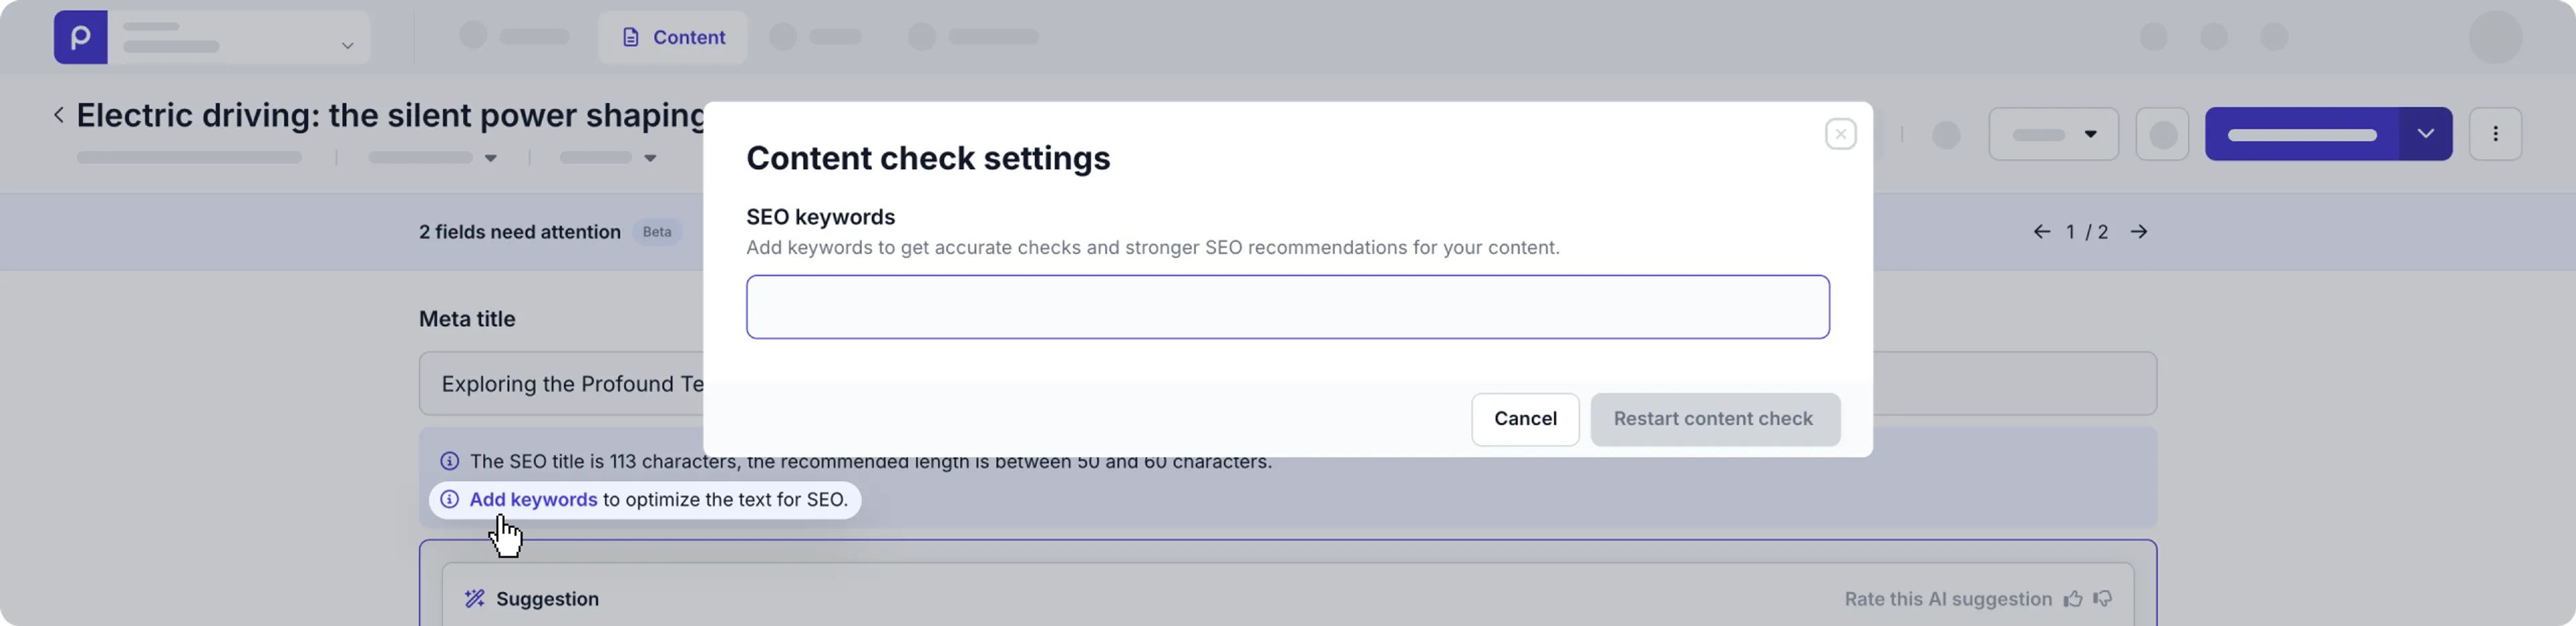
For best practices on handling SEO for development, check out the [SEO best practices guide](/development/best-practices/seo).
Source: https://docs.prepr.io/content-management/managing-content/optimizing-content-for-seo
---
# Creating rich content
*Easily create rich content using basic features in Prepr.*
## Introduction
This article shows you how to enrich your content in different ways:
- Using the [*Dynamic Content Editor*](#using-the-dynamic-content-editor).
- [Adding content references](#adding-content-references) to link different content items.
- [Adding links](/content-management/managing-content/creating-rich-content#adding-internal-and-external-links) to reference external resources.
## Using the Dynamic content editor

In the *Dynamic Content Editor*, you can enrich your content using the following elements:
- **Paragraph**
The paragraph element contains a number of formatting options. You can use **bold text**, *italic*, and . Bullets (ordered and unordered), links, and tables are also available.
- **Headings**
Depending on the settings, you can choose up to six levels of headings to match your content item. You can easily change a heading element to another heading or other text element by making a selection from the drop-down options.
- **List**
You can add an ordered or unordered list. Like the paragraph, you can apply a number of formatting options.
- **Table**
You can add a table with up to 10 rows and 10 columns.
- **Code**
You can paste a code snippet in your content, for example, HTML.
- **Media**
Depending on the settings on the [dynamic content field](/content-modeling/field-types#dynamic-content-field), select the icon to add one or more images, videos or files. You could also edit captions, set the alignment or define image presets. [Learn more about image presets and alignment](/content-management/managing-assets/editing-and-configuring-assets).
- **Social post embeds**
Social elements are embeds from the largest social media platforms, namely, Twitter, Facebook, Instagram, Spotify, Youtube, SoundCloud, vimeo, TikTok, Apple Podcast, Bluesky, and Threads. To embed a social post, choose the corresponding social media icon and insert the URL of the social post.
- **Location**
Click the icon to add a location based on a Google Map address or coordinates.
- **Integrations**
If you need to reference content in an external CMS, a legacy system or an ecommerce platform, click the corresponding integration icon and choose the integrated content. Prepr will keep the data in sync automatically. Check out more details in the [integrations](/integrations) docs.
- **Component**
If a component is defined and included in the settings of the dynamic content field, you can embed a component by clicking on the corresponding icon. By using a component, you can add empty elements to your dynamic content. This way you can trigger the front end to insert static front-end components, such as banners, marketing widgets, or forms. Check out more details in the [components](/content-modeling/managing-components) doc.
There are several ways to edit your content in the *Dynamic Content Editor*:
- **Add an element.** To add a new element, do one of the following:
- Enter **/** to see a pop-up with all the elements.
- Click an element icon in the toolbar below.
- Press ENTER to add a new paragraph and SHIFT ENTER to add a break line.
- From the element icon on the left, click the **Add element below** button.
- **Multi-select *Text* elements.** You can select multiple text elements to copy or delete them.
- **Change the element type.** To change an element to another element type, click the element icon on the left and select the new element type from the drop down. Note that you can only change a filled element type to an element of the same type. For example, a paragraph can be changed to a heading, but not to a media file.
- **Sort elements.** To change the position of an element, click the element icon on the left and click the or button.
- **Remove elements.** To remove a text element from the dynamic content field, do one of the following:
- Empty the element and enter BACKSPACE.
- Click the element icon on the left and click the button.
## Adding content references
The content reference is a super-fast way to link related items to your content item. The content reference field is often used for linked content items, such as authors, categories, or as manually picked related items.
There are three options to display the content reference field, depending on your needs: as a modal window, as an autosuggest, or as checkboxes/radio buttons. You can make your choice in the [Reference field settings](/content-modeling/field-types#content-reference-field).
- **Modal window**. This option combines searching and adding new items. You can also add a filter to quickly find the related item you need. If the item you need is not present, you can create it there and then.

- **Auto-suggest**. You can use autosuggest if you need a specific content item quickly, without having to search extensively. Start typing in your input field and the results will appear immediately.
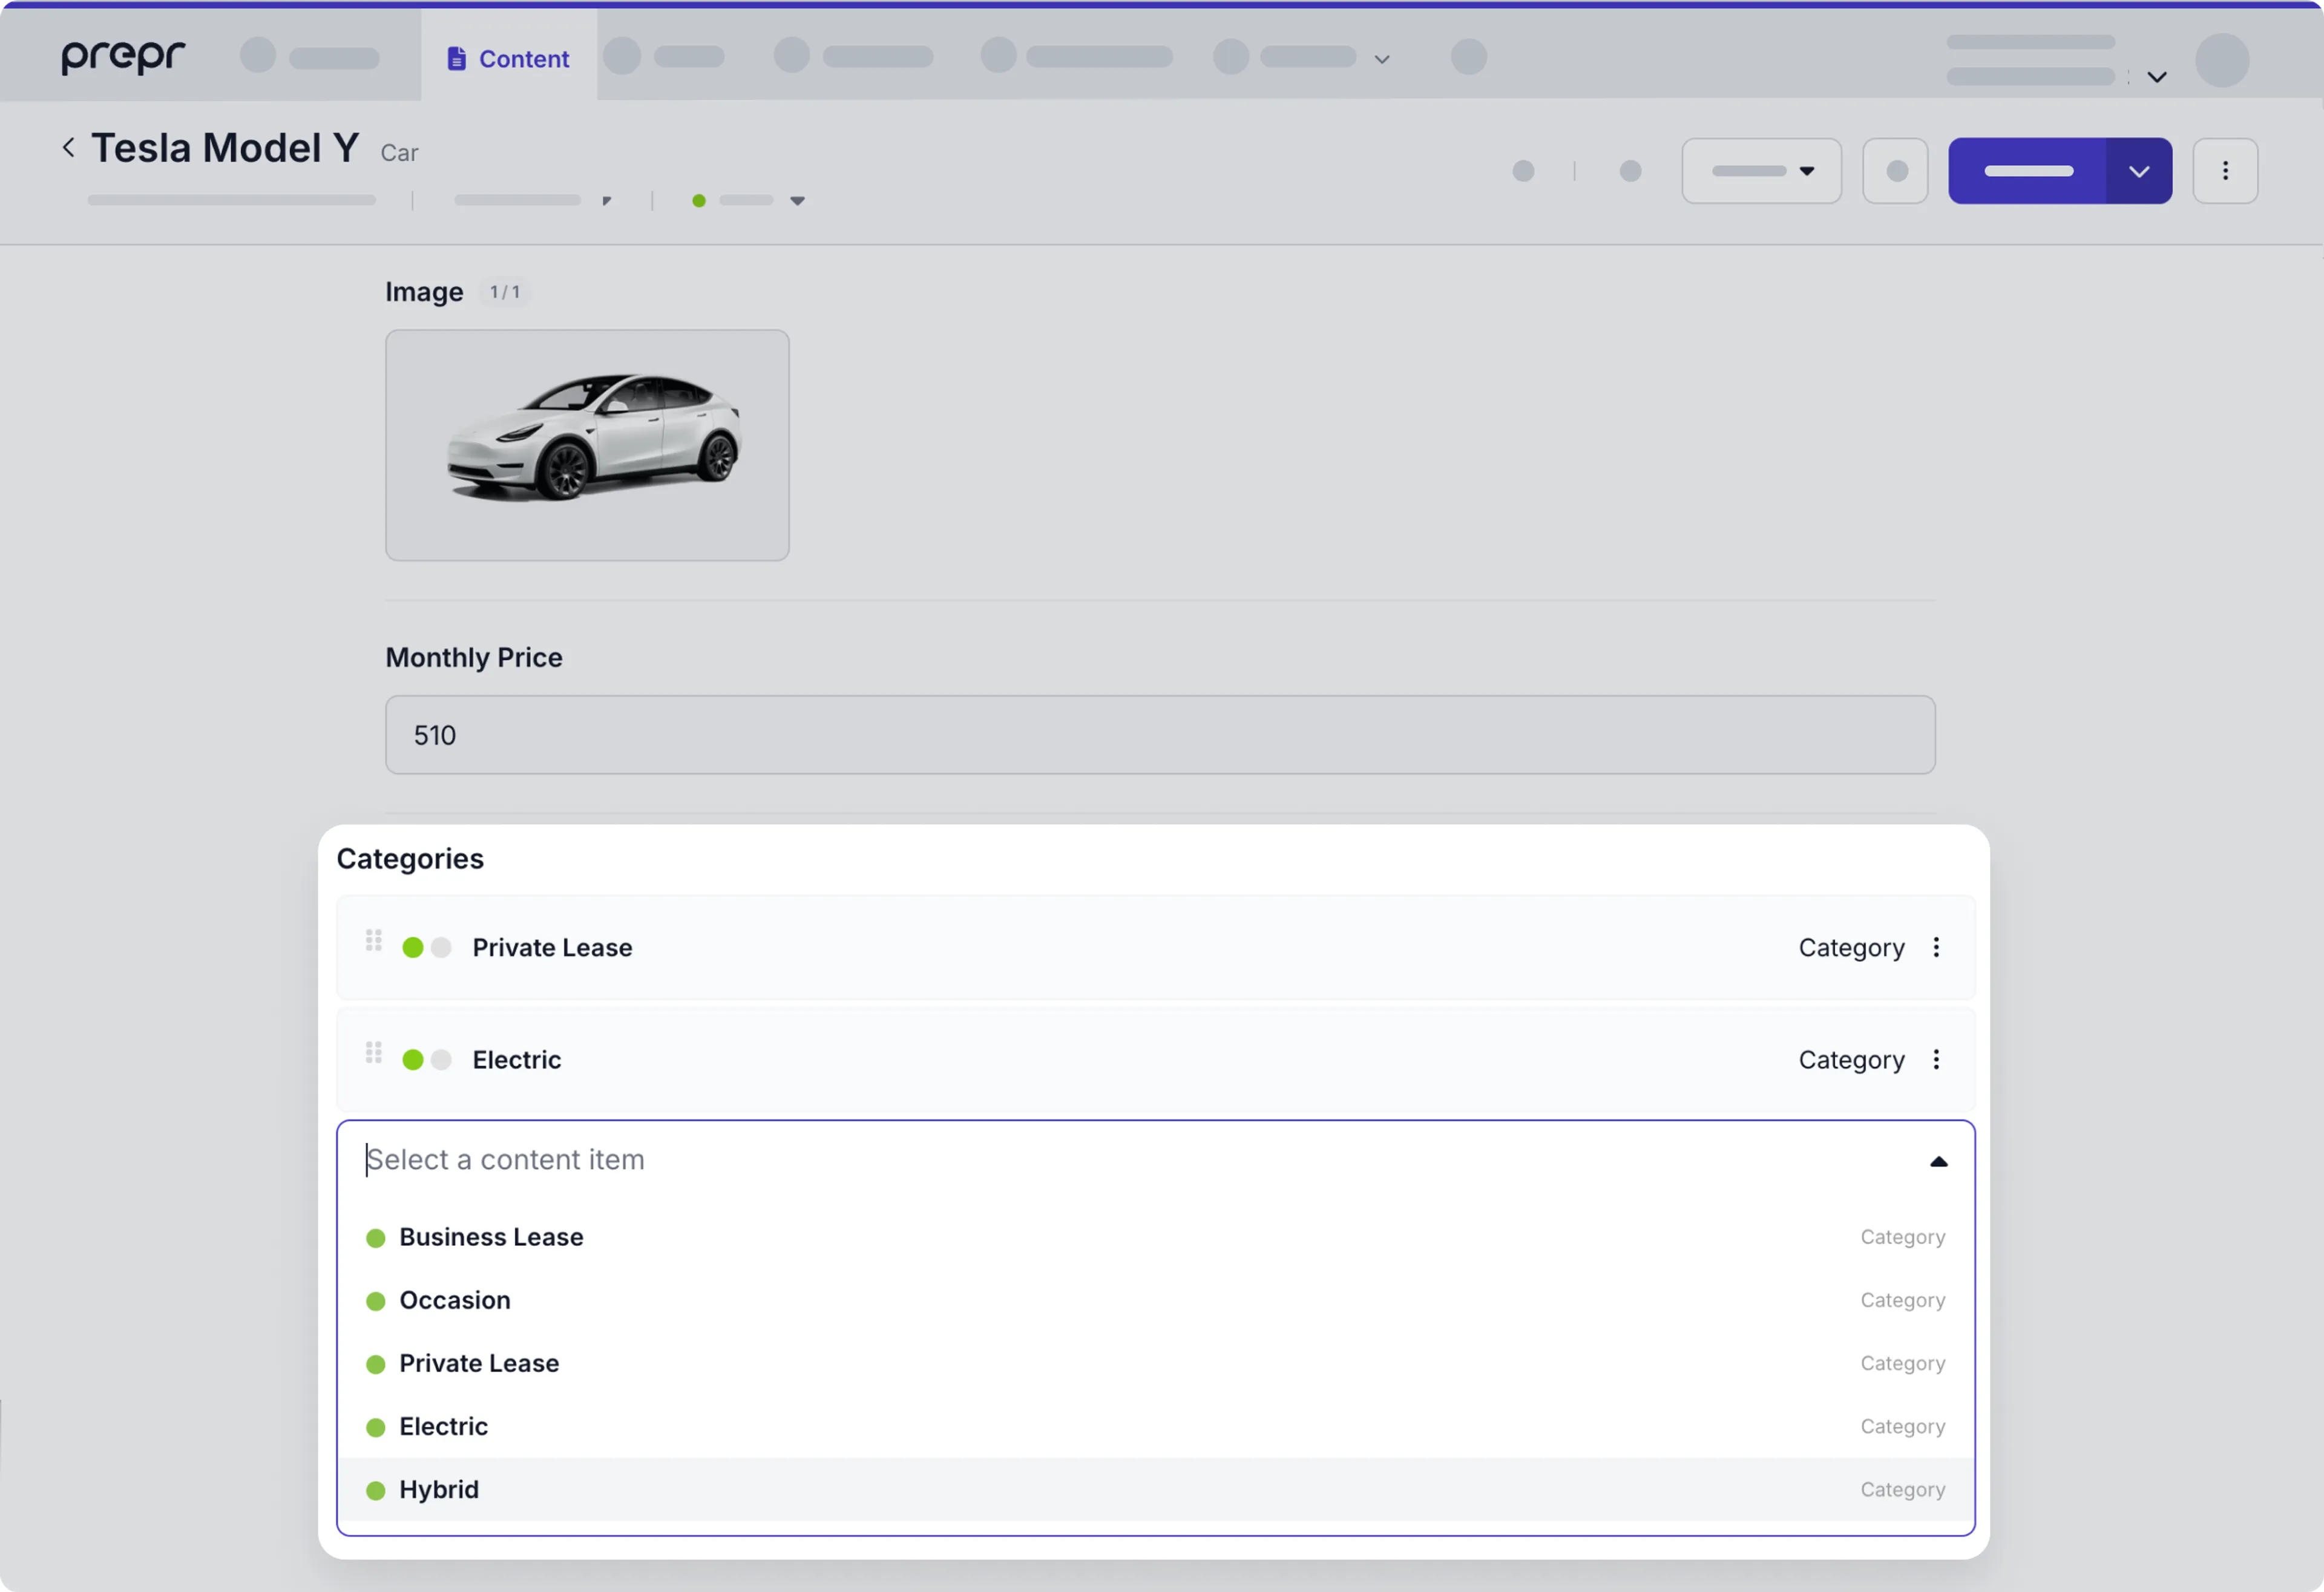
- **Checkboxes**. This option is best used if you only have a limited set of content items to choose from. An example is a topic or author you want to refer to. When you have indicated a maximum of 1 in your model, the options will be shown as a radio button.
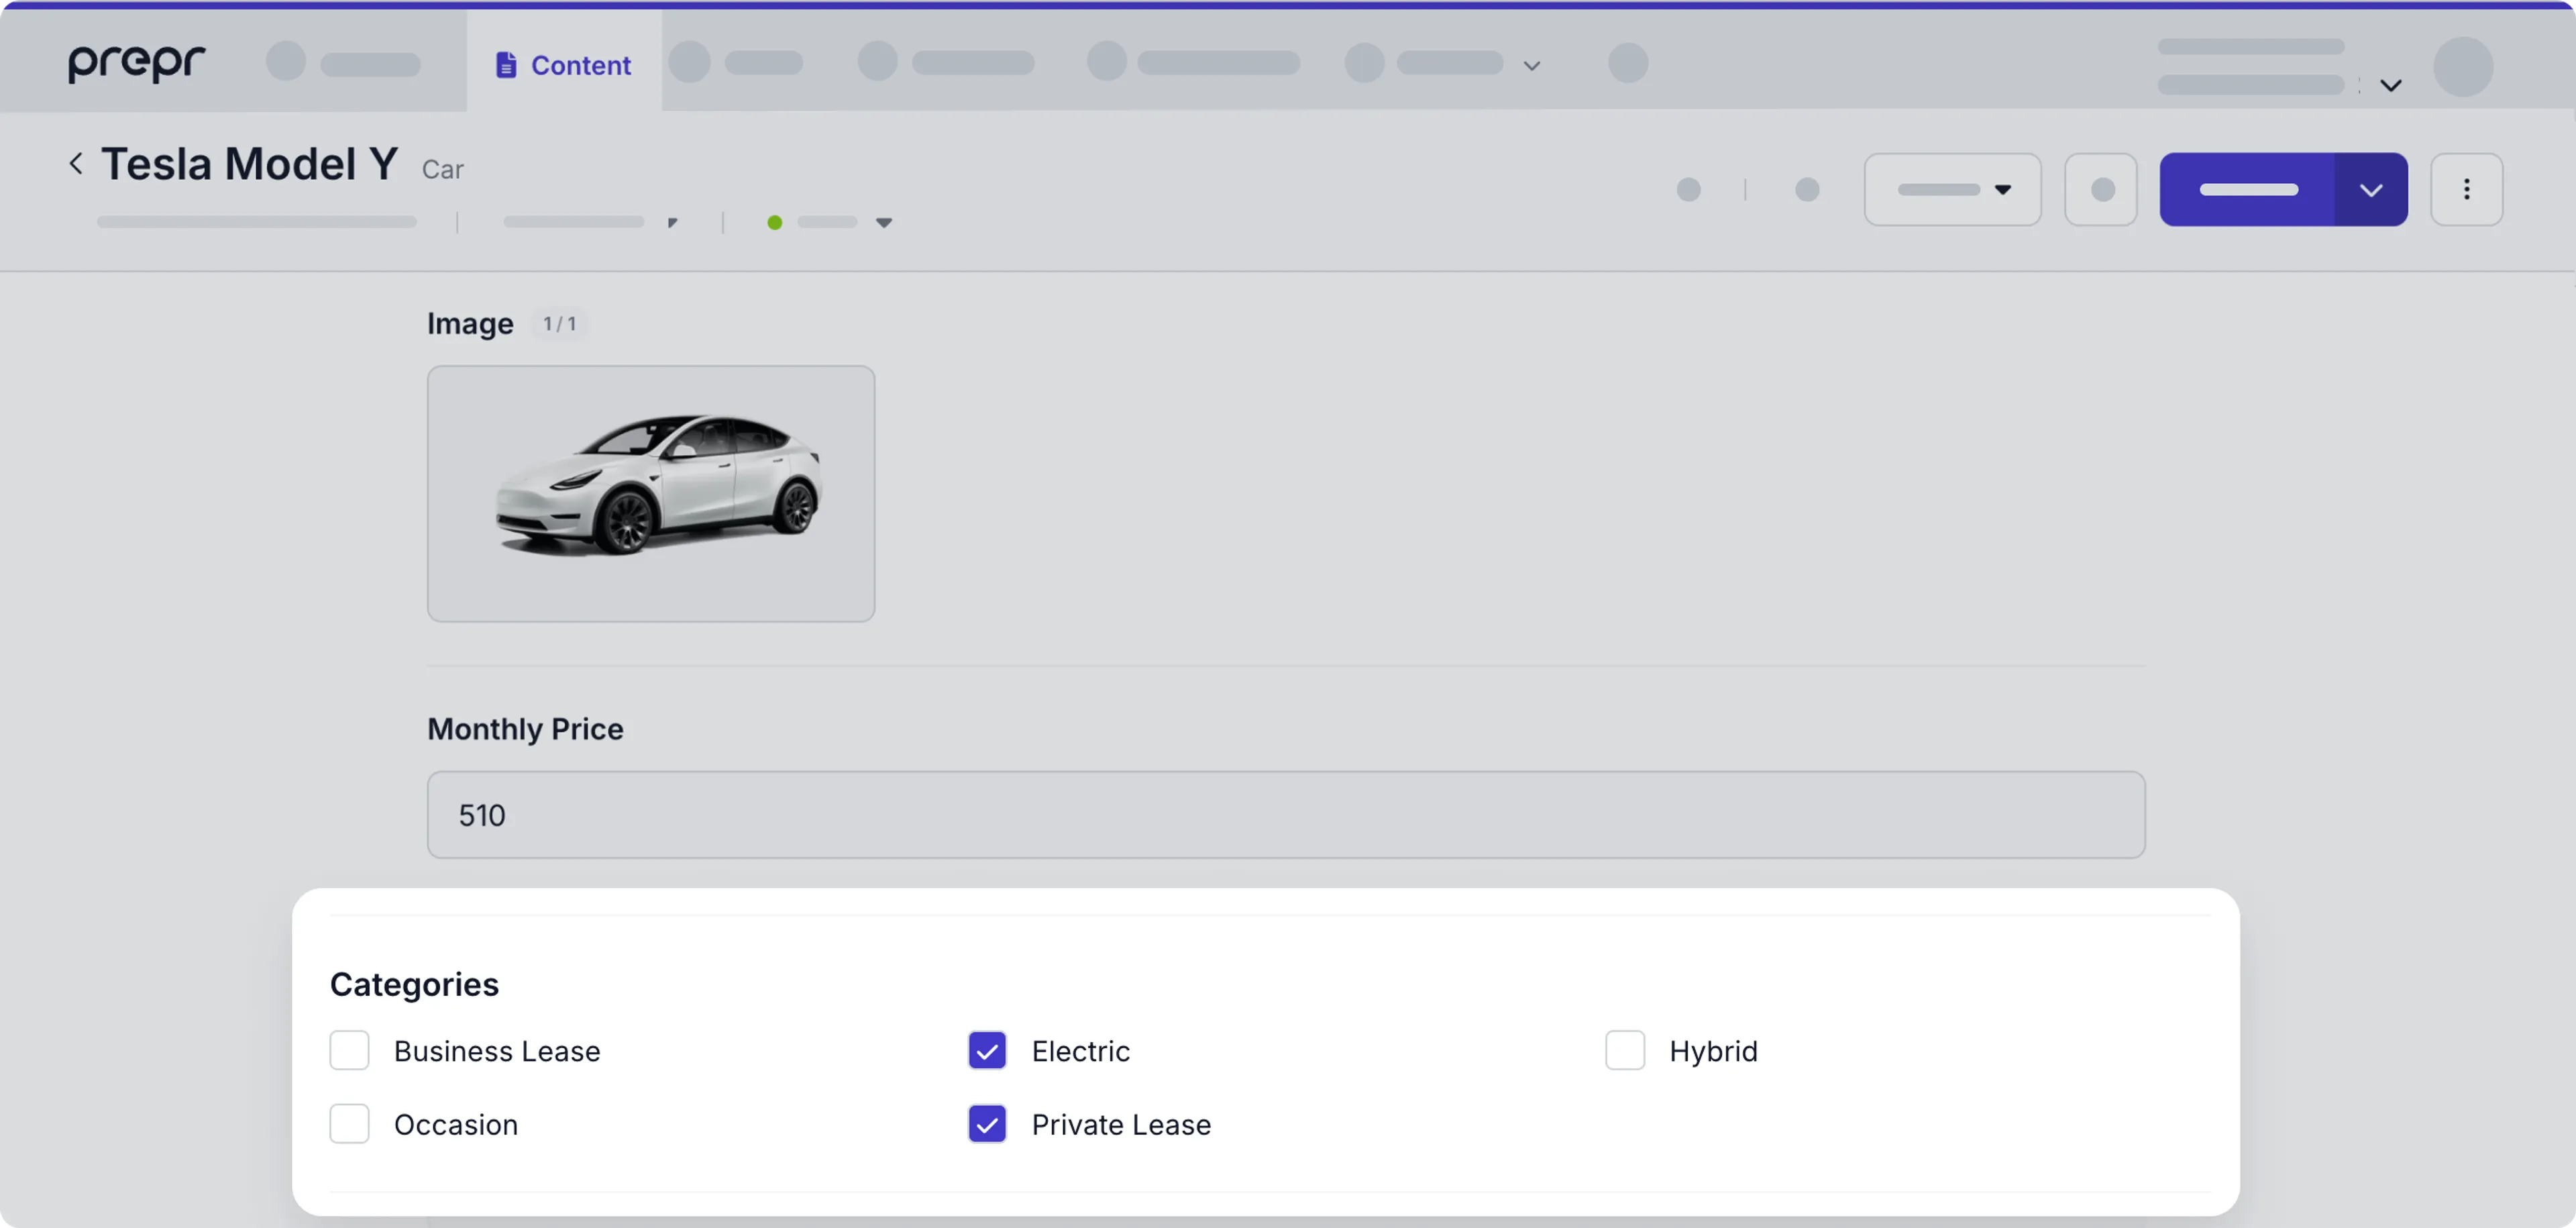
## Adding internal and external links
### Dynamic internal links
The Internal links are references to items or assets in Prepr. You can refer to other content items or assets in a text editor or the *Dynamic Content Editor*.
To create an internal reference, click the **Insert item link** icon in the toolbar of the text editor and choose whether you want to link to a content item or an asset. Select the item or asset in the media browser and insert the link.
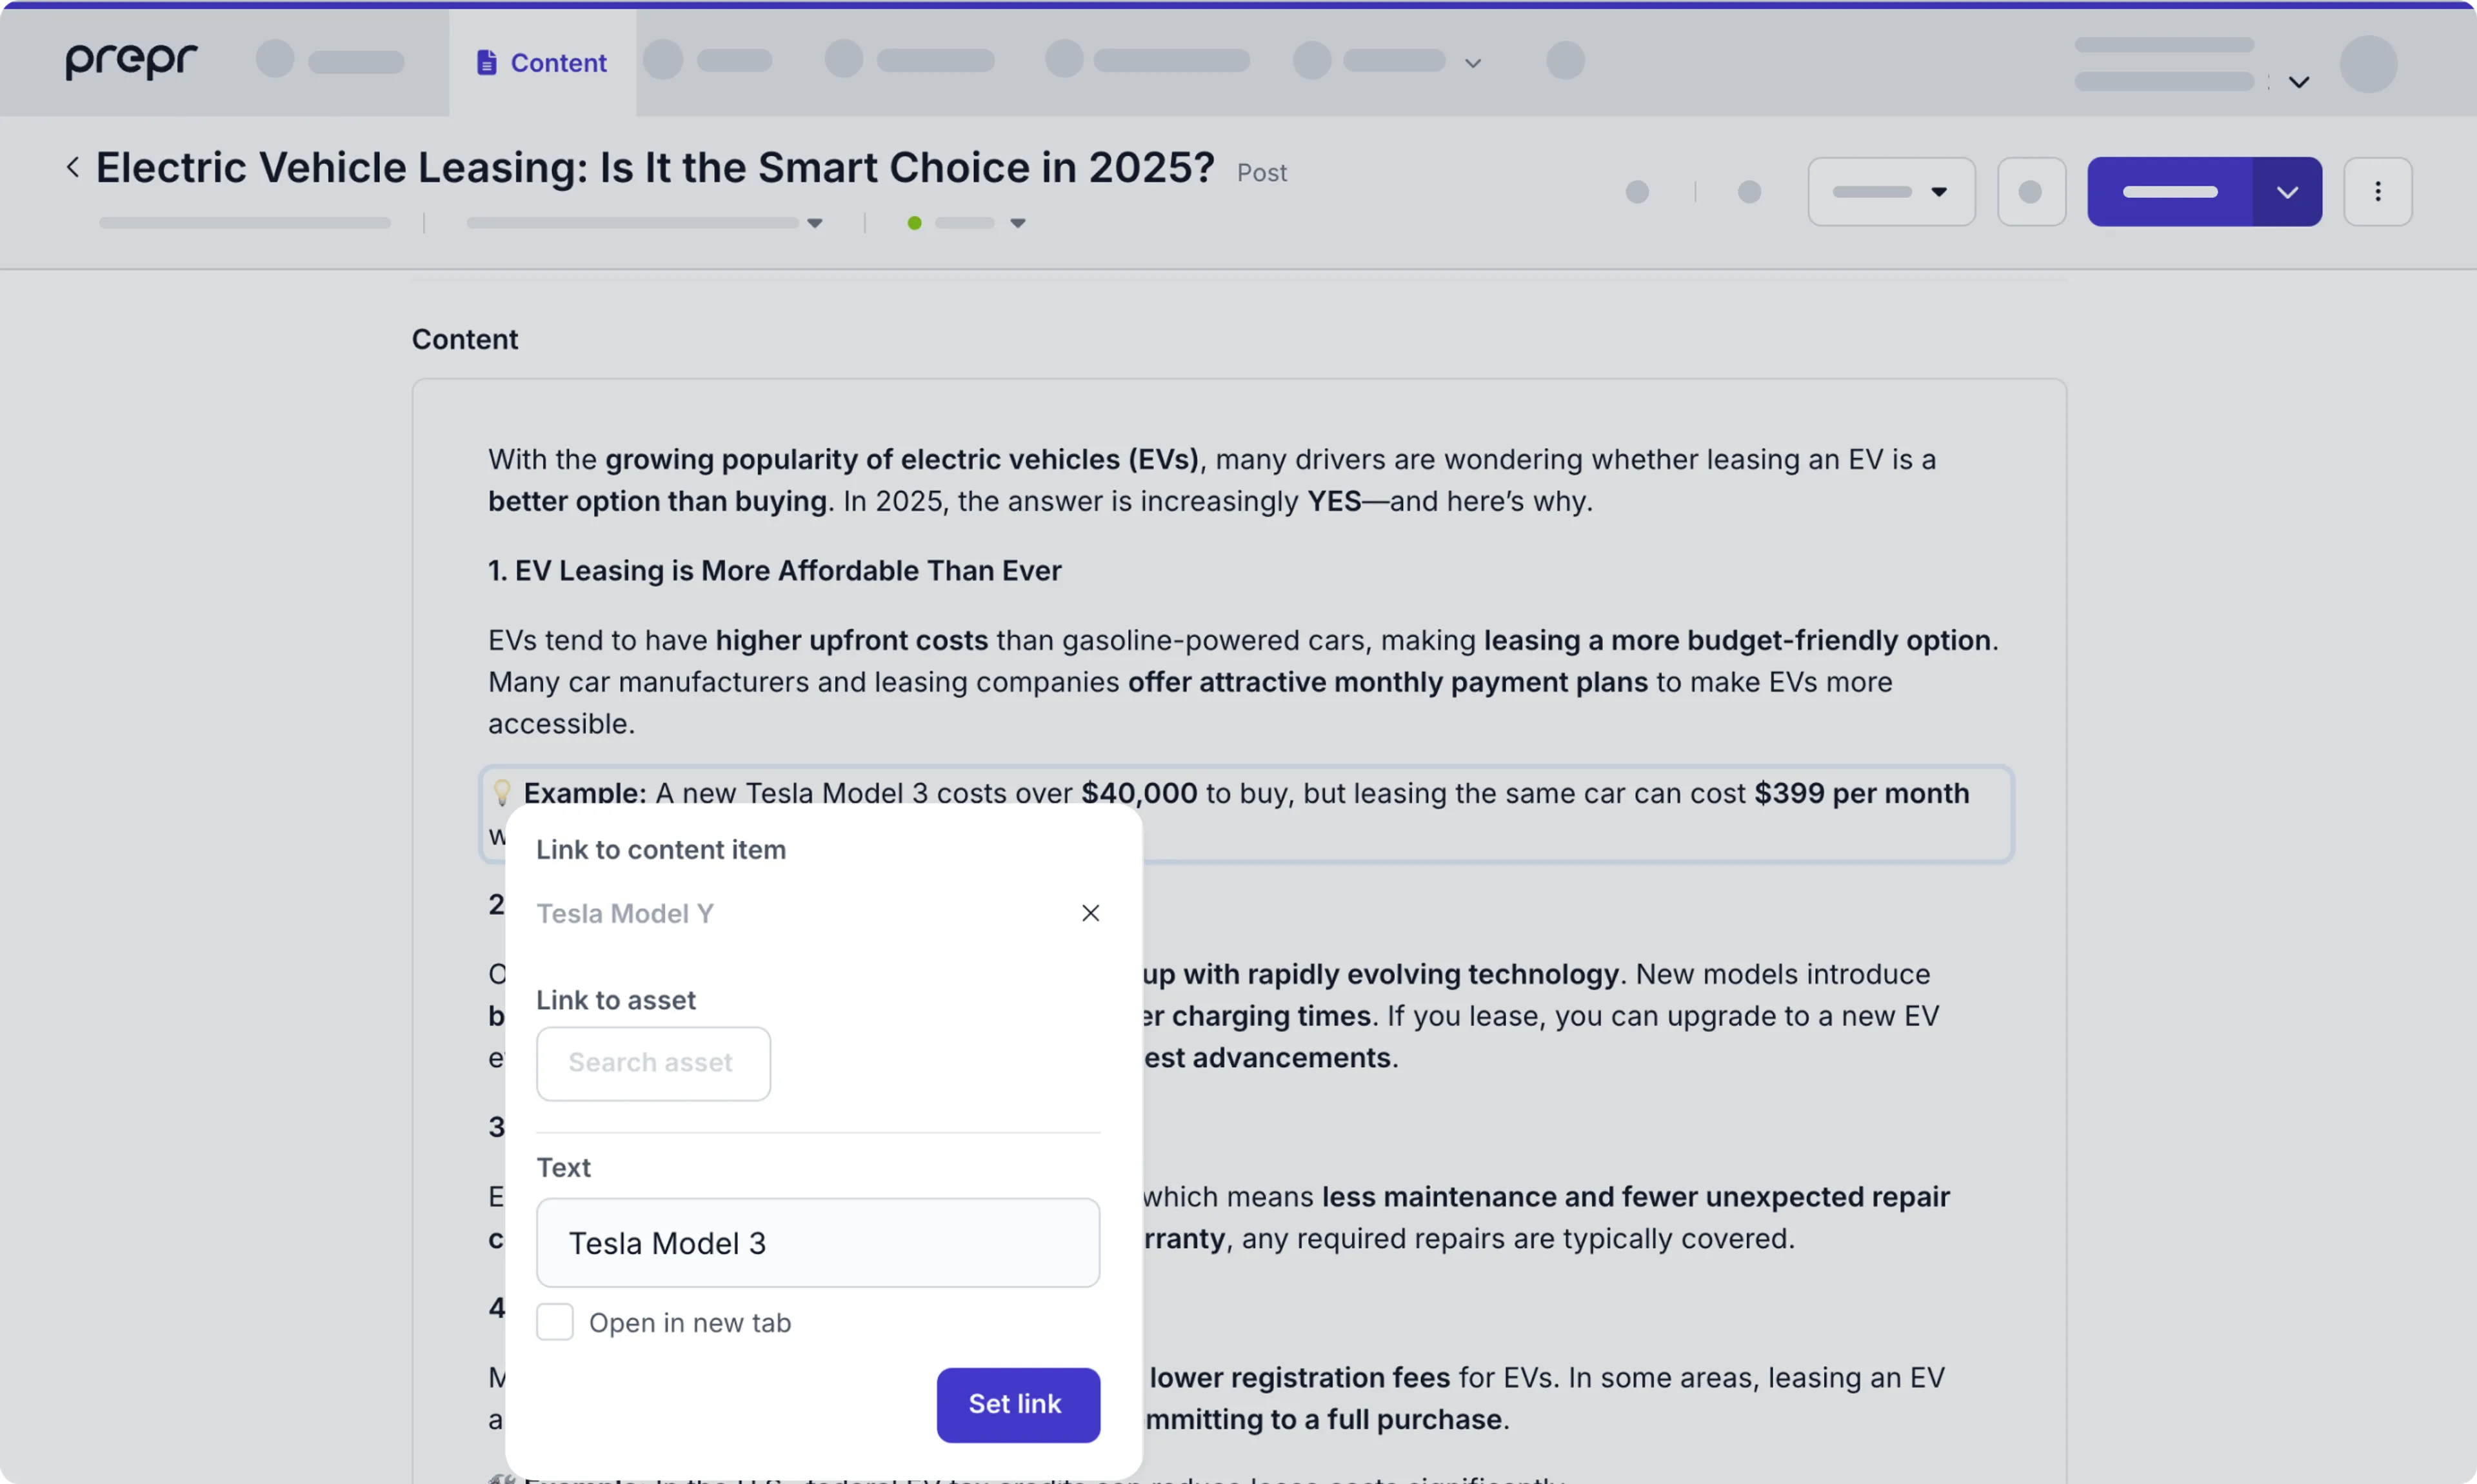
The created link is dynamic, this means that as soon as the title, slug, or URL of the linked content item or asset changes, the link will update dynamically. This way you never have to deal with dead links in your text again.
Check out the [dynamic content field API reference](/graphql-api/schema-field-types-dynamic-content-field#links-text) on how to query the internal link.
### External linking options
You can link to an external URL using the **Link option**.
If *Links* are enabled on a text field or the *Dynamic content Editor*, you can add an external link to your text.
To add an external link, click the icon to make an in-line reference. Enter the URL, and the link text, and decide whether this link needs to be opened in a new tab or not. For SEO purposes, you can also select the Don't follow option.
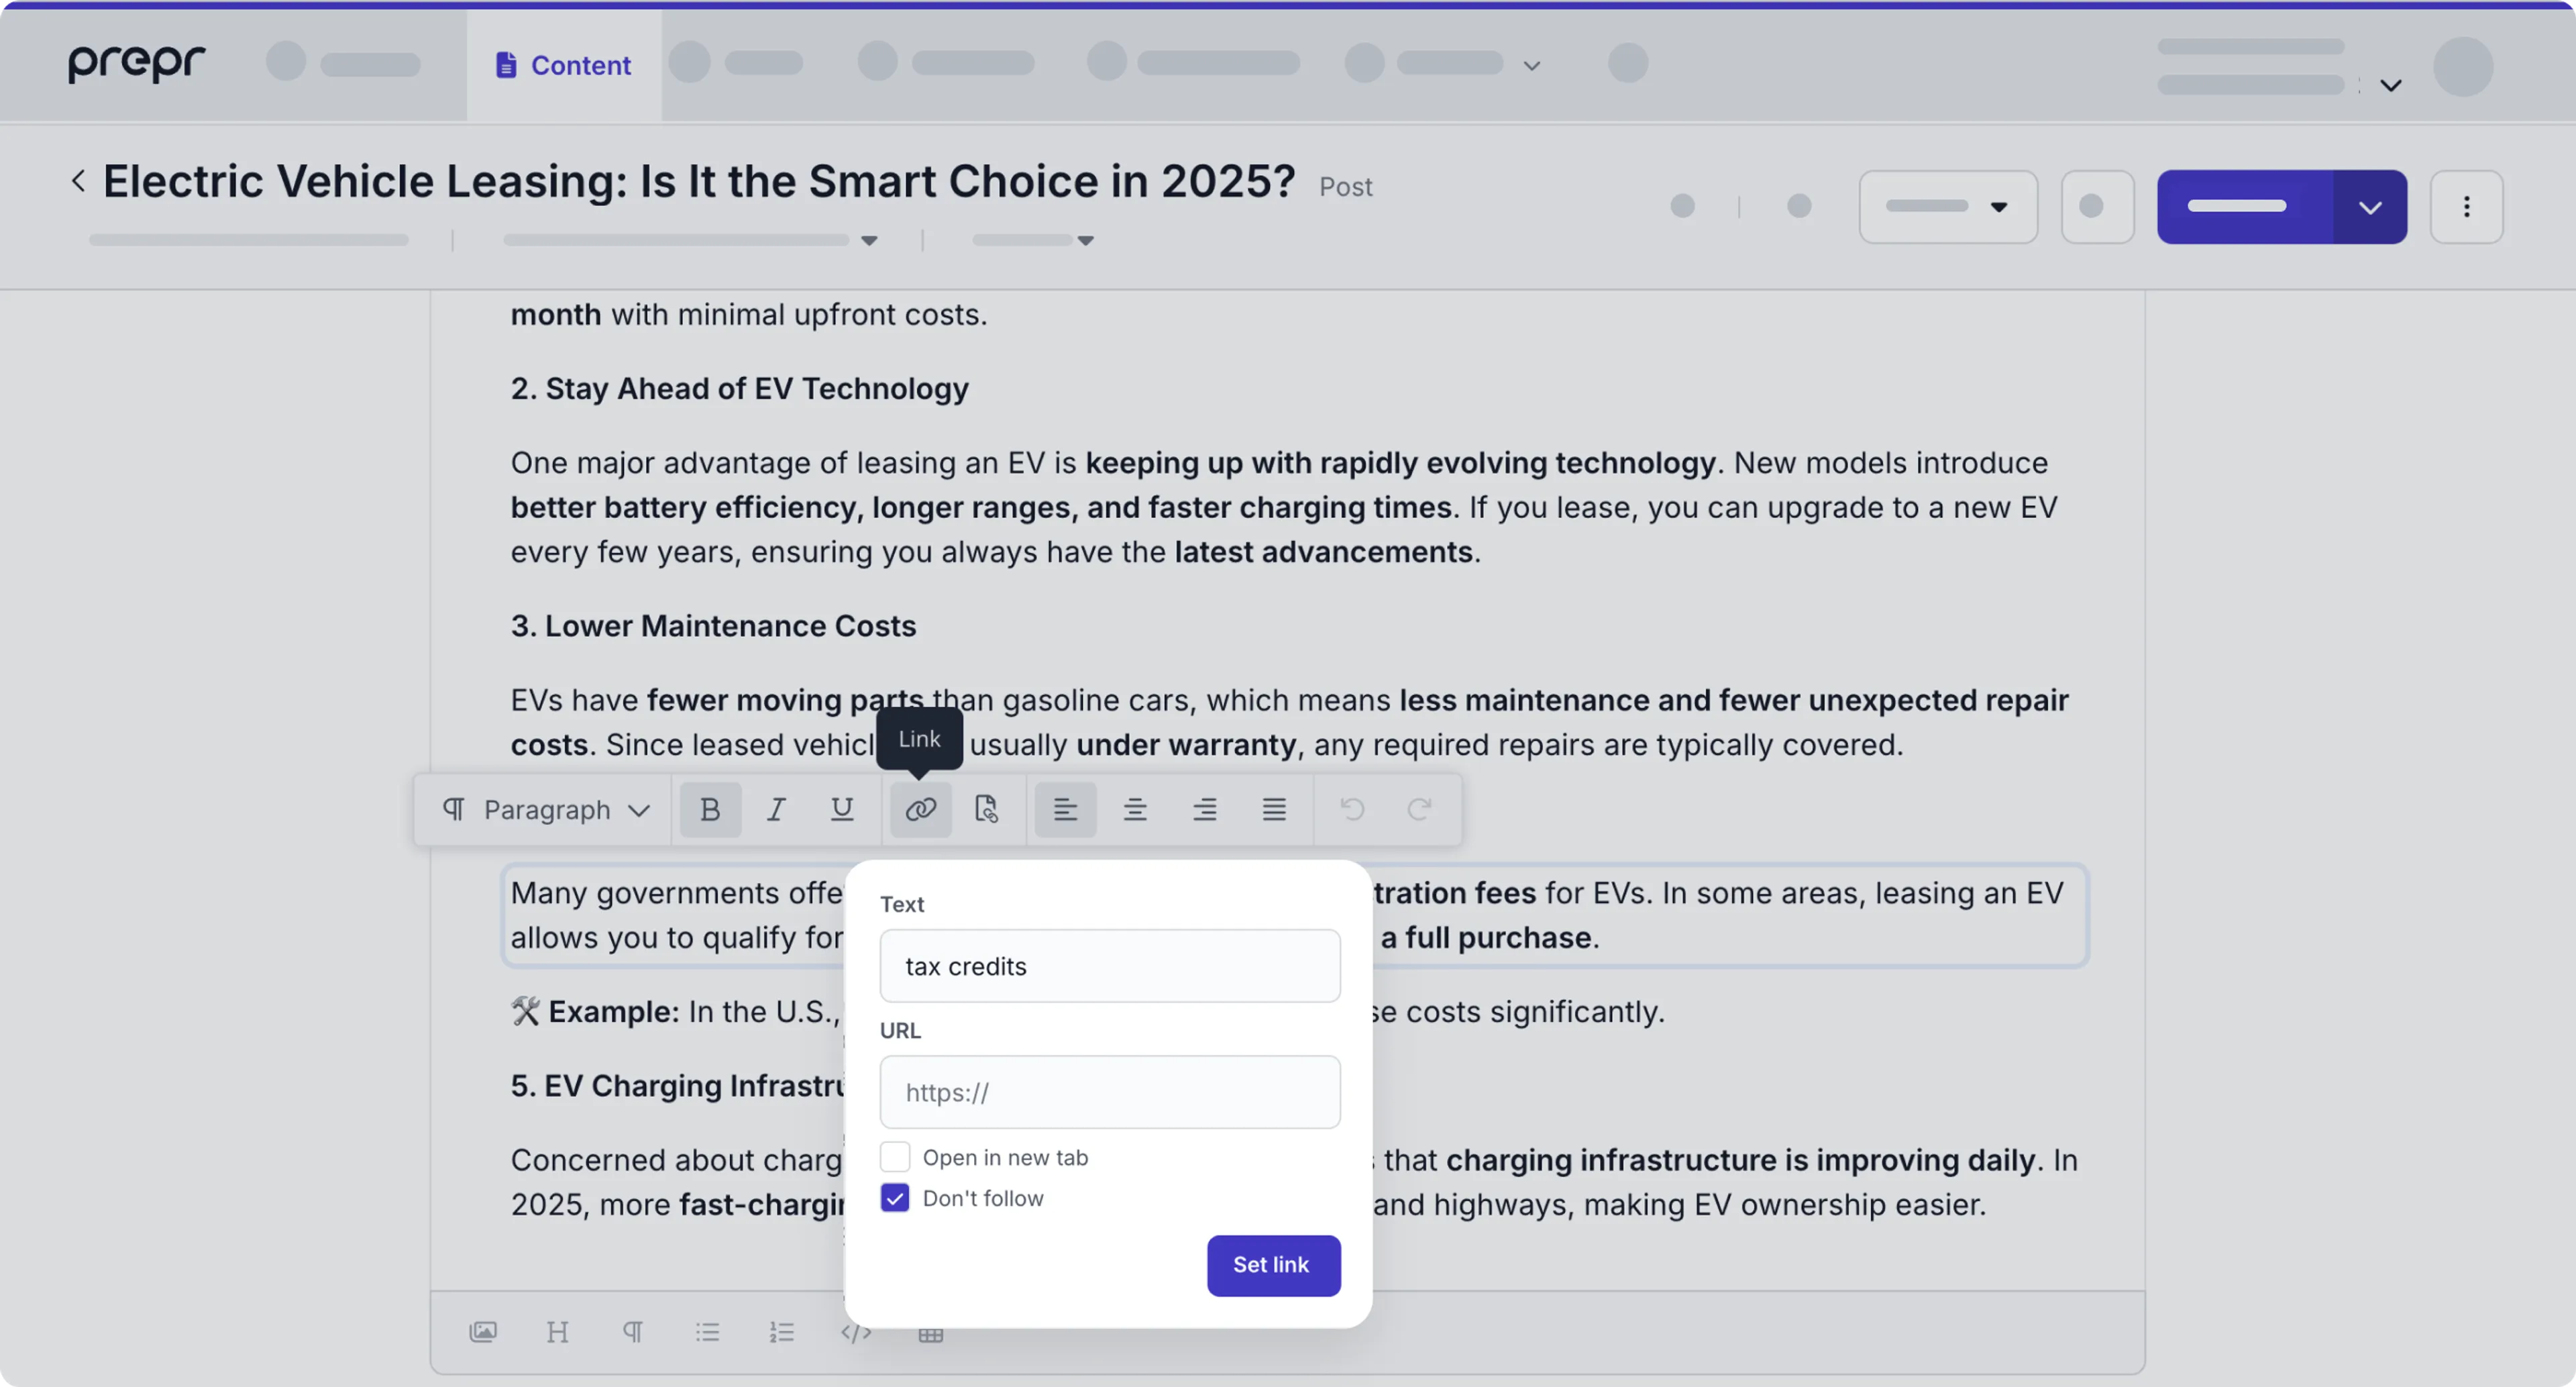
To edit the added link, simply click anywhere on the link text and click **Edit link** to make changes in the URL or in the link text.
## Adding remote content
When you need to add content that is sourced from an external system, and the [remote source is set up in Prepr](/content-modeling/creating-a-custom-remote-source),
you can simply you’ve connected to the external system and you can add the remote content to a content item using the following steps:
1. Navigate to the **Content** tab and click the desired content item from the list.
2. In the remote content section, click the button to add new items (in our example – **Add product**), search through the catalog or use a filter to find and add the desired items to the content item.
3. Save and publish this content item to complete the setup.

That’s it. Now your web page includes 3rd party content. Prepr will synchronize your remote content automatically to keep it up to date.
Source: https://docs.prepr.io/content-management/managing-content/creating-rich-content
---
# Managing content
*Learn about managing content items, improving SEO and readability and creating rich content in Prepr CMS.*
Source: https://docs.prepr.io/content-management/managing-content
---
# Introduction to Assets
*From this article, you’ll learn what assets are and which asset types are available in Prepr.*
## What are assets?
*Assets* are media files such as images, video, audio, and other digital files you can use on your web pages to enrich content.
With the growing demands of an internet business, brands have to do more to stand out and meet the rising expectations of potential customers. Rich content has a crucial role in attracting and keeping your audience.
Prepr allows you to easily create content pages filled with rich media assets. Let's look at them in detail.
## Assets in Prepr
An *Asset* in Prepr is a media file, such as an image, audio, video, live stream, or another file type, that lives in one organized storage — [*the Media Library*](/content-management/managing-assets/managing-assets). You only need to upload digital assets to Prepr once, and you can reuse them on multiple web pages.
Prepr automatically deploys and serves all media assets over a high-performing *Content delivery network (CDN)*. A CDN stores a cached version of content and puts it in many places simultaneously. This improves page load speed and accelerates content delivery.
Prepr supports the most popular image formats and provides automatic image optimization with *WebP encoding technology*. The WebP format makes your web pages load faster, frees up storage space, and guarantees high image quality.
The following table lists the asset types in Prepr and their supported media formats.
| Asset type|Description|Supported formats|
| -------------------------------------------- | ----------------------------------------------|---------------------|
| [Image](/content-management/managing-assets/introduction-to-assets#image) | Image files such as photos. | JPG, JPEG, PNG, BMP, SVG, GIF and more. **Note:** WebP graphics are supported through the *File* asset in Prepr. |
| [Video](/content-management/managing-assets/introduction-to-assets#video-and-audio) | Video files and live video streams. | MOV, M4V, MPG, MP4, and more. |
| [Audio](/content-management/managing-assets/introduction-to-assets#video-and-audio) | Audio files. | MP3, M4A, WAV, and more. |
| [File](/content-management/managing-assets/introduction-to-assets#file) | Archives, documents, and vector images. | The file upload recognizes the ZIP, PDF, XLSX, DOCX, and WebP extensions. Files with any other extension are uploaded as documents. |
### Image
There’s a wide range of image options in the Prepr Editor interface and through the API. For example, image presets for different device types, cropping, captions, and more.
Read more about [adding images to your web application](/development/best-practices/assets/images).
### Video and Audio
You can enrich your web pages with audio and video content or broadcast live video streams thanks to the *Prepr and Mux Video integration*. This integration gives you the benefits of seamless multi-channel content delivery and cutting-edge video processing technologies.
*Mux Video* accepts most modern video formats and codecs. And you get automatic video transcoding, audio normalization, and high-quality live streaming with the *HLS (HTTP Live Streaming)* protocol out of the box.
Prepr uploads your media files to Mux automatically, so you do not need to have a Mux account yourself. Follow our step-by-step guides to [post audio and video content](/development/best-practices/assets/video-audio) or [stream your live video](/development/best-practices/assets/live-video-stream) in a web application.
### File
With Prepr, you can add different file types to your web application, such as PDF, ZIP, and more. You can also use the *File* asset to work with WebP graphics in Prepr. Find more details in the [Files guideline](/development/best-practices/assets/files).
## Where to start?
To start with, learn how to create and where to store assets in Prepr. Please check out the [Manage assets](/content-management/managing-assets/managing-assets) guide.
Source: https://docs.prepr.io/content-management/managing-assets/introduction-to-assets
---
# Managing assets on the *Media* page
*This article explains where assets live in Prepr and which actions you can perform on them.*
## Introduction
You can find all your digital assets in one place in Prepr using the **Media** page.
This makes it easy to access, view, and manage your assets.
You can directly upload, edit, download, replace, delete, organize, and find assets from the *Media* page. For Mux videos, you can also replace thumbnails and add subtitles.
Let's dive into each of these actions in more detail.
## Uploading assets
To upload an asset, follow the steps below.

1. In the **Media** page, simply drag and drop the asset/s directly from your local drive.
2. Or at the top of the **Media** page, click the **Upload asset** button to open your file explorer and choose the asset/s you want to upload and click the **open** button.
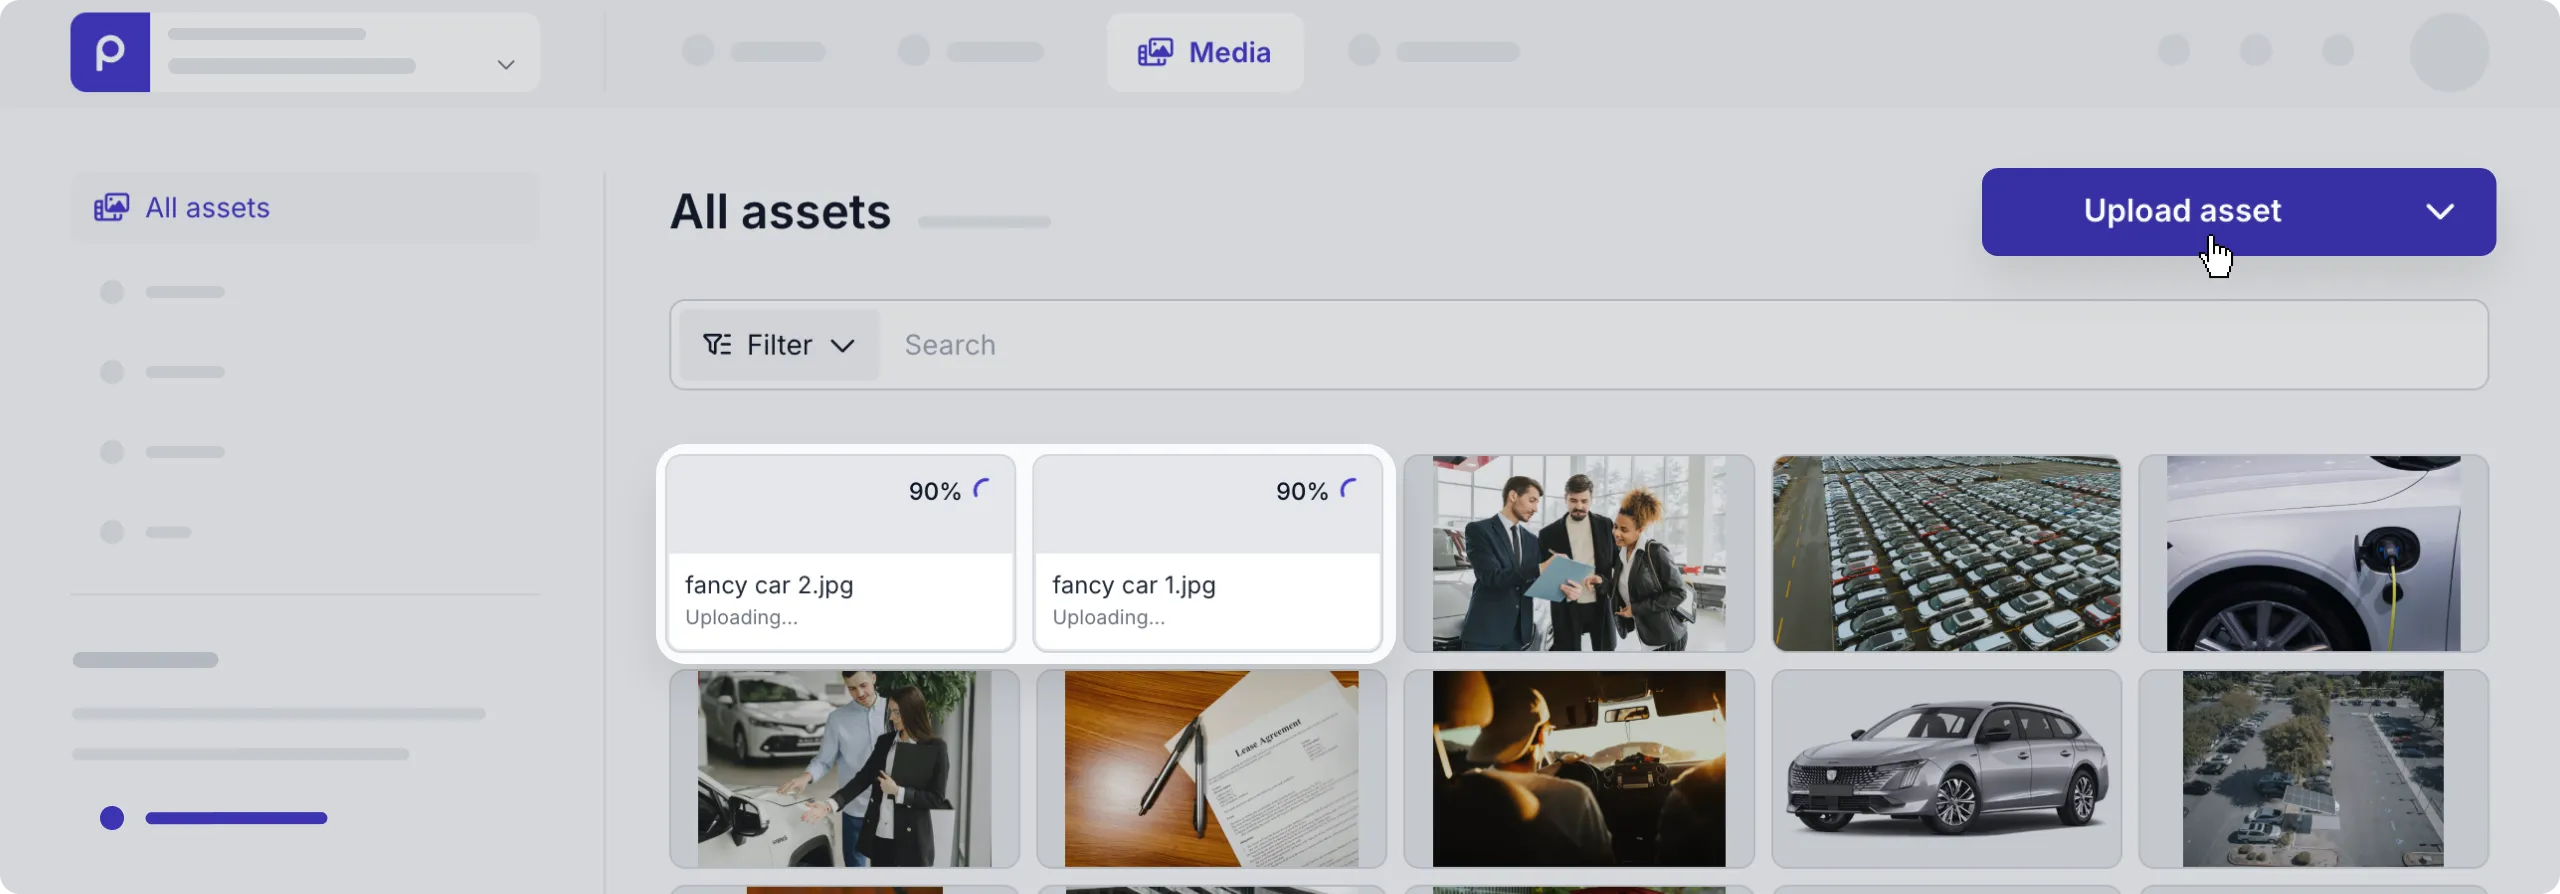
You'll see the progress of asset/s in each thumbnail while they're uploading.
Once done, you can then click the thumbnail of the assets you want to view.
## Editing assets
To edit a specific asset, go to the **Media** tab and click the thumbnail of the asset to open it.
You can update some of the asset fields below directly in the *Asset* page.
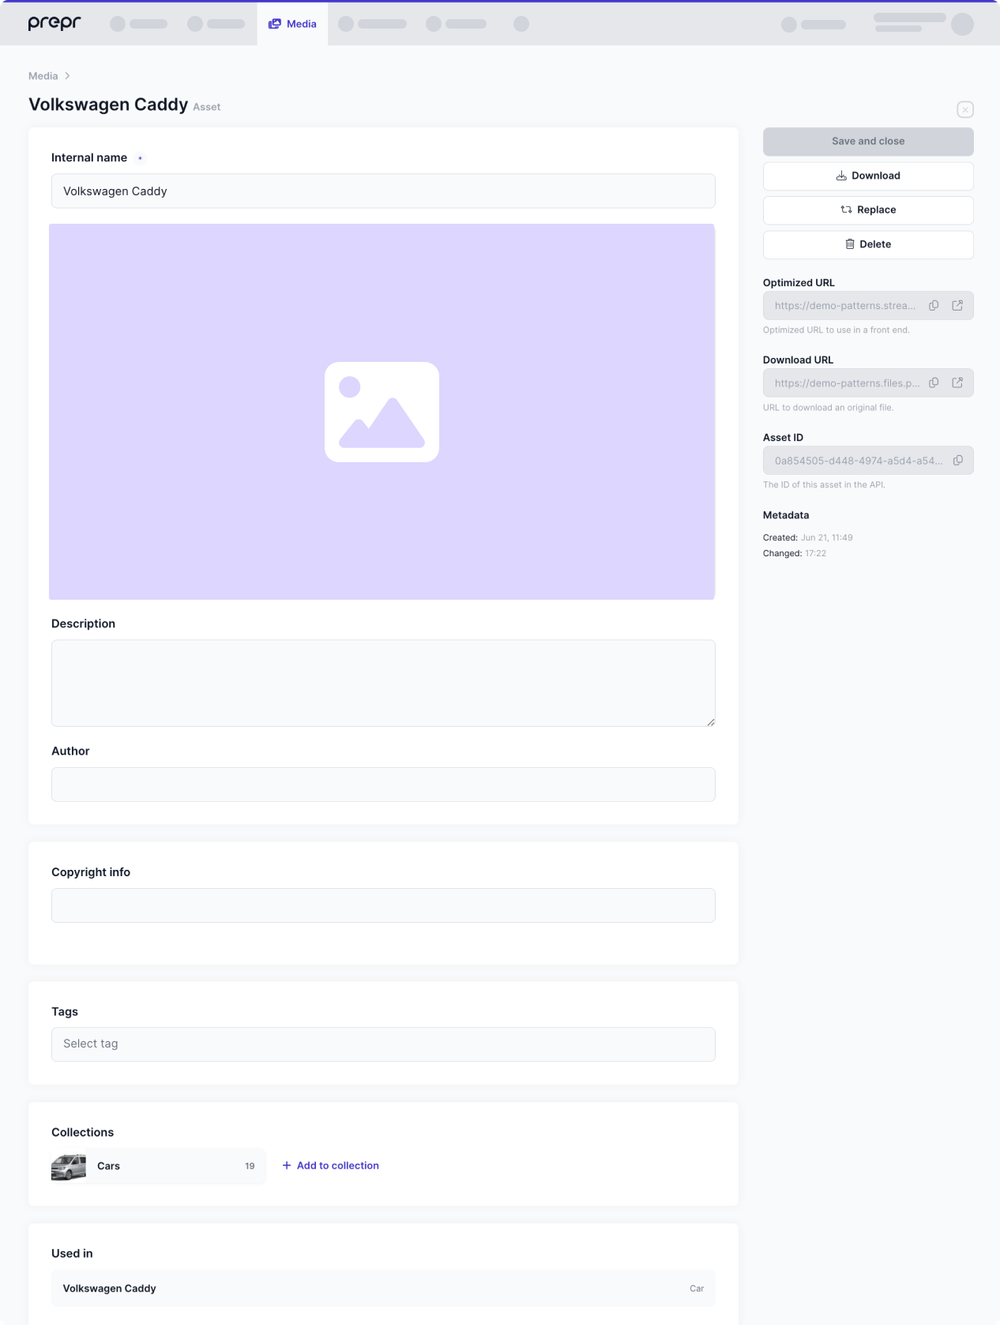
- **Internal name** - This field is required and is used to enter the *Title* of the asset.
- **Description** - This optional field is used by editors to describe the asset.
- **Author** - This optional field can be used to enter the name of the photographer or the visual designer of the asset.
- *Additional fields* - Any additional fields can be added to the **Asset** model, such as **Copyright info**. For more details, check out the [Asset model doc](/content-modeling/defining-the-asset-model).
- **Tags** – Allows you to [add one or more tags to an asset](#tags).
- **Collections** – Allows you to [group assets into collections](#collections).
- **Used in** - The list of all content items that use this asset.
To edit the asset details, simply update the applicable fields and click the **Save and close** button.
In the sidebar of the *Asset* page, you can see the following generated data:
- **Optimized URL** – The URL you can use to include the asset in your front end.
- **Download URL** – The URL you can use to download an original asset file.
- **Asset ID** – The unique identifier of an asset you can refer to in API requests.
- **Playback ID** – The public Mux Playback ID for videos.
- **Metadata** – The date and time when an asset is created and changed.
### Multiple locale assets
When localization is enabled in the Asset model, additional fields will be available for each locale allowed in your environment.
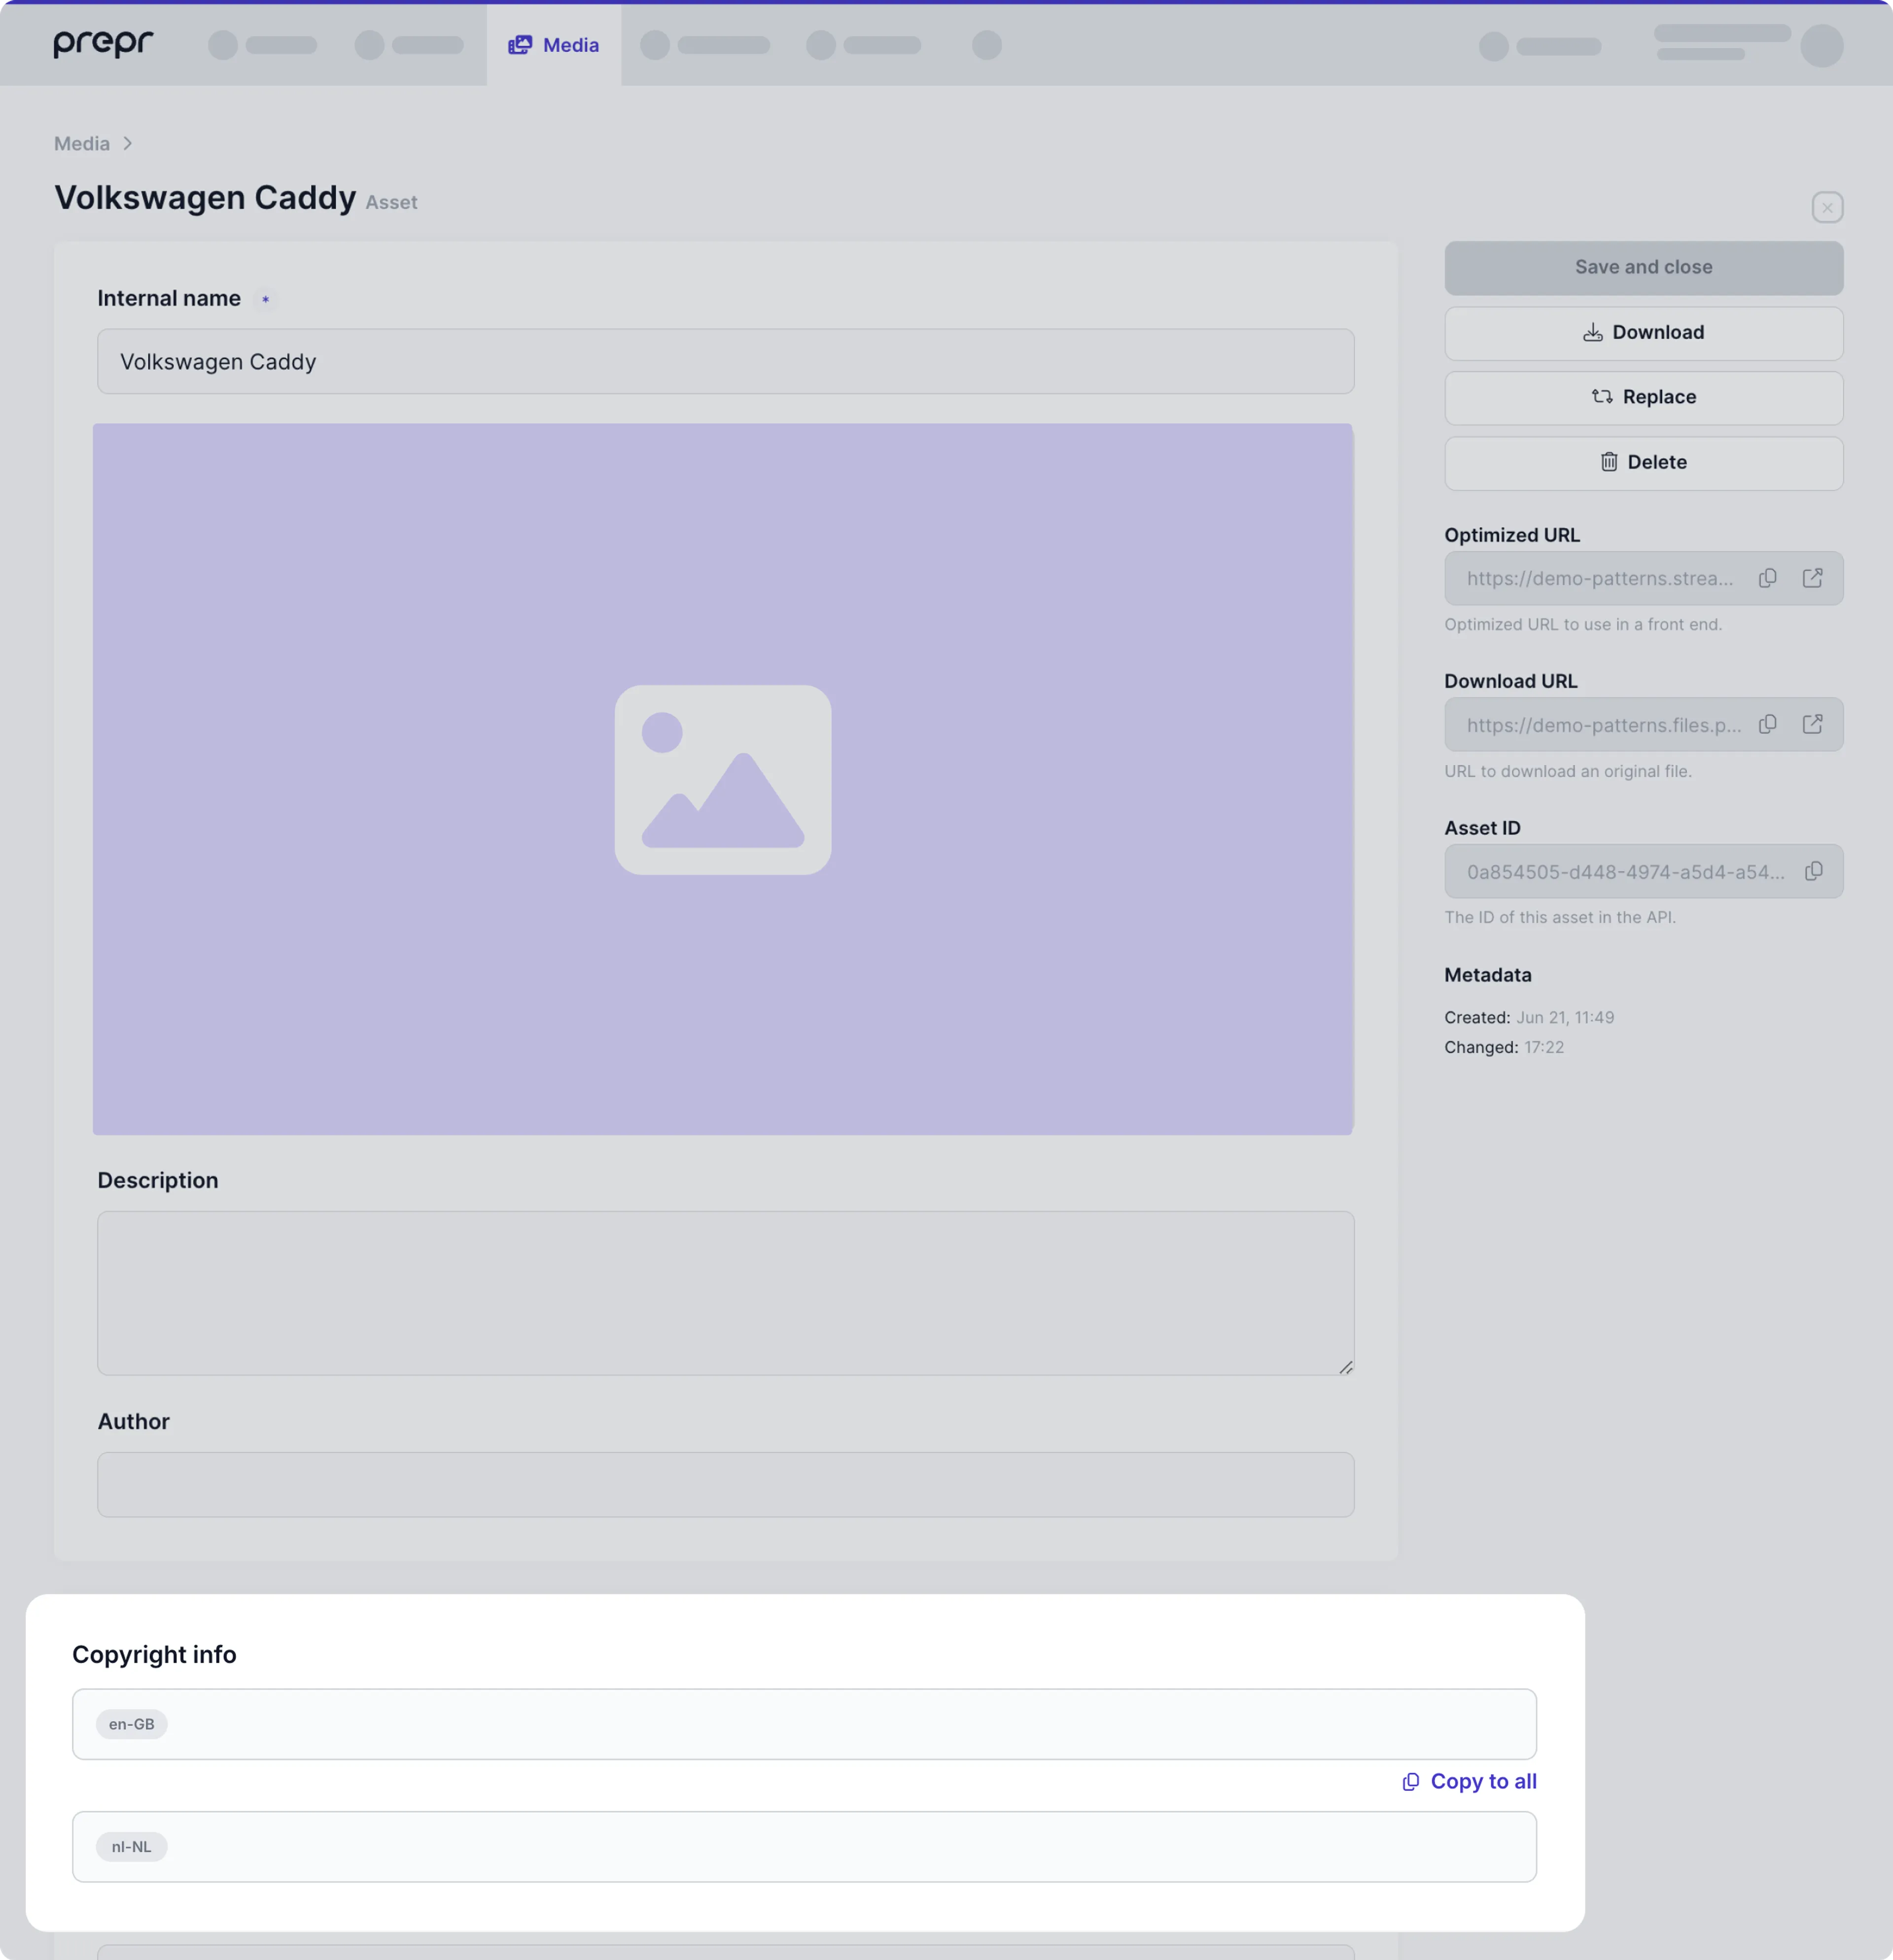
For more details on the setup, check out the [Asset model doc](/content-modeling/defining-the-asset-model#enable-localization-in-assets).
## Downloading an asset
In the *Asset* page, you can download this asset to your local storage, by clicking the **Download** button in the sidebar.
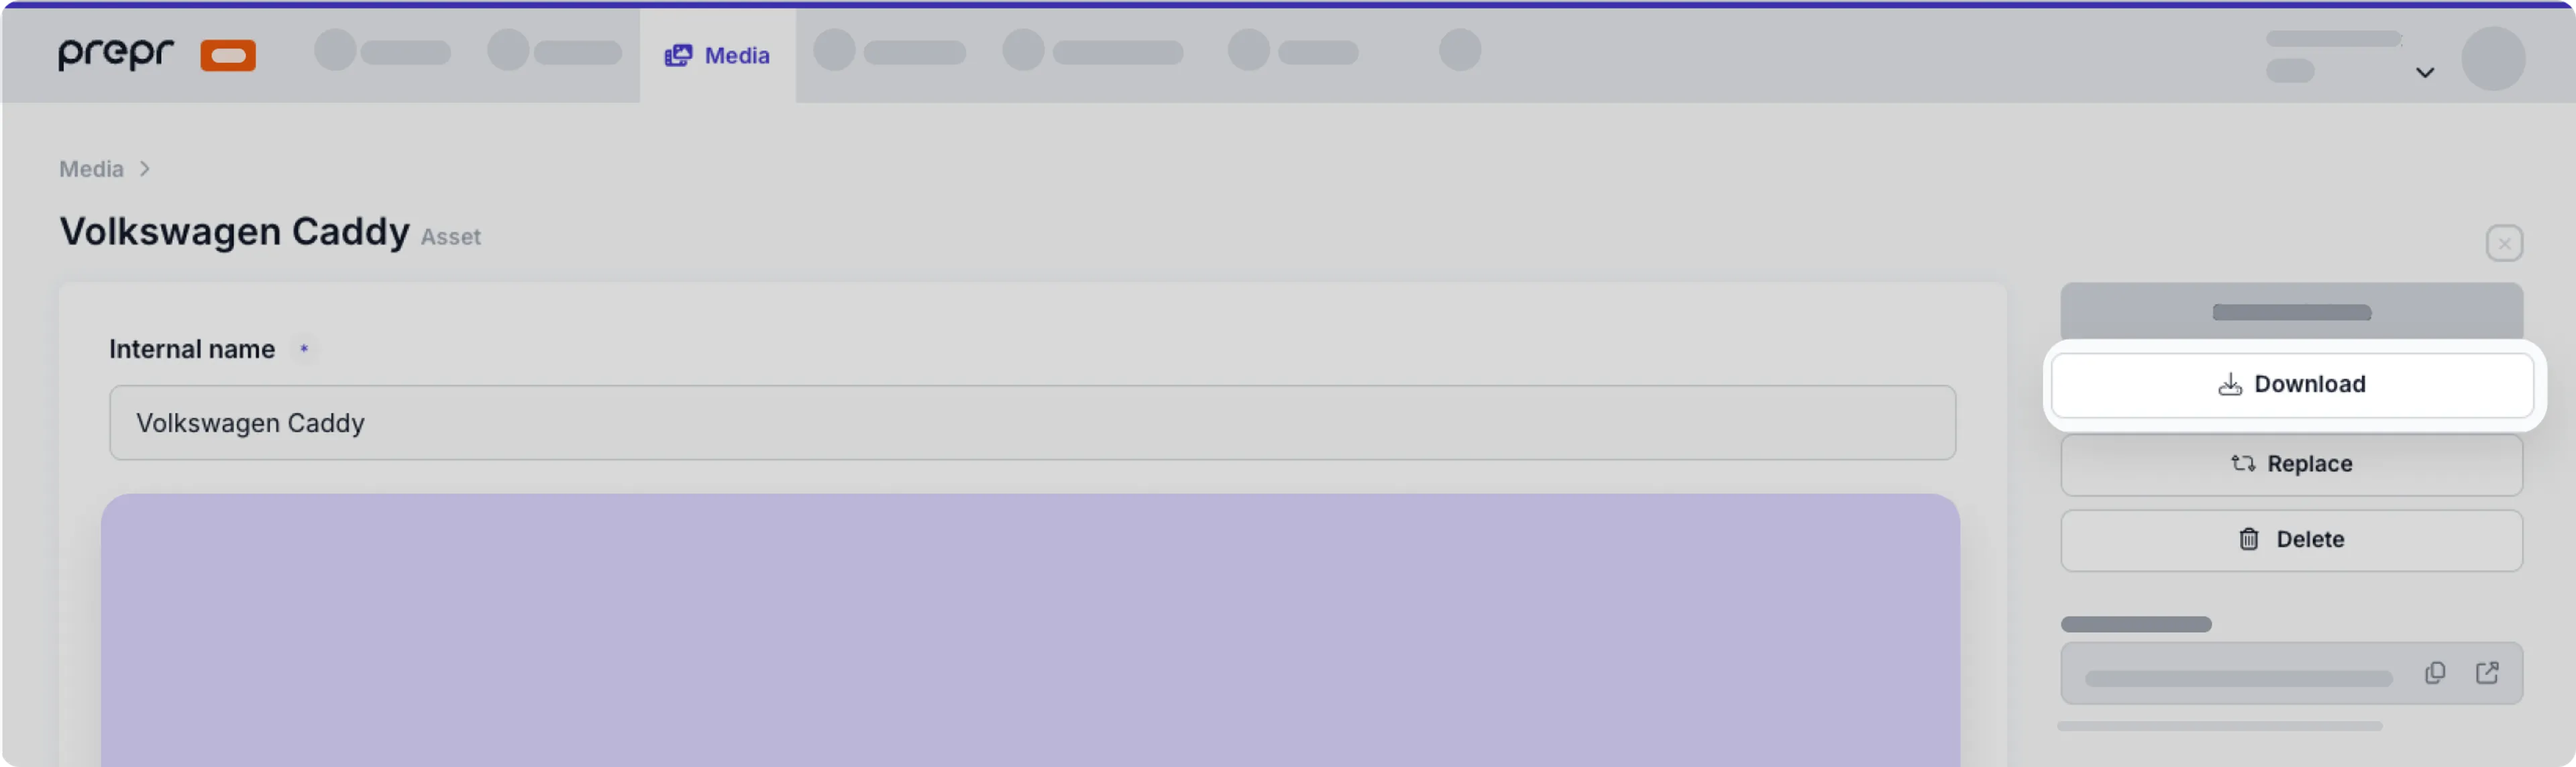
The original file will be saved to your default download folder.
## Replacing an asset
In the *Asset* page, you can replace an existing file with a new one by clicking the **Replace** button to choose the replacement file from your local storage.
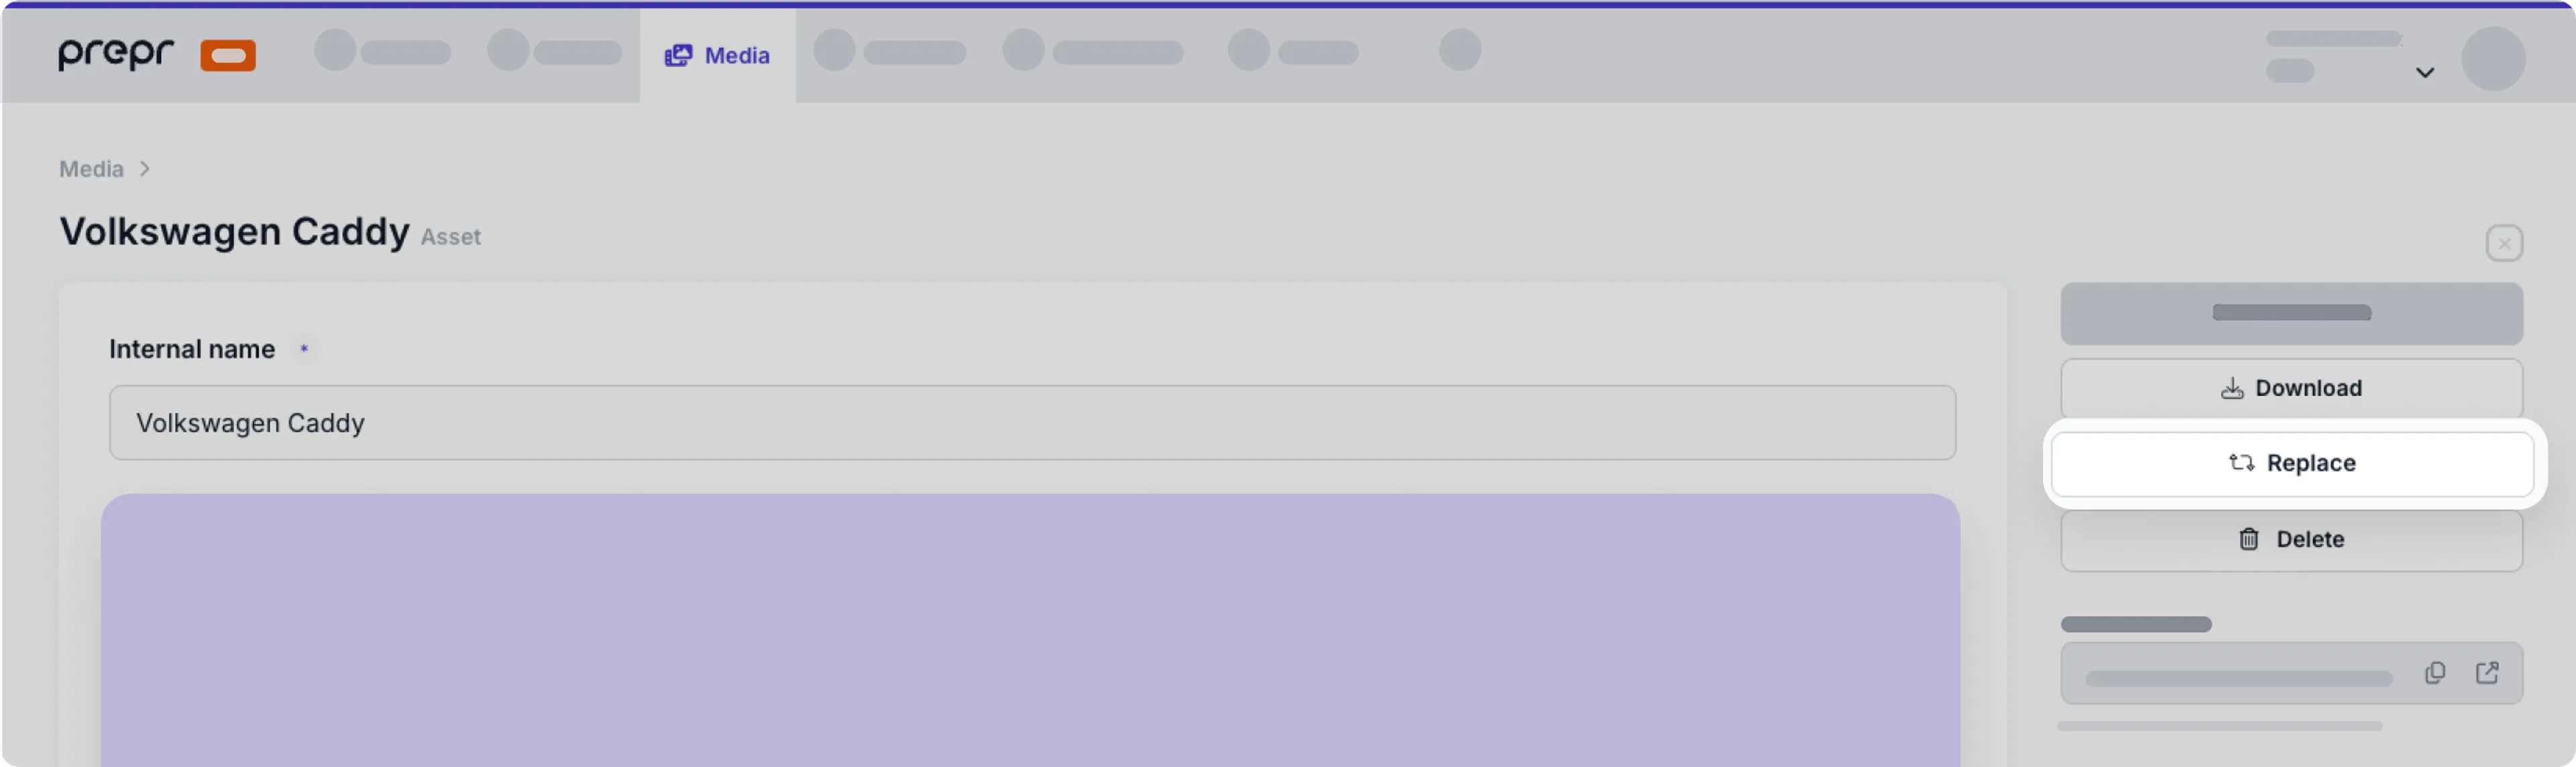
## Deleting assets
In the *Asset* page, you can delete an individual asset if you no longer need it, by simply clicking the **Delete** button.
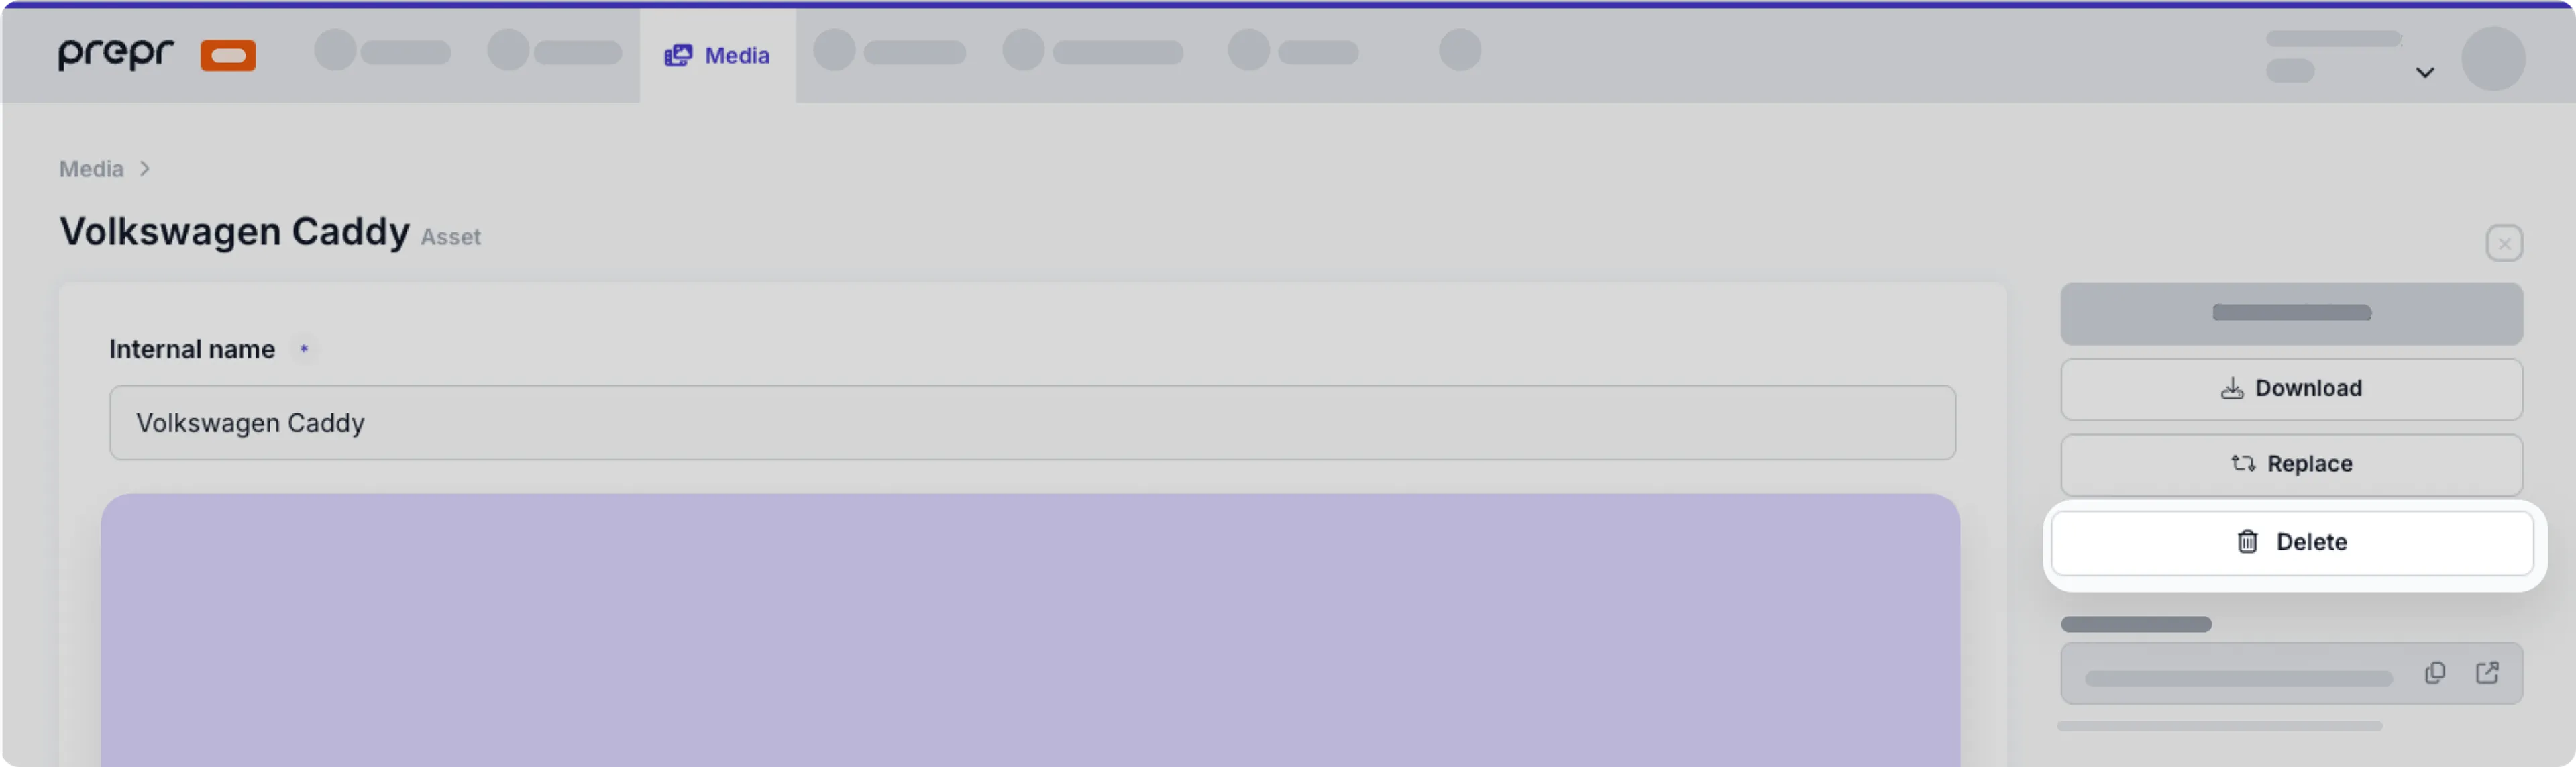
In the confirmation dialog window, click the **Yes, delete** button to confirm the delete.
You can also delete multiple assets by following the steps below.
1. Go to the **Media** tab and select assets by hovering over each thumbnail and clicking the icon. To select all assets, click the icon in the top action menu.
2. In the top action menu, click the icon to delete the selected assets.
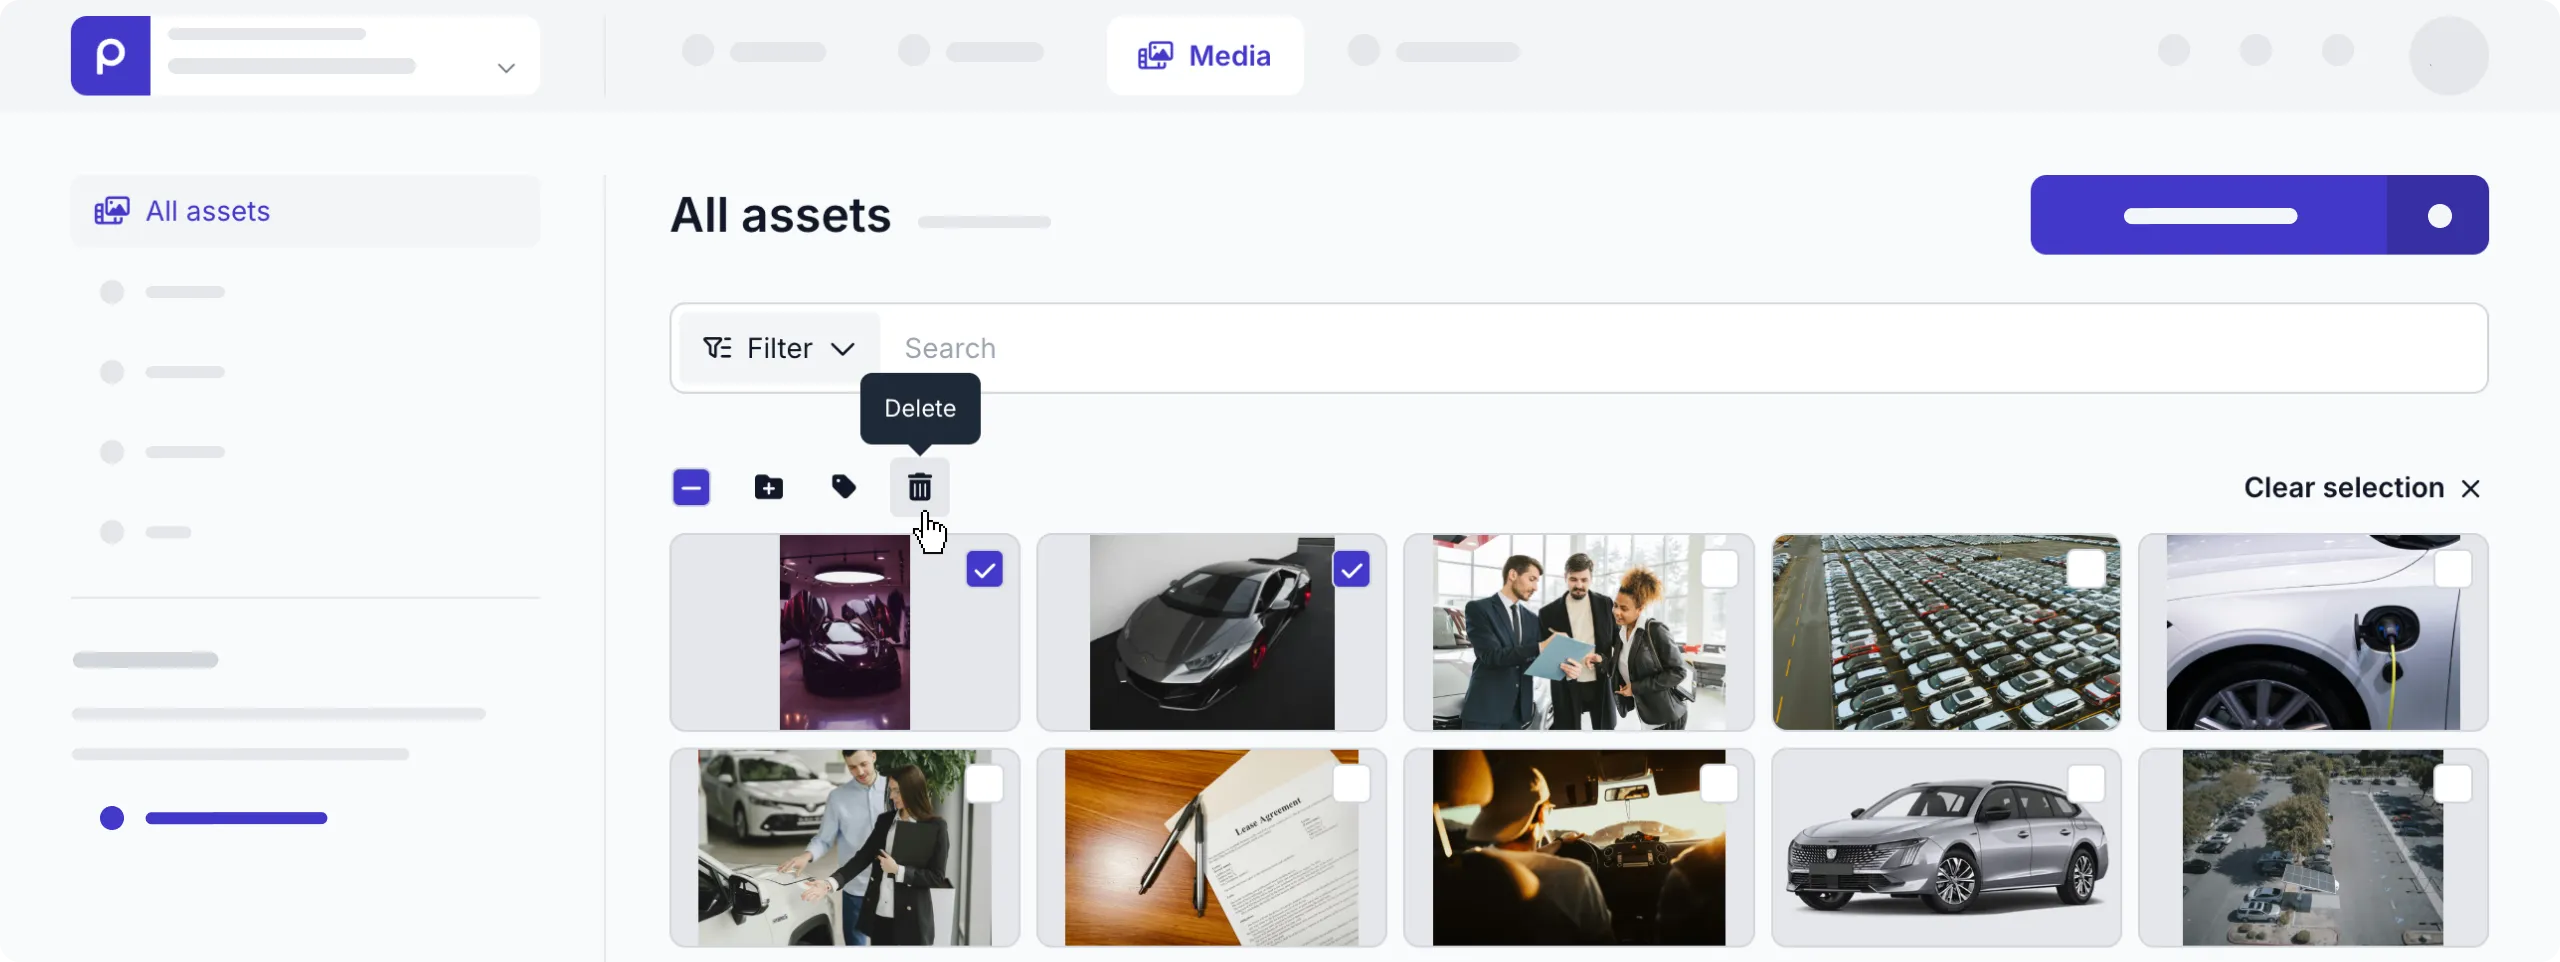
3. In the confirmation dialog window, click the **Yes, delete** button.
## Organizing assets
In Prepr, you can organize your assets in a way that works for you. For example, choose to group assets into collections, add tags, or do both for better categorization and precise search. Find out more below.
### Collections
A *Collection* represents a set of media files grouped by specific attributes and includes all types of assets.
It can be a collection of profile pictures, banners, stock photos, etc.
Let's look at how to organize assets using collections in more detail.
#### Create a collection of assets
To create a collection, follow the steps below.

1. Go to the **Media** page.
2. Under the *Collections* section on the left, click the **+ Add collection** link.
3. Enter the title for a collection and click the **Add** button to confirm.
4. You can then add assets to the collection in different ways:

a. From the *All assets* view select the images you want in the collection and drag them into the collection directly.
b. You can also add assets directly in the collection, by clicking the collection to open it. From here, click the **Add assets** button to open the *Media browser*.
c. In this window, you can then select and drag the assets you want to add to the collection or select the assets and click the **Add x assets** button.
d. If the images you want to add to the collection are not yet uploaded, click the **Upload assets** button to upload new assets and add them to the collection.
To add just a single asset to a collection in the asset detail page.
1. In the **Media** page, click the thumbnail of an asset to open it.
2. At the bottom of the *Asset* detail page, click the **+ Add to collection** link in the *Collections* section.
3. Choose a collection from the drop-down menu.
4. On the right-hand sidebar, click **Save and close** to apply the changes.
#### Remove assets from a collection
You can remove multiple assets from a collection or a single asset in the asset detail page.
To remove several assets from a collection, follow the steps below.
1. Go to the **Media** page and under the *Collections* section on the left, click the collection from which you want to remove assets.
2. Select the assets you want to remove by hovering and clicking the icon on each of the thumbnails.
3. Click the icon in the top action bar to remove the assets from this collection.
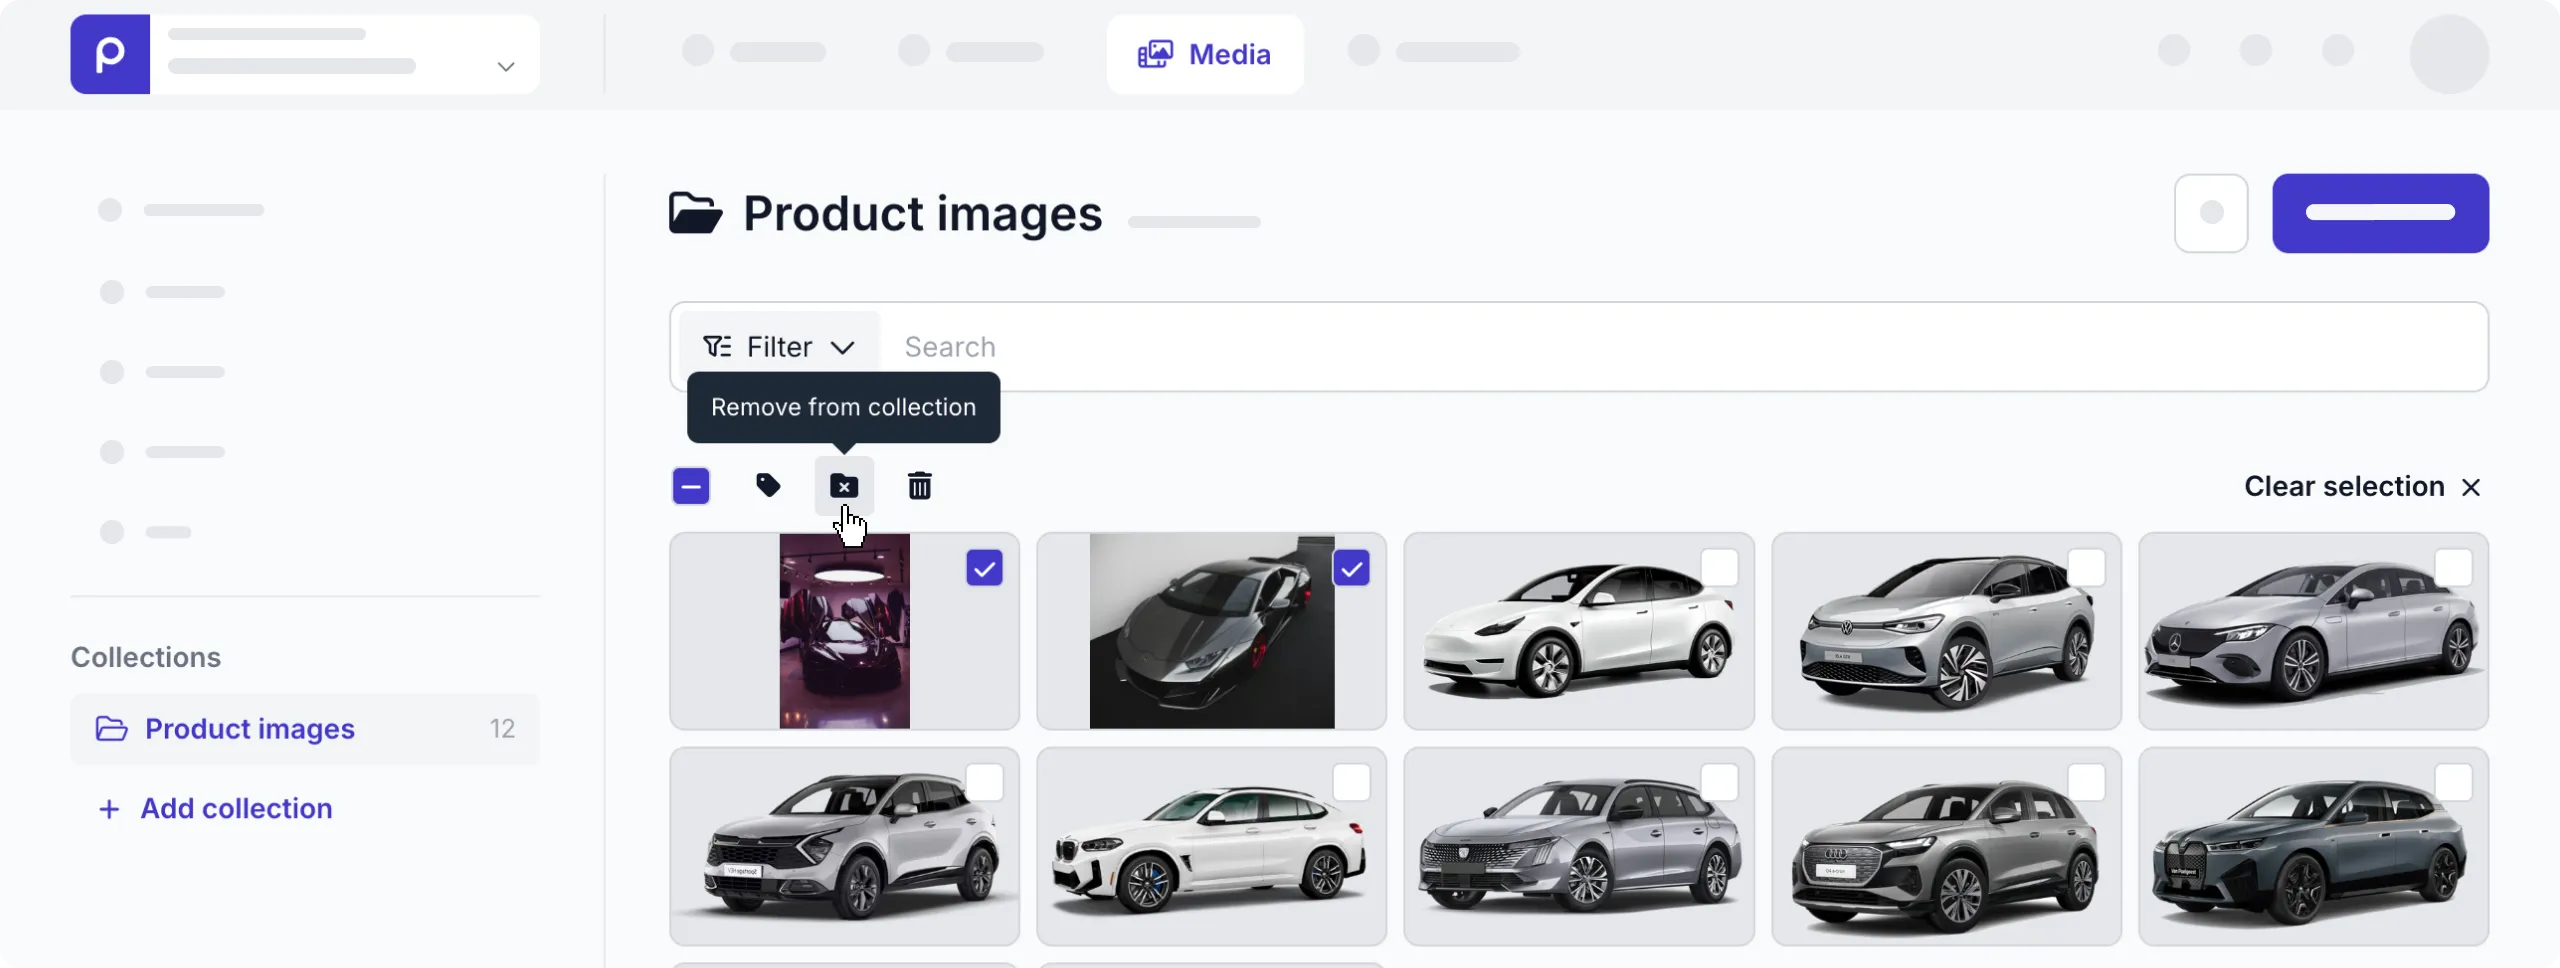
To remove a single asset from a collection, follow the steps below.
1. Go to the **Media** page and click the asset you want to modify.
2. On the *Asset* detail page, go to the **Collections** section and hover over the collection.
3. Click the icon to remove the asset from the collection.
4. On the right-hand sidebar, click **Save and close** to apply the changes.
#### Update the collection title
To update a collection title, under the *Collections* section on the left, hover over the collection you want to edit.
Then click the icon and choose the **Edit collection** option.
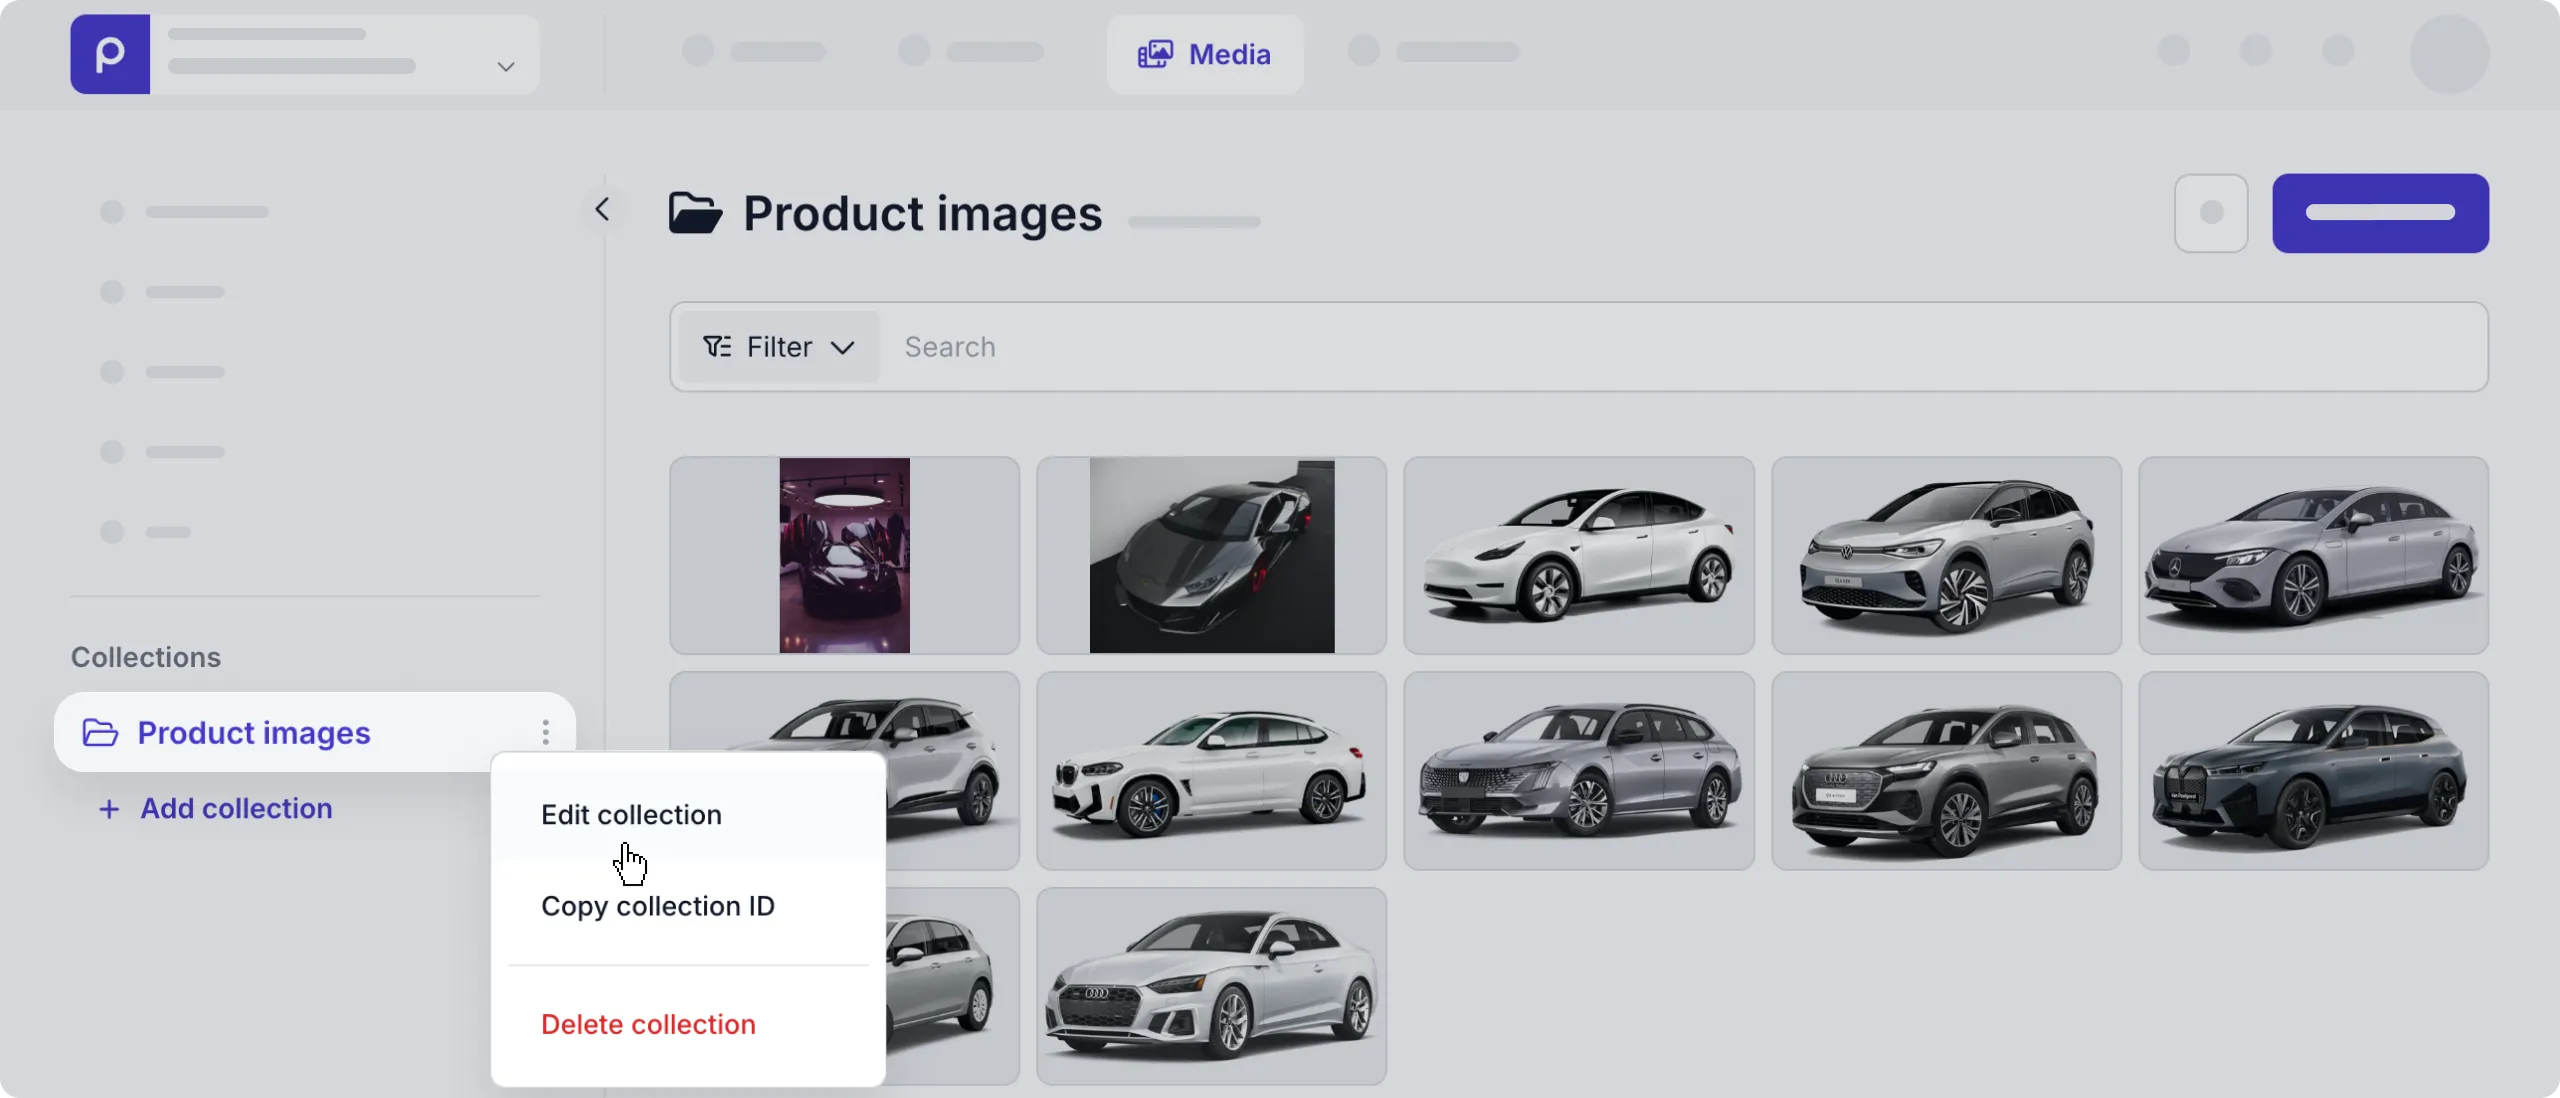
In the dialog window, enter a new title and click the **Save** button.
#### Delete a collection
To delete a collection title, under the *Collections* section on the left, hover over the collection you want to delete.
Then, click the icon and choose the **Delete collection** option. In the confirmation window, click the **Yes, delete** button.
### Tags
A *Tag* is a meaningful label you can assign to your assets to differentiate between them while filtering.
You can add tags to multiple assets or to a single asset in the *Asset* page.
To tag several assets at once, follow the steps below.
1. Go to the **Media** page and in the *All assets* view, select the assets you want to tag by hovering over each thumbnail and clicking the icon.
2. In the top action menu, click the icon.

3. Choose an existing tag or type a new one.
4. Click the **Add tags** button.
To tag a single asset, follow the steps below.
1. Go to the **Media** tab and click the asset to open it.
2. At the bottom of the **Asset** page, click the *Tag* field.
3. Choose an existing tag or type a new one.
4. On the right-hand sidebar, click the **Save and close** button to apply the changes.
That’s it. You have organized your assets in the Media Library. Now it's easier to find the right one. Let's see how to do this in the next paragraph.
## Finding assets
Prepr gives you multiple search and filter options to find the assets you need with ease:
- Search the assets by the asset title or keywords in the asset description.
- Filter the assets by *Asset type*, *Tags*, *Created on* date, or the *Unused* checkbox.
- You can also filter assets by [enumeration field values in the Asset model](/content-modeling/defining-the-asset-model#add-fields-to-the-asset-model), for example, to find a specific license holder.
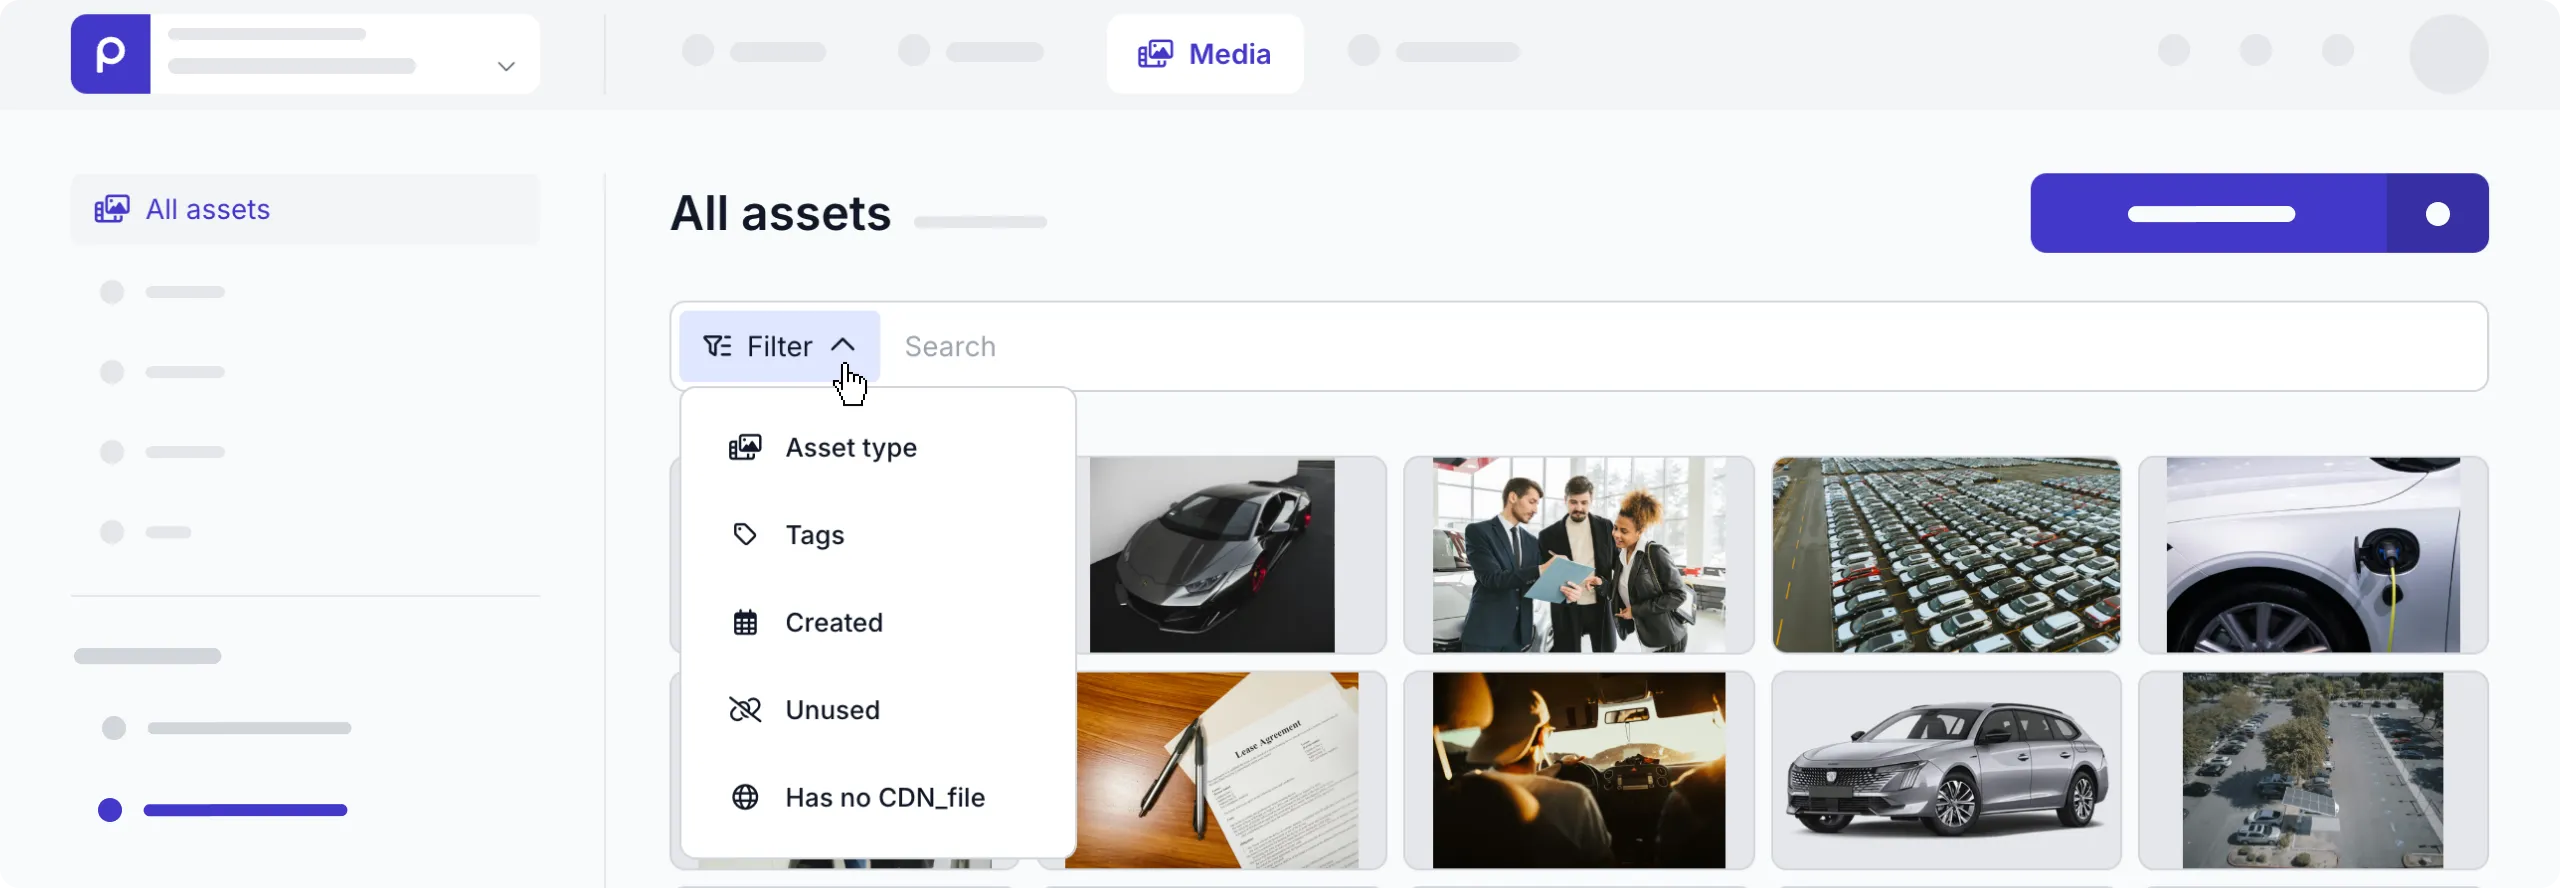
## Replacing video thumbnails
By default, a thumbnail image is taken from the middle of the video based on the Mux *Playback ID*. Still, you can set a custom video thumbnail in Prepr as follows:
1. Go to the ** Media** page and click the thumbnail of the video asset that you want to edit.
2. On the asset detail page, hover over the thumbnail and click the icon.
3. Choose the replacement image file to replace the thumbnail.
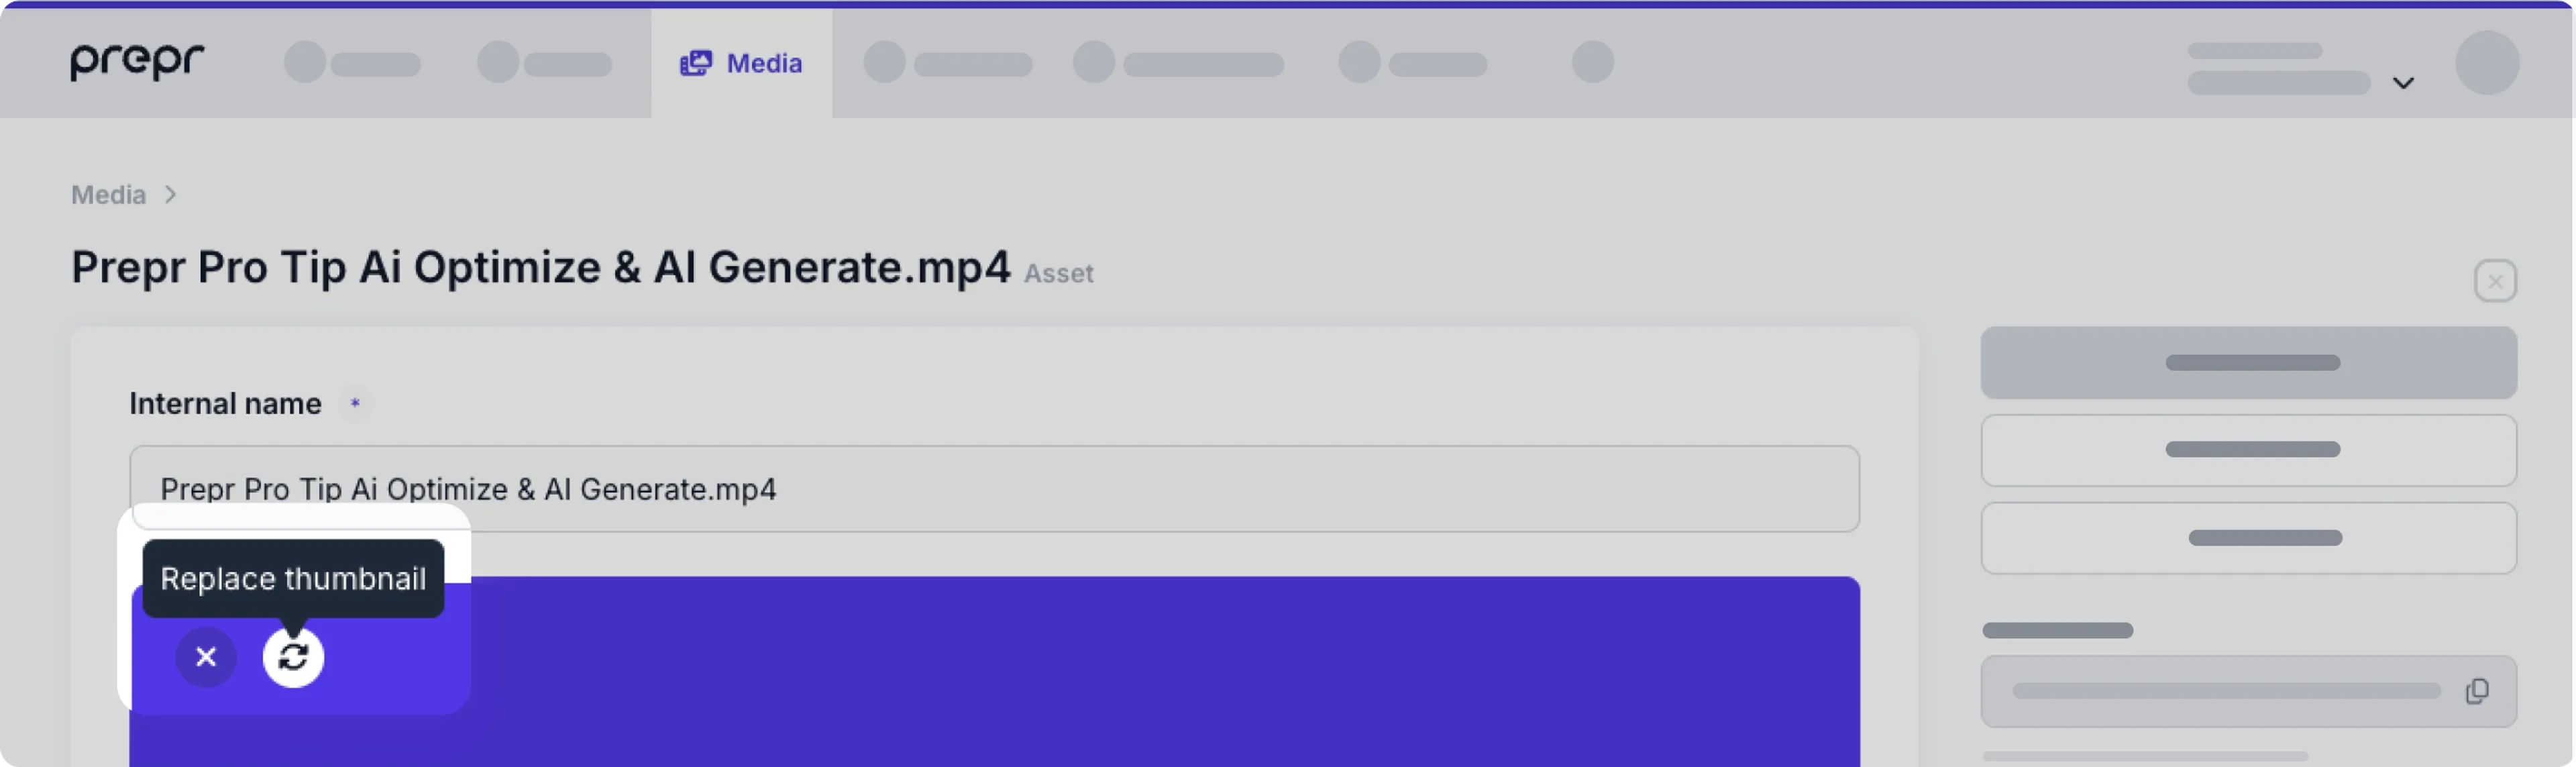
## Adding video subtitles
You can add subtitles to your Mux videos in Prepr to provide multilingual support to your web app visitors and extend the web app accessibility.
To add subtitles, follow the steps below.
1. Go to the ** Media** page and open the video file to which you want to add subtitles.
2. On the asset detail page, click the **+ Add Subtitle** link.
3. Choose a locale, and upload either an *SRT* or *WebVTT* file containing the subtitle information.
Prepr will automatically generate a subtitle URL and add it to the video in Mux.

There's no limit on the number of subtitle files you can include in your video asset. Each subtitle file will be stored as an individual file asset in Prepr.
[Learn more on how to add videos to your web app](/development/best-practices/assets/video-audio).
Source: https://docs.prepr.io/content-management/managing-assets/managing-assets
---
# Using assets in content items
*This guide describes the Prepr features you can use to edit and configure assets when adding them to your web application.*
## Introduction
Media files can enrich your website content only when they are qualitative and usable. For instance, images should be optimized for a device and presented at the highest resolution possible. Likewise, having a well-described video with the key cues in your audience’s native language increases the chances your visitors will watch the content. In other words, the way you configure your assets significantly affects your content usability.
The following options are available for you to edit and configure assets in your content item:
- Adding captions
- Setting alignment
- Setting an image focal point
- Cropping images
- Setting a download filename
Before configuring your assets though, let's first look at how to add assets to a content item.
## Adding assets to a content item
If [asset fields are defined in the model](/content-modeling/field-types#assets-field) of your content item, you'll see an asset block for each asset field.
Check out more details on [the supported assets in Prepr](/content-management/managing-assets/introduction-to-assets#assets-in-prepr).
To add assets to a content item, simply drag and drop the asset file from your local storage to this block, or click it to open the media window dialog to choose an existing file in Prepr.

From this window, you can also click the **Upload asset** button instead to choose the files you want to upload and add them to your content item.
Once done, click the **Add x assets** button to add these to the content item.
Now that you know how to add assets to a content item, let's dive into different display options for the images.
## Setting alignment
The *Alignment* feature lets you position a digital asset within the text elements on a web page. You can choose from the following options:
- **Left** – aligns the left edges of an asset and text element.
- **Center** – aligns the center points of an asset and text element.
- **Right** – aligns the right edges of an asset and text element.
To align an asset, a developer can [enable the *Allow alignment* toggle in the asset field settings](/content-modeling/field-types#assets-field-settings).
1. On the **Content item** page, hover over an image and click the icon in the top right corner.
2. Select the desired alignment option.
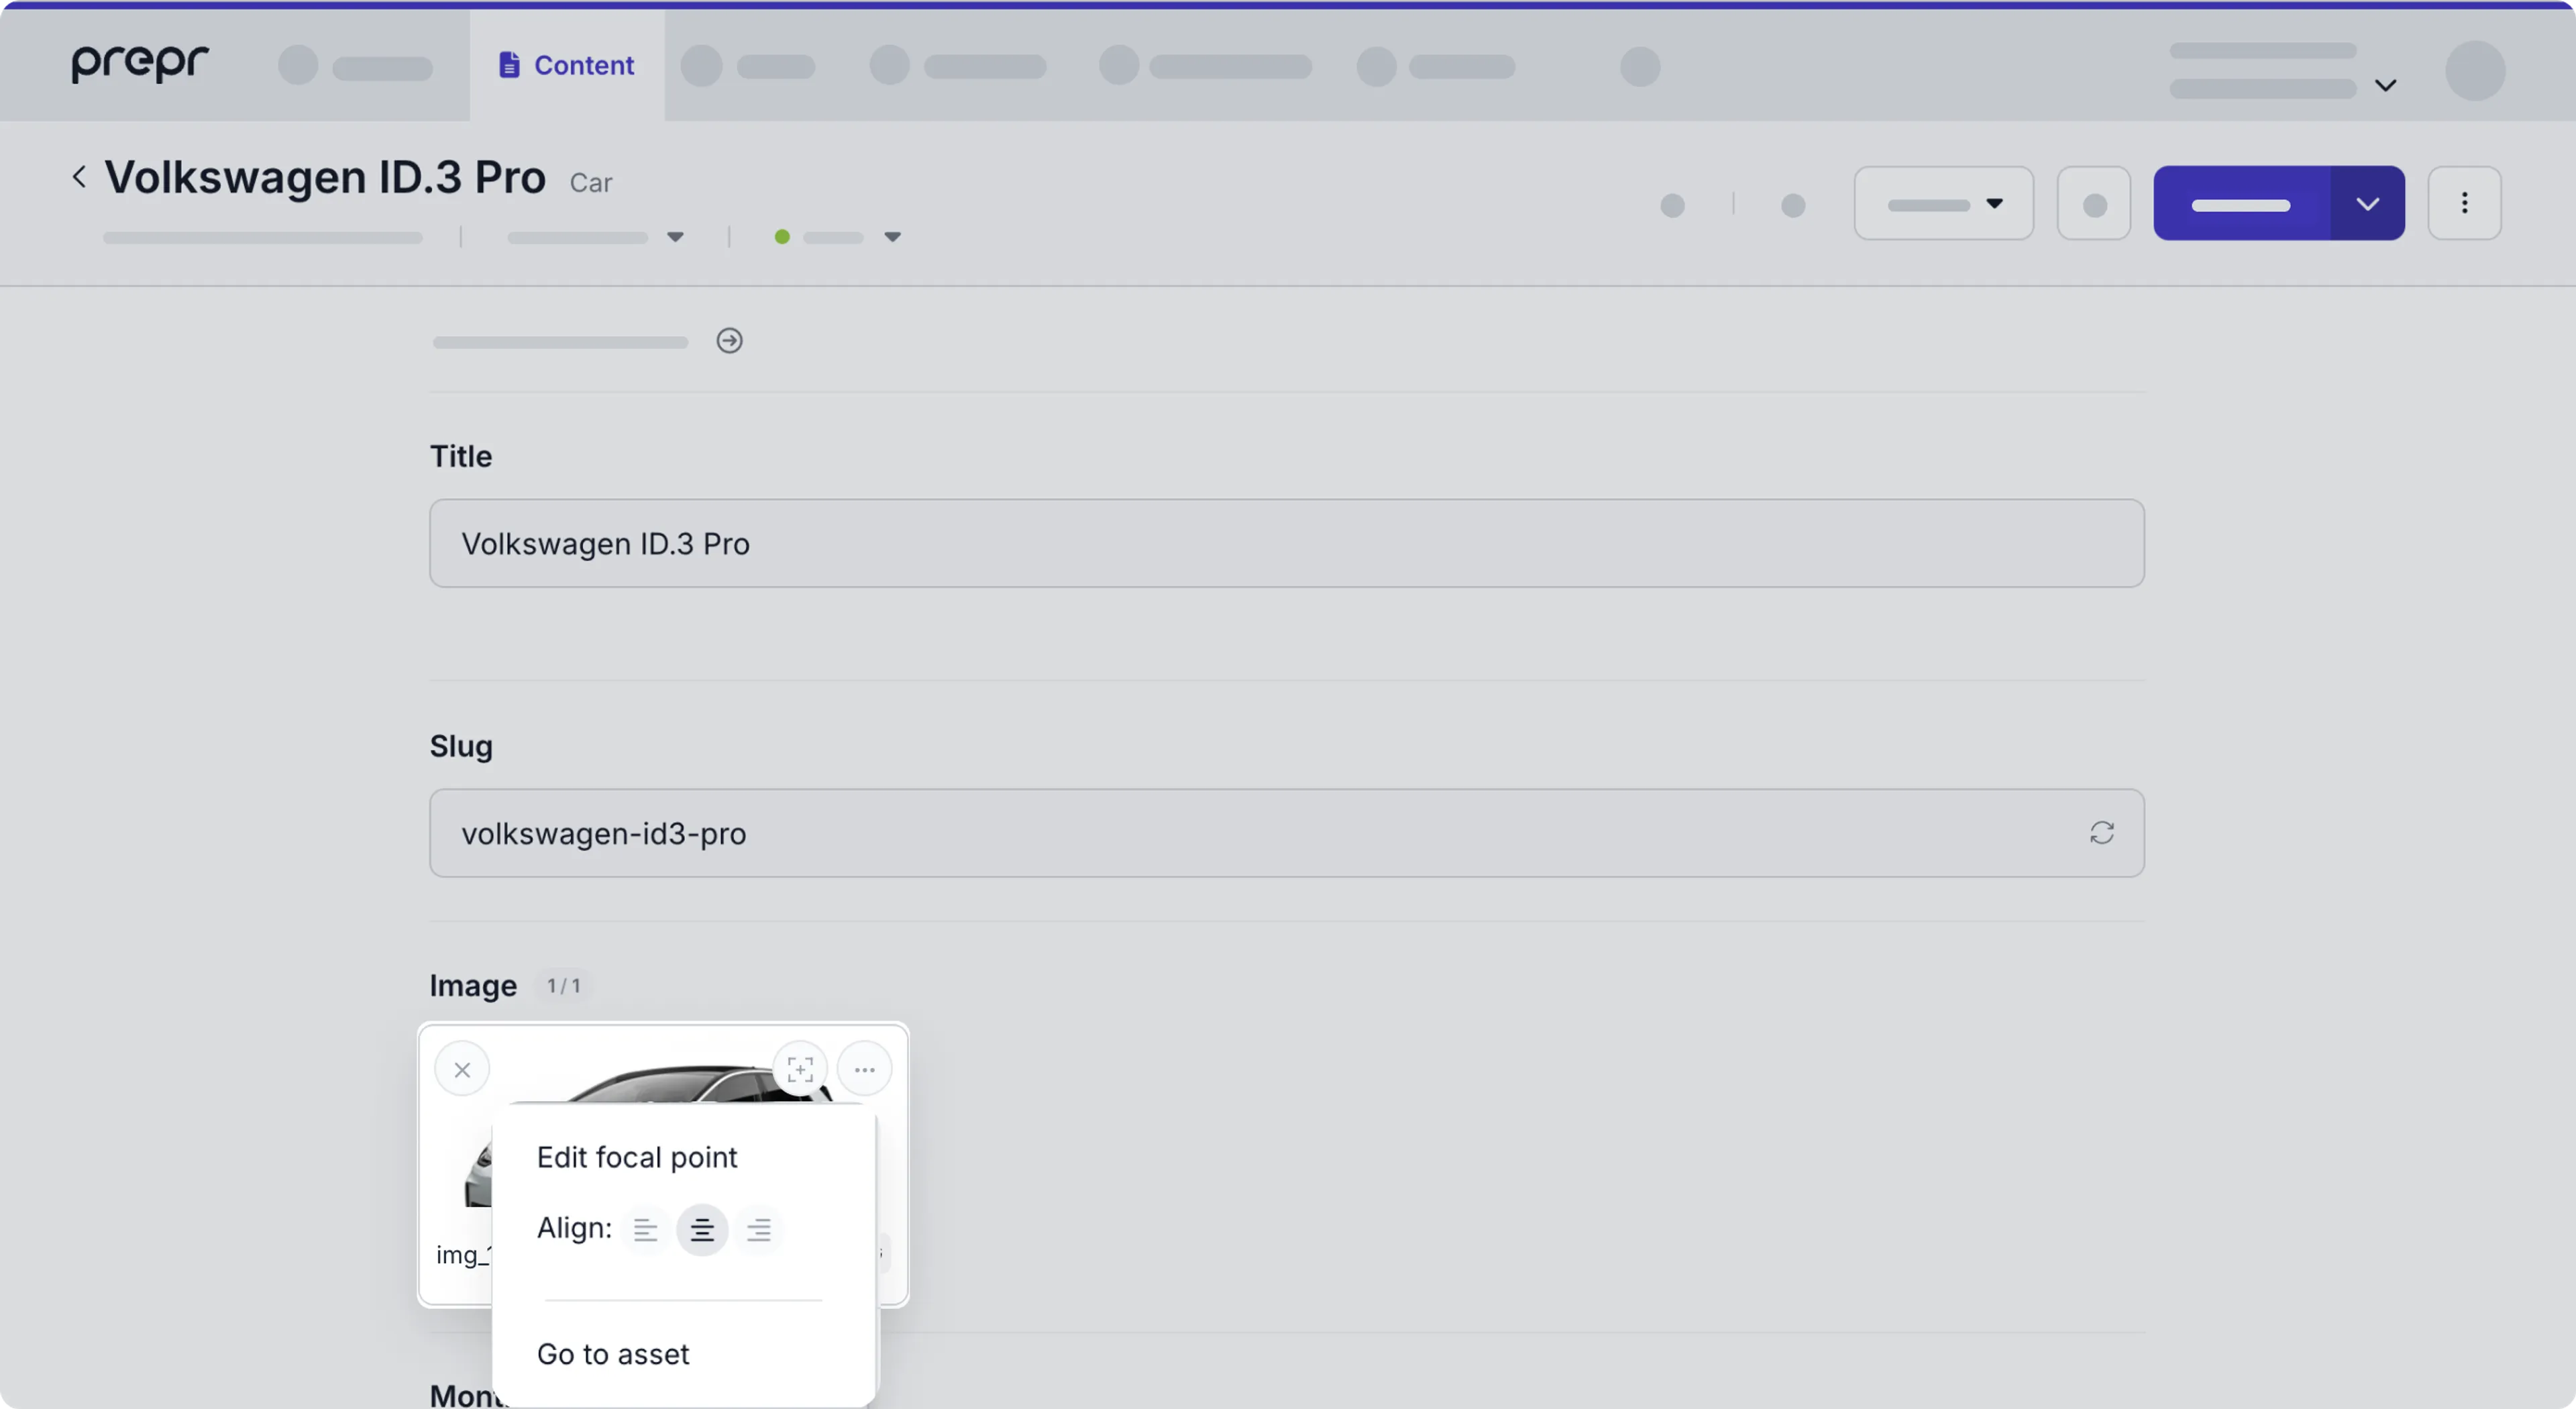
## Adding captions
The *Caption* feature lets you create multiple descriptions for a single asset every time you use this asset in a content item or a content item locale. While the [*Asset Description* field](/content-management/managing-assets/managing-assets#editing-assets) is recommended for internal use, captions are helpful in the following cases:
- When you need to describe a single asset across multiple content items.
- When you need to describe a single asset in a multi-language content item.
To create a caption for an asset, a developer can [enable the *Allow caption* toggle in the asset field settings](/content-modeling/field-types#assets-field-settings).
1. On the **Content item** page, hover over the image thumbnail and click the icon in the top right corner, then click **Edit caption**.
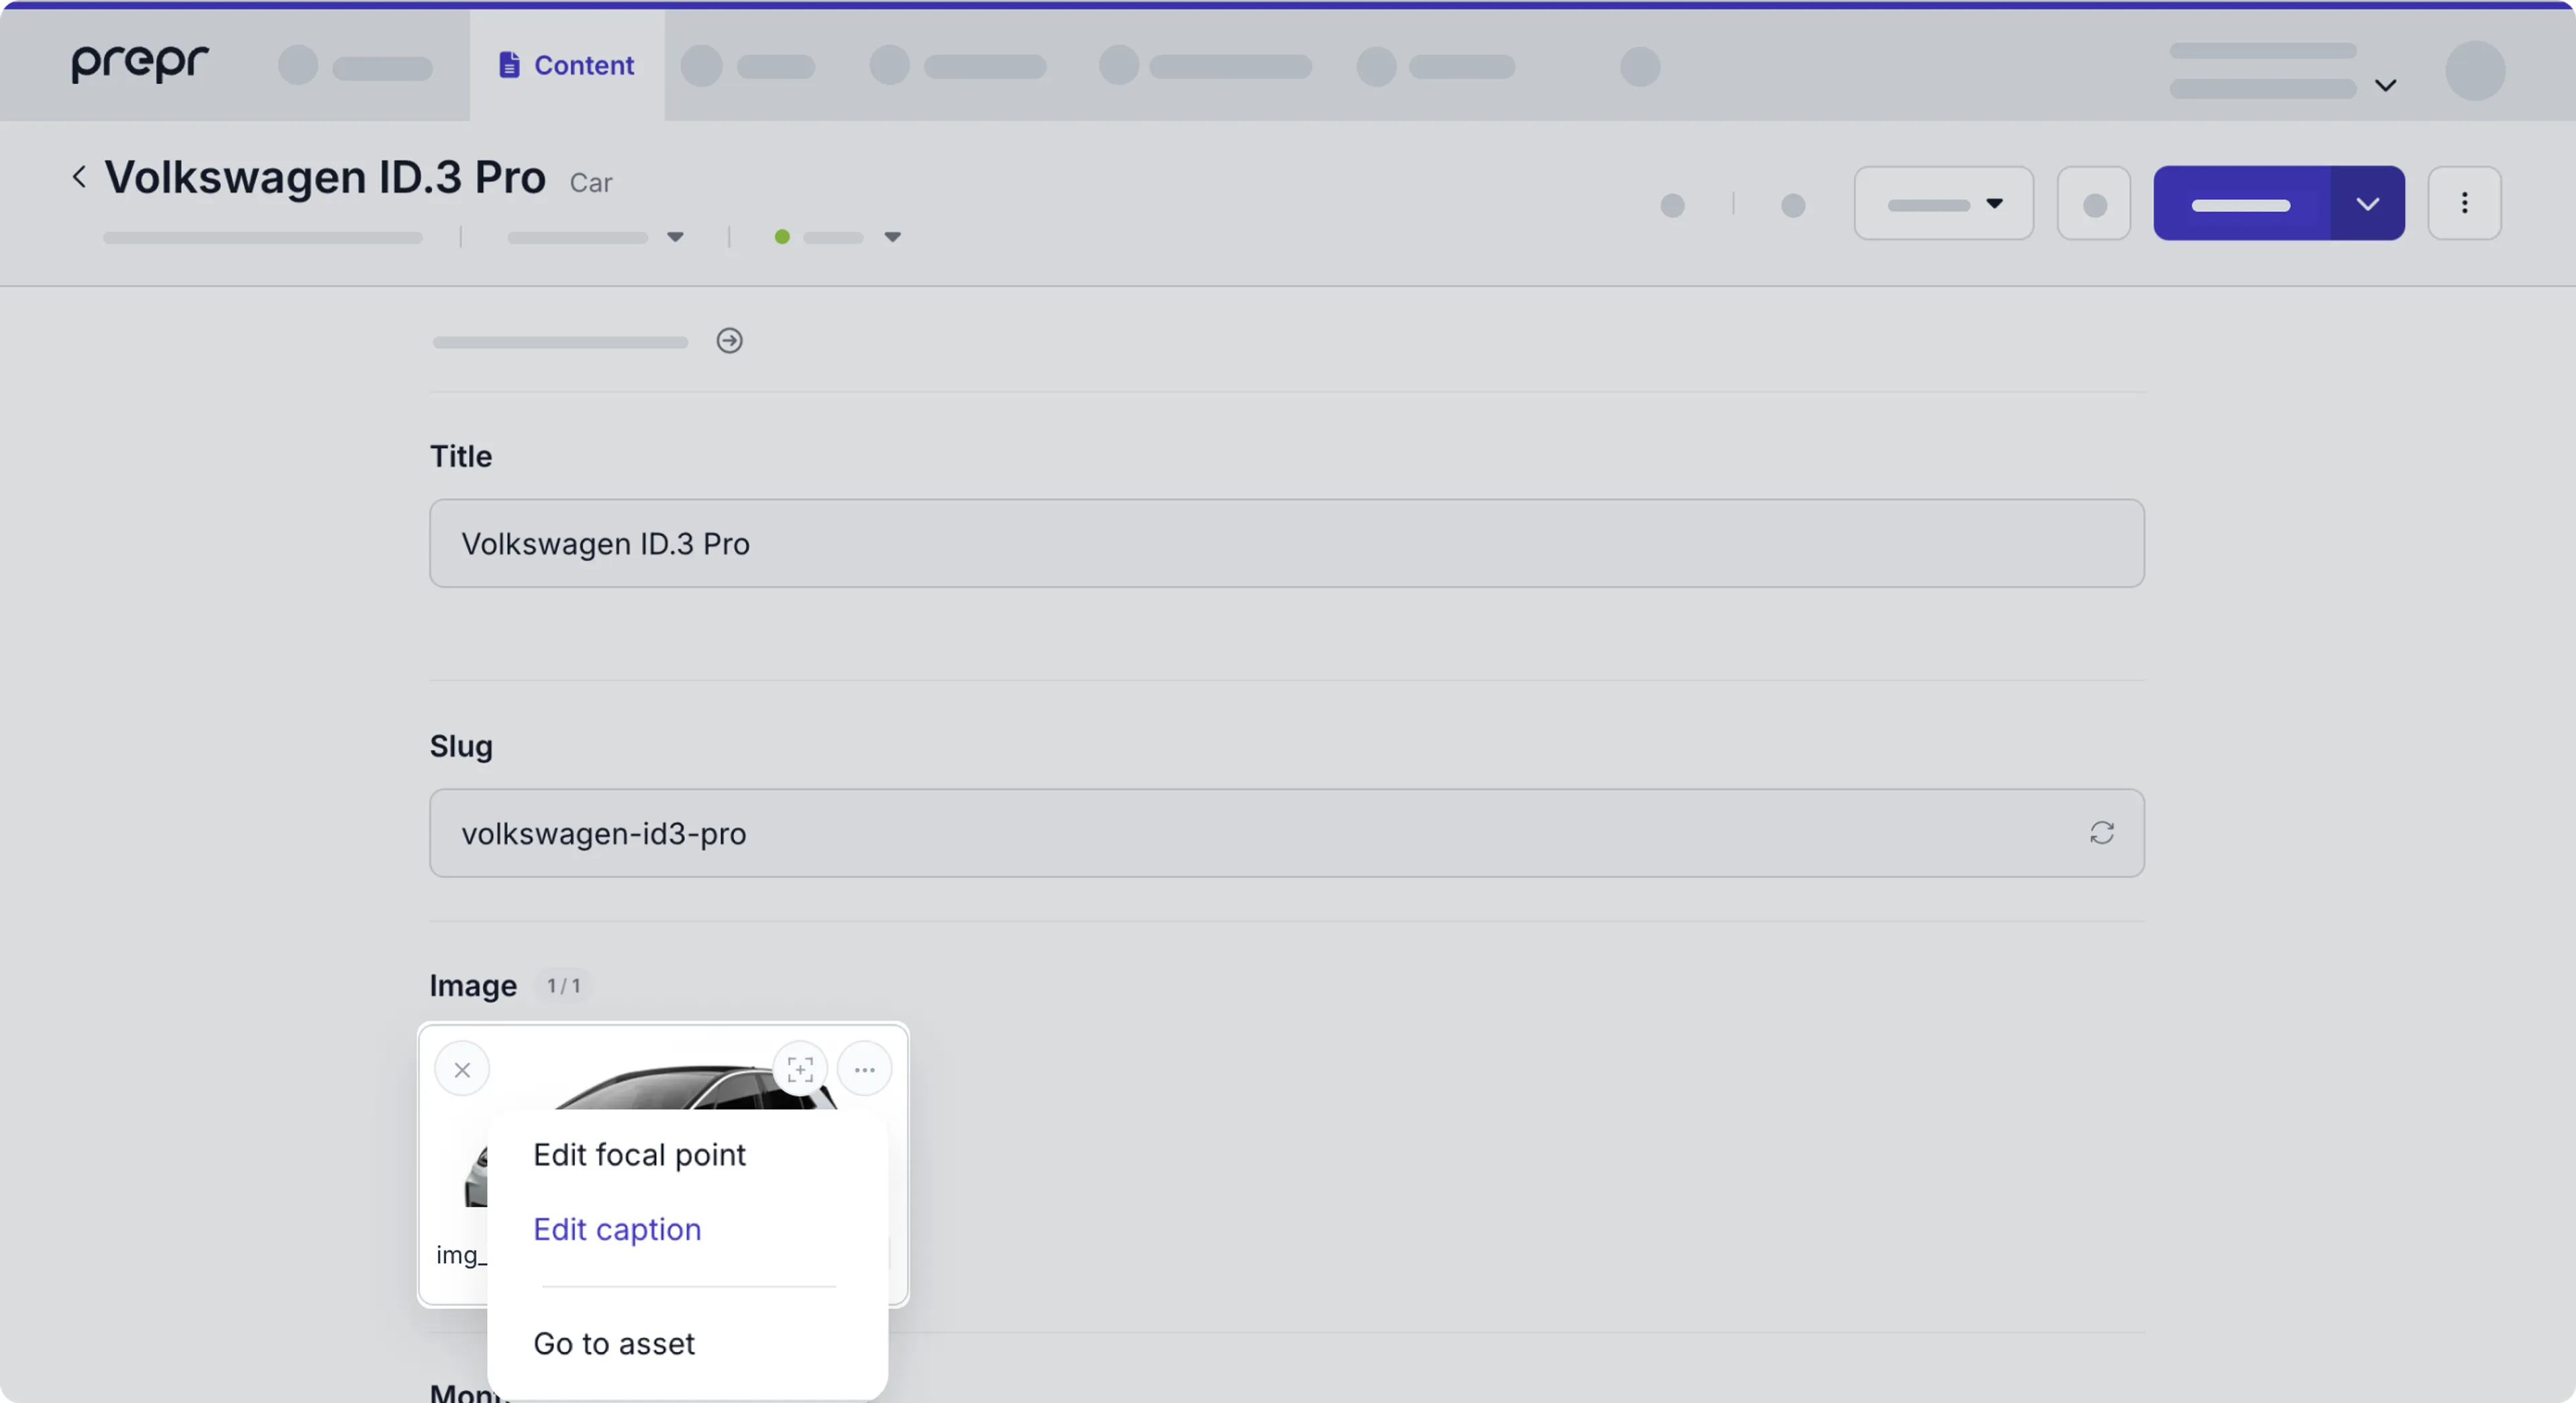
2. In the opened dialog window, type your text, then click **Save** to apply your caption.
## Setting an image focal point
An image focal point is the key area that you want to remain visible regardless of how the image is resized.
It ensures that important parts of the image (such as a person’s face or a product) stay in focus when displayed across different screen sizes or aspect ratios.
If the [set image focal point option is enabled](/content-modeling/field-types#assets-field-settings), you can choose the focal point for an image when adding or editing the image in a content item .
### Set focal point for new image
Follow the same process above to [add images to a content item](#adding-assets-to-a-content-item).
When adding an image to a content item and a focal point is required in the [asset field settings](/content-modeling/field-types#assets-field), you'll see the **Set focal point** button at the bottom of the *Media* dialog window.
1. Click the **Set focal point** button to open the *Set focal point* modal.
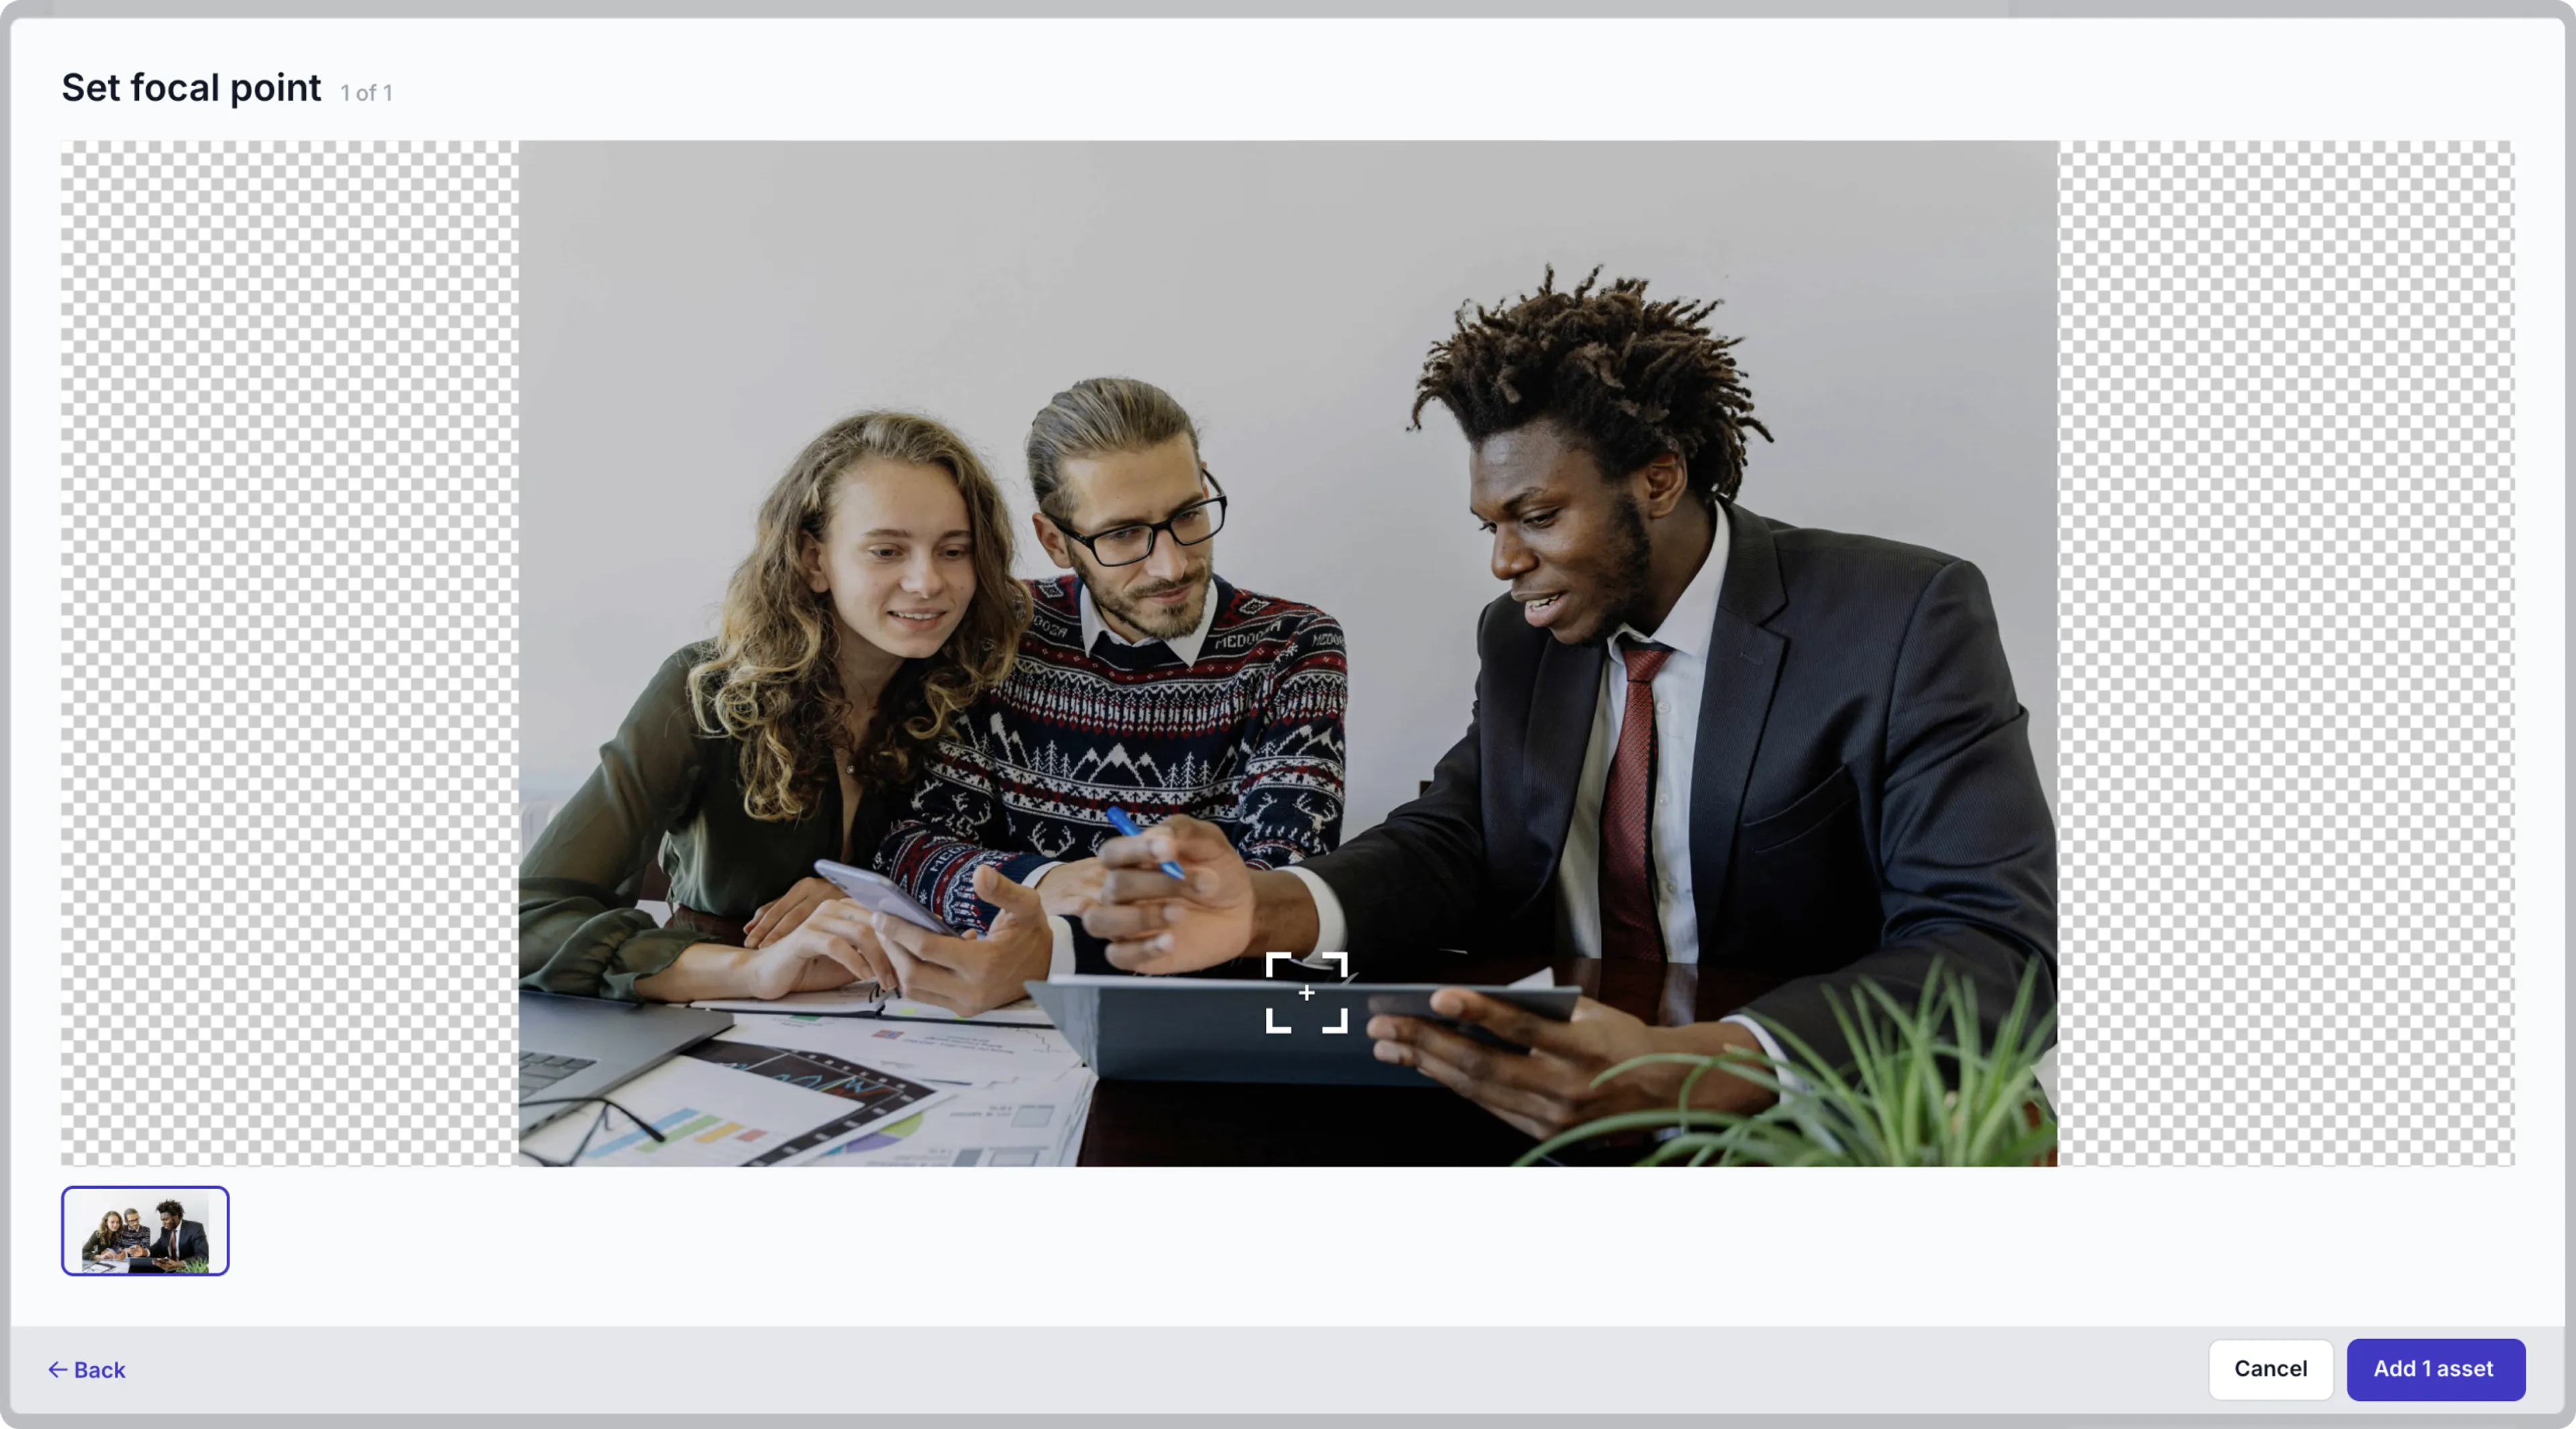
2. Move the focal point indicator to the part of the image you always want visible and click the **Add 1 asset** or the **Next asset** (in the case of multiple assets) button.
3. When you've set the focal image for multiple images, simply click the **Add x assets** button.
### Set focal point for existing image
1. On the **Content item** page, hover over the image and click the icon in the top right corner to open the *Set focal point* modal.
2. Choose the focal point for the selected image and click the **Save** button.

## Cropping images
*Cropping* an image is important when adding it to your content.
You crop images to look great on all devices, such as mobile, desktops, and tablets.\
With Prepr, you can crop image files easily, without altering the original stored files.
To enable cropping on images, developers can define the image presets. Check out the [*Assets* field settings](/content-modeling/field-types#assets-field) for more details.
When you add images to content items and crop them according to the presets, a developer can retrieve the chosen presets using the GraphQL API to render them accordingly in the web app.
For that, they need to specify a preset name in the API request. For more details, see the sample query for retrieving *Presets* in the [GraphQL API reference](/graphql-api/schema-field-types#images).
Alternatively, a developer can transform images themselves using the API. For more information, check out the [REST API](/mutation-api/assets-resizing) or the [GraphQL API](/graphql-api/schema-field-types#images).
### Crop new images
Follow the same process above to add images to a content item.
When adding an image to a content item and cropping is required in the [asset field settings](/content-modeling/field-types#assets-field), you'll see the **Crop x assets** button at the bottom of the *Media* dialog window.
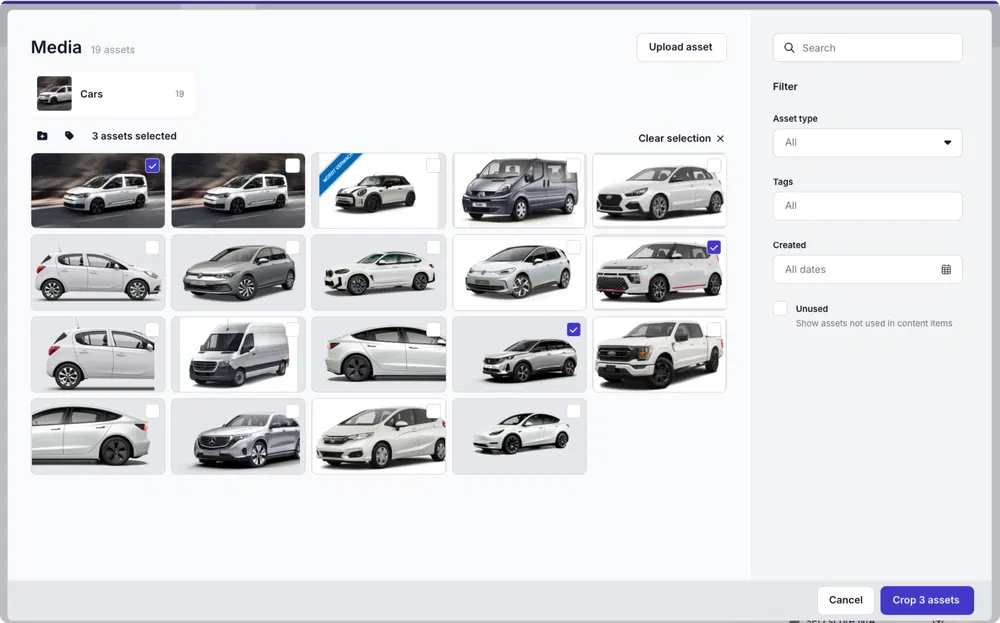
1. Click the **Crop x assets** button to open the crop images window.
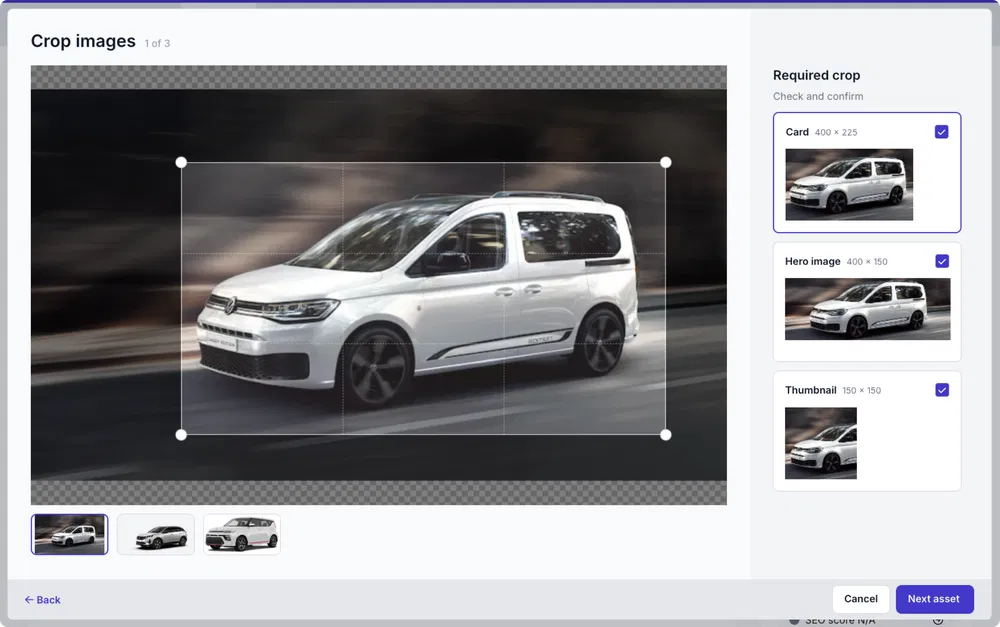
2. Simply choose the preset and move the crop area over the part of the image that you want cropped.
3) If there are multiple presets, simply click the thumbnail of the next preset to add its crop.
4) When cropping multiple files, click the next image thumbnail in the bottom left corner to crop another image or click the **Next asset** button.
5) Once done, click the **Add x assets** button to add the cropped images to the content item.
### Crop existing images
When cropping is not set to required, you can add a crop after the image has already been added to a content item.
To crop an existing image in a content item, complete the following steps for each image:
1. On the **Content item** page, hover over the image and click the icon in the top right corner, then click **Crop image**. Or click the icon on the image thumbnail to open the crop editor quickly.

2. In the crop editor window, select a preset and an area in your crop by dragging the points or moving the entire crop area.
3. Click **Save** to apply the updated cropped image.
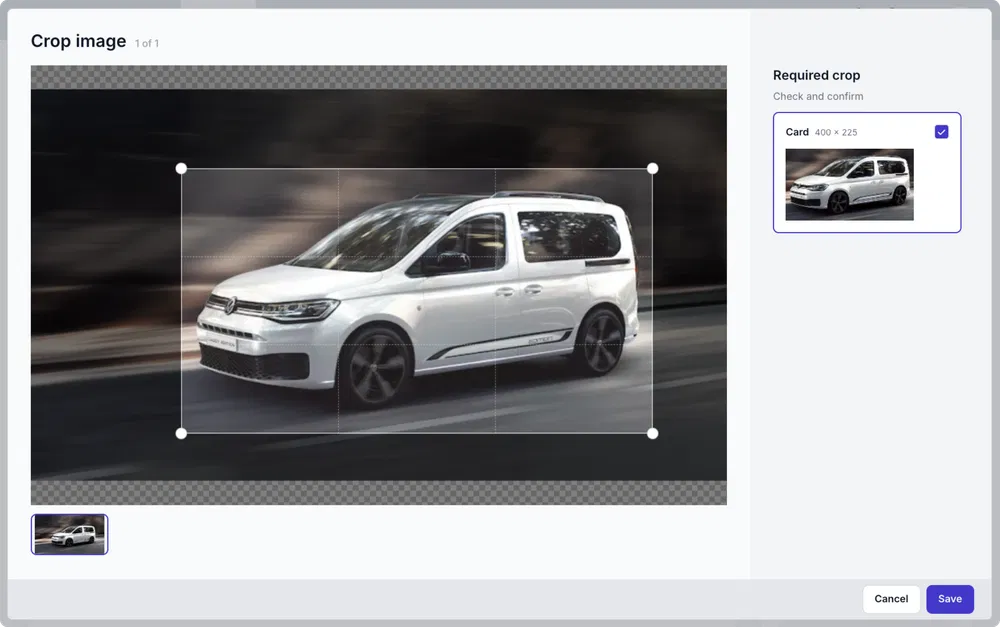
### Edit image crop
If you want to change the current crop, complete the following steps for each image:
1. On the **Content item** page, hover over the image and click the icon in the top right corner, then click **Edit crop**. Or simply click the icon to open the crop editor window and follow the same steps as above.
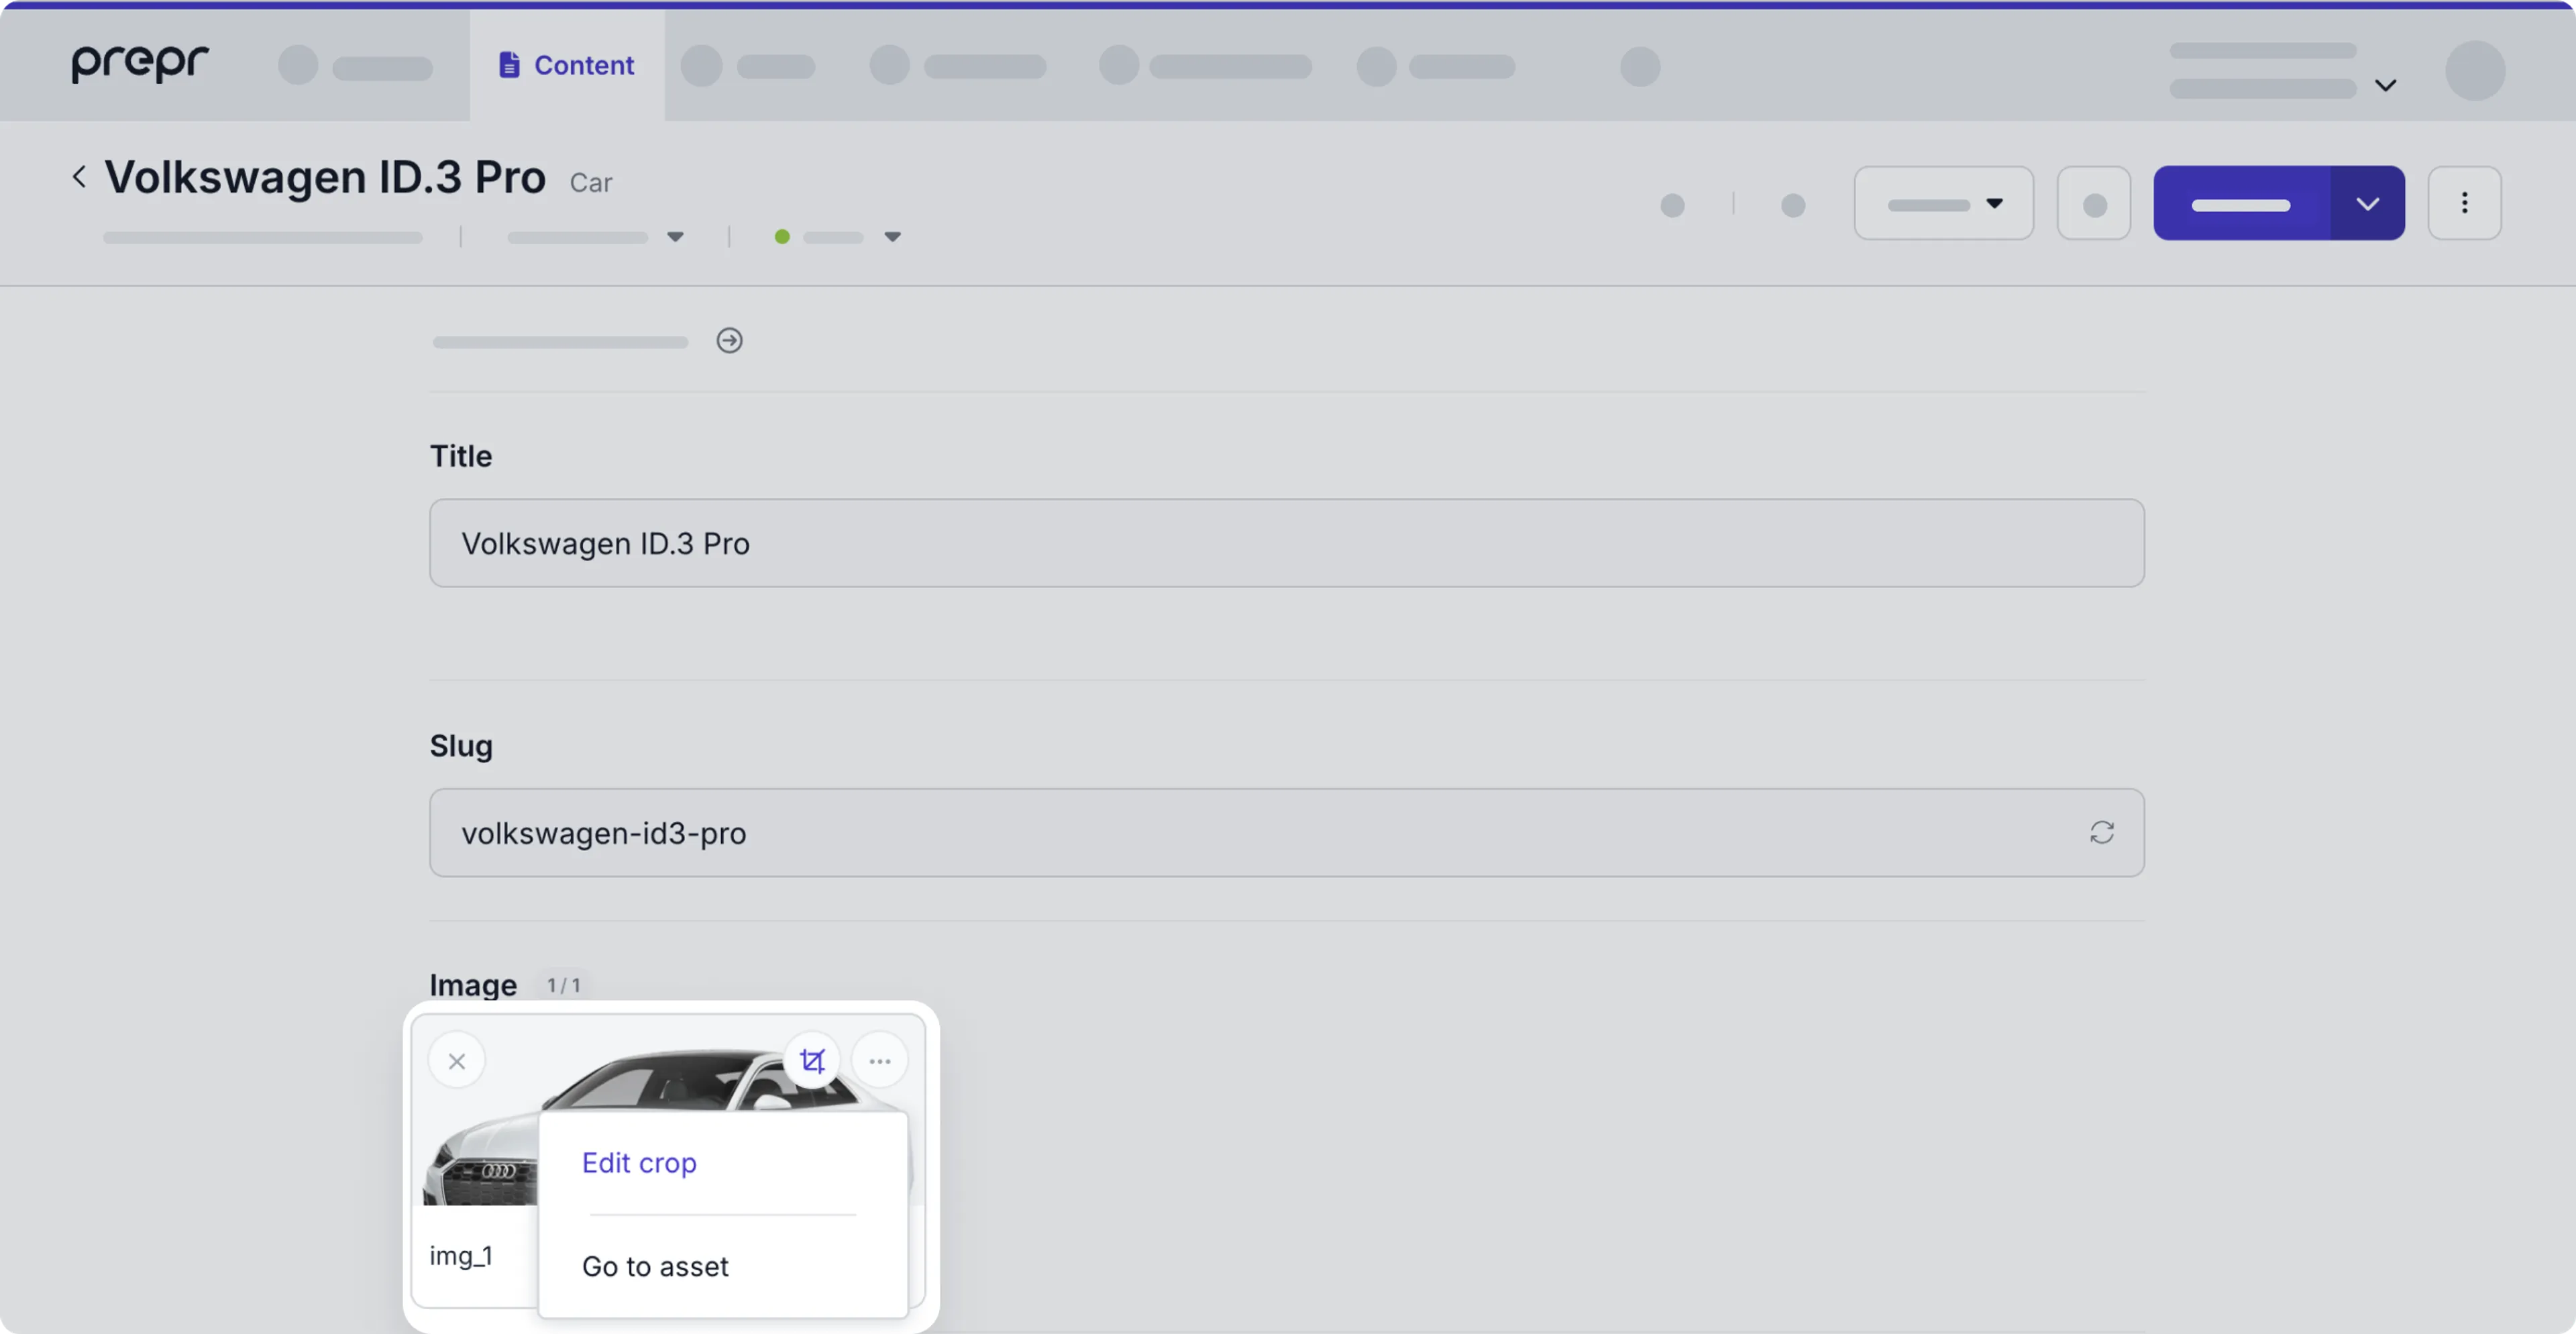
### Delete image crop
To delete a crop, hover over the image thumbnail in the *Content item* and click the icon in the top right corner.
Then, choose the **Delete crop** option.
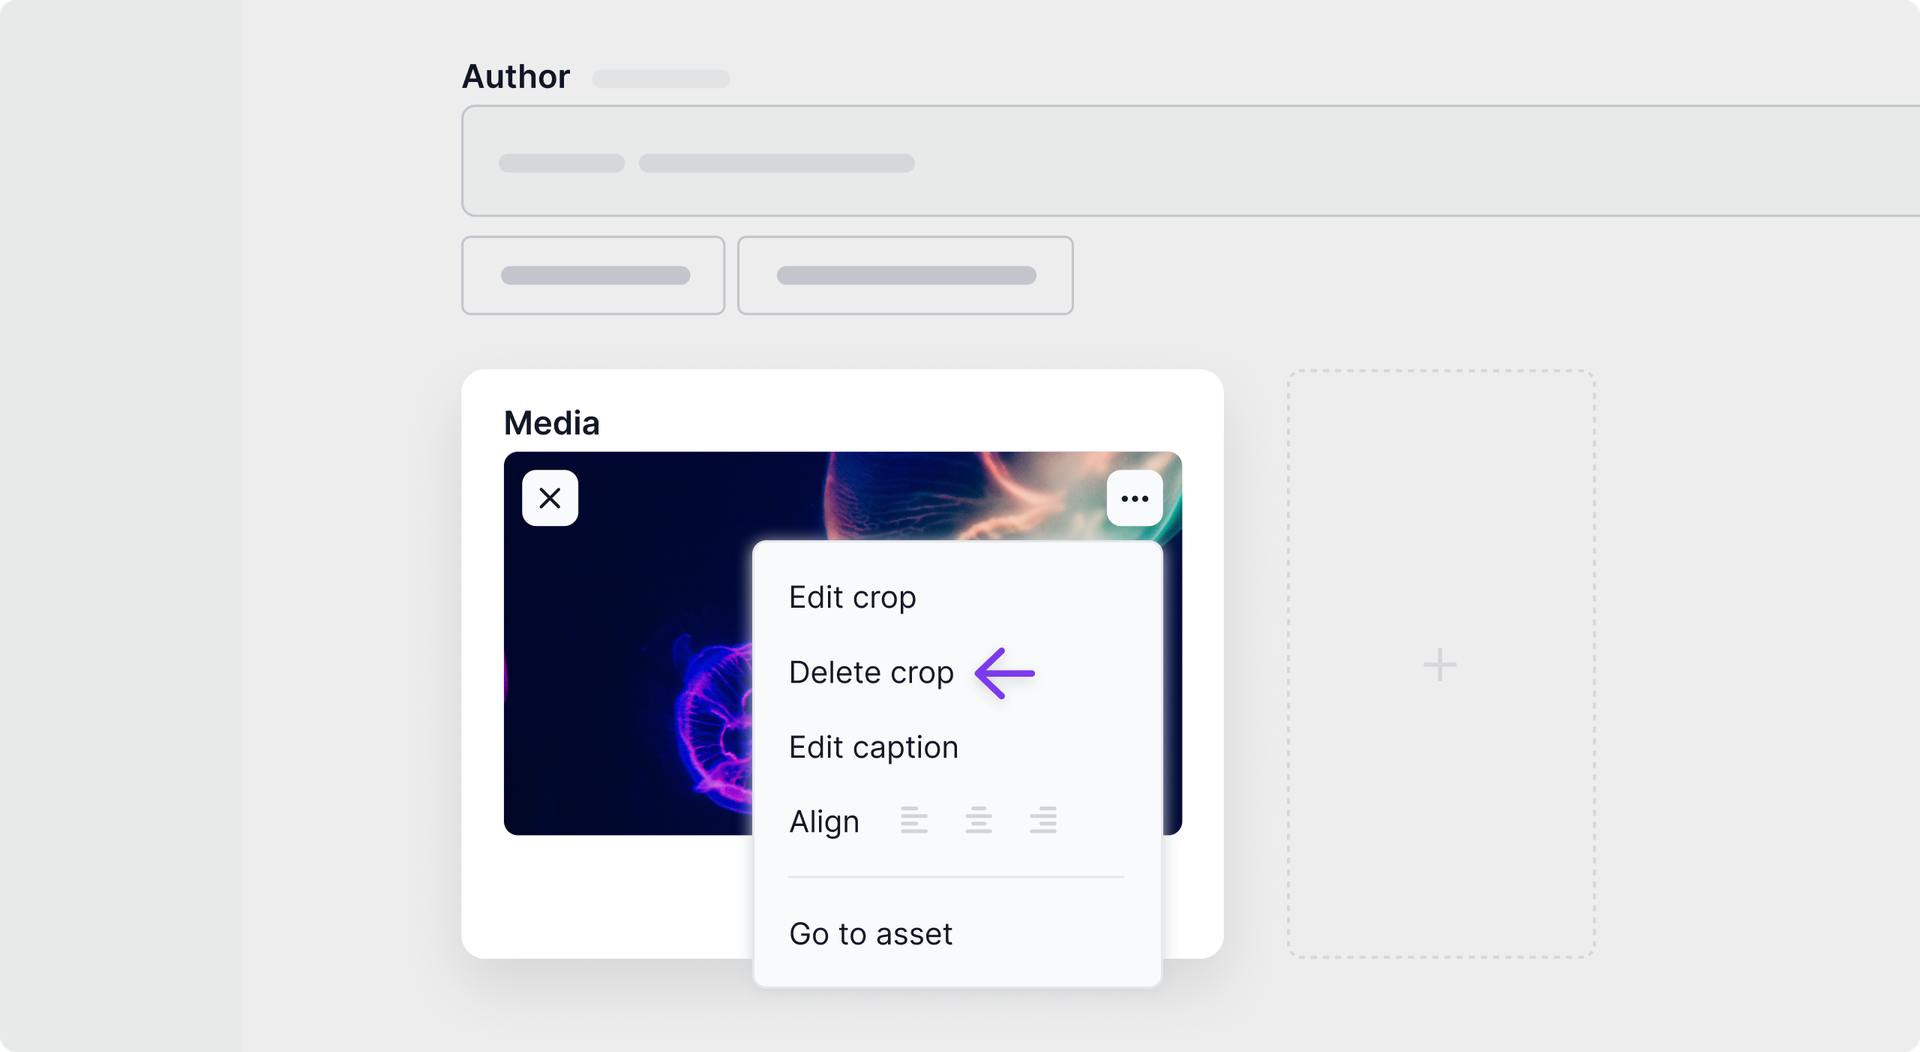
## Setting a download filename
When you need to provide a download URL link in your content item to make a file available to web app visitors for download,
you can set a parameter in the URL to define the filename.
For example: `https://acme-company.files.prepr.io/24eovl6bs4q-guide.pdf?filename=the-best-guide-ever.pdf`
If you don't set this filename parameter, the filename in the URL is used as is. In the example above, this would be `24eovl6bs4q-guide.pdf`.
Source: https://docs.prepr.io/content-management/managing-assets/editing-and-configuring-assets
---
# Managing assets
*Learn how to upload, manage and store your assets centrally in Prepr CMS to create photo galleries, video blogs, or even start a live-streaming event in your web application.*
Source: https://docs.prepr.io/content-management/managing-assets
---
# Add Exif data to images automatically
*This integration allows you to add Exif data to your images automatically.*
## Introduction
Exif (Exchangeable image file format) is a standard that specifies formats for media files. When you activate the *Prepr image processing* integration, you can choose which Exif data to add to your image assets.
## Activate Exif
Simply activate the Exif integration with the following steps:
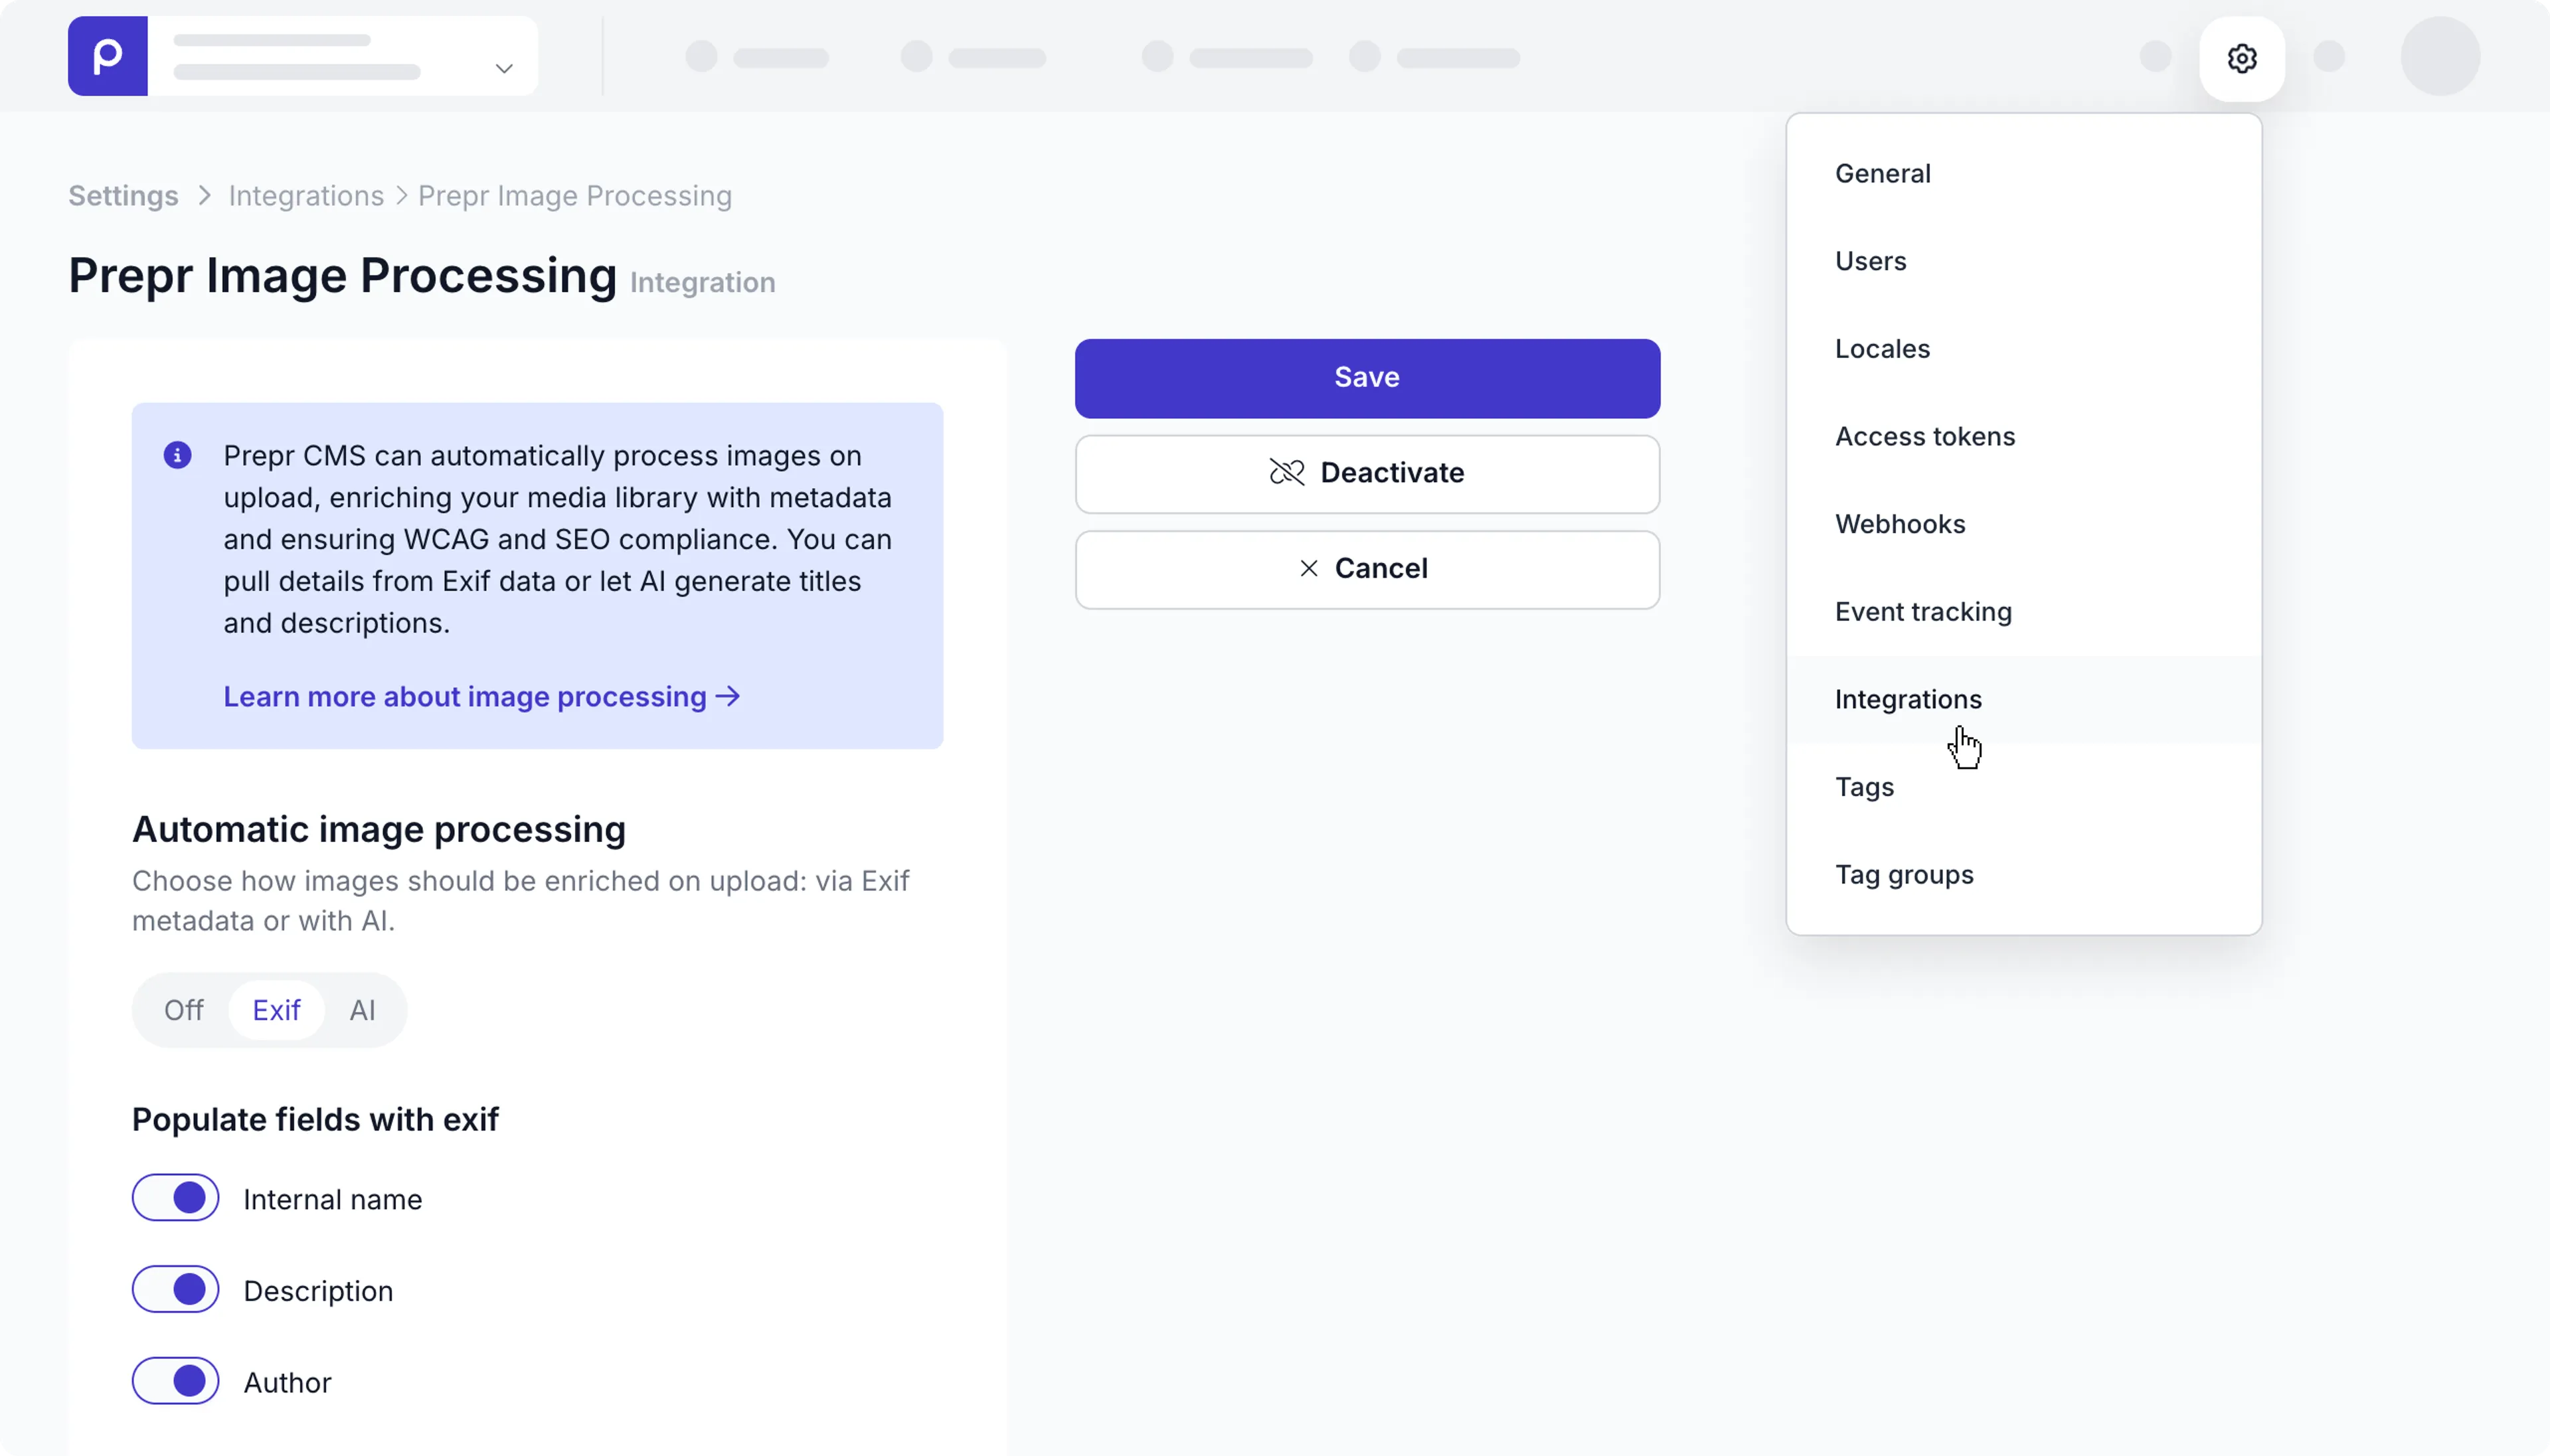
1. Click the icon and choose the **Integrations** option to view all integrations.
Go to the **Prepr image processing** card and click the **Activate** button.
2. Choose the **Exif** option.
3. Select one or more of the fields you want to extract:
- **Internal name**
- **Description**
- **Author**
4. Click the **Save** button.
5. To make any changes to the selected fields, go back to the **Prepr image processing** card and click the **Manage** button to make your changes.
Now that the integration with Exif is activated, your chosen fields will be filled automatically whenever new images are uploaded.
If you have any questions, please [contact our Support team](https://prepr.io/support).
Source: https://docs.prepr.io/integrations/image-processing/exif
---
# AI-generate text for images
*The AI integration automatically generates text values, such as alt text, when uploading new images.*
## Introduction
When you activate the *Prepr image processing* integration, you can choose to integrate to AI to process images.
When a user uploads an image, Prepr CMS prompts AI to scan the image and the image file name to detect information and generate selected text values, such as alt text.
## Activate AI generation for image text fields
Simply activate the AI integration with the following steps:
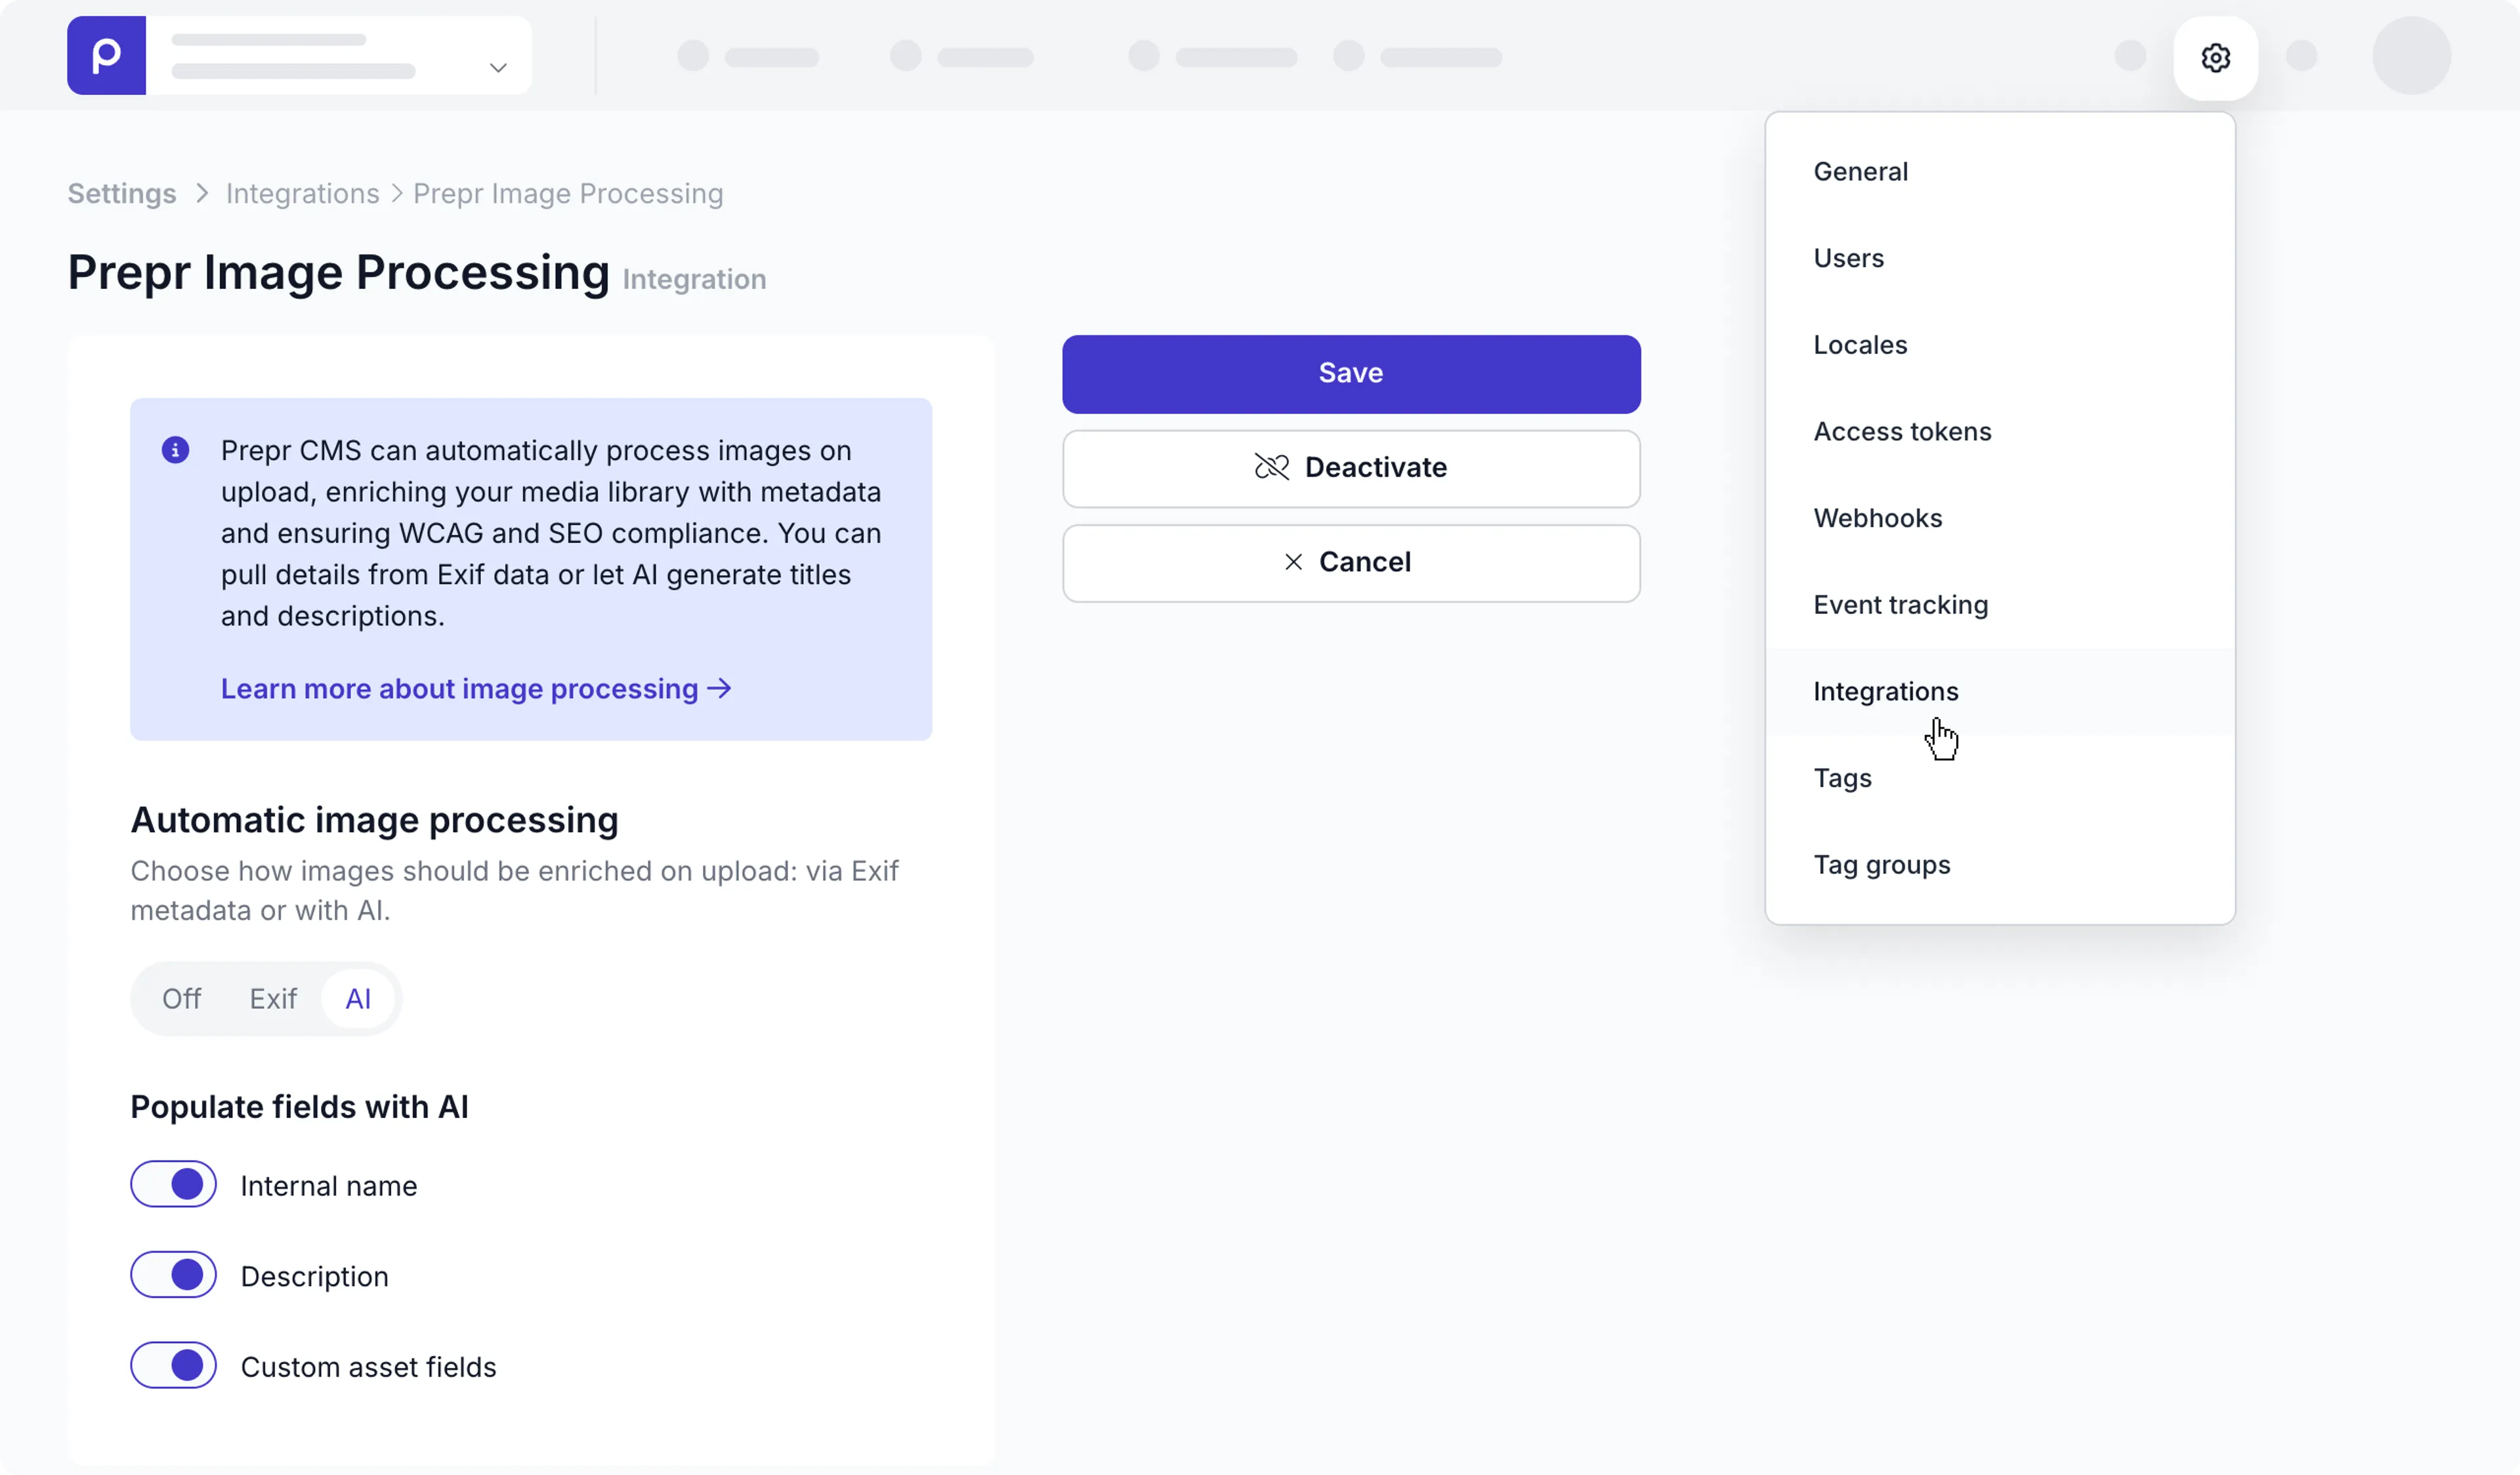
1. Click the icon and choose the **Integrations** option to view all integrations.
Go to the **Prepr image processing** card and click the **Activate** button.
2. Enable the **AI** toggle and choose one or more of the fields listed.
- **Internal name**
- **Description**
- **Custom asset fields** - These include any custom text fields you added to the [*Asset* model](/content-modeling/defining-the-asset-model#add-fields-to-the-asset-model), like an *Alt text* field.
To make changes to the options, go back to the **Prepr image processing** card and click the **Manage** button to make your changes.
3. If you have any custom asset fields in the *Asset* model, set a prompt for each text field you want AI-generated, as follows:
- Go to the **Schema** page and click to open the **Asset** model.
- Click the text field you want AI-generated and in the dialog, click the *AI* tab.
- Then enable the toggle to **Allow AI text generation**
- Choose one of the *Suggested prompts* and edit it, if needed, or create your own and click the **Save** button.
Once the AI integration is activated and all prompts are set, editors will get generated text for any new images they upload.

If you have any questions, please [contact our Support team](https://prepr.io/support).
Source: https://docs.prepr.io/integrations/image-processing/ai
---
# Prepr image processing
Prepr CMS can automatically process images on upload, enriching chosen text values in your image assets to help boost SEO.
You can activate this integration to either pull details from Exif data or to let AI generate alt text or other text values for images.
Source: https://docs.prepr.io/integrations/image-processing
---
# Connect Claude Desktop to the Prepr MCP server
*Add Prepr as a custom connector in Claude Desktop, authorize access to your environment, and test the connection.*
## What’s next?
Explore [typical use cases](/prepr-mcp-server/use-cases) or review the [available tools and actions](/prepr-mcp-server/available-tools-and-actions).
Source: https://docs.prepr.io/prepr-mcp-server/getting-started/claude-desktop
---
# Connect Claude Code to the Prepr MCP server
*Add Prepr as a remote HTTP MCP server in Claude Code, authorize access, and test the connection from your project.*
## What’s next?
Explore [typical use cases](/prepr-mcp-server/use-cases) or review the [available tools and actions](/prepr-mcp-server/available-tools-and-actions).
Source: https://docs.prepr.io/prepr-mcp-server/getting-started/claude-code
---
# Connect ChatGPT to the Prepr MCP server
*Add Prepr as a custom MCP app in ChatGPT, authorize access to your environment, and test the connection.*
## What’s next?
Explore [typical use cases](/prepr-mcp-server/use-cases) or review the [available tools and actions](/prepr-mcp-server/available-tools-and-actions).
Source: https://docs.prepr.io/prepr-mcp-server/getting-started/chatgpt
---
# Connect Codex to the Prepr MCP server
*Add Prepr as a streamable HTTP MCP server in Codex, authorize access to your environment, and test the connection.*
## What’s next?
Explore [typical use cases](/prepr-mcp-server/use-cases) or review the [available tools and actions](/prepr-mcp-server/available-tools-and-actions).
Source: https://docs.prepr.io/prepr-mcp-server/getting-started/codex
---
# Connect Cursor to the Prepr MCP server
*Add Prepr to Cursor's MCP configuration, authorize access to your environment, and test the connection.*
## What’s next?
Explore [typical use cases](/prepr-mcp-server/use-cases) or review the [available tools and actions](/prepr-mcp-server/available-tools-and-actions).
Source: https://docs.prepr.io/prepr-mcp-server/getting-started/cursor
---
# Connect GitHub Copilot CLI to the Prepr MCP server
*Add Prepr to GitHub Copilot CLI's MCP configuration, configure authentication, and test the connection.*
## What’s next?
Explore [typical use cases](/prepr-mcp-server/use-cases) or review the [available tools and actions](/prepr-mcp-server/available-tools-and-actions).
Source: https://docs.prepr.io/prepr-mcp-server/getting-started/github-copilot
---
# Connect a Notion custom agent to the Prepr MCP server
*Add Prepr as an MCP connection for a Notion custom agent, authorize access, and test the connection.*
## What’s next?
Explore [typical use cases](/prepr-mcp-server/use-cases) or review the [available tools and actions](/prepr-mcp-server/available-tools-and-actions).
Source: https://docs.prepr.io/prepr-mcp-server/getting-started/notion-custom-agent
---
# Connect OpenCode to the Prepr MCP server
*Add Prepr to OpenCode's MCP configuration, configure authentication, and test the connection.*
## What’s next?
Explore [typical use cases](/prepr-mcp-server/use-cases) or review the [available tools and actions](/prepr-mcp-server/available-tools-and-actions).
Source: https://docs.prepr.io/prepr-mcp-server/getting-started/opencode
---
# Get started with the Prepr MCP server
*Connect your preferred AI client to the Prepr MCP server, then test the connection with your Prepr content.*
## Before you start
All clients connect to the same remote MCP server:
- *Server URL:* `https://mcp.prepr.io`
- **Authentication:** OAuth, when supported by the client
## Choose your AI client
Review the [available tools and actions](/prepr-mcp-server/available-tools-and-actions) and [typical use cases](/prepr-mcp-server/use-cases) before you start building workflows.
Source: https://docs.prepr.io/prepr-mcp-server/getting-started
---
# Introduction to the Next.js complete guide
*This section introduces you to the complete guide that shows you how to connect Prepr to a Next.js project including styling, adaptive content, and A/B testing and a preview bar.*
At the end of the complete guide, you’ll have a working website with personalization and A/B testing like the images below.
You can customize this project to fit the requirements for your web app.
**Home page for general website visitors**
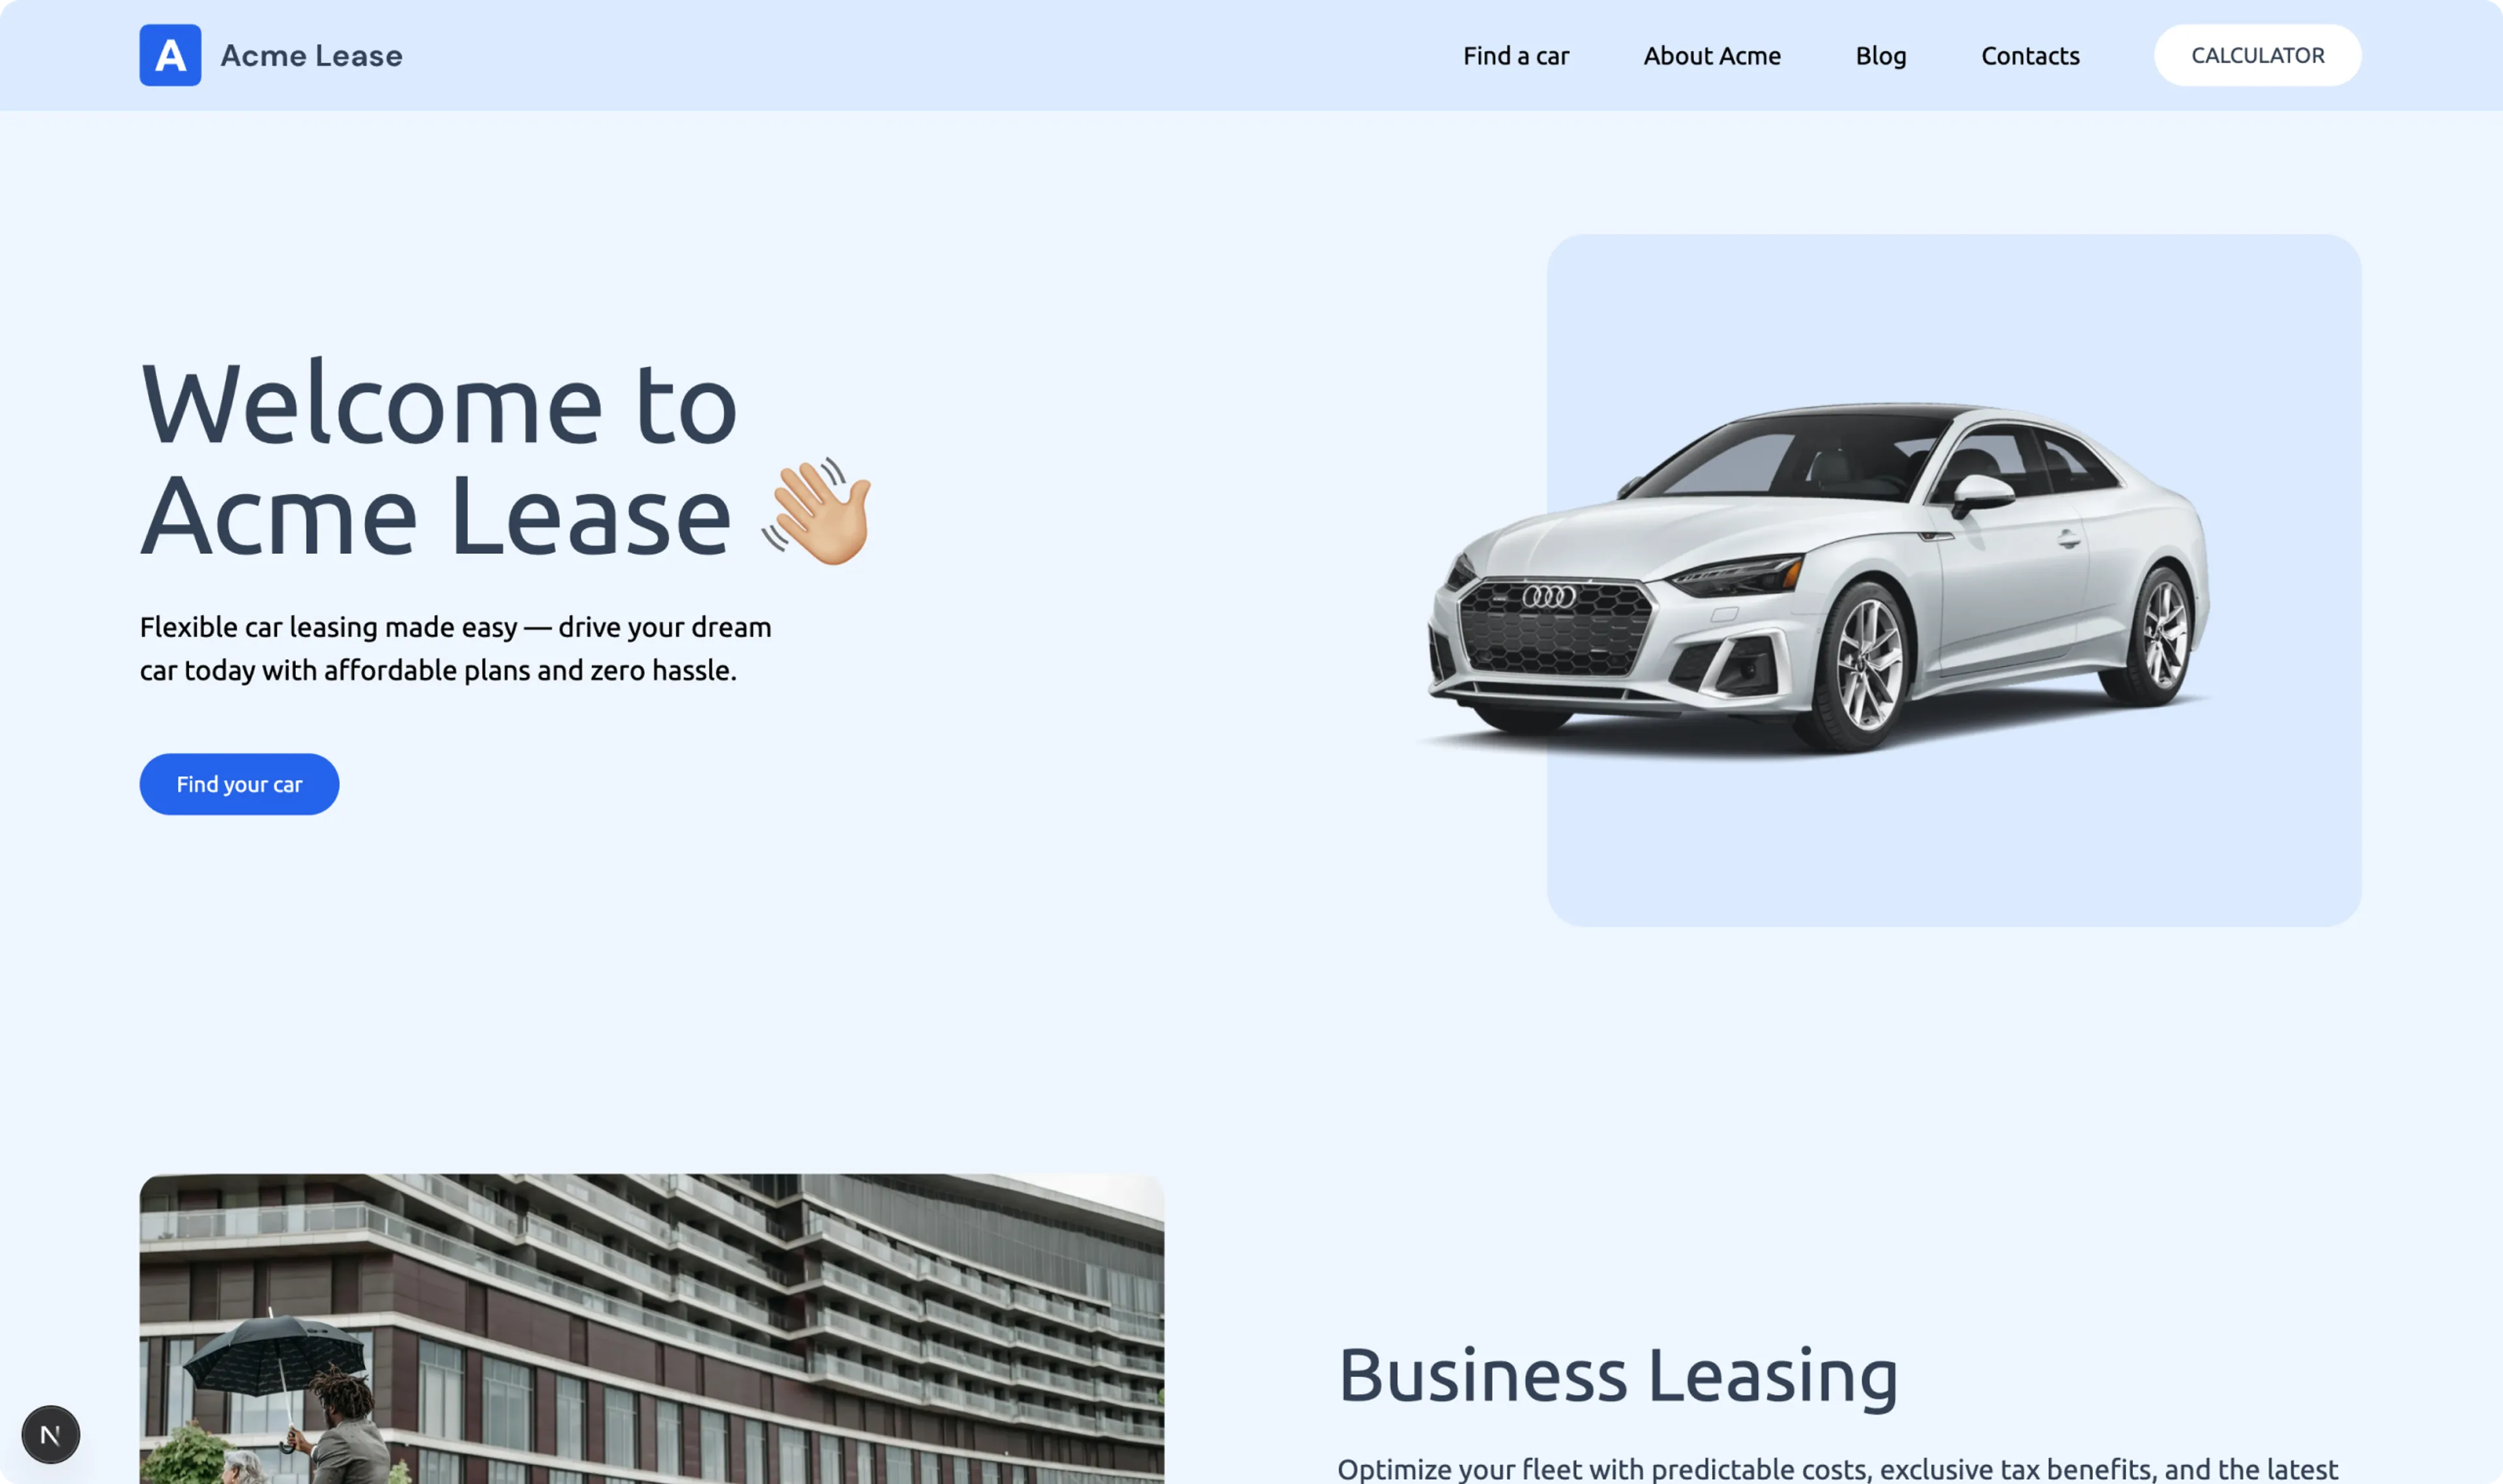
**Two variants of a running A/B test on a landing page**

**Personalized home page for electric car lovers**

## Prerequisites
Make sure the following is in place before getting started:
- [A free Prepr account](https://signup.prepr.io/?plan=free)
- [An environment with Acme Lease demo data in Prepr](/project-setup/setting-up-environments#create-an-environment)
- [The latest version of Node.js](https://nodejs.org/en/download)
Now that you know what to expect and have your Prepr environment ready, you can get started with the first step to [set up the Next.js project](/connecting-a-front-end-framework/nextjs/next-complete-guide/step-1-set-up-a-nextjs-project).
Source: https://docs.prepr.io/connecting-a-front-end-framework/nextjs/next-complete-guide/introduction
---
# Set up a Next.js project
*The instructions below will guide you through the first step of the Next.js complete guide.
These show you how to create a Next.js website with static components.*
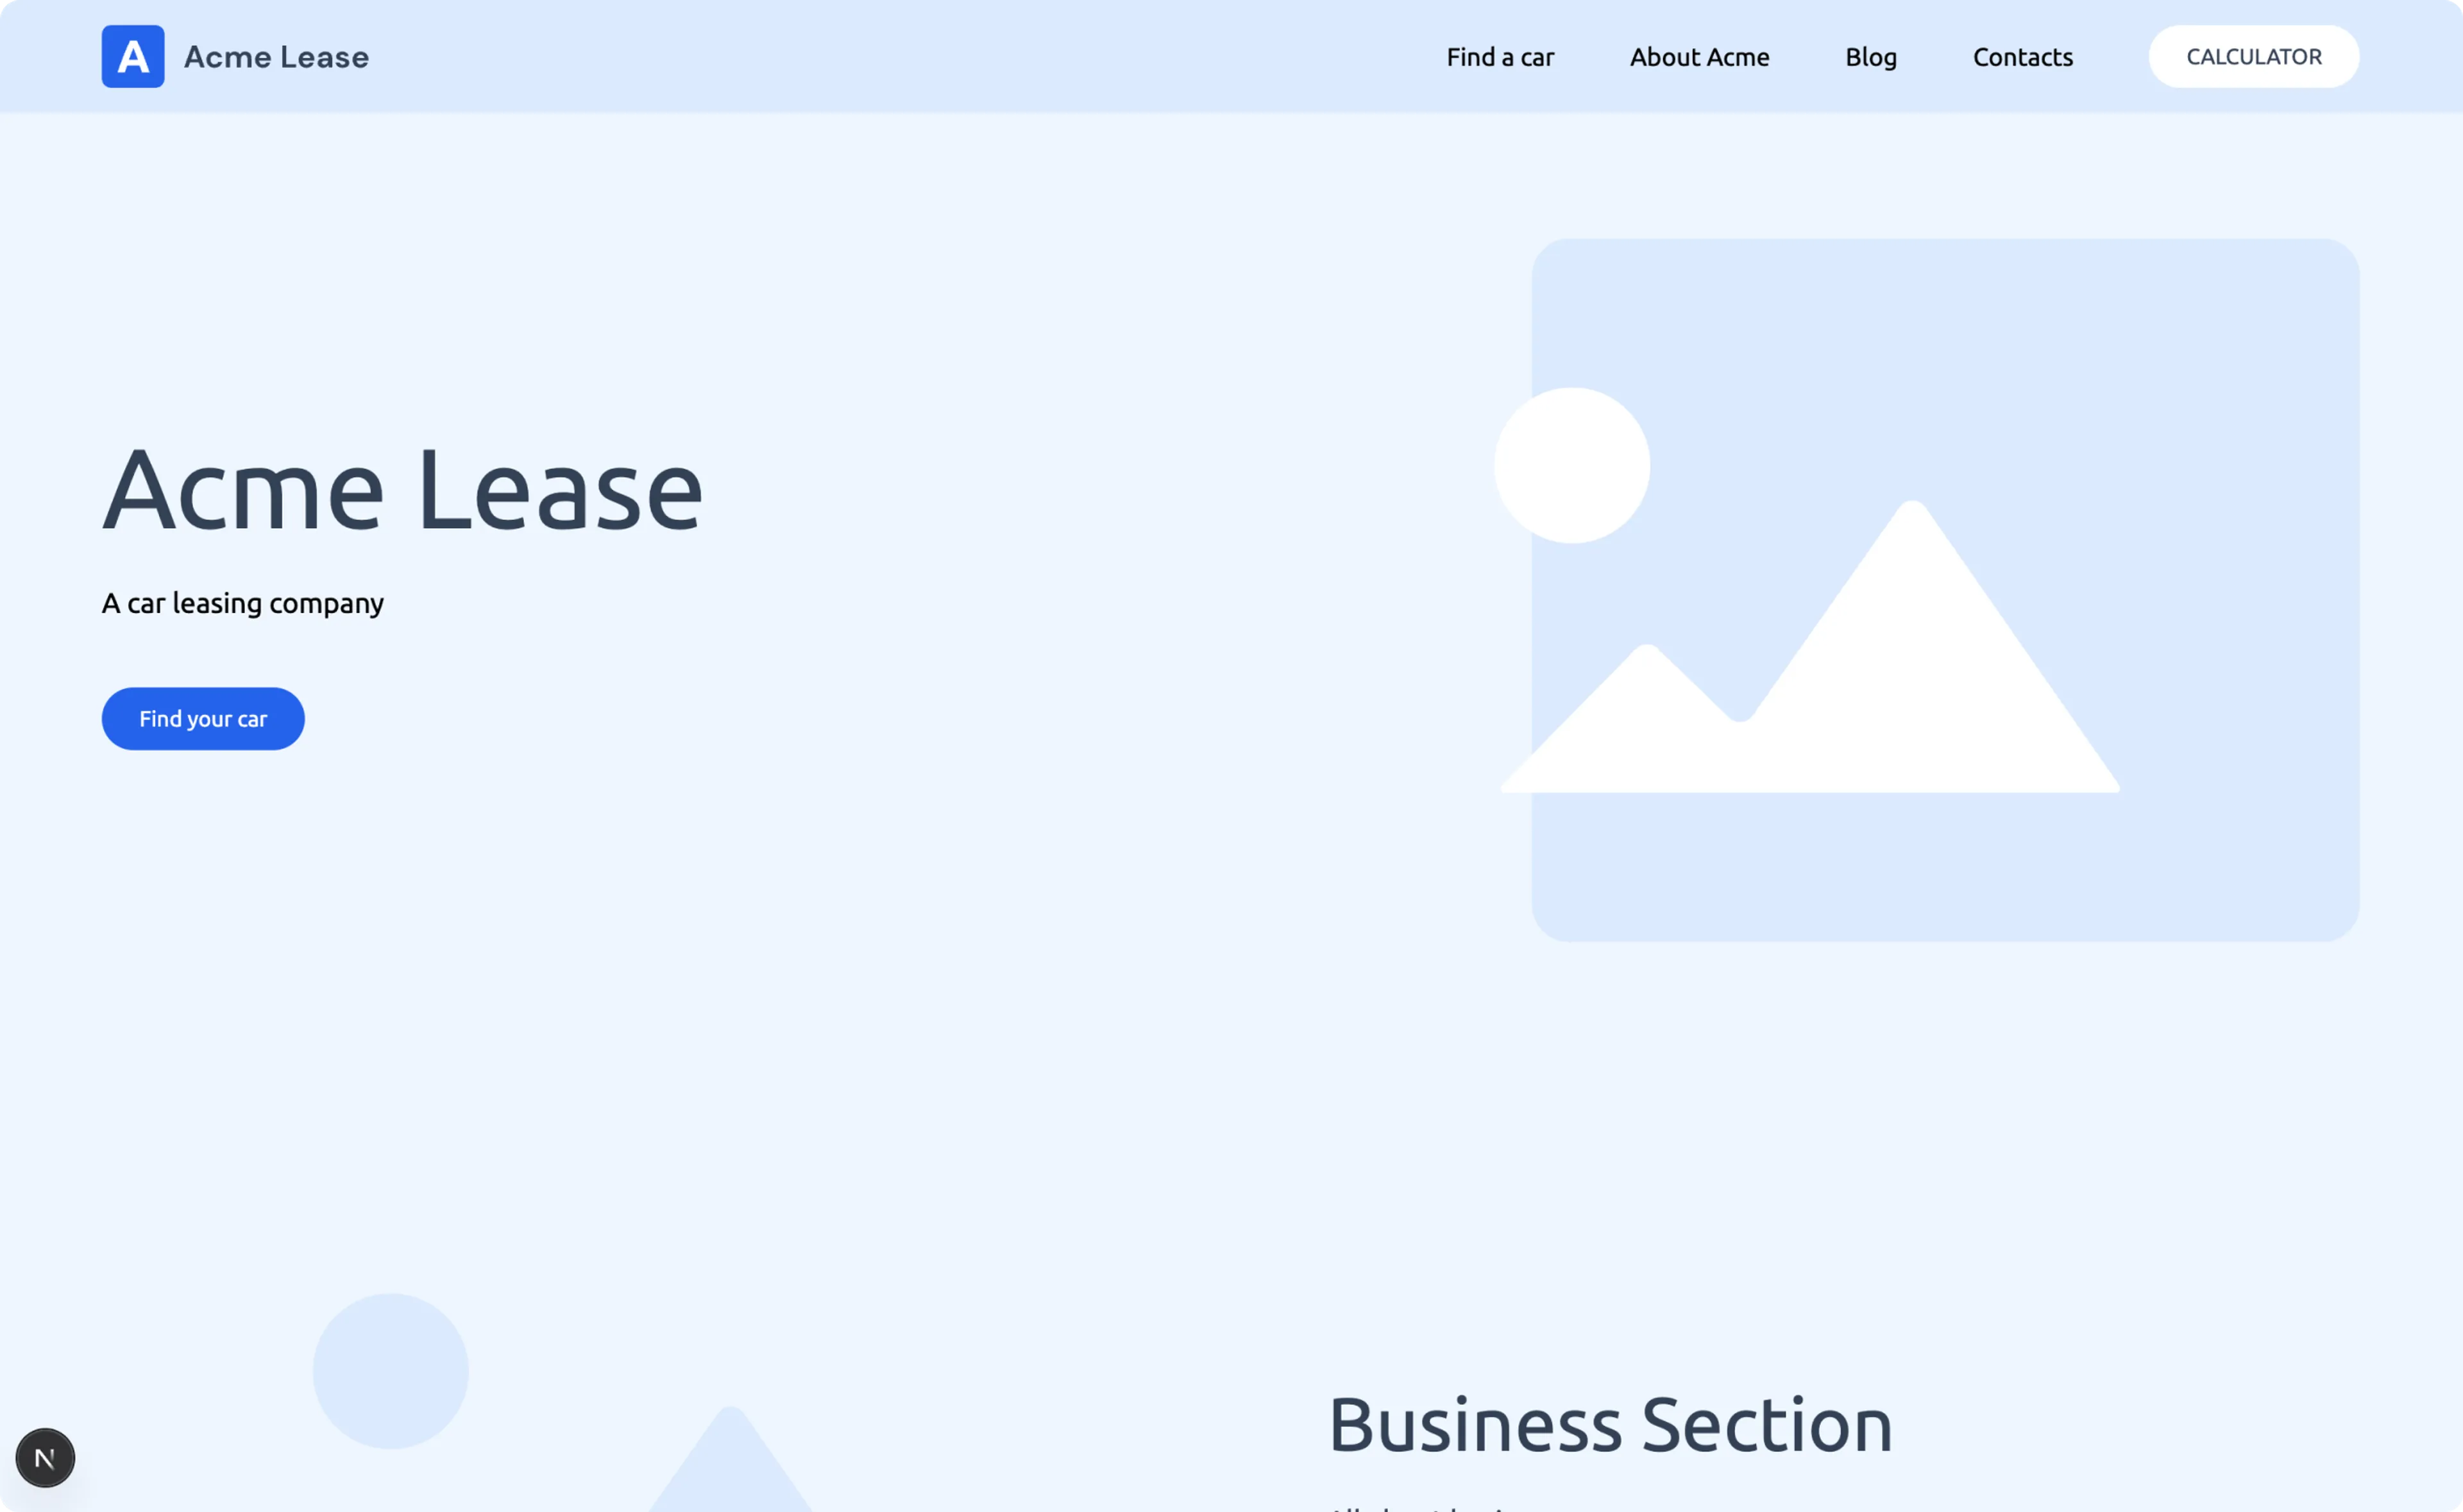
You can also watch the video for step-by-step instructions detailed in the guide below.
## Create a Next.js website with static components
If you have an existing Next.js project then you can skip this section and continue with the next section to [make your Next.js project dynamic with Prepr content](/connecting-a-front-end-framework/nextjs/next-complete-guide/step-2-make-the-project-dynamic).
Otherwise, let's get started.
Great work on getting your static web app working!
Continue your journey to the next section to [make your Next.js project dynamic with Prepr content](/connecting-a-front-end-framework/nextjs/next-complete-guide/step-2-make-the-project-dynamic).
Source: https://docs.prepr.io/connecting-a-front-end-framework/nextjs/next-complete-guide/step-1-set-up-a-nextjs-project
---
# Make your Next.js project dynamic
*This guide shows you how to connect an existing Next.js project to Prepr to retrieve and show Acme Lease demo content.*
You can also watch the video for step-by-step instructions detailed in the guide below.
## Connect your Next.js website to Prepr
The steps below continue from the previous section, [Set up a Next.js project](/connecting-a-front-end-framework/nextjs/next-complete-guide/step-1-set-up-a-nextjs-project).
If you don't yet have a Next.js website with static pages, follow the steps in this section first.
Otherwise, let's get started.
Congratulations! You have successfully connected your front end to Prepr to make your website dynamic.
Continue your journey to the next section to [set up data collection](/connecting-a-front-end-framework/nextjs/next-complete-guide/step-3-set-up-data-collection).
Source: https://docs.prepr.io/connecting-a-front-end-framework/nextjs/next-complete-guide/step-2-make-the-project-dynamic
---
# Set up data collection with tracking and the Prepr Next.js package
*Prepr is a CMS that includes built-in A/B testing and personalization features.
These capabilities require visitor data to measure your test results and to build segments for personalization.
This chapter of the Next.js complete guide shows you how to enable tracking to collect this data in your Next.js front end and how to simplify this data collection with the Prepr Next.js package.*
You can also watch the video for step-by-step instructions detailed in the guide below.
The steps below continue from the previous section, [Make your Next.js project dynamic](/connecting-a-front-end-framework/nextjs/next-complete-guide/step-2-make-the-project-dynamic).
If you don't yet have a Next.js project connected to Prepr, follow the previous steps listed in the [Complete guide overview](/connecting-a-front-end-framework/nextjs/next-complete-guide) to create one.
Otherwise, let's get started.
## Install the Prepr Next.js package
We've provided the [Prepr NextJS package](https://github.com/preprio/prepr-nextjs) to simplify working with event data for A/B testing and personalization.
In the steps below, you'll enable tracking in your website by adding the *Prepr Tracking Code* to your front end.
This code generates the `__prepr_uid` cookie for each website visitor.
This visitor gets stored in Prepr with this unique ID, if they don't already exist.
This means you can use this `__prepr_uid` cookie value to set the API request header, `Prepr-Customer-Id`, when you retrieve the page content for A/B testing and personalization.
The *Prepr NextJS package* prepares the `Prepr-Customer-Id` API request header for you, using the `__prepr_uid` cookie value.
Based on this value, Prepr retrieves the right content as follows:
- A/B testing: Prepr decides which variant, A or B, to return in the content.
- Personalization: Prepr checks the segment that this visitor belongs to and retrieves the matching personalized variant.
To install the *Prepr NextJS package*, follow the steps below.
1. In your Next.js project, stop the localhost website server (`CTRL-C`) if it's running and install the package with the following terminal command:
```bash copy
npm install @preprio/prepr-nextjs
```
Once done, you need to call a function in the package to prepare the API request headers before the page gets rendered in your website.
2. To do this, go to your project and create a new file `proxy.ts` in the `src` folder. Then add the following code to perform the package's preprocessing logic on user requests.
```ts filename="./src/proxy.ts" copy
import { NextRequest } from 'next/server'
import createPreprMiddleware from '@preprio/prepr-nextjs/middleware'
export async function proxy(request: NextRequest) {
return createPreprMiddleware(request, { preview: false })
}
```
## Enable Prepr tracking and collect view events
Congratulations! You've successfully enabled Prepr tracking in your Next.js front end, started collecting page view events, and installed the Prepr Next.js package for A/B testing and personalization.
Now, you're ready to [add A/B testing](/connecting-a-front-end-framework/nextjs/next-complete-guide/step-4-add-ab-testing) and [personalization](/connecting-a-front-end-framework/nextjs/next-complete-guide/step-5-add-personalization) to your website.
Source: https://docs.prepr.io/connecting-a-front-end-framework/nextjs/next-complete-guide/step-3-set-up-data-collection
---
# Add A/B testing to your Next.js website
*Prepr CMS enables editors to create A/B tests directly within their content.
This means testing different content versions is simple and effective.
This chapter of the Next.js complete guide demonstrates how to set up A/B testing in Prepr, including testing the display of variants and measuring the results.*
At the end of this section, you'll see the A and B versions on the *Electric Lease Landing Page*.

The steps below make use of the A/B test in the *Electric Lease Landing Page* content item from the Acme Lease demo data.
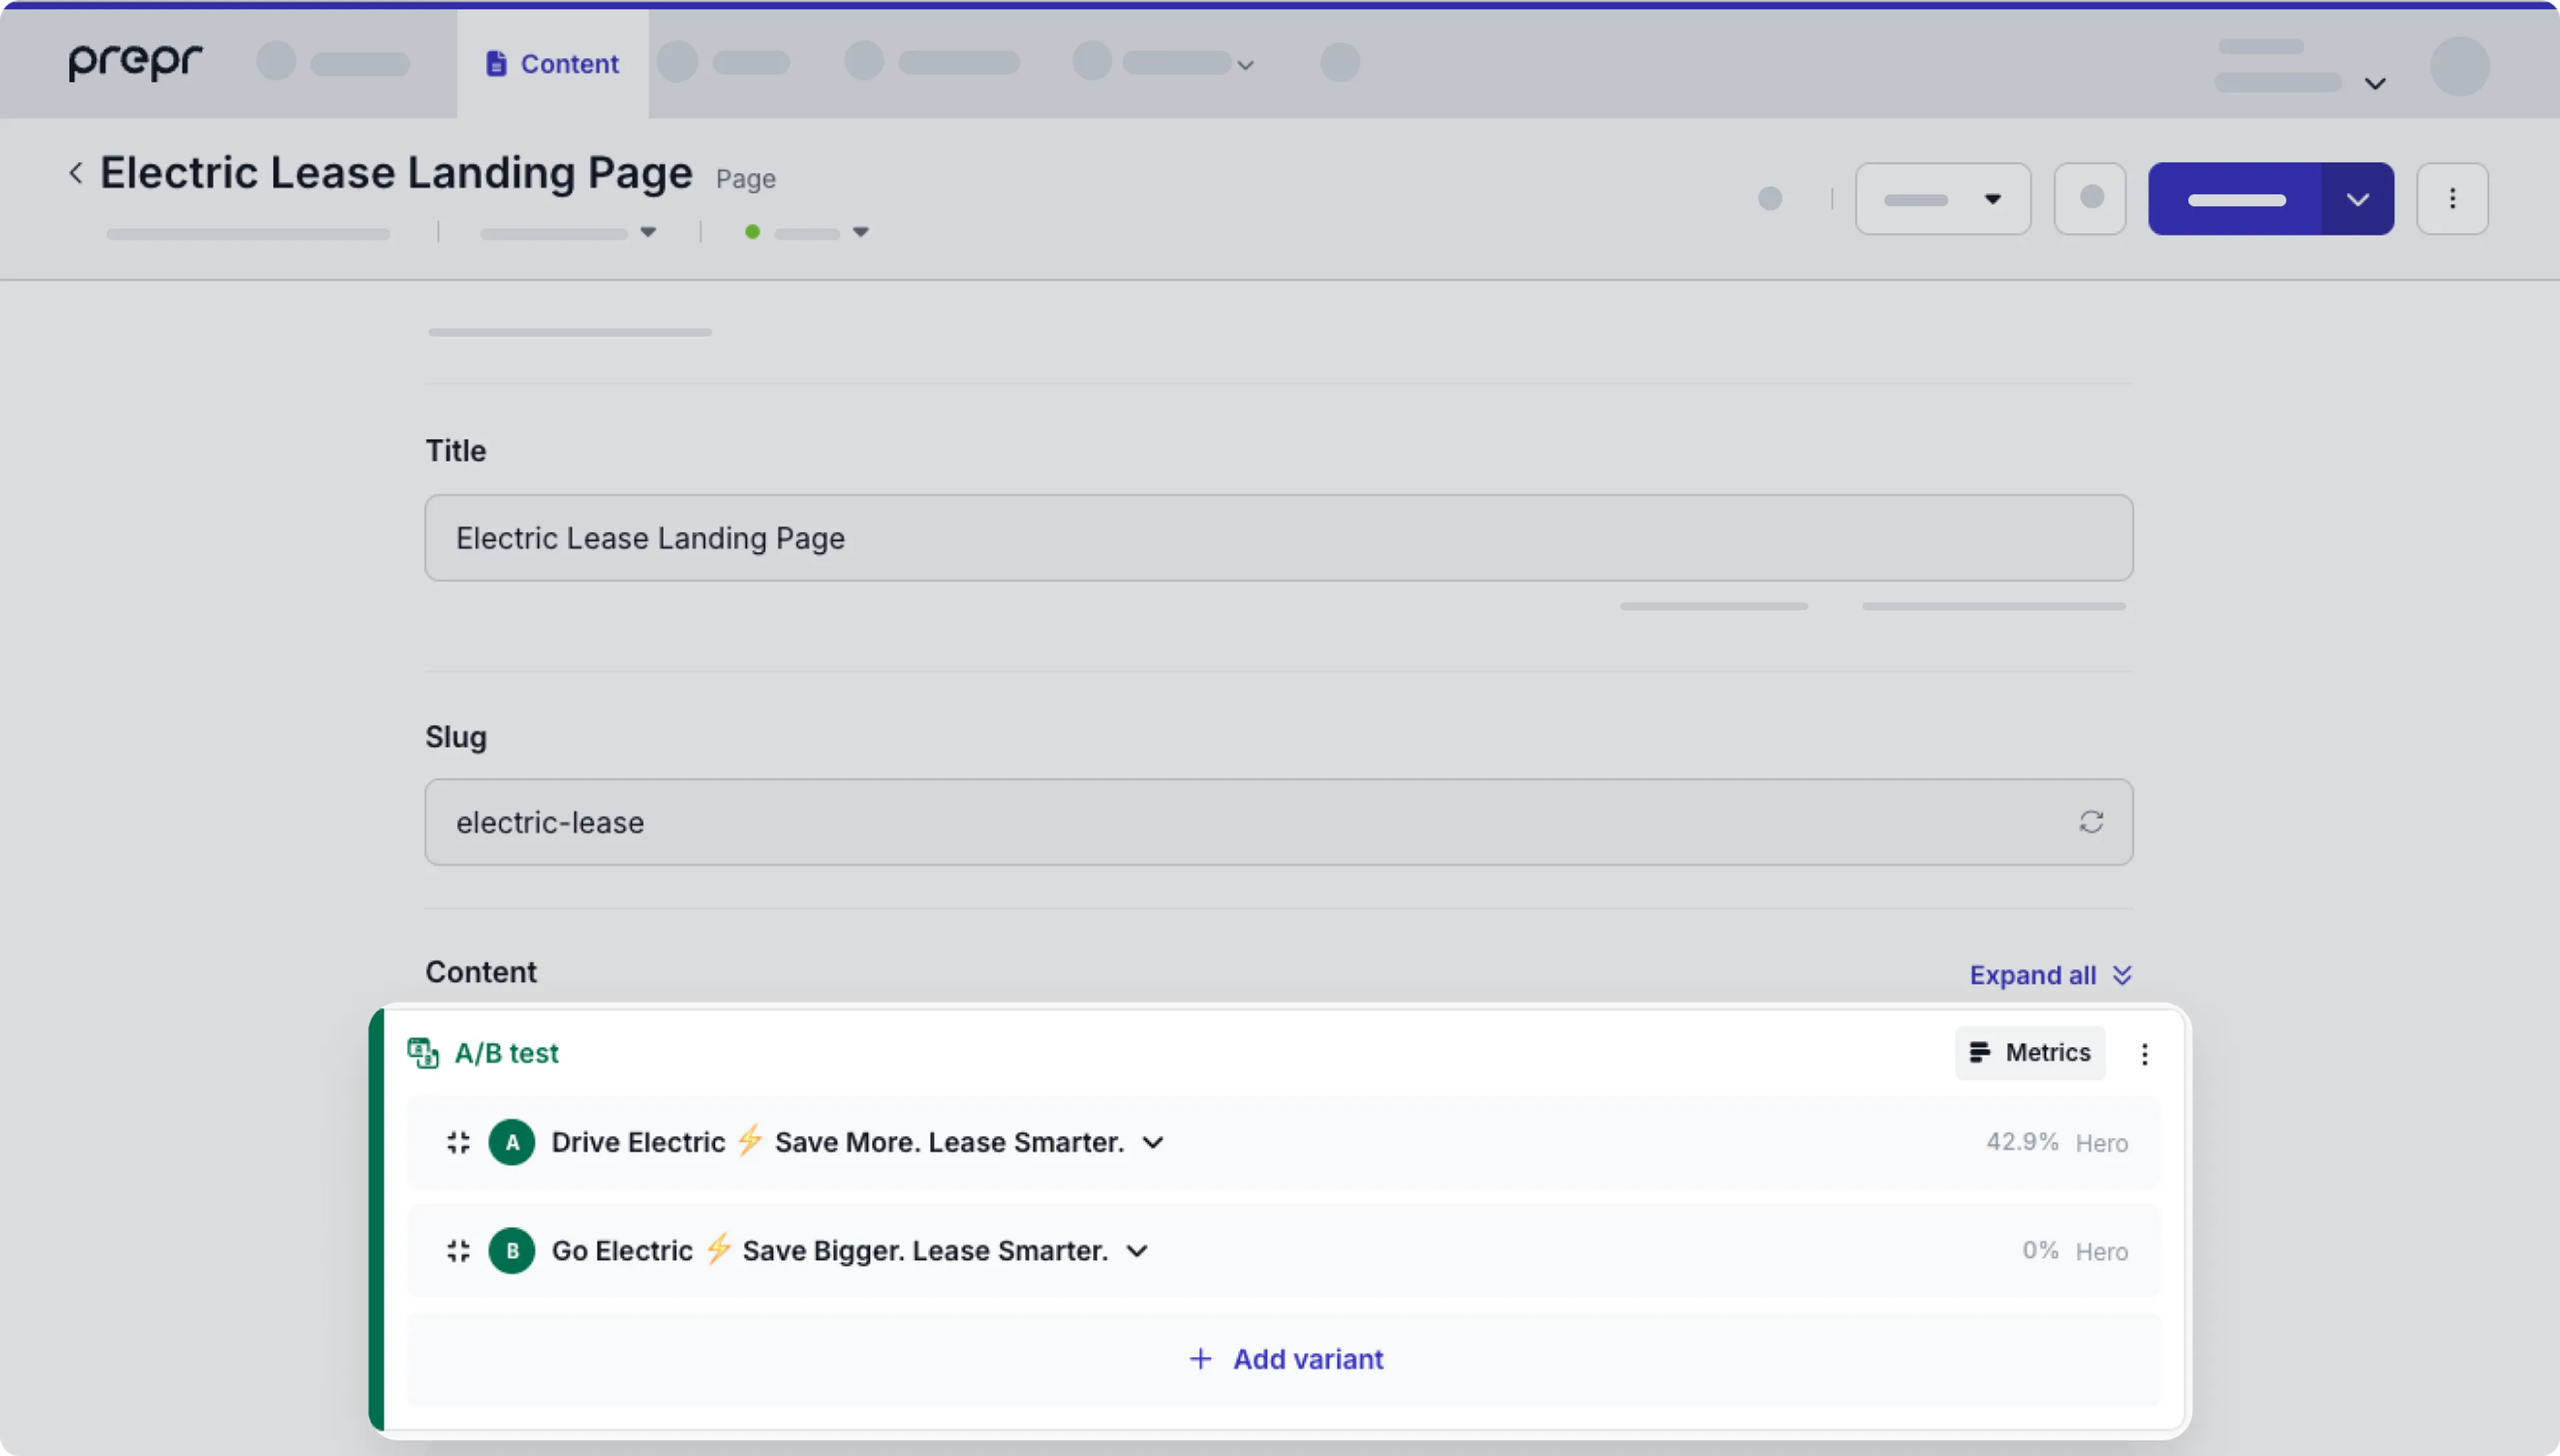
This chapter continues from the previous section, [Set up data collection](/connecting-a-front-end-framework/nextjs/next-complete-guide/step-3-set-up-data-collection).
If you haven't yet enabled Prepr tracking in your Next.js project, follow the steps in this section first.
Otherwise, let's get started.
You can also watch the video for step-by-step instructions detailed in the guide below.
## Set up A/B testing for the *Electric Lease Landing Page*
You can run an A/B test on parts of a web page to show two different versions of the content to different visitors and compare which variant is more engaging.
To show the right variant to the right visitor:
- Every visitor gets an ID that resolves to an A or a B variant.
- In your front end, you need to send this ID along with the query to retrieve the right variant.
- This is done by setting the value for the API request header, `Prepr-Customer-Id`, when you make the API request to retrieve the content.
By [installing the Prepr Next.js package](/connecting-a-front-end-framework/nextjs/next-complete-guide/step-3-set-up-data-collection#install-the-prepr-nextjs-package) in the previous section, you've already prepared your API request headers.
Congratulations! You have a running A/B test with metrics in your Next.js website.
Now, you can [Add personalization](/connecting-a-front-end-framework/nextjs/next-complete-guide/step-5-add-personalization) to your website.
Source: https://docs.prepr.io/connecting-a-front-end-framework/nextjs/next-complete-guide/step-4-add-ab-testing
---
# Add personalization to your Next.js website
*Prepr CMS enables editors to create adaptive content directly in their content items to personalize elements of web pages.
This makes setting up personalization really simple and effective in increasing engagement and conversions.
This chapter of the Next.js complete guide shows you how to add personalization to your Next.js website.*
At the end of this section, you'll see a personalized home page for visitors interested in electric cars.

The steps below make use of the Adaptive content in the *Homepage* content item from the Acme Lease demo data.
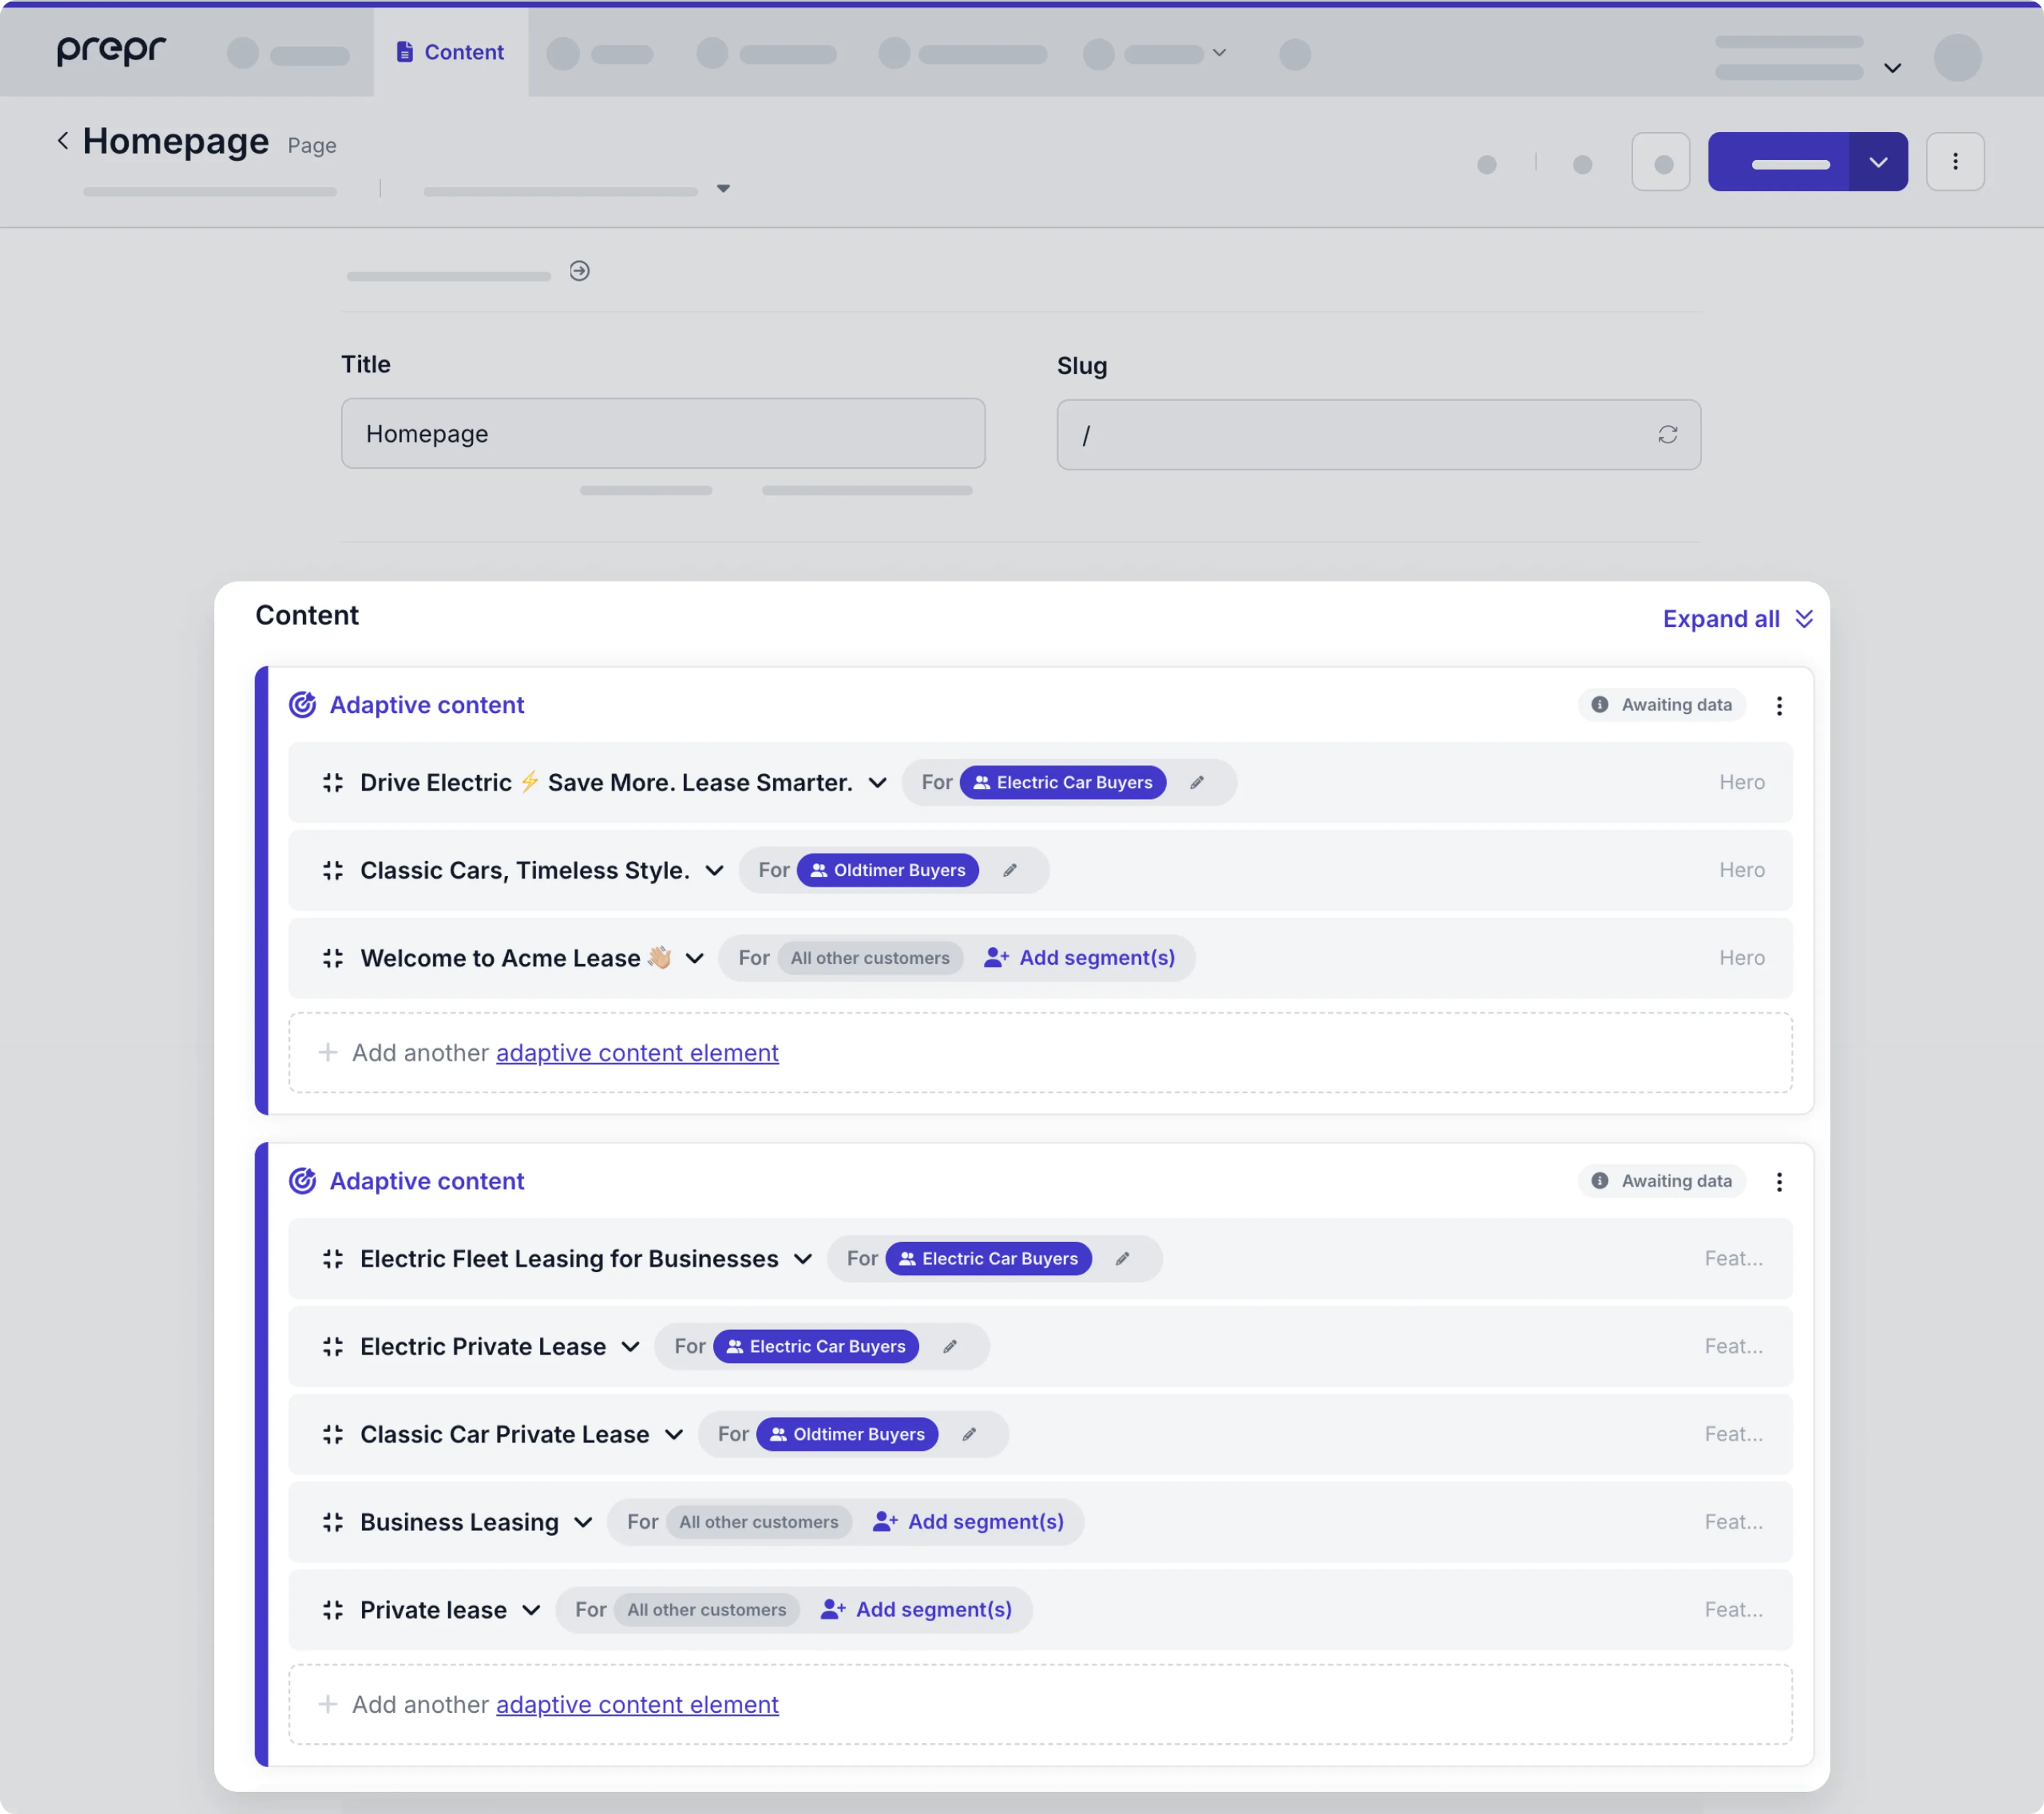
This chapter continues from the previous section, [*Set up data collection*](/connecting-a-front-end-framework/nextjs/next-complete-guide/step-3-set-up-data-collection).
If you haven't yet enabled Prepr tracking in your Next.js project, follow the steps in this section first.
Otherwise, let's get started.
You can also watch the video for step-by-step instructions detailed in the guide below.
## Set up personalization for the home page
You can show different personalized versions of the content to different groups (*Segments*) of visitors.
To show the right variant to the right visitor:
- Every visitor is given an ID that resolves to a segment they belong to.
- In your front end, you need to send this ID along with the query to retrieve the right variant.
- This is done by setting the value for the API request header, `Prepr-Customer-Id`, when you make the API request to retrieve the content.
By [installing the Prepr Next.js package](/connecting-a-front-end-framework/nextjs/next-complete-guide/step-3-set-up-data-collection#install-the-prepr-nextjs-package) in the previous section, you've already prepared your API request headers.
Congratulations! You have successfully set up personalization with metrics in your Next.js website.
Now, you can [install the preview bar](/connecting-a-front-end-framework/nextjs/next-complete-guide/step-6-install-the-preview-bar) to your website.
Source: https://docs.prepr.io/connecting-a-front-end-framework/nextjs/next-complete-guide/step-5-add-personalization
---
# Install the *Prepr preview toolbar*
*This guide shows you how to install the Prepr preview toolbar to easily review A/B testing and Adaptive content directly in your Next.js website.*
At the end of this section, you can use the Prepr preview toolbar in your website.

You can also watch the video for step-by-step instructions detailed in the guide below.
## Add the *Prepr preview toolbar* to your website
The steps below assume that you already have [A/B testing](/connecting-a-front-end-framework/nextjs/next-complete-guide/step-4-add-ab-testing) or [personalization](/connecting-a-front-end-framework/nextjs/next-complete-guide/step-5-add-personalization) set up in your Next.js website.
If you haven't yet added A/B testing or personalization, follow the steps in these sections first.
Otherwise, let's get started.
## All done
Congratulations!
You have successfully installed the Prepr preview toolbar in your Next.js website.
This brings you to the end of the Next.js complete guide which has given you all the tools and tips you need to create your own web app
connected to Prepr CMS complete with personalization, A/B testing and a preview bar.
Don't hesitate to [give us feedback](mailto:feedback@prepr.io) on your experience using this guide.
## Next steps
To learn more on how to expand your project, check out the following resources:
- [Content modeling examples](/content-modeling/examples)
- [More data collection details](/data-collection)
- [More about A/B testing](/ab-testing)
- [More about personalization](/personalization)
- [Deploy your Next app with Vercel](https://nextjs.org/learn-pages-router/basics/deploying-nextjs-app)
Source: https://docs.prepr.io/connecting-a-front-end-framework/nextjs/next-complete-guide/step-6-install-the-preview-bar
---
# Complete guide to Next.js and Prepr
*This guide shows you how to connect Prepr to a Next.js project including styling, adaptive content, A/B testing and a preview bar.*
Follow the steps below in the recommended order to set up your own working Next.js website with adaptive content, A/B testing and a preview bar.
You can also customize this project to fit the requirements for your web app.
Source: https://docs.prepr.io/connecting-a-front-end-framework/nextjs/next-complete-guide
---
# Introduction to the Nuxt complete guide
*This section introduces you to the complete guide that shows you how to connect Prepr to a Nuxt project including styling, adaptive content, A/B testing and the visual editing setup.*
At the end of the complete guide, you’ll have a working website with personalization and A/B testing like the images below.
You can customize this project to fit the requirements for your web app.
**Home page for general website visitors**

**Two variants of a running A/B test on a landing page**

**Personalized home page for electric car lovers**

## Prerequisites
Make sure the following is in place before getting started:
- [A free Prepr account](https://signup.prepr.io/?plan=free)
- [An environment with Acme Lease demo data in Prepr](/project-setup/setting-up-environments#create-an-environment)
- [The latest version of Node.js](https://nodejs.org/en/download)
Now that you know what to expect and have your Prepr environment ready, you can get started with the first step to [set up the Nuxt project](/connecting-a-front-end-framework/nuxtjs/nuxt-complete-guide/step-1-set-up-a-nuxt-project).
Source: https://docs.prepr.io/connecting-a-front-end-framework/nuxtjs/nuxt-complete-guide/introduction
---
# Set up a Nuxt project
*The instructions below will guide you through the first step of the Nuxt complete guide.
These show you how to create a Nuxt website with static components.*

## Create a Nuxt website with static components
If you have an existing Nuxt project then you can skip this section and continue with the next section to [make your Nuxt project dynamic with Prepr content](/connecting-a-front-end-framework/nuxtjs/nuxt-complete-guide/step-2-make-the-project-dynamic).
Otherwise, let's get started.
Great work on getting your static web app working!
Continue your journey to the next section to [make your Nuxt project dynamic with Prepr content](/connecting-a-front-end-framework/nuxtjs/nuxt-complete-guide/step-2-make-the-project-dynamic).
Source: https://docs.prepr.io/connecting-a-front-end-framework/nuxtjs/nuxt-complete-guide/step-1-set-up-a-nuxt-project
---
# Make your Nuxt project dynamic
*This guide shows you how to connect an existing Nuxt project to Prepr to retrieve and show Acme Lease demo content.*
## Connect your Nuxt website to Prepr
The steps below continue from the previous section, [Set up a Nuxt project](/connecting-a-front-end-framework/nuxtjs/nuxt-complete-guide/step-1-set-up-a-nuxt-project).
If you don't yet have a Nuxt website with static pages, follow the steps in this section first.
Otherwise, let's get started.
Congratulations! You have successfully connected your front end to Prepr to make your website dynamic.
Continue your journey to the next section to [set up data collection](/connecting-a-front-end-framework/nuxtjs/nuxt-complete-guide/step-3-set-up-data-collection).
Source: https://docs.prepr.io/connecting-a-front-end-framework/nuxtjs/nuxt-complete-guide/step-2-make-the-project-dynamic
---
# Set up data collection with tracking
*Prepr is a CMS that includes built-in A/B testing and personalization features.
These capabilities require visitor data to measure your test results and to build segments for personalization.
This chapter of the Nuxt complete guide shows you how to enable tracking to collect this data in your Nuxt front end.*
## Enable Prepr tracking and collect view events
The steps below continue from the previous section, [Make your Nuxt project dynamic](/connecting-a-front-end-framework/nuxtjs/nuxt-complete-guide/step-2-make-the-project-dynamic).
If you don't yet have a Nuxt project connected to Prepr, follow the previous steps listed in the [Complete guide overview](/connecting-a-front-end-framework/nuxtjs/nuxt-complete-guide) to create one.
Otherwise, let's get started.
Congratulations! You've successfully enabled Prepr tracking in your Nuxt front end, and started collecting page view events.
Now, you're ready to [add A/B testing](/connecting-a-front-end-framework/nuxtjs/nuxt-complete-guide/step-4-add-ab-testing) and [personalization](/connecting-a-front-end-framework/nuxtjs/nuxt-complete-guide/step-5-add-personalization) to your website.
Source: https://docs.prepr.io/connecting-a-front-end-framework/nuxtjs/nuxt-complete-guide/step-3-set-up-data-collection
---
# Add A/B testing to your Nuxt website
*Prepr CMS enables editors to create A/B tests directly within their content.
This means testing different content versions is simple and effective.
This chapter of the Nuxt complete guide demonstrates how to set up A/B testing in Prepr, including testing the display of variants and measuring the results.*
At the end of this section, you'll see the A and B versions on the *Electric Lease Landing Page*.

The steps below make use of the A/B test in the *Electric Lease Landing Page* content item from the Acme Lease demo data.

This chapter continues from the previous section, [Set up data collection](/connecting-a-front-end-framework/nuxtjs/nuxt-complete-guide/step-3-set-up-data-collection).
If you haven't yet enabled Prepr tracking in your Nuxt project, follow the steps in this section first.
Otherwise, let's get started.
## Set up A/B testing for the *Electric Lease Landing Page*
You can run an A/B test on parts of a web page to show two different versions of the content to different visitors and compare which variant is more engaging.
To show the right variant to the right visitor:
- Every visitor gets an ID that resolves to an A or a B variant.
- In your front end, you need to send this ID along with the query to retrieve the right variant.
- This is done by setting the value for the API request header, `Prepr-Customer-Id`, when you make the API request to retrieve the content.
Congratulations! You have a running A/B test with metrics in your Nuxt website.
Now, you can [Add personalization](/connecting-a-front-end-framework/nuxtjs/nuxt-complete-guide/step-5-add-personalization) to your website.
Source: https://docs.prepr.io/connecting-a-front-end-framework/nuxtjs/nuxt-complete-guide/step-4-add-ab-testing
---
# Add personalization to your Nuxt website
*Prepr CMS enables editors to create adaptive content directly in their content items to personalize elements of web pages.
This makes setting up personalization really simple and effective in increasing engagement and conversions.
This chapter of the Nuxt complete guide shows you how to add personalization to your Nuxt website.*
At the end of this section, you'll see a personalized home page for visitors interested in electric cars.

The steps below make use of the Adaptive content in the *Homepage* content item from the Acme Lease demo data.

This chapter continues from the previous section, [Set up data collection](/connecting-a-front-end-framework/nuxtjs/nuxt-complete-guide/step-3-set-up-data-collection).
If you haven't yet enabled Prepr tracking in your Nuxt project, follow the steps in this section first.
Otherwise, let's get started.
## Set up personalization for the home page
You can show different personalized versions of the content to different groups (*Segments*) of visitors.
To show the right variant to the right visitor:
- Every visitor is given an ID that resolves to a segment they belong to.
- In your front end, you need to send this ID along with the query to retrieve the right variant.
- This is done by setting the value for the API request header, `Prepr-Customer-Id`, when you make the API request to retrieve the content.
Congratulations! You have successfully set up personalization with metrics in your Nuxt website.
This brings you to the end of the Nuxt complete guide which has given you all the tools and tips you need to create your own web app
connected to Prepr CMS complete with personalization, and A/B testing.
Don't hesitate to [give us feedback](mailto:feedback@prepr.io) on your experience using this guide.
## Next steps
To learn more on how to expand your project, check out the following resources:
- [Set up visual editing](/project-setup/setting-up-previews-and-visual-editing)
- [More data collection details](/data-collection)
- [More about A/B testing](/ab-testing)
- [More about personalization](/personalization)
Source: https://docs.prepr.io/connecting-a-front-end-framework/nuxtjs/nuxt-complete-guide/step-5-add-personalization
---
# Complete guide to Nuxt and Prepr
*This guide shows you how to connect Prepr to a Nuxt project including styling, adaptive content, and A/B testing.*
Follow the steps below in the recommended order to set up your own working Nuxt website with adaptive content, A/B testing and a preview bar.
You can also customize this project to fit the requirements for your web app.
Source: https://docs.prepr.io/connecting-a-front-end-framework/nuxtjs/nuxt-complete-guide
---
# Introduction to the Laravel complete guide
*This section introduces you to the complete guide that shows you how to connect Prepr to a Laravel project including styling, adaptive content, A/B testing and the visual editing setup.*
At the end of the complete guide, you’ll have a working website with personalization and A/B testing like the images below.
You can customize this project to fit the requirements for your web app.
**Home page for general website visitors**

**Two variants of a running A/B test on a landing page**

**Personalized home page for electric car lovers**

{/*
If you can't wait and want to skip ahead, clone the [repository on GitHub](https://github.com/preprio/laravel-complete-starter) to run the demo locally or visit our [demo website](https://acme-lease.prepr.io/) to see it in action.
These resources and this guide are based on the latest version of Laravel.
*/}
## Prerequisites
Make sure the following is in place before getting started:
- [A free Prepr account](https://signup.prepr.io/?plan=free)
- [An environment with Acme Lease demo data in Prepr](/project-setup/setting-up-environments#create-an-environment)
Now that you know what to expect and have your Prepr environment ready, you can get started with the first step to [set up the Laravel project](/connecting-a-front-end-framework/laravel/laravel-complete-guide/step-1-set-up-a-laravel-project).
Source: https://docs.prepr.io/connecting-a-front-end-framework/laravel/laravel-complete-guide/introduction
---
# Set up a Laravel project
*The instructions below will guide you through the first step of the Laravel complete guide.
These show you how to create a Laravel website with static components.*
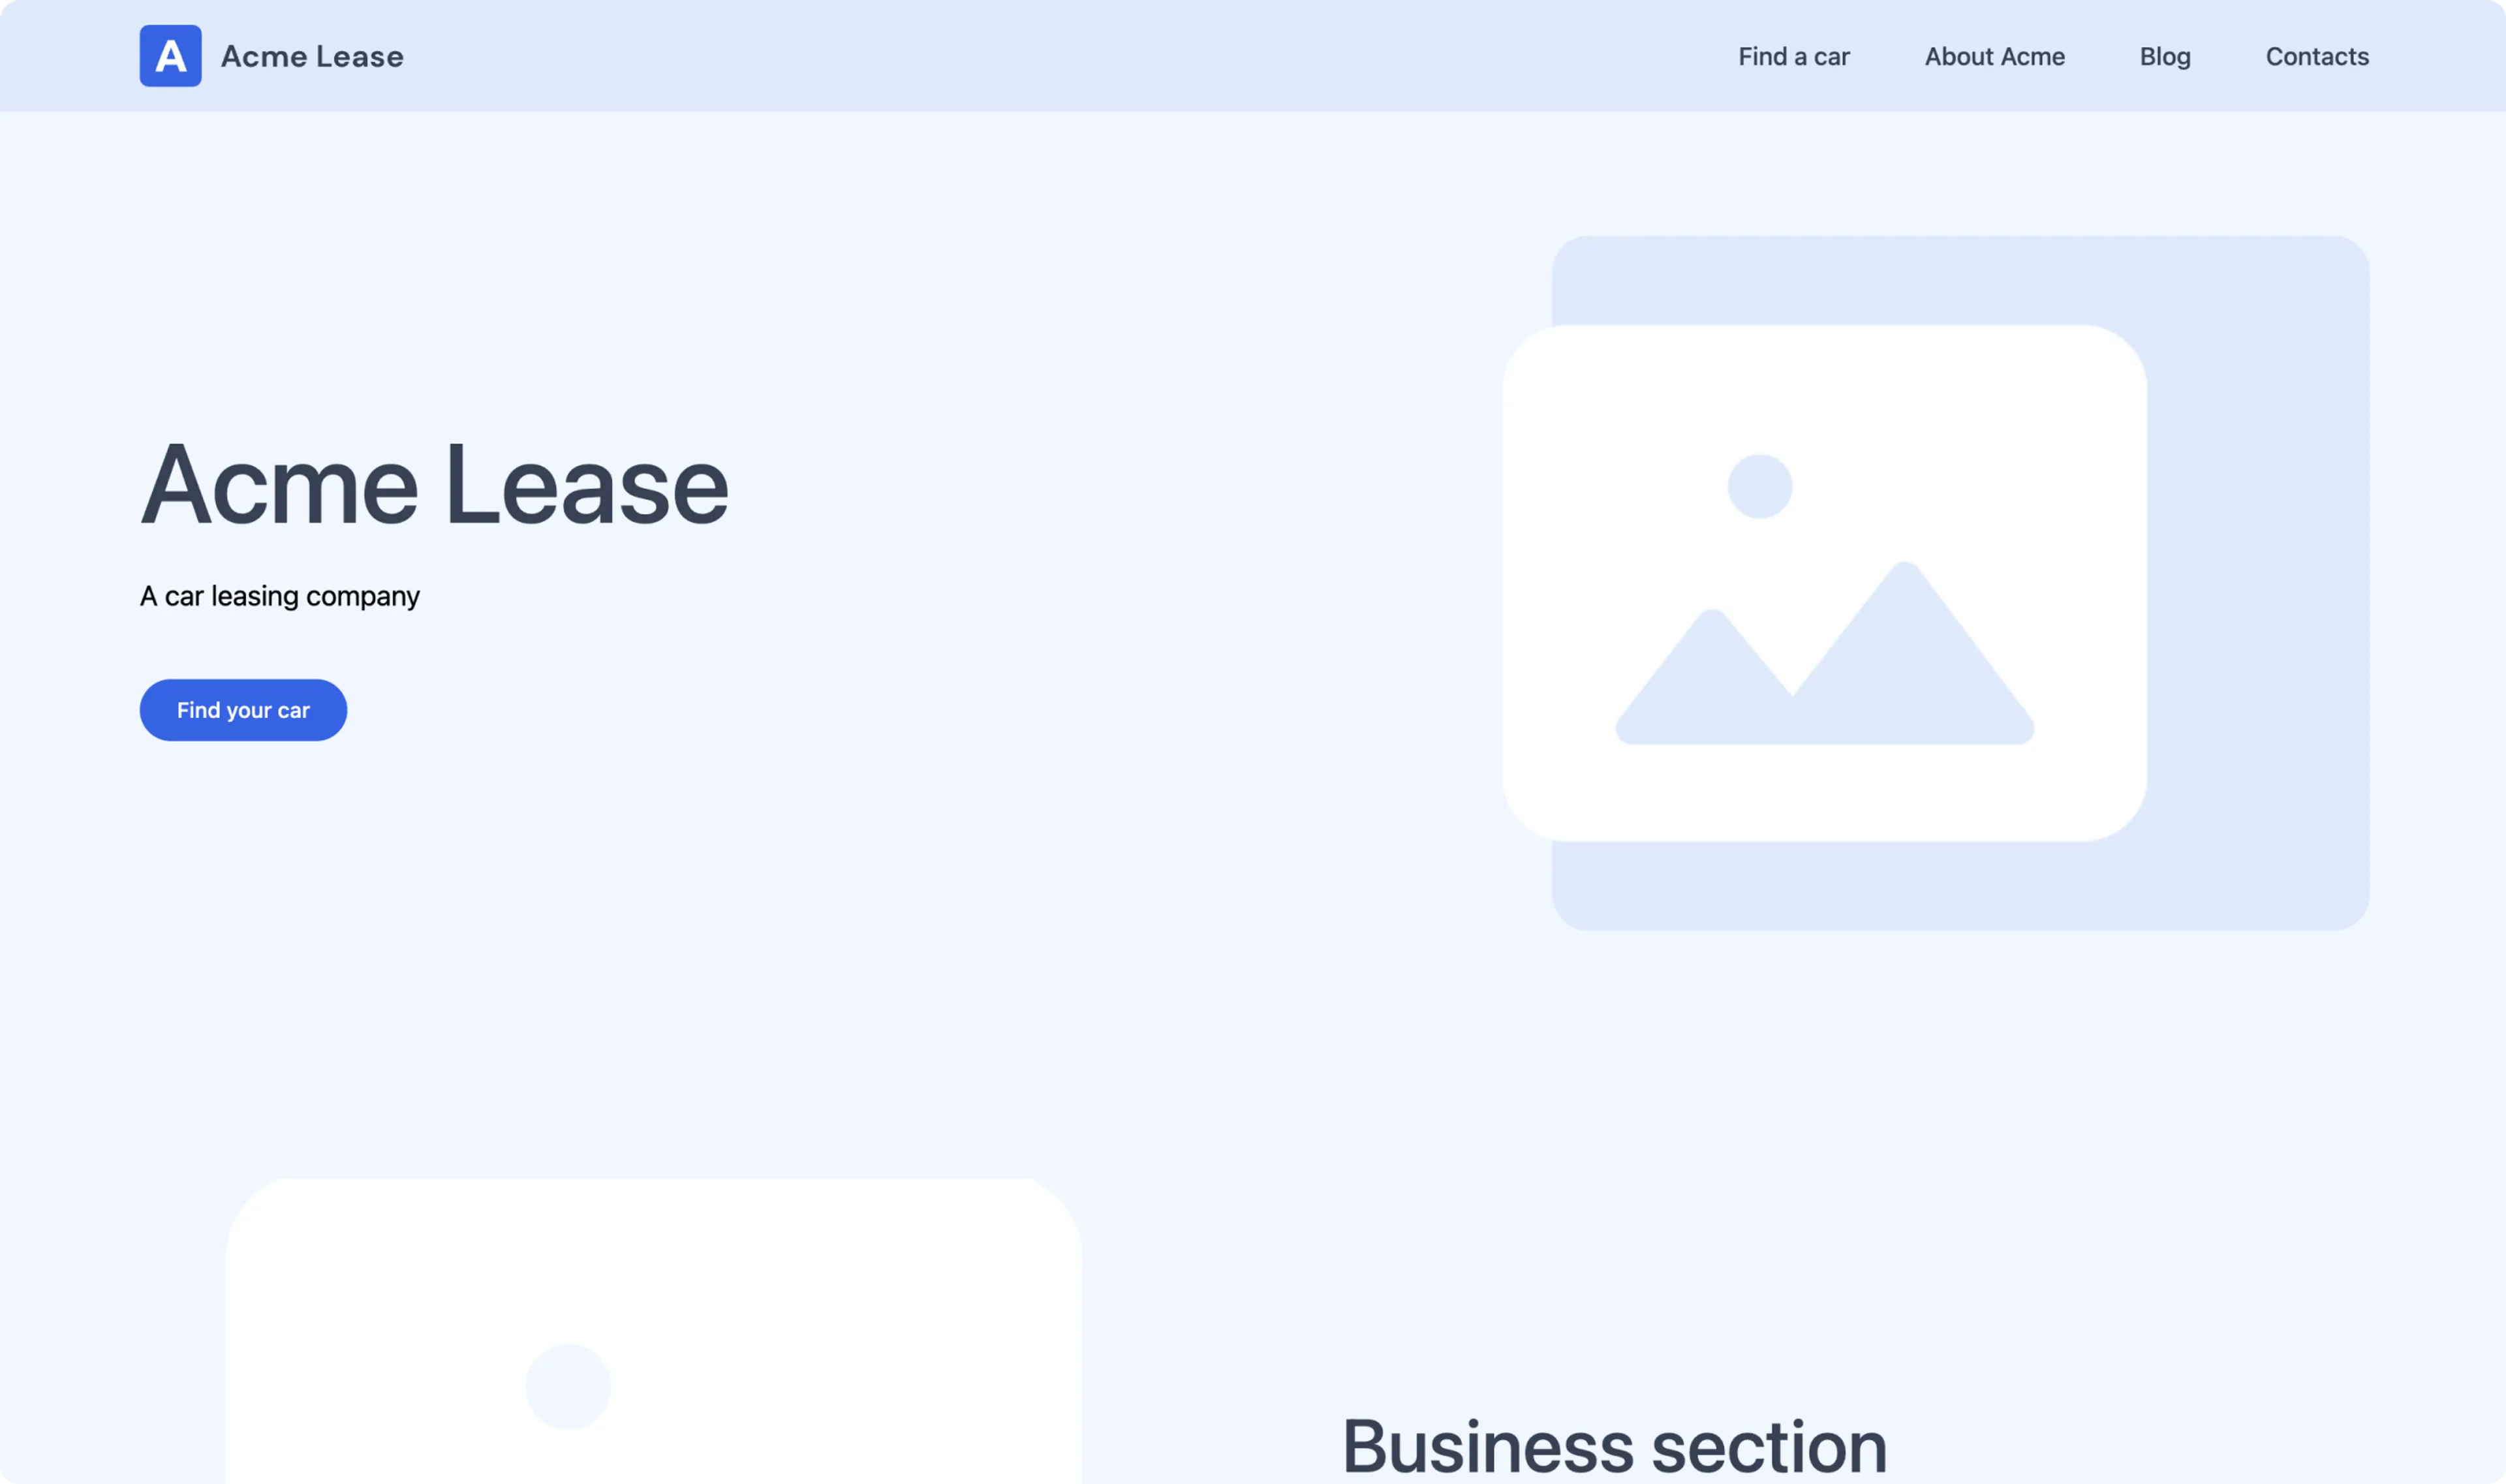
## Create a Laravel website with static components
If you have an existing Laravel project then you can skip this section and continue with the next section to [make your Laravel project dynamic with Prepr content](/connecting-a-front-end-framework/laravel/laravel-complete-guide/step-2-make-the-project-dynamic).
Otherwise, let's get started.
Great work on getting your static web app working!
Continue your journey to the next section to [make your Laravel project dynamic with Prepr content](/connecting-a-front-end-framework/laravel/laravel-complete-guide/step-2-make-the-project-dynamic).
Source: https://docs.prepr.io/connecting-a-front-end-framework/laravel/laravel-complete-guide/step-1-set-up-a-laravel-project
---
# Make your Laravel project dynamic
*This guide shows you how to connect an existing Laravel project to Prepr to retrieve and show Acme Lease demo content.*
## Connect your Laravel website to Prepr
The steps below continue from the previous section, [Set up a Laravel project](/connecting-a-front-end-framework/laravel/laravel-complete-guide/step-1-set-up-a-laravel-project).
If you don't yet have a Laravel website with static pages, follow the steps in this section first.
Otherwise, let's get started.
Congratulations! You have successfully connected your front end to Prepr to make your website dynamic.
Continue your journey to the next section to [set up data collection](/connecting-a-front-end-framework/laravel/laravel-complete-guide/step-3-set-up-data-collection).
Source: https://docs.prepr.io/connecting-a-front-end-framework/laravel/laravel-complete-guide/step-2-make-the-project-dynamic
---
# Set up data collection with tracking
*Prepr is a CMS that includes built-in A/B testing and personalization features.
These capabilities require visitor data to measure your test results and to build segments for personalization.
This chapter of the Laravel complete guide shows you how to enable tracking to collect this data in your Laravel front end.*
## Enable Prepr tracking and collect view events
The steps below continue from the previous section, [Make your Laravel project dynamic](/connecting-a-front-end-framework/laravel/laravel-complete-guide/step-2-make-the-project-dynamic).
If you don't yet have a Laravel project connected to Prepr, follow the previous steps listed in the [Complete guide overview](/connecting-a-front-end-framework/laravel/laravel-complete-guide) to create one.
Otherwise, let's get started.
Congratulations! You've successfully enabled Prepr tracking in your Laravel front end, and started collecting page view events.
Now, you're ready to [add A/B testing](/connecting-a-front-end-framework/laravel/laravel-complete-guide/step-4-add-ab-testing) and [personalization](/connecting-a-front-end-framework/laravel/laravel-complete-guide/step-5-add-personalization) to your website.
Source: https://docs.prepr.io/connecting-a-front-end-framework/laravel/laravel-complete-guide/step-3-set-up-data-collection
---
# Add A/B testing to your Laravel website
*Prepr CMS enables editors to create A/B tests directly within their content.
This means testing different content versions is simple and effective.
This chapter of the Laravel complete guide demonstrates how to set up A/B testing in Prepr, including testing the display of variants and measuring the results.*
At the end of this section, you'll see the A and B versions on the *Electric Lease Landing Page*.

The steps below make use of the A/B test in the *Electric Lease Landing Page* content item from the Acme Lease demo data.

This chapter continues from the previous section, [Set up data collection](/connecting-a-front-end-framework/laravel/laravel-complete-guide/step-3-set-up-data-collection).
If you haven't yet enabled Prepr tracking in your Laravel project, follow the steps in this section first.
Otherwise, let's get started.
## Set up A/B testing for the *Electric Lease Landing Page*
You can run an A/B test on parts of a web page to show two different versions of the content to different visitors and compare which variant is more engaging.
To show the right variant to the right visitor:
- Every visitor gets an ID that resolves to an A or a B variant.
- In your front end, you need to send this ID along with the query to retrieve the right variant.
- This is done by setting the value for the API request header, `Prepr-Customer-Id`, when you make the API request to retrieve the content.
Congratulations! You have a running A/B test with metrics in your Laravel website.
Now, you can [Add personalization](/connecting-a-front-end-framework/nuxtjs/nuxt-complete-guide/step-5-add-personalization) to your website.
Source: https://docs.prepr.io/connecting-a-front-end-framework/laravel/laravel-complete-guide/step-4-add-ab-testing
---
# Add personalization to your Laravel website
*Prepr CMS enables editors to create adaptive content directly in their content items to personalize elements of web pages.
This makes setting up personalization really simple and effective in increasing engagement and conversions.
This chapter of the Laravel complete guide shows you how to add personalization to your Laravel website.*
At the end of this section, you'll see a personalized home page for visitors interested in electric cars.

The steps below make use of the Adaptive content in the *Homepage* content item from the Acme Lease demo data.

This chapter continues from the previous section, [Set up data collection](/connecting-a-front-end-framework/laravel/laravel-complete-guide/step-3-set-up-data-collection).
If you haven't yet enabled Prepr tracking in your Laravel project, follow the steps in this section first.
Otherwise, let's get started.
## Set up personalization for the home page
You can show different personalized versions of the content to different groups (*Segments*) of visitors.
To show the right variant to the right visitor:
- Every visitor is given an ID that resolves to a segment they belong to.
- In your front end, you need to send this ID along with the query to retrieve the right variant.
- This is done by setting the value for the API request header, `Prepr-Customer-Id`, when you make the API request to retrieve the content.
Congratulations! You have successfully set up personalization with metrics in your Laravel website.
This brings you to the end of the Laravel complete guide which has given you all the tools and tips you need to create your own web app
connected to Prepr CMS complete with personalization, and A/B testing.
Don't hesitate to [give us feedback](mailto:feedback@prepr.io) on your experience using this guide.
## Next steps
To learn more on how to expand your project, check out the following resources:
- [Set up visual editing](/project-setup/setting-up-previews-and-visual-editing)
- [More data collection details](/data-collection)
- [More about A/B testing](/ab-testing)
- [More about personalization](/personalization)
Source: https://docs.prepr.io/connecting-a-front-end-framework/laravel/laravel-complete-guide/step-5-add-personalization
---
# Complete guide to Laravel and Prepr
*This guide shows you how to connect Prepr to a Laravel project including styling, adaptive content, and A/B testing.*
Follow the steps below in the recommended order to set up your own working Laravel website with adaptive content, A/B testing and a preview bar.
You can also customize this project to fit the requirements for your web app.
Source: https://docs.prepr.io/connecting-a-front-end-framework/laravel/laravel-complete-guide
---
# Adding images to web apps
*This step-by-step guide describes how to add images to your web application.*
## Introduction
Prepr simplifies asset management and provides multi-format support.
This guide covers the end-to-end workflow from defining image assets in your Prepr schema, adding images to content items and fetching them via the API.
## Prerequisites
You need to have the following setup before you can render images in your web application.
- [A free Prepr account](https://signup.prepr.io/)
- [At least one content model](/content-modeling/managing-models#create-a-model) in your environment.
## Adding images to your web application
The steps below make use of the example of a cover image in blog articles.
That's it. Once you [publish your content item](/content-management/managing-content/managing-content-items#publish-a-content-item), images become available in your web application in the best possible format.
## Want to learn more?
Check out the following guides to learn how to add other asset types to your web application:
- [Video & Audio](/development/best-practices/assets/video-audio)
- [Live video stream](/development/best-practices/assets/live-video-stream)
- [Files](/development/best-practices/assets/files)
Source: https://docs.prepr.io/development/best-practices/assets/images
---
# Adding video and audio to web apps
*Follow this guide to learn how to add video and audio files to your web application.*
## Introduction
Prepr simplifies asset management and provides multi-format support so you can embed video and audio files in your web application.
This guide covers the end-to-end workflow from defining video/audio assets in your Prepr schema, adding these assets to content items and fetching them via the API.
## Prerequisites
You need to have the following setup before you can embed video and audio files in your web application.
- [A free Prepr account](https://signup.prepr.io/)
- [At least one content model](/content-modeling/managing-models#create-a-model) in your environment.
## Embedding video and audio files in your web application
The steps below make use of the example of including a video or audio file in the content ([*Dynamic content* field](/content-modeling/field-types#dynamic-content-field)) of blog articles.
## Want to learn more?
Check out the following guides to learn how to add other asset types to your web application:
- [Live video stream](/development/best-practices/assets/live-video-stream)
- [Images](/development/best-practices/assets/images)
- [Files](/development/best-practices/assets/files)
Source: https://docs.prepr.io/development/best-practices/assets/video-audio
---
# Adding live video streams to web apps
*Follow this guide to learn how to add a live video stream to your web application using Prepr.*
## Introduction
Imagine you are about to hold a corporate event.
In this case, you may want to create a web page to announce and broadcast your virtual event.
Also, recording your online event might be essential, especially if you attract attendees located in another time zone or want to send out the replay to all registrants.
Prepr makes all this incredibly simple with the *Live streaming* feature powered by Mux's advanced video services.
Prepr works as a centralized interface you can use for the following purposes:
- Create and manage a live video stream.
- Integrate a live video stream in a web application using the API and a video player.
- Save and store your live stream as an on-demand video recording.
## Prerequisites
You need to have the following setup before you can render images in your web application.
- [A free Prepr account](https://signup.prepr.io/)
- [At least one content model](/content-modeling/managing-models#create-a-model) in your environment.
## Adding live streams to your web application
The steps below make use of the example of a live stream in a blog article.
## Want to learn more?
Check out the following guides to learn how to add other asset types to your web application:
- [Images](/development/best-practices/assets/images)
- [Video & Audio](/development/best-practices/assets/video-audio)
- [Files](/development/best-practices/assets/files)
Source: https://docs.prepr.io/development/best-practices/assets/live-video-stream
---
# Adding files to web apps
*This guide describes adding different file formats such as PDF, ZIP, GIF, and more to your web application using Prepr.*
## Introduction
Prepr allows you to add several file formats to a web application.
You can use popular file types like `PDF` and `ZIP`, for example, to publish a *Press kit*, *Terms of use*, or any other document you want your website visitors to download.
## Prerequisites
You need to have the following setup before you can embed downloadable files in your web application.
- [A free Prepr account](https://signup.prepr.io/)
- [At least one content model](/content-modeling/managing-models#create-a-model) in your environment.
## Adding downloadable files to your web application
The steps below make use of the example of downloadable files in blog articles.
That's it. Once you [publish your content item](/content-management/managing-content/managing-content-items#publish-a-content-item), your file becomes available in your web application for download.
## Want to learn more?
Check out the following guides to learn how to add other asset types to your web application:
- [Images](/development/best-practices/assets/images)
- [Video & Audio](/development/best-practices/assets/video-audio)
- [Live video stream](/development/best-practices/assets/live-video-stream)
Source: https://docs.prepr.io/development/best-practices/assets/files
---
# Working with assets
Follow these guidelines to help you include images, videos, audios, and files in your web applications.
Source: https://docs.prepr.io/development/best-practices/assets