Edit and configure assets
This article describes the Prepr features you can use to edit and configure assets before adding them to your web application.
Introduction to asset configuration
Media files can enrich your website content only when they are qualitative and usable. For instance, images should be optimized for a device and presented at the highest resolution possible. Likewise, having a well-described video with the key cues in your audience’s native language increases the chances your customers will watch the content. In other words, the way you configure your assets significantly affects your content usability.
Prepr gives you various options to configure your assets. Let’s take a closer look.
Image cropping
The Cropping is one of the most important image operations. It makes images look great on all devices, such as mobile, desktops, and tablets. With Prepr, you can crop image files easily, without altering the original files in the Media Library. All you need to do is define the image presets, crop images, and retrieve the presets using the API.
Add image presets
Before you can crop image files, ask the content modeler to define the image presets. The Image presets in Prepr are image size templates you can predefine for different device types or use cases. For example, you may want to define a preset for displaying images on mobile or using them in a banner.
For more information, check out the Field types doc on how to define presets in either the Assets field or the Dynamic content field.
Once done, you can crop your image files.
Crop new images
To crop images when adding them to a content item, do as follows:
-
Navigate to the Content tab and open a content item.
-
On the Content item page, click the icon next to the asset placeholder.
-
In the opened dialog window, upload assets or add them from the Media Library, then click Crop x items.
-
In the crop editor window, select a preset and an area in your crop by dragging the points or moving the entire crop area.
Note
-
When cropping multiple files, click Next in the bottom left corner of the dialog window to crop another file.
-
Click Add items to apply the cropping settings and add images to a content item.

Note
If there are several presets and cropping is required, you must create crops for all of the presets.
Crop existing images
To crop the existing image files in a content item, complete the following steps for each image:
-
Go to the Content tab and open a content item.
-
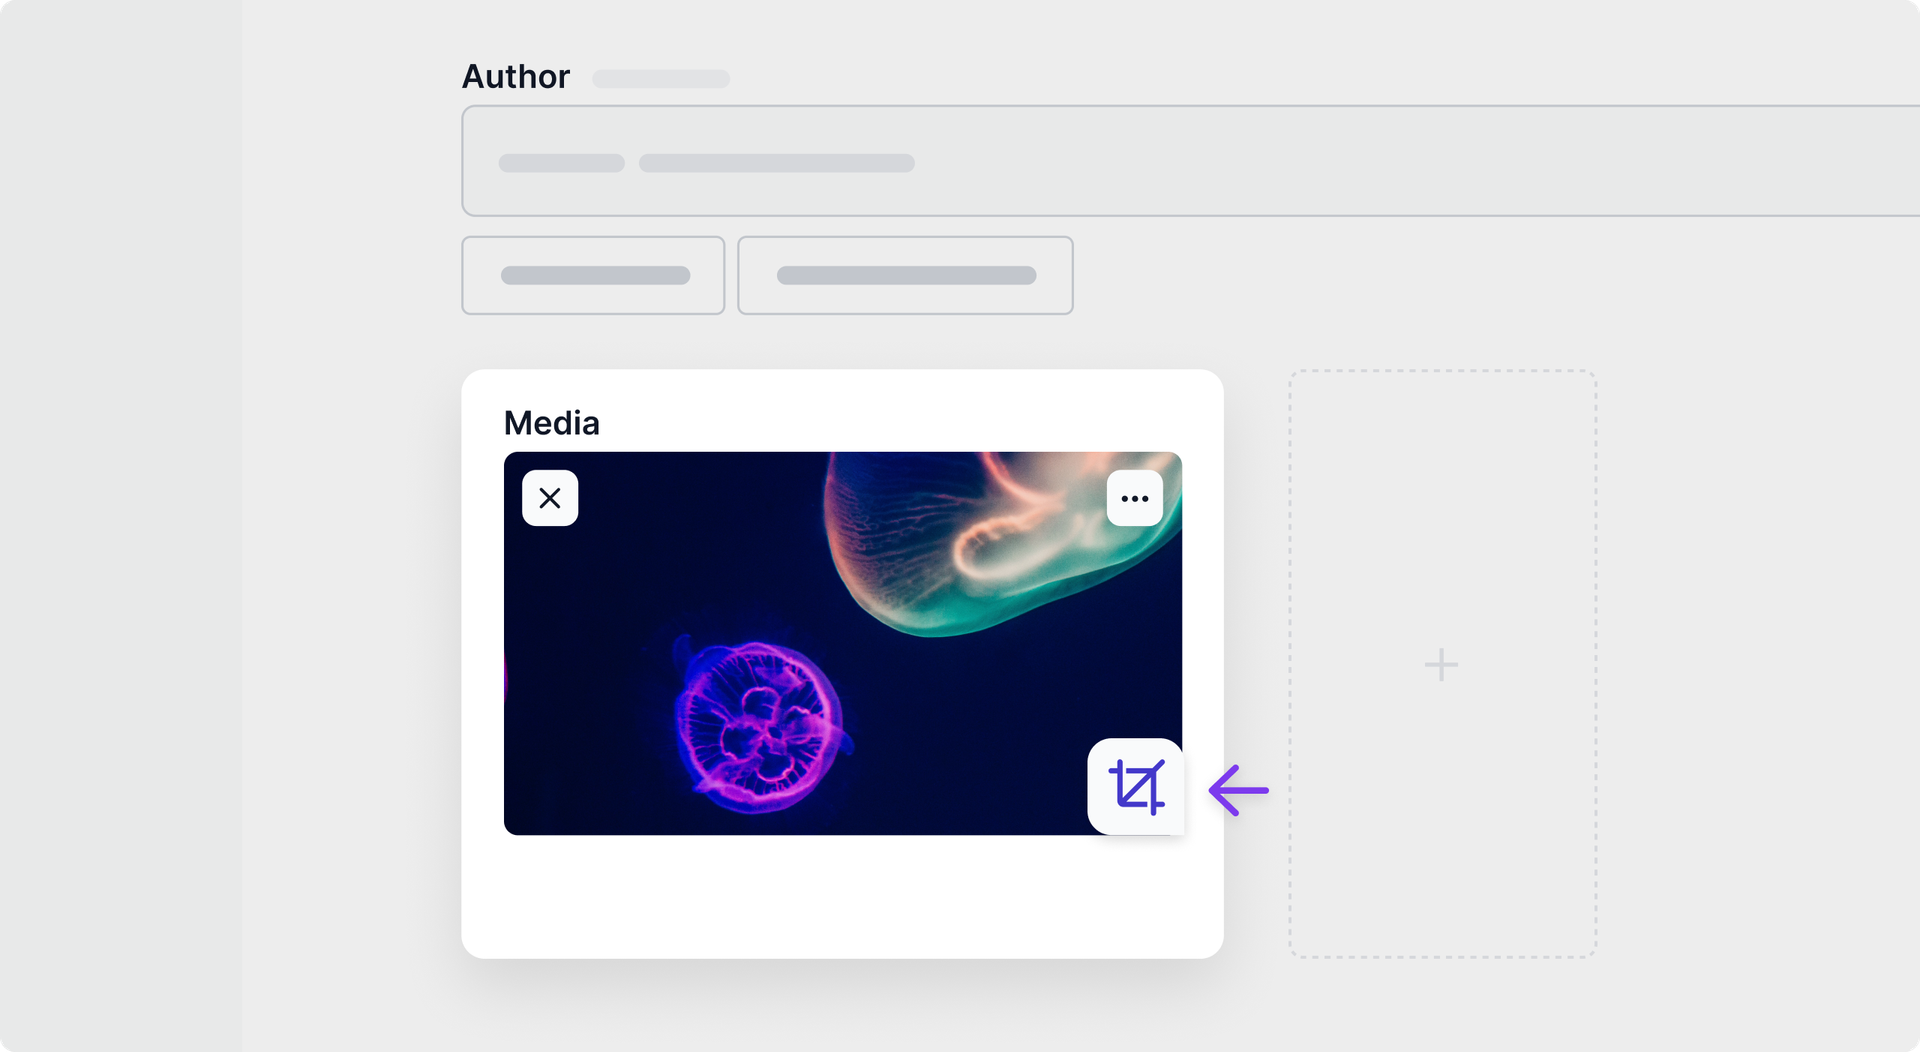
On the Content item page, hover over an image and click the icon in the top right corner, then click Crop image.
-
In the crop editor window, select a preset and an area in your crop by dragging the points or moving the entire crop area.
-
Click Save to apply the new cropping settings.

Tip
Alternatively, click the icon on the image thumbnail to open the crop editor quickly.
Note
If you have several presets and cropping is required, you must create crops for all of the presets.
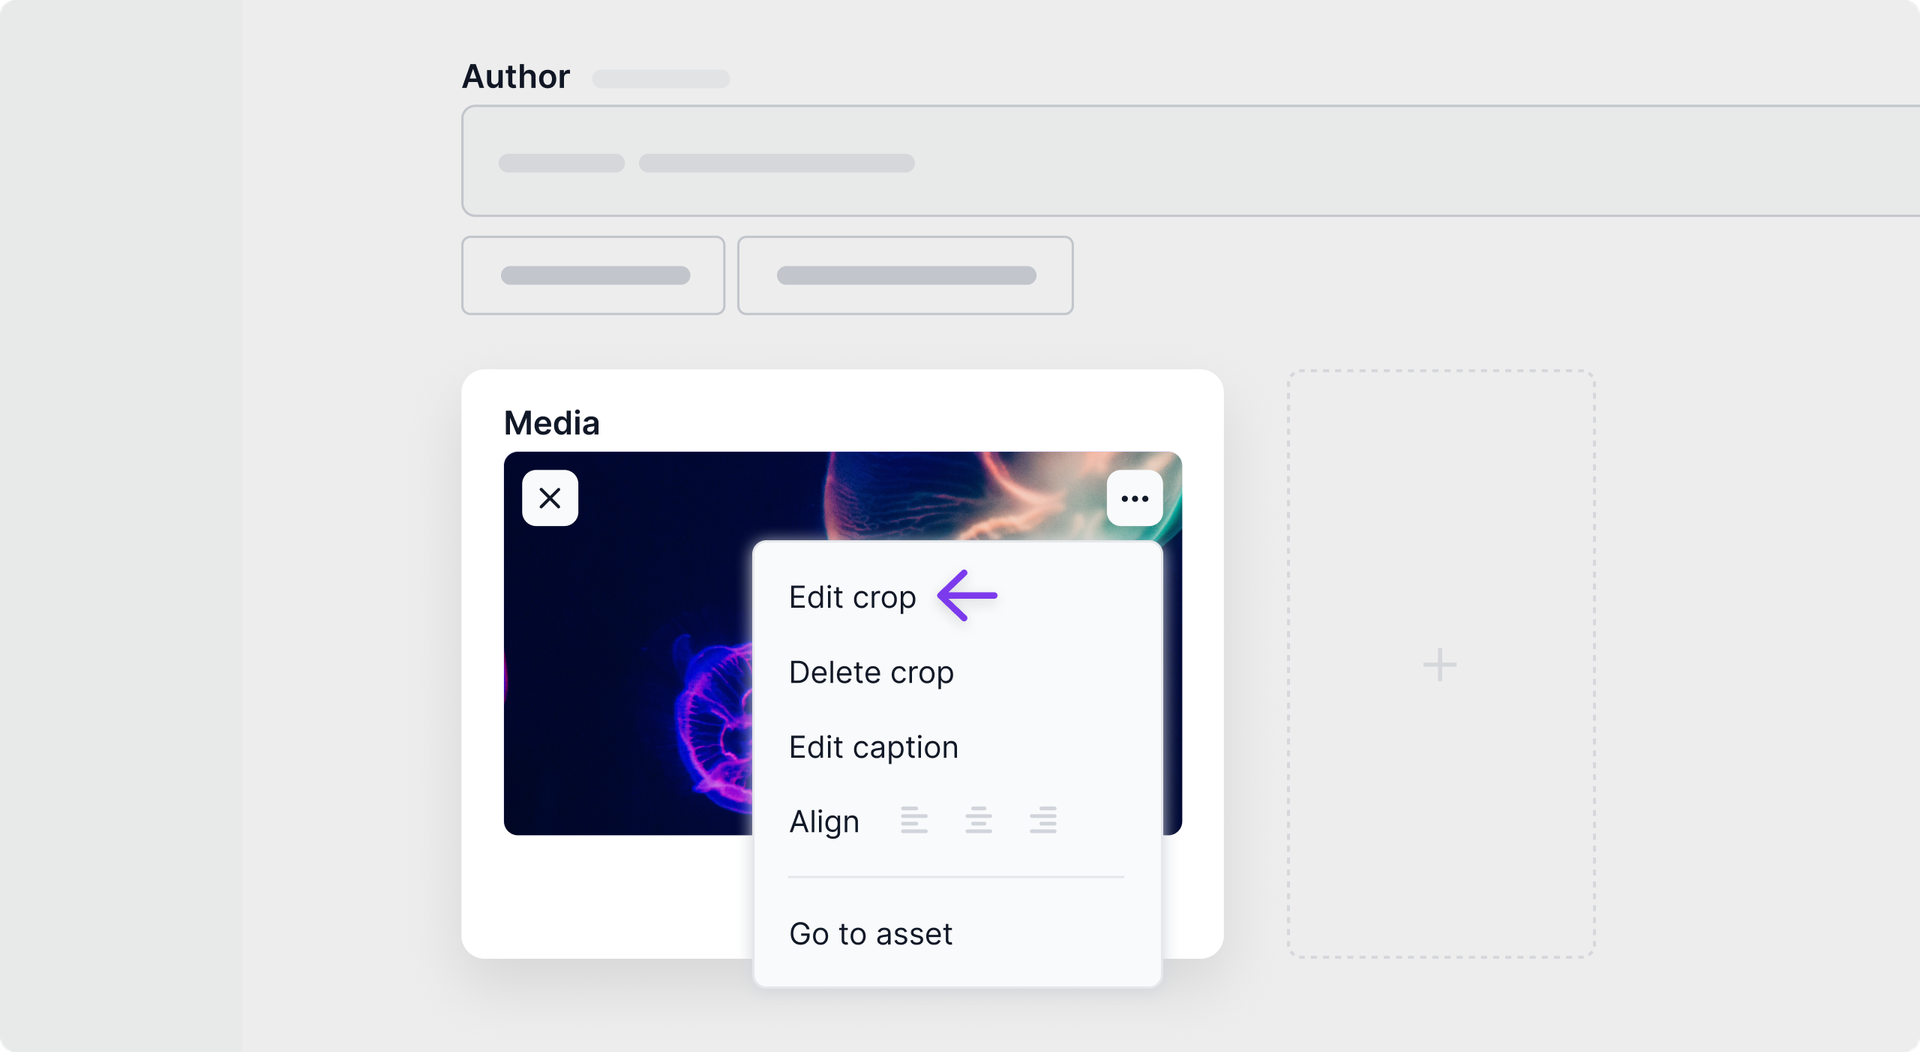
Edit image crop
Once you crop an image, you'll see the icon is highlighted in purple on the image thumbnail.
If you want to change the current crop, do as follows:
-
On the Content item page, hover over an image and click the icon in the top right corner, then click Edit crop.
-
In the crop editor window, provide changes.
-
Click Save to apply the new cropping settings.
Tip
Alternatively, click the icon on the image thumbnail to open the crop editor quickly.
Delete image crop
To delete a crop, do as follows:
-
On the Content item page, hover over an image and click the icon in the top right corner.
-
Click Delete crop.

Note
You cannot delete a crop if cropping is required. In that case, you can only edit the existing crop.
Use cropped images
Once you crop images, you can retrieve them using the API. For that, you need to specify a preset name in your request. For more details, see the sample query for retrieving Presets in the GraphQL API reference.
Tip
Alternatively, you can transform images using the API. For more information, see the appropriate reference:
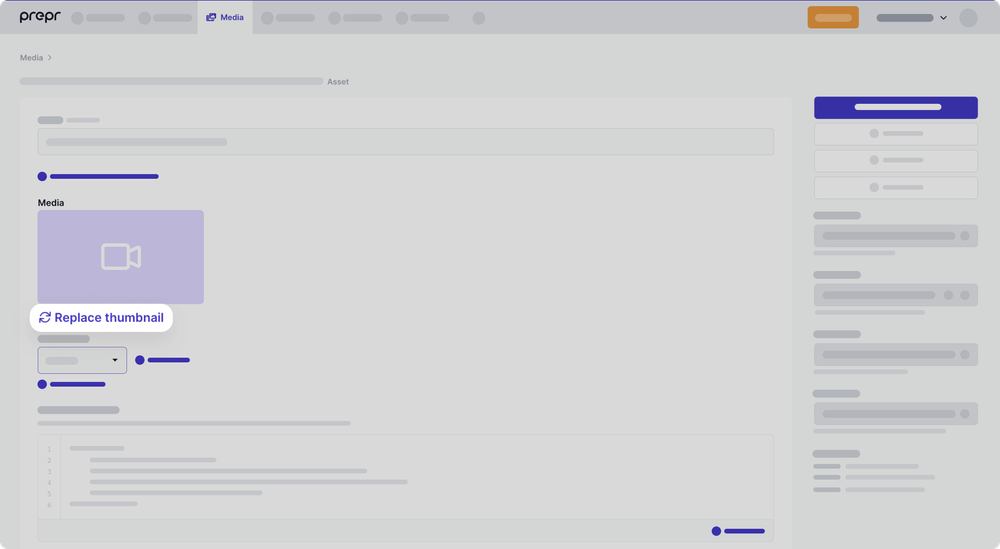
Video thumbnails
By default, a thumbnail image is taken from the middle of the video based on the Playback ID you provide. Still, you can set a custom video thumbnail in Prepr as follows:
- Go to the Media tab and open the needed video file.
- On the Asset details page, click Replace thumbnail.
- In the opened dialog window, choose to upload an image file and click Add.
Tip
You can retrieve a video thumbnail using the cover attribute in your API request. Check out the GraphQL API reference for more details.
Video subtitles
The Subtitle feature lets you add subtitles to your Mux videos in Prepr to provide multilingual support to your web app visitors and extend the web app accessibility.
Note
The Subtitle feature is only compatible with the Mux web player. Read more in the Mux documentation.
To add subtitles, do as follows:
- Go to the Media tab and open the needed video file.
- On the Asset details page, click +Add Subtitle.
- Choose a locale, and upload either an SRT or WebVTT file containing the subtitle information.
Prepr will automatically generate a subtitle URL and add it to the video in Mux.
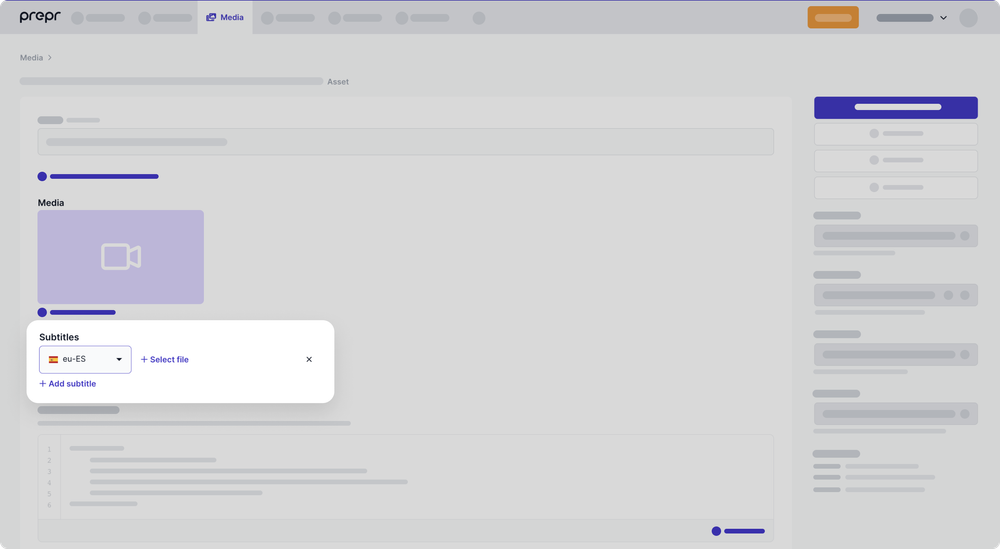
There's no limit on the number of subtitle files you can include in your video asset. Each subtitle file will be stored as an individual file asset in Prepr.
Learn more on how to add videos to your web app.
Caption
The Caption feature lets you create multiple descriptions for a single asset every time you use this asset in a content item or a content item locale. While the Asset Description field in the Media Library is recommended for internal use, captions are helpful in the following cases:
- When you need to describe a single asset across multiple content items.
- When you need to describe a single asset in a multi-language content item.
To create a caption for an asset, complete the following steps:
- First, enable the Caption feature for assets.
Depending on how you include assets in your model, you might need to set up either the Assets field or Dynamic content field. For more information, see Field types.
-
Go to Content tab and open the needed content item.
-
On the Content item page, hover over an image and click the icon in the top right corner, then click Edit caption.
-
In the opened dialog window, type your text, then click Save to apply changes.
To edit an existing caption, go through steps 3-4 from the instructuons above.
Tip
The asset caption is set up per content item locale. Therefore, you can add different captions to each locale of your content item. For more information, see Manage captions in multi-language content items.
Alignment
The Alignment feature lets you position a digital asset within the text elements on a web page. You can choose from the following options:
- Left – aligns the left edges of an asset and text element.
- Center – aligns the center points of an asset and text element.
- Right – aligns the right edges of an asset and text element.
To align an asset, complete the following steps:
- First, enable the Alignment feature for assets.
Depending on how you include assets in your model, you might need to set up either the Assets field or Dynamic content field. For more information, see Field types.
-
Go to Content tab and open the needed content item.
-
On the Content item page, hover over an image and click the icon in the top right corner.
-
Select the desired align option.
