Managing enumerations
This article explains how to create and use an enumeration in Prepr. An enumeration is a predefined list of values that can be used in models and components.
Create an enumeration
To create an enumeration, follow these steps:
- Click the Schema tab to open the Schema Editor.
- Then, click the + Add enumeration button.
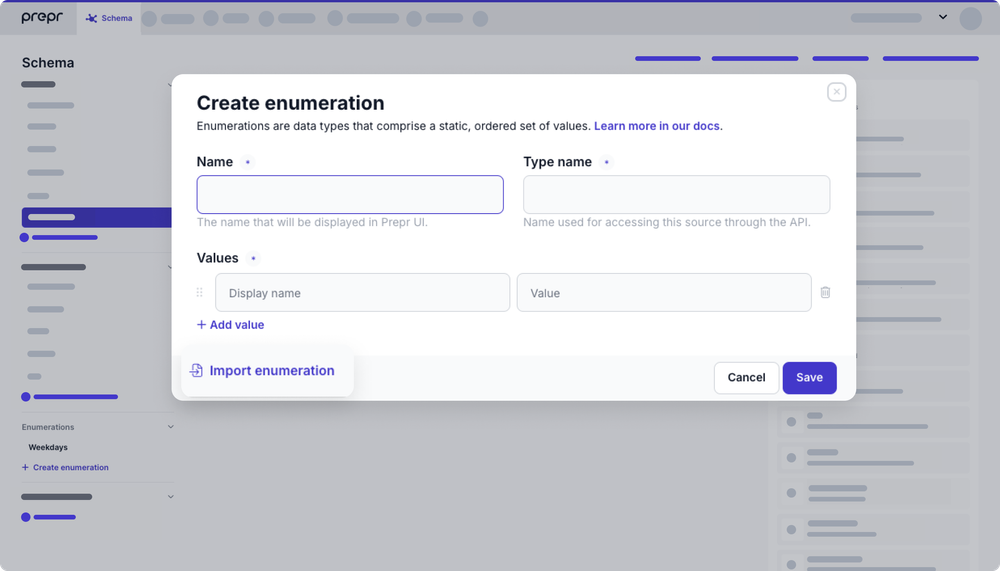
- Fill in a unique Display name value for the enumeration.
The value of the API ID is automatically generated. This field is important for the GraphQL API to connect your front end to Prepr. When you create a new enumeration, this name is generated as follows: PascalCase version of the Display name, stripped of all non-alphanumeric characters. For example, the Display name value of Days of the week generates DaysOfTheWeek.
- Add each of the list values and click the Save button. The Name values are visible to content editors.
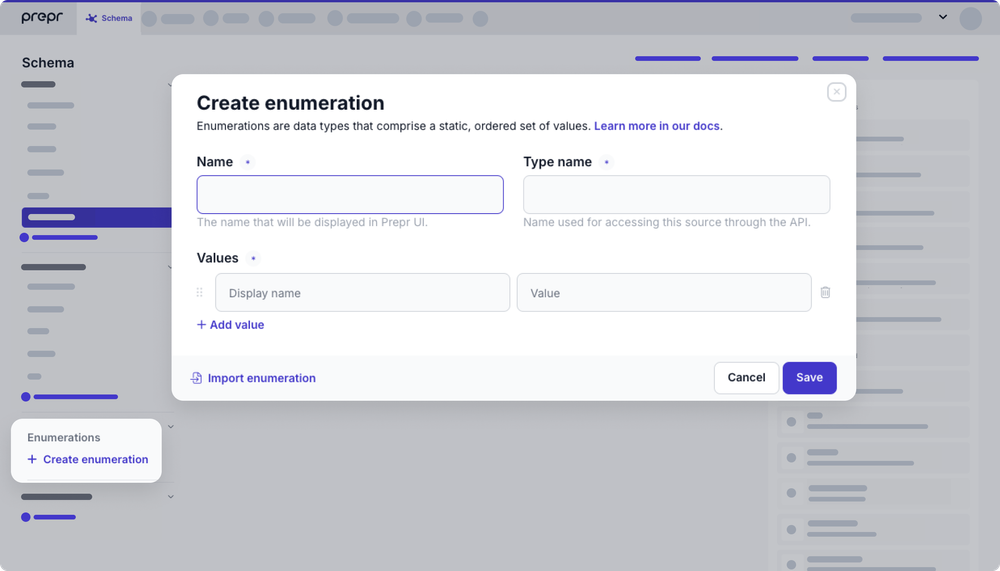
Once your enumeration is created, it's ready for you to use in a model or component.
Duplicate an enumeration
In some cases you can duplicate an enumeration to save time when you want to create an enumeration that is similar to an existing one.
To duplicate an existing enumeration follow the steps below.
- Click the Schema tab to open the Schema Editor.
- Click the enumeration you want to copy.
- Click the button at the top of the enumeration.
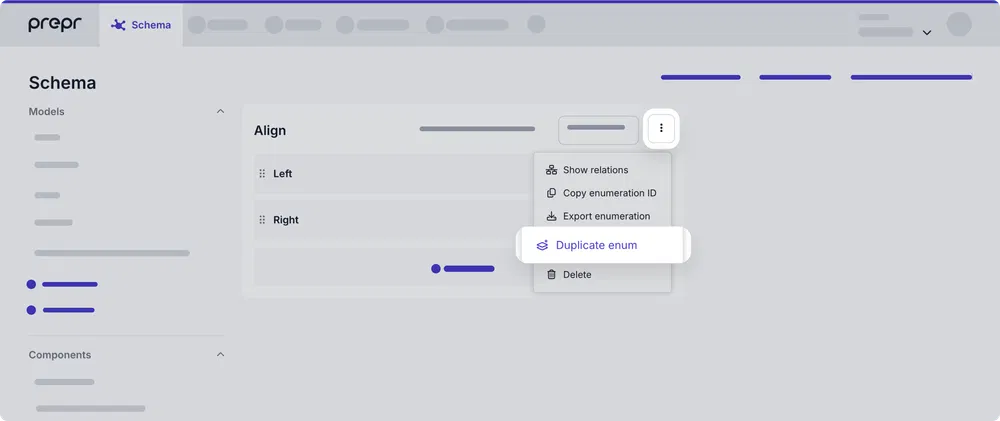
- Click the Duplicate enum option. The duplicate process is an automatic export and import of the enumeration.
- Once done, click the Close button.
You'll see the duplicated enumeration in the schema with (Copy) in the name. You can then rename and edit the duplicated enumeration, as needed.
Add the enumeration to a model or component
Go to the model or component where you want to include the enumeration and follow the steps below.
- Add a List field to the model or component. Check out the model and component docs for more details.
- From the Select enumeration dropdown, choose your enumeration.
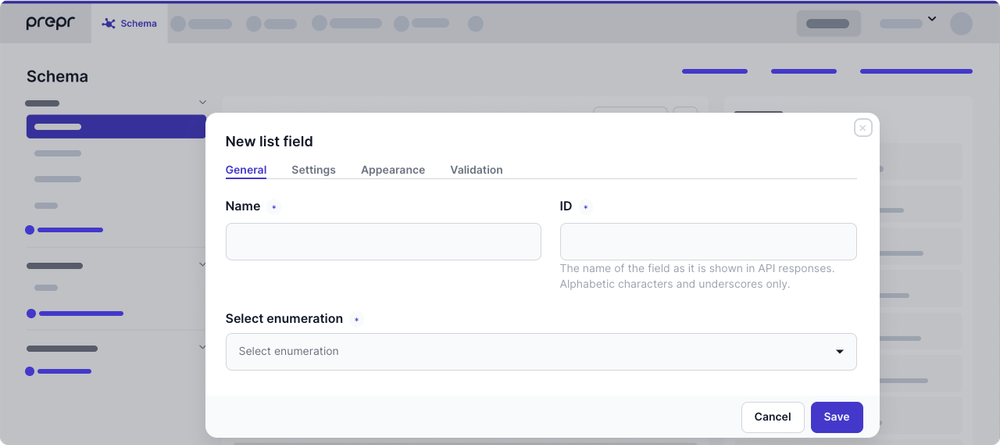
And that's it. You've successfully included your enumeration in a model or component.
To prevent schema integrity issues and impact to existing content items, you cannot update an enumeration once it has been set in a List field in your model or component.
Organize enumerations into folders
When you have dozens of enumerations, folders make it easy to find related enumerations. For example, when you have multiple enumerations which are used in the same components.
Click the Add folder link and enter a name for the new folder. Select the enumerations that you want to include in the new folder. Click the Add folder button.
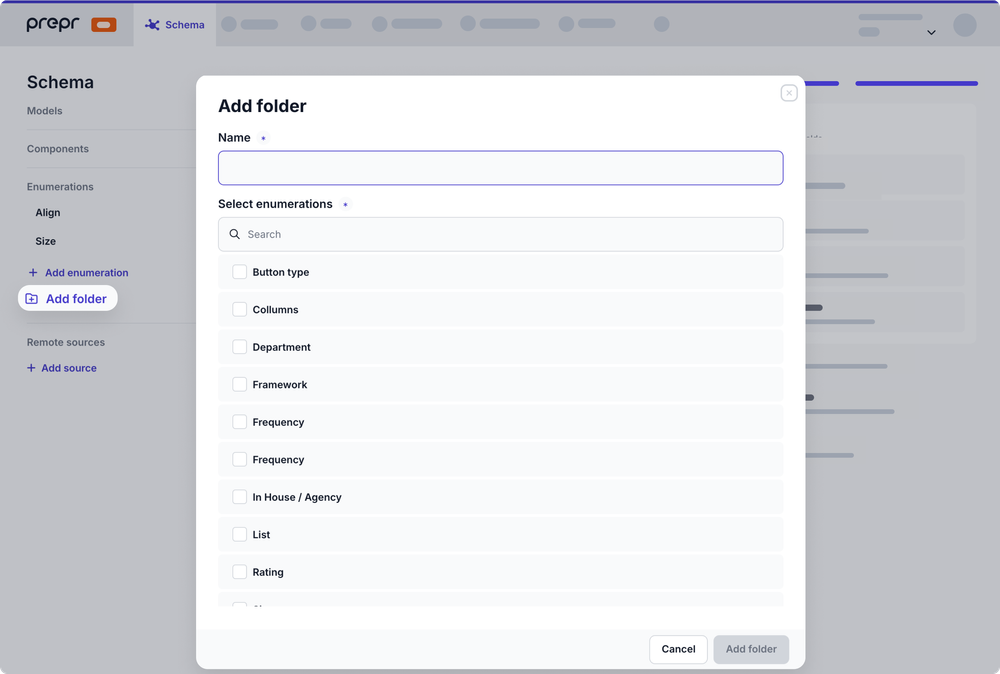
To add or remove enumerations from an existing folder, click the button next to the folder name and select Edit. You can then select or deselect the enumerations that you want to add or remove.
You can also delete the folder by selecting Delete. The folder structure will be removed and the included enumerations will return to the alphabetical list of enumerations.
Export and import an enumeration
Use the export and import if you only need a couple of enumerations copied from one environment to another. For example, export an enumeration from your production environment and import it into your development environment.
To sync a schema with models, components, enumerations and remote sources from another environment then follow the process detailed in the Sync schema doc instead.
To share the same enumerations across multiple environments, for example when an organization has different brands, but needs content in separate environments, you can create a shared schema as detailed in the Shared schemas doc.
To export an enumeration, follow these steps:
- Click the Schema tab to open the Schema Editor.
- Click the enumeration that you want to export from the list of enumerations on the left.
- Click the button at the top of the enumeration.
- Click the Export enumeration option to download a JSON file of the enumeration.
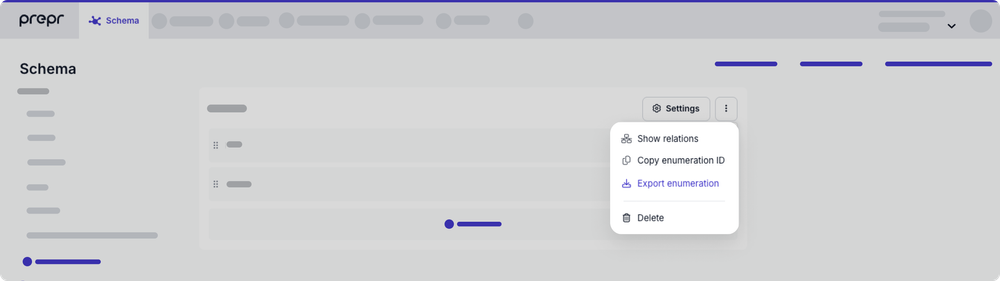
When the export is successful, you'll find the JSON file in the location you selected.
To import an enumeration, follow these steps:
- Click the Schema tab to open the Schema Editor.
- Then, click the + Add enumeration button.
- Click the Import enumeration link.
- Choose the JSON file of the enumeration that you want to import.
When the import is successful, you'll see the detailed enumeration in your schema.
Was this article helpful?
We’d love to learn from your feedback