Using assets in content items
This guide describes the Prepr features you can use to edit and configure assets when adding them to your web application.
Introduction
Media files can enrich your website content only when they are qualitative and usable. For instance, images should be optimized for a device and presented at the highest resolution possible. Likewise, having a well-described video with the key cues in your audience’s native language increases the chances your customers will watch the content. In other words, the way you configure your assets significantly affects your content usability.
The following options are available for you to edit and configure assets in your content item:
- Adding captions
- Setting alignment
- Setting an image focal point
- Cropping images
- Setting a download filename
Before configuring your assets though, let’s first look at how to add assets to a content item.
Adding assets to a content item
If asset fields are defined in the model of your content item, you’ll see an asset block for each asset field. Check out more details on the supported assets in Prepr.
To add assets to a content item, simply drag and drop the asset file from your local storage to this block, or click it to open the media window dialog to choose an existing file in Prepr.

From this window, you can also click the Upload asset button instead to choose the files you want to upload and add them to your content item.
Once done, click the Add x assets button to add these to the content item.
Now that you know how to add assets to a content item, let’s dive into different display options for the images.
Setting alignment
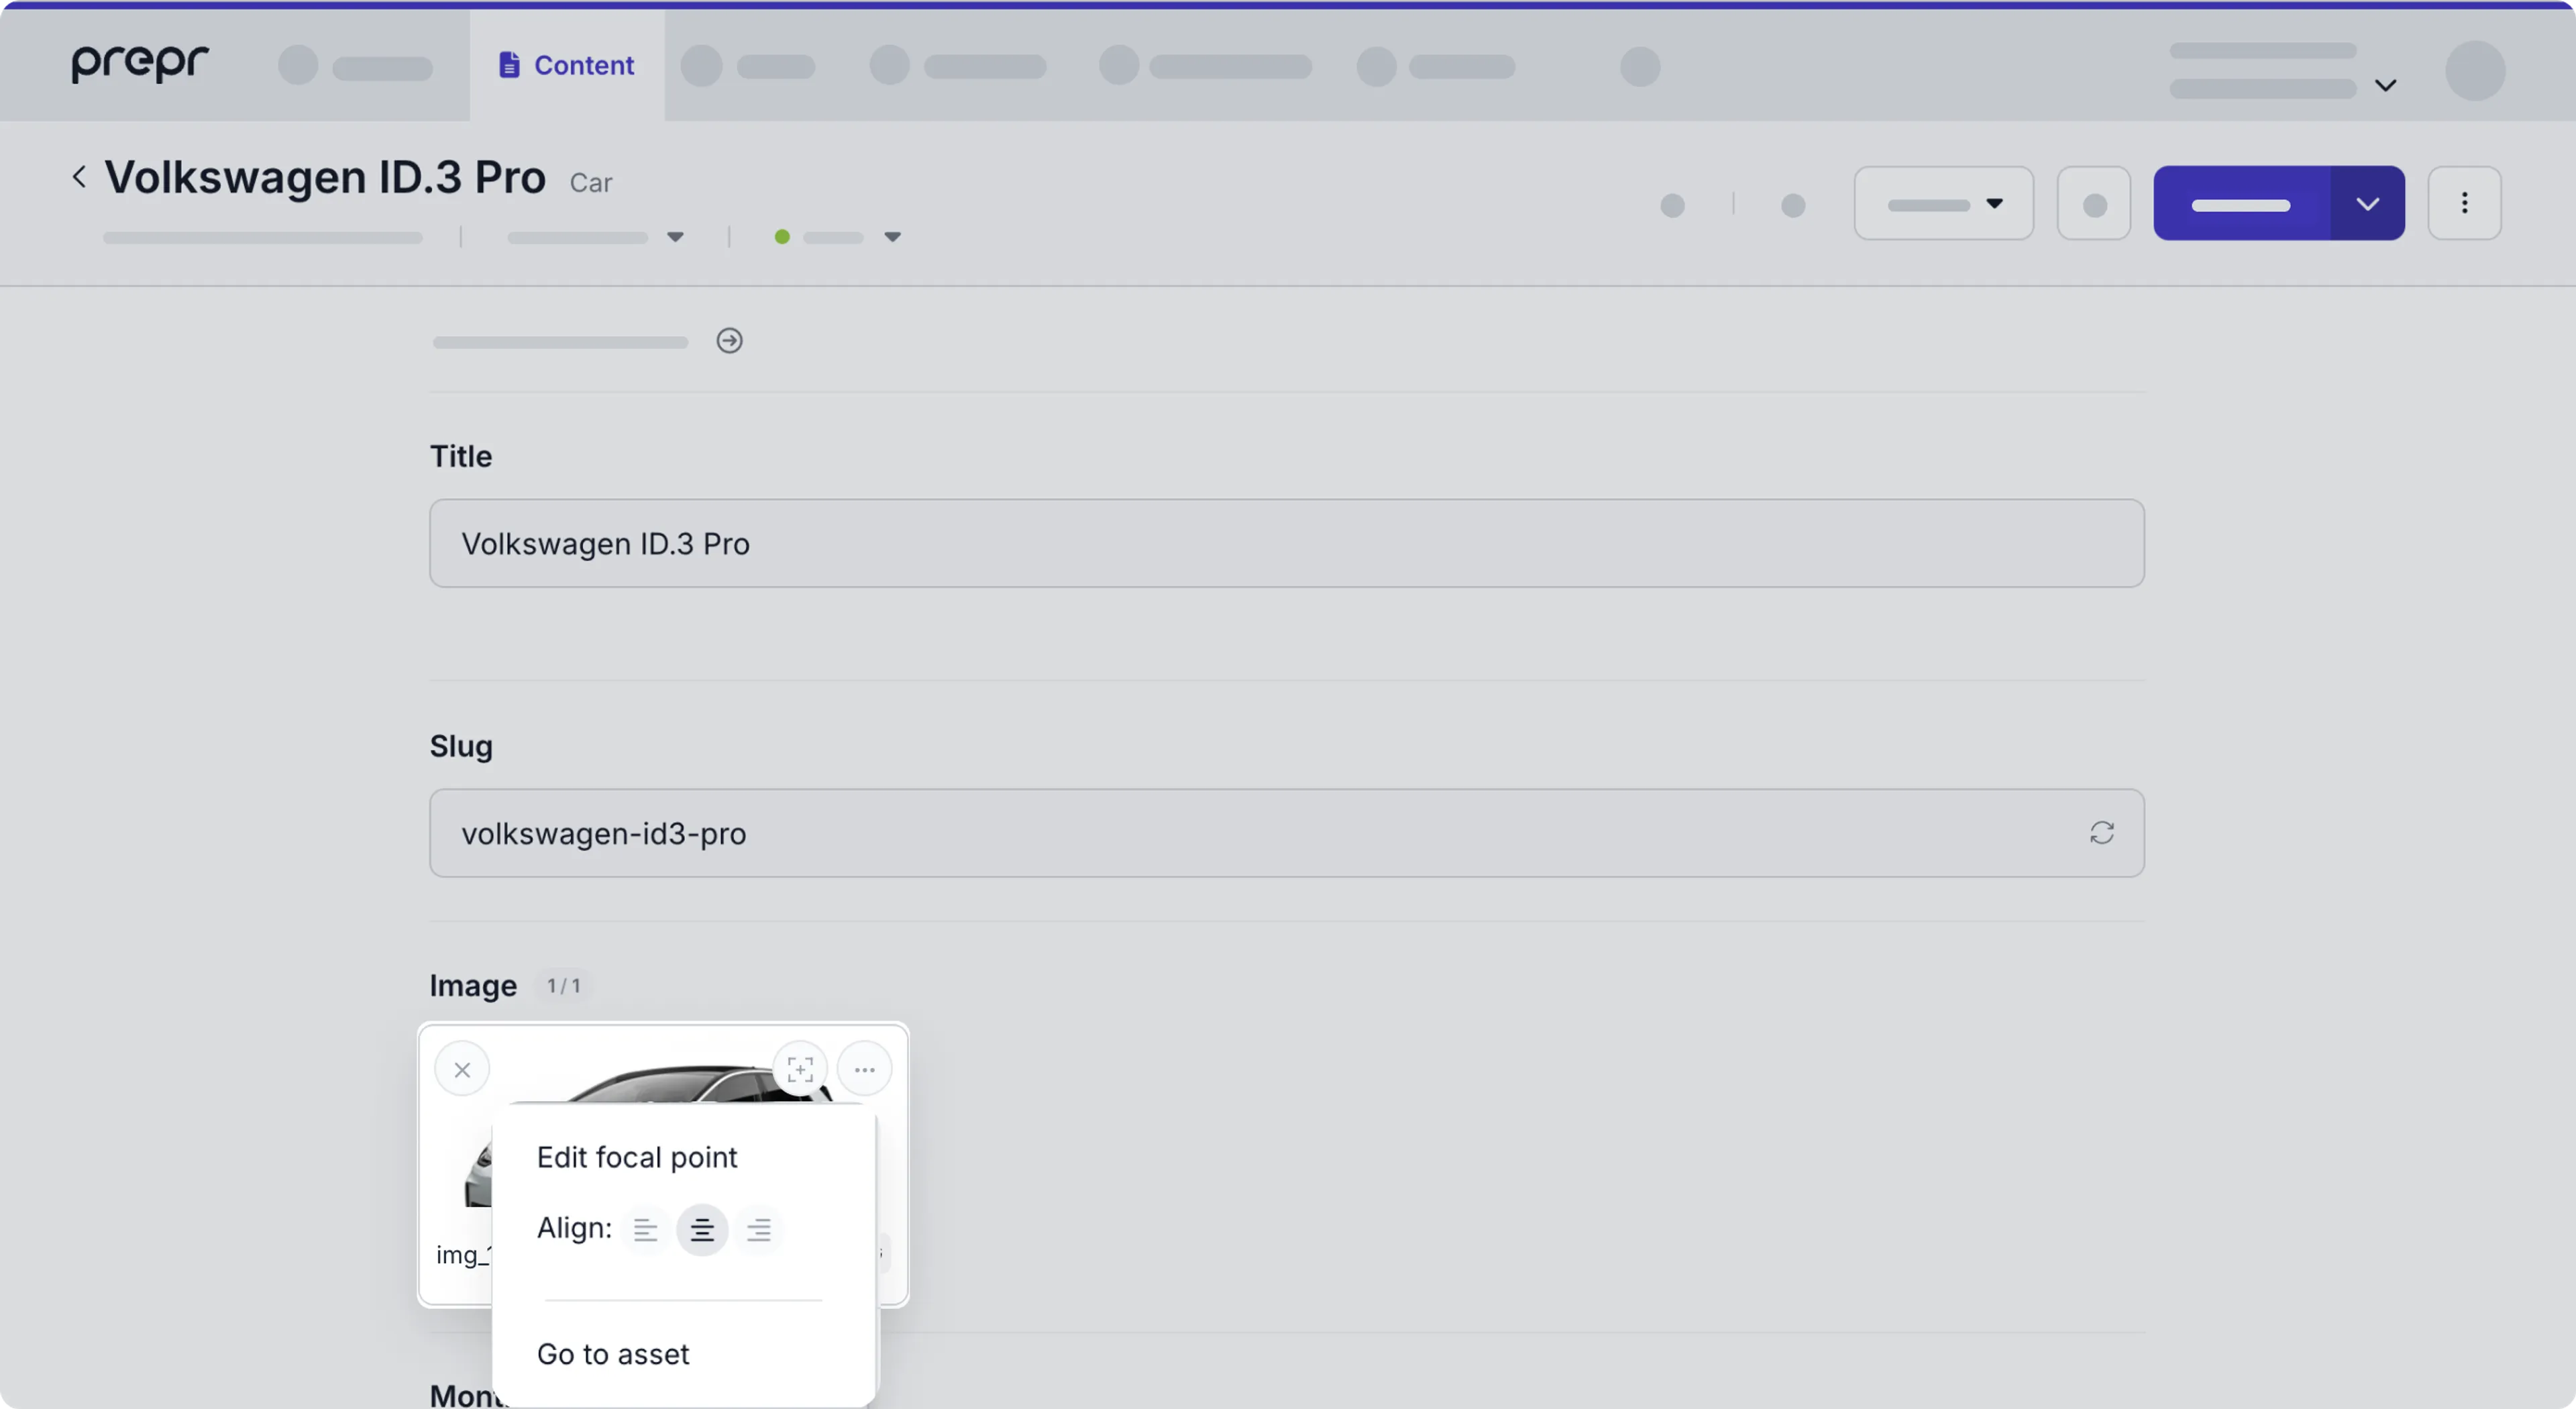
The Alignment feature lets you position a digital asset within the text elements on a web page. You can choose from the following options:
- Left – aligns the left edges of an asset and text element.
- Center – aligns the center points of an asset and text element.
- Right – aligns the right edges of an asset and text element.
To align an asset, a developer can enable the Allow alignment toggle in the asset field settings.
- On the Content item page, hover over an image and click the icon in the top right corner.
- Select the desired alignment option.
Adding captions
The Caption feature lets you create multiple descriptions for a single asset every time you use this asset in a content item or a content item locale. While the Asset Description field is recommended for internal use, captions are helpful in the following cases:
- When you need to describe a single asset across multiple content items.
- When you need to describe a single asset in a multi-language content item.
To create a caption for an asset, a developer can enable the Allow caption toggle in the asset field settings.
-
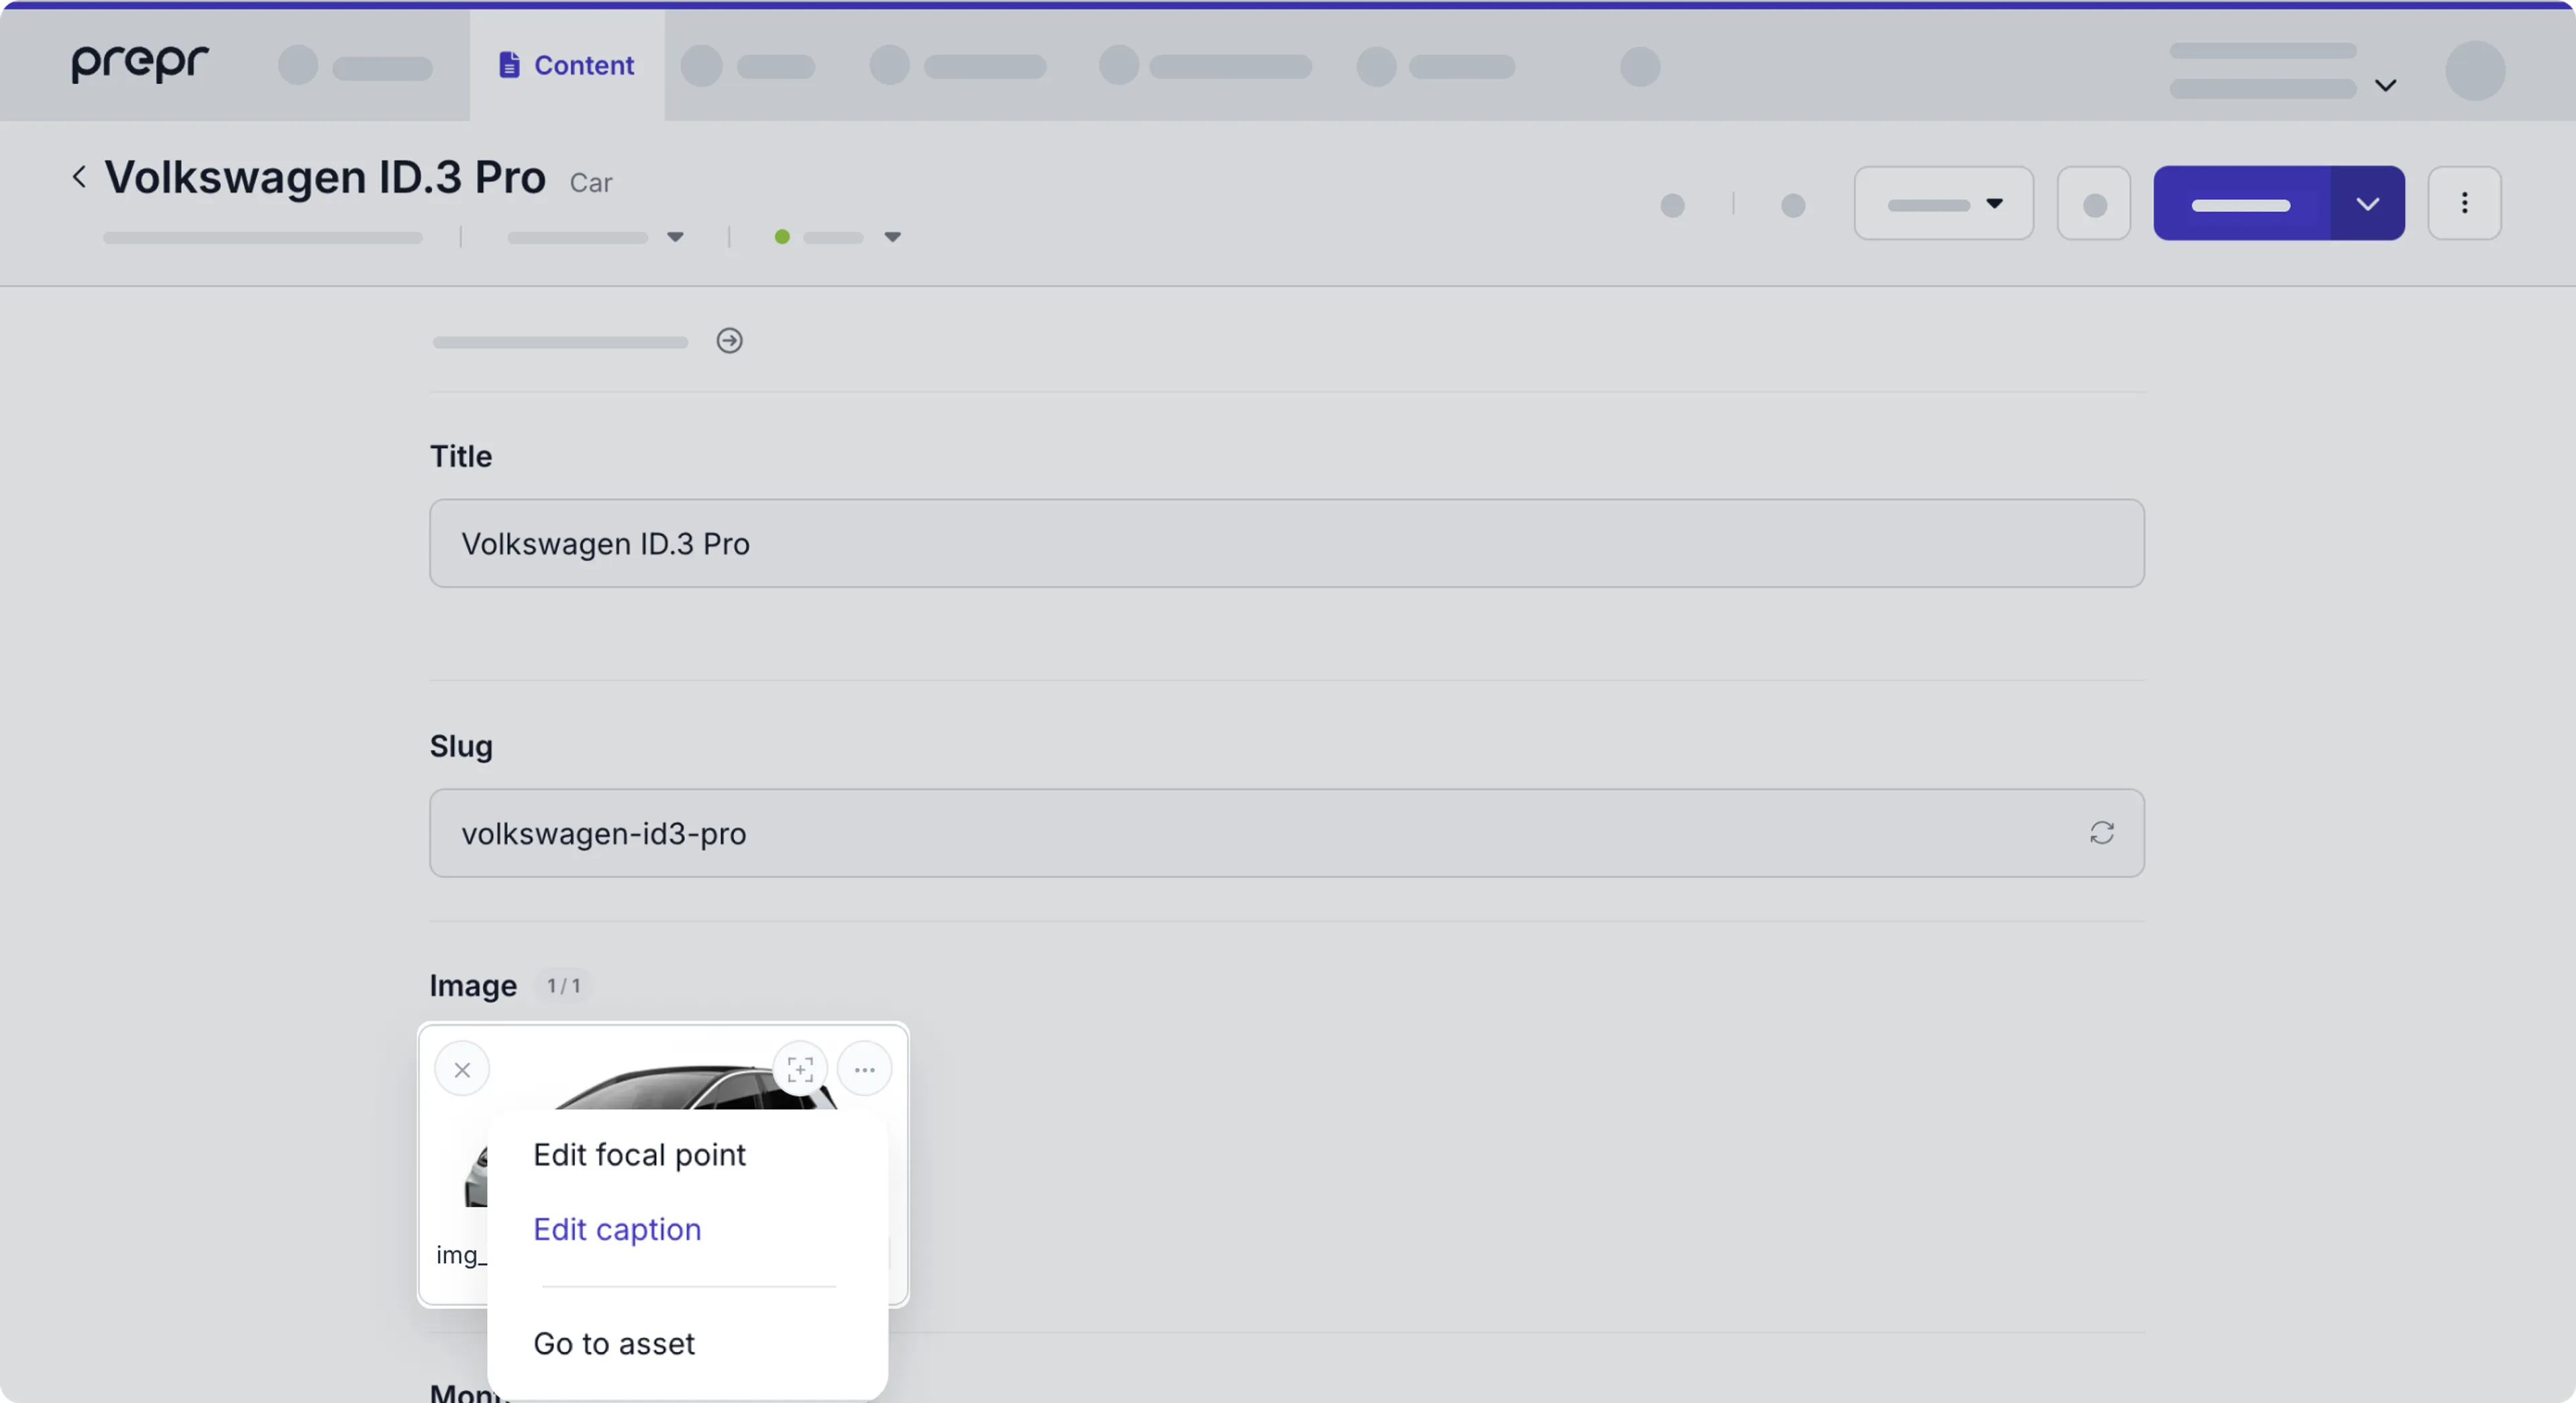
On the Content item page, hover over the image thumbnail and click the icon in the top right corner, then click Edit caption.
-
In the opened dialog window, type your text, then click Save to apply your caption.
The asset caption is set up per content item locale. Therefore, you can add different captions to each locale of your content item. For more information, see Manage captions in multi-language content items.
Setting an image focal point
An image focal point is the key area that you want to remain visible regardless of how the image is resized. It ensures that important parts of the image (such as a person’s face or a product) stay in focus when displayed across different screen sizes or aspect ratios. If the set image focal point option is enabled, you can choose the focal point for an image when adding or editing the image in a content item .
Set focal point for new image
Follow the same process above to add images to a content item. When adding an image to a content item and a focal point is required in the asset field settings, you’ll see the Set focal point button at the bottom of the Media dialog window.
- Click the Set focal point button to open the Set focal point modal.
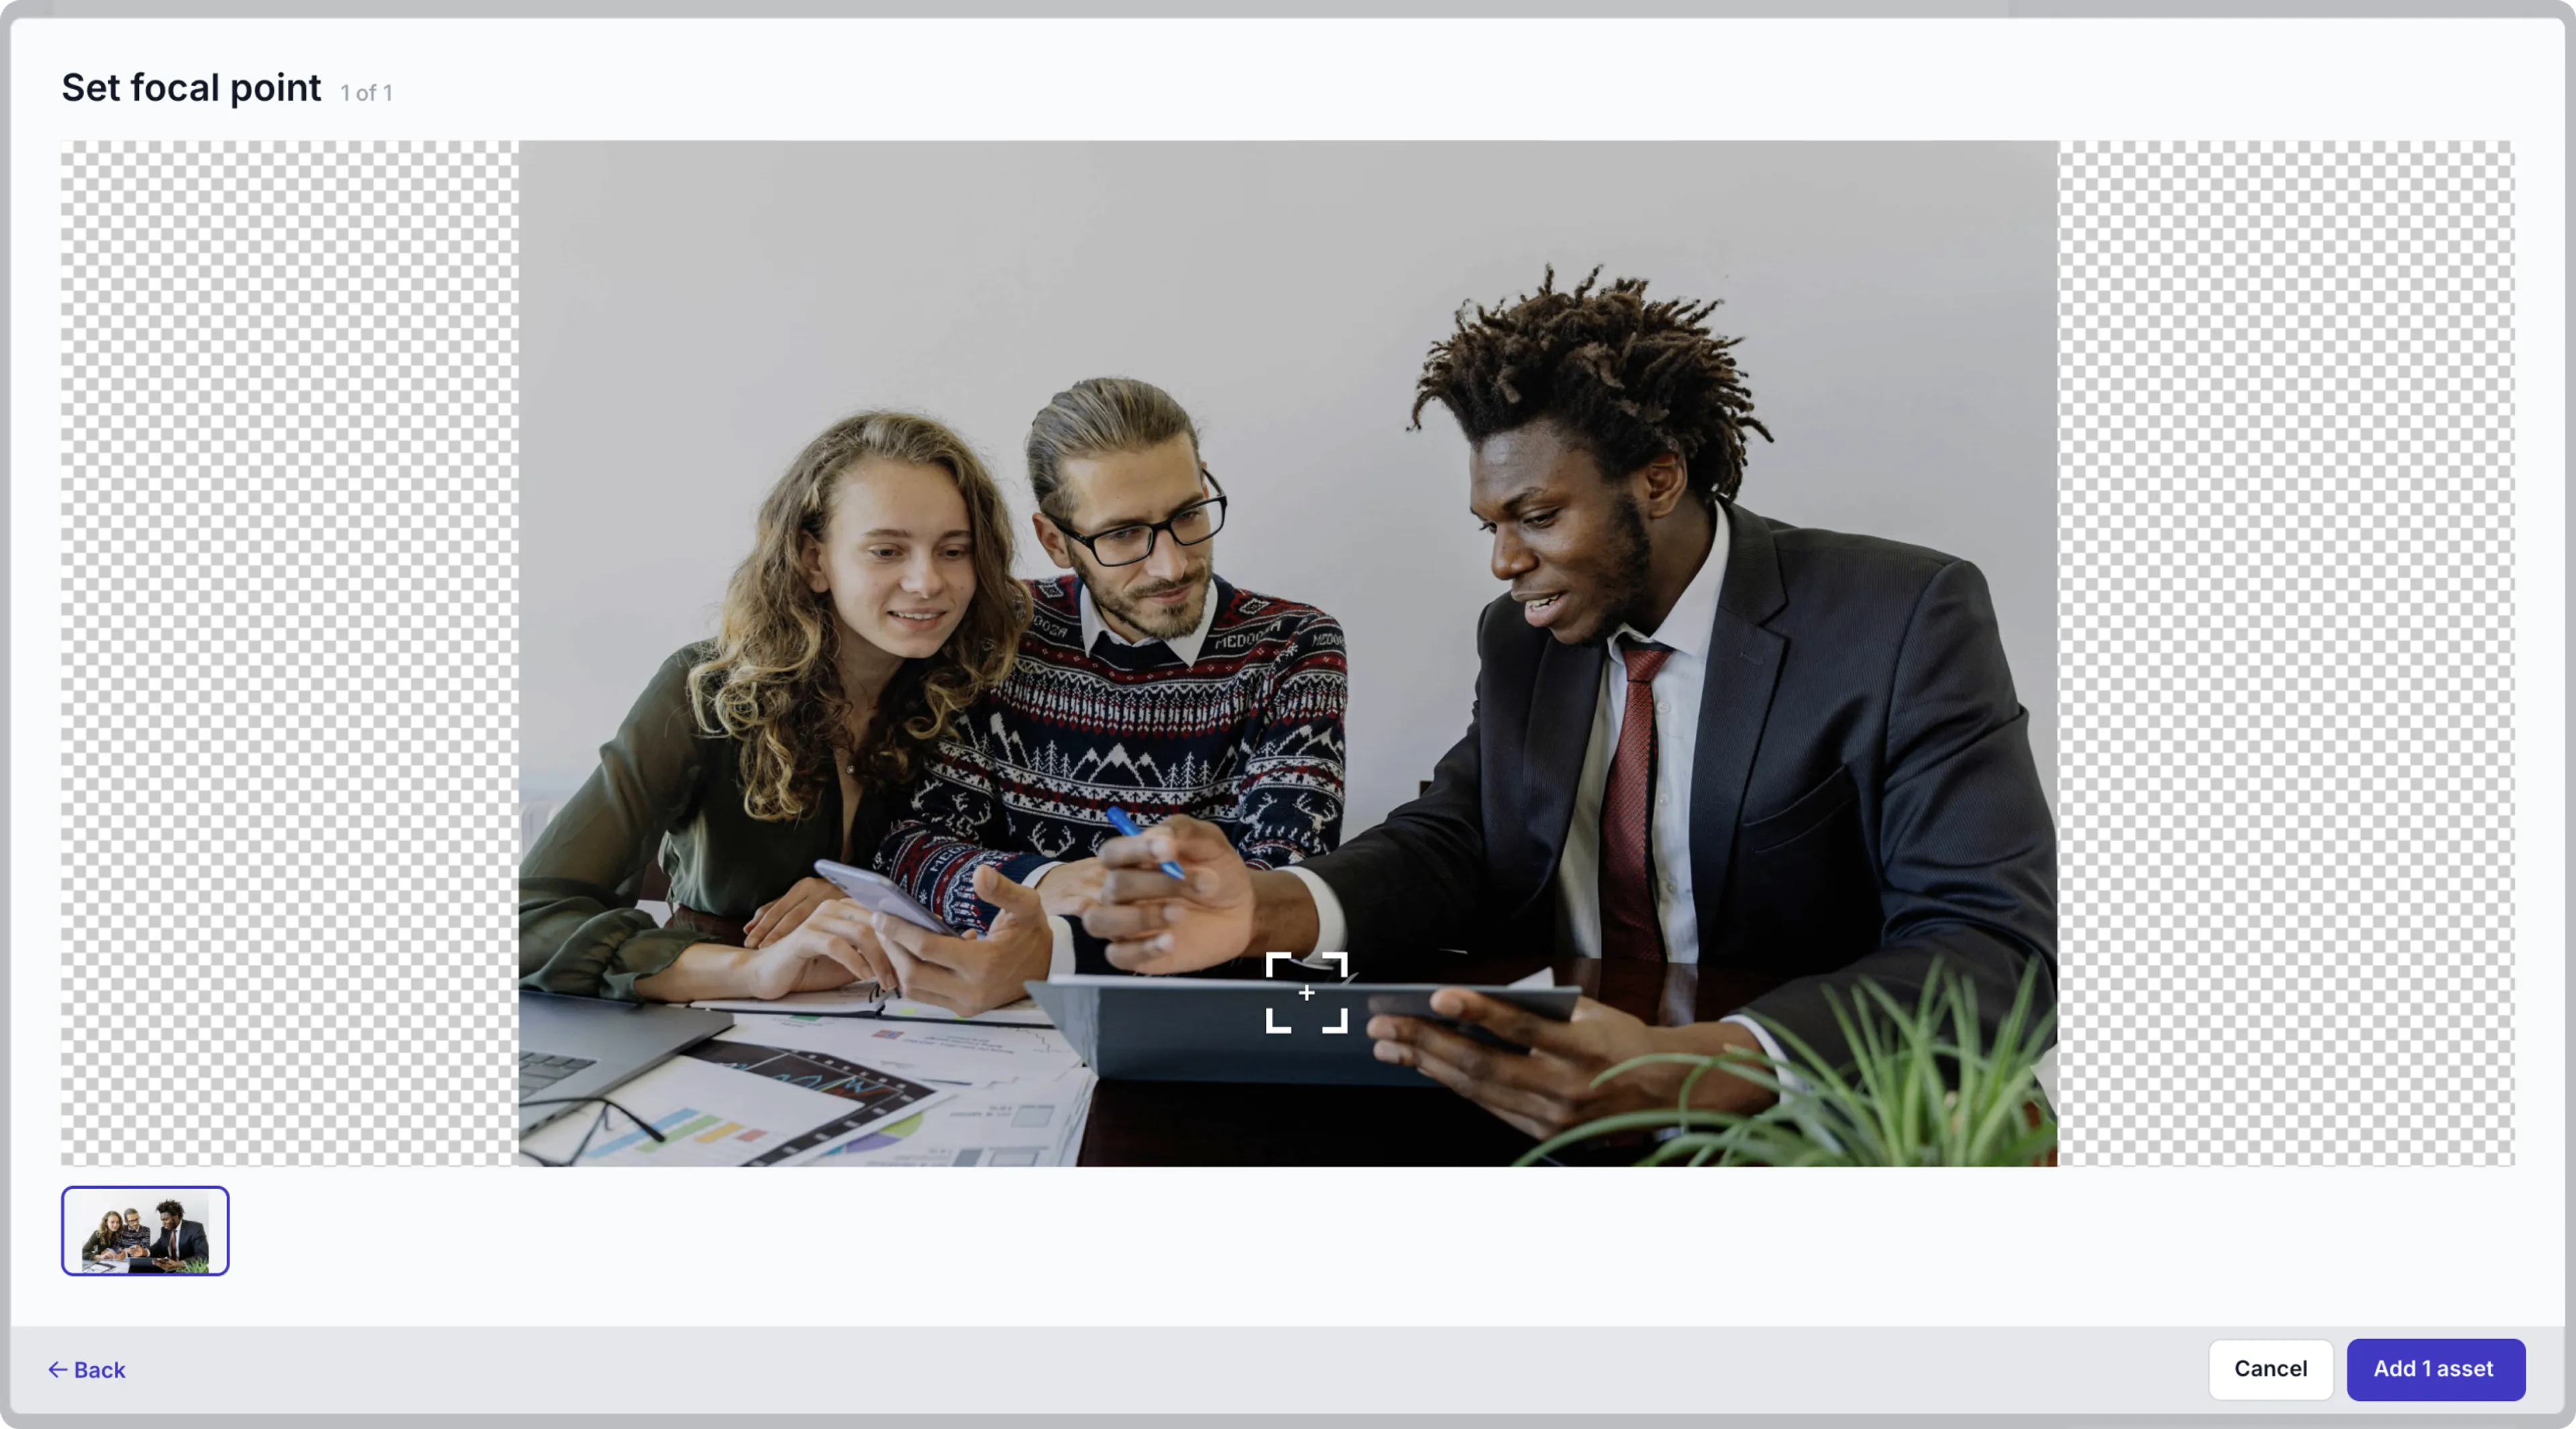
- Move the focal point indicator to the part of the image you always want visible and click the Add 1 asset or the Next asset (in the case of multiple assets) button.
- When you’ve set the focal image for multiple images, simply click the Add x assets button.
Set focal point for existing image
- On the Content item page, hover over the image and click the icon in the top right corner to open the Set focal point modal.
- Choose the focal point for the selected image and click the Save button.

Cropping images
Cropping an image is important when adding it to your content.
You crop images to look great on all devices, such as mobile, desktops, and tablets.
With Prepr, you can crop image files easily, without altering the original stored files.
To enable cropping on images, developers can define the image presets. Check out the Assets field settings for more details. When you add images to content items and crop them according to the presets, a developer can retrieve the chosen presets using the GraphQL API to render them accordingly in the web app. For that, they need to specify a preset name in the API request. For more details, see the sample query for retrieving Presets in the GraphQL API reference.
Alternatively, a developer can transform images themselves using the API. For more information, check out the REST API or the GraphQL API.
If there are several presets and cropping is required, you must create crops for all of the presets defined for an image.
Crop new images
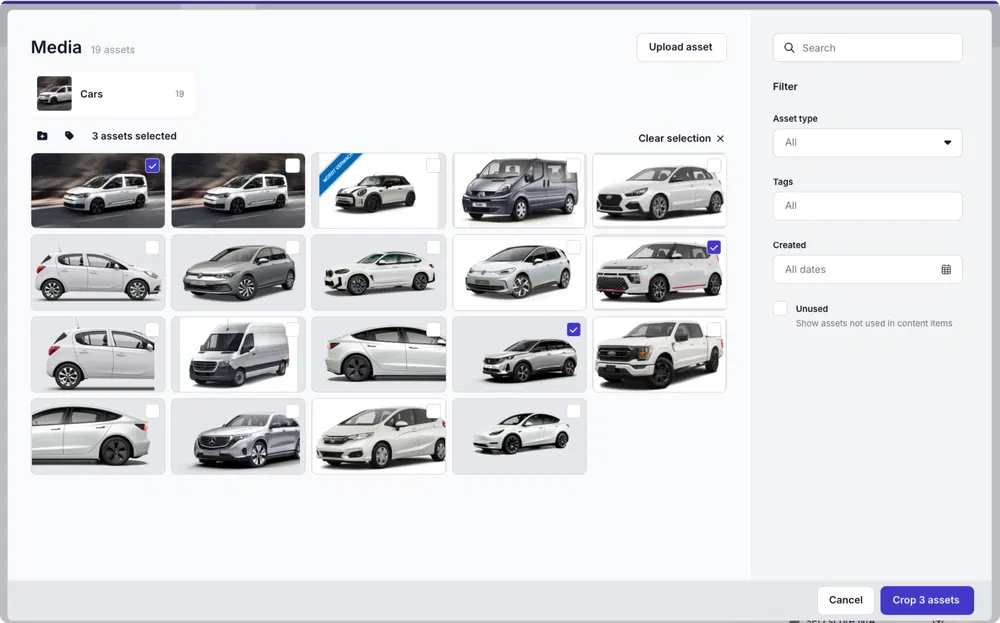
Follow the same process above to add images to a content item. When adding an image to a content item and cropping is required in the asset field settings, you’ll see the Crop x assets button at the bottom of the Media dialog window.
-
Click the Crop x assets button to open the crop images window.
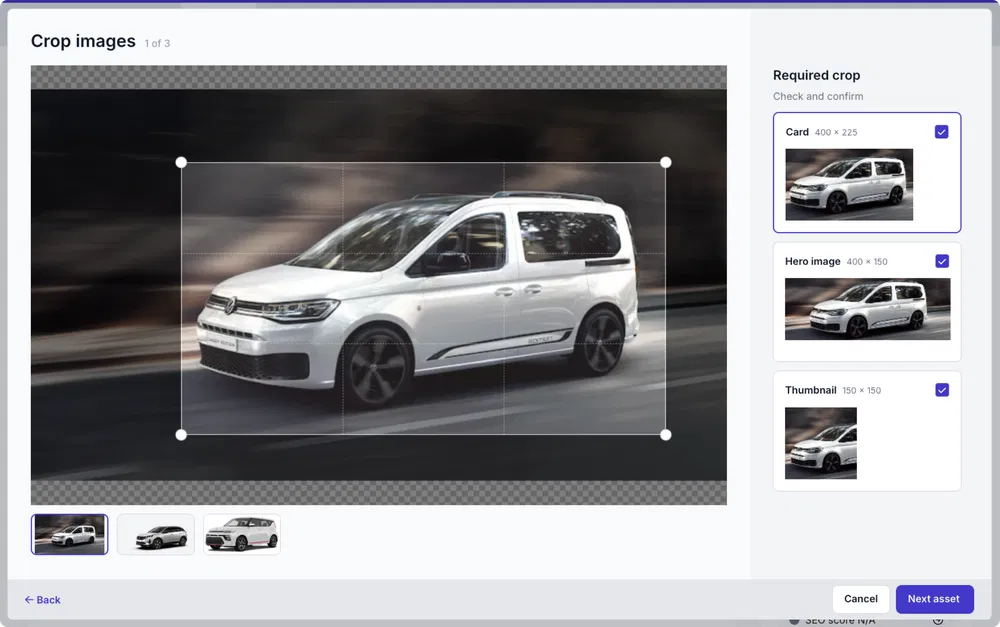
-
Simply choose the preset and move the crop area over the part of the image that you want cropped.
The values you choose is the aspect ratio and is not based on the image resolution. The resolution depends on the uploaded image.
- If there are multiple presets, simply click the thumbnail of the next preset to add its crop.
- When cropping multiple files, click the next image thumbnail in the bottom left corner to crop another image or click the Next asset button.
- Once done, click the Add x assets button to add the cropped images to the content item.
Crop existing images
When cropping is not set to required, you can add a crop after the image has already been added to a content item. To crop an existing image in a content item, complete the following steps for each image:
- On the Content item page, hover over the image and click the icon in the top right corner, then click Crop image. Or click the icon on the image thumbnail to open the crop editor quickly.
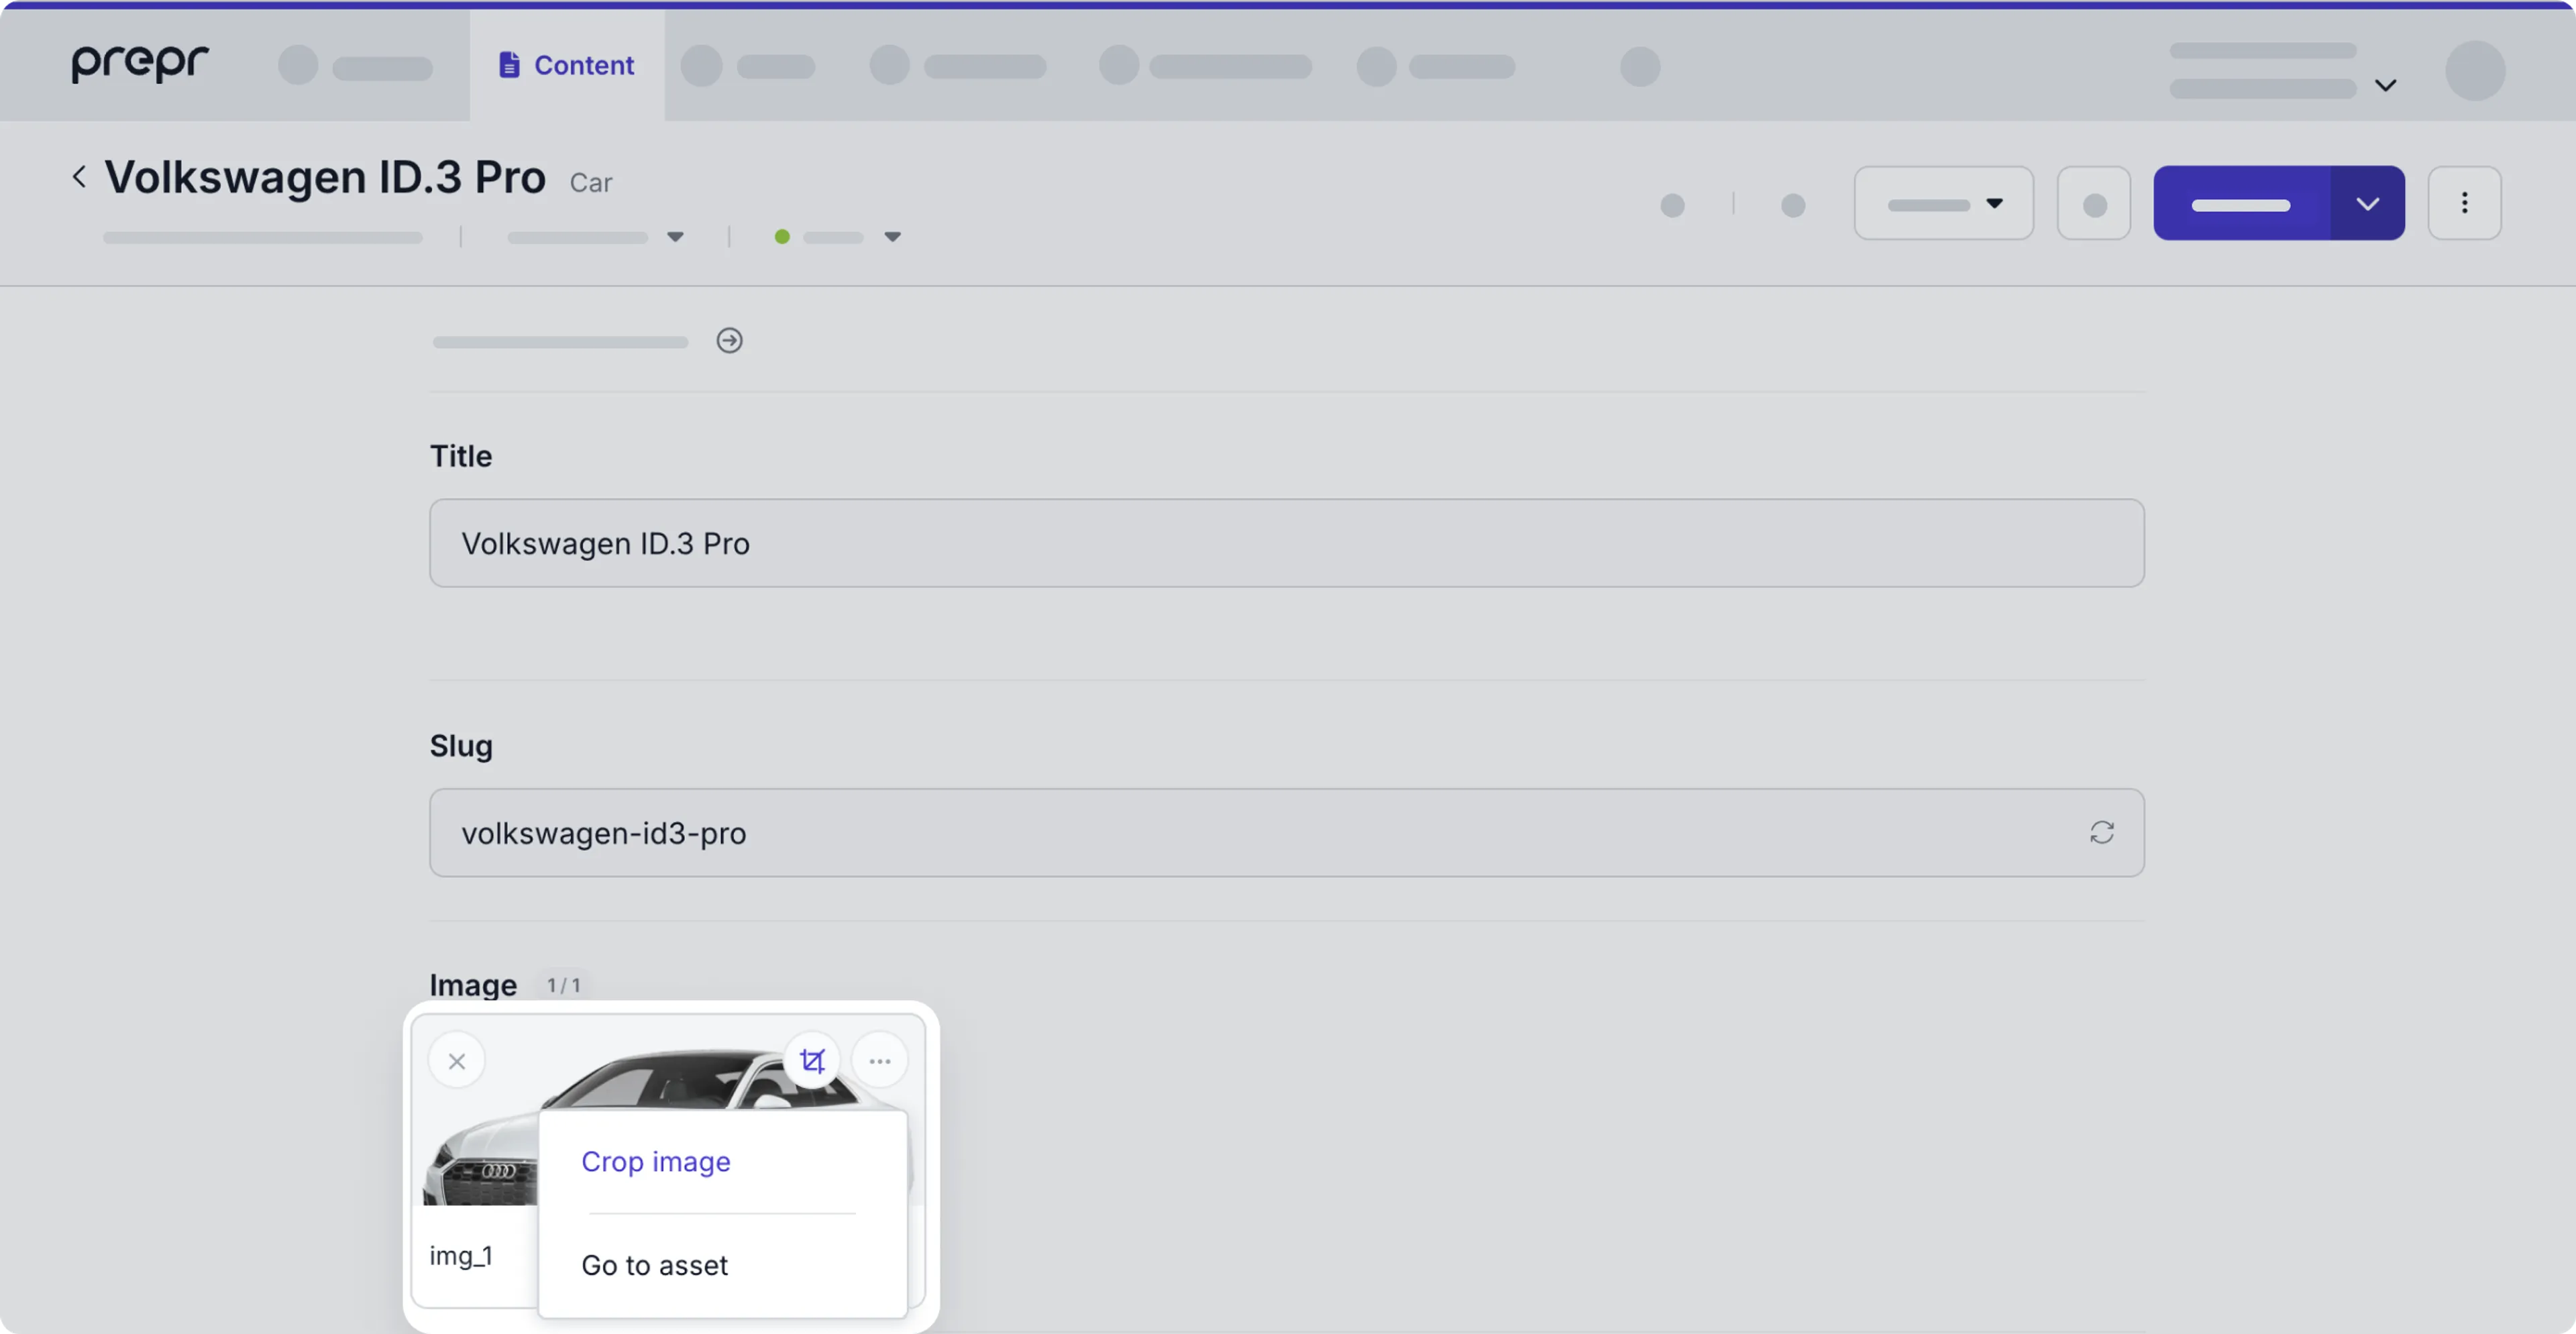
-
In the crop editor window, select a preset and an area in your crop by dragging the points or moving the entire crop area.
-
Click Save to apply the updated cropped image.
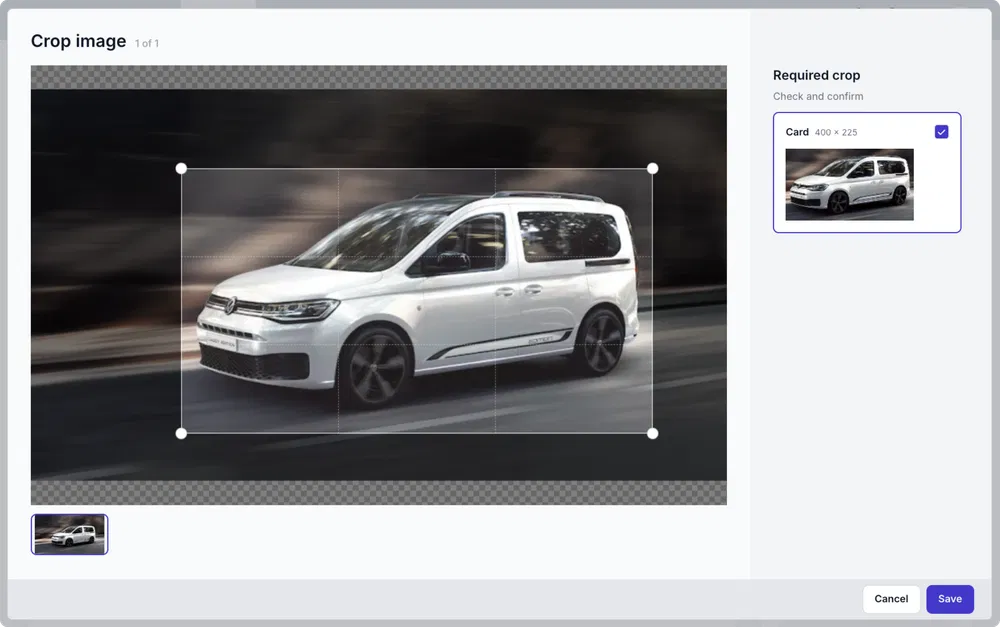
Edit image crop
If you want to change the current crop, complete the following steps for each image:
- On the Content item page, hover over the image and click the icon in the top right corner, then click Edit crop. Or simply click the icon to open the crop editor window and follow the same steps as above.

Delete image crop
To delete a crop, hover over the image thumbnail in the Content item and click the icon in the top right corner. Then, choose the Delete crop option.
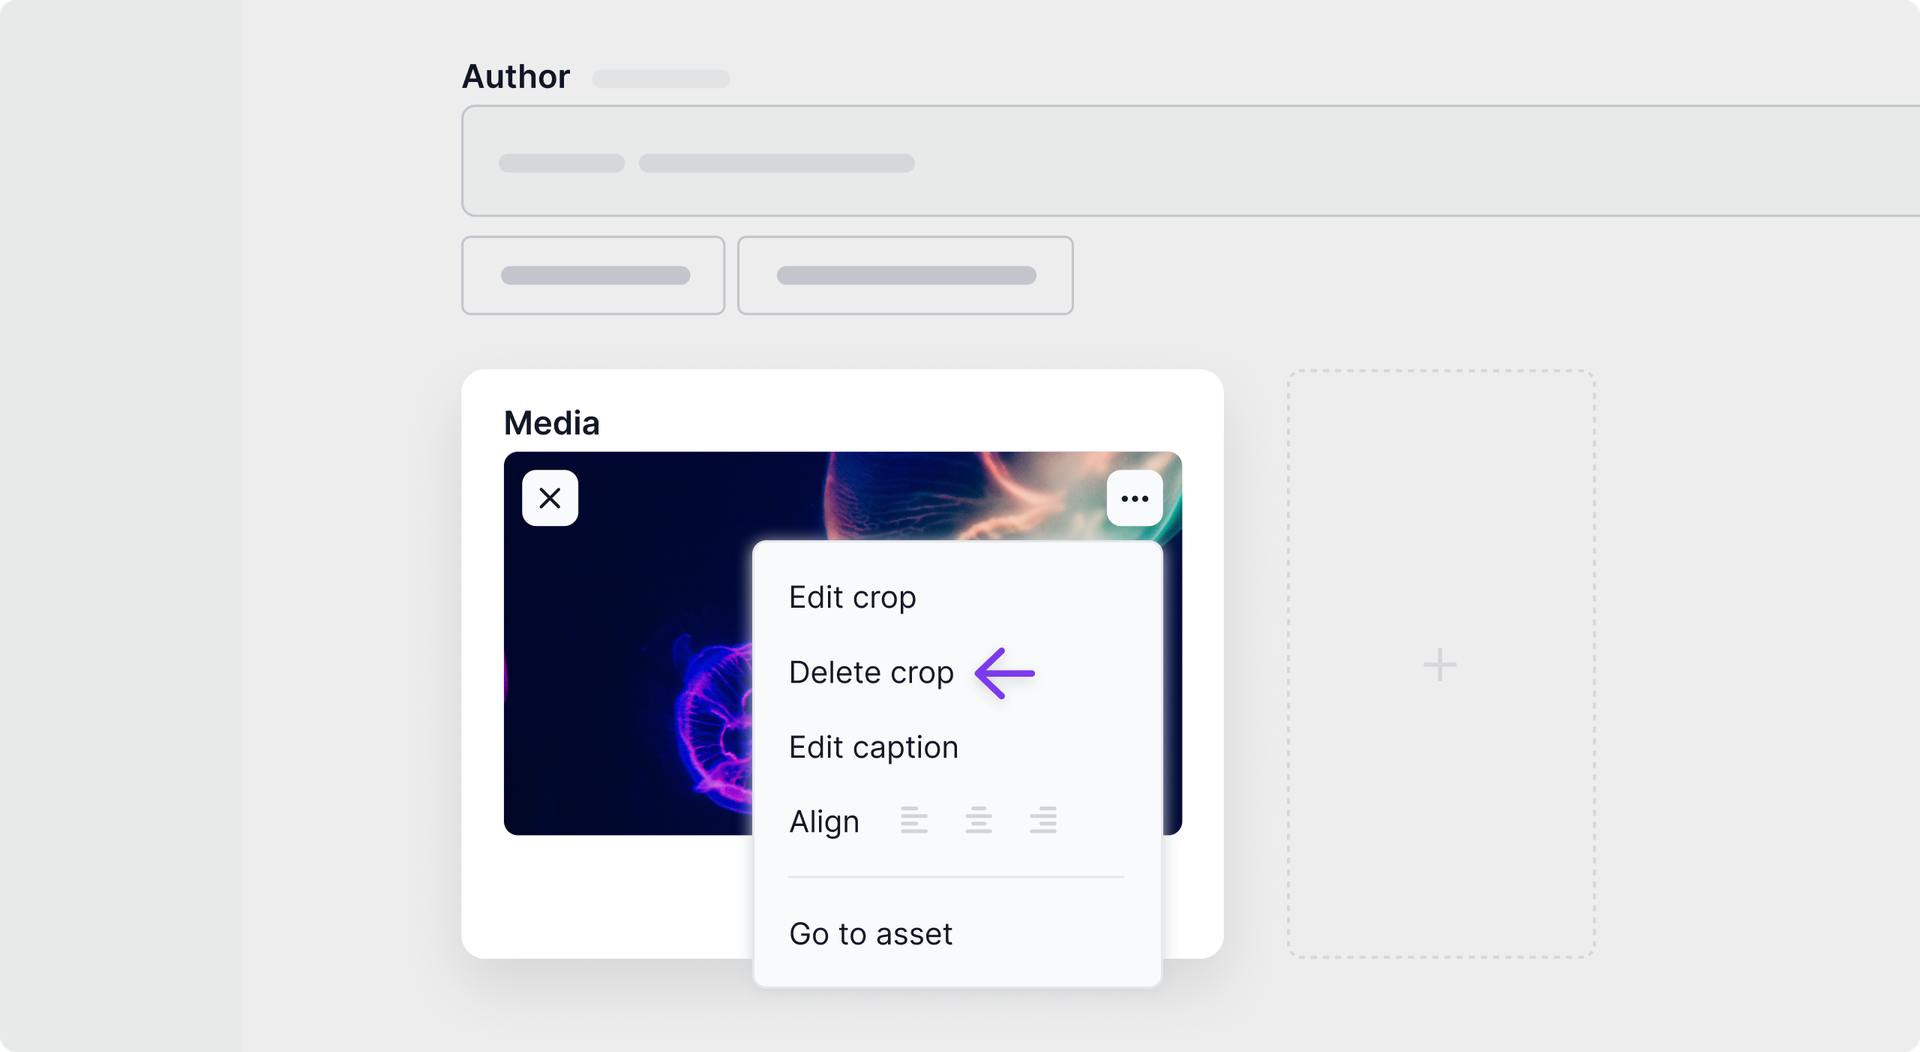
You cannot delete a crop if cropping is required.
Setting a download filename
When you need to provide a download URL link in your content item to make a file available to web app visitors for download, you can set a parameter in the URL to define the filename.
For example: https://acme-company.files.prepr.io/24eovl6bs4q-guide.pdf?filename=the-best-guide-ever.pdf
If you don’t set this filename parameter, the filename in the URL is used as is. In the example above, this would be 24eovl6bs4q-guide.pdf.