Add personalization to your Laravel website
Prepr CMS enables editors to create adaptive content directly in their content items to personalize elements of web pages. This makes setting up personalization really simple and effective in increasing engagement and conversions. This chapter of the Laravel complete guide shows you how to add personalization to your Laravel website.
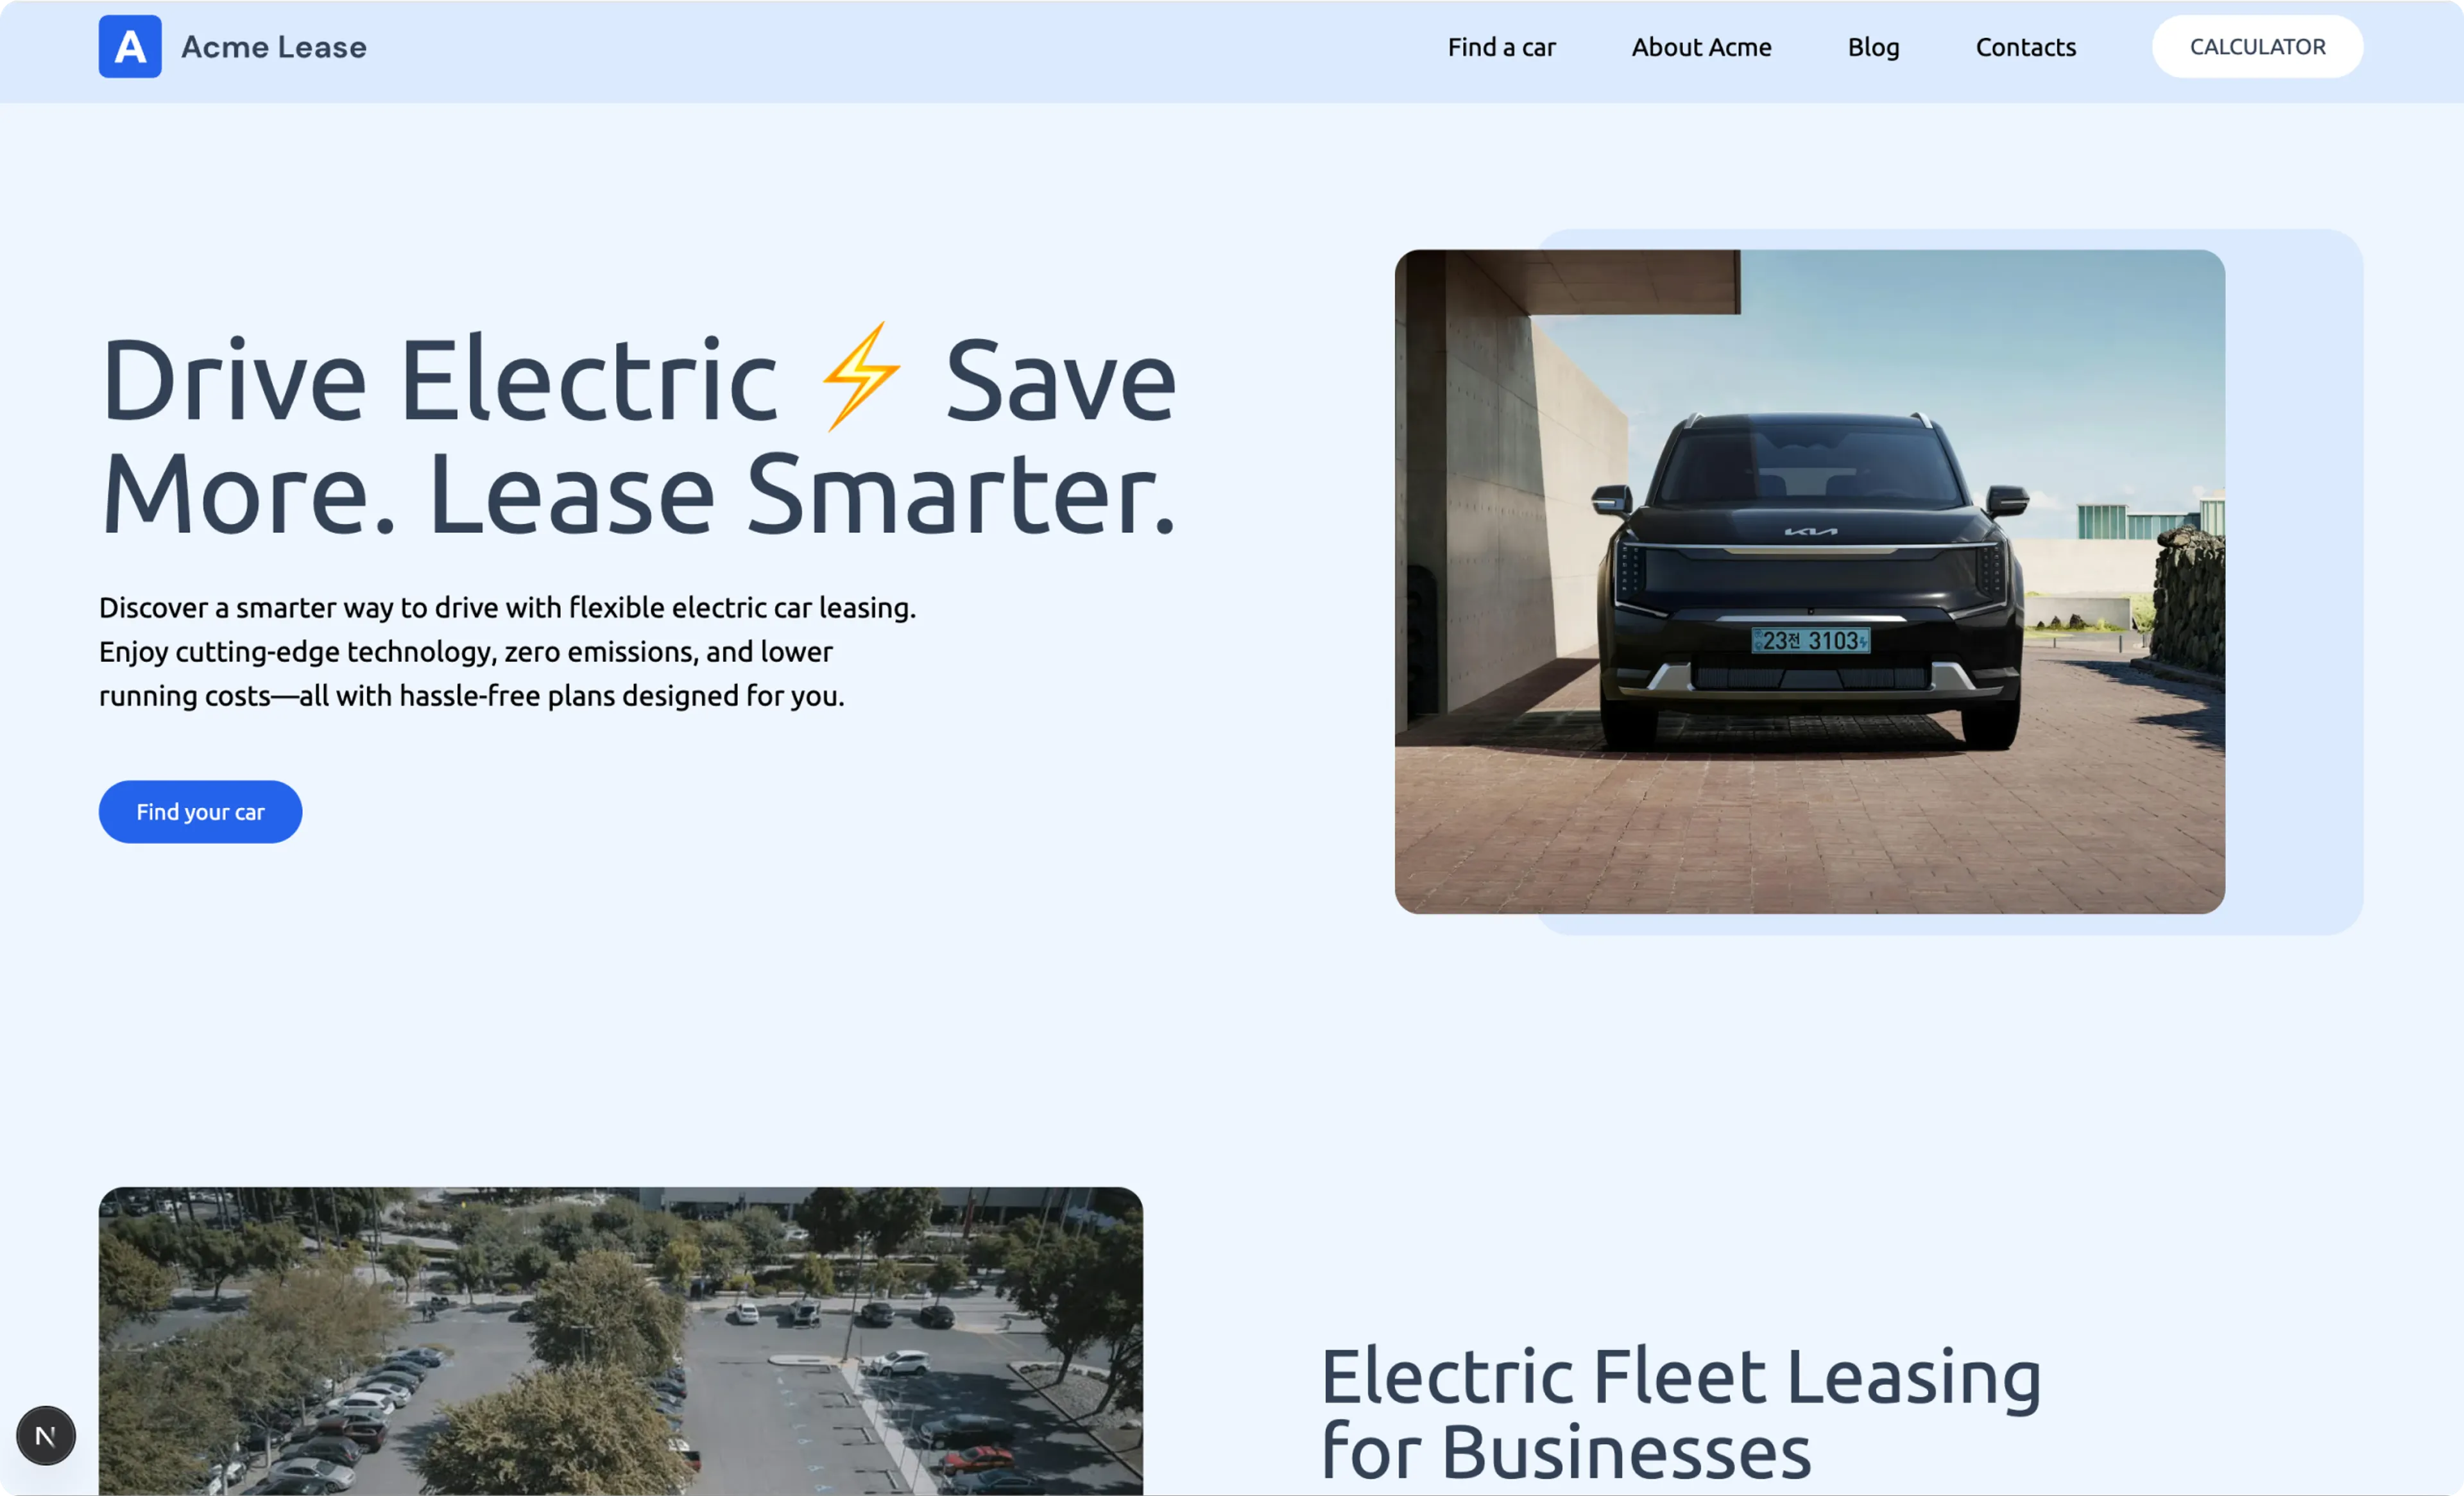
At the end of this section, you’ll see a personalized home page for visitors interested in electric cars.
The steps below make use of the Adaptive content in the Homepage content item from the Acme Lease demo data.
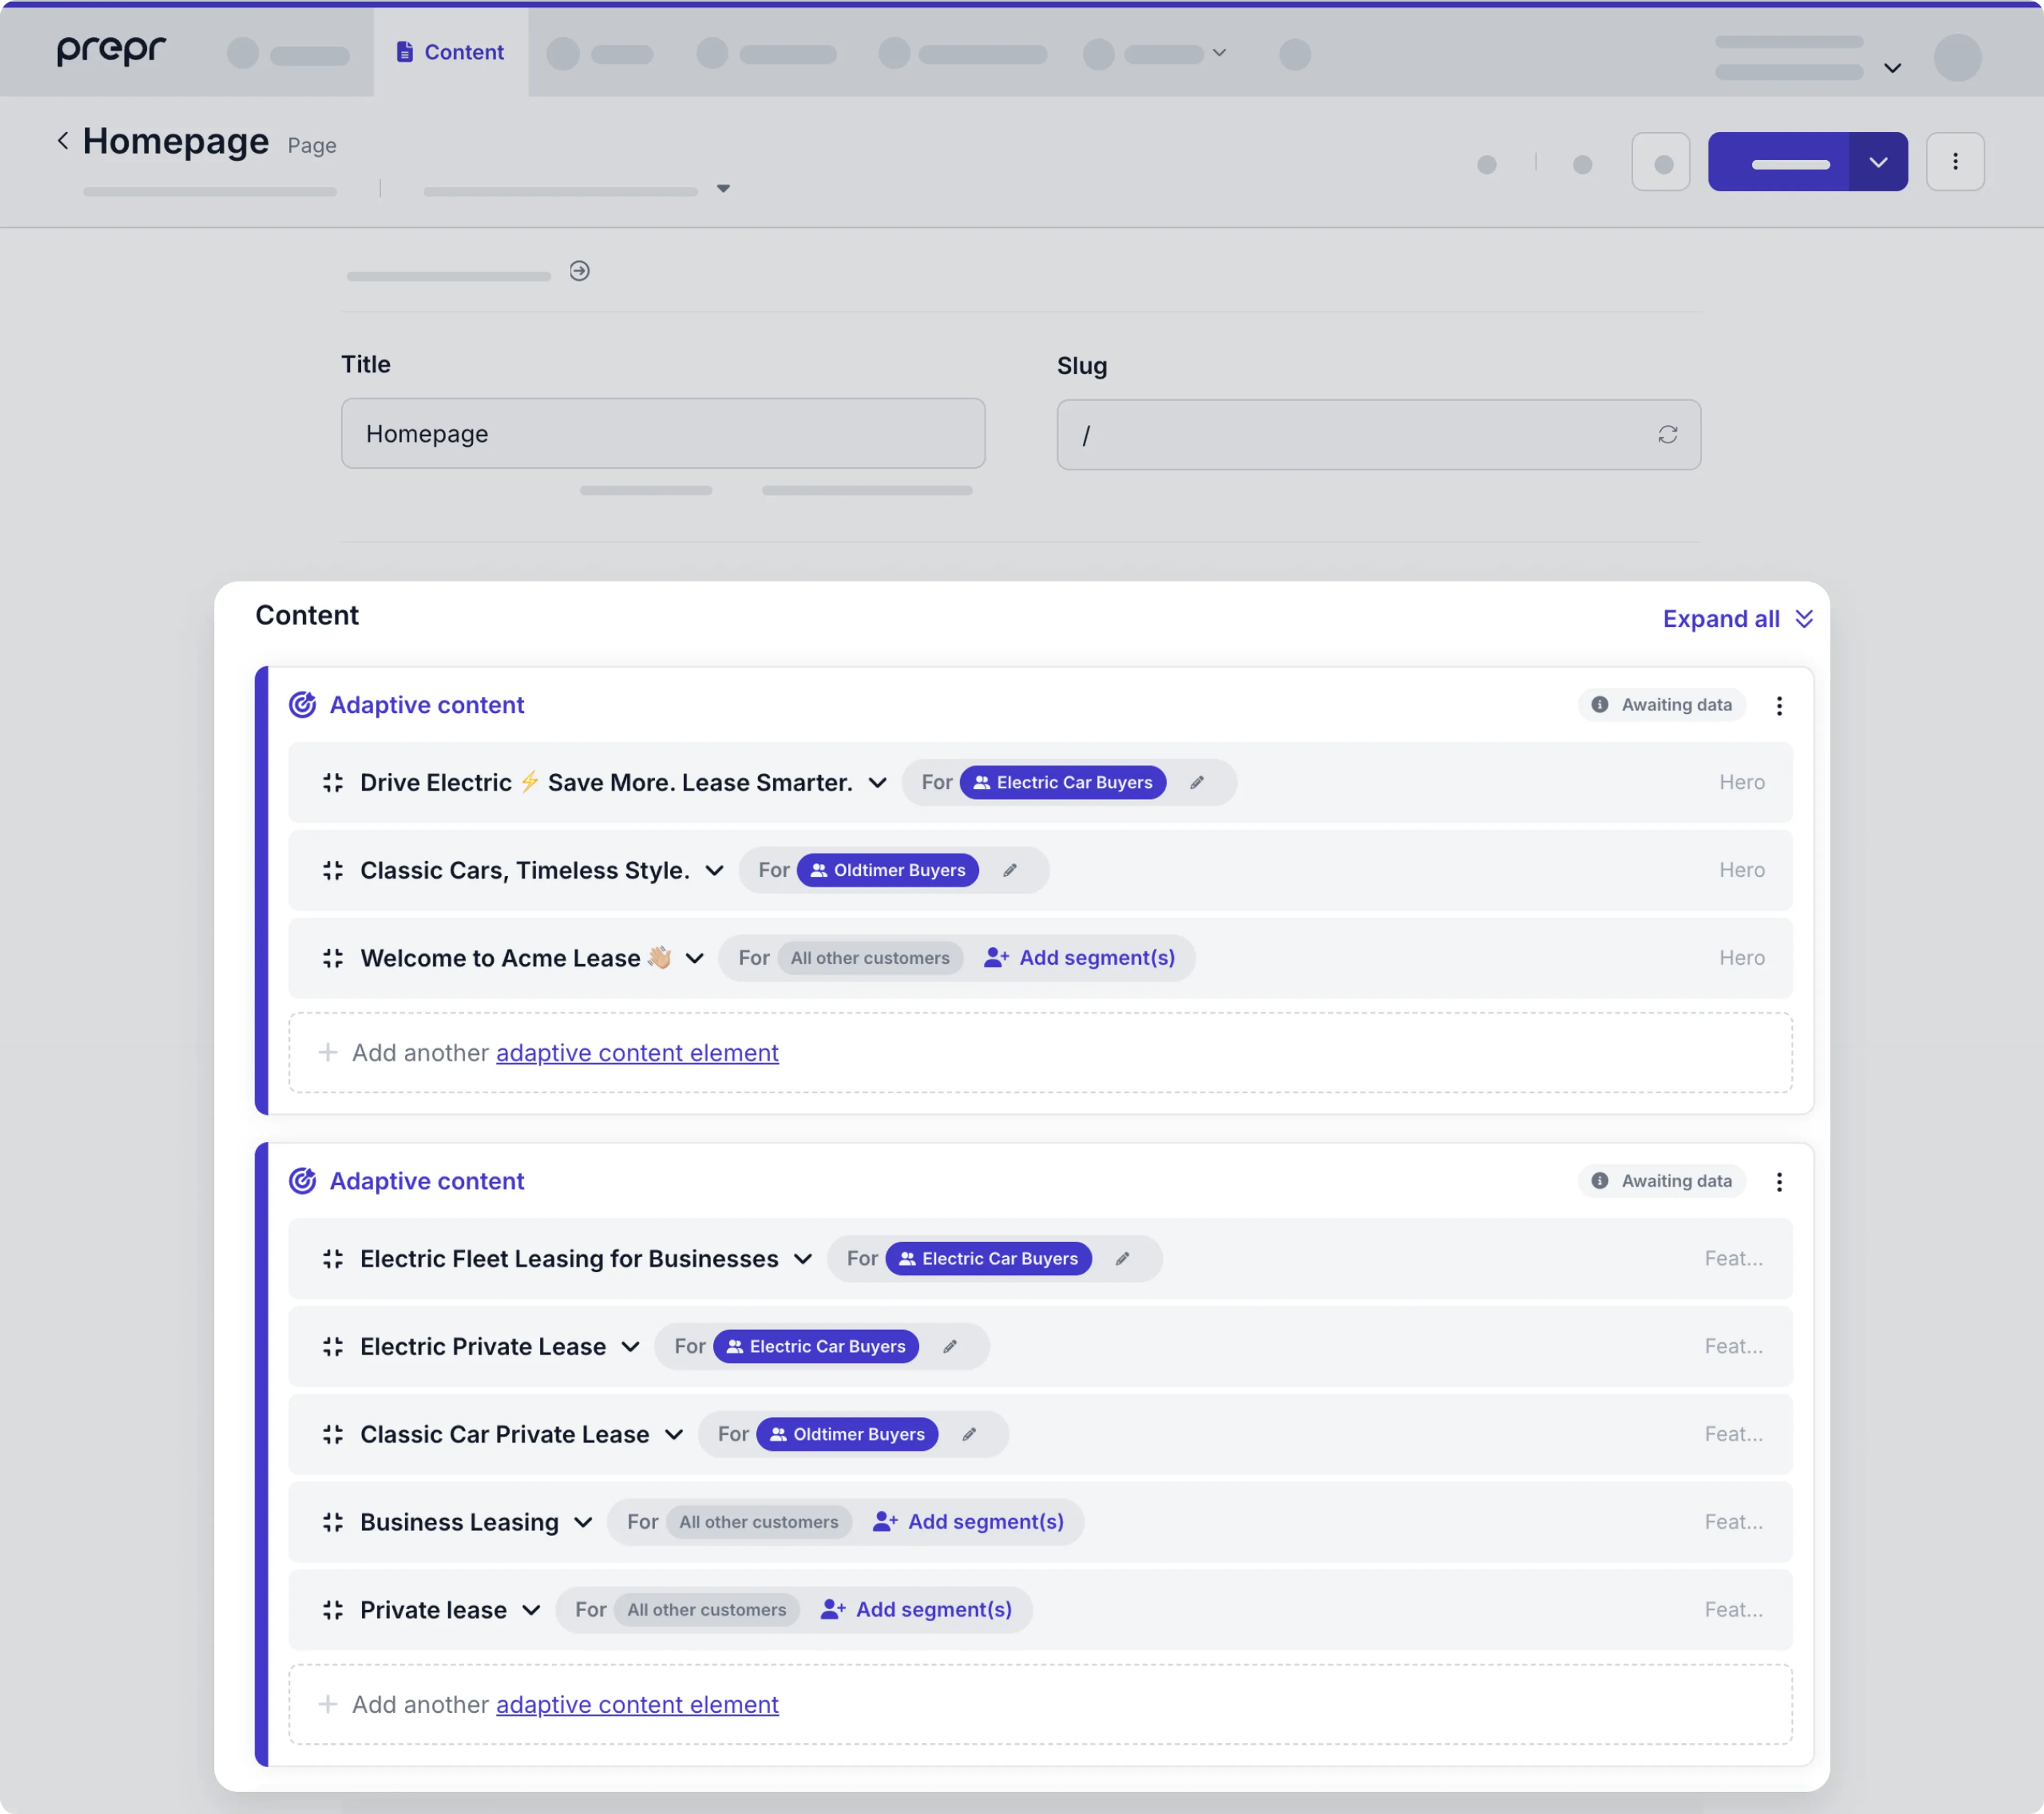
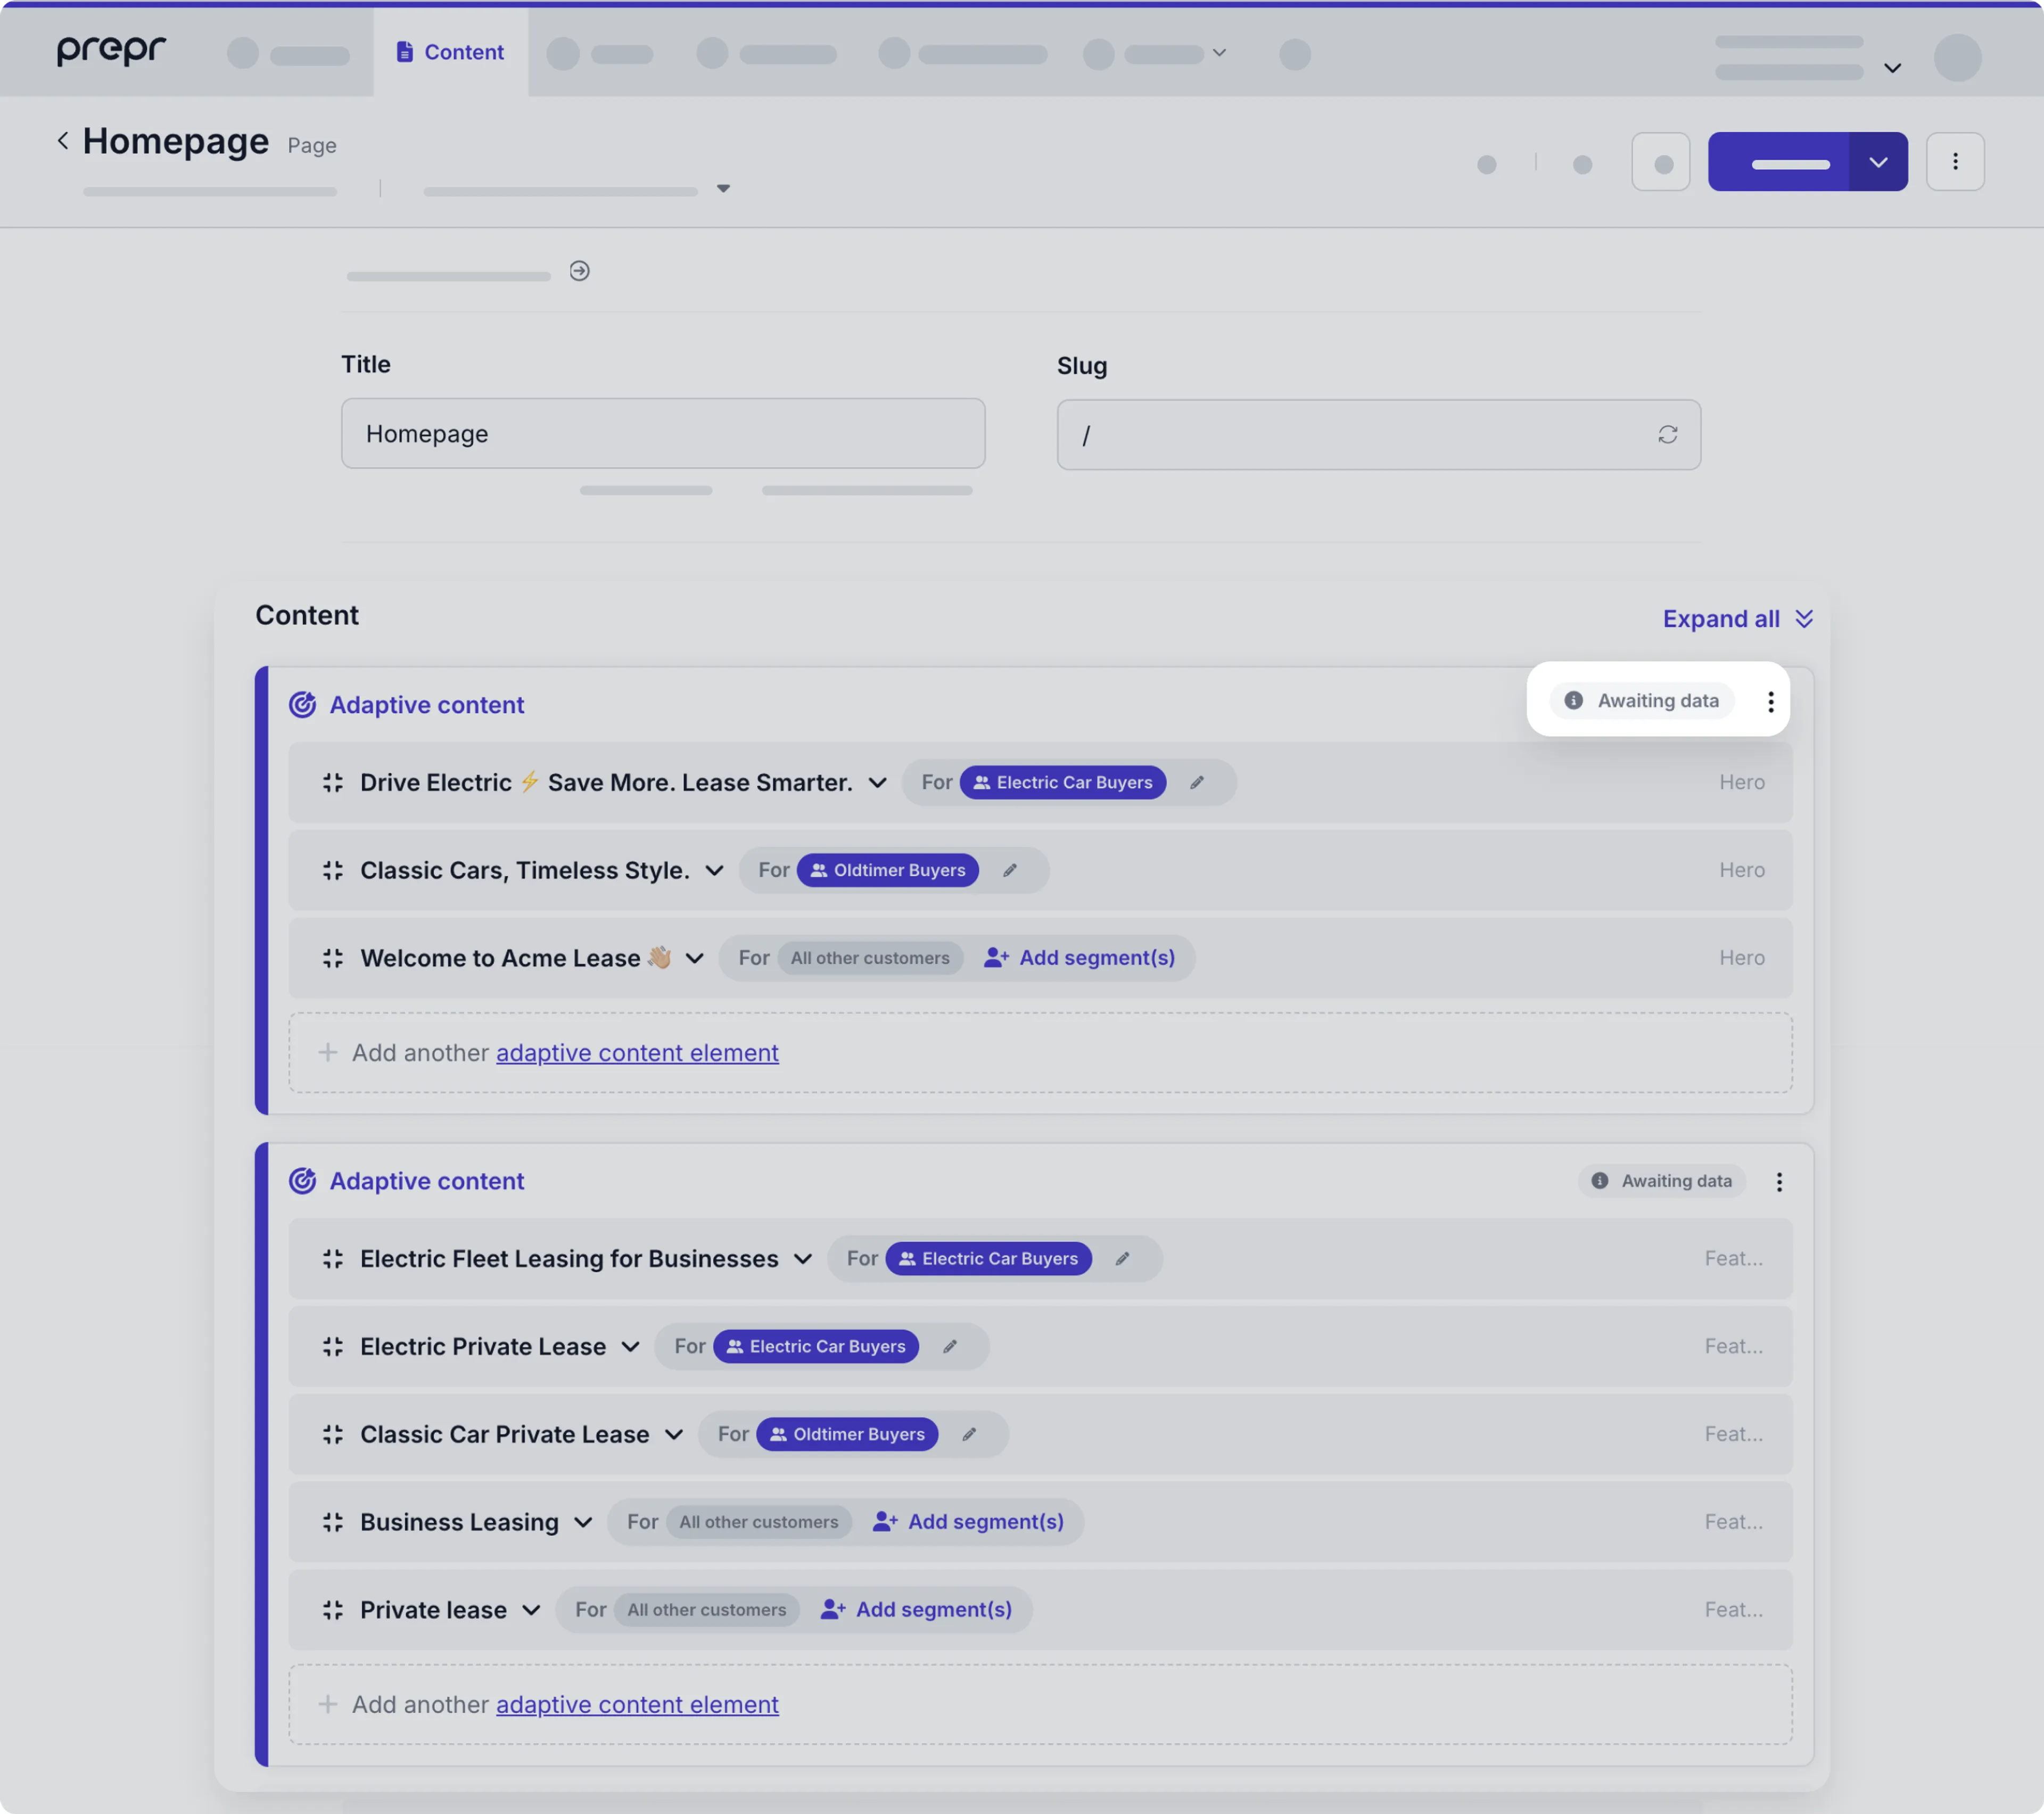
Home page content item with Adaptive content for the Hero and Feature sections.
This chapter continues from the previous section, Set up data collection. If you haven’t yet enabled Prepr tracking in your Laravel project, follow the steps in this section first. Otherwise, let’s get started.
Set up personalization for the home page
You can show different personalized versions of the content to different groups (Segments) of visitors. To show the right variant to the right visitor:
- Every visitor is given an ID that resolves to a segment they belong to.
- In your front end, you need to send this ID along with the query to retrieve the right variant.
- This is done by setting the value for the API request header,
Prepr-Customer-Id, when you make the API request to retrieve the content.
Add visitors to segments
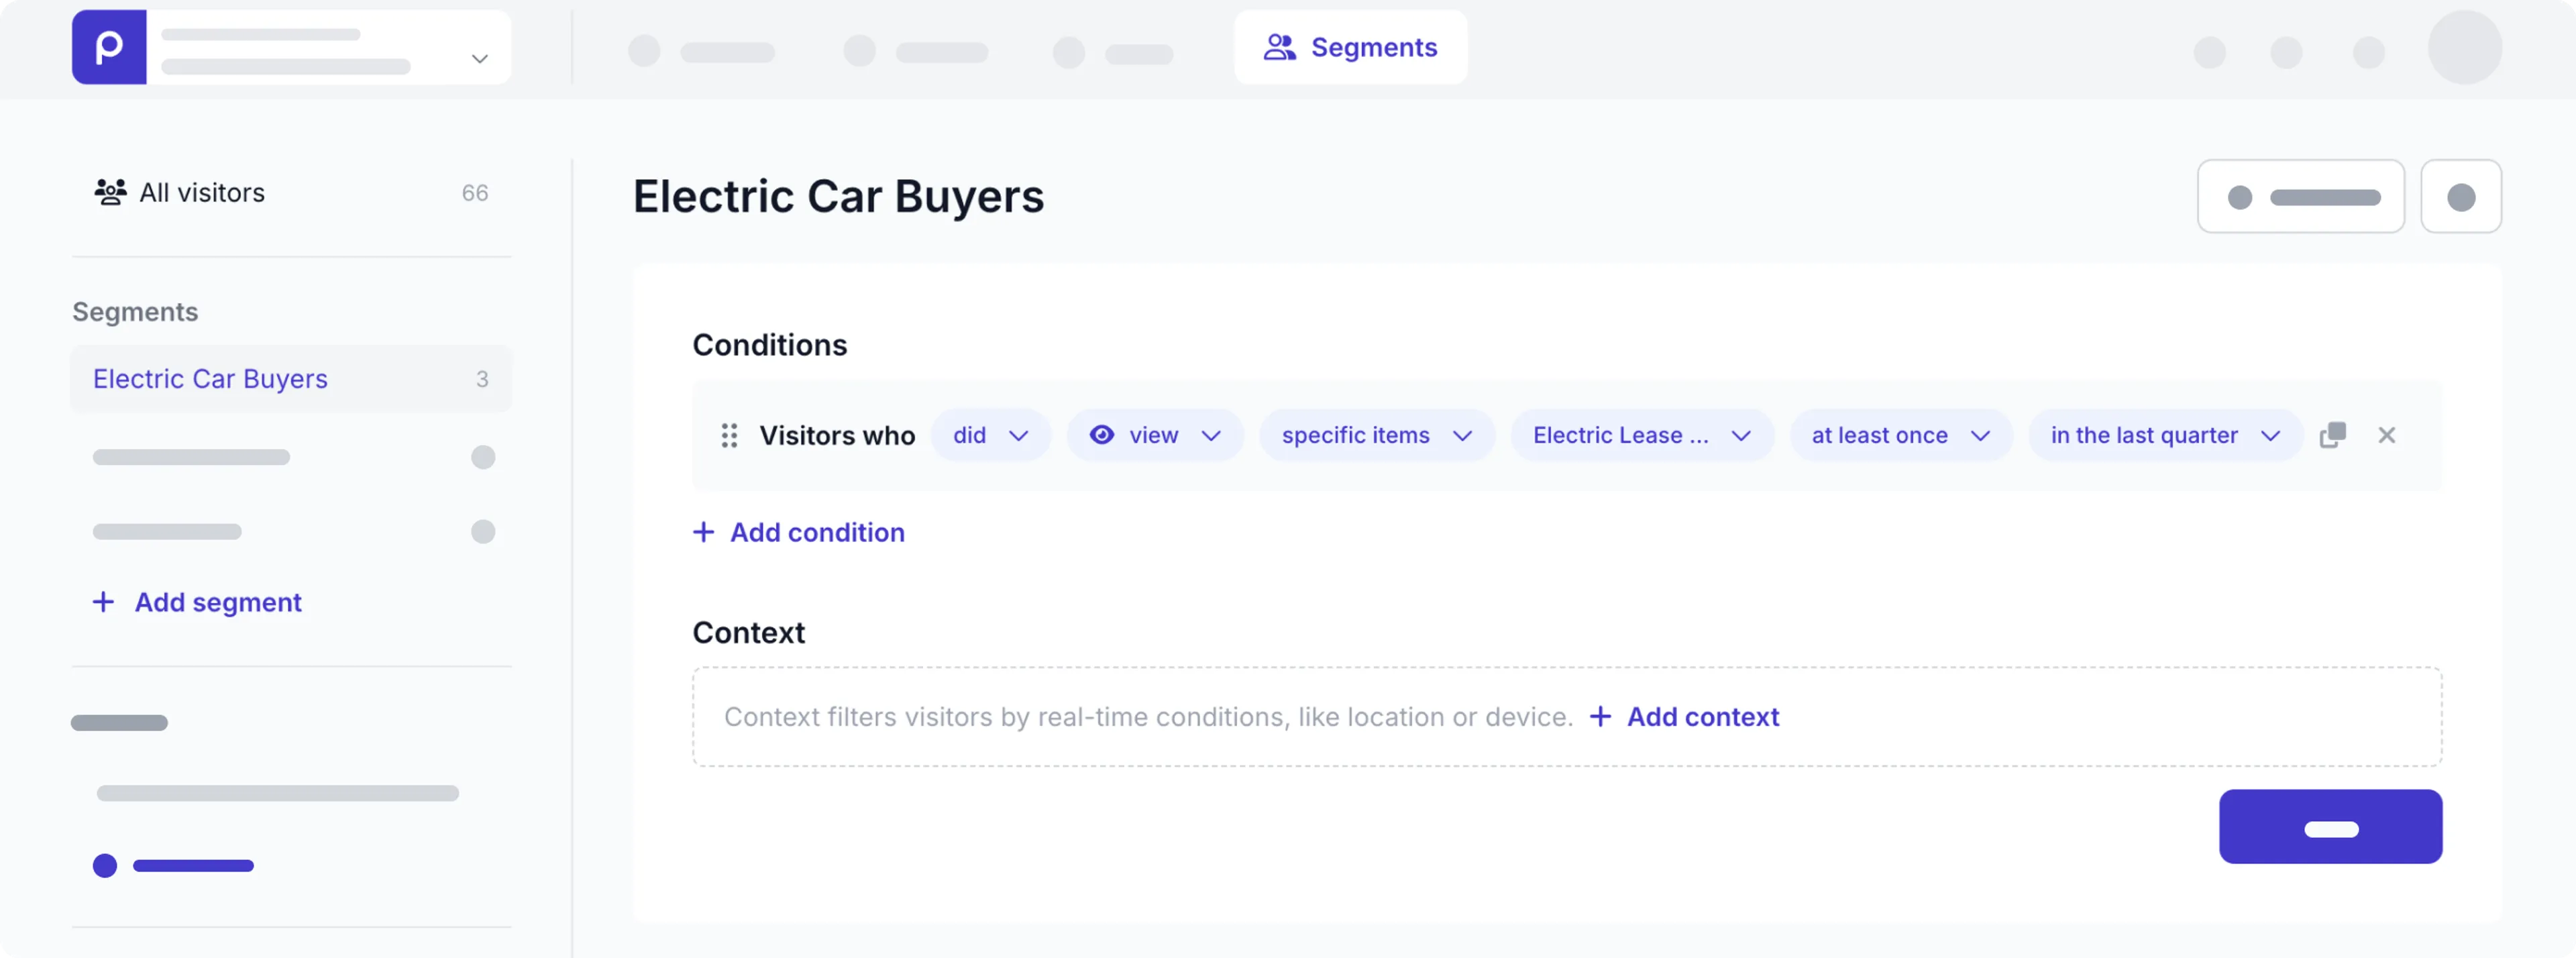
For this setup we’ll make use of the Electric Car Buyers segment in the Acme lease demo data.
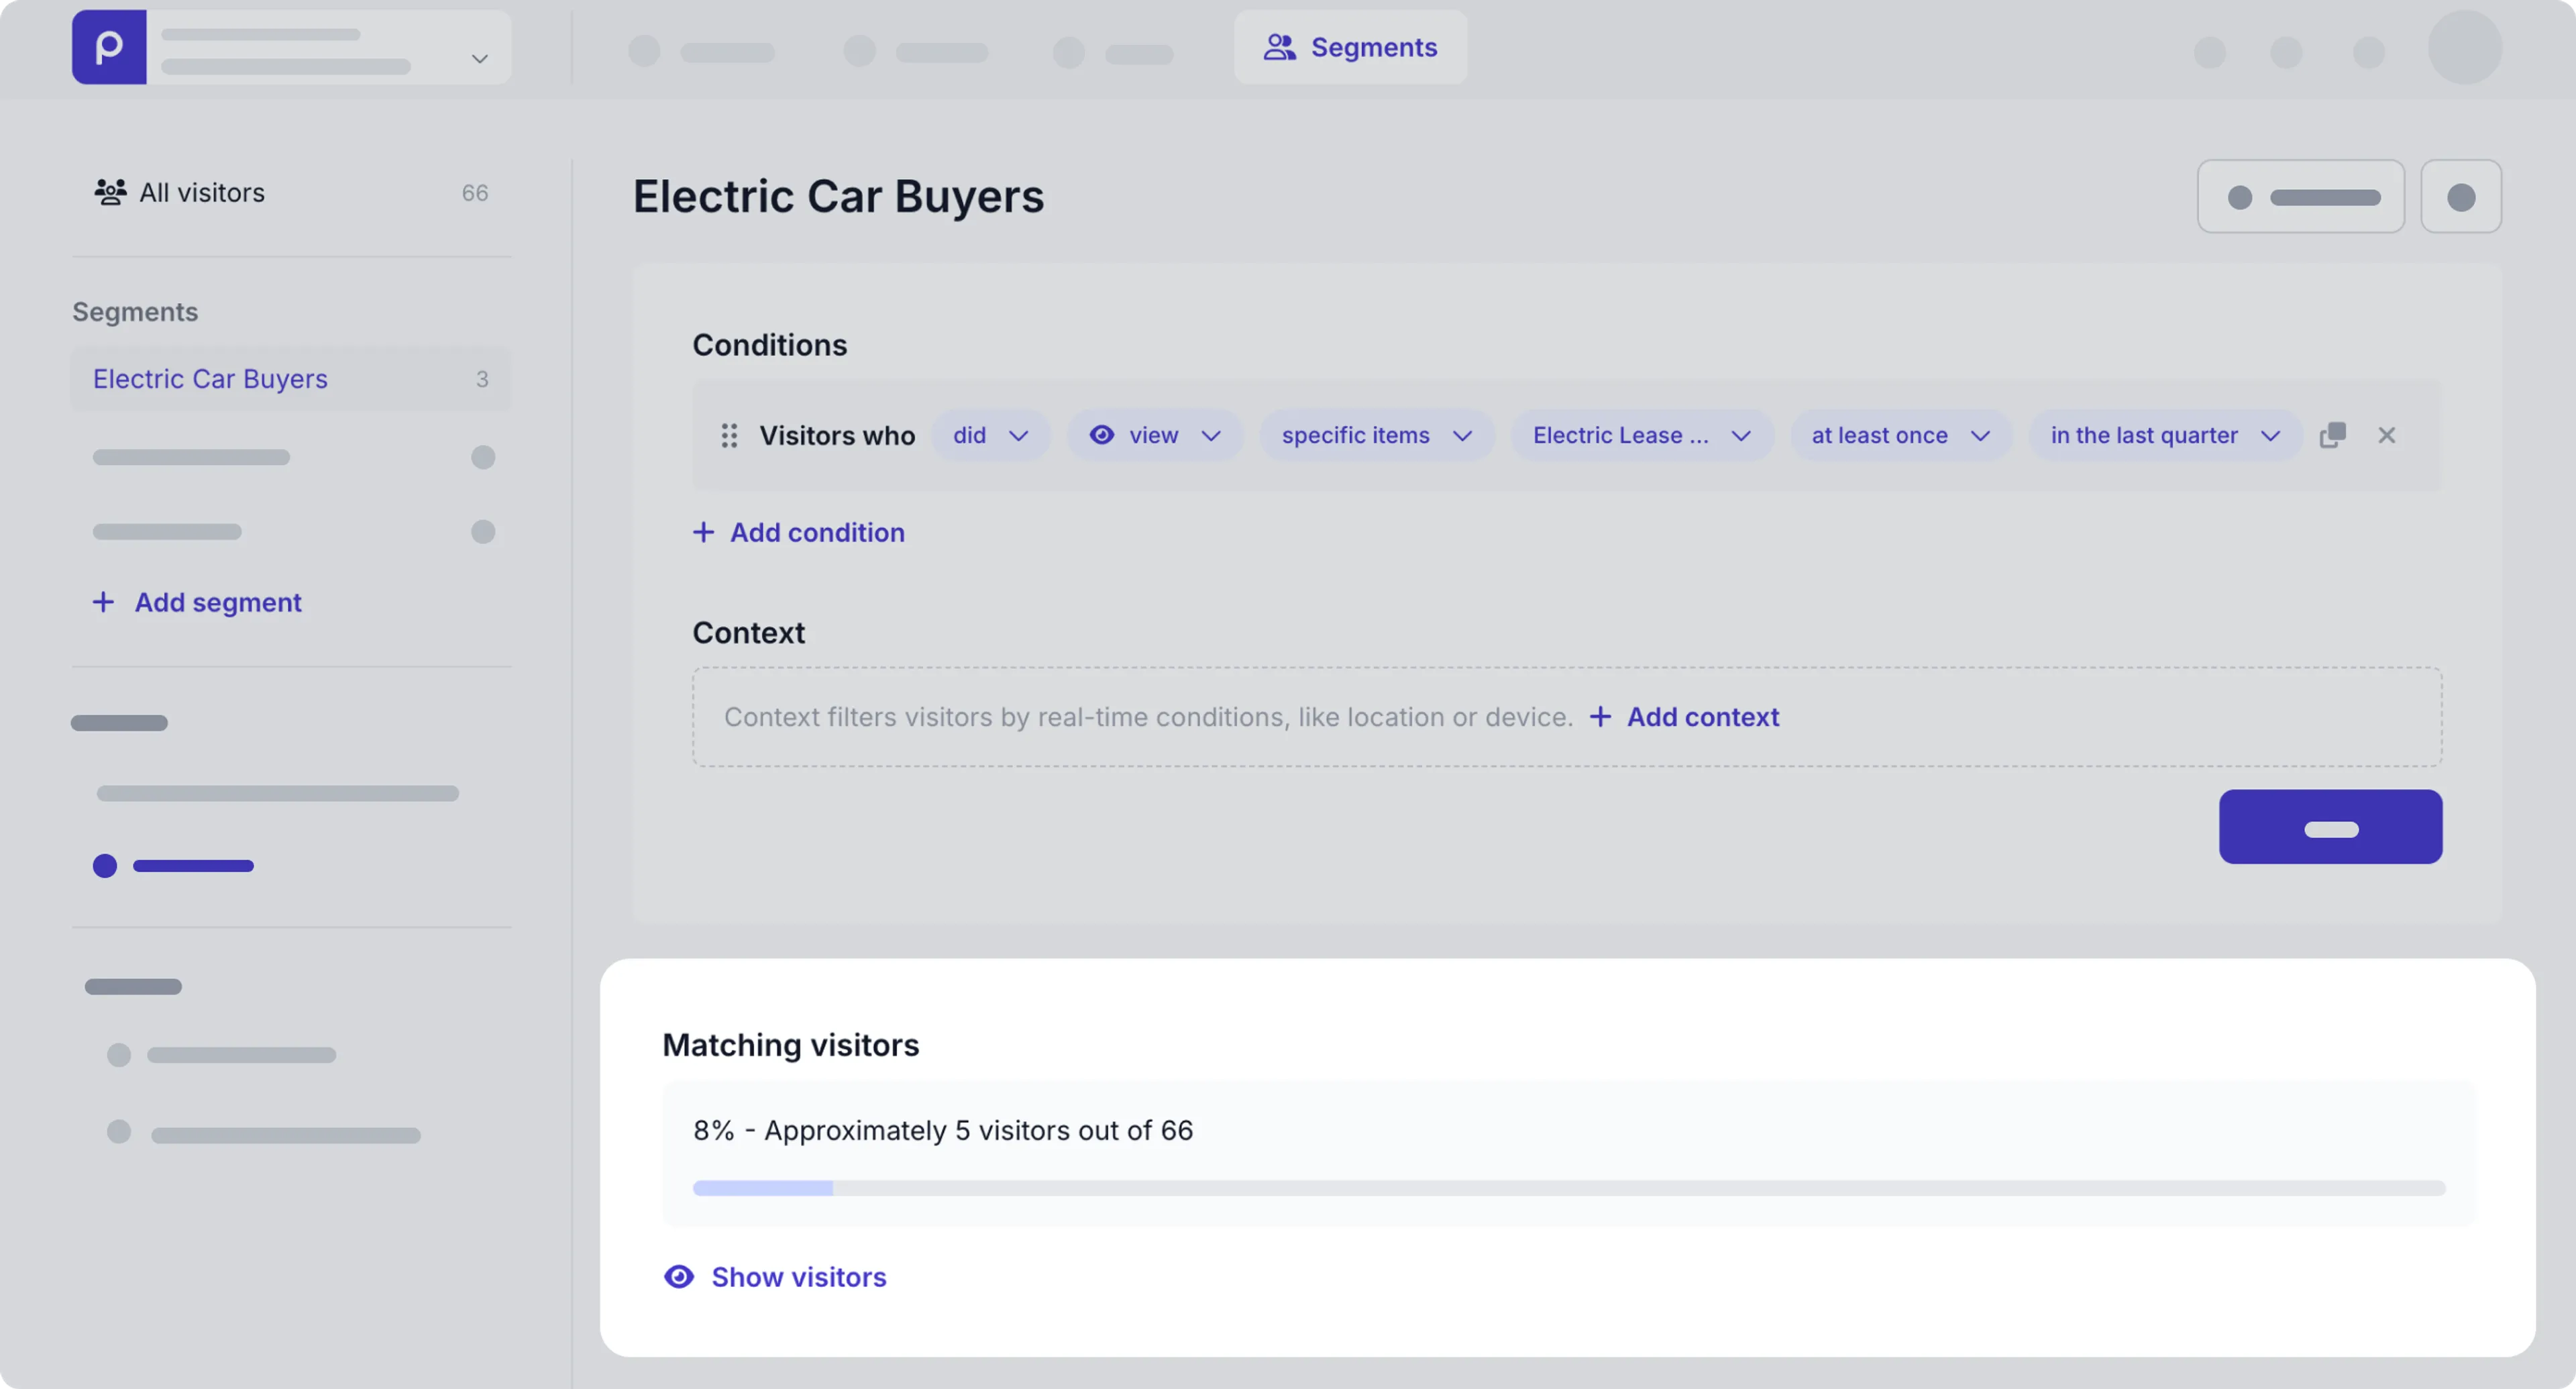
Make sure that the segment in your Prepr environment includes the condition, Visitors who did view specific items, Electric Lease Landing Page.
If you need more details, checkout the Segments docs.
You previously enabled Prepr tracking in your website. This means a visitor gets added to the Electric Car Buyers segment whenever they view the Electric Lease Landing Page content item.
You can test this with the following steps:
-
Go to
http://localhost:8000/electric-leaseto open the electric lease landing page in your website.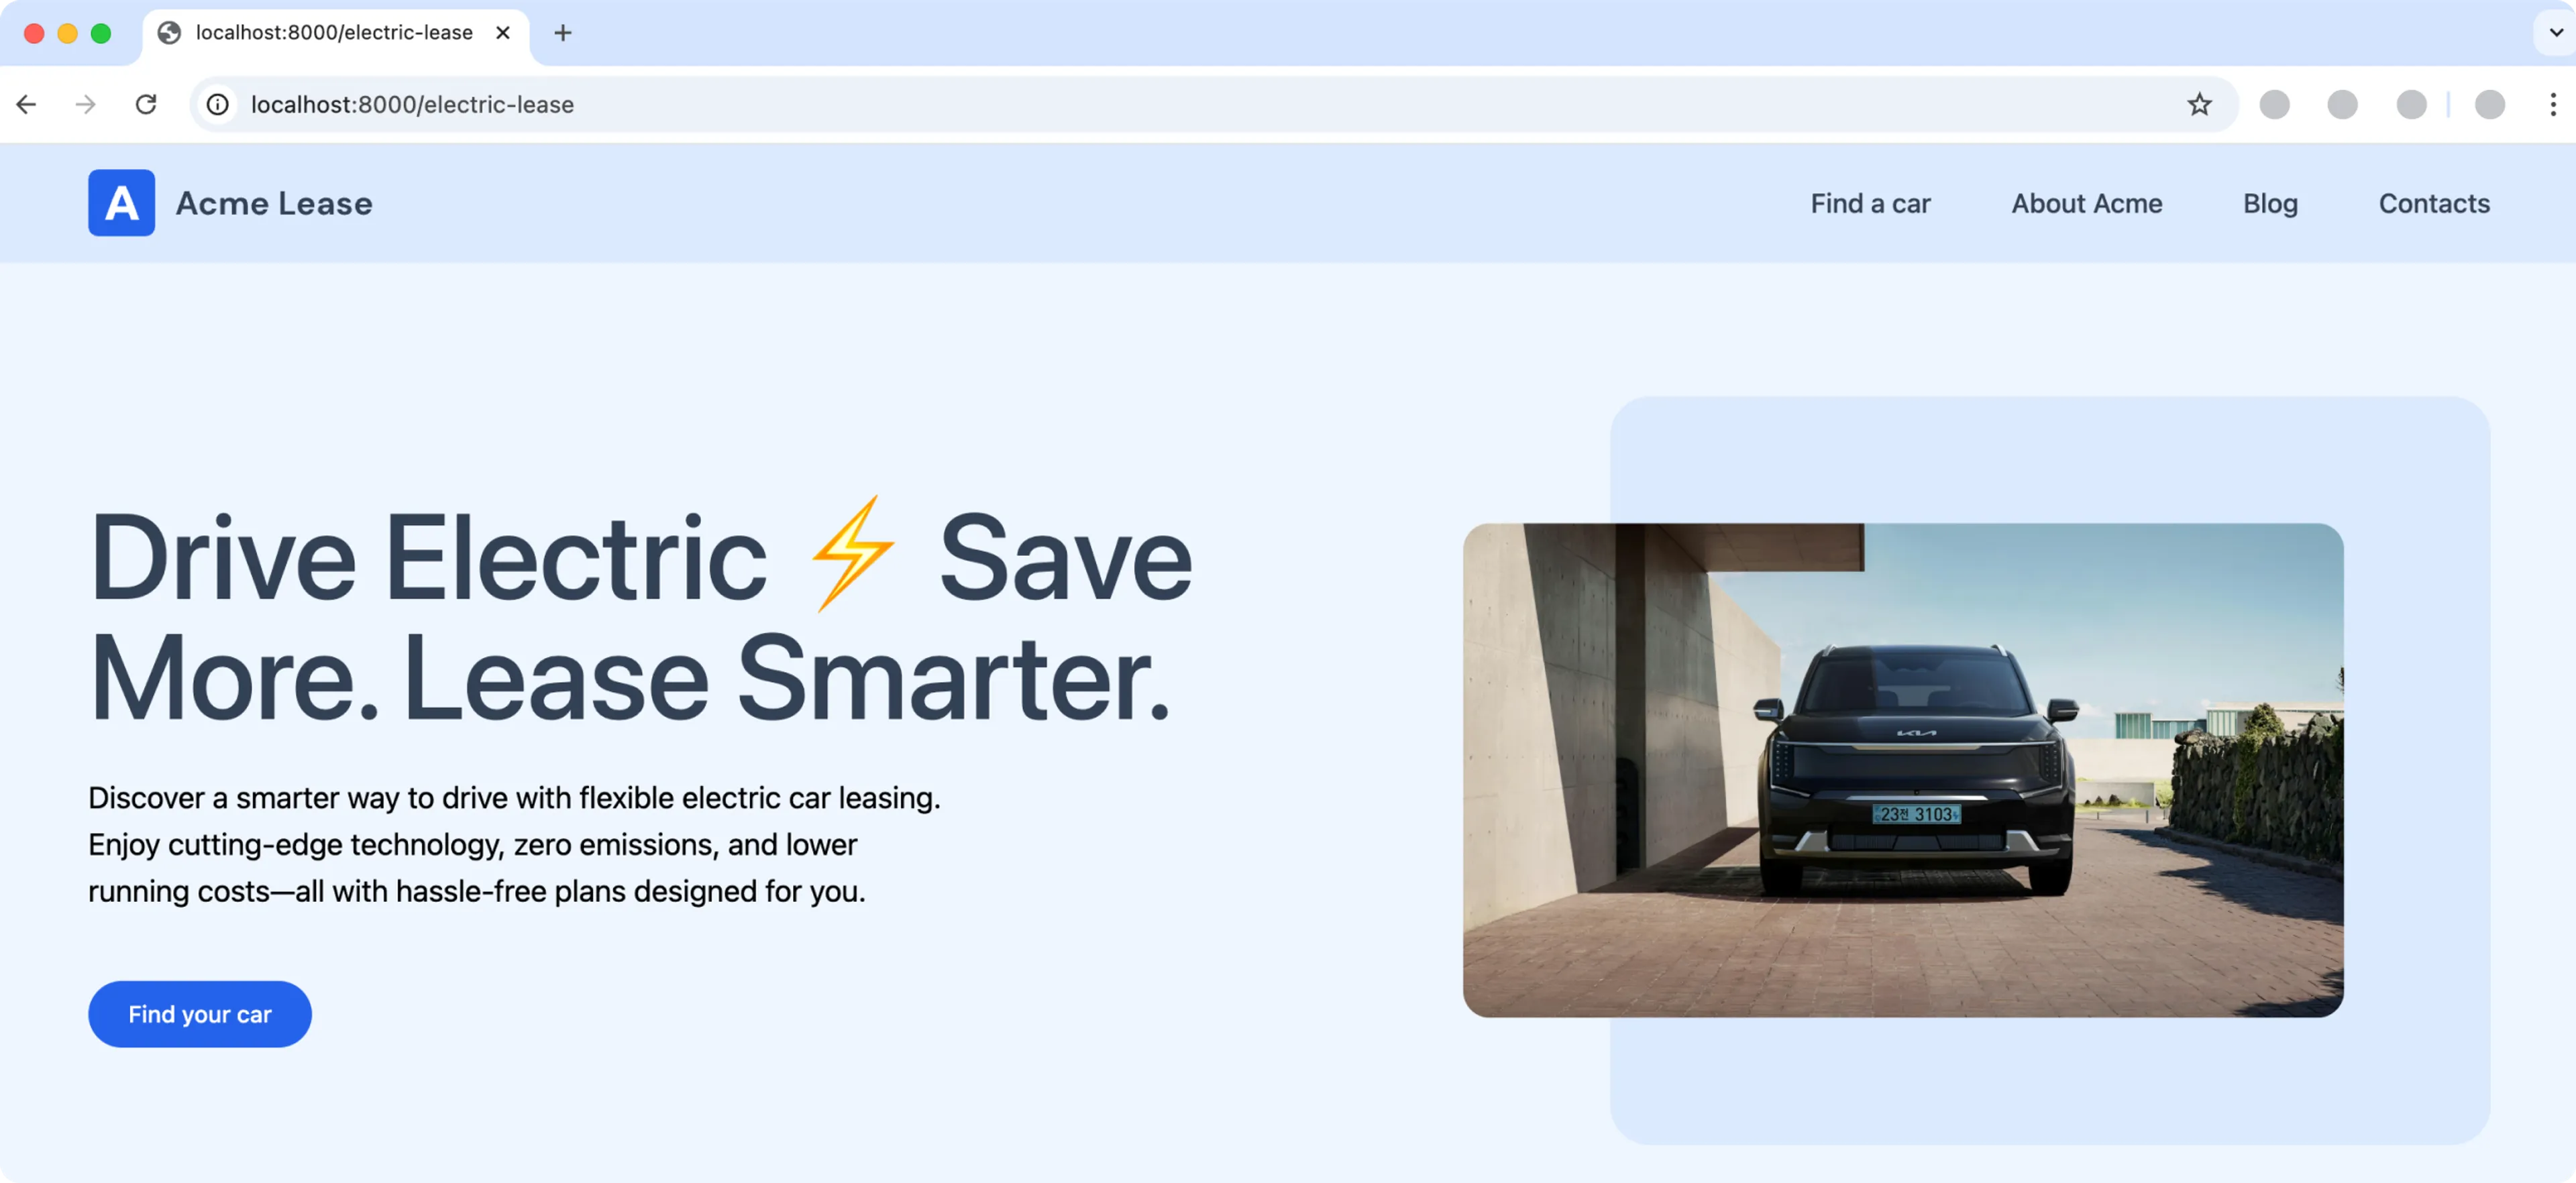
-
In your Prepr environment, go to the Segments page and click the Electric Car Buyers segment. You should see matching visitors in this segment like in the image below.
To make sure that visitors in the Electric Car Buyers segment see the matching adaptive content when they visit the home page, you need to set the API request header, Prepr-Customer-Id, when you retrieve the page content.
Based on this value, Prepr will check the segment that this visitor belongs to and will retrieve the matching personalized variant.
When you enable Prepr tracking, it assigns each visitor a unique ID with a cookie called __prepr_uid.
You can use the __prepr_uid value to set the Prepr Customer ID.
The latest version of Laravel automatically tries to decrypt cookies. This results in the __prepr_uid value being set to null when the page is loaded.
To exclude this cookie from the decryption process, you first need to extend the system code by adding it an exception.
-
Go to the
bootstrapfolder and add the highlighted code below to theapp.phpfile../bootstrap/app.php<?php use Illuminate\Foundation\Application; use Illuminate\Foundation\Configuration\Exceptions; use Illuminate\Foundation\Configuration\Middleware; return Application::configure(basePath: dirname(__DIR__)) ->withRouting( web: __DIR__.'/../routes/web.php', commands: __DIR__.'/../routes/console.php', health: '/up', ) ->withMiddleware(function (Middleware $middleware) { $middleware->encryptCookies(except: [ '__prepr_uid', ]); }) ->withExceptions(function (Exceptions $exceptions) { // }) ->create(); -
Go to the
app/Http/controllersfolder and add the following code to thePageController.phpto get the__prepr_uidcookie value and use it to set the API request headerPrepr-Customer-Id../app/Http/controllers/PageController.php<?php namespace App\Http\Controllers; // Include Http to make the query request use Illuminate\Support\Facades\Http; //Include to get cookie from request use Illuminate\Http\Request; class PageController extends Controller { public function index(Request $request, $slug='/') { $response = Http::prepr([ 'query' => 'get-page-by-slug', 'variables' => [ 'slug' => $slug, ], 'headers' => [ 'Prepr-Customer-Id' => $request->cookie('__prepr_uid') ] ]); $page = data_get($response->json(), 'data.Page'); // Return the page view with query response if ($page) { return view('pages.index', [ 'page' => $page, ]); } } }
Test your adaptive content
Now that people who visit the Electric lease landing page are being grouped into the Electric Car Buyers segment, you can test the adaptive content. To test the adaptive content for the Electric Car Buyers segment follow the steps below.
-
Go to the Electric Car landing page in your website. For example:
http://localhost:8000/electric-lease. -
Wait a few seconds and go back to the home page. You can now see the personalized home page like in the image below.
To see the non-personalized page, you can reset the cookies and refresh the page as follows:
-
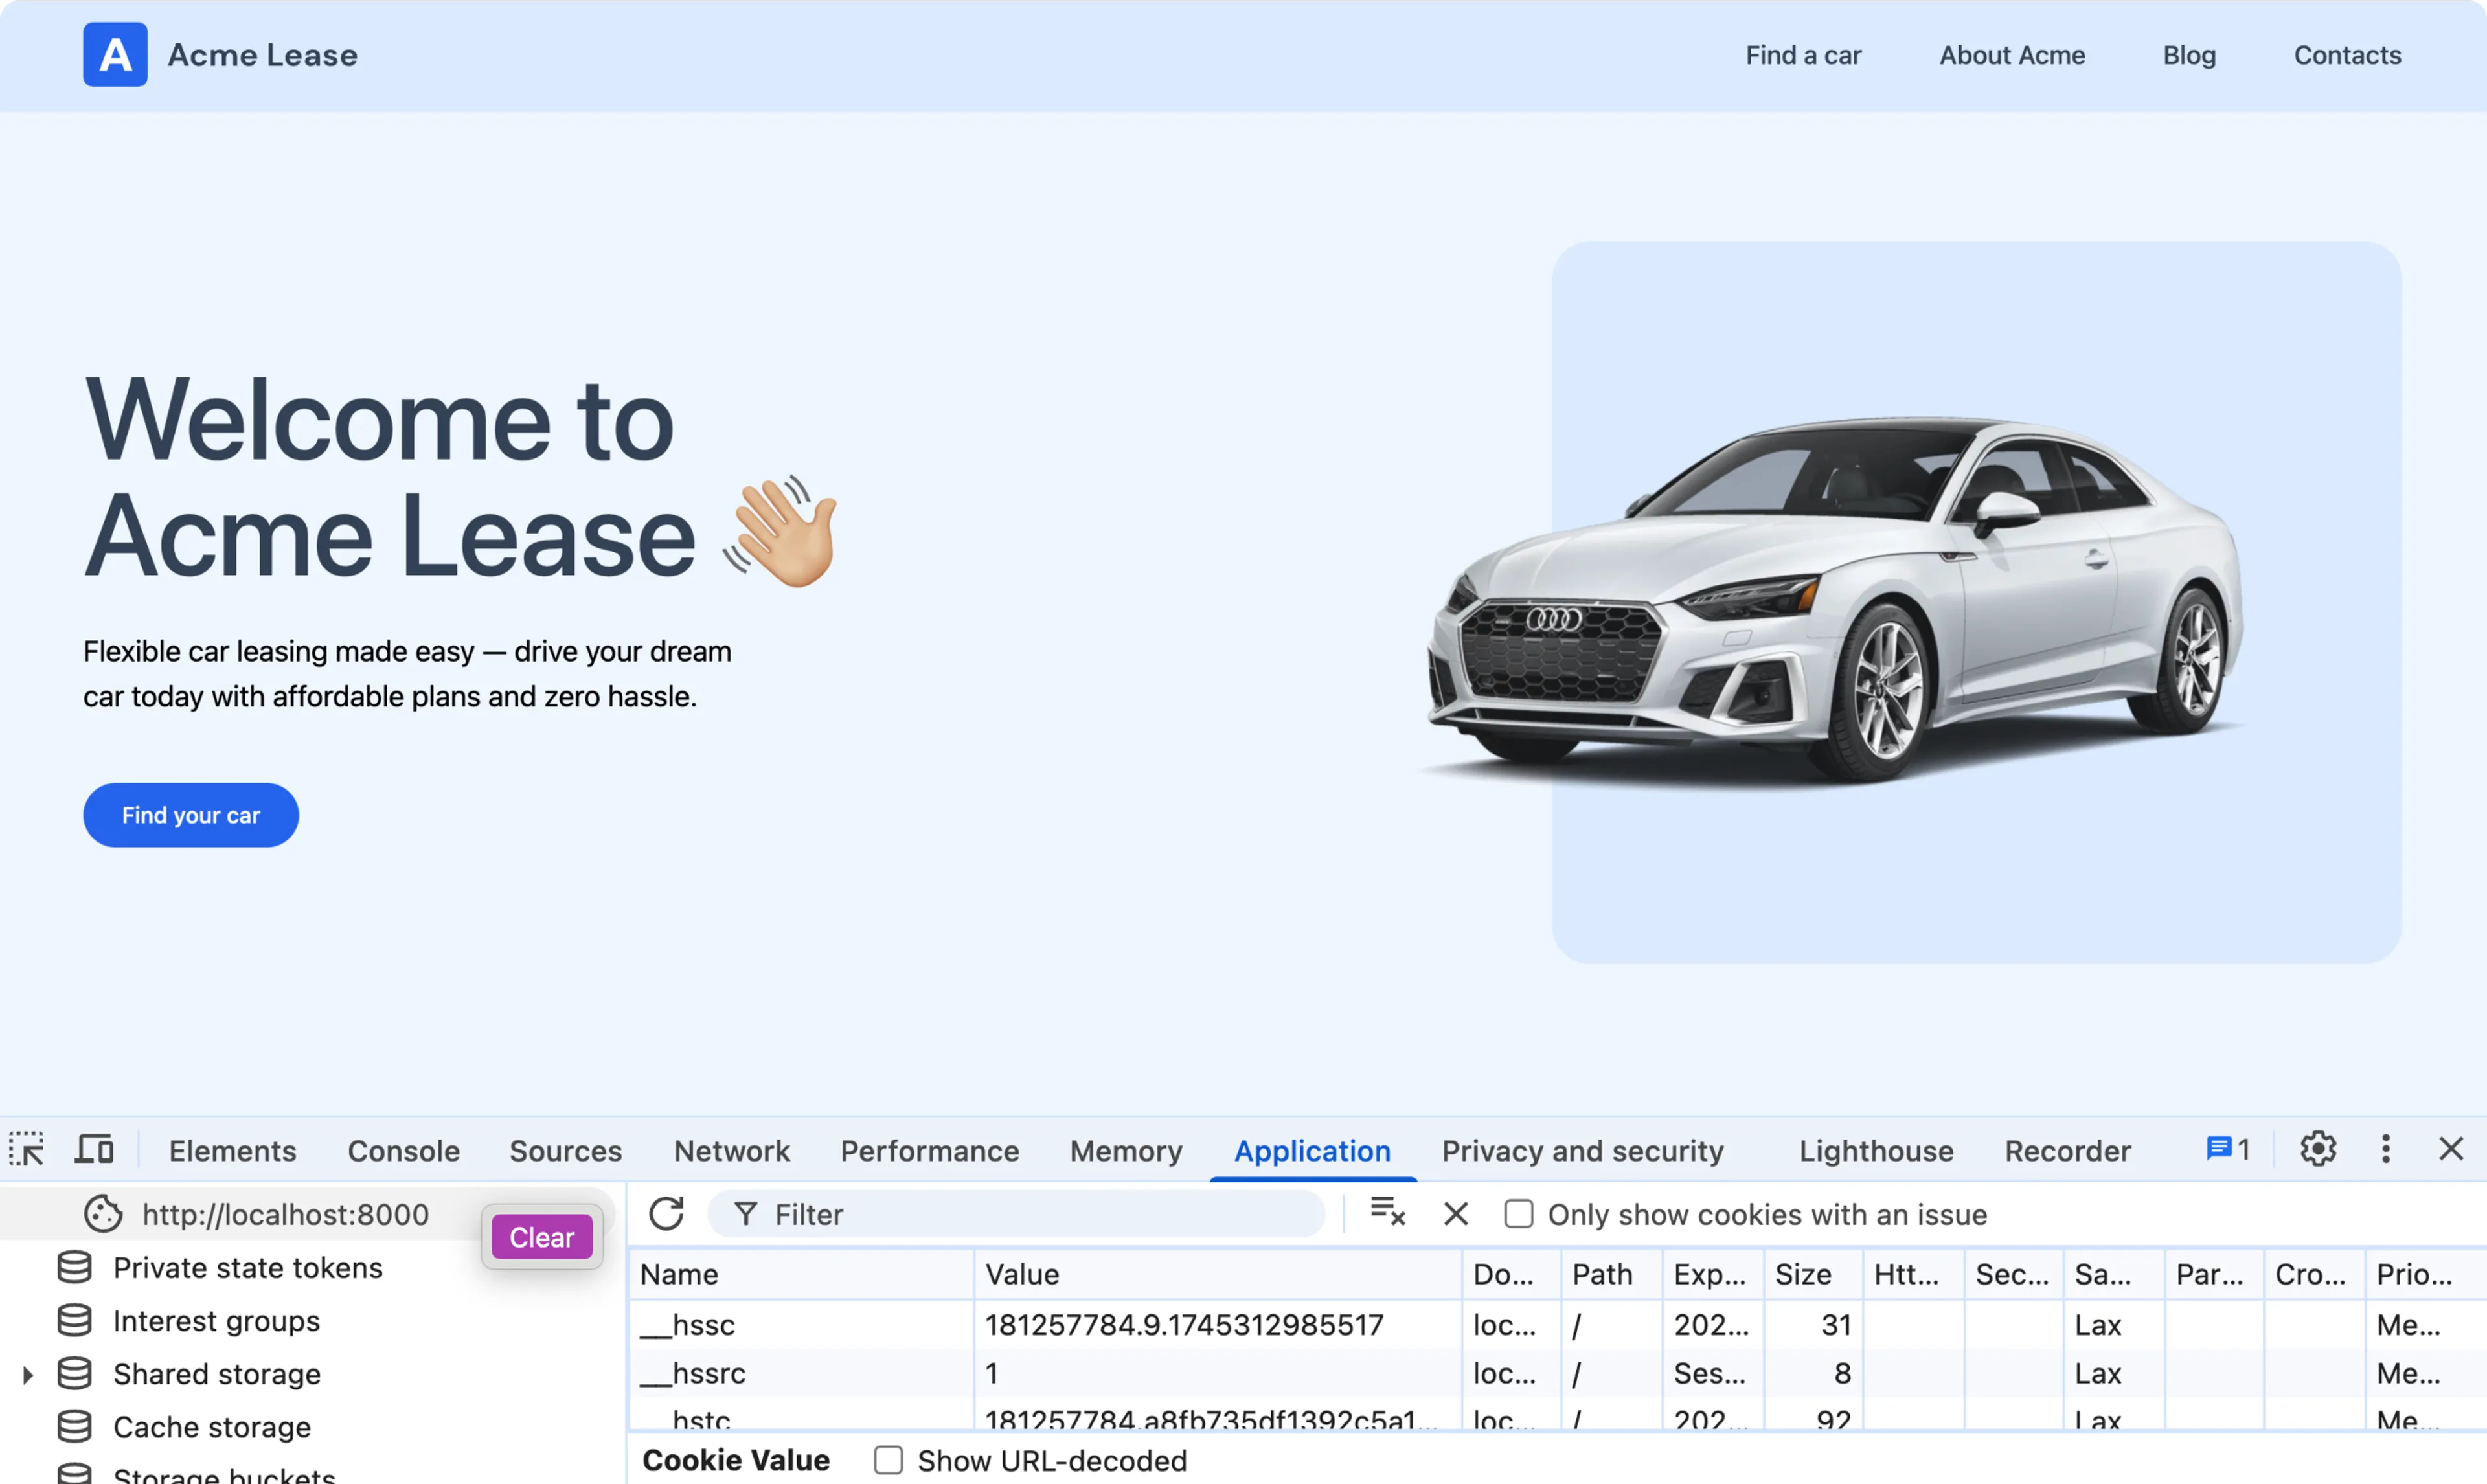
Right-click the page to Inspect the page, click the Application tab. Under the cookies, click your localhost. You’ll notice the
__prepr_uidcookie in the list. -
Right-click the localhost entry to Clear the cookies and refresh the page. You should now see the non-personalized content in the home page.
Add HTML attributes to track impressions and conversion events
Your personalization is running successfully, however there are no metrics being recorded yet. You can see this with the Awaiting data message at the top of the Adaptive content block in the Homepage content item.
To get Prepr to start showing some metrics data, you need to add HTML attributes to elements in your adaptive content. When you add these attributes, the tracking pixel automatically tracks impressions and your chosen conversion events.
-
To start collecting impressions and clicks, add the HTML attributes
data-prepr-variant-keyanddata-prepr-variant-eventto the Hero section as shown in the highlighted code below. The impression is recorded when the Hero element scrolls into view. The click is recorded when the button is clicked../resources/views/components/hero-section.blade.php<section class="bg-primary-50" data-prepr-variant-key="{{ data_get($data,'_context.variant_key') }}"> <div class="mx-auto max-w-8xl p-spacing flex flex-col items-center md:flex-row gap-8 py-10 lg:py-20"> <div class="basis-6/12"> <h1 class="text-mb-5xl lg:text-7xl text-secondary-700 font-medium break-words text-balance"> {{ data_get($data,'heading') }} </h1> <p class="text-mb-lg text-secondary-500 lg:text-lg mt-4 lg:mt-6 text-balance"> {{ data_get($data,'sub_heading') }} </p> <div class="flex gap-4 mt-8 xl:mt-10"> <div> <a href="#" data-prepr-variant-event><x-button>Find your car</x-button></a> </div> </div> </div> <div class="basis-6/12 relative flex justify-end items-center"> <div class="z-10 flex items-center aspect-20/17 w-9/12 overflow-hidden justify-center absolute top-1/2 left-1/2 transform -translate-x-1/2 -translate-y-1/2"> <img src="{{ data_get($data,'image.url') }}" alt="Hero Image" class="object-cover rounded-2xl" /> </div> <div class="w-9/12 aspect-20/17 bg-primary-100 rounded-3xl right-0 top-0 z-0"></div> </div> </div> </section>
If you want to track a conversion other than a click event, e.g. a quote request, then set your data-prepr-variant-event to the custom event.
For example: data-prepr-variant-event="QuoteRequest". Check out the Personalization doc for more details.
-
To start recording metrics, go to the home page in your website, click the Find your car button.
-
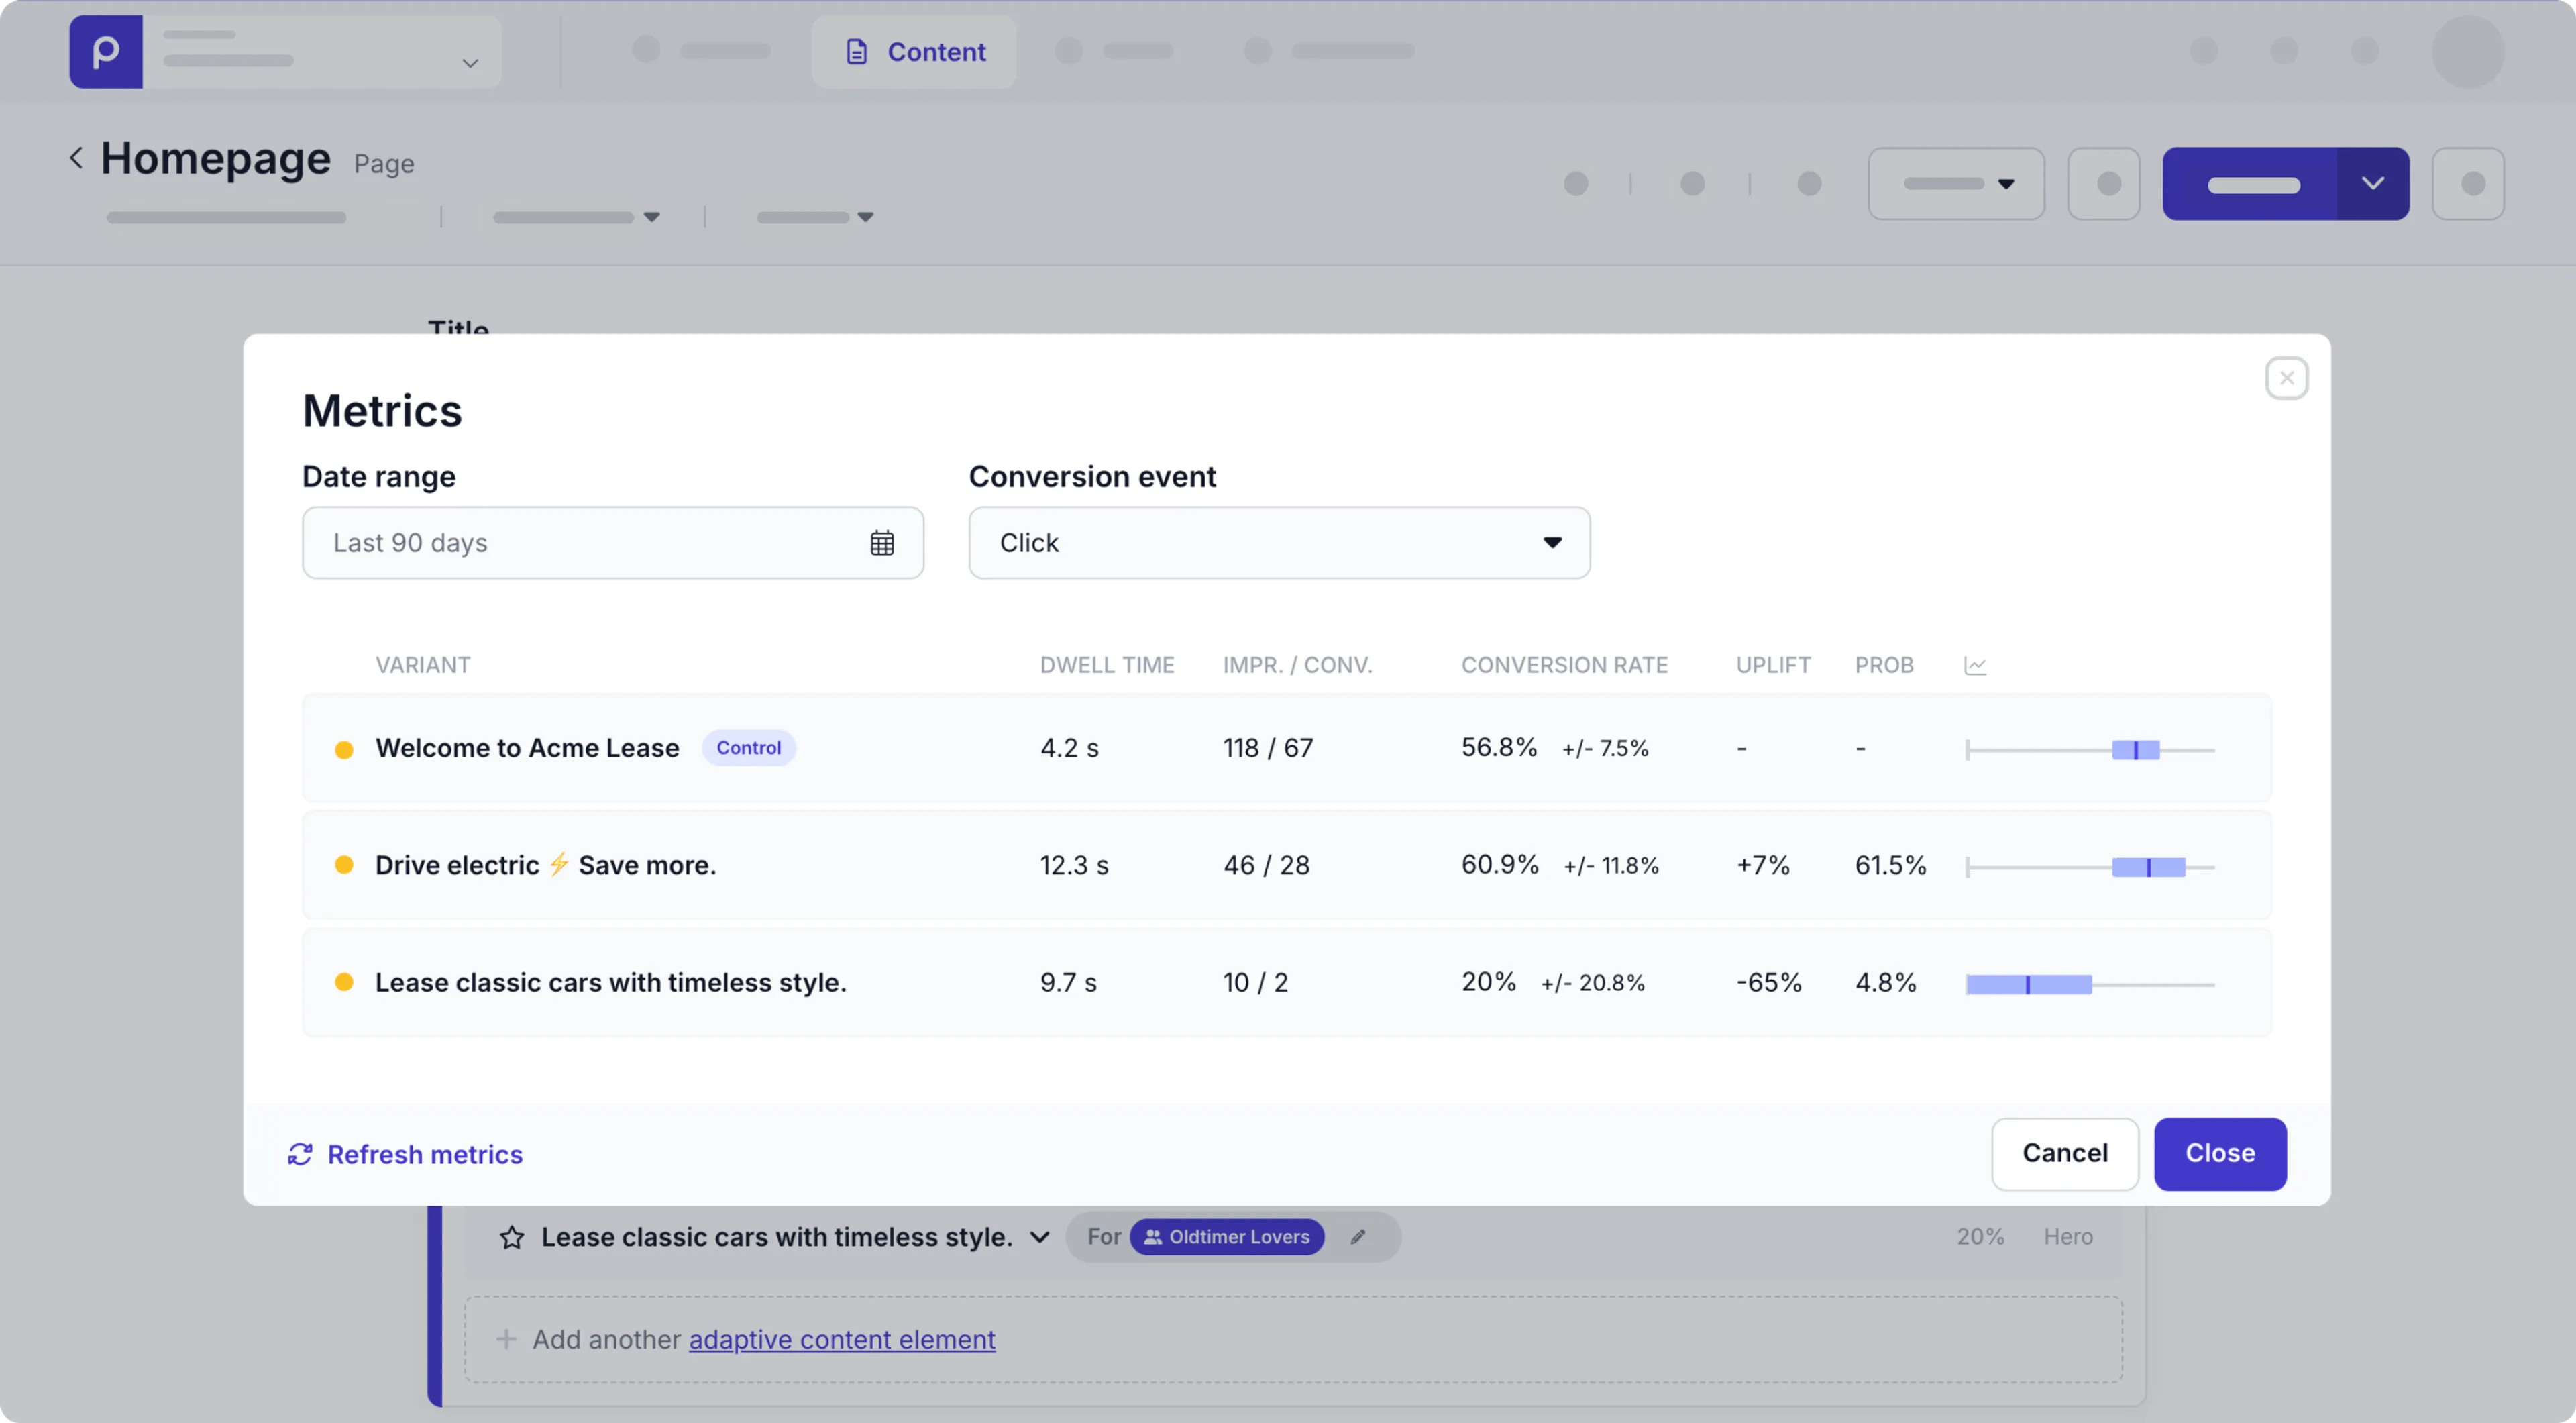
Now when you view the adaptive content in your Homepage content item, you can click the Metrics link and see the number of impressions and clicks like in the image below.
Congratulations! You have successfully set up personalization with metrics in your Laravel website. This brings you to the end of the Laravel complete guide which has given you all the tools and tips you need to create your own web app connected to Prepr CMS complete with personalization, and A/B testing. Don’t hesitate to give us feedback on your experience using this guide.
Next steps
To learn more on how to expand your project, check out the following resources: