Make your Laravel project dynamic
This guide shows you how to connect an existing Laravel project to Prepr to retrieve and show Acme Lease demo content.
Connect your Laravel website to Prepr
The steps below continue from the previous section, Set up a Laravel project. If you don’t yet have a Laravel website with static pages, follow the steps in this section first. Otherwise, let’s get started.
Install the Laravel GraphQL SDK
The Laravel GraphQL SDK is an integration tool that helps to retrieve Prepr CMS data with GraphQL. The instructions below show you how to install the Laravel GraphQL SDK so that you can execute GraphQL queries to request data from the Prepr API.
-
Execute the following command in the terminal:
composer require preprio/laravel-graphql-sdk -
Once done, update the
services.phpfile in theconfigfolder to add the Prepr endpoint service:./config/services.php<?php return [ 'postmark' => [ 'token' => env('POSTMARK_TOKEN'), ], 'ses' => [ 'key' => env('AWS_ACCESS_KEY_ID'), 'secret' => env('AWS_SECRET_ACCESS_KEY'), 'region' => env('AWS_DEFAULT_REGION', 'us-east-1'), ], 'resend' => [ 'key' => env('RESEND_KEY'), ], 'slack' => [ 'notifications' => [ 'bot_user_oauth_token' => env('SLACK_BOT_USER_OAUTH_TOKEN'), 'channel' => env('SLACK_BOT_USER_DEFAULT_CHANNEL'), ], ], /* Include the Prepr endpoint service */ 'prepr' => [ 'endpoint' => env('PREPR_ENDPOINT'), /* Optional timeout settings */ 'timeout' => env('PREPR_TIMEOUT'), 'connect_timeout' => env('PREPR_CONNECT_TIMEOUT') ], ]; -
Update the .env file in the root directory of your project by adding the Prepr endpoint below.
./.envPREPR_ENDPOINT=<YOUR-PREPR-GRAPHQL-URL> # Optional variables for custom timeout values, Default Laravel defaults are 30 and 10 PREPR_TIMEOUT=<YOUR-TIMEOUT-IN-SECONDS> PREPR_CONNECT_TIMEOUT=<YOUR-CONNECT-TIMEOUT-IN-SECONDS> -
Replace the placeholder value
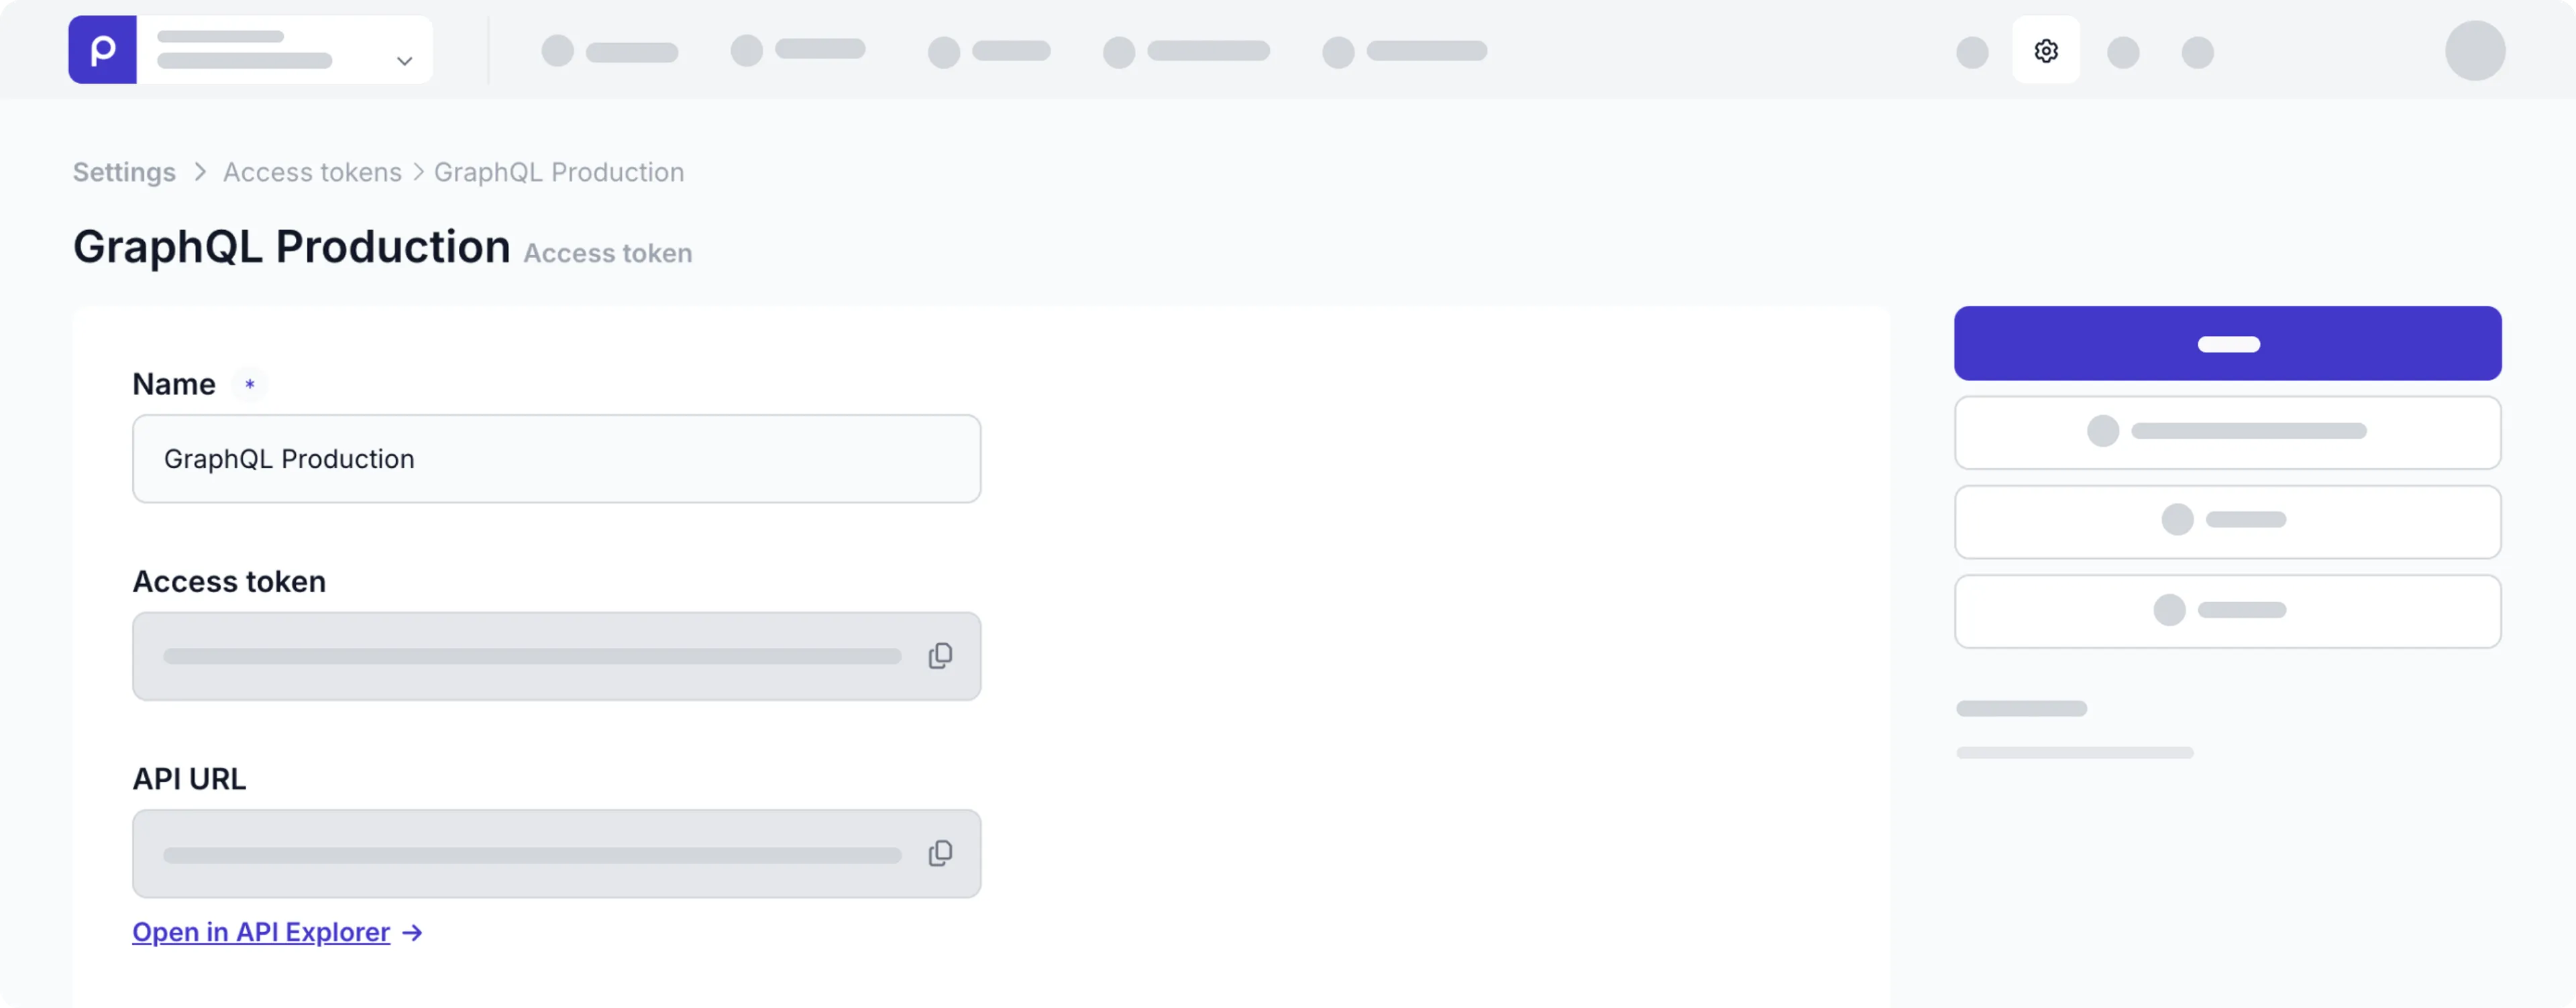
<YOUR-PREPR-GRAPHQL-URL>with the API URL of an access token from Prepr. Get an access token by logging into your Prepr account:
a. Click the icon and choose the Access tokens to view all the access tokens.
b. Click to open the GraphQL Production access token, and copy the API URL to only retrieve published content items on your site for now. c. Paste the copied API URL in your.envfile.
Use the GraphQL Production access token to request published content items for your live app and use the GraphQL Preview token to make a preview of unpublished content items for your content editors.
Now refresh the app in your browser, if your app runs without errors, then the setup above was done correctly. The next step is to fetch content from Prepr using the installed GraphQL SDK.
Add a GraphQL query
Now that the Laravel GraphQL SDK is installed and connected to Prepr, let’s fetch the page content from Prepr.
If you’re using preloaded demo data in your Prepr environment as mentioned in the Prerequisites, you should have a Homepage content item like in the images below. The Homepage has all the elements of the page in a Stack field. The stack makes it easy for an editor to set up their page content in a flexible structure for the front end.
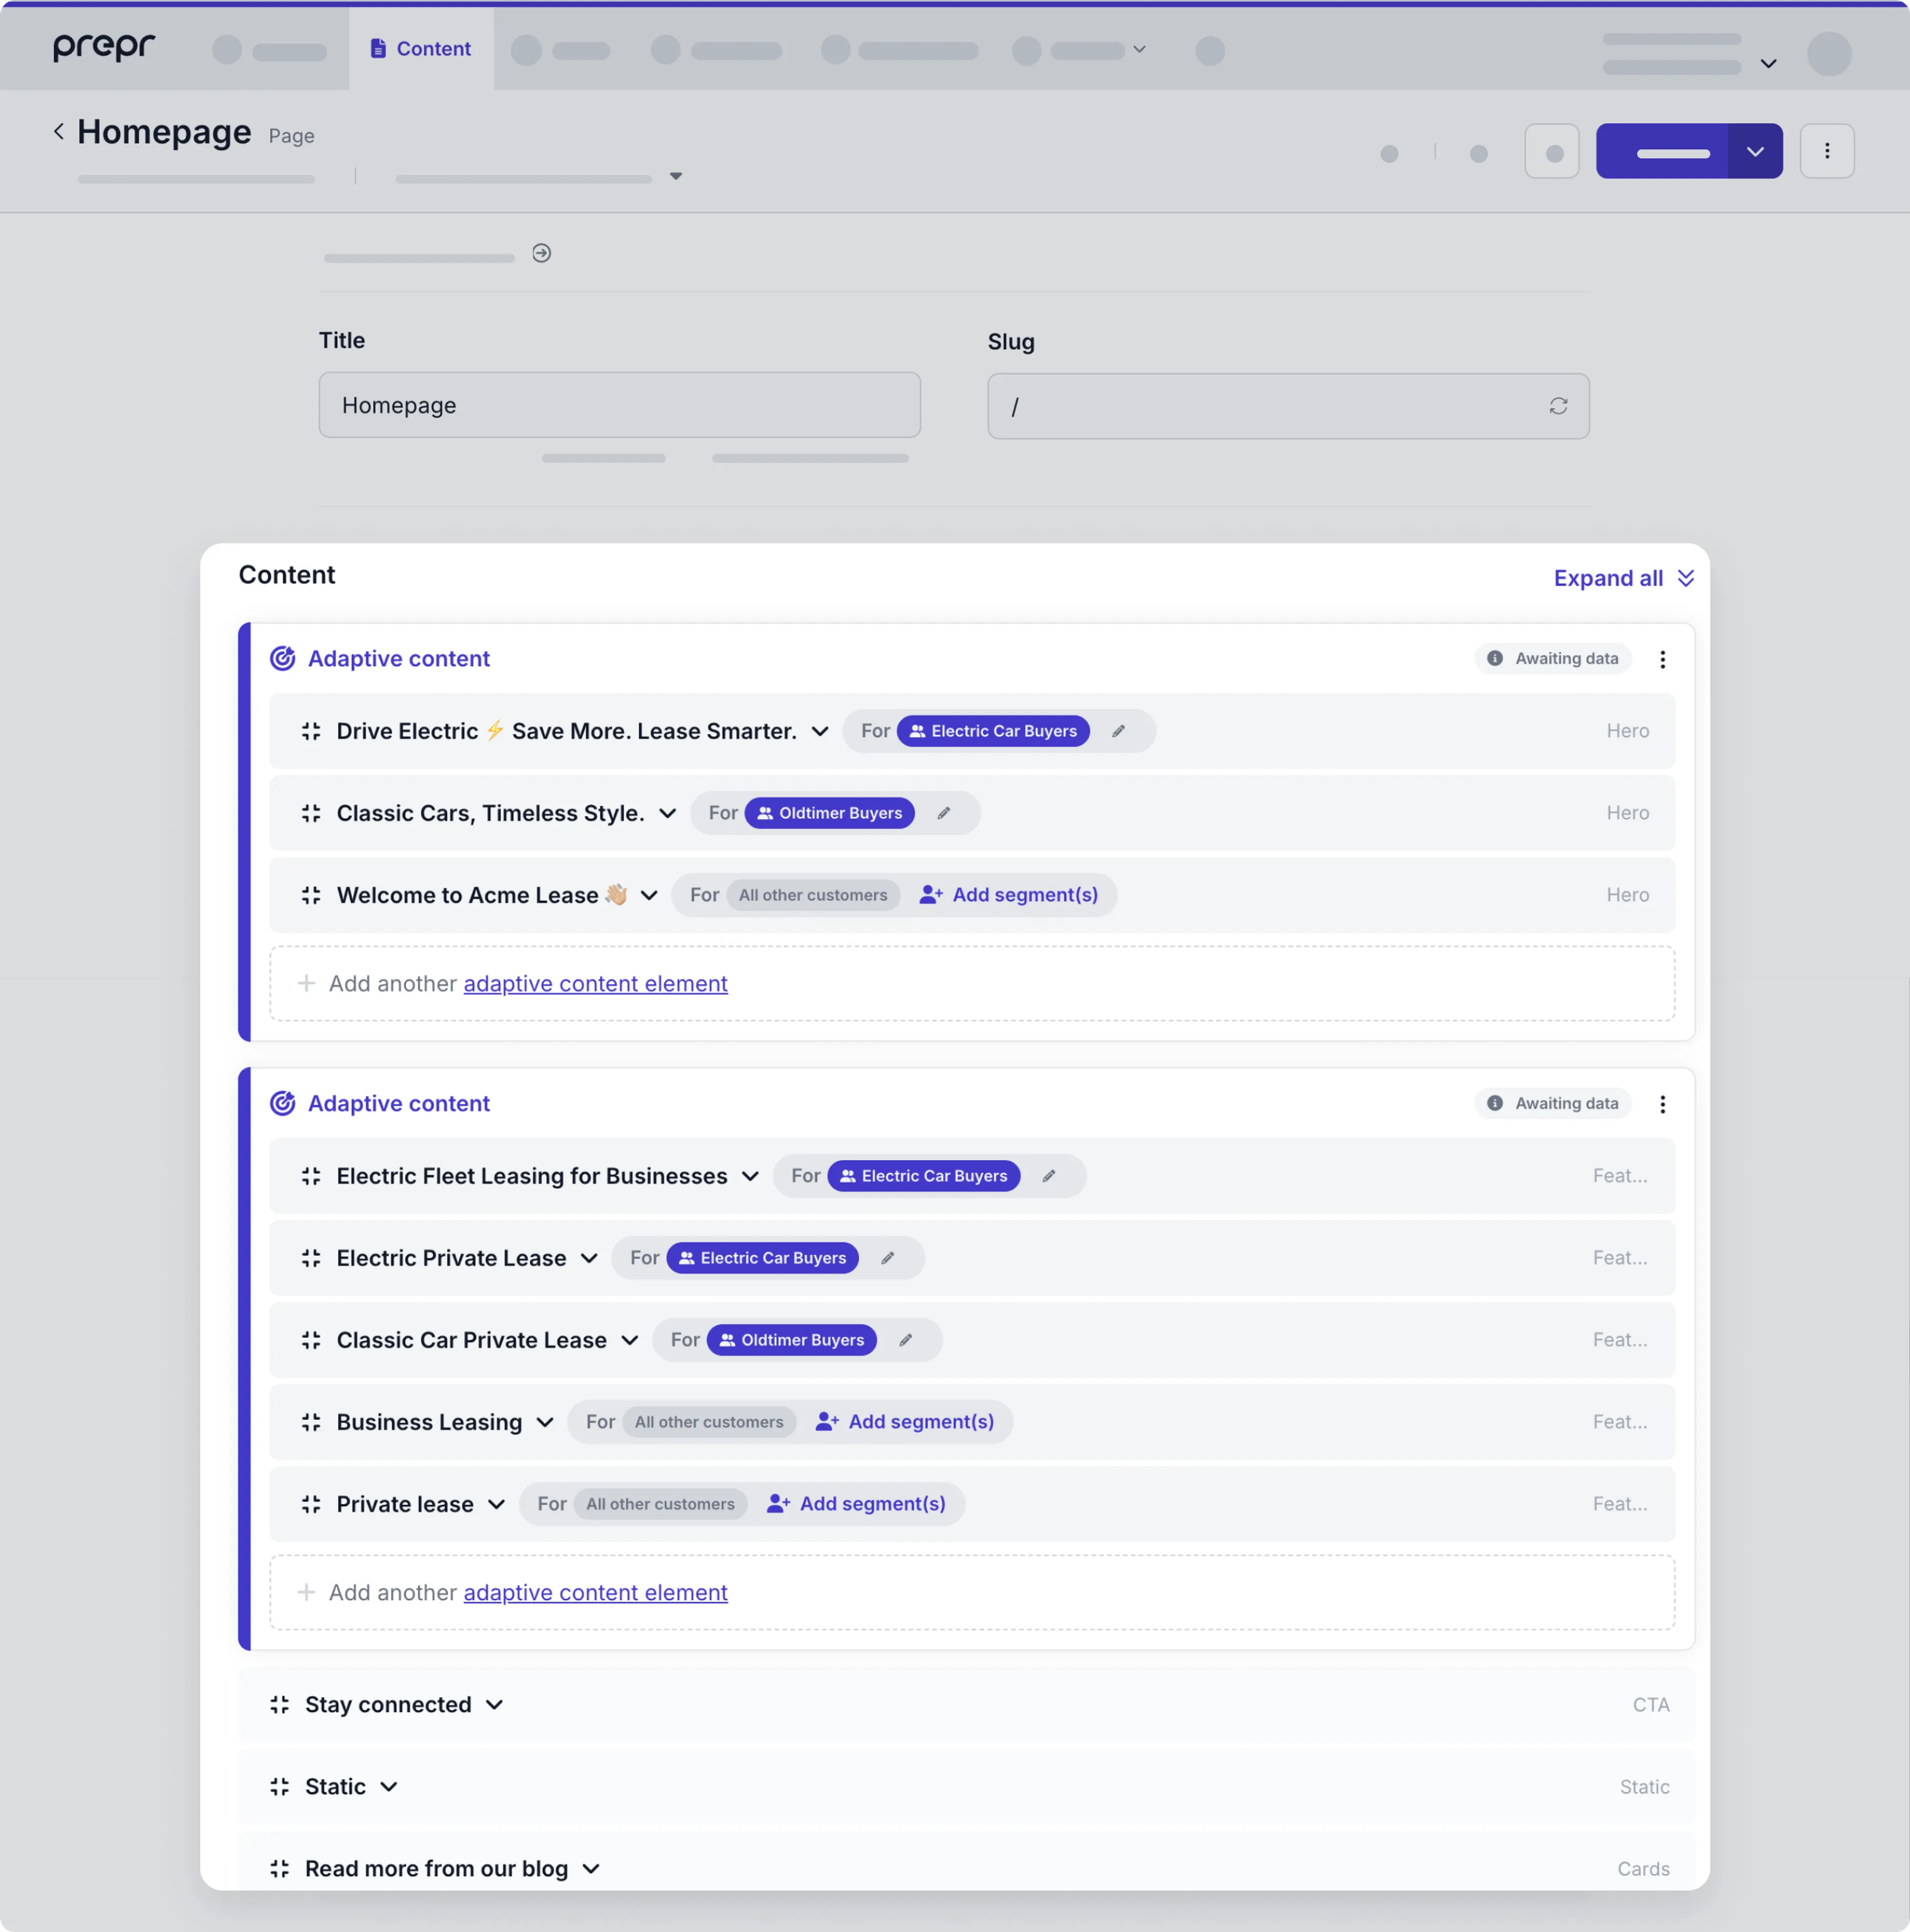
You can see that the hero and feature sections are in adaptive content blocks. We’ll explain that in more detail in the upcoming personalization chapter.
Follow the steps below to add a query to retrieve the id, title, slug, and a stack containing the hero and feature sections with their own fields:
-
In the
appfolder, create aQueriessubfolder. In this folder, create a file namedget-page-by-slug.graphqland add the following query to this file to retrieve a page by its slug:./app/Queries/get-page-by-slug.graphqlquery GetPageBySlug($slug: String) { Page(slug: $slug) { title _id content { __typename ... on Hero { _id sub_heading image { url(preset: "Hero", width: 2000) height width } _context { variant_key } heading buttons { button_type text external_url link { ... on Category { _slug } ... on Page { _slug } ... on Post { _slug } } } } ... on Feature { _id heading sub_heading button { button_type text external_url link { ... on Category { _slug } ... on Page { _slug } ... on Post { _slug } } } _context { variant_key } image_position image { url(width: 870, height: 570) } } } } }
You can create and test GraphQL queries using the Apollo explorer from Prepr. Open the API Explorer from the Article content item or the access token that you copied previously.
-
Test the query by going to the
app/Http/controllersfolder and adding the following code to thePageController.phpfile. This code executes the query with a slug value and prints the query results to the front end../app/Http/controllers/PageController.php<?php namespace App\Http\Controllers; // Include Http to make the query request use Illuminate\Support\Facades\Http; class PageController extends Controller { // Default slug to / when empty to show home page public function index($slug='/') { // Make the query request $response = Http::prepr([ 'query' => 'get-page-by-slug', 'variables' => [ 'slug' => $slug, ], ]); $page = data_get($response->json(), 'data.Page'); // Print the query response to the browser dump($page); // Return the page view with query response if ($page) { return view('pages.index', [ 'page' => $page, ]); } } }
You can create and test GraphQL queries using the Apollo explorer from Prepr. Open the API Explorer from the Homepage content item or from your access token page.
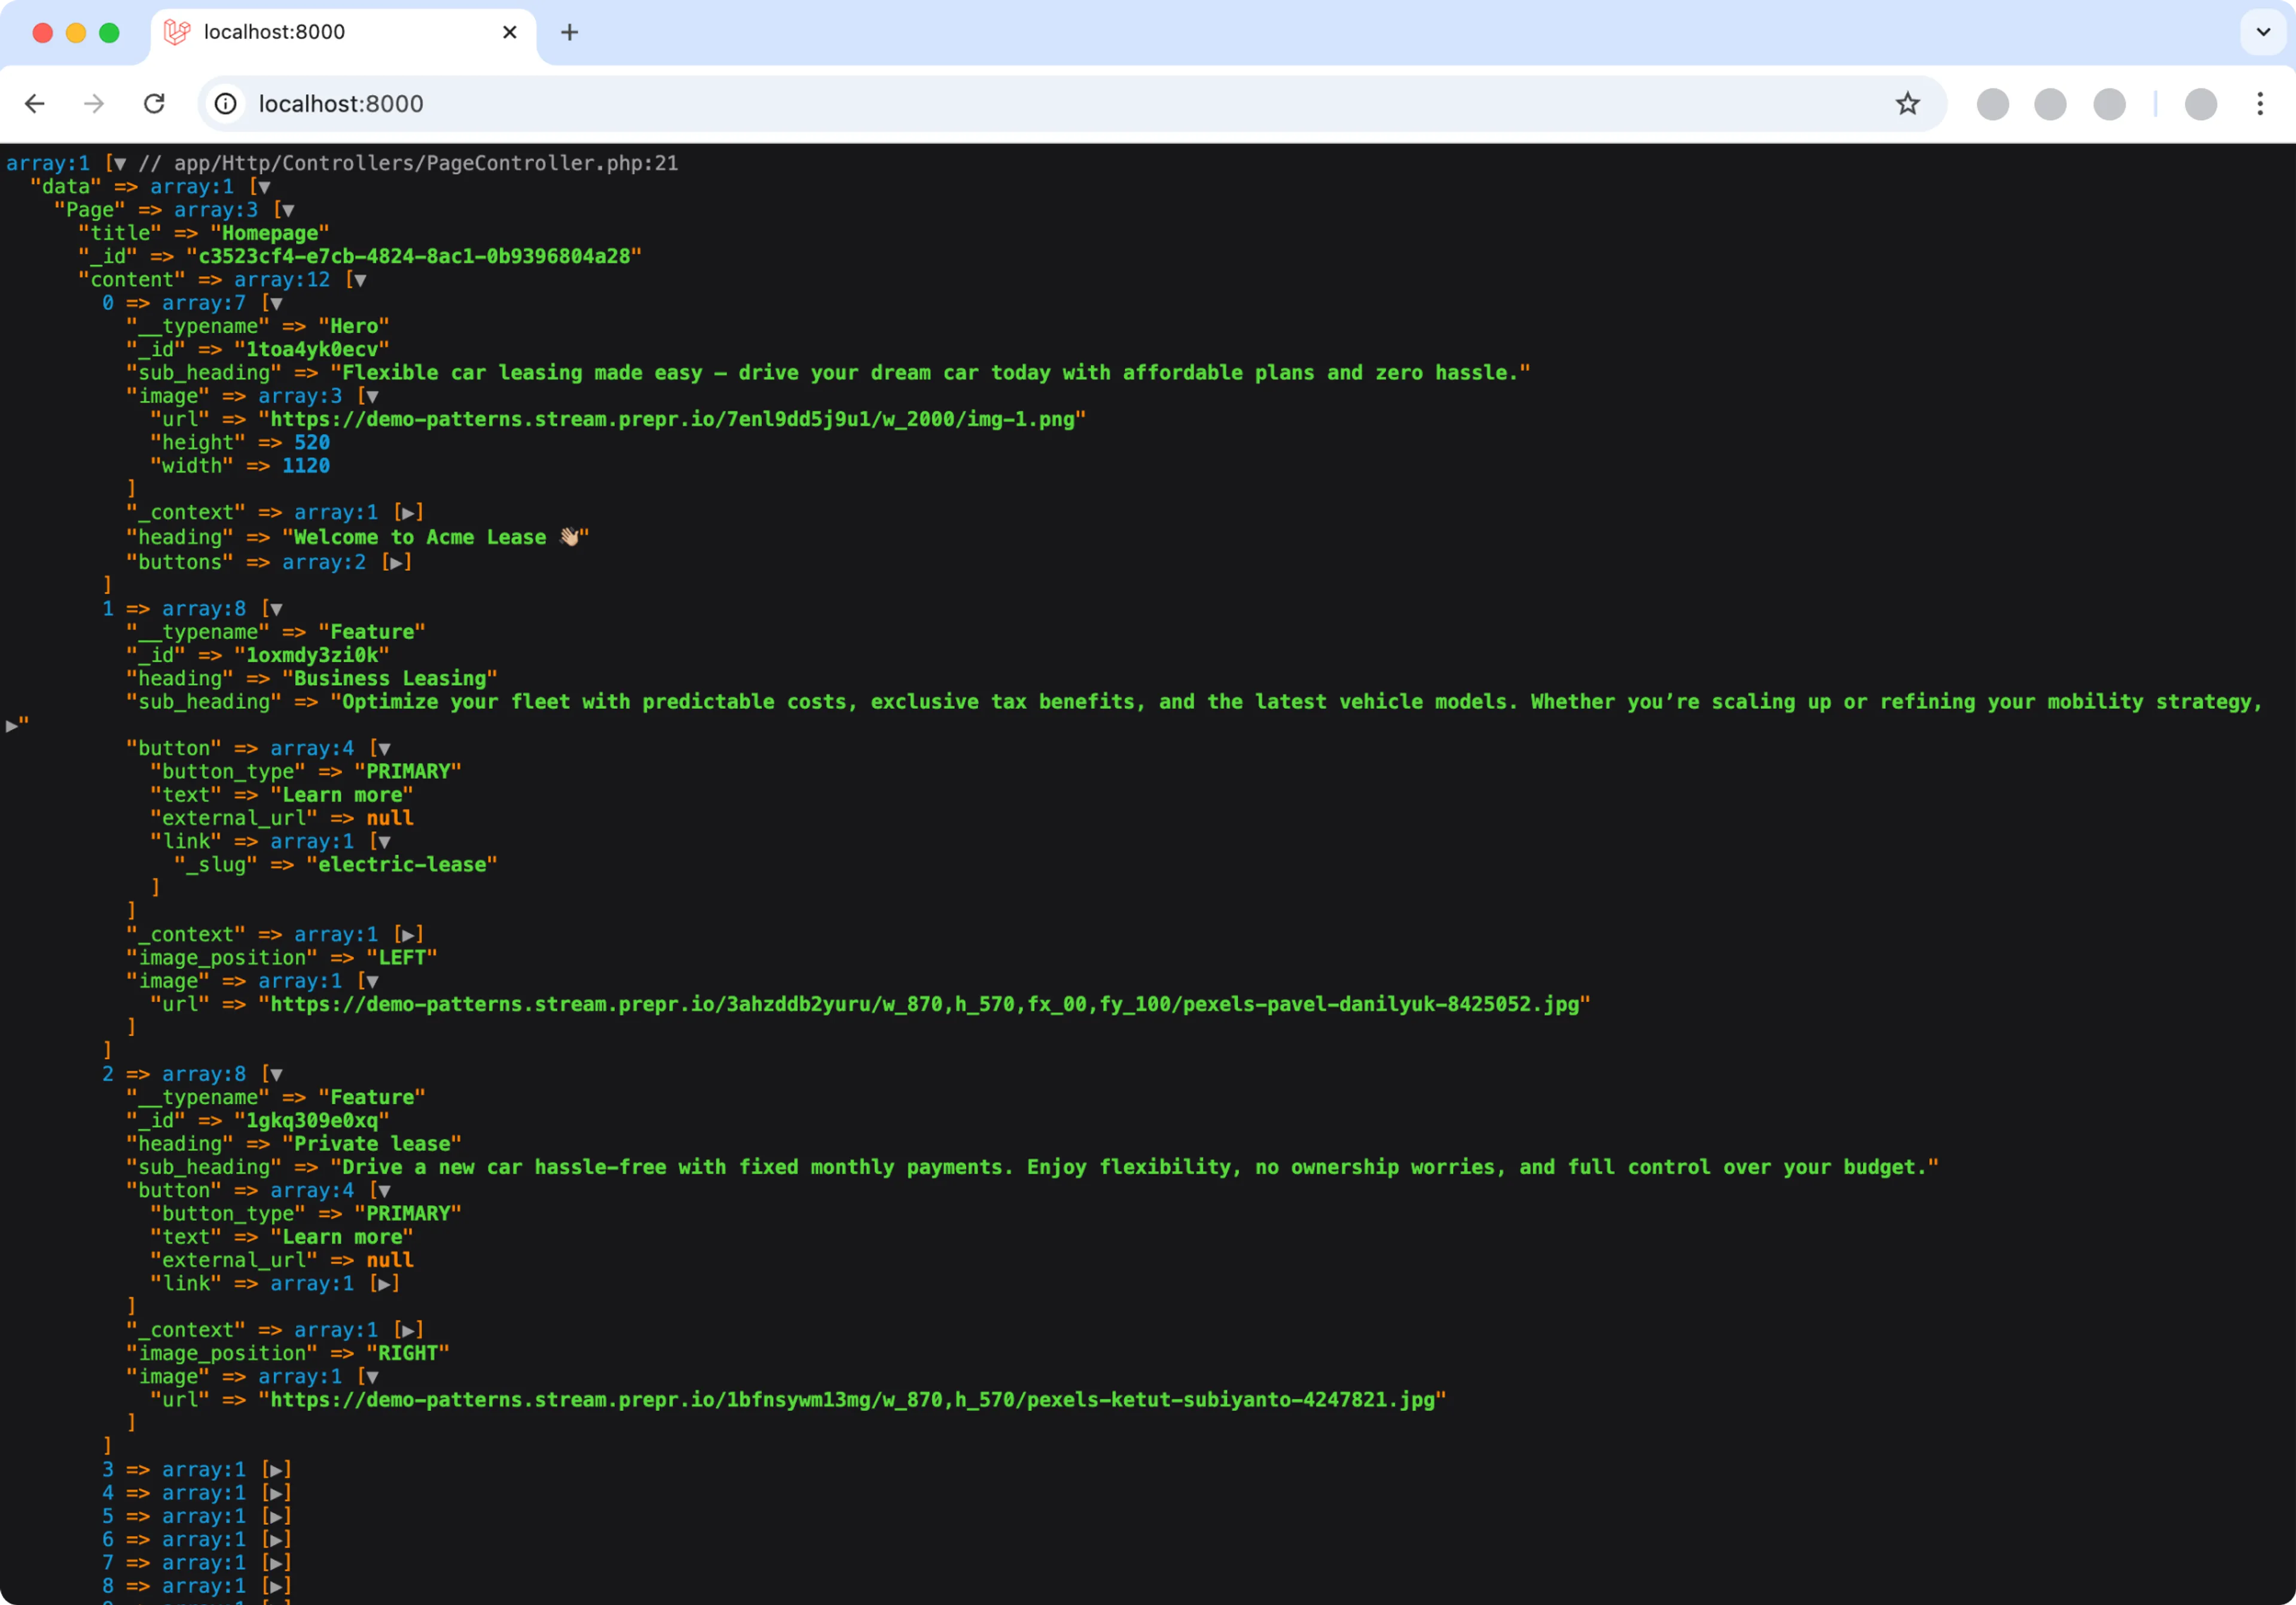
If you’re using preloaded demo data in your Prepr environment as mentioned above in the Prerequisites section, you should have one home page with the slug home. The query will retrieve the id, title, slug, and a stack containing a page header and two image and text blocks with their own fields.
When you refresh the page on the browser, the response to the query looks something like this:
Fetch page content
Now that the query has been created and retrieves the data successfully, let’s display the specific page content from the query results.
-
Go to the
resources/views/pagesand update theindex.blade.phpto display the data retrieved from the query instead of the static data../resources/views/pages/index.blade.php<head> <!-- import app.css --> @vite('resources/css/app.css') <x-navbar/> </head> <body> <!-- Loop through elements in the content stack field and assign the matching components--> <div> @if(data_get($page,'content')) @foreach(data_get($page,'content') as $element) @if(data_get($element,'__typename') === 'Hero') <x-hero-section :data="$element"/> @elseif(data_get($element,'__typename') === 'Feature') <x-feature-section :data="$element"/> @endif @endforeach @endif </div> </body>
Now when you refresh the page, you’ll see something like the image below:
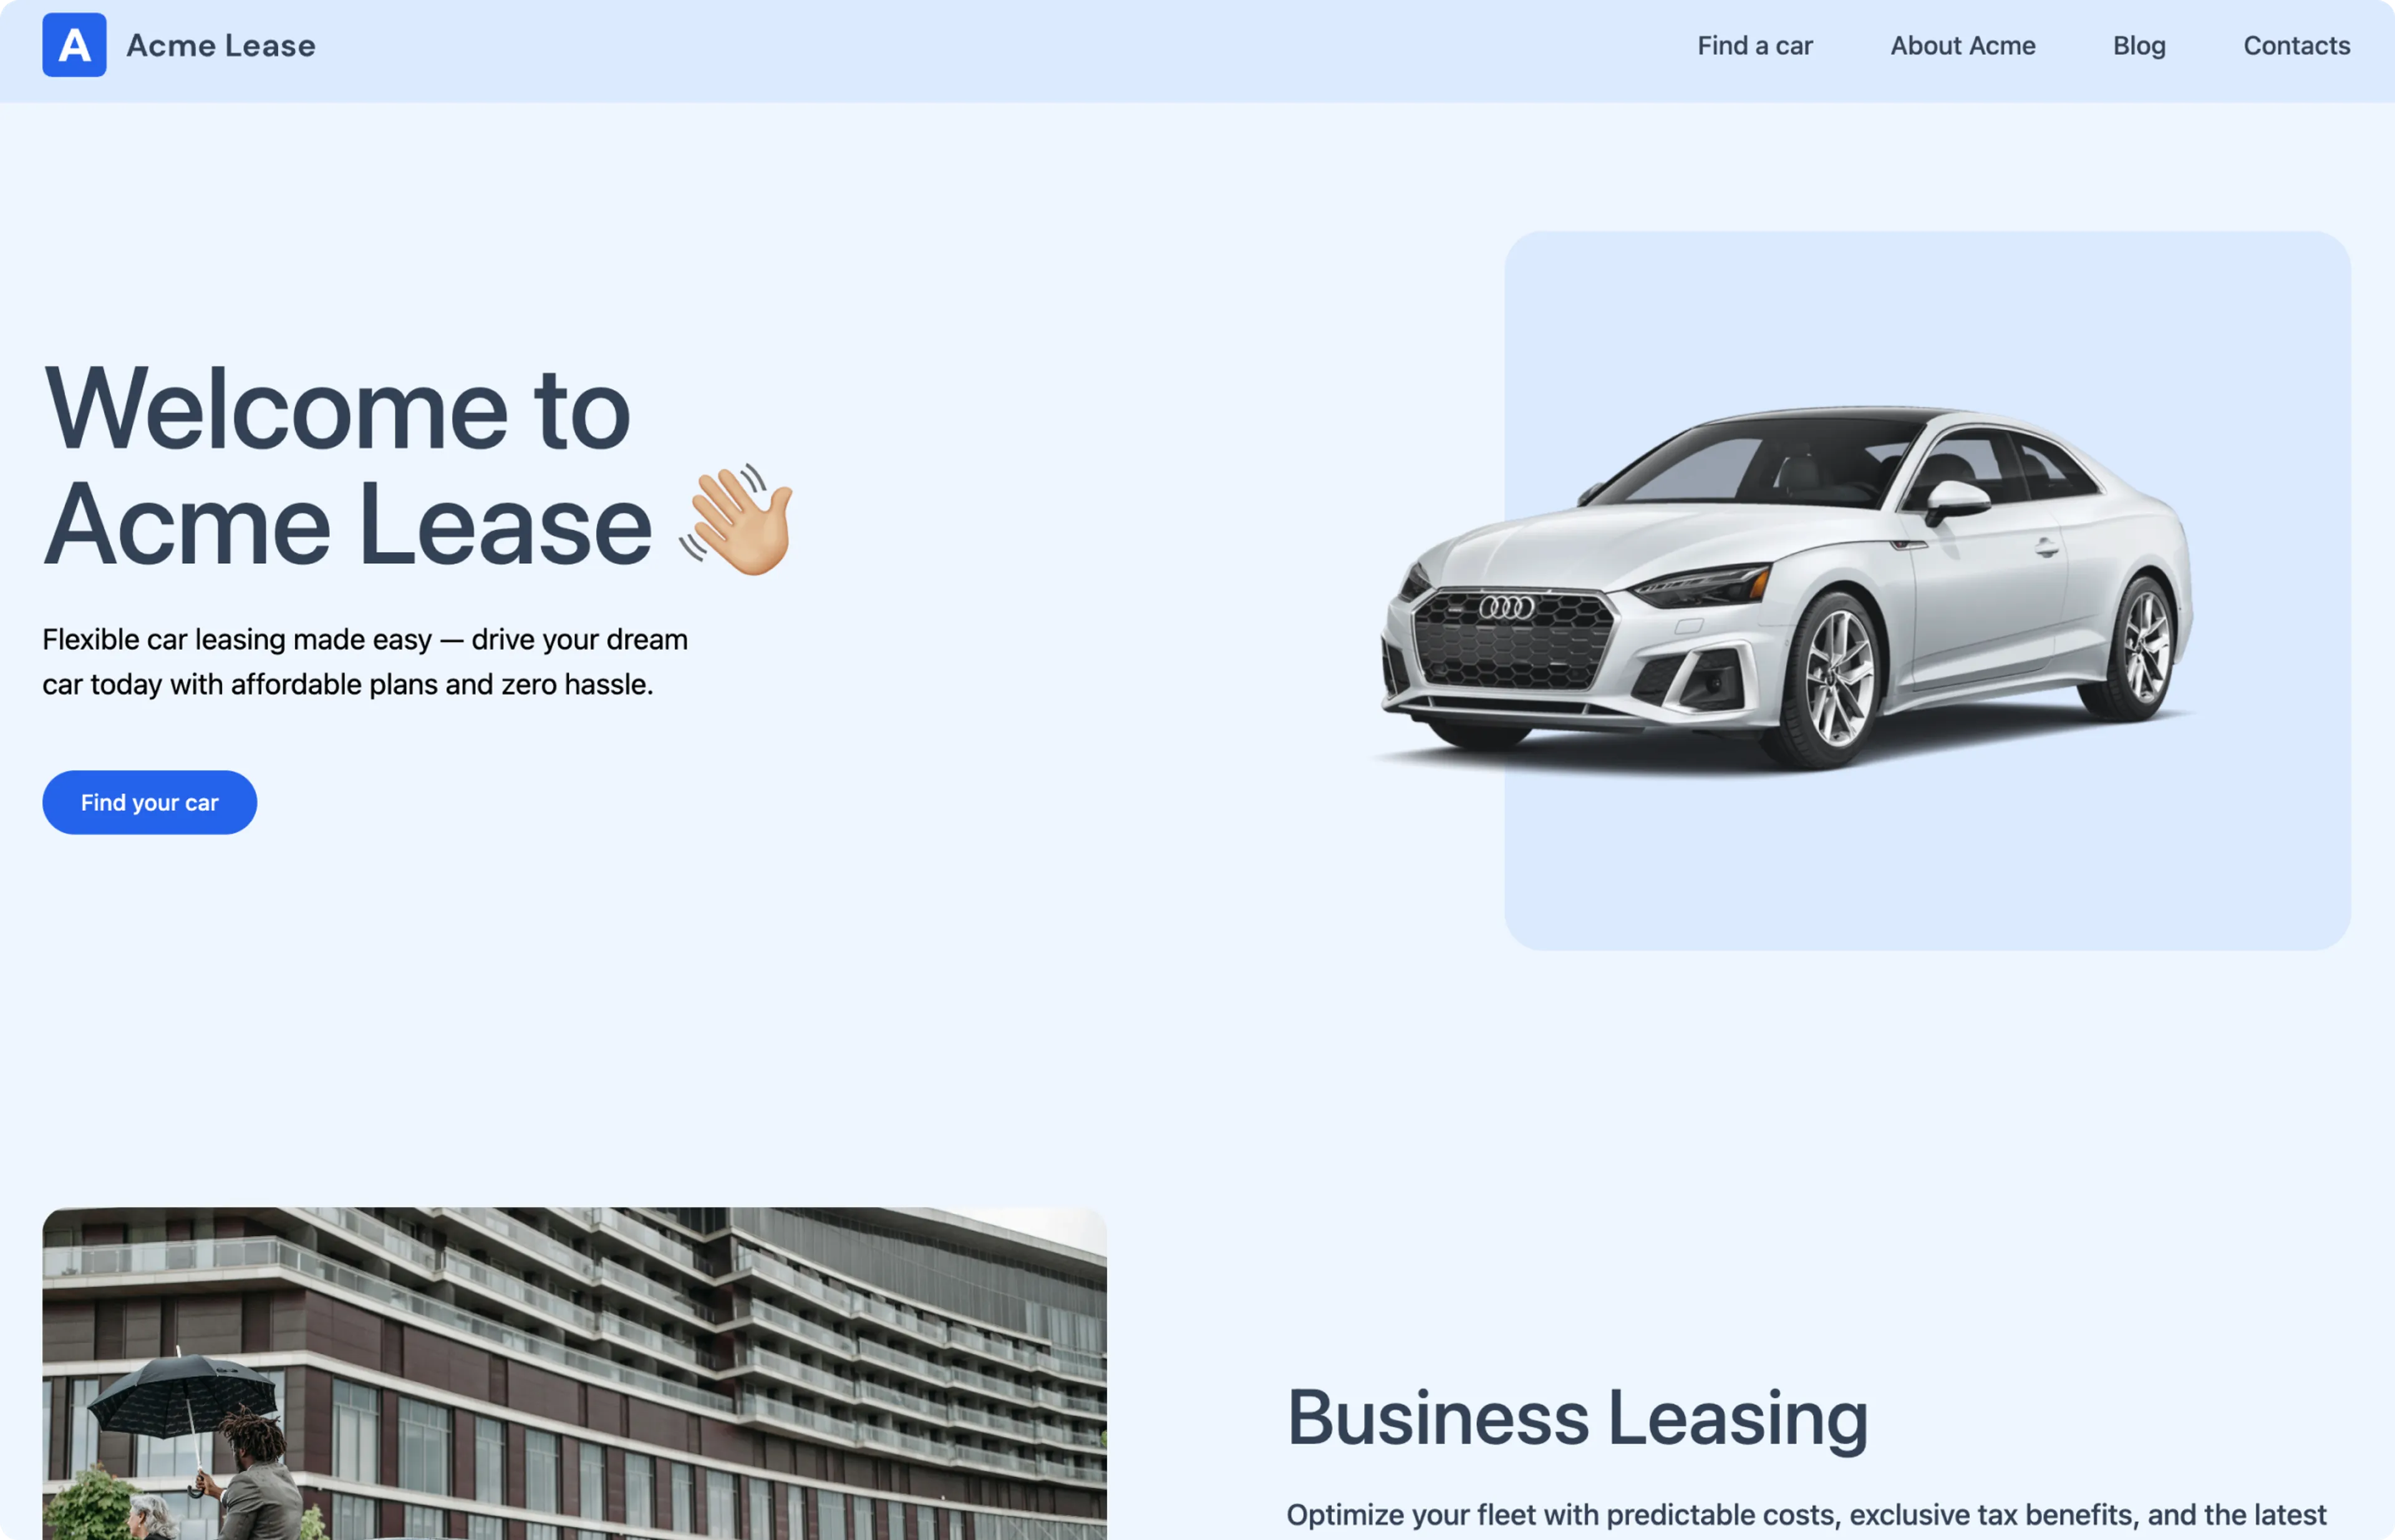
Congratulations! You have successfully connected your front end to Prepr to make your website dynamic. Continue your journey to the next section to set up data collection.