Set up data collection with tracking
Prepr is a CMS that includes built-in A/B testing and personalization features. These capabilities require visitor data to measure your test results and to build segments for personalization. This chapter of the Nuxt complete guide shows you how to enable tracking to collect this data in your Nuxt front end.
Enable Prepr tracking and collect view events
The steps below continue from the previous section, Make your Nuxt project dynamic. If you don’t yet have a Nuxt project connected to Prepr, follow the previous steps listed in the Complete guide overview to create one. Otherwise, let’s get started.
Enable Prepr tracking
When you enable Prepr tracking in your front end, it captures visitor (Customer) data and lets you track how they engage with your content.
-
In the
pluginsfolder, create a new file calledtracking.client.jsand add the code below../plugins/tracking.client.jsexport default defineNuxtPlugin(() => { // This code runs only on client because of `.client.js` if (typeof window !== 'undefined') { // Prepr Tracking Code <YOUR-PREPR-CODE-SNIPPET> } }); -
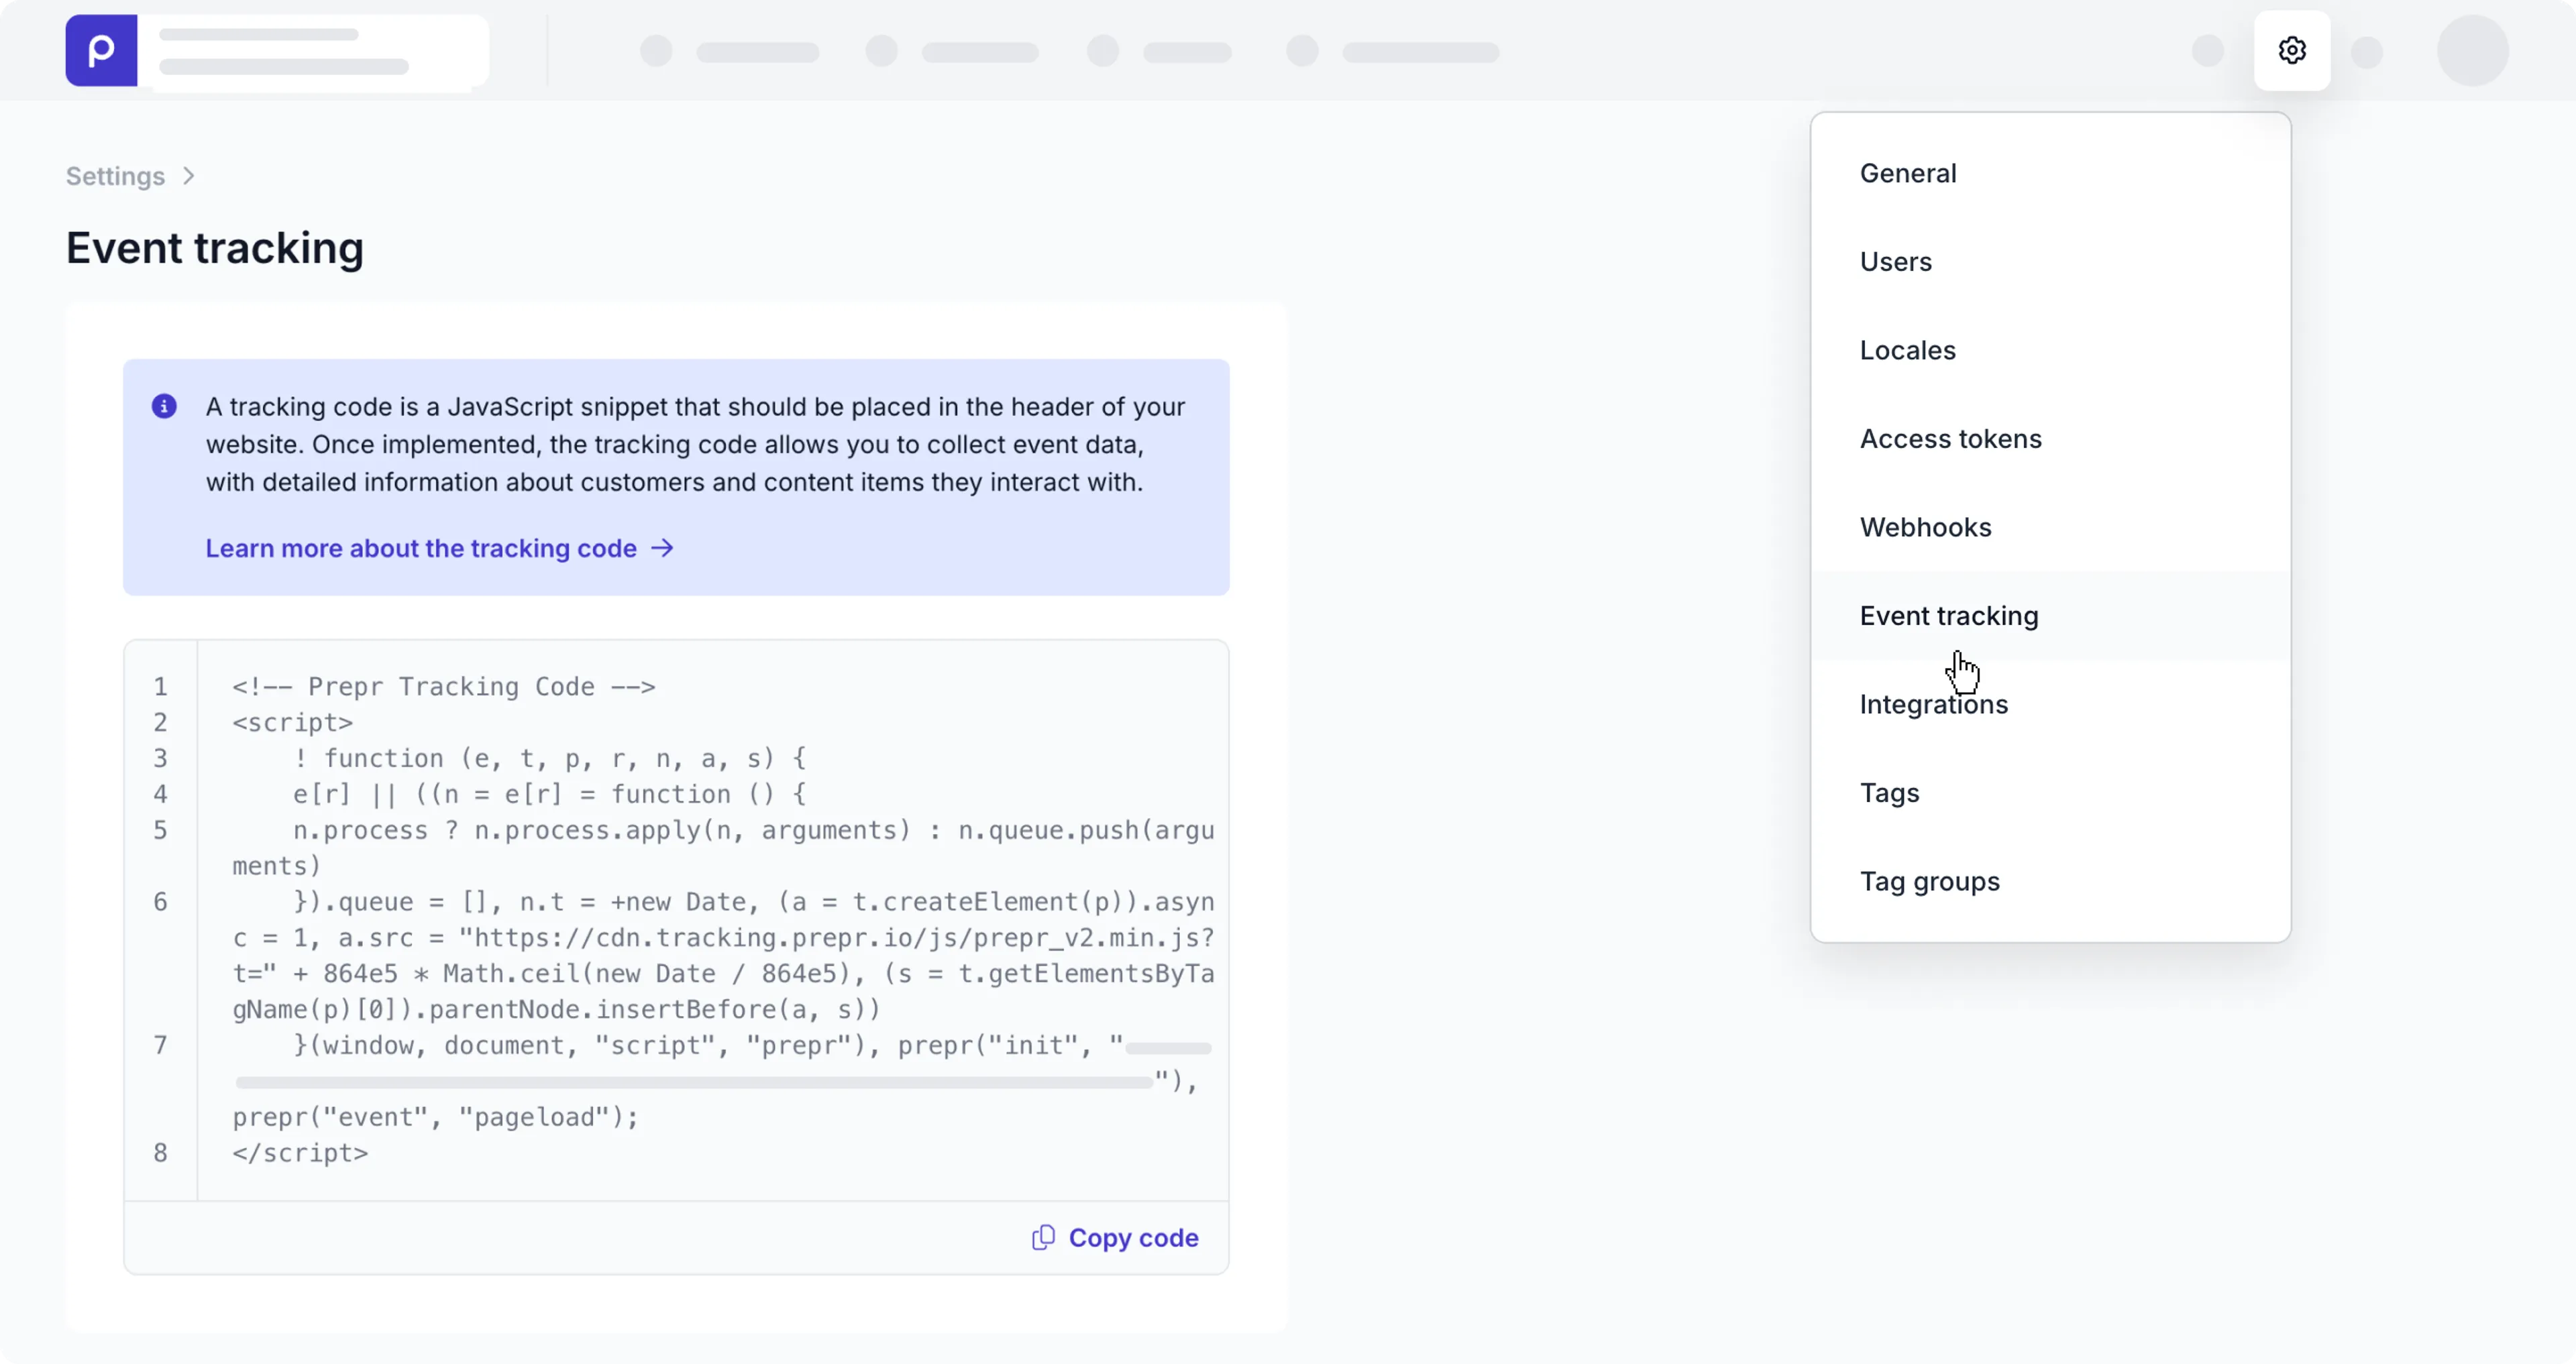
In your Prepr environment, click the icon and choose the Event tracking option to view the Prepr Tracking Code.
-
Copy the Prepr Tracking Code and paste it into the placeholder
YOUR-PREPR-CODE-SNIPPETabove.
-
Remove the HTML tags
<!-- Prepr Tracking Code -->,<script>and</script>tags from the embedded code. -
Refresh your website page in the browser. If there are no errors in the terminal console, Prepr tracking is set up successfully.
Track page view events
For the subsequent A/B testing and personalization sections in this guide, we want to track page view events.
To do this, add a content item meta property to the index.vue file like in the highlighted code below.
The tracking pixel automatically recognizes this property and records the view event in Prepr.
Check out the data collection events docs for more details.
<template>
  <meta property='prepr:id' :content="page._id"/>

  <!--Loop through elements in the queried stack and set the data variable to the components you want -->
  <component
        v-for="element in stack"
        :key="element._id"
        :is="getComponent(element.__typename)"
        :data="element"
    ></component>
</template>

<script setup>
    import { computed } from "vue";
    import { reactive } from "vue";
    import { GetPageBySlug } from "@/queries/get-page-by-slug";

     // Import the components
    import HeroSection from "@/components/hero-section";
    import FeatureSection from "@/components/feature-section";

    const route = useRoute();

    // Set up the components
    const components = [
    { name: "Hero", comp: HeroSection },
    { name: "Feature", comp: FeatureSection },
    ];

    // Assign the components for the stack loop above
    const getComponent = (name) => {
    const component = components.find((component) => component.name === name);
    return component ? component.comp : null;
    };

    const { data } = await useAsyncQuery({
        query: GetPageBySlug,
        variables: {
          slug: route.params.slug ? route.params.slug.join('/') : '/'
        }
    });

    {/* Output the query results to the console */}
    console.log(JSON.stringify(data, undefined, 2));

  // Assign the page and stack variables with the queried results
    const page = data.value.Page;

    const stack = computed(() => {
        return page.content;
    });
</script>
For more details on how to track other types of events, check out the data collection docs.
Test data collection
You can easily check if the data collection is successful with the following steps.
-
Restart your localhost with
npm run devand go to your website. -
In your Prepr environment, go to the the Segments page.
-
If the page view is recorded successfully you’ll see a recent customer in the All customers list.
-
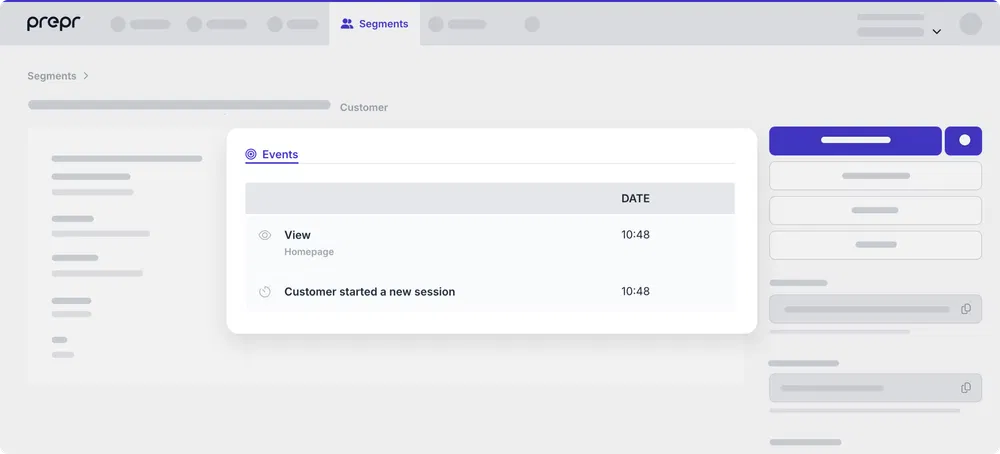
Click to open this customer and you should see the View event on the Homepage similar to the image below.

Congratulations! You’ve successfully enabled Prepr tracking in your Nuxt front end, and started collecting page view events. Now, you’re ready to add A/B testing and personalization to your website.