Zapier
In this guide, you’ll learn how to set up a Zapier integration to send data from any listed external system to Prepr CMS.
Introduction
Zapier is an automation tool that connects apps and services, allowing users to create workflows (called Zaps) that trigger actions between them without coding.
We’ve set up two types of workflows to pair any app with Prepr.
- Tag a Customer Profile - Creates a tag on the matching Prepr visitor profile with a value from the external system.
- Track event - Records an event for a matching visitor in Prepr based on an action in the external system.
To send visitor data or to trigger an event through Zapier, the visitors need to exist in your Prepr environment. These visitors can be identified by an email address or a reference ID.
Before creating a Zap, you need to get the access token for the Prepr environment that Zapier needs to connect to.
Getting the Prepr access token
Go to your Prepr environment to get the access token to use in the Zapier workflow as follows:
- Go to Settings → Access tokens.
- If you don’t have an access token for REST API requests, click the Add access token button.
- In your REST API access token, click the Edit scopes button to add the
capture_publishREST API scope and click the Save button.
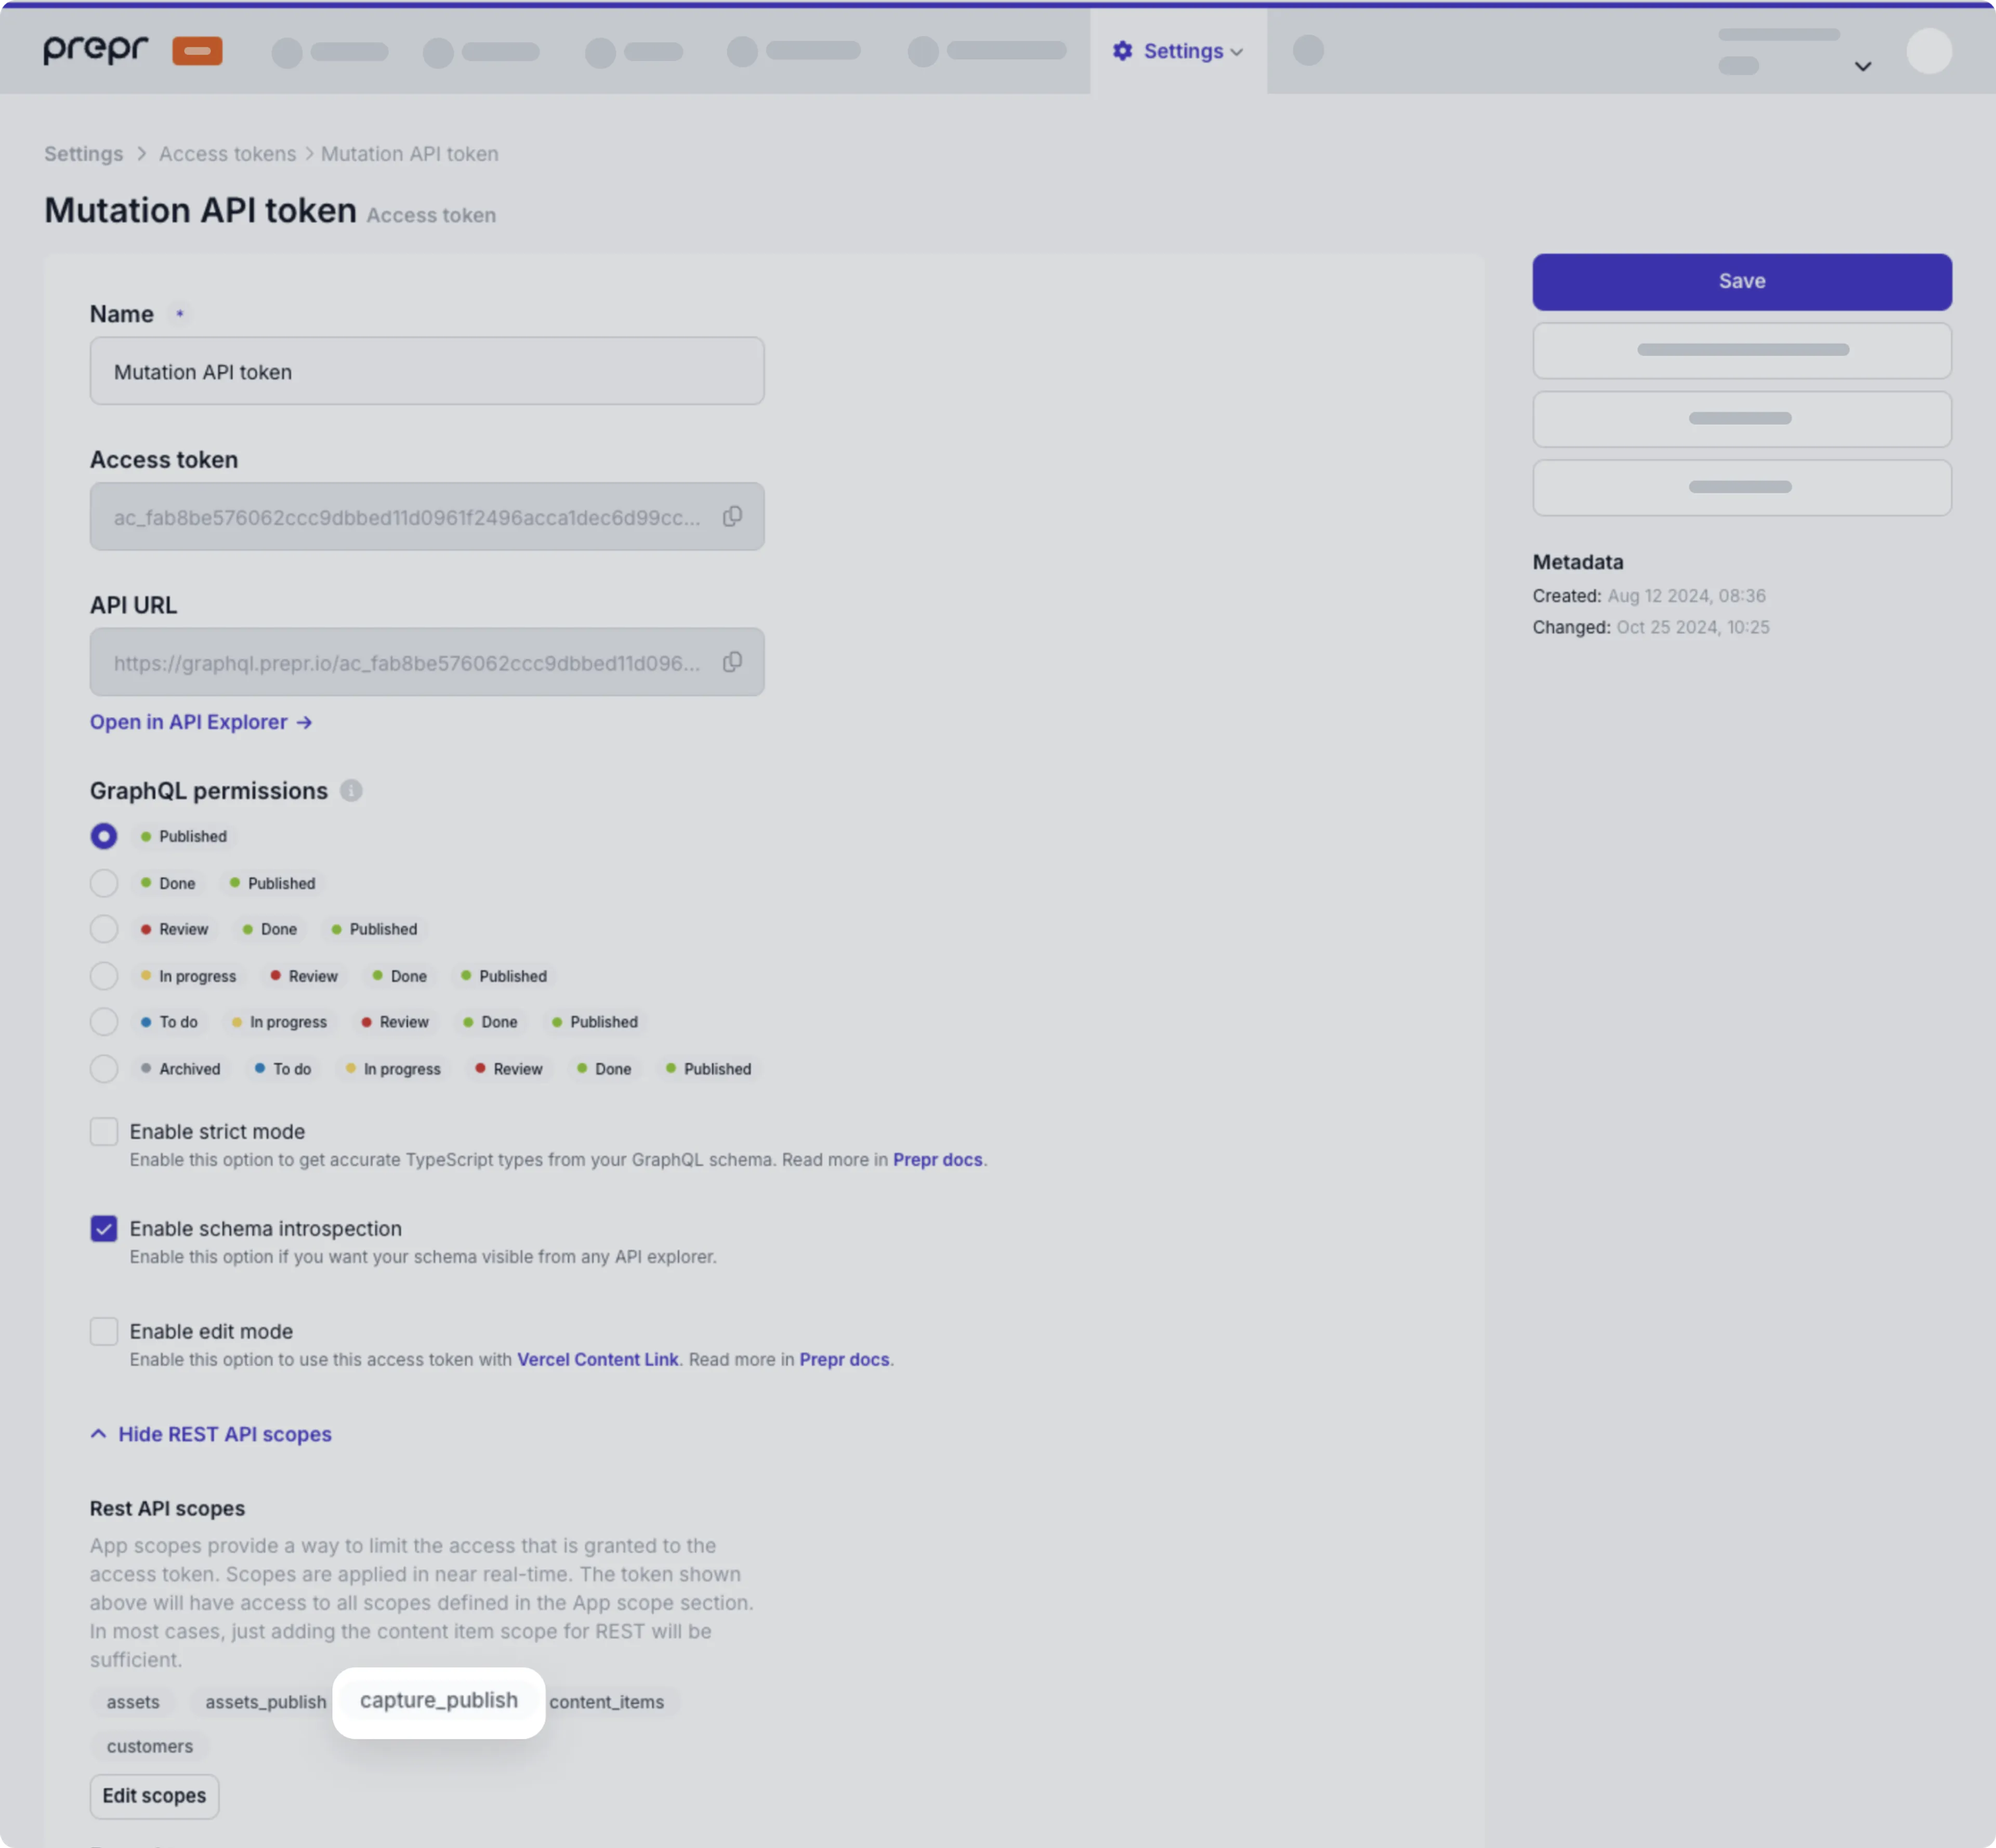
- Click the icon to copy the Access token value.
Now that you have the access token, you can create a Zap.
Creating a Zap
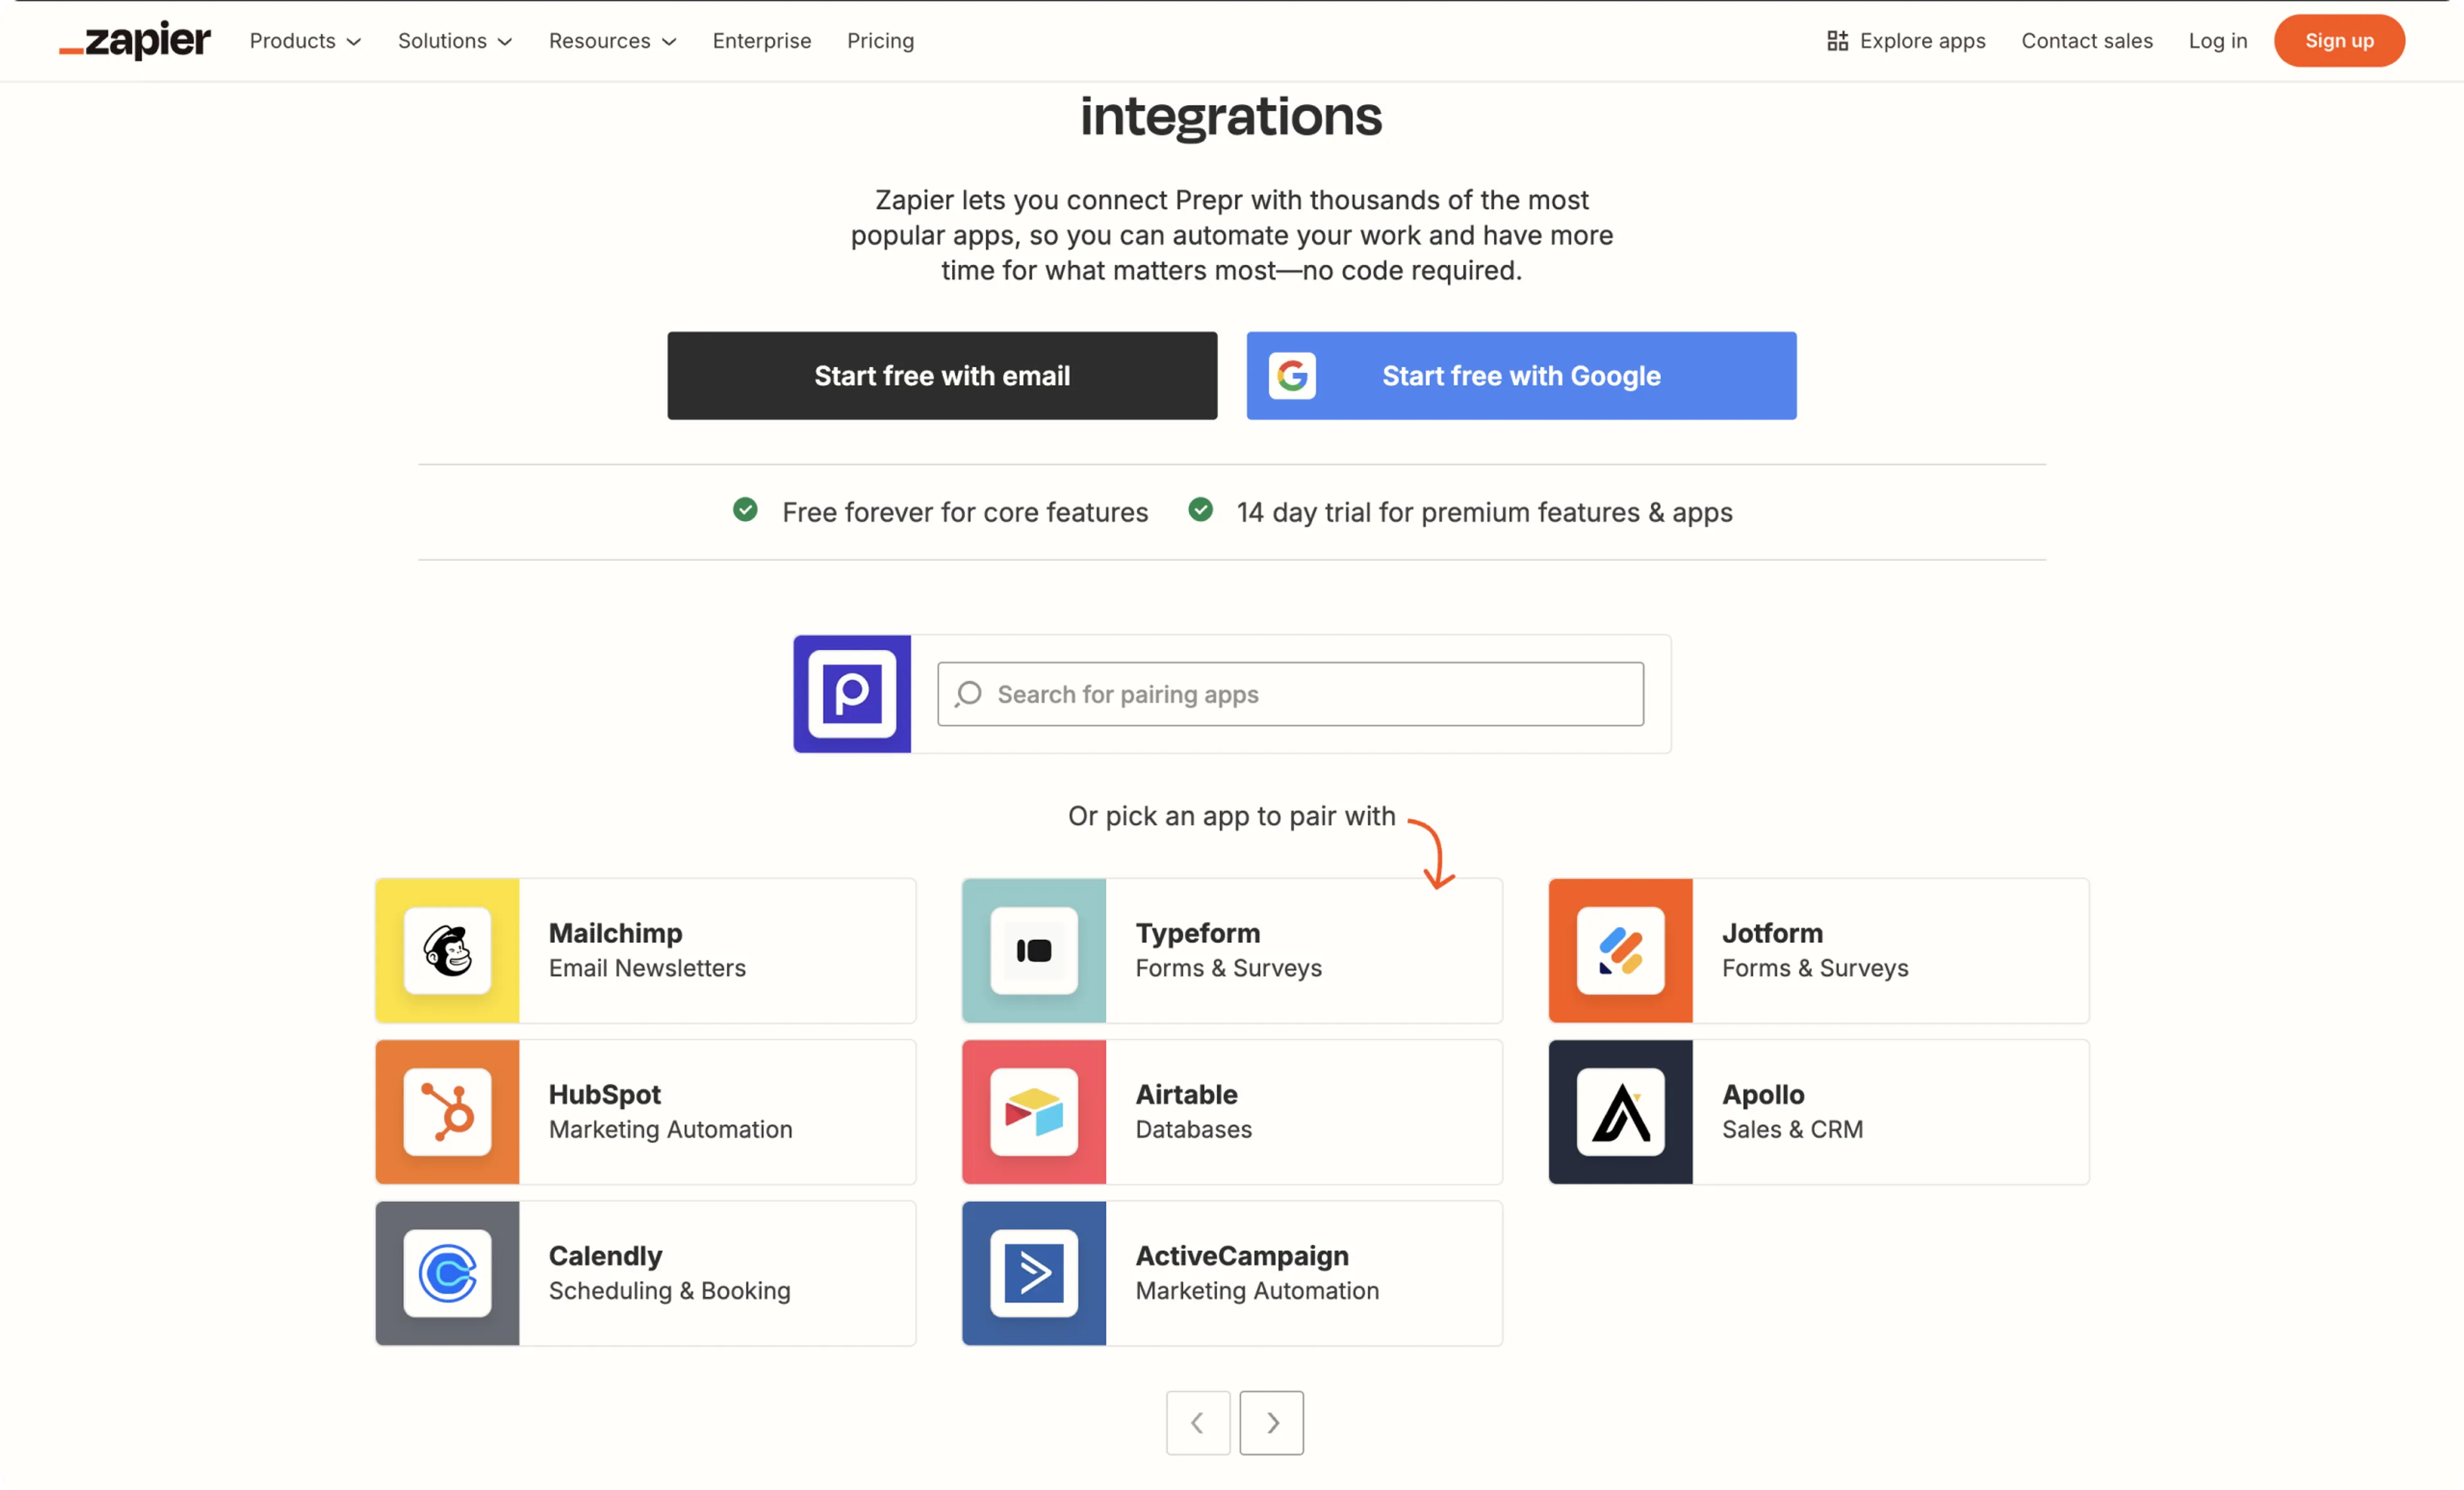
To create a Zap, go to the Prepr’s Zapier integration page .
Tag a Customer Profile
This action is useful when you need to send some visitor data from another system to Prepr for segmentation.
For example, you can send the industry of a known visitor in Prepr when they request a demo through a HubSpot form.
Create a Zap to tag a visitor profile in Prepr with the following steps:
-
In the Prepr’s Zapier integration page , choose a pairing app, for example, HubSpot.
-
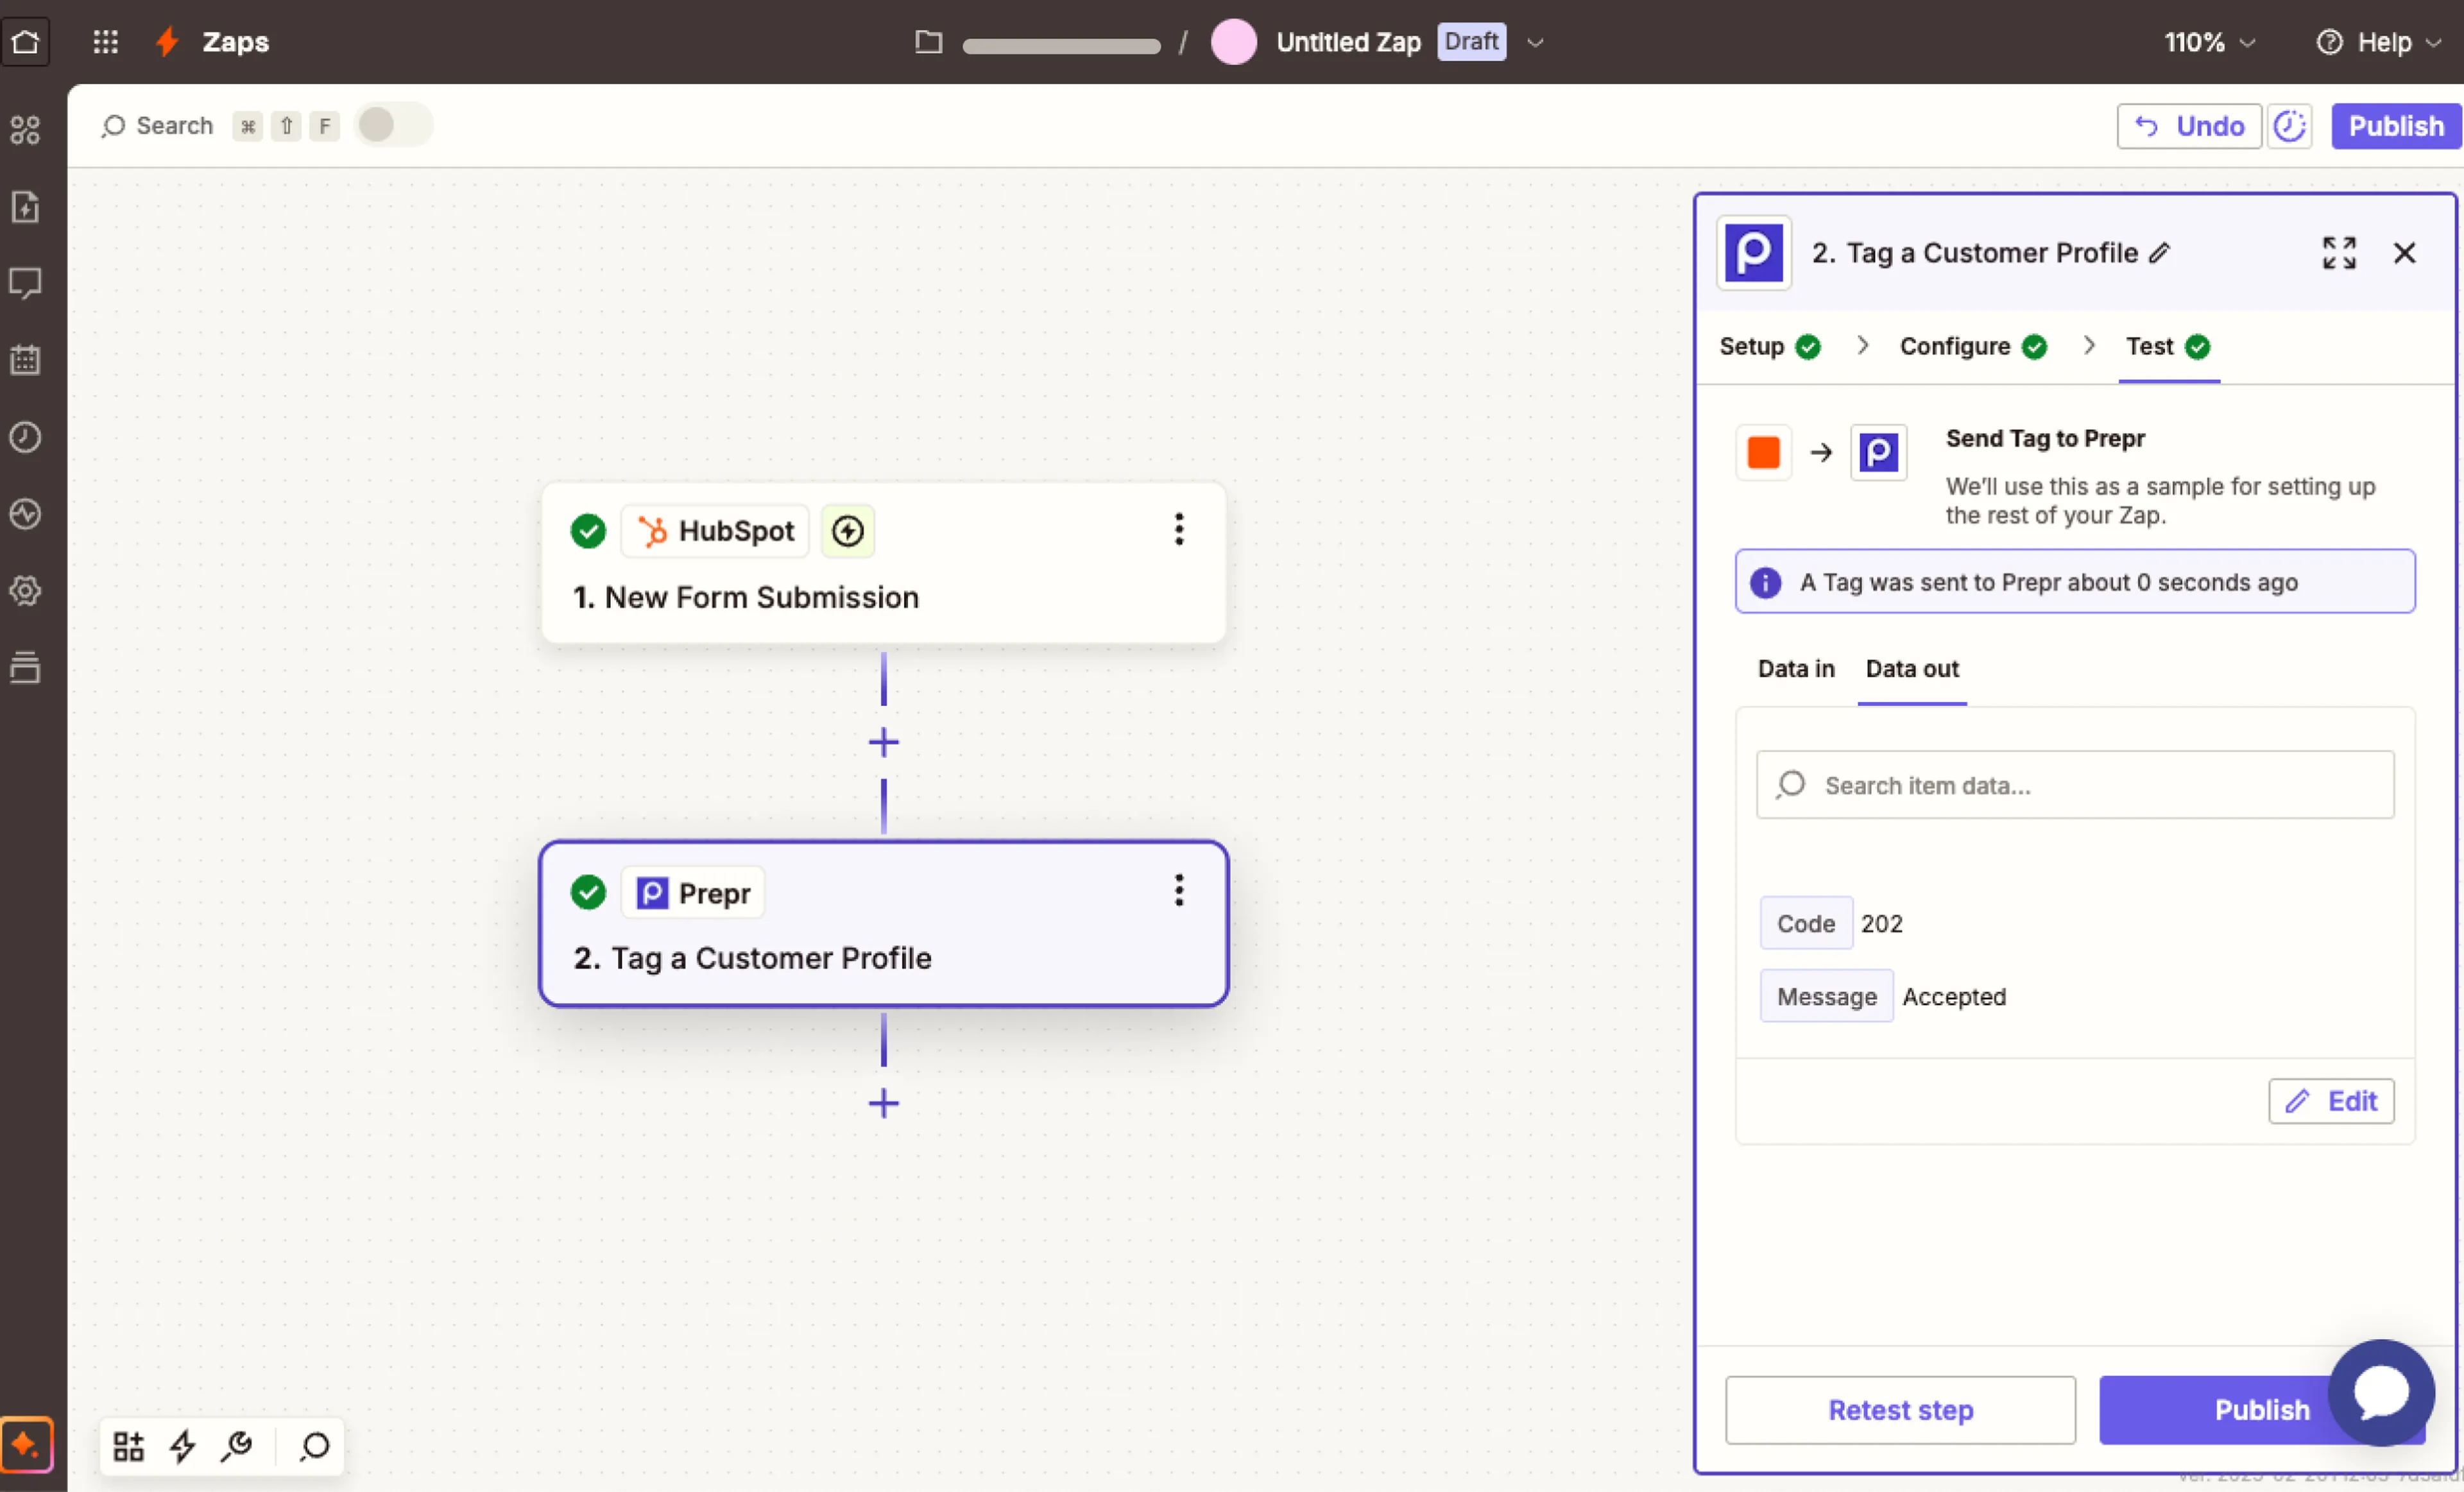
Choose a trigger, for example, New Form Submission, choose Tag a Customer Profile for the action and click the Connect these apps button. Zapier creates the basic workflow (Zap) and you can customize it according to your needs.
-
Log in to your account for the app you paired and click the Continue button.
-
Depending on the trigger you chose, you’ll need to choose some additional info, for example, a Demo request form.
-
Click the Test trigger button and choose any record for the test.
-
Click the Sign in button and paste the access token you copied from your Prepr environment.
-
In the Tags field, click the icon and choose the field you want to add. Enter the email address of the matching visitor in Prepr. Click the Test step button. You’ll see a message about the tag being sent to Prepr.
-
In your Prepr environment, go to the Segments tab and open the visitor that you matched in the test. You’ll see a new tag for that visitor matching the field value in the paired app.
-
In Zapier, click the Publish button to activate the integration.
The integration to Prepr is now activated and Zapier automatically sends visitor data from the paired app to create a tag in Prepr for any matching visitor.
Track Event
This action is useful when you need to trigger Prepr to create an event for segmentation. For example, when you want to create the Subscribe event whenever a someone new subscribes to your Mailchimp newsletter.
-
In Prepr’s Zapier integration page , choose a paired app, for example, Mailchimp.
-
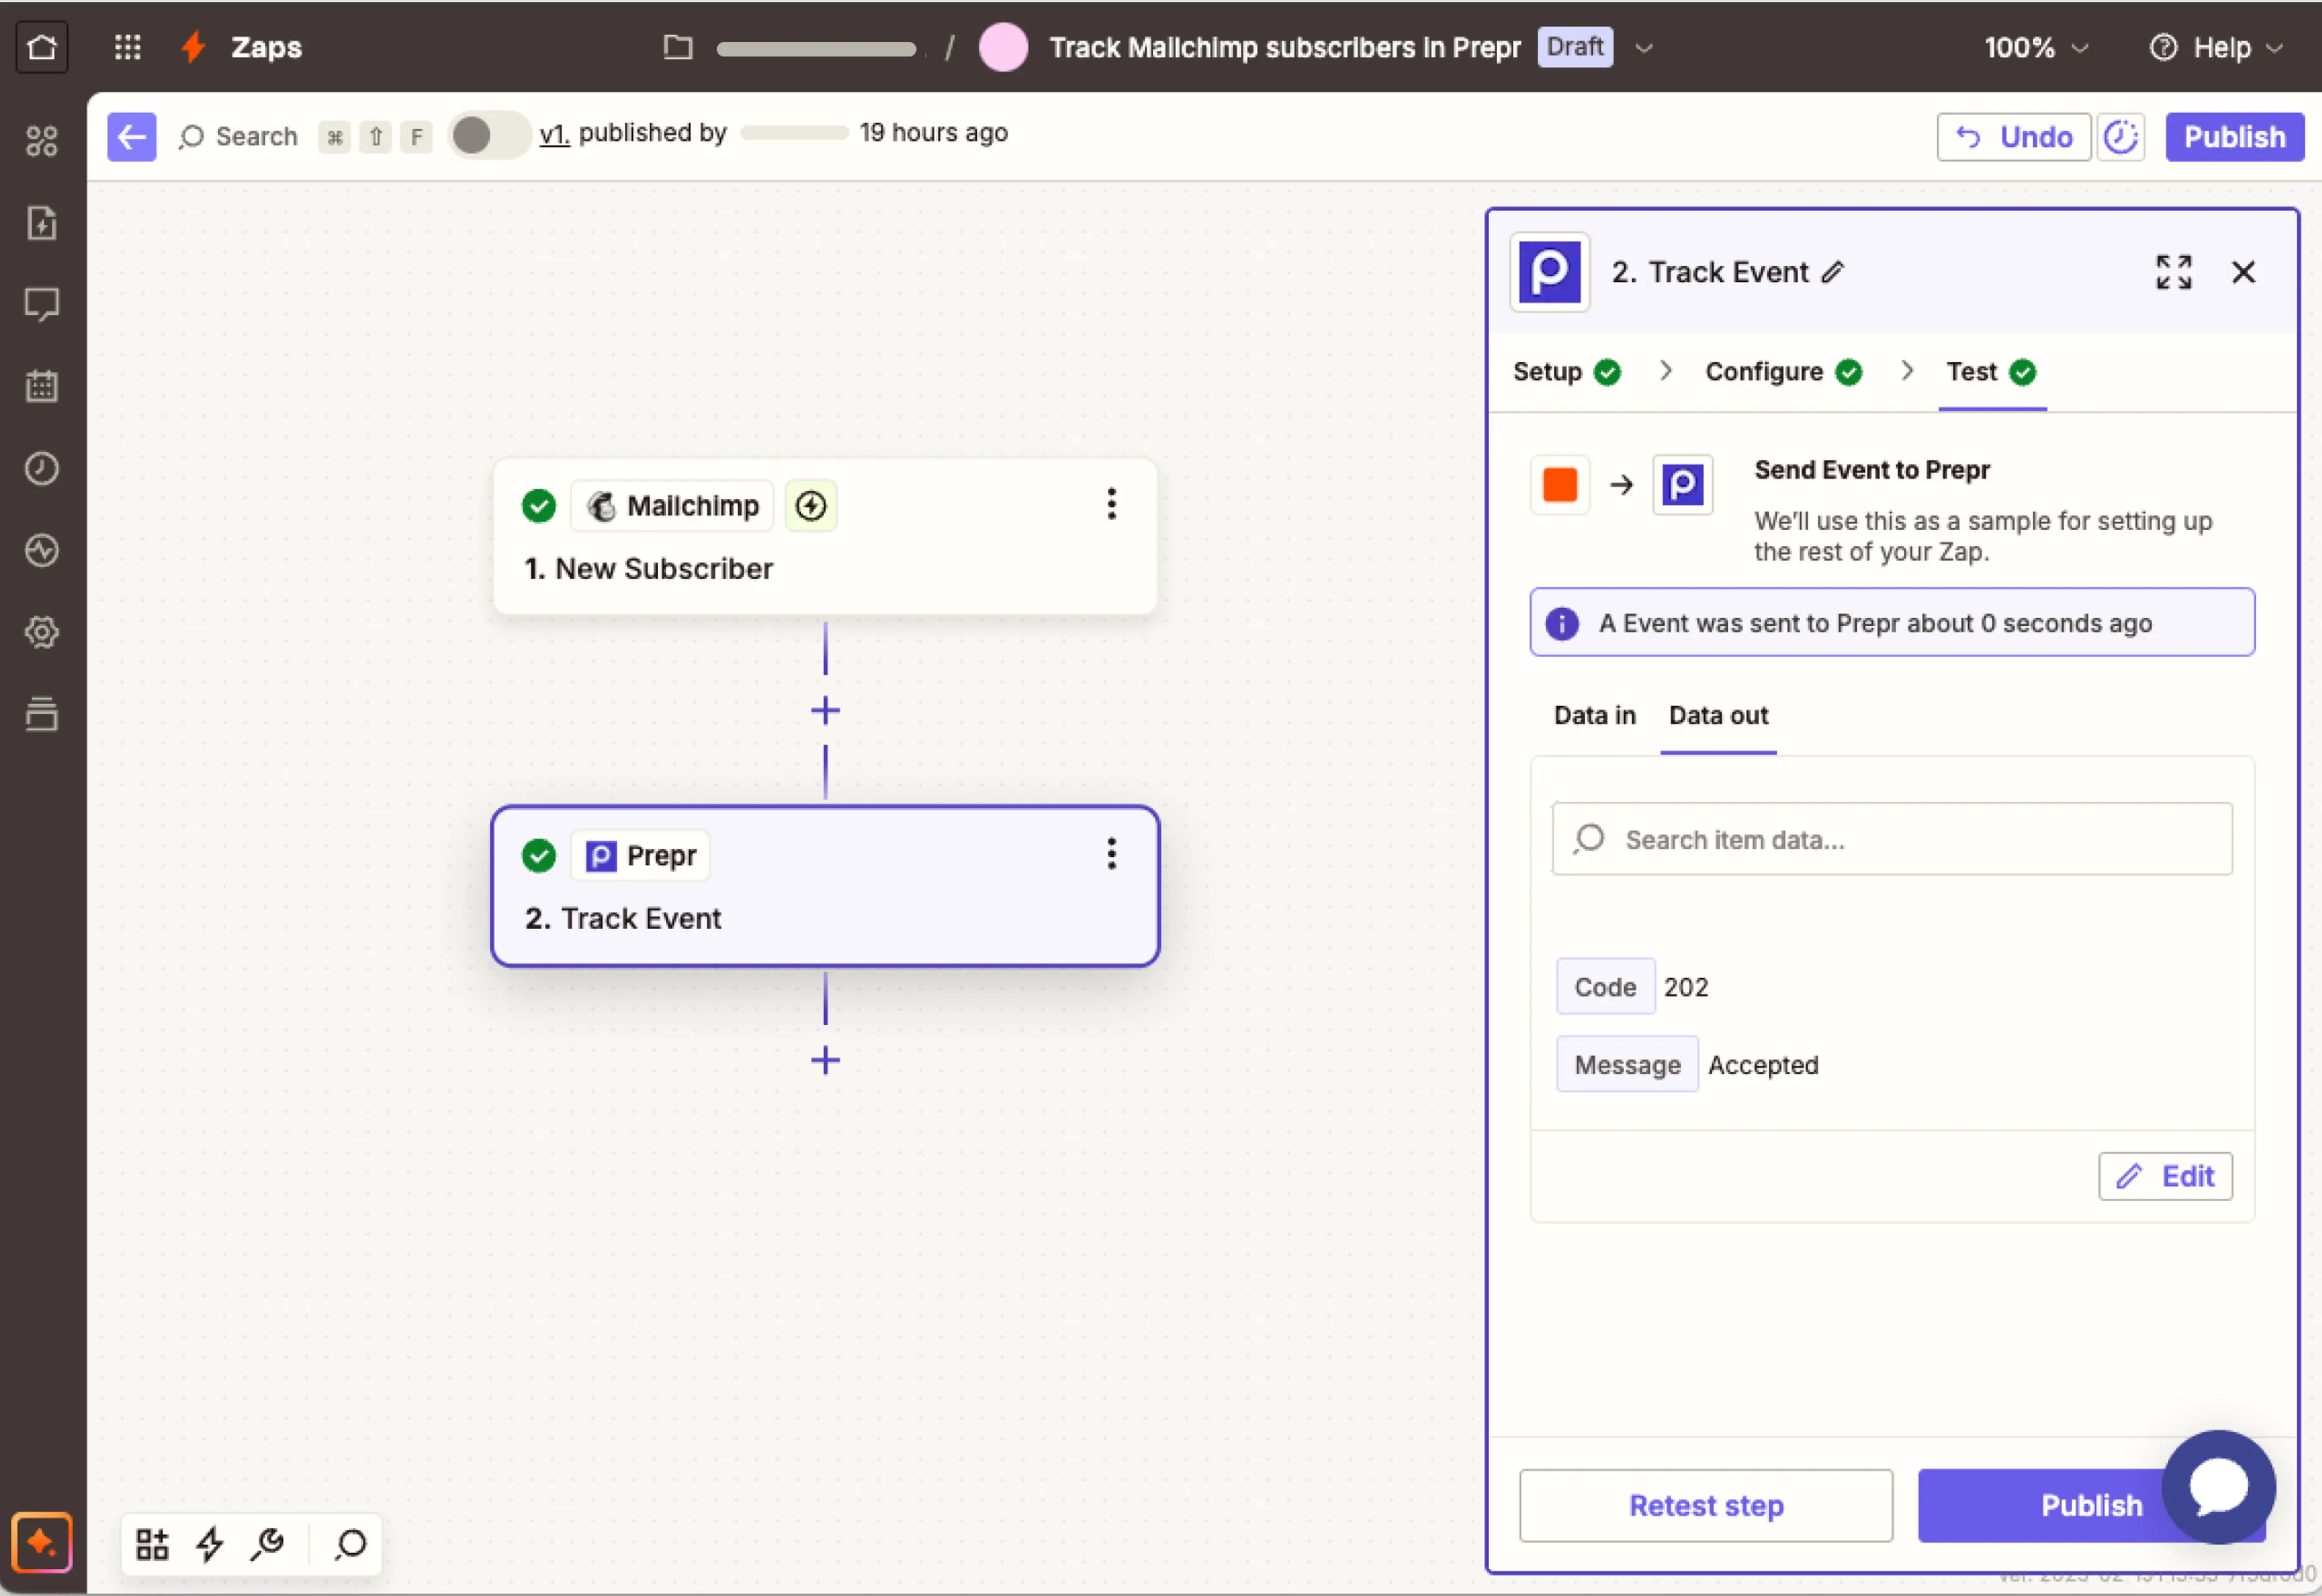
Choose a trigger, for example, New Subscriber. Choose Track Event for the action and click the Connect these apps button. Zapier creates the basic workflow (Zap) and you can customize it according to your needs.
-
Sign in to your account for the paired app and click the Continue button.
-
Depending on the paired app, you need to choose additional info, for example, the Mailchimp Audience, and click the Continue button.
-
Click the Test trigger button and choose any record for the test.
-
Click the Sign in button and paste the access token you copied from your Prepr environment.
-
Enter a value for the Event Name, for example, Subscribe, and enter the email address or external ID to match the visitor in Prepr. Click the Test step button. You’ll see a message about an event being sent to Prepr.
-
In your Prepr environment, go to the Segments tab and open the visitor that you matched in the test. You’ll see a new event recorded for that visitor.
-
In Zapier, click the Publish button to activate the integration.
The integration to Prepr is activated and Zapier triggers Prepr to create an event for every matching visitor in the paired app for the chosen trigger.