Set up data collection with tracking
Prepr is a CMS that includes built-in A/B testing and personalization features. These capabilities require visitor data to measure your test results and to build segments for personalization. This chapter of the Laravel complete guide shows you how to enable tracking to collect this data in your Laravel front end.
Enable Prepr tracking and collect view events
The steps below continue from the previous section, Make your Laravel project dynamic. If you don’t yet have a Laravel project connected to Prepr, follow the previous steps listed in the Complete guide overview to create one. Otherwise, let’s get started.
Enable Prepr tracking
When you enable Prepr tracking in your front end, it captures visitor data and lets you track how they engage with your content.
-
In your Prepr environment, click the icon and choose the Event management option.
-
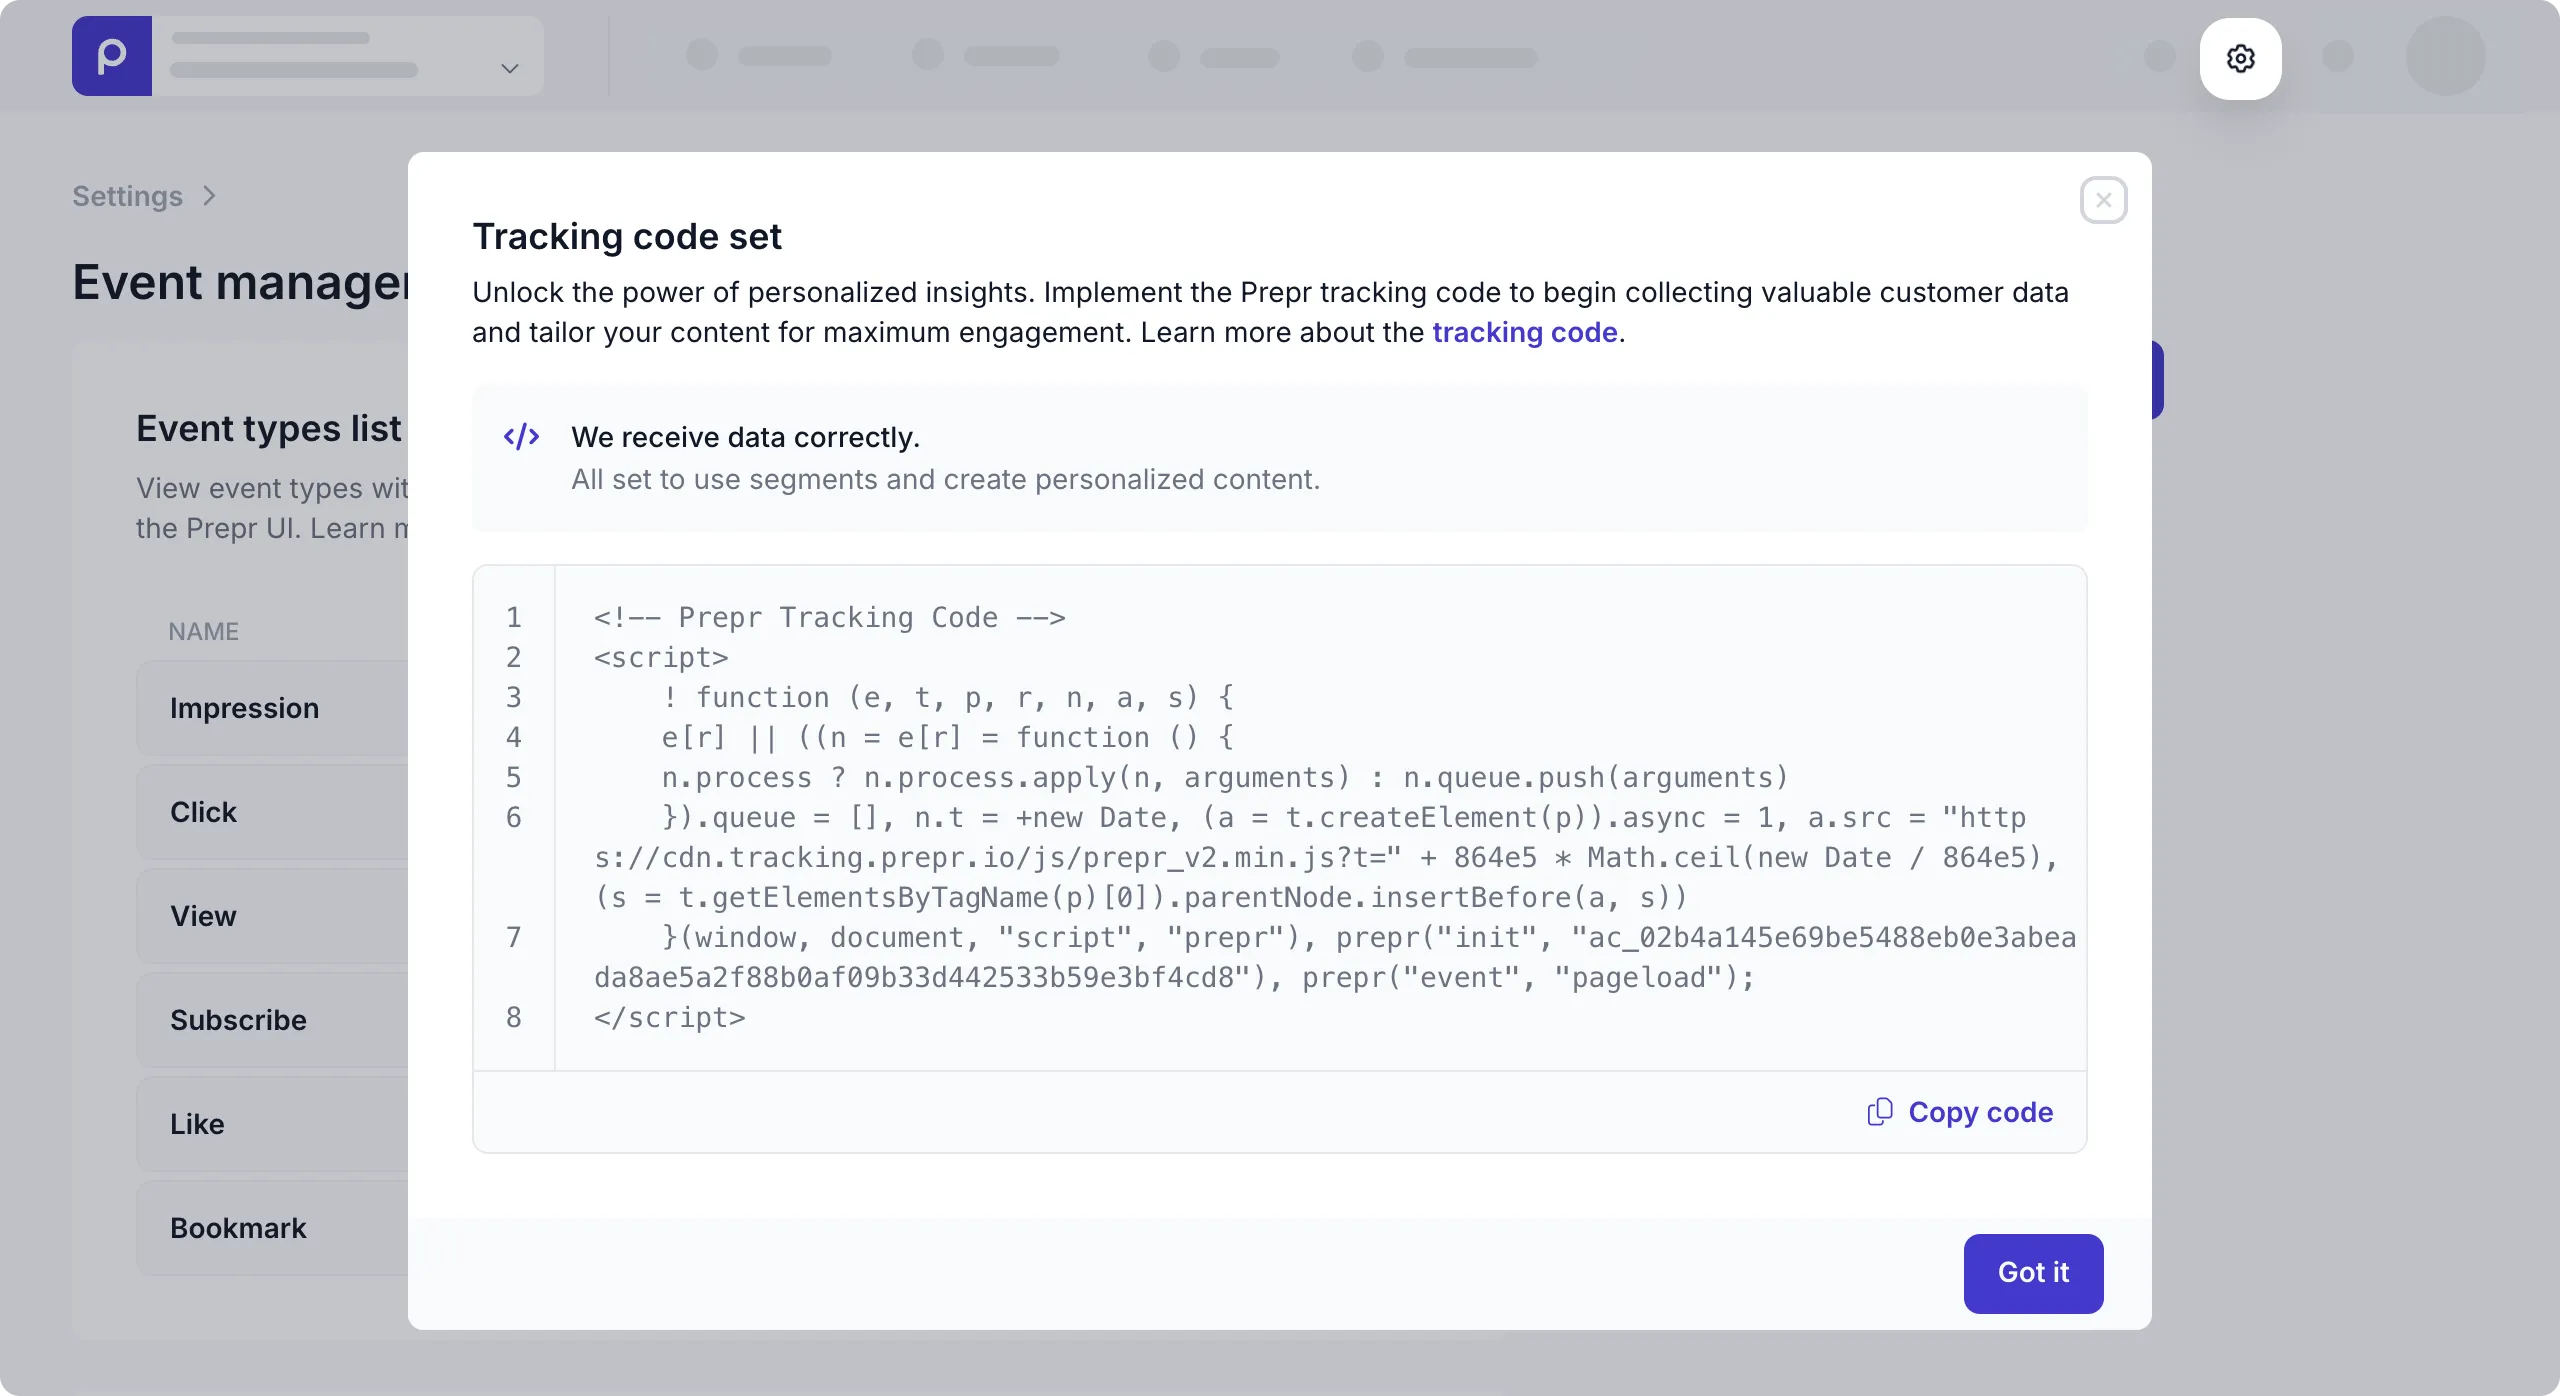
Click the Get tracking code link and copy the Prepr Tracking Code.
-
In the
resources/views/pagesfolder, update theindex.blade.phpincluding the Prepr Tracking Code you just copied../resources/views/pages/index.blade.php<head> <!-- import app.css --> @vite('resources/css/app.css') <!-- Place Prepr Tracking Code here--> <x-navbar/> </head> <body> <!-- Loop through elements in the content stack field and assign the matching components--> <div> @if(data_get($page,'content')) @foreach(data_get($page,'content') as $element) @if(data_get($element,'__typename') === 'Hero') <x-hero-section :data="$element"/> @elseif(data_get($element,'__typename') === 'Feature') <x-feature-section :data="$element"/> @endif @endforeach @endif </div> </body> -
Refresh your website page in the browser. If there are no errors in the terminal console, Prepr tracking is set up successfully.
Track page view events
For the subsequent A/B testing and personalization sections in this guide, we want to track page view events.
To do this, add a content item meta property to the index.blade.php file like in the highlighted code below.
The tracking pixel automatically recognizes this property and records the view event in Prepr.
Check out the data collection events docs for more details.
<head>
  <!-- import app.css -->
  @vite('resources/css/app.css')

  <!-- Place Prepr Tracking Code here-->

  <meta property='prepr:id' content="{{ data_get($page,'_id') }}"/>
  <x-navbar/>
</head>
<body>
  <!-- Loop through elements in the content stack field and assign the matching components-->
  <div>
    @if(data_get($page,'content'))
      @foreach(data_get($page,'content') as $element)
        @if(data_get($element,'__typename') === 'Hero')
          <x-hero-section :data="$element"/>
        @elseif(data_get($element,'__typename') === 'Feature')
          <x-feature-section :data="$element"/>
        @endif
      @endforeach
    @endif
  </div>
</body>
For more details on how to track other types of events, check out the data collection docs.
Test data collection
You can easily check if the data collection is successful with the following steps.
-
Go to your website in the browser and refresh the page.
-
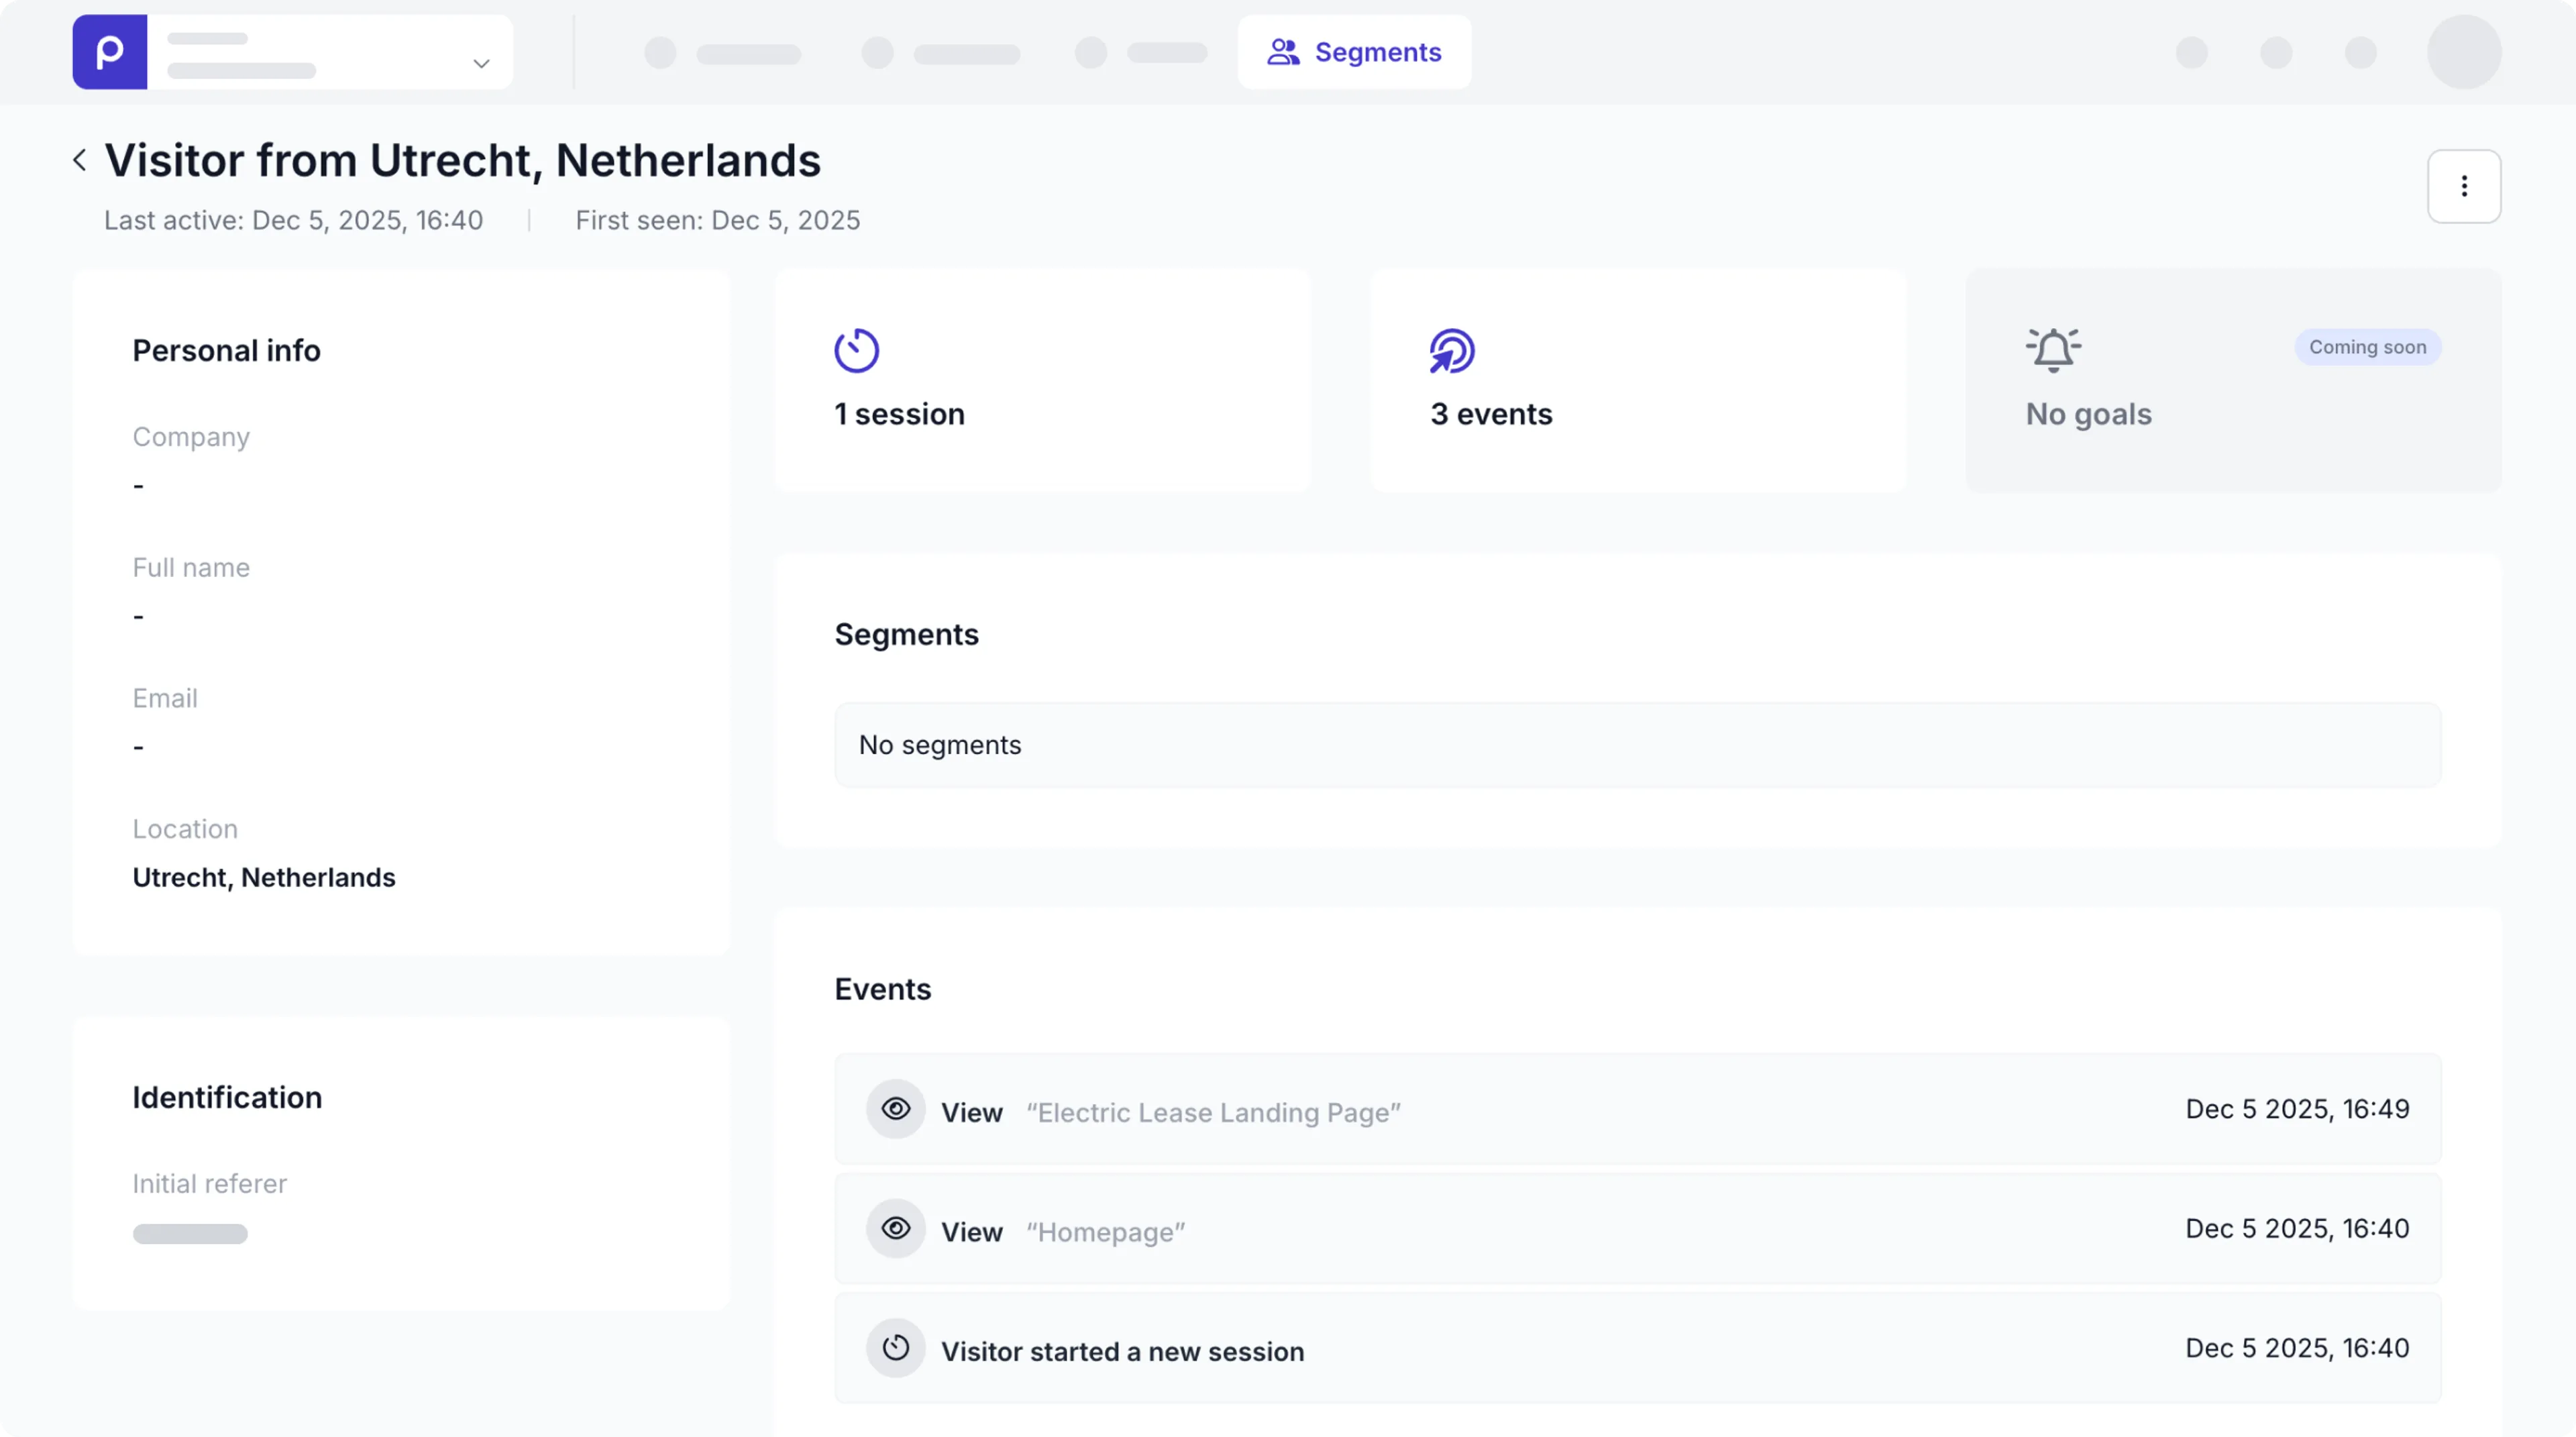
In your Prepr environment, go to the the Segments page.
-
If the page view is recorded successfully you’ll see a recent visitor in the All visitors list.
-
Click to open this visitor and you should see the View event on the Homepage similar to the image below.
Congratulations! You’ve successfully enabled Prepr tracking in your Laravel front end, and started collecting page view events. Now, you’re ready to add A/B testing and personalization to your website.