Set up a Nuxt project
The instructions below will guide you through the first step of the Nuxt complete guide. These show you how to create a Nuxt website with static components.
Nuxt website with static text and images.
Create a Nuxt website with static components
If you have an existing Nuxt project then you can skip this section and continue with the next section to make your Nuxt project dynamic with Prepr content. Otherwise, let’s get started.
Install a Nuxt project
-
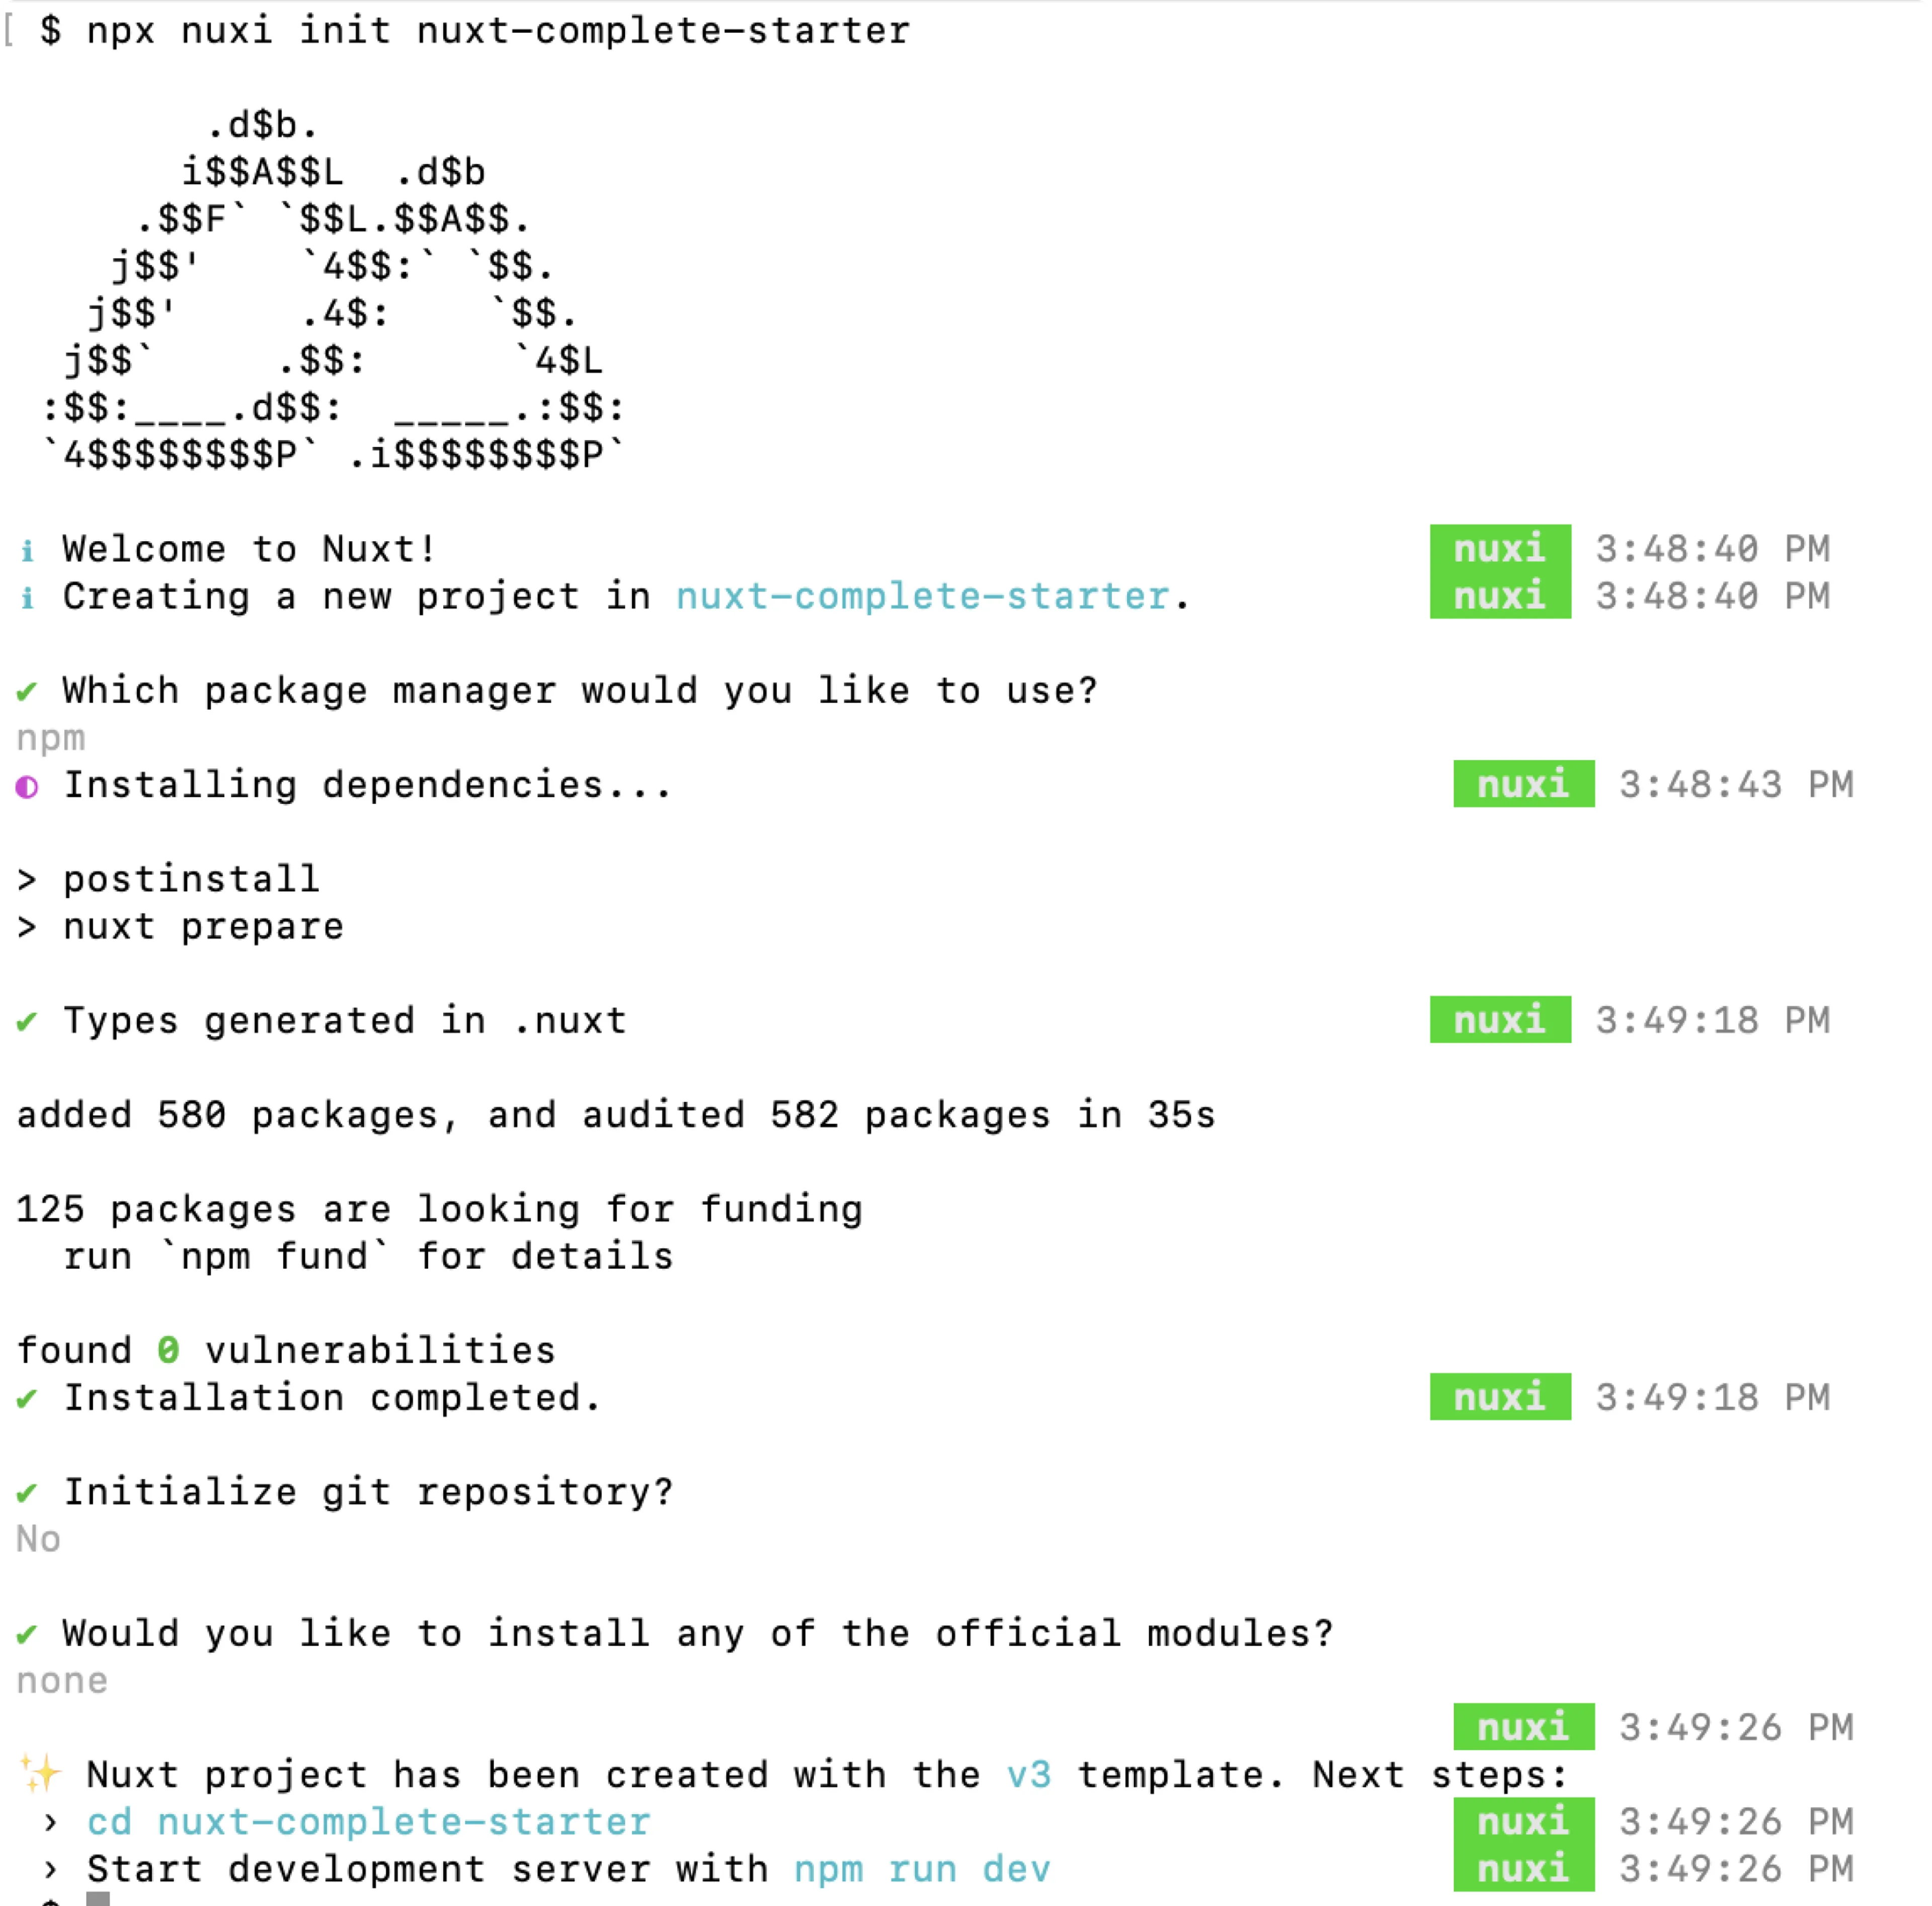
Open a terminal, go to your development projects folder and execute the command below to create a new Nuxt project called
nuxt-complete-starter.npx nuxi init nuxt-complete-starterMark the options as shown in the image below to create the same project structure used in this guide.
-
When the project is successfully created, go to the
nuxt-complete-starterfolder, the root directory of the project, and run the project with the following commands in the terminal:cd nuxt-complete-starternpm run dev -
You should now be able to view your app on your localhost, for example,
http://localhost:3000/. -
Open the Nuxt project with your preferred code editor.
-
Update the
app.vuefile with the following code to display your blog:./app.vue<template> <div> <h1>My home page</h1> </div> </template>
You should now see something like the image below on your localhost.

Install Tailwind
Follow the steps below to install and set up Tailwind styling.
-
In the terminal, stop the server you started in the above step (
CTRL-C), and install Tailwind to make styling easier in the components you’ll create below.npm install tailwindcss @tailwindcss/vite -
Create an
./assets/css/main.cssfile to import the Tailwind CSS and to set up some additional colors and spacing:./assets/css/main.css@import "tailwindcss"; @theme { --font-size-mb-4xl: 2rem; --font-size-mb-5xl: 2.675rem; --spacing-8xl: 90rem; --container-8xl: 90rem; --container-prose: 50rem; --color-gray-50: #EEEEEE; --color-primary-50: #EFF6FF; --color-primary-100: #DBEAFE; --color-primary-600: #2563EB; --color-primary-700: #1D4ED8; --color-secondary-500: #4748B; --color-secondary-700: #334155; } -
Add the
@tailwindcss/viteplugin and your newmain.css. to your Nuxt configuration.nuxt.config.tsimport tailwindcss from "@tailwindcss/vite"; export default defineNuxtConfig({ compatibilityDate: "2024-11-01", devtools: { enabled: true }, css: ['~/assets/css/main.css'], vite: { plugins: [ tailwindcss(), ], }, }); -
Test that Tailwind is correctly installed by updating the
app.vuefile as follows:./app.vue<template> <div> <h1 class="text-3xl font-bold underline">My home page</h1> </div> </template> -
Restart the localhost with
npm run dev. You should see updating styling like in the image below: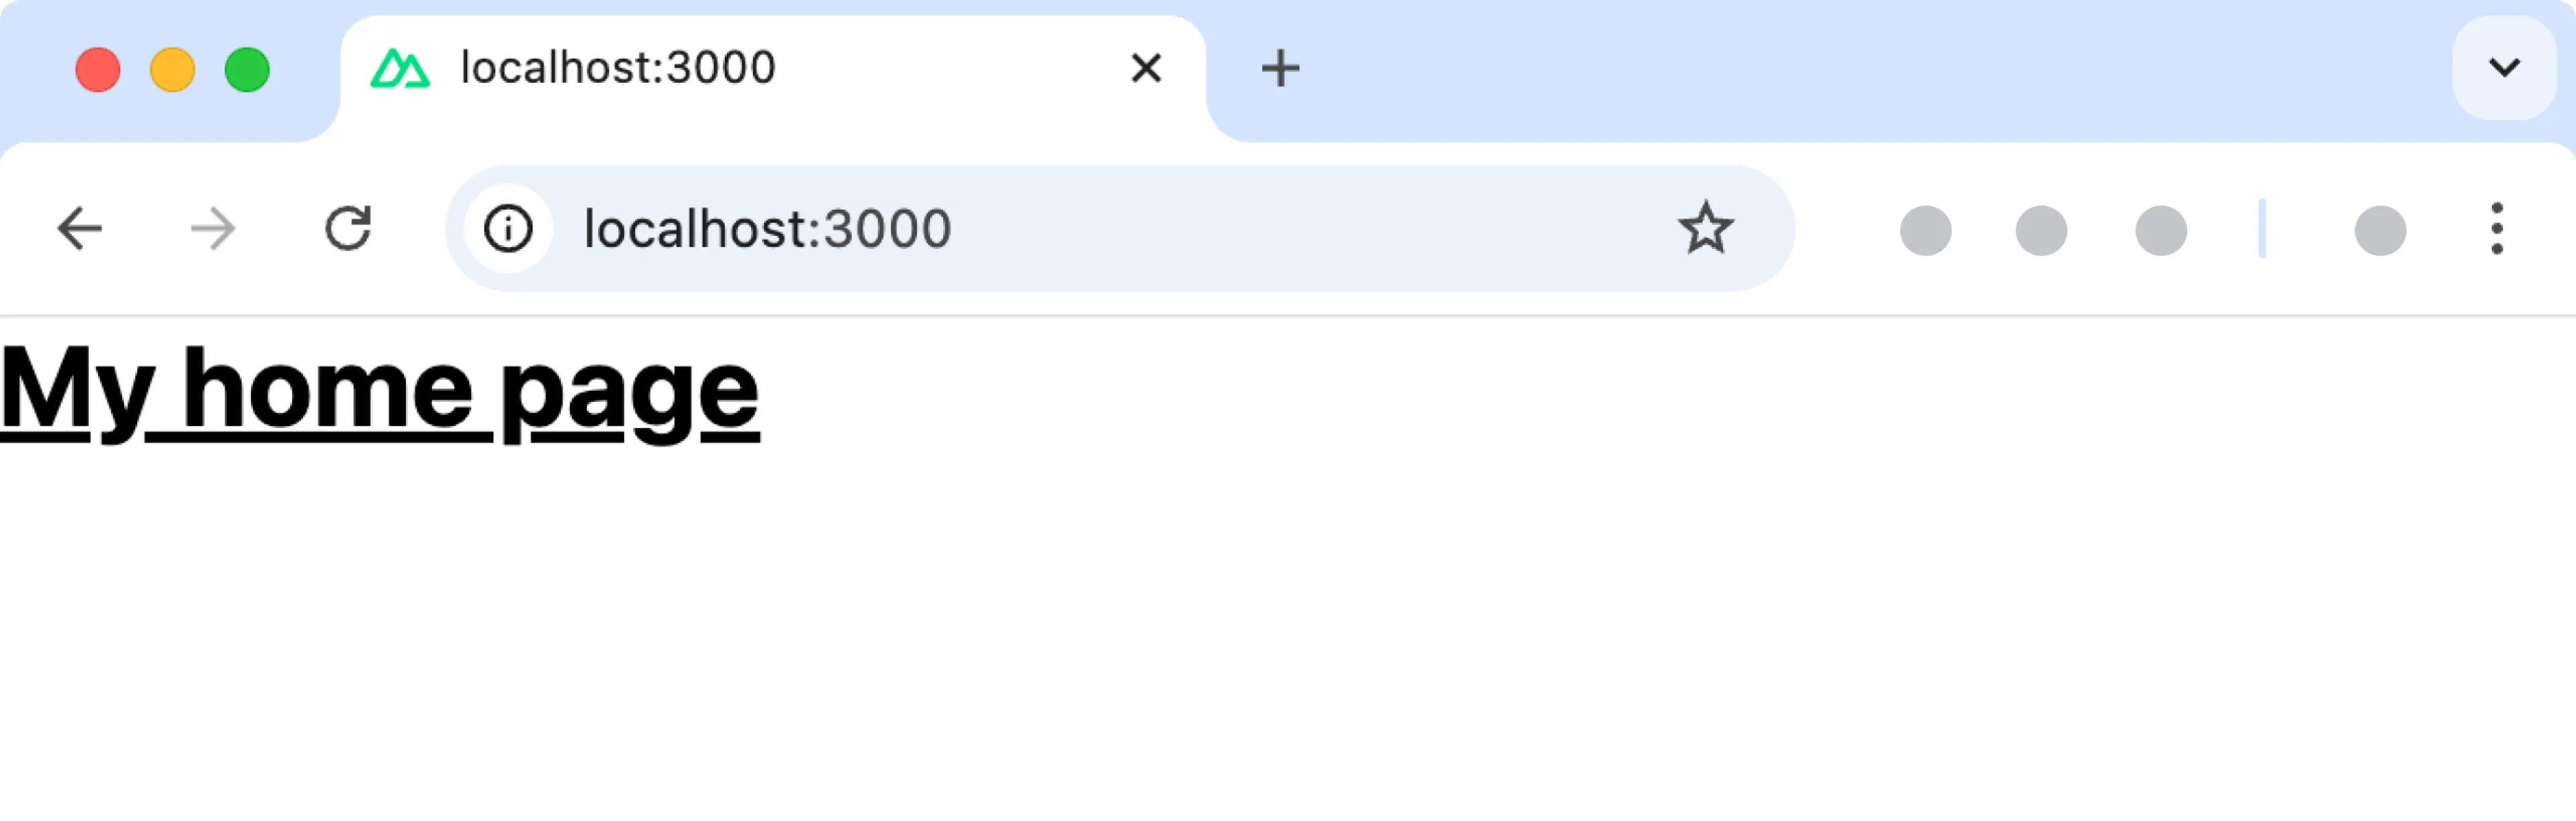
Add a simple navigation bar
-
Create new
pagesfolder, and in this folder create a new[...slug]folder. Add a new file, calledindex.vueto this subfolder. These new folders create a dynamic route to all your pages. -
Copy the code from
app.vuefile to the newindex.vuefile. -
Update the code in the
app.vueto define a layout for the whole website../app.vue<template> <NuxtLayout> <NuxtPage/> </NuxtLayout> </template> -
Create a
componentsfolder in the root directory and add the following three components to your project to display a navigation bar at the top of your website.Button
./components/button.vue<template> <button :class="classes" v-bind="additionalProps"> <slot></slot> </button> </template> <script> export default { name: 'Button', props: { buttonStyle: { type: String, default: 'primary', validator: (value) => { return ['primary', 'secondary'].includes(value); } }, className: { type: String, default: '' } }, computed: { additionalProps() { const { buttonStyle, className, ...rest } = this.$props; return rest; }, classes() { return [ 'flex rounded-full text-sm px-6 py-2.5 font-medium', this.buttonStyle === 'primary' ? 'bg-primary-600 hover:bg-primary-700 text-white' : '', this.buttonStyle === 'secondary' ? 'bg-white hover:bg-gray-50 text-secondary-700' : '', this.className ].join(' ').trim(); } } } </script> -
To view the navigation bar, include it in the page as follows:
./app.vue<template> <NuxtLayout> <navbar/> <NuxtPage/> </NuxtLayout> </template> -
Restart the localhost server with
npm run devin the terminal and go back to your browser. You should see the navigation bar and your heading text like in the image below.
Once your Nuxt project is created and working, you can create a static page with components.
Create static components
In this step, you’ll create a static version of the page to contain two front-end components. One for a Hero section at the top of the page and another for Feature sections to highlight features for the company. Add these components to the front end as follows:
-
Replace the simple code in the
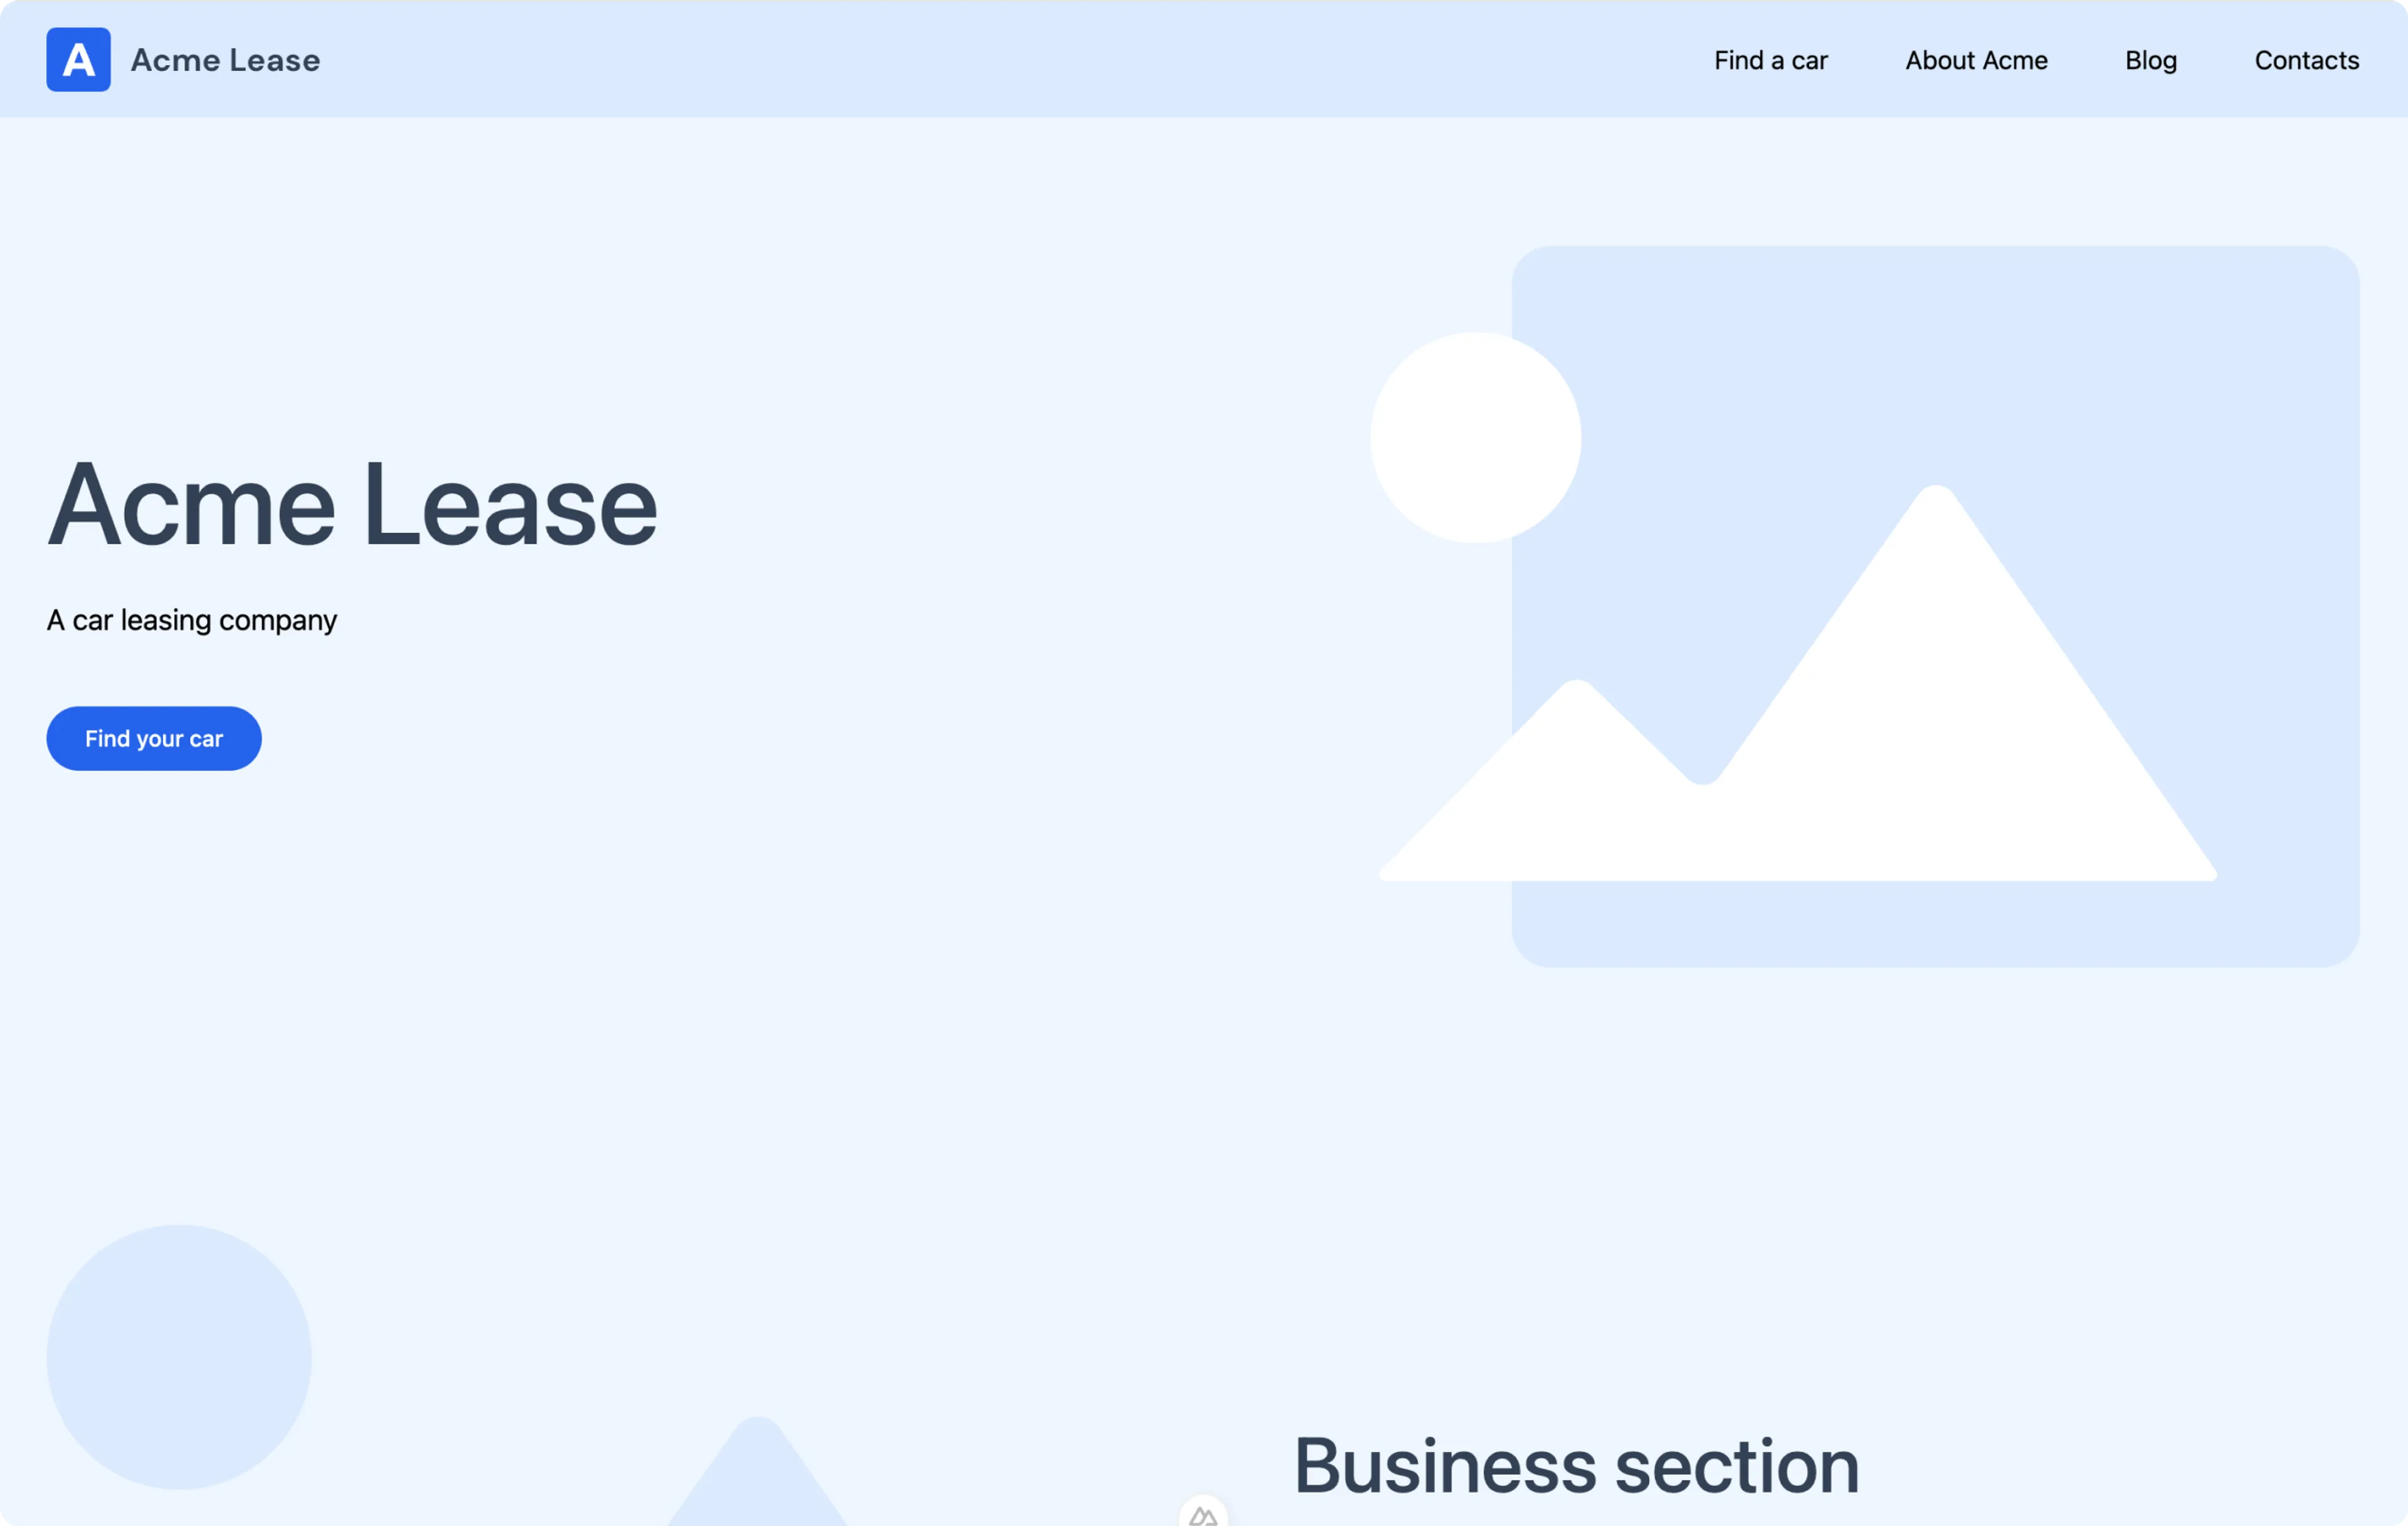
index.vuewith the code below to display the components with static data../pages/index.vue<template> <div> <hero-section :data="{ heading: 'Acme Lease', sub_heading: 'A car leasing company', image: { url: 'https://img.icons8.com/?size=100&id=112935&format=png&color=FFFFFF' } }" > </hero-section> <feature-section :data="{ heading: 'Business section', sub_heading: 'All about business', image_position: 'LEFT', button: { text: 'Click me', button_type: 'primary' }, image: { url: 'https://img.icons8.com/?size=100&id=112935&format=png&color=FFFFFF' } }" > </feature-section> <feature-section :data="{ heading: 'Another Business section', sub_heading: 'All about other business', image_position: 'RIGHT', button: { text: 'Click me', button_type: 'primary' }, image: { url: 'https://img.icons8.com/?size=100&id=112935&format=png&color=FFFFFF' } }" > </feature-section> </div> </template> -
Go to the
componentsfolder, create new files calledhero-section.vueandfeature-section.vueand copy the code below to construct these components.Hero section
./components/hero-section.vue<template> <section class="bg-primary-50"> <div class="mx-auto max-w-8xl p-spacing flex flex-col items-center md:flex-row gap-8 py-10 lg:py-20"> <div class="basis-6/12"> <h1 class="text-mb-5xl lg:text-7xl text-secondary-700 font-medium break-words text-balance"> {{ data.heading }} </h1> <p class="text-mb-lg text-secondary-500 lg:text-lg mt-4 lg:mt-6 text-balance"> {{ data.sub_heading }} </p> <div class="flex gap-4 mt-8 xl:mt-10"> <div> <NuxtLink to="#"><Button>Find your car</Button></NuxtLink> </div> </div> </div> <div class="basis-6/12 relative flex justify-end items-center"> <div class="z-10 flex items-center aspect-20/17 w-9/12 overflow-hidden justify-center absolute top-1/2 left-1/2 transform -translate-x-1/2 -translate-y-1/2"> <img :src="data.image.url || ''" alt="Hero Image" class="object-cover rounded-2xl" /> </div> <div class="w-9/12 aspect-20/17 bg-primary-100 rounded-3xl right-0 top-0 z-0"></div> </div> </div> </section> </template> <!-- Add a script to fetch the data --> <script setup> import { computed } from "vue"; // Pass the data as props to the page const props = defineProps(["data"]); const data = computed(() => props.data); const hasImage = computed(() => "image" in props.data); </script>
When you go back to your page in the browser, you should now see something like the image below.
Great work on getting your static web app working! Continue your journey to the next section to make your Nuxt project dynamic with Prepr content.