Managing customer data manually
This guide explains how to perform different actions on customer data directly in Prepr.
Introduction
Customers in Prepr are your web app visitors, both anonymous and known, who interact with your web app. When you store customer profiles in Prepr, you can track their interactions to understand common characteristics and behavior. This allows you to personalize their experiences by grouping them into Segments. For more details, check out the Managing segments guide.
Manage customers in Prepr by adding, updating, merging, exporting, anonymizing, and deleting customer profiles.
Adding customer profiles
You can add customer profiles in Prepr automatically or manually. When you enable Prepr tracking in your web app to collect customer data, profiles are automatically created in the system for each web app visitor, if they don’t already exist, Alternatively, you can also add customer profiles manually in two ways.

Importing customer profiles
To manually import multiple customers into Prepr follow the steps below.
-
Go to the Segments tab.
-
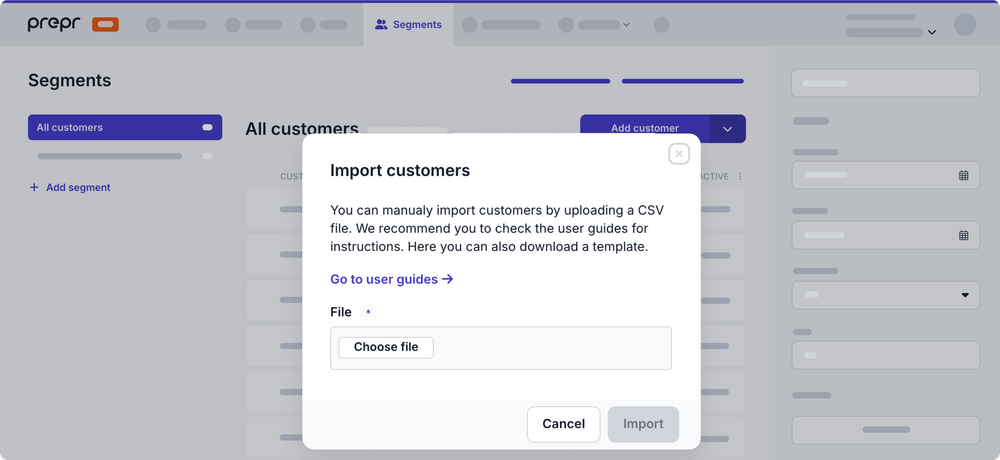
Click the All customers link on the left, then click the Add customer dropdown and choose Import customers to upload a CSV file.

-
Use the table below to create the complete CSV file.
Column title Variable Format first_name First name last_name Last name email Email address Valid email address country Country Only English notation allowed tags Tags Comma-separated reference_id Reference Only alphanumeric characters allowed. Customers are matched based on the email address.
- If an email address does not yet exist in Prepr, this customer will be added.
- When an e-mail address already exists in Prepr, this customer will be updated. If the field is filled in the import file, but not in Prepr, the field will be filled in Prepr.
- When no email address is imported, the customer will be added in Prepr.
After the import, you will receive an email with a summary of the following information:
- How many new customers have been created
- How many existing customers have been updated with new information
- How many customers were already fully present in the database
- How many rows were imported (and how many failed, reason included)
Adding a single customer profile
To manually add one customer profile, follow the steps below:
- Go to the Segments tab.
- Click the All customers link on the left, then click the Add customer button to create one profile.
- Enter the First name and Last name, if needed, and click the Save button.
Updating customer profiles
To update a single customer profile, follow the steps below:
-
Go to the Segments tab.
-
Click the All customers link on the left. Use the Search or Filter to find the customer that you want to update.
-
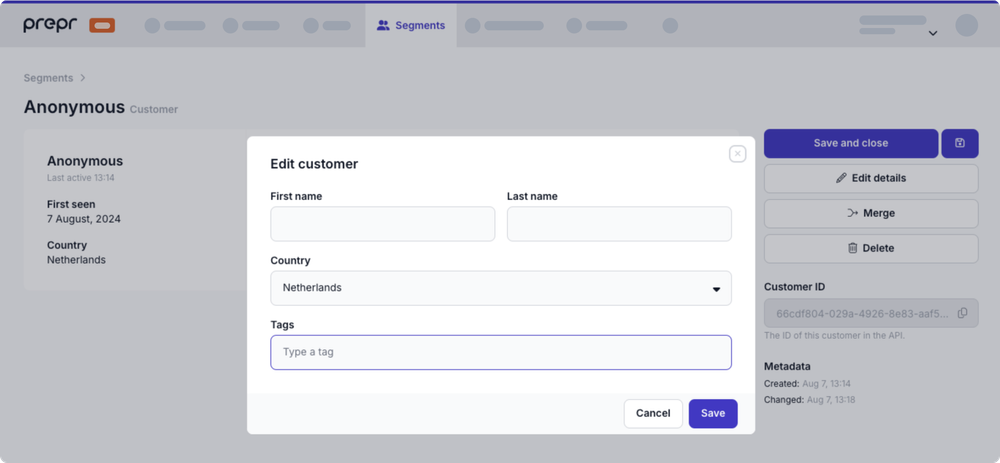
Click the customer and click the Edit details button to enter values for the Country and Tags.

To update multiple customer profiles, import them with matching email addresses or use the mutation API .
Merging customer profiles
A good customer database is a tidy database. This means that profiles are enriched with the correct customer data and any duplicates are removed. You can easily merge customer profiles in Prepr. In other words, you can combine duplicate profiles, where one profile contains certain data and the second profile contains other data about the same person.
To merge two profiles, follow the steps below.
-
Go to the Segments tab.
-
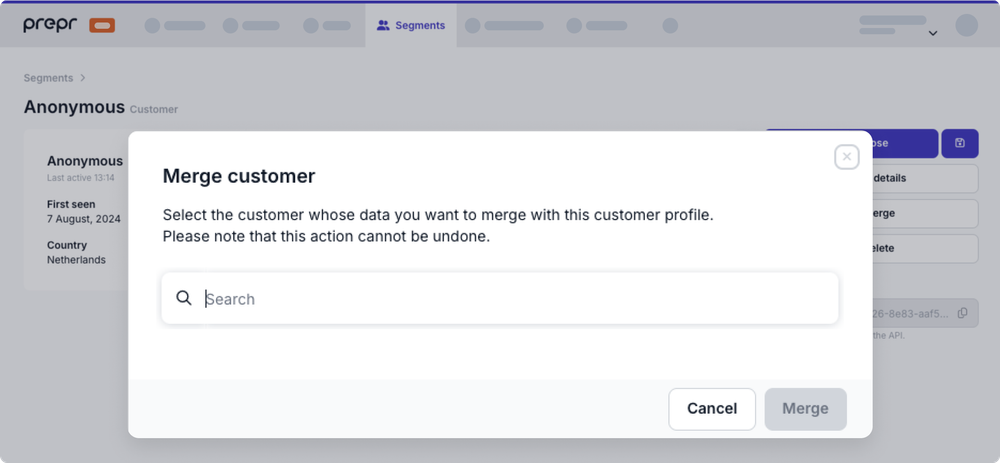
Click the All customers link on the left. Use the Search or Filter to find the customer that you want to merge. And click the Merge button to open the merge modal.

-
Search for the customer whose data you want to merge and click the Merge button.
When two customer profiles are successfully merged, the fields will be updated as follows:
- All fields of which only one is allowed (such as name, or date of birth) are filled in if they are empty in the main profile.
- All fields of which more than one is allowed (such as events, email addresses, or telephone numbers) are added to the main profile.
Exporting customer profiles
Prepr offers two types of customer exports: export of a single customer profile (for GDPR purposes) and a bulk export via CSV.
Use the GDPR export to give individuals the right to request a copy of any of their personal data which are being used in any way according to the General Data Protection Regulation.
- Go to the Segments tab.
- Click the All customers link on the left. Use the Search or Filter to find the customer that you want to export. Hover over the customer to the right and choose the GDPR Export option. A Json file for this customer will be directly downloaded to your local device.
Use the CSV export to export the Prepr customer list to a CSV file.
-
Go to the Segments tab.
-
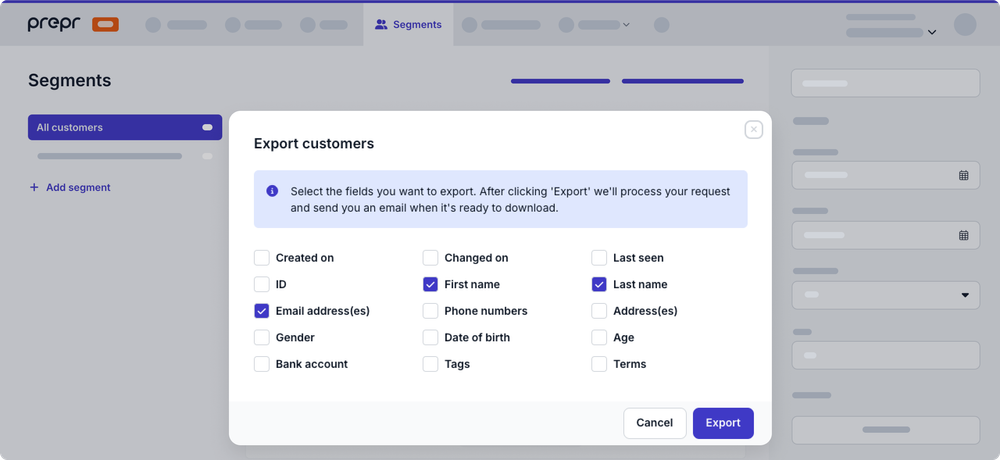
Click the All customers link on the left. Click the Export button to open the export modal.

-
Choose the fields that you want included in the export and click Export.
We’ll process your request and send you an email when it’s ready to download.
The customer export is only available for user roles with bulk export permissions.
Deleting customer profiles
You can delete customer profiles in a couple ways:
-
Select multiple customers from the Customers list
- Go to the Segments tab.
- Hover over and click the checkbox for the customers you want to delete.
- To select all customers, click the icon at the top of the list.
- Click the icon at the top of the list to delete all the selected customers.
- In the pop-up window, click Delete again to confirm the action.
-
Select single customer from the Customers list
-
Go to the Segments tab.
-
Hover over the customer you want to delete to make the actions available.

-
Click the icon on the right to delete the highlighted customer.
-
In the pop-up window, click Delete again to confirm the action.
-
-
From the Customer page
- Go to the Segments tab.
- Click the All customers link on the left. Use the Search or Filter to find the customer that you want to delete.
- Click the customer to open the Customer page and click the Delete button.
- In the pop-up window, click Delete again to confirm the action.