Using webhooks
Webhooks in Prepr CMS let you receive real-time updates for any events.
Whenever a content item, asset, segment, customer, schema or tag changes, Prepr sends a secure HTTP POST request to your webhook endpoint.
This allows your application to respond to an event in Prepr — whether that’s syncing data, triggering notification or other automation, or keeping your UI in sync with content changes.
Event types
The events below can be used to trigger a webhook notification. Depending on your plan some options may not be available.
Content items
content_item.publishedcontent_item.unpublishedcontent_item.createdcontent_item.changedcontent_item.deleted
Assets
asset.createdasset.uploadedasset.changedasset.deletedstorage_file.deletedcdn_file.deleted
Schema
schema.changed
Segments
segment.createdsegment.changedsegment.deleted
Customers
person.createdperson.changedperson.deletedperson.segment.addedperson.segment.removed
Tags
tag.createdtag.changedtag.deleted
Event structure
The table below outlines the structure of the webhook request, detailing key parameters and their associated data. Each parameter represents an aspect of the event, including metadata.
| Field name | Field type | Description |
|---|---|---|
id | string | The event unique identifier. |
created_on | string | The timestamp in UTC when the event is created. |
event | string | The triggered event, for example content-item.published. |
payload | object | Object with info about the resource that triggered the event. |
performed_by | string | The Prepr user who triggered the event. |
The sections below describe the payload for each resource in more detail.
Content items
The below example request is the payload object when a content-item.published event triggers for a Post model.
{
  "id": "75ec2d8c-e5ba-452e-be08-3524af2e1f49",
  "created_on": "2025-03-19T14:30:49+00:00",
  "changed_on": "2025-05-28T09:01:45+00:00",
  "label": "Publication",
  "read_time": {
    "en-US": 2,
    "nl-NL": 2
  },
  "publish_on": {
    "en-US": "2025-05-28T09:01:00+00:00",
    "nl-NL": "2025-02-19T12:33:00+00:00"
  },
  "slug": {
    "nl-NL": "de-top-5-mythes-over-autoleasing-ontkracht",
    "en-US": "the-top-5-myths-about-car-leasing-debunked"
  },
  "model": {
    "id": "4a8b8f49-b5cd-412f-97e0-5b04a072688d",
    "body_singular": "Post",
    "body_plural": "Posts"
  }
}| Field name | Field type | Description |
|---|---|---|
id | string | The content item unique identifier. |
created_on | string | The timestamp in UTC when the item is created. |
changed_on | string | The timestamp in UTC when the item is changed. |
label | string | Type of resource. For content items, this value is Publication. |
read-time.{locale} | integer | Values are listed for each locale, for example en-US. The calculated time a user reads an article in minutes. |
publish_on.{locale} | string | Values are listed for each locale, for example en-US. The timestamp in UTC when the item is published. |
slug.{locale} | string | Values are listed for each locale, for example en-US. The slug value of the content item, if applicable. |
model.id | string | The internal id of the model. |
model.body_singular | string | The singular name of the model, for example Post. |
model.body_plural | string | The plural name of the model, for example Posts. |
Assets
The below example request is the payload for an asset.changed event.
{
  "id": "c8580913-bbac-4309-9f74-95a6835930b8",
  "created_on": "2025-03-19T16:01:14+00:00",
  "changed_on": "2025-05-27T15:23:33+00:00",
  "label": "Photo",
  "name": "bmw",
  "body": "",
  "author": "",
  "status": null,
  "replaceable": true,
  "reference_id": "b773b7b3-97ce-40c3-ae1f-b1369d0516e1",
  "reference": null,
  "original_name": "img",
  "mime_type": "image/png",
  "extension": "png",
  "height": 250,
  "width": 496
}| Field name | Field type | Description |
|---|---|---|
id | string | The asset unique identifier. |
created_on | string | The timestamp in UTC when the asset is created. |
changed_on | string | The timestamp in UTC when the asset is changed. |
label | string | Type of resource. For assets, this value is Photo, Video or Document. |
name | string | The name of the asset. |
body | string | Additional information about the asset. |
author | string | The person who created the asset such as the photographer. |
reference_id | string | The external id of the asset. |
Schema
The schema events currently don’t contain any payload.
Segments
The below example request is the payload for a segments.deleted event.
{
  "id": "sgm_5g4820qaz70",
  "created_on": "2025-05-28T08:52:19+00:00",
  "changed_on": "2025-05-28T08:52:19+00:00",
  "synced_on": "2025-05-28T08:52:19+00:00",
  "label": "Segment",
  "body": "New segment",
  "description": null,
  "reference_id": "new-segment",
  "query": {
    "conditions": [
      {
        "type": "event",
        "event_name": "View",
        "result": true
      }
    ]
  },
  "mode": 2,
  "count": null
}| Field name | Field type | Description |
|---|---|---|
id | string | The segment unique identifier. |
created_on | string | The timestamp in UTC when the segment is created. |
changed_on | string | The timestamp in UTC when the segment is changed. |
label | string | Type of resource. For segments, this value is Segment. |
body | string | The name of the segment as it’s displayed in the CMS. |
reference_id | string | An external id for the segment. This value can be used to identify the segment in an external CRM system, if applicable. |
query.conditions | array | A list of condition objects for this segment. The object fields depend on the condition options saved for this segment. For a complete list, check out the segments doc. |
Customers
The below example request is the payload for a person.changed event.
{
  "id": "3b0e2f5e-5b06-4563-828d-13ce49252672",
  "created_on": "2024-08-23T07:20:45+00:00",
  "changed_on": "2025-05-27T15:48:20+00:00",
  "last_seen": "2024-08-23T07:20:45+00:00",
  "label": "Person",
  "reference_id": null,
  "first_name": "Braylen",
  "last_name": "Nash",
  "full_name": "Braylen Nash"
}| Field name | Field type | Description |
|---|---|---|
id | string | The customer unique identifier. |
created_on | string | The timestamp in UTC when the customer is created. |
changed_on | string | The timestamp in UTC when the customer is changed. |
label | string | Type of resource. For customers, this value is Person. |
full-name | string | The full name of the customer. For a full list of available customer characteristics, checkout the customers doc. |
Tags
The below example request is the payload for a tag.created event.
{
  "id": "c921ef1e-b8e5-4e8a-8cfa-2914665c3bf1",
  "created_on": "2025-09-03T12:40:49+00:00",
  "changed_on": "2025-09-03T12:40:49+00:00",
  "label": "Tag",
  "color": null,
  "body": "subscriber",
  "slug": "subscriber"
}| Field name | Field type | Description |
|---|---|---|
id | string | The customer unique identifier. |
created_on | string | The timestamp in UTC when the tag is created. |
changed_on | string | The timestamp in UTC when the tag is changed. |
label | string | Type of resource. For tags, this value is Tag. |
body | string | The value of the tag. |
Creating a webhook
Before adding a webhook in Prepr, you need to set up your callback endpoint in your application.
The endpoint must use HTTPS and be able to receive both GET and POST requests.
Check out the Next.js static website example for example webhook endpoints that check for content-item.changed and content-item.published events.
Webhooks in Prepr send notifications as POST requests and include a JSON payload with Prepr headers and custom headers, if defined in the webhook.
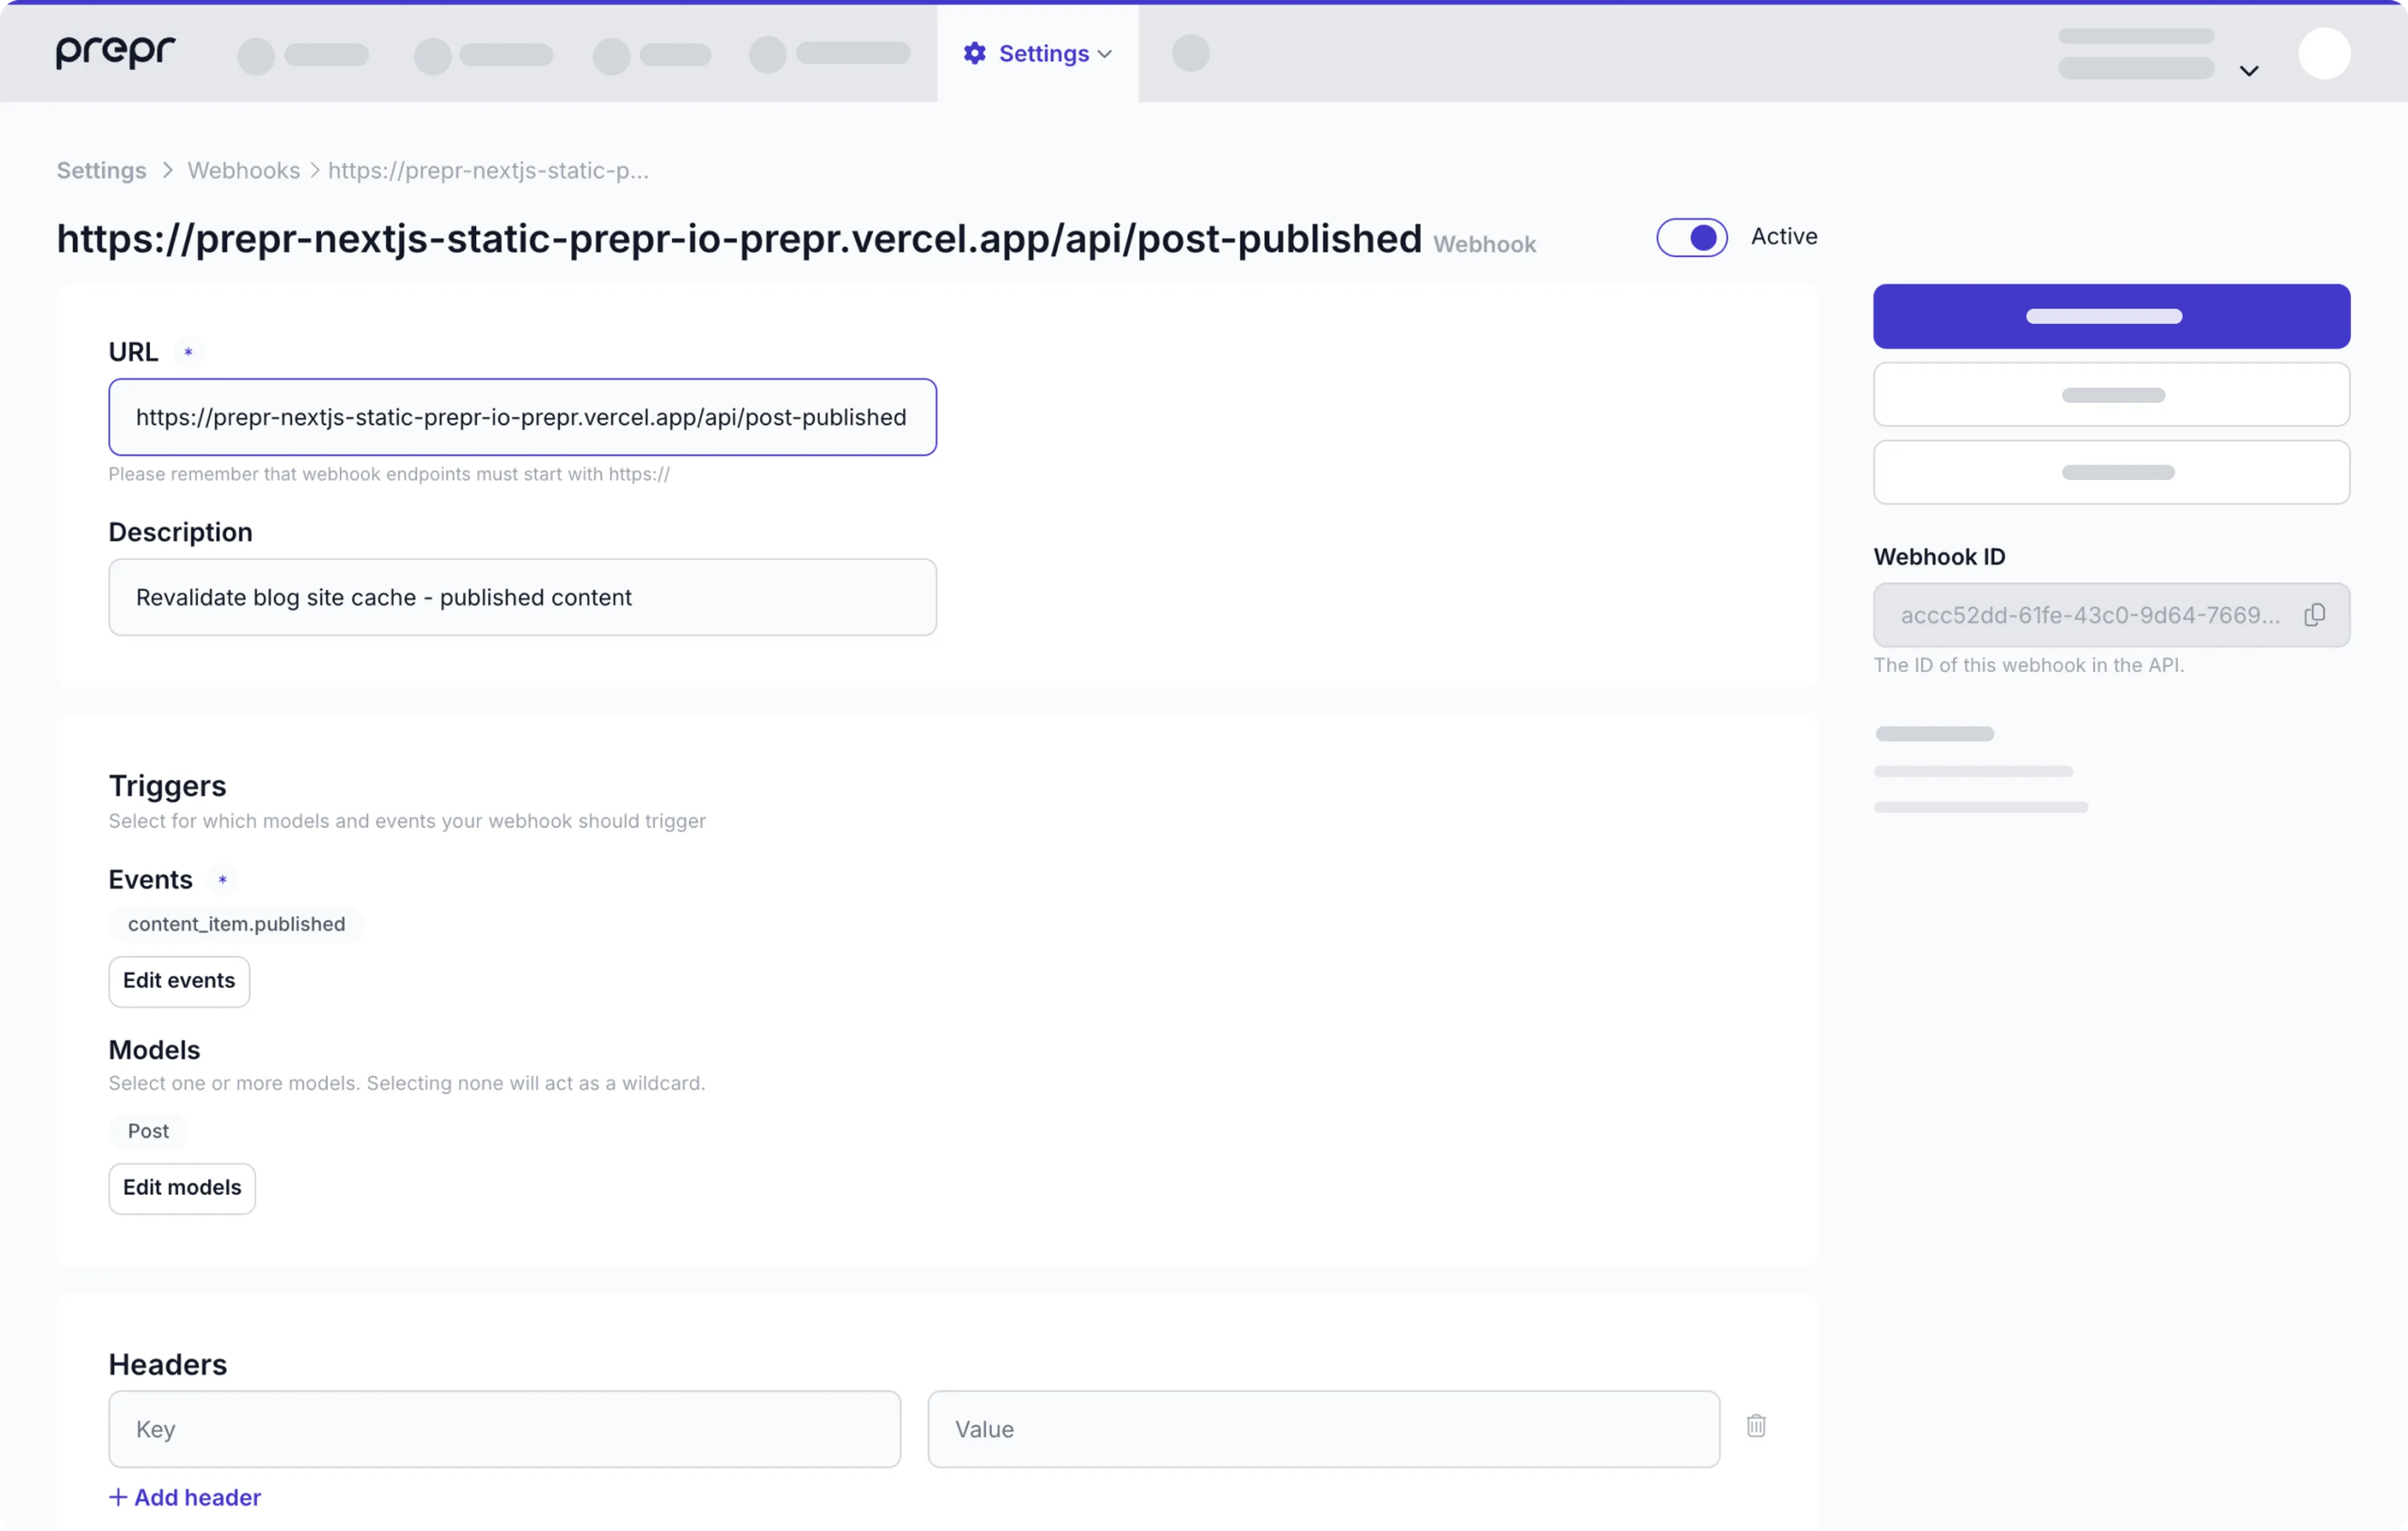
Follow the steps below to add a new webhook.
-
Log in to your Prepr account with a user that has Owner, Admin or Developer rights.
-
Go to Settings → Webhooks.
-
Create a new webhook by clicking the Add webhook button.
-
Add the URL of the endpoint where the notifications will be sent.
-
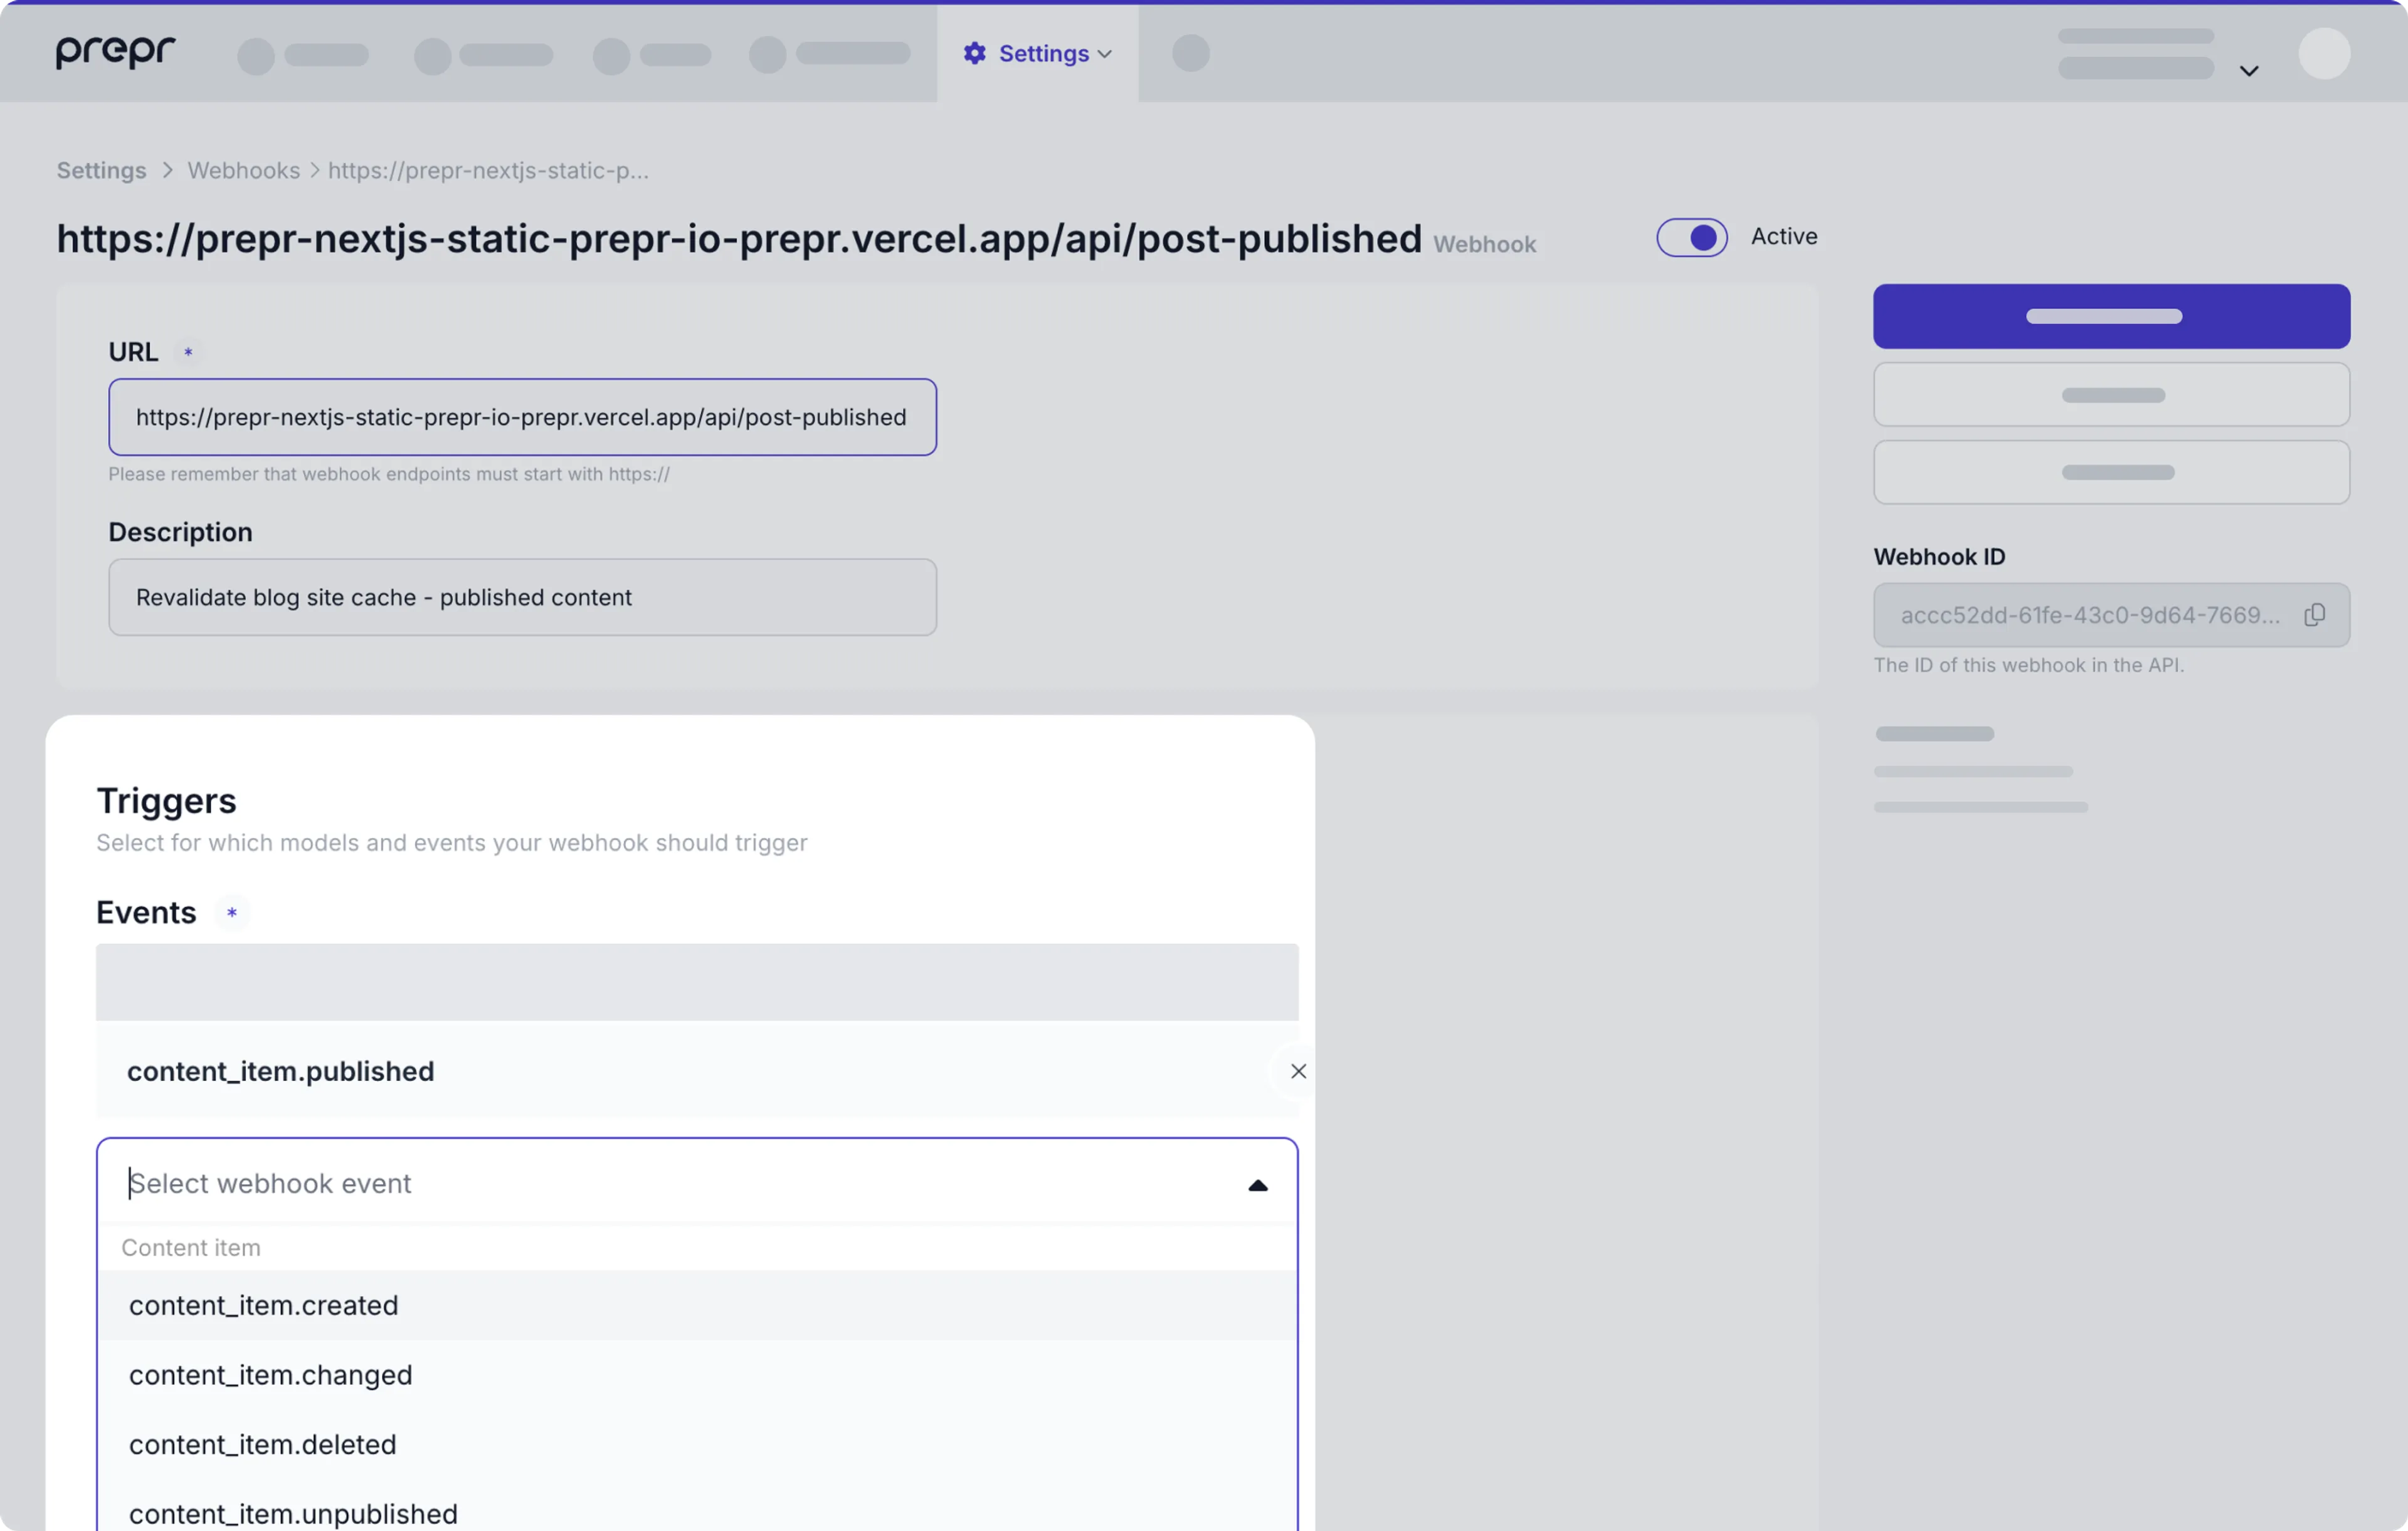
Select the events that will trigger the request.
-
Click the Save and close button.
Check out the list below for additional info you can include in your webhook.
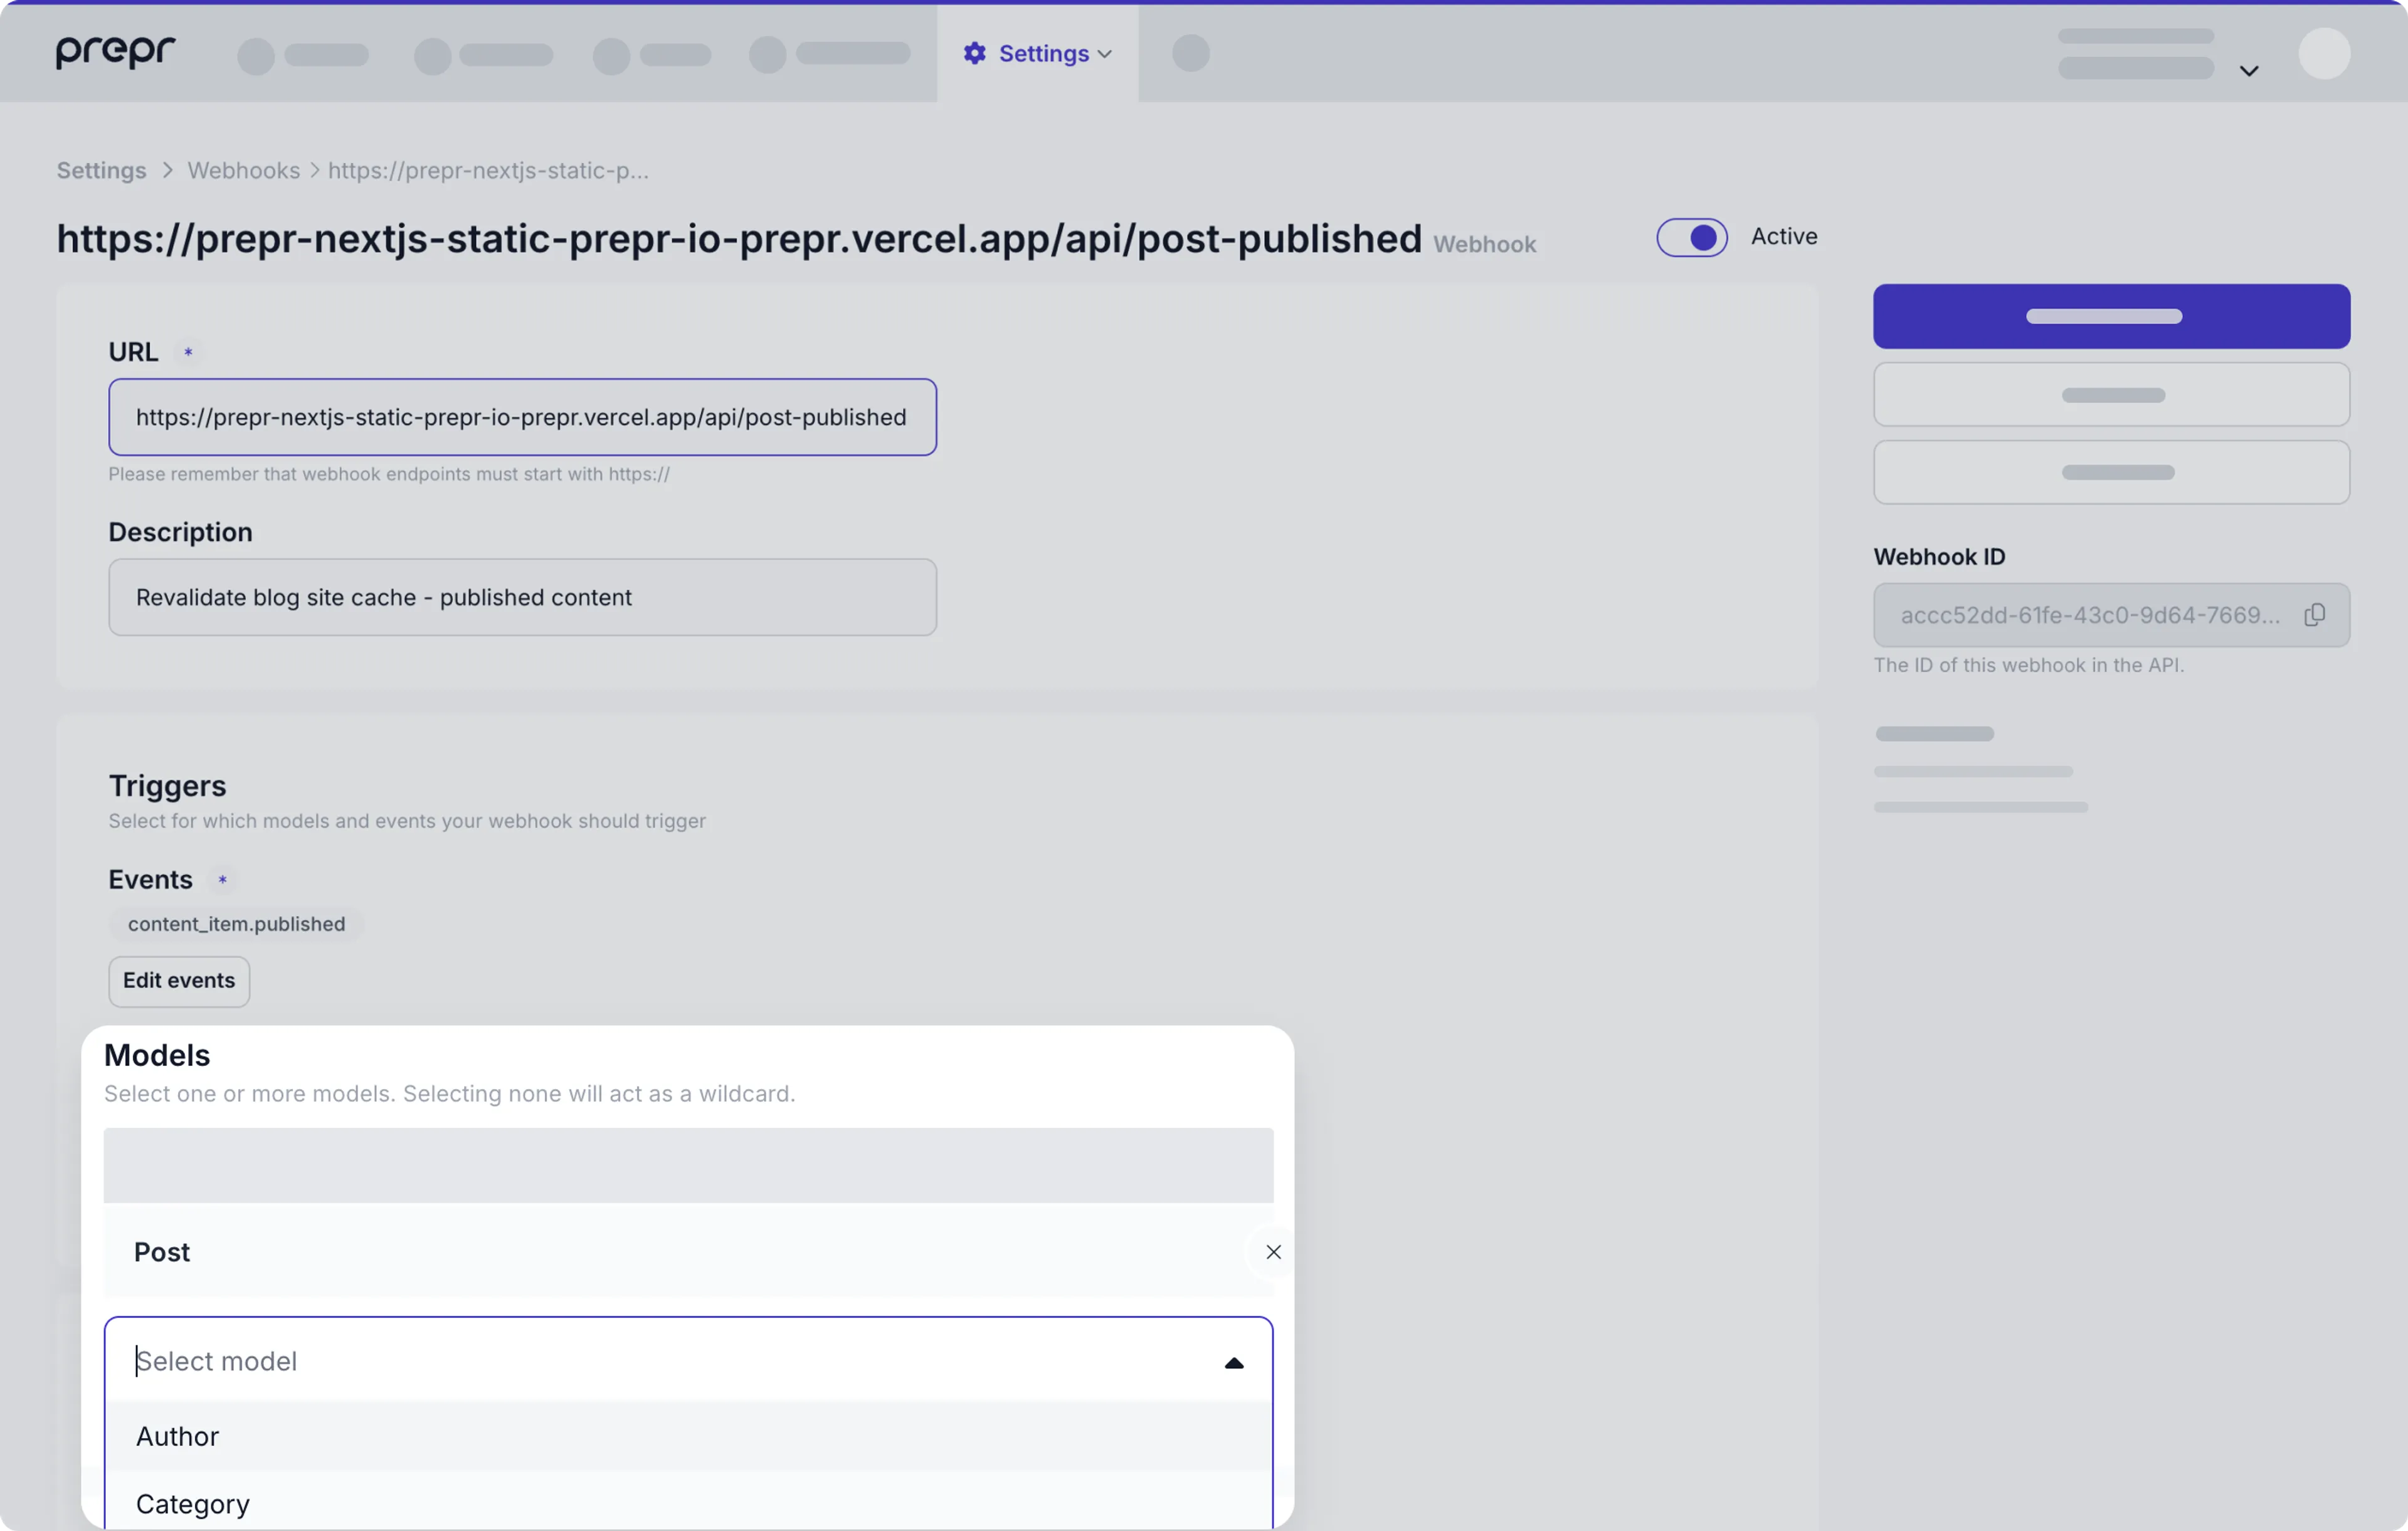
Models
When you select a content item event, you will receive notifications when any content item is created, published, unpublished, changed, or deleted. You can further specify which content items you want to receive notifications from.
Select one or more models to receive webhook events for content items of that specific model.
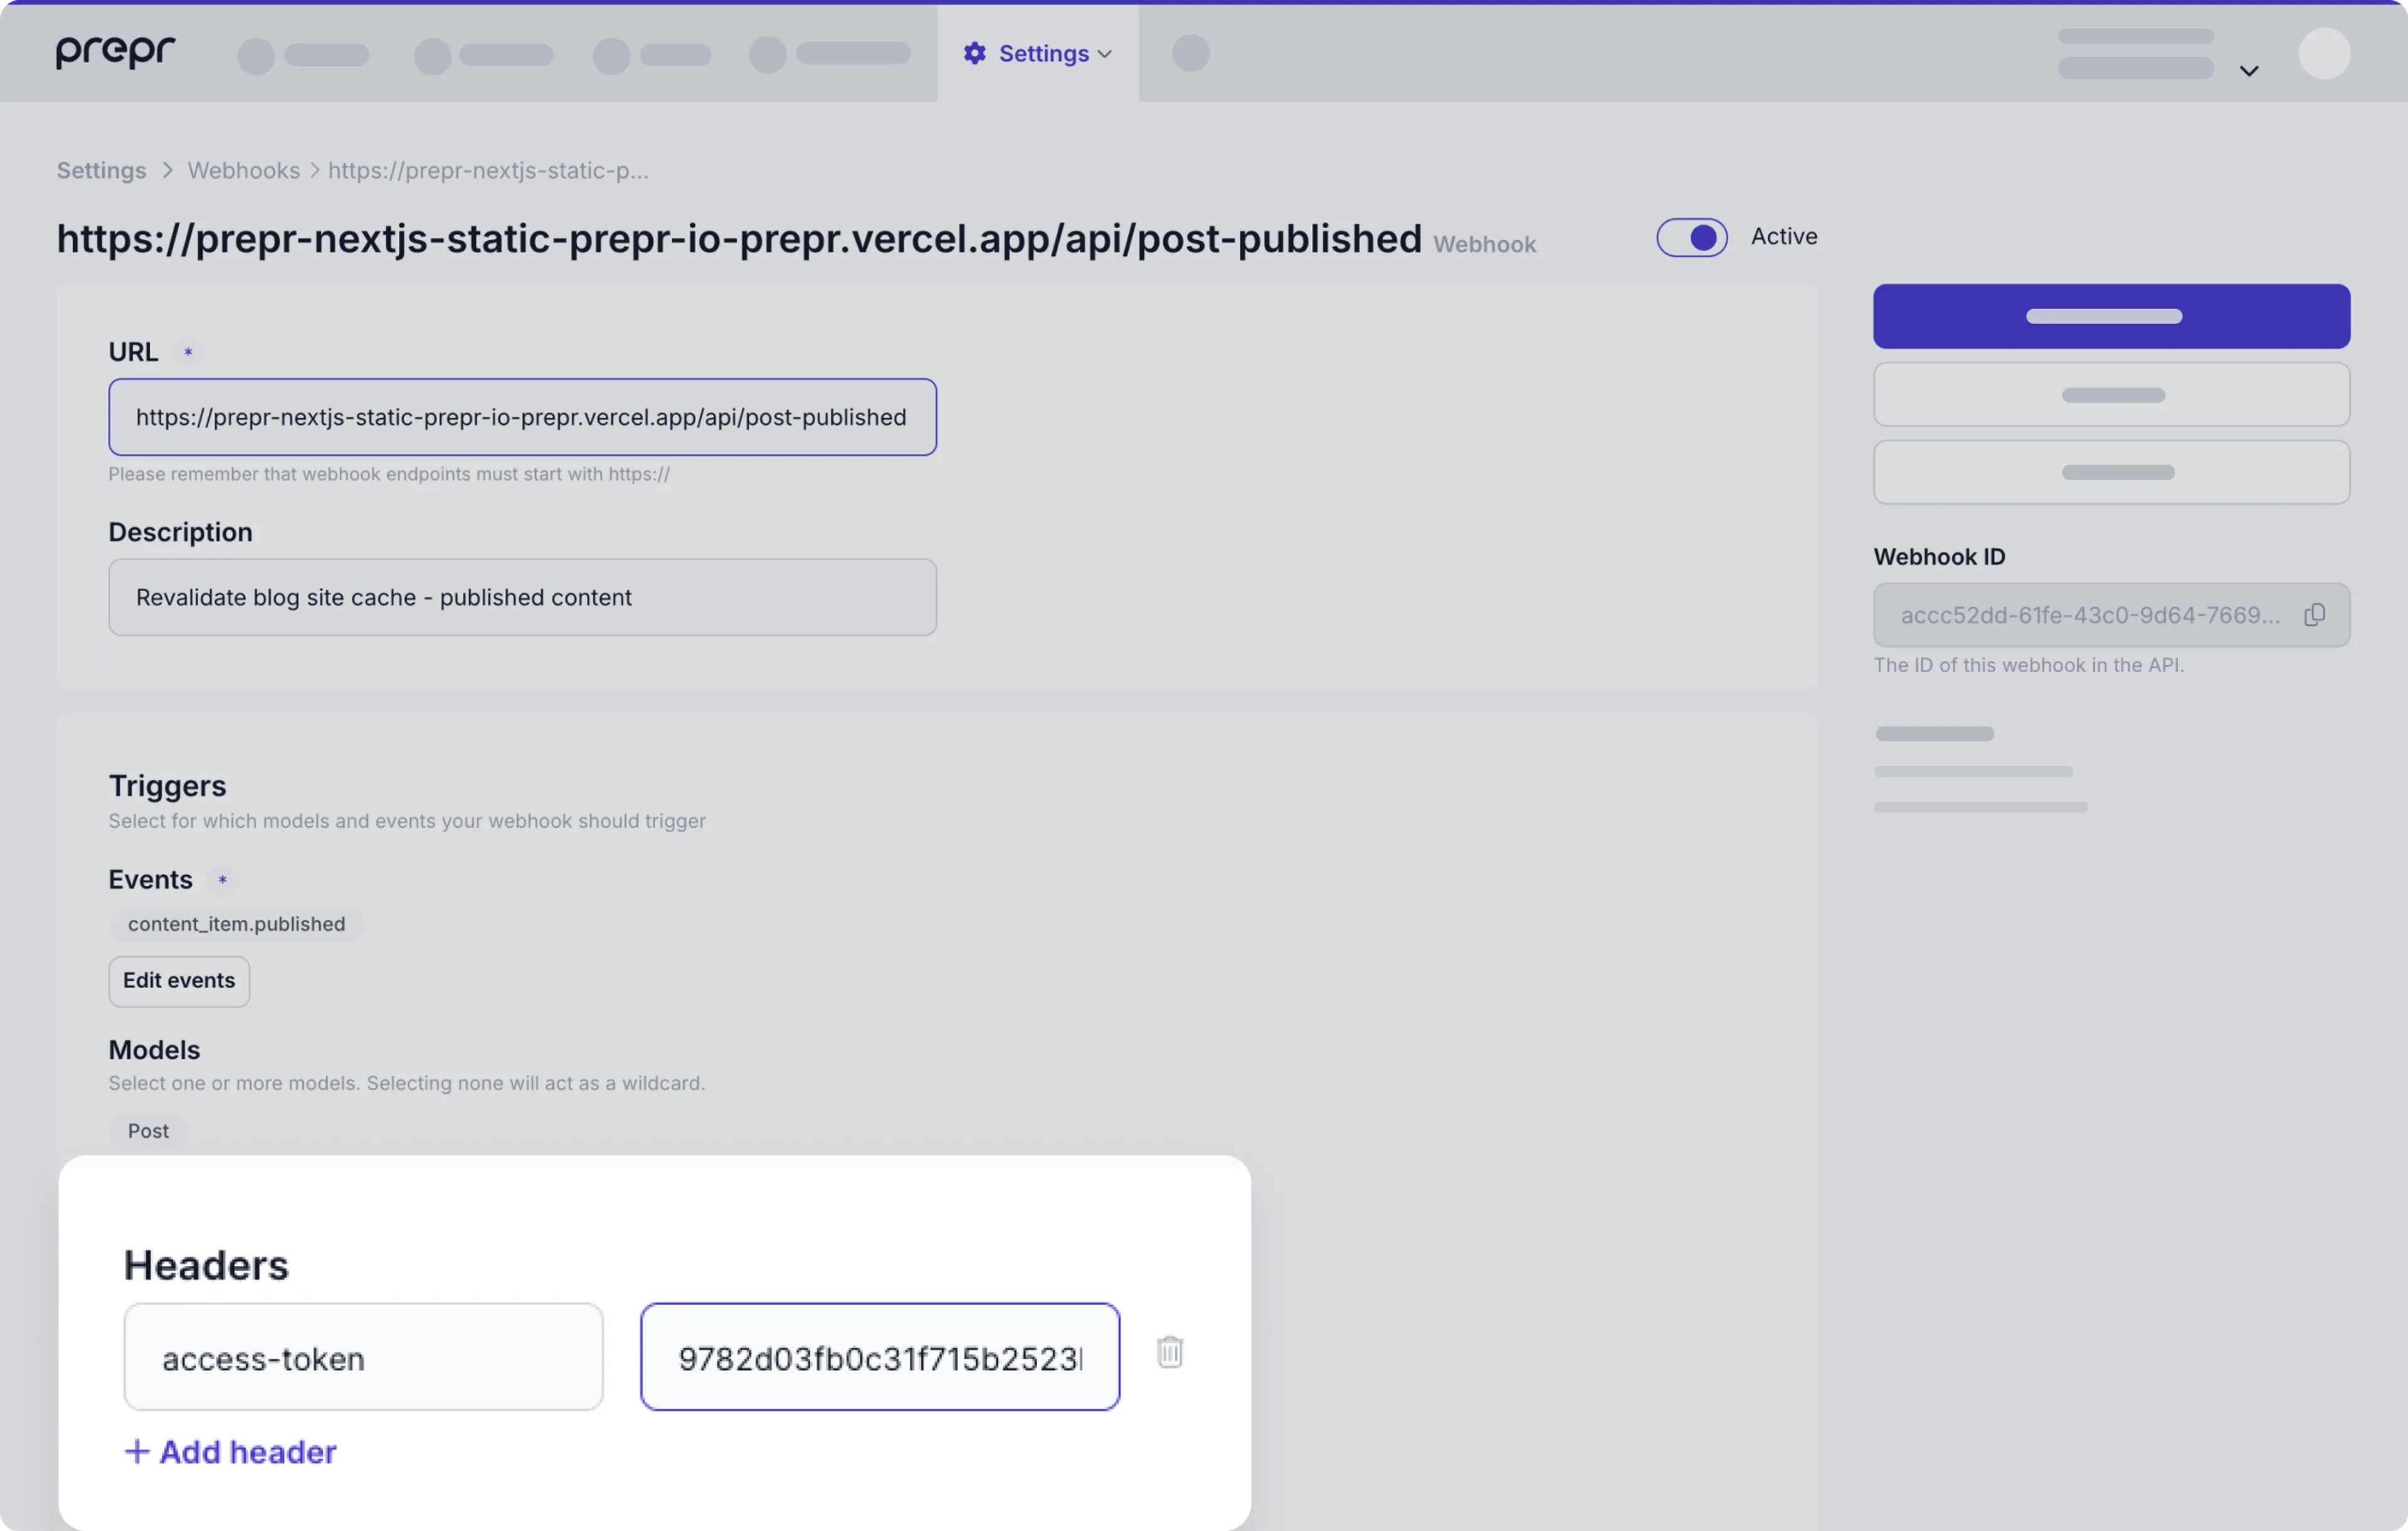
Custom headers
There are some use cases where an application requires some fields to be added in the header of the webhook payload. For example, for access tokens or a personal scope key. To add a custom header, enter a header key and value.
Response
View the full list of notifications sent to your webhook on the Webhook detail page in your Prepr account. From here you can view the response the Prepr server received from your endpoint.

Your endpoint should return a 2xx HTTPS response for all notifications. When other status codes are returned
the notification is considered failed and will be retried.
If your webhook continues to fail multiple times in 24 hours, your webhook will be disabled. The account owner and any Technical contact users will be notified in this case.
Retry behavior
Prepr attempts multiple times to deliver a given notification to your webhook endpoint with an exponential back off. You can configure a maximum number of retries. If your endpoint has been disabled you can still expect to see future retry attempts.
Disable behaviour
Prepr will actively notify the account owner and any Technical contact users when the webhook is misconfigured or the error rate is 100%. The email also states when the endpoint will be automatically disabled.
View attempts
To manage an existing webhook, go to Settings → Webhooks and click the specific webhook in the list. All attempts of this webhook of the last three days can be viewed and retried here. You can also view the response the Prepr server received from your endpoint.
Resend webhooks
You can resend a webhook event by clicking the icon.
Disable webhooks
You can easily switch off your webhook temporarily. Go to Settings → Webhooks and click the specific webhook in the list. Switch it off by disabling the Active toggle.
Performance considerations
Respond to all webhook events in 12 seconds or less. After 12 seconds the notification is considered failed and will be retried.
Security guidelines
We recommend you protect the endpoints configured in each webhook. This prevents unauthorized actions on your app.
Authorization headers
When configuring your webhook in Prepr, add an authorization Header with a secret access token only your incoming webhook server knows.
Prepr will send all of the custom headers you added when sending a notification, including authorization. If the values don’t match, you can ignore the request.
Whitelisting Prepr server IPs
You can ensure your app is always communicating with Prepr through one of our IP addresses.
87.233.165.0/26
2001:9a8:0:4b:: 64 bits
Webhook signatures
Prepr will sign the webhook events it sends to your endpoints. We do so by
including a signature in each event’s Prepr-Signature header. This allows
you to validate that the events were sent by Prepr, not by a third party.
Before you can verify signatures, you need to store your endpoint’s ID when creating a new Webhook. Each ID is unique to the endpoint to which it corresponds. If you use multiple endpoints, you must obtain an ID for each one.
Verifying signatures
The Prepr-Signature header contains the full json payload you receive.
Prepr generates signatures using a hash-based message authentication code (HMAC) with SHA-256.
Compute an HMAC with the SHA256 hash function. Use the endpoint’s signing ID
as the key, and use the json payload string as the message.
Compare the signature in the header to the expected signature. If a signature matches, compute the difference between the current timestamp and the received timestamp, then decide if the difference is within your tolerance.
To protect against timing attacks, use a constant-time string comparison to compare the expected signature to each of the received signatures.
Preventing replay attacks
A replay attack is when an attacker intercepts a valid payload and its signature,
then re-transmits them. To mitigate such attacks, Prepr includes a timestamp in
the Prepr-Signature header. Because this timestamp is part of the signed payload,
it is also verified by the signature, so an attacker cannot change the timestamp
without invalidating the signature. If the signature is valid but the timestamp is too old,
you can have your application reject the payload.
We recommend a tolerance of five minutes between the timestamp and the current time. We advise that you use Network Time Protocol (NTP) to ensure that your server’s clock is accurate and synchronizes with the time on Prepr servers.
Prepr generates the timestamp and signature each time we send an event to your endpoint. If Prepr retries an event, for example: your endpoint previously replied with a non-2xx status code, then we generate a new signature and timestamp for the next delivery attempt.