Collaborating with coworkers
Manage workflows
Use workflows to assign content items to team members, work together smoothly, and manage content easily with a Kanban board, commenting, and notifications.
Workflow stage
A workflow is the lifecycle of a content item from its creation until it's done and ready to be published. Explore the below workflow stages to leverage its power in Prepr.
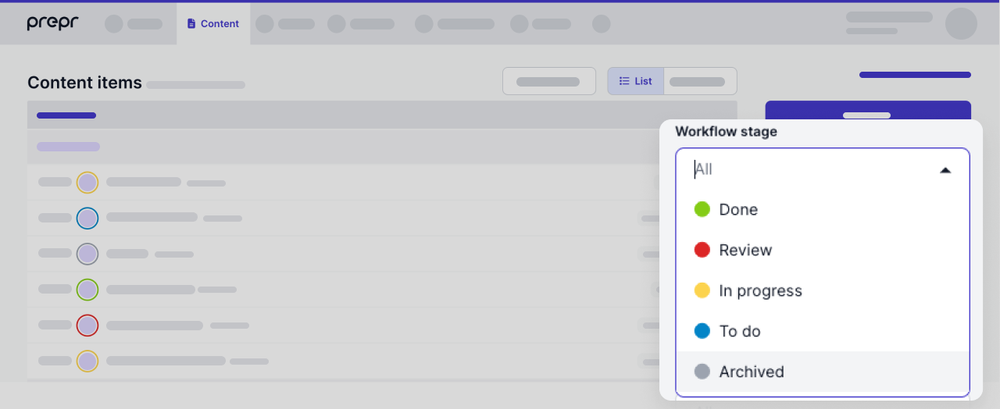
To do
When you create a new content item, it is first set to the To do stage. This means that you have yet to start work on this content item. To do content items are typically items in which raw text has been entered with many missing fields.
In progress
The moment the content item is further compiled by you or your team, the stage is updated to In progress. The content item is built and all fields are now filled with the correct content. You can save content items in this stage, even if required fields have not been entered.
Review
When the content item is almost finished and needs a final check, set the workflow stage to Review. If someone else has to review your work, you can assign this content item to someone else. You can save content items in this stage, even if required fields have not been entered.
Done
The content item is finished and does not need any further adjustments. The content is set to Done automatically when the content item is published. Check out the Manage content items doc for more details. You can only save content items in the stage Done if all required fields have been entered.
If you schedule a content item, make sure the workflow stage is set to Done if you want it to be published automatically on the Publish on date.
Archived
A content is automatically Archived when the Unpublish on date and time is set on the content item and has been reached.
The workflow stage does not necessarily indicate that a content item has been published or not. You can easily see if a content item has been published at the top of the content item sidebar. Check out the Manage content items doc for more details.
Assignees
You can assign content items to a user and filter the content item list by assignee, making it easier to focus on the items you need to work on.
To assign a content item to another user, follow the steps below.
- Go to the Content tab and select the content item you want to assign.
- Simply click the Assigned to [Name] or Unassigned text at the top of the page to open the user search bar.
- Search for and choose the user you want to assign the content item to. You can assign the content item to yourself or to another user.
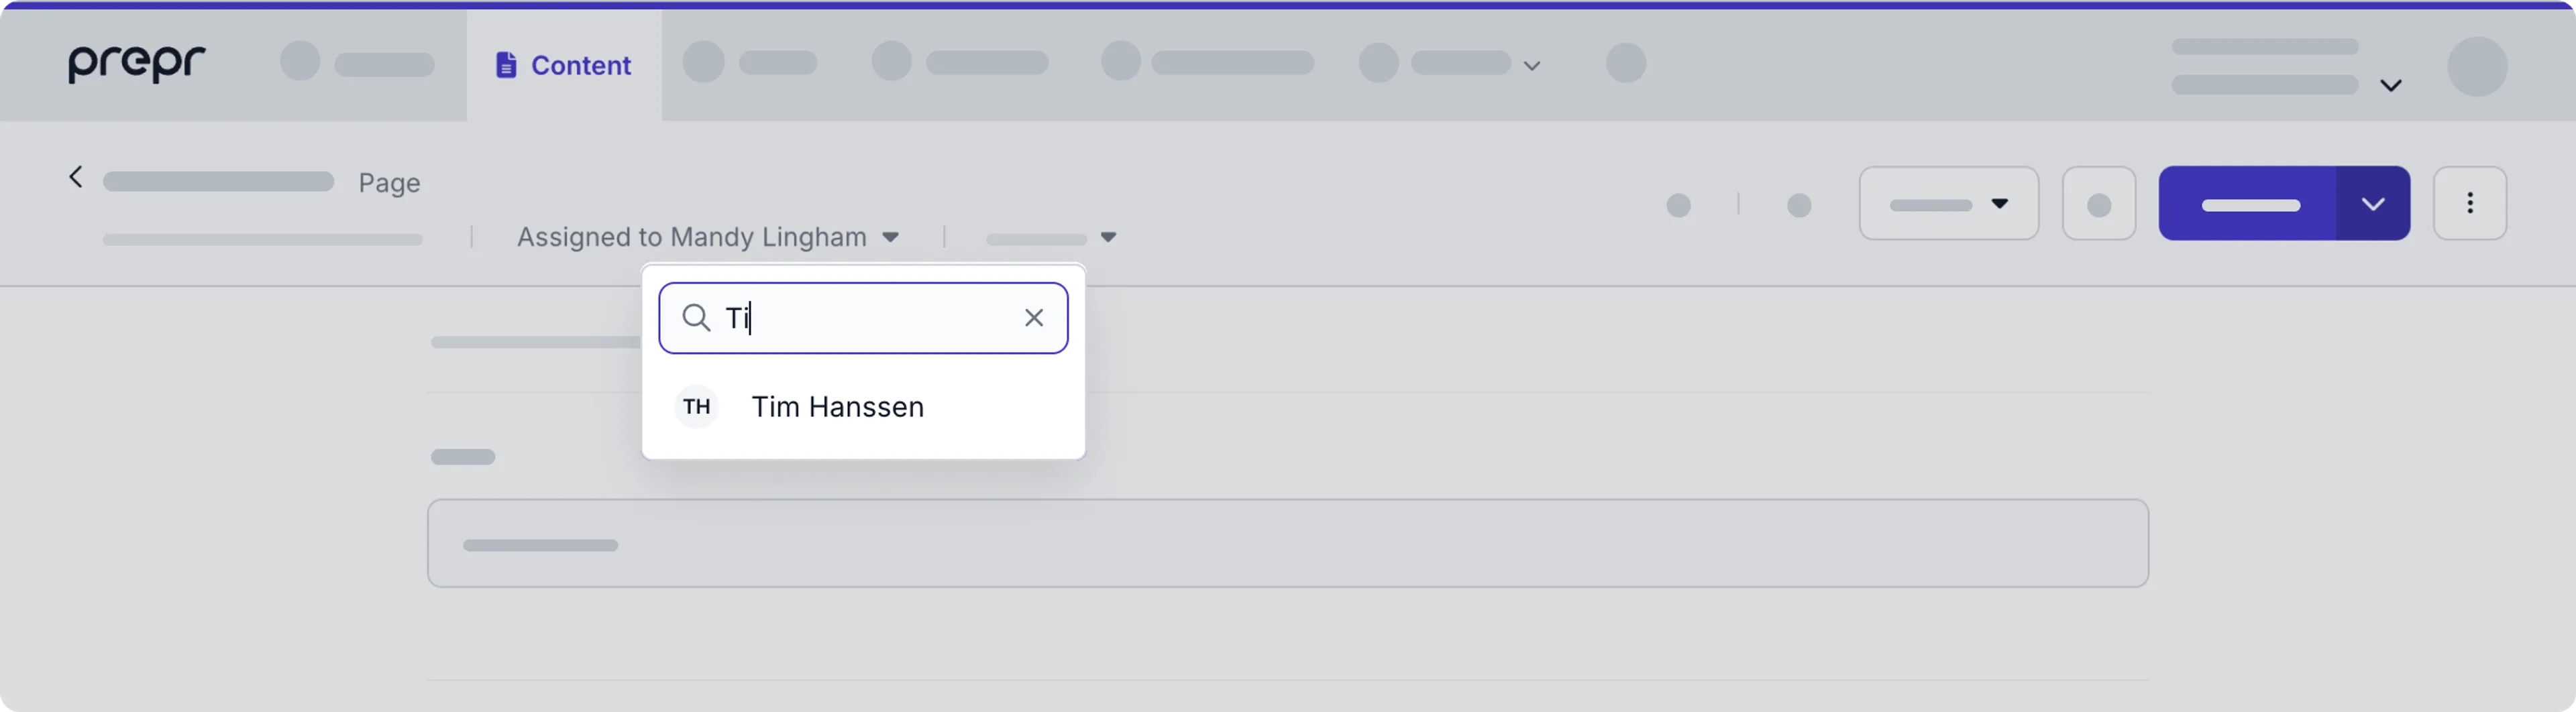
To get a clear overview of all content items that have been assigned to a specific user, you can filter the content item list by the Assignee. Click the user for whom you want to see all content items. Select Assigned to me if you want to see all content items that you have to work on.
Commenting
You can make internal comments for a content item, for example, while reviewing the content. Follow the steps below to add a comment.
- Go to the Content tab and select the content item you want to comment on.
- Click the button at the top right of the page to open the action list and choose Comments. This can be useful when they need to review the content item.
- Enter your comment.
- To notify another user, you can mention them in your comment with an
@, type their first initial and choose their name from the list of users.
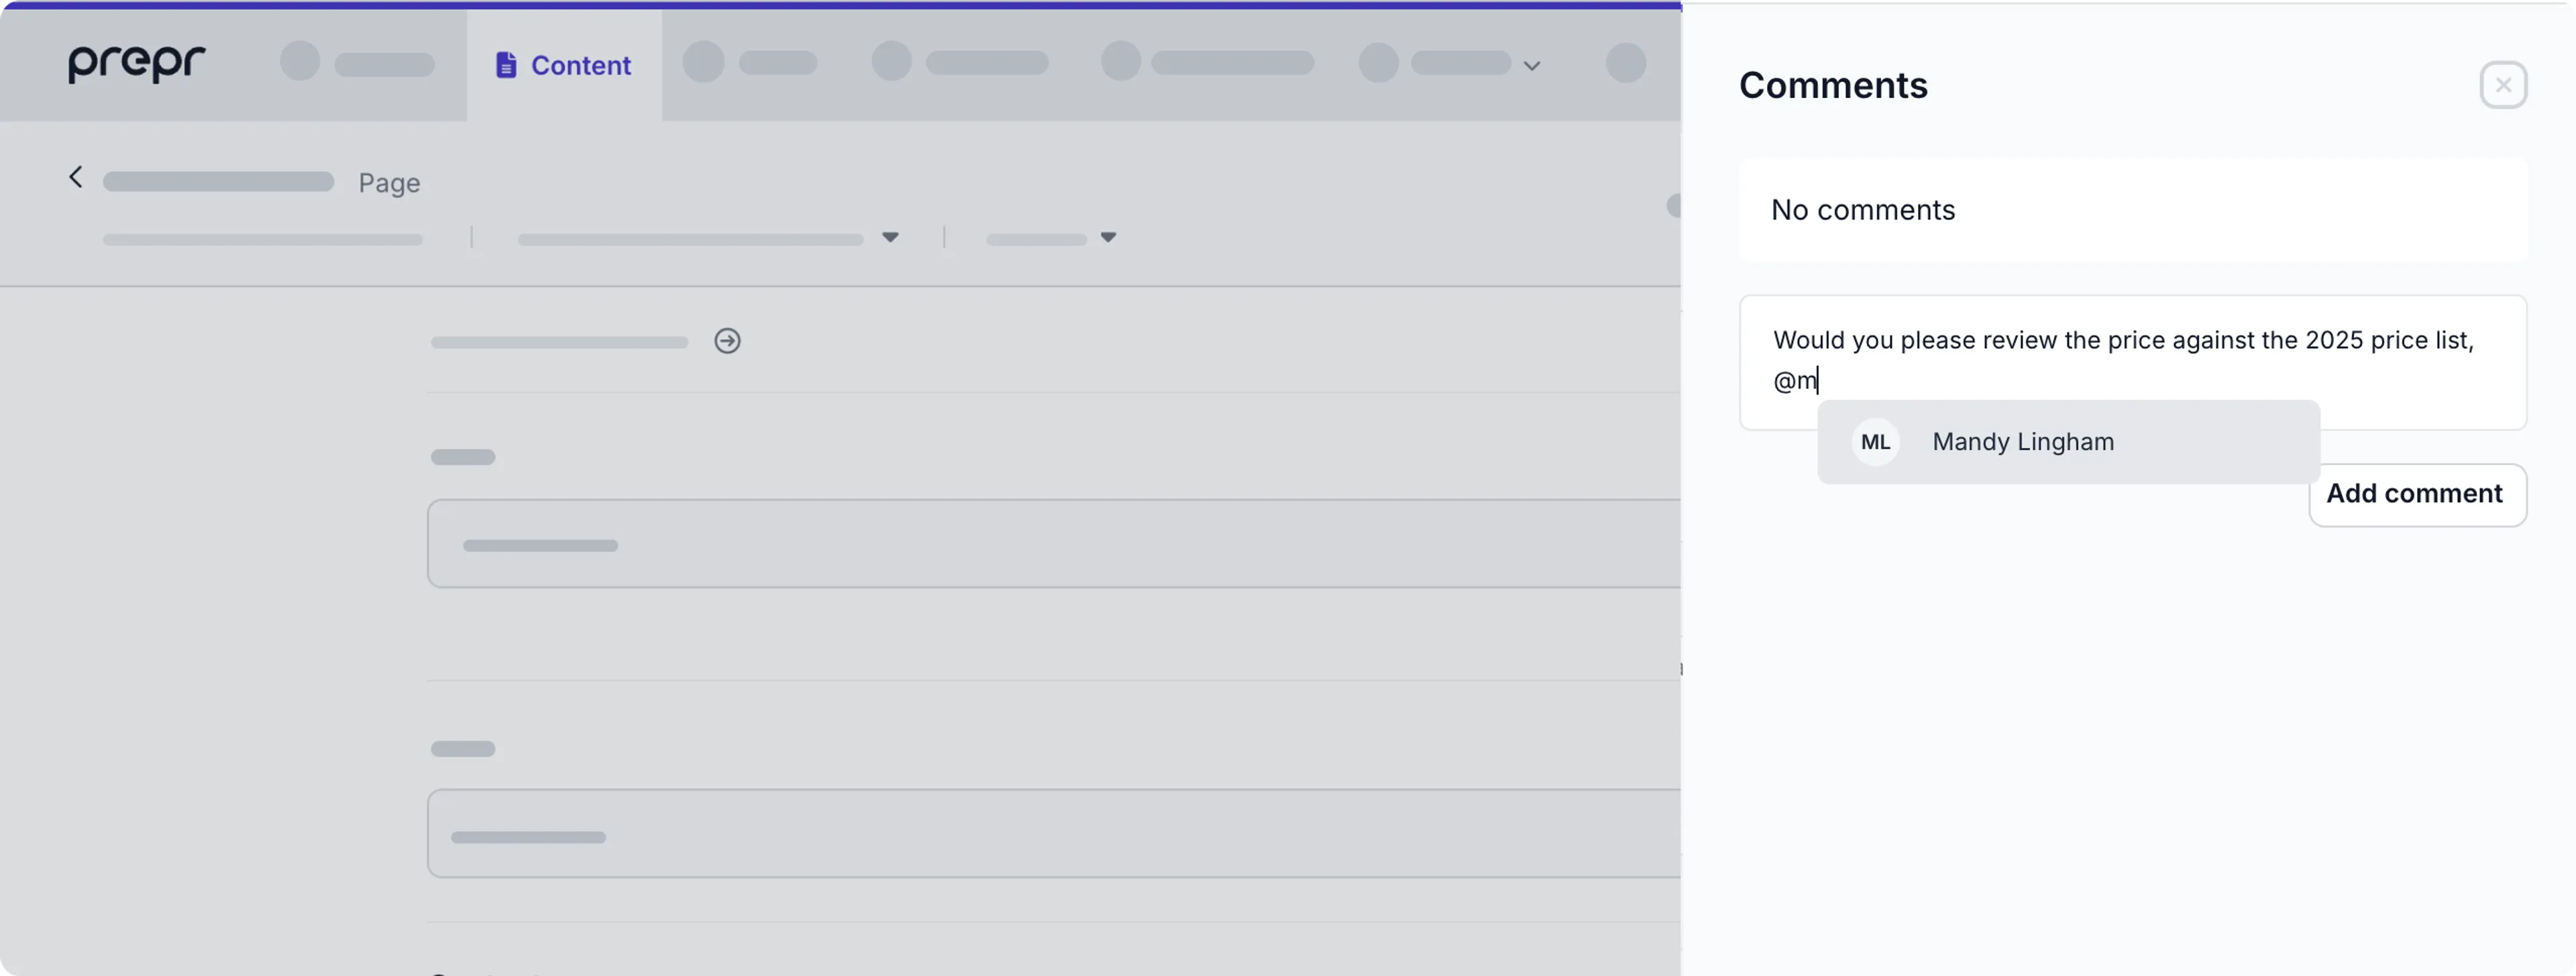
- Click the Add comment button to save your comment.
Your co-worker will receive an email notification and a notification in Prepr at the top of the screen with a link to the right content item.
If you don't see the Comments option in the action list, then you need to allow comments in the settings for the corresponding model.
Kanban view
At the top right of the content item list, switch from the List view to the Kanban view. Here you can see the content items by each of the workflow stages. In this view, you can easily drag and drop a content item to update the stage.

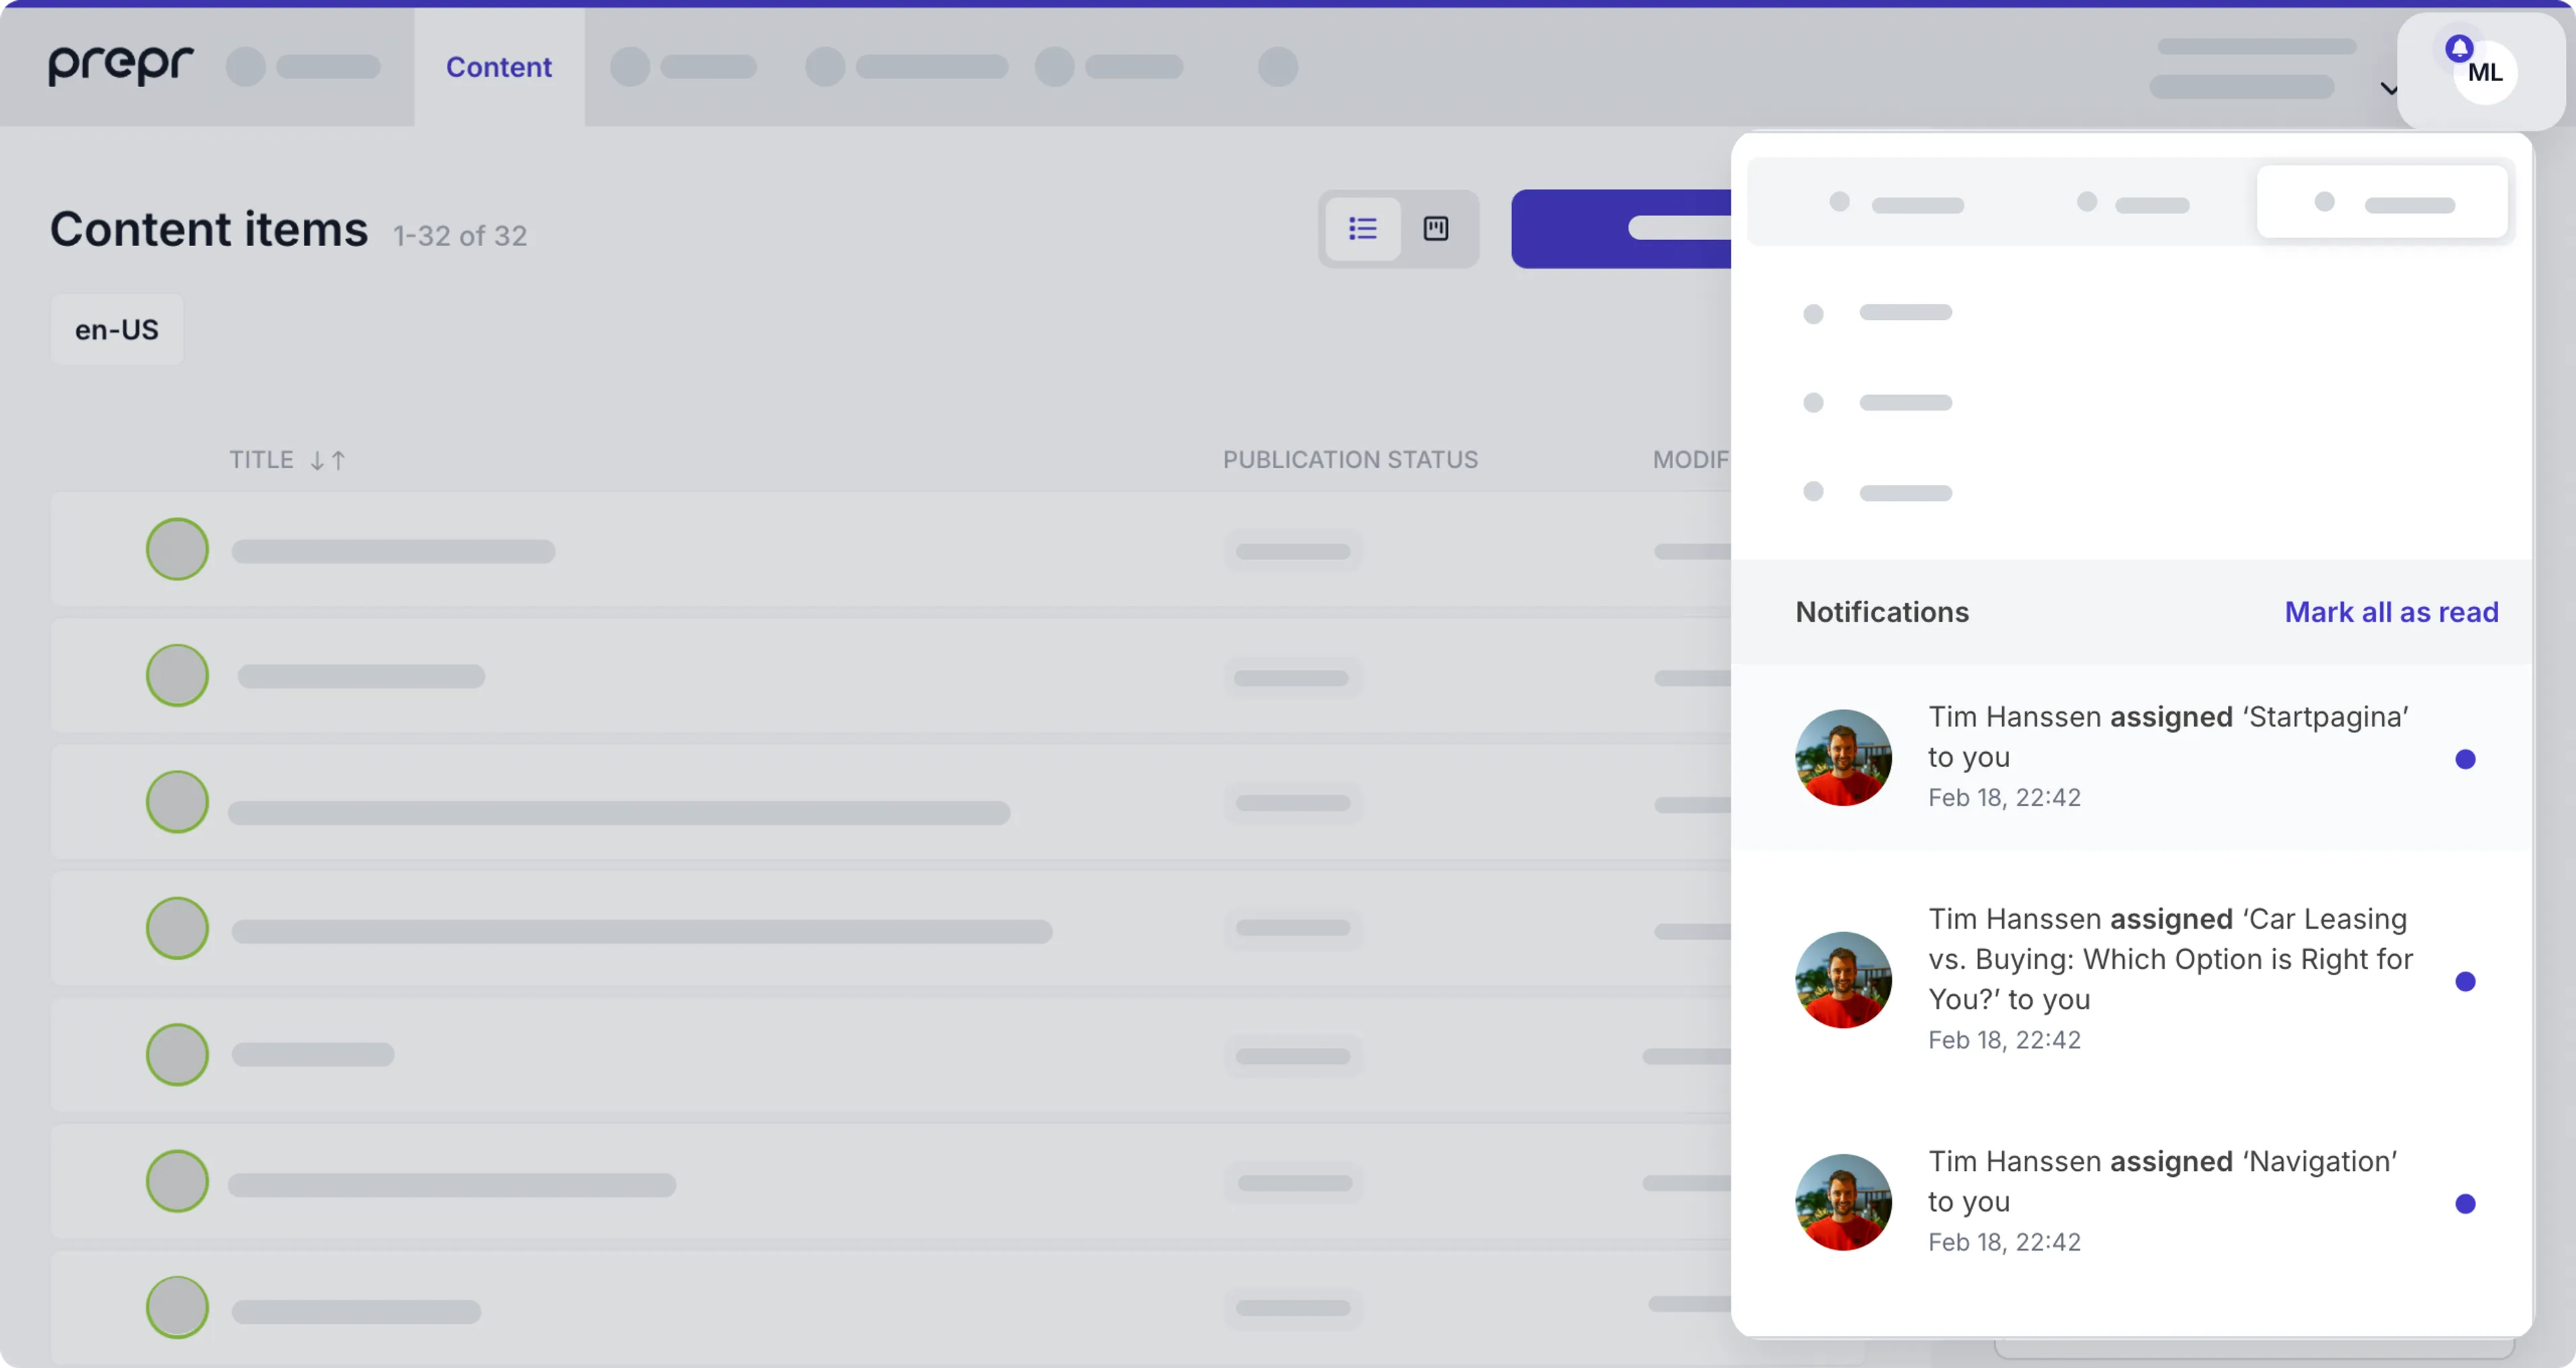
Notifications
When you assign a content item to someone else or mention them in a comment, they will receive a notification in Prepr at the top of their screen and a notification by email within a few minutes. The link in the email will lead them directly to the right content item.
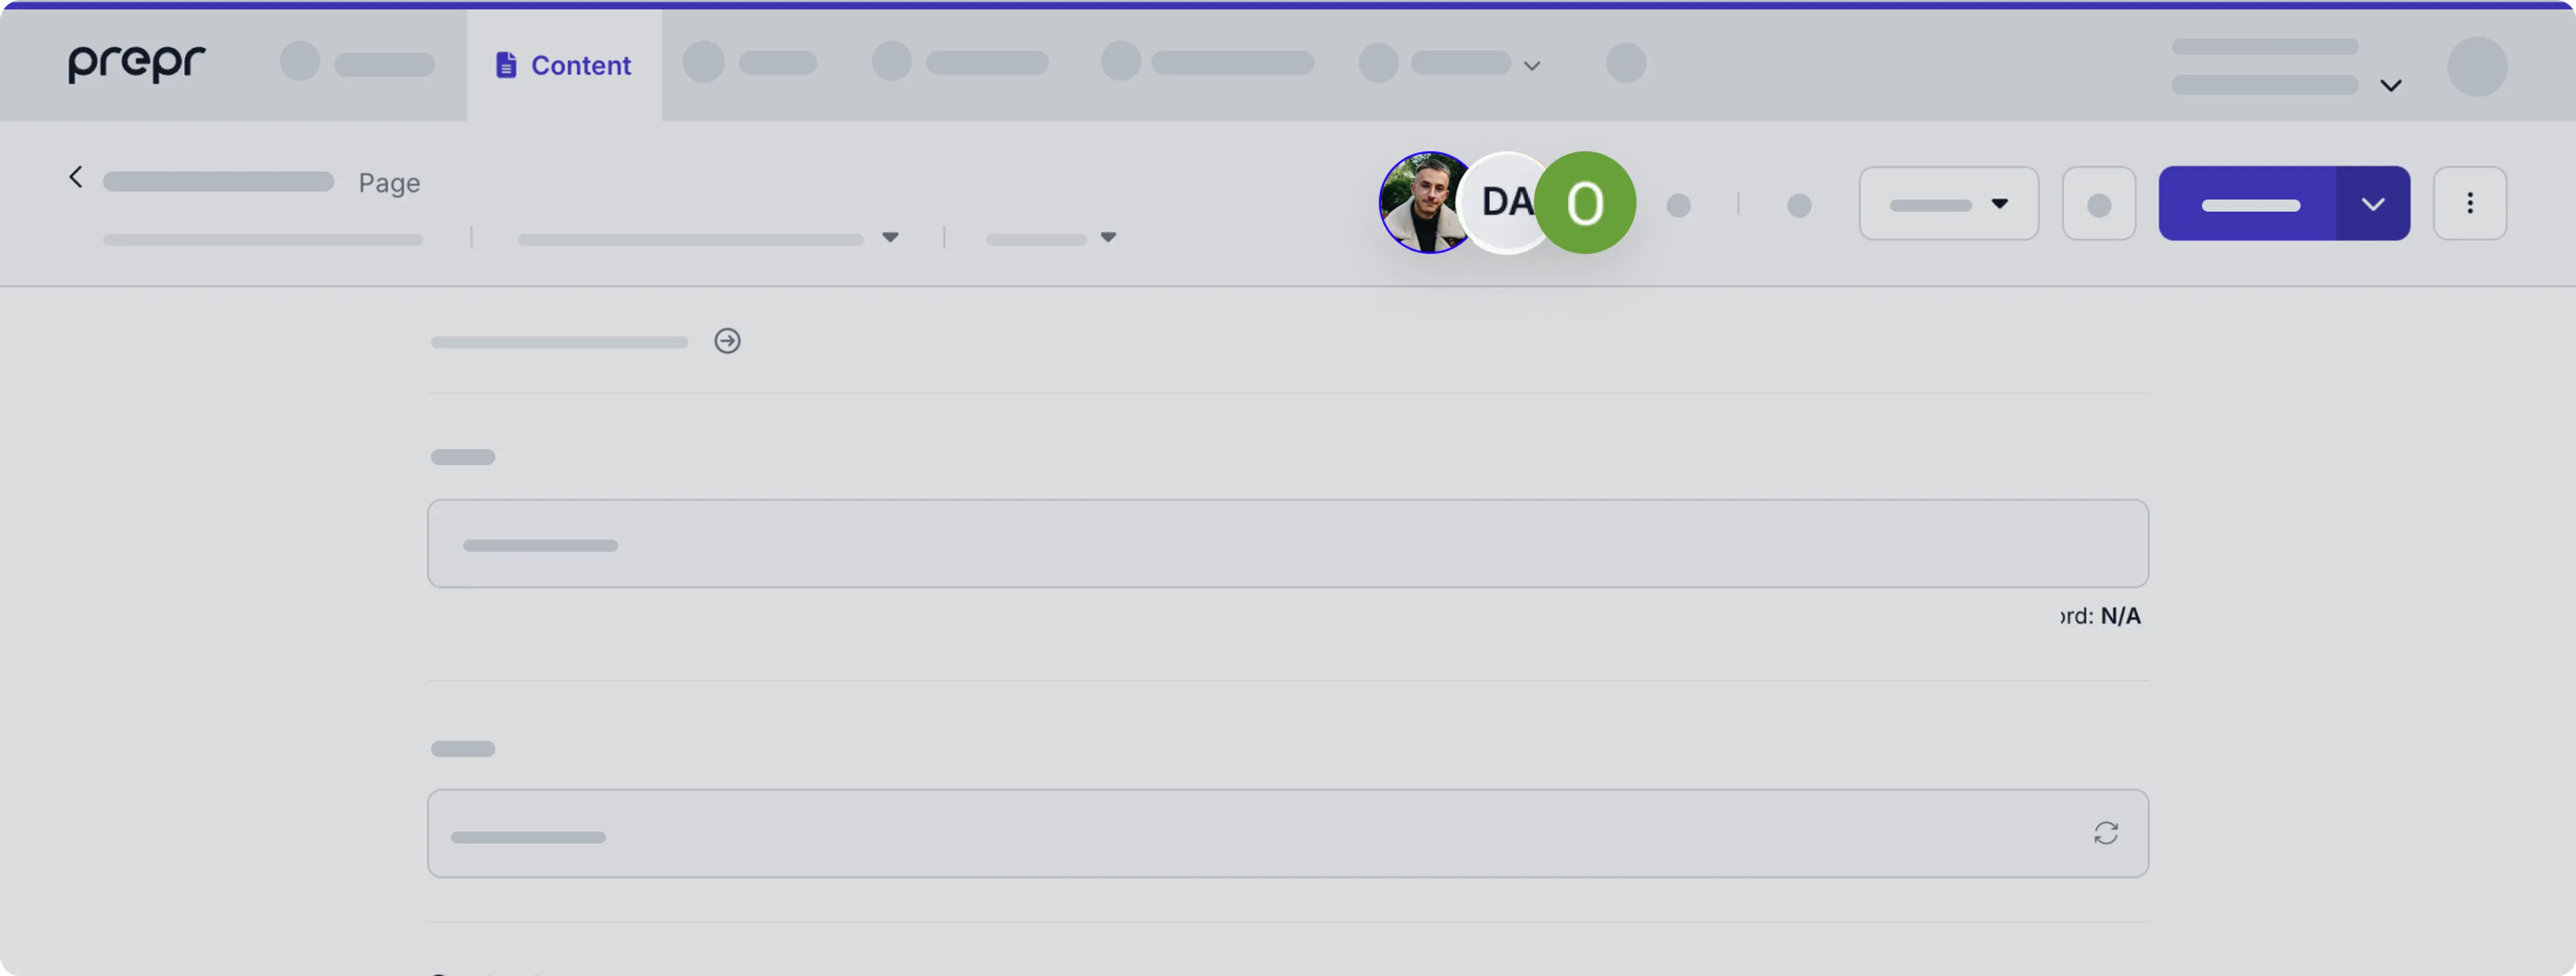
When another Prepr user starts working in the same content item as you, this will be visible above the save button.
Was this article helpful?
We’d love to learn from your feedback