Managing segments
This guide covers everything you need to know about segments including how to manage them to unlock the full potential of Prepr’s personalization features.
Introduction
Segments are groups of customers who share similar characteristics or behaviors. While Customers are any visitors who interact with your web app such as viewing, clicking, or liking content items. By creating segments, you can target different audiences, making it easier to deliver relevant content and experiences to your web app visitors.
Before creating segments in Prepr, it's important to collect customer data to identify target audiences. Check out the data collection docs for more details. If Prepr is not your primary source for customer profiles, you could use customer data maintained in an external CRM/CDP system with external segments.
Let's dive into how to build customer segments in Prepr.
Building customer segments
If you collect and store customer profiles in Prepr, you can build segments using this customer data. For example, you can segment customers based on personal characteristics such as where they live, events such as their page views or clicks, or UTM parameters such as the marketing campaign that routed them to your web app.
Let's look at a virtual car leasing company (Acme Lease) as an example. While analyzing customer data, they realize that some customers are mainly interested in electric cars. So, they create a segment with conditions to match their behavior.
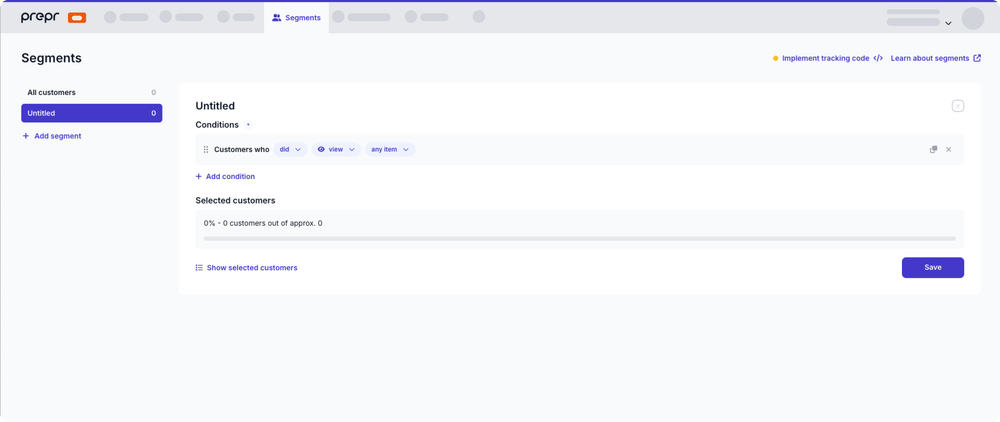
To build this segment, follow these steps:
-
Go to Segments → + Add segment.
-
Set up segment conditions. For our car leasing example, the condition could be Customers who
didviewspecific items,Landing Page Electric Car,at least once.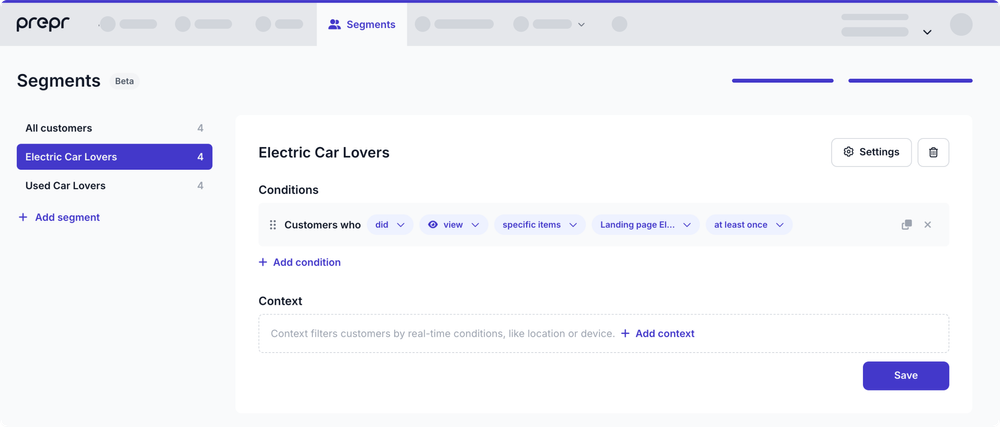
You can set up any combination of conditions in your segments for customer Events, customer Characteristics, or the customer Source. Combine conditions by using the
ANDorORlogical operators. -
If needed, you can also set up Context information, for example, to limit the segment to a device the customer uses when they interact with the personalized content.
-
Click the Save button and provide a meaningful name for the segment. The value of the API ID field will be generated automatically based on the segment name. You can update the value manually if needed, like in the case of an external segment.
-
Click Save.
Now that you've seen how to create a segment, let's look at the filter options in more detail to help you set up Conditions and the Context for your segments.
Conditions
When you set up conditions to build your segments, there's an extensive list of Filter options available. The filter options are grouped into customer Events, customer Characteristics and the customer Source. Let's look at these options in more detail.
Customer events
Customer Events refer to how the customer interacted with content items rendered by your web app, such as Viewed, Liked, Clicked, Bookmarked, and Subscribed. You can also choose a Custom event for any other event specific to your segmentation needs.
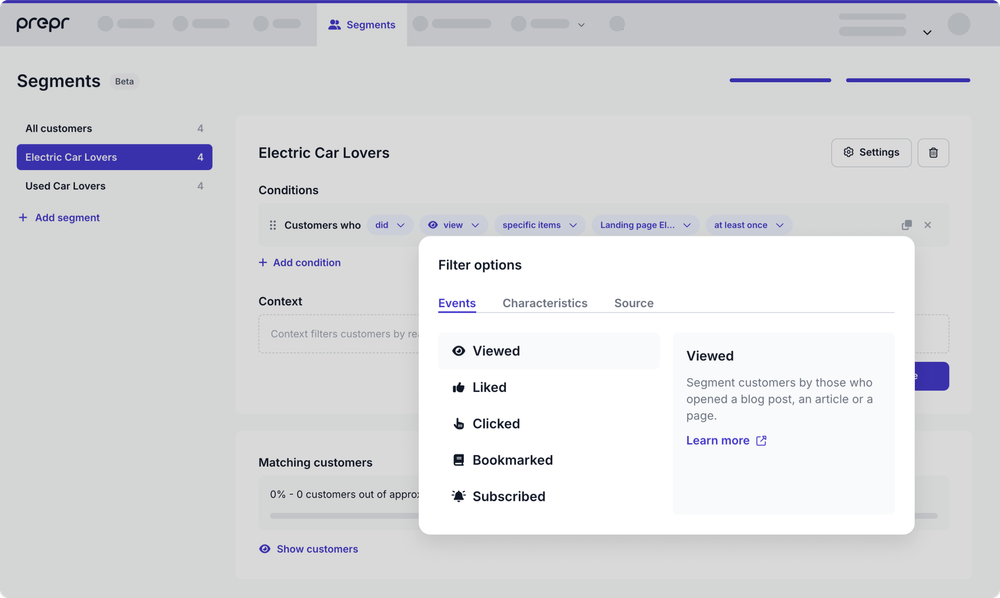
These events need to be recorded from the front end to segment the customers accurately. Once these events are recorded, Prepr automatically adds those customers to your segments according to the Event conditions you set up.
Content item selection
You can choose from the following list of options to define the set of content items that you want to include in the condition.
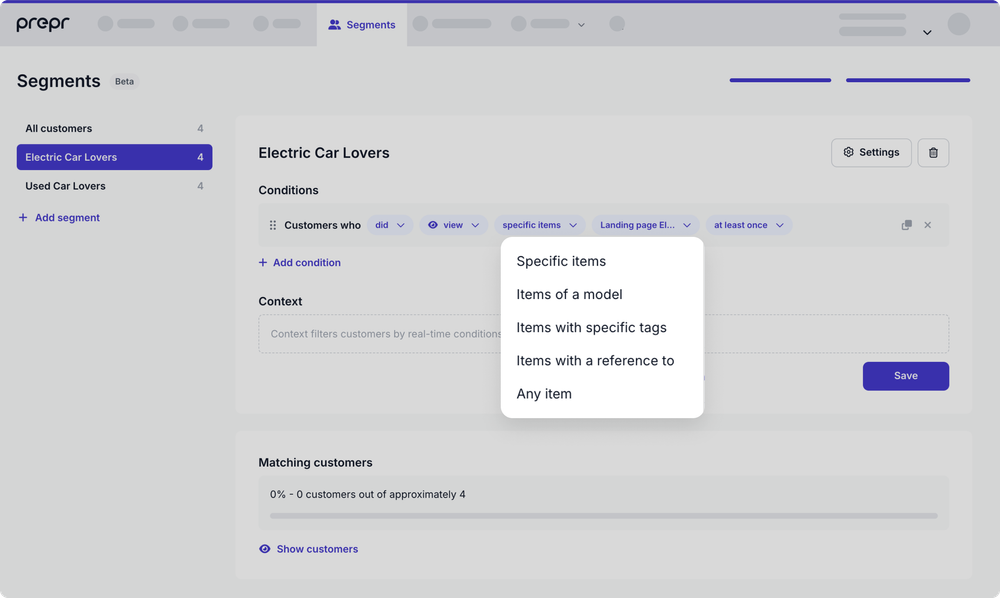
- Any item - The default option. Include customers who performed events on any content item.
- Specific items - Only include customers with events on one or more specific content items. Choose the content item by its Title for this option. For example, Customers who
didviewspecific itemsLanding Page Electric Carat least once. - Items of a model - Only include customers with events on content items for this model. For example, Customers who
didviewitems of a modelArticleat least once. - Items with specific tags - Only include customers with events on content items with one or more tags. For example, Customers who
didviewitems with specific tagsArticleat least once. - Items with specific reference to item - Only include customers with events on content items linked to specific content items. For example, Customers who
didviewitems with a reference toJohn Smithat least oncecan group customers who viewed articles written by the person, John Smith.
When adding a new condition for an event, the did action is selected by default.
You can also choose the did not action, instead.
For example, Customers who did not view items of a model Article at least once.
Frequency options
You can narrow your condition by specifying how many times an event occurred. Use one of the following options:
- At least once - The default value.
- x number of times - The event must occur exactly x times where x is a whole number.
- More than x times - Only include events that happened more than x times where x is a whole number.
- Less than x times - Only include events that happened less than x times where x is a whole number.
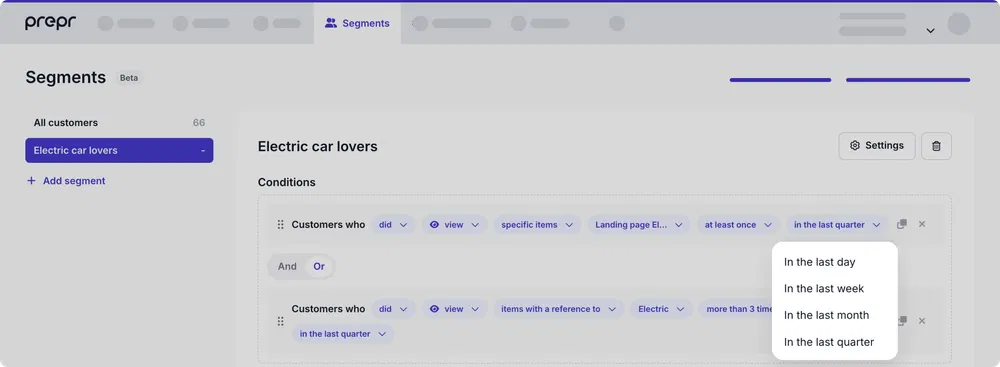
Time filter
You can narrow your condition to only include customers with recent activity (Events) by specifying when last the customer interacted with a content item. You can choose from one of the time filters below.
- In the last day
- In the last week
- In the last month
- In the last quarter (The default value)
Customer characteristics
The customer Characteristics are based on data stored in the customer profile. Check out more details on how to manage customer data.
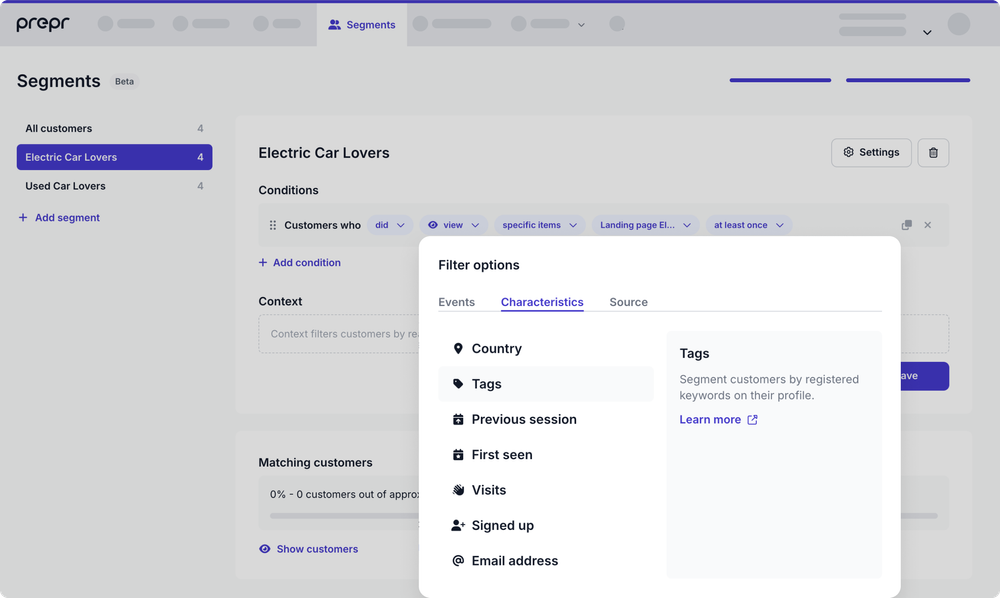
Let's look at each of the characteristics in more detail.
Country
You can choose the Country option to define the customers by where they live. For the actions below, Prepr uses the Country in the customer profile to match the criteria.
- Did visit from - For example, Customers who
didvisit fromNetherlands. - Did not visit from - For example, Customers who
did notvisit fromUnited States.
Tags
Segment customers by one of the keywords (tags) on their profile.
For example, you can choose Customers who are tagged with Employees or Customers who are not tagged with VIP.
Check out more technical details on how to record these customer properties from your front end.
Previous session
Choose one of the time filter options to segment customers by when they last visited the web app.
- In the last # days/weeks/months - For example, Customers whose
previous session wasin the last 2 weeks. - Before
{date}- For example, Customers whoseprevious session wasbefore 7 oct 2024. - After
{date}- For example, Customers whoseprevious session wasafter 1 aug 2024. - Between
{date}and{date}- For example, Customers whoseprevious session wasbetween 25 jul 2024 and 1 aug 2024.
First seen
Choose one of the time filter options to segment customers by when they first visited the web app.
- In the last # days/weeks/months - For example, Customers who
were first activein the last 2 weeks. - Before
{date}- For example, Customers whowere first activebefore 7 oct 2024. - After
{date}- For example, Customers whowere first activeafter 1 aug 2024. - Between
{date}and{date}- For example, Customers whowere first activebetween 25 jul 2024 and 1 aug 2024.
Visits
Choose one of the options to segment customers by how many times they visited the web app.
- # times - For example, Customers who
visited5 times. - More than # times - For example, Customers who
visitedmore than 10 times. - Less than # times - For example, Customers who
visitedless than 3 times.
Signed up
Segment customers by who've signed up or not signed up. Check out the data collection docs for more details on recording this customer event in Prepr.
Email address
You can include customers that have or don't have an email address.
Customer source
The customer's Source includes campaigns and referrals from which a customer was redirected. See a complete list below for available options and corresponding examples.
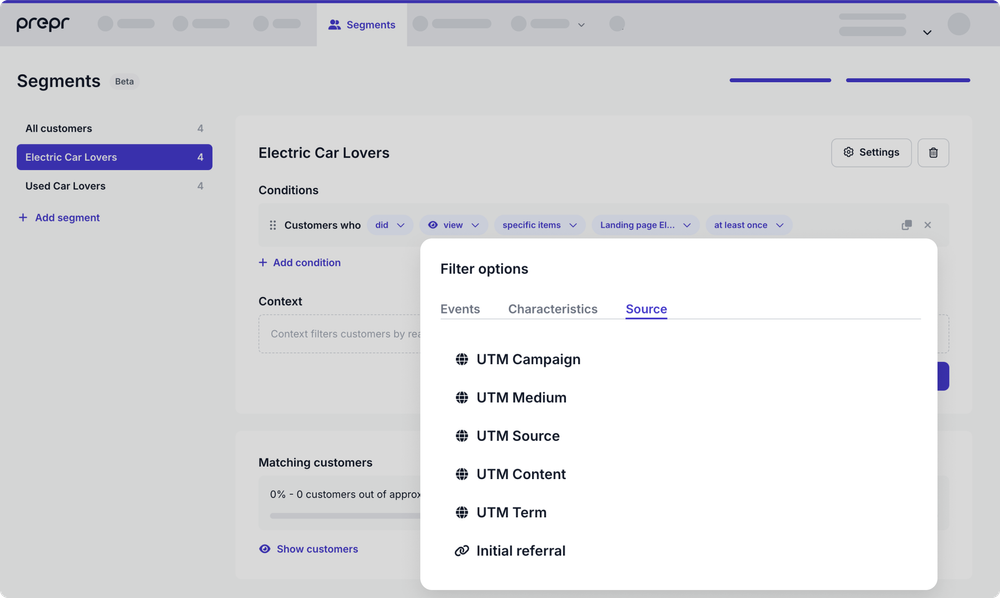
Campaigns
Choose one of these campaign sources to segment customers by a campaign that redirected them to your web app.
- UTM Campaign - Customers who
have entered throughUTM Campaignsummer_car_lease_promo. - UTM Medium - Customers who
have entered throughUTM Mediumemail. - UTM Source - Customers who
have entered throughUTM Sourcenewsletter. - UTM Content - Customers who
have entered throughUTM Contentno_comms_button. - UTM Term - Customers who
have entered throughUTM Termcar_lease_deals.
For each of these campaign options, you can choose the not action instead.
For example: Customers who have not entered through UTM campaign summer_car_lease_promo
Referrals
You can group customers that land on your web app from another website.
- Inital referral - Customers who
are visiting through a referral domainhttps://topautorev.com.
Now that you know how to set up conditions for your segments, let's look at the options you can choose for the Context.
HubSpot
With this condition you can group customers who belong to a segment defined in HubSpot, for example, for a HubSpot list based on contacts who are marked as leads.
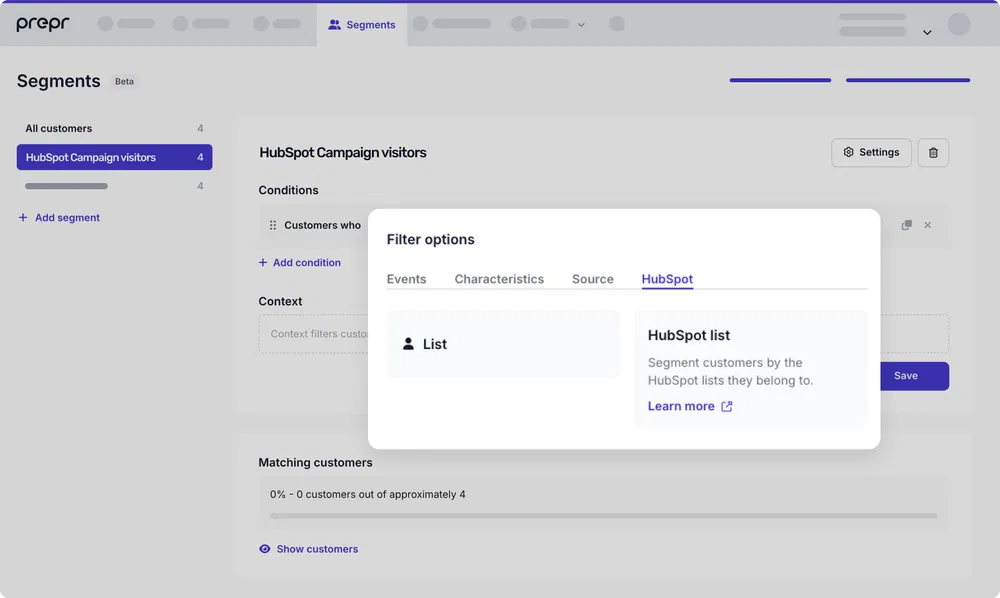
Check out the HubSpot doc on how to activate the integration.
Dealfront
With this condition you can group B2B customers who belong to a segment defined in Dealfront, for example, for visitors from the Retail or Manufacturing industries or to specifically target small to medium companies.
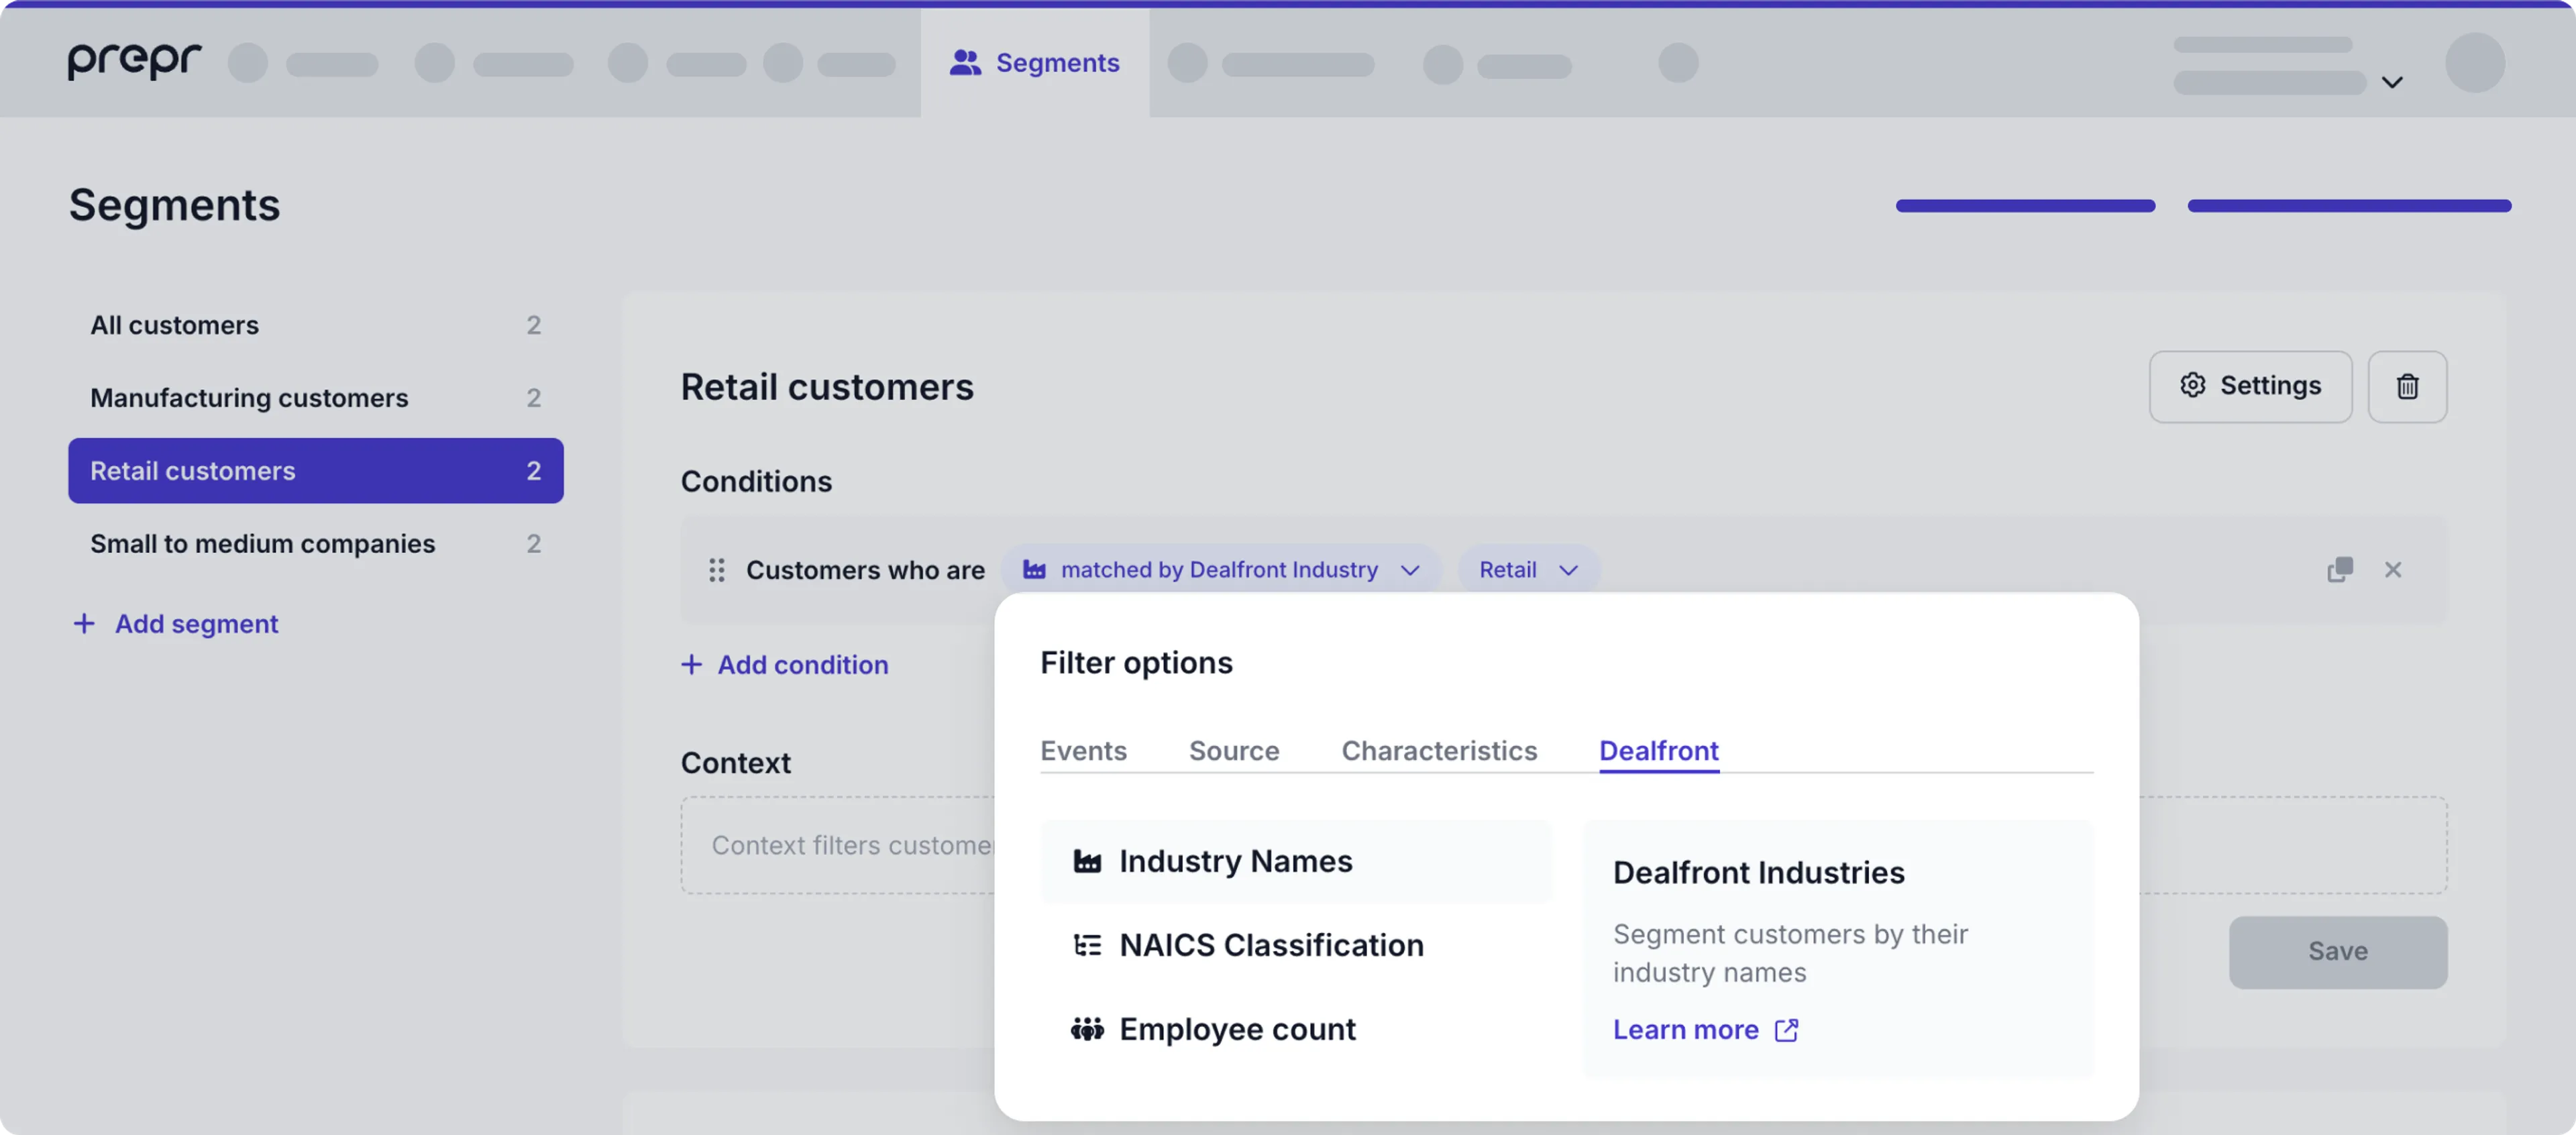
Check out the Dealfront doc on how to activate the integration.
Context
In addition to the conditions, you can also define a current context for the segment. The Context of a segment includes current info about the customer when they interact with personalized content. You can select the options below to define a Context.
Current country
You can define the segment in the context of the country that the customers are currently visiting the web app from. For example, Customers who are currently visiting from United States.
Current device
You can define the segment in the context of the device that the customers are currently using or not currently using.
For example, Customers who are currently using a mobile device or Customers who are not currently using a mobile device.
HTTP header
You can define the segment in the context of an HTTP header value, such as the web app version the customers are currently using.
For example, Customers who are currently requesting with HTTP header APP-Version is greater than 1.
Semantic versioning (SemVer)
You can add conditions with semantic versions to compare more accurate version numbers like 1.0.3.

The is greater than x condition includes the x value you enter.
While, the is less than x condition excludes the x value you enter.
Current Day
You can define a segment by the current day that a customer visits.
For example, Customers who are visiting on Saturday or Sunday to target weekend visitors.
Current Time
You can define a segment by the current time that a customer visits.
For example, Customers who are visiting between 06:00 and 12:00 to target morning visitors.
Now that you know how to build segments, you're ready to manage your adaptive content. Check out the Managing adaptive content guide for more details.
Using external segments
If you manage your customer segments in an external system such as a CRM/CDP system and want to use them in Prepr, you can create segments that reference those external segments as follows:
-
Go to Segments → + Create segment. You'll notice that a default condition is partially filled.
-
Click the x icon to delete the condition and enter a name for the segment.
-
Go to Settings button at the top of the segment.
-
Copy and paste the segment unique identifier from your CRM/CDP system to replace the automatically generated API ID value in Prepr.
This unique identifier may contain the following characters: A-Z, a-z, 0-9, hyphens, underscores, and spaces and has to be at least 3 characters long.
-
Provide a meaningful name for the segment.
-
Click the Save button.
-
Repeat the previous steps to add as many segments as needed.
This setup will work as a reference to the segment created in the external system, so you don't need to specify any conditions for this segment in Prepr.
External segments can only be used to personalize content with Prepr. You need customer data registered in Prepr to run A/B testing.
What’s next?
Follow our Managing adaptive content guide to immediately start delivering a personalized customer experience to your website app visitors.
Was this article helpful?
We’d love to learn from your feedback