Sync schemas between two environments
This guide shows you how to update one schema with the other, for example, when you have a development and production environment with the same schema that is out of sync.
Introduction
In the event that you have separate environments, for example, Development, Testing, Acceptance, and Production, you may need to sync the schemas in these environments. You can do this automatically by running a schema sync in Prepr.
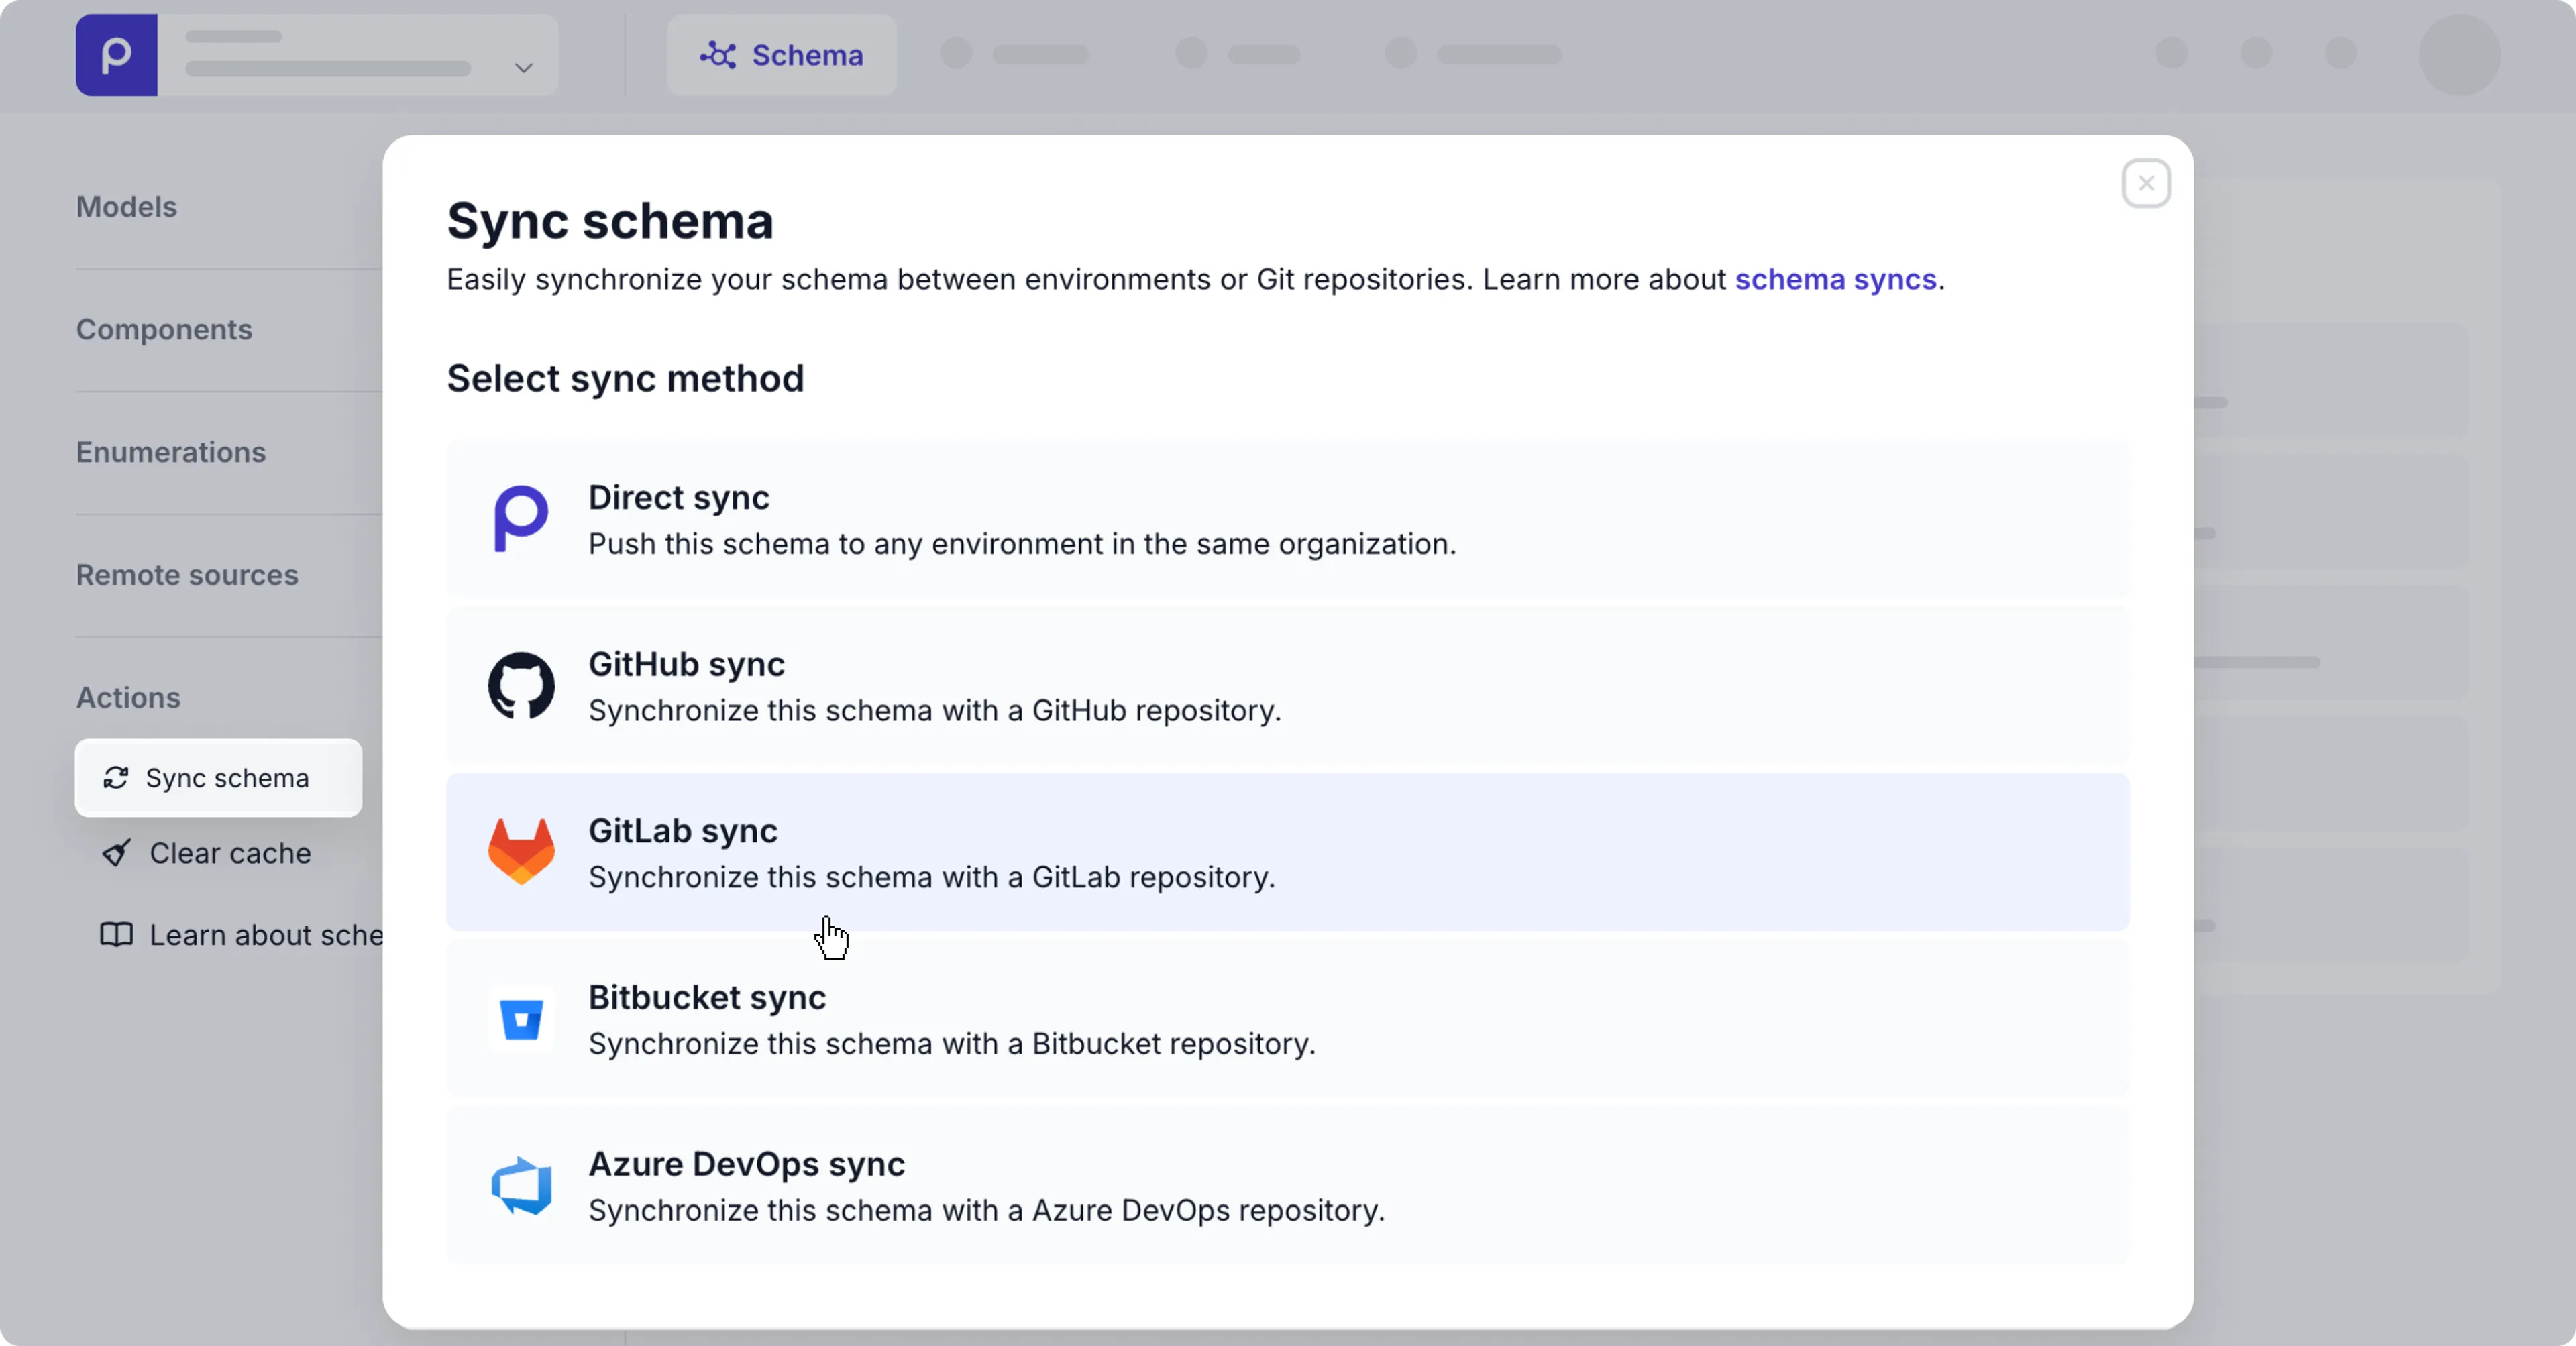
There are a few schema sync processes you can choose from:
- Direct schema sync - Use this process to directly compare and sync your schema between two environments in the same organization.
- GitHub schema sync - Export to a GitHub repository or import from a GitHub repository to keep your schema in sync between environments.
- GitLab schema sync - Export to a GitLab project or import from a GitLab project to keep your schema in sync between environments.
- Bitbucket schema sync - Export to a Bitbucket repository or import from a Bitbucket repository to keep your schema in sync between environments.
- Azure DevOps schema sync - Export to a Azure DevOps repository or import from a Azure DevOps repository to keep your schema in sync between environments.
Use cases
See the following use cases for when you may need to synchronize your schema:
-
Sync production to development An example DTAP strategy is to maintain the schema in the Production environment and when the same content structure is needed for realistic test cases this schema needs to be copied to the Development, Test, or Acceptance environment. Learn more on how to set up a DTAP configuration.
-
Sync development to production After testing your development on the latest schema version in the Development or Test environments, it’s possible that you may need to make changes to the live schema. In this case, you could copy these changes to the Production environment.
-
Share a schema between environments Use the Shared schema feature to maintain one schema across multiple environments, for example, for multiple brands. Check out more details in the environments doc. A schared schema can also be imported from GitHub or GitLab or exported to GitHub or GitLab. This could be useful for agencies when you want to do testing with client’s shared schema in your own organization instead of in the client organization.
Prerequisites
You need to have a role, such as the Developer or Admin role, with the Schema permission enabled to have access to the Sync schema action. If you need to sync a shared schema, then you need the Organization *Schema permission enabled. Check out roles and permissions in Prepr for more details.
Direct schema sync
Use the direct schema sync process if you choose not to use an external service like GitHub sync, GitLab sync, Bitbucket sync, or Azure DevOps. The direct schema sync needs no external tools, whereas using an external service gives you more flexibility and the added benefit of version control.
Note the list of constraints below before triggering the direct schema sync process.
Constraints
-
This process only works between environments in the same organization.
-
Models in your target environment will be overwritten with the models from the current environment if their Singular names match. Fields will be added or deleted to match the updated structure.
Even if a model has the same Name, but different Singular name in the current and target environments, it’s treated as a new model for the target environment. To ensure models are matched and updated successfully make sure the Singular name matches.
- Components, enumerations and remote sources in your target environment will be overwritten with the components, enumerations and remote sources from the current environment if their Type name values match. Fields will be added or deleted to match the updated structure.
Even if a component, enumeration or remote source has the same Name, but different Type name in the current and target environments, it’s treated as a new component, enumeration, or remote source for the target environment. To ensure they are matched and updated successfully make sure the Type name matches.
- Models, components, enumerations or remote sources that are not in the current environment, but present in the target environment will be deleted if they are unused.
Once the sync has finished successfully, the changes cannot be undone. Make sure to preview the changes carefully for any discrepancies before confirming the schema sync.
The process below shows you how to sync your schema from one environment (current environment) to another (target environment).
Choose the source schema
First, decide on the source schema and navigate to the environment in which it was created. This will be your current environment. For example, if you want to copy your Development schema to Production, navigate to the Development environment.
Run the schema sync process
Once you’ve opened the chosen environment with the source schema, do as follows:
-
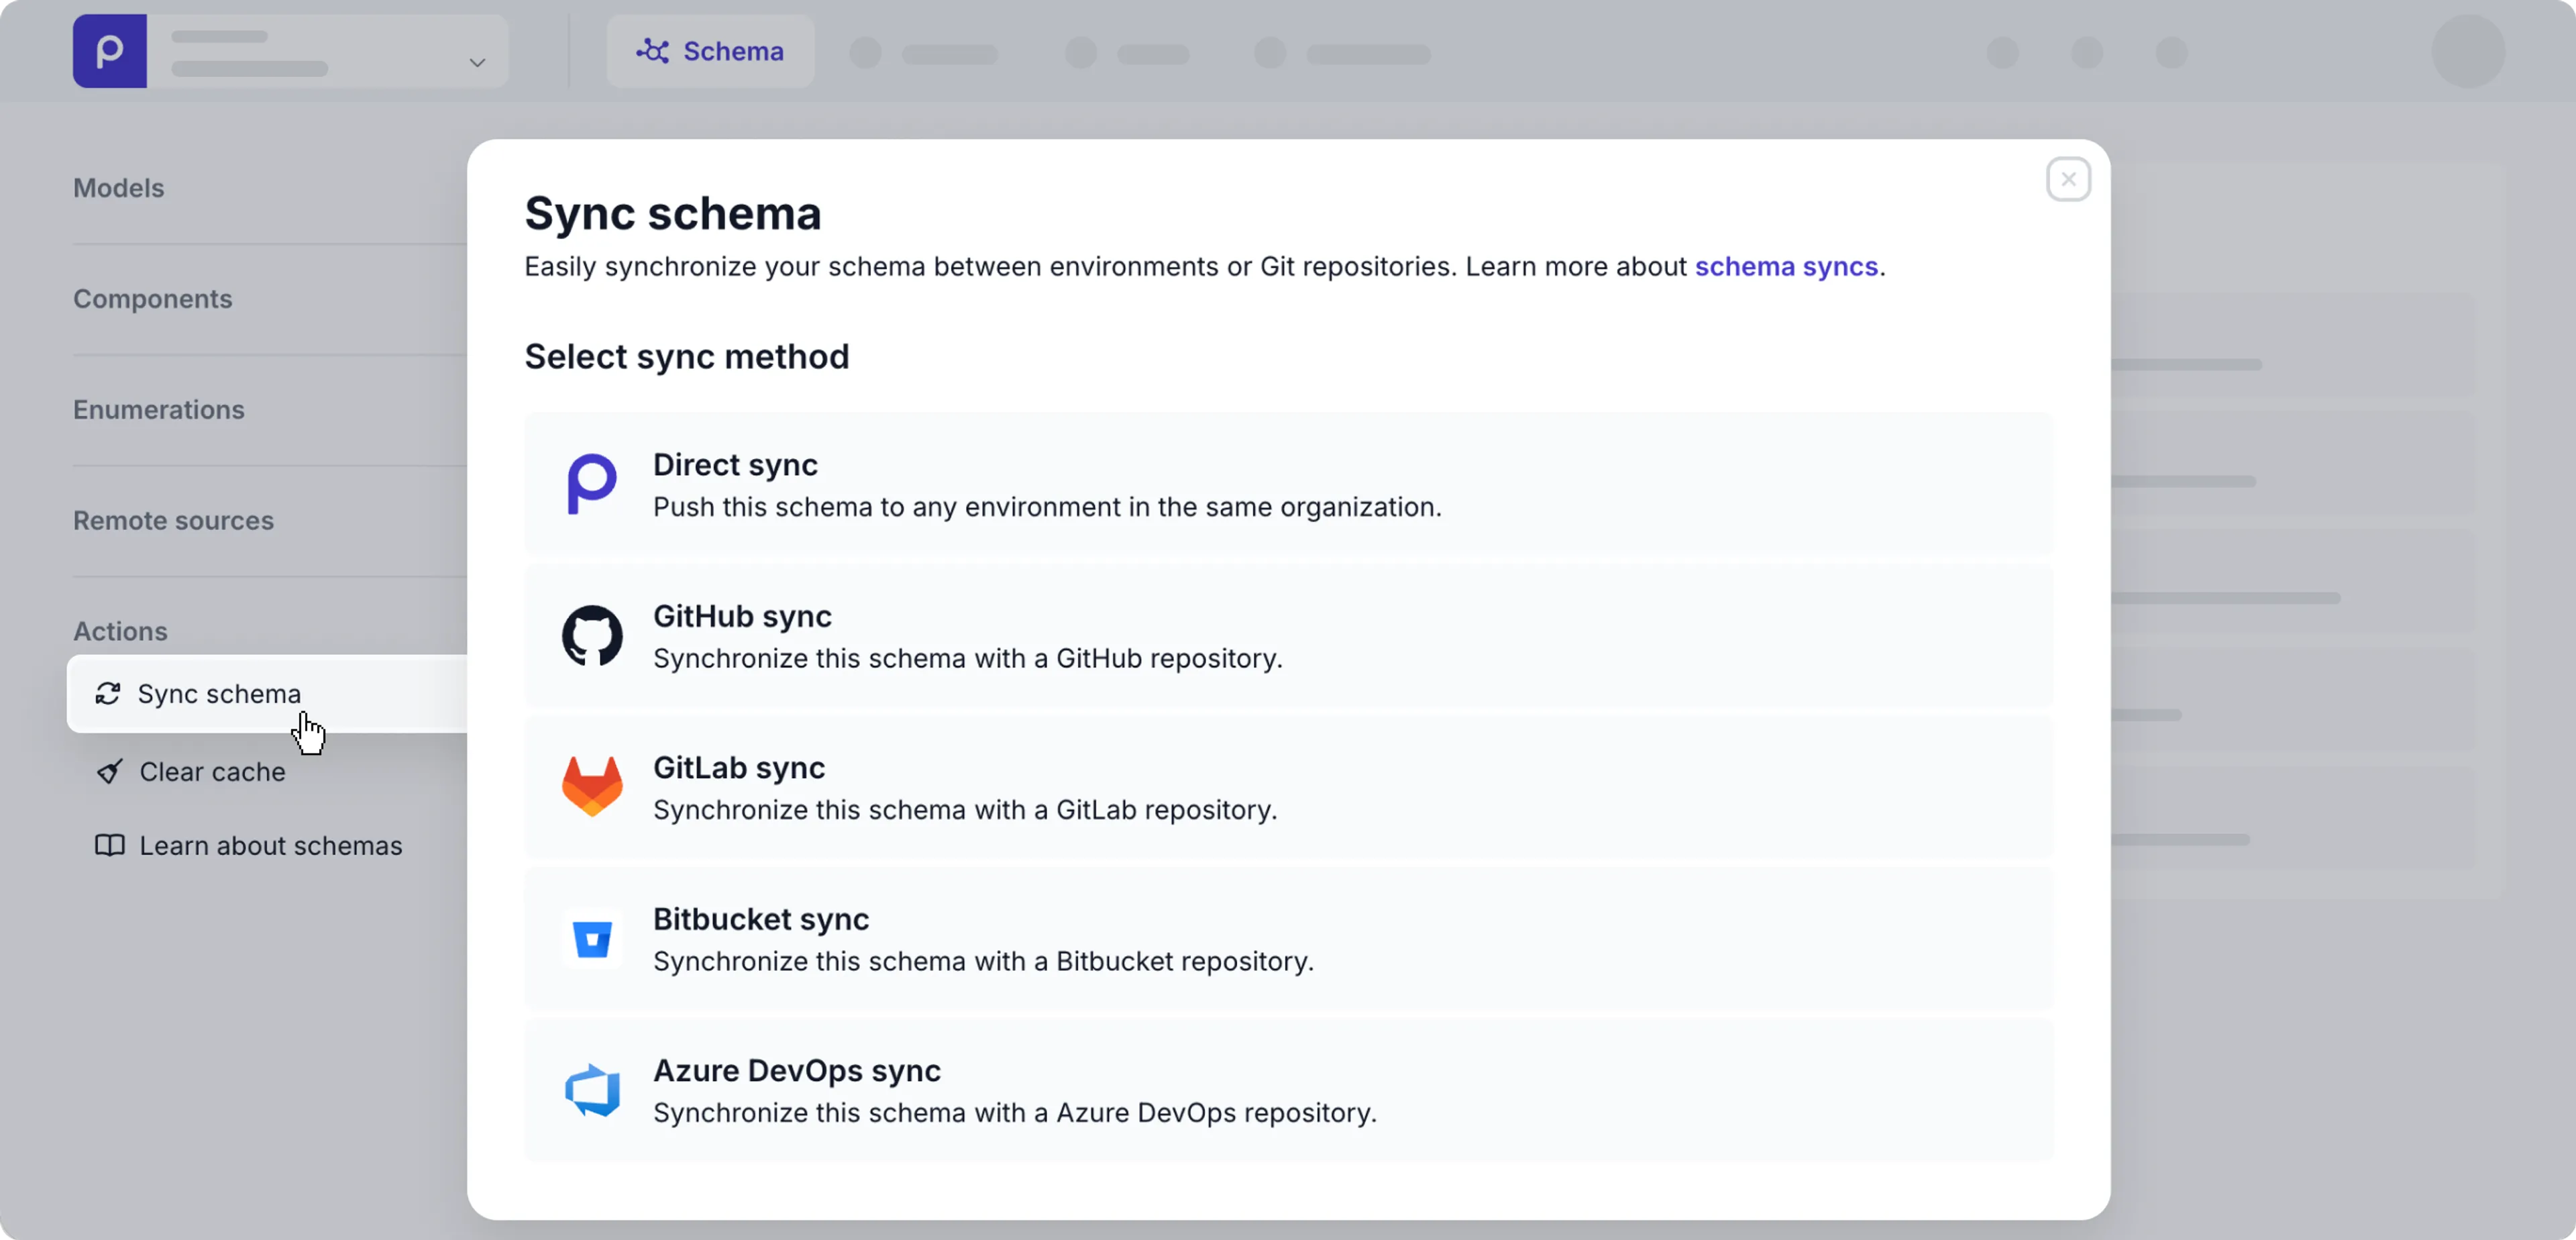
Go to the Schema tab and click the Sync schema link in the Actions section at the bottom left.
-
Choose the Direct sync option to start the process.
Preview URLs and remote source URLs, headers and images domains will be set when the destination values are blank, otherwise they will remain untouched.
-
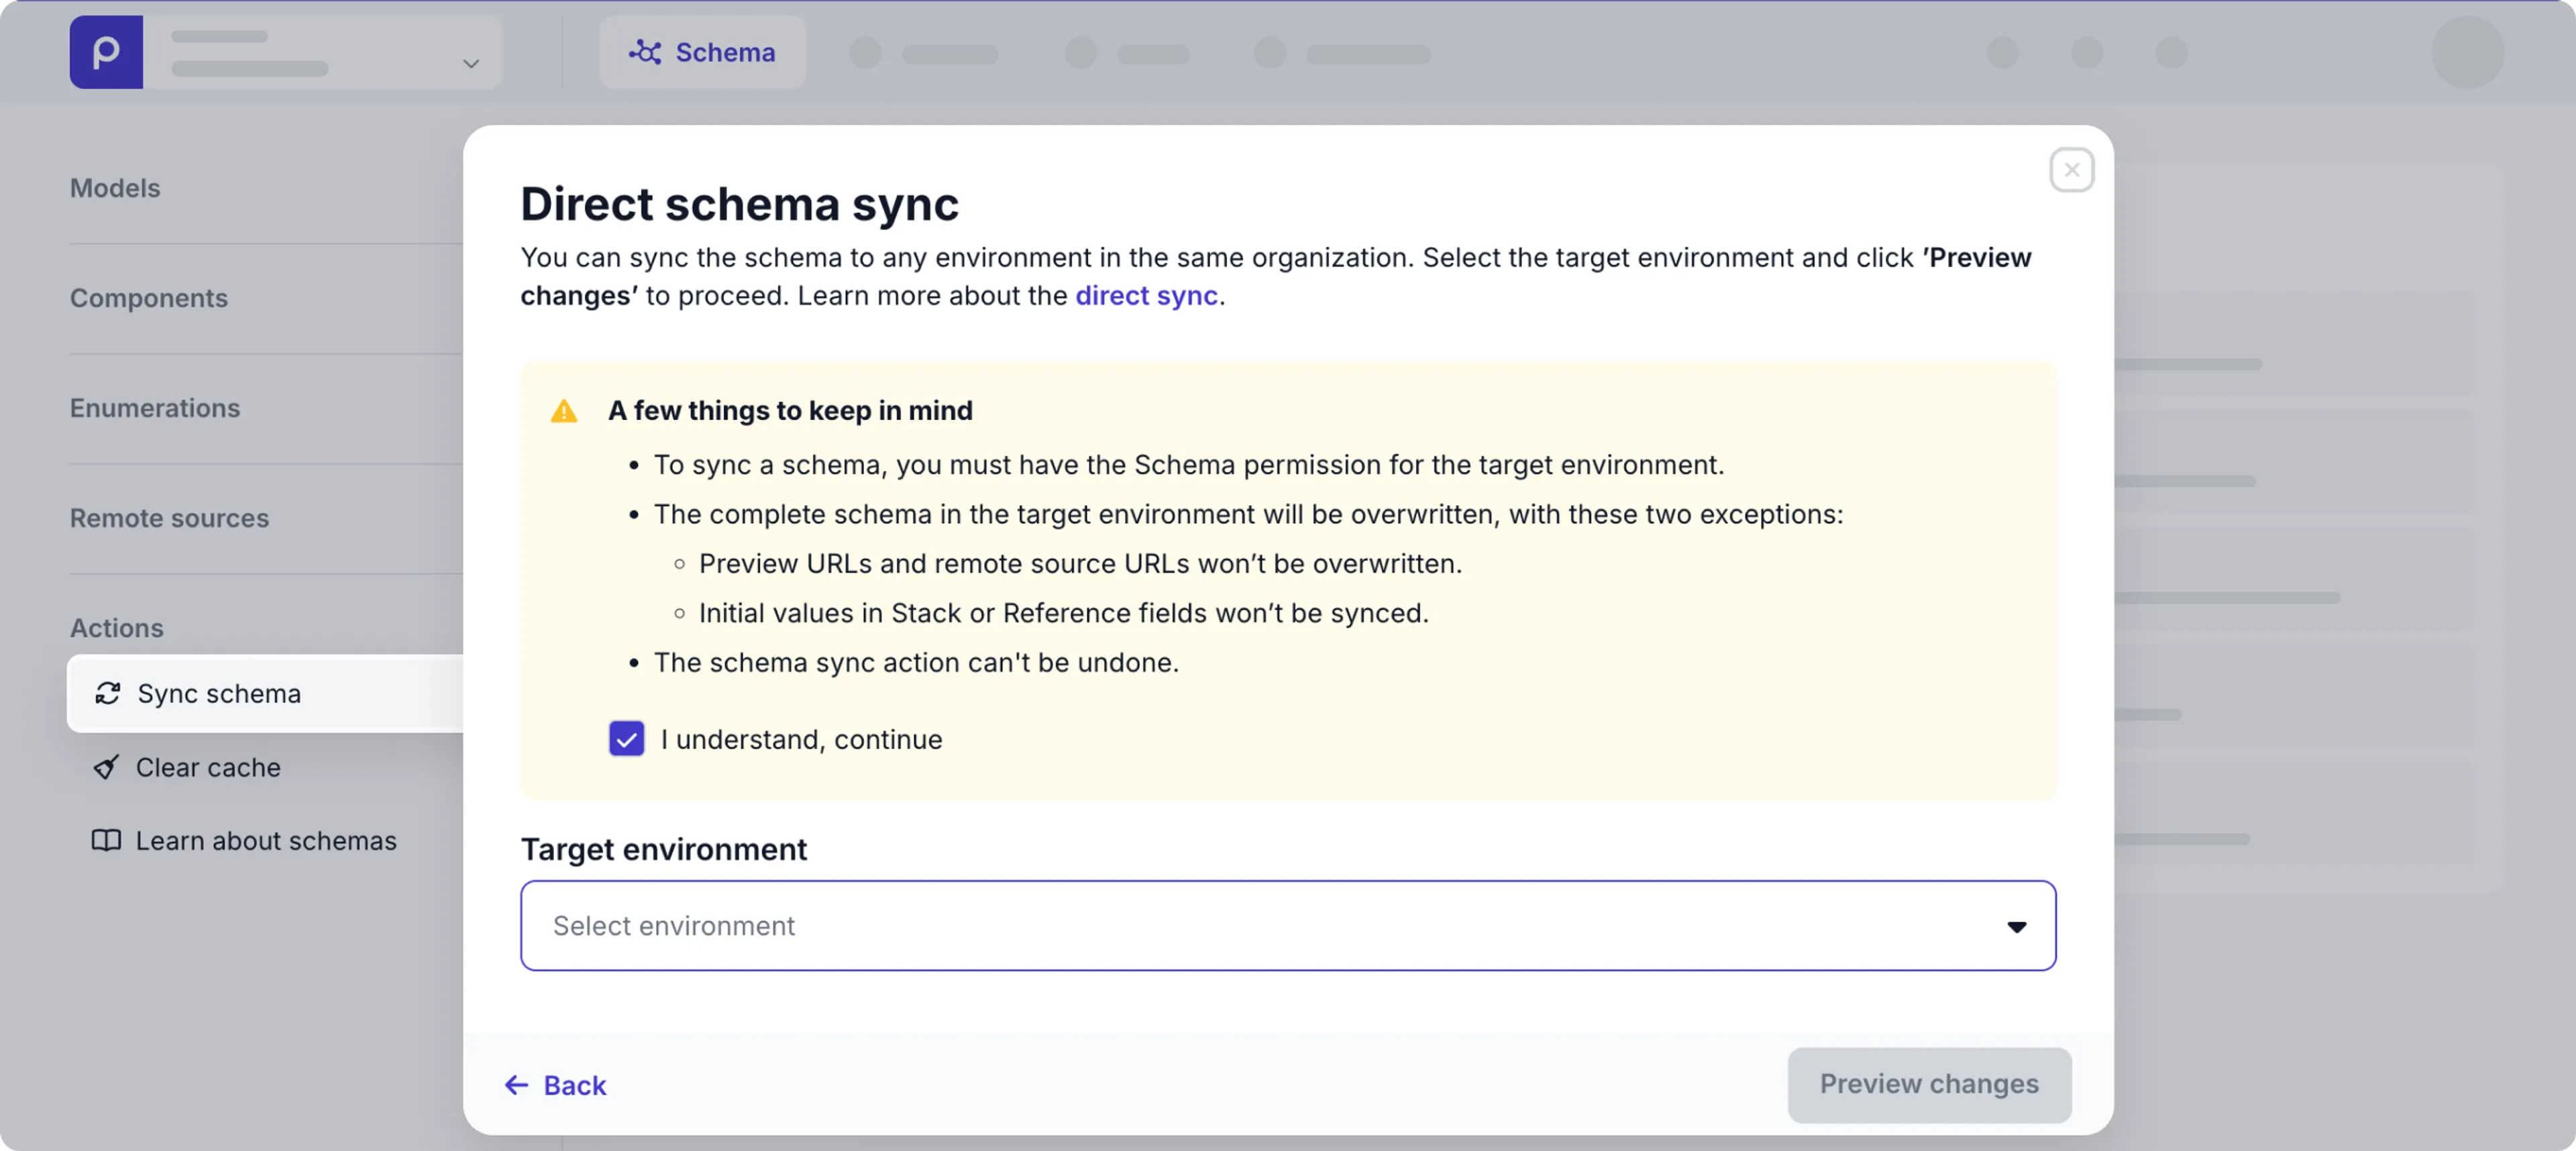
Review the conditions before checking the I understand, continue checkbox. Then, select the Target environment you want to sync your schema to. Here you can only choose an environment in the same organization.
-
Click the Preview changes button to review the upcoming changes.

-
To see specific differences in JSON, expand the model, component, enumeration or remote source and click an item in the list.
-
When you’re happy with the upcoming changes, click the Sync schema button to start the sync process.
Check the result
After the sync is done, you’ll get a Sync completed status message.
Click the See sync overview link to open an overview of the changes made.
You can then confirm the models, components, enumerations and remote sources that were added, updated or deleted by navigating to your target environment.
That’s it! You‘ve successfully synchronized the schema from your current environment to the target environment.
GitHub schema sync
The process below shows you how to connect to your GitHub account and sync a schema using a GitHub repository.
Generate a personal access token
To use a GitHub repository to sync schemas, follow the steps below to create a personal access token in your GitHub account.
- Log in to your GitHub account and follow the GitHub docs to create a repository and necessary branches to manage your Prepr schema.
- In your GitHub account, click your profile photo to expand the sidebar menu on the right, and click the Settings link.
- From the side menu on the left, go to Developer Settings at the bottom.
- Expand the Personal access tokens option and click the Fine-grained tokens link.
- Click the Generate new token button, enter a Token name (Max. 40 characters) to indicate the purpose of the token like
Prepr schema syncand select an Expiration for the token. - Under the Repository access section, choose the Only select repositories option and choose the repository you created earlier.
- Under the Permissions section, click the + Add permissions button, scroll down and select the Contents option. Make sure to select an access level of Read and write.
- Click the Generate token button and make sure to copy the generated token and save it somewhere safe. The token value will only be visible once.
Once done, you are ready to connect to your GitHub repository from Prepr CMS.
Connect to GitHub
The next step is to connect the Prepr CMS environment or organization to your GitHub account with the steps below.
You can enable the GitHub sync for each environment by either activating the GitHub option on the Integrations page or via the Schema page as detailed below.
-
Navigate to each Prepr environment or organization where schemas need to be synced.
-
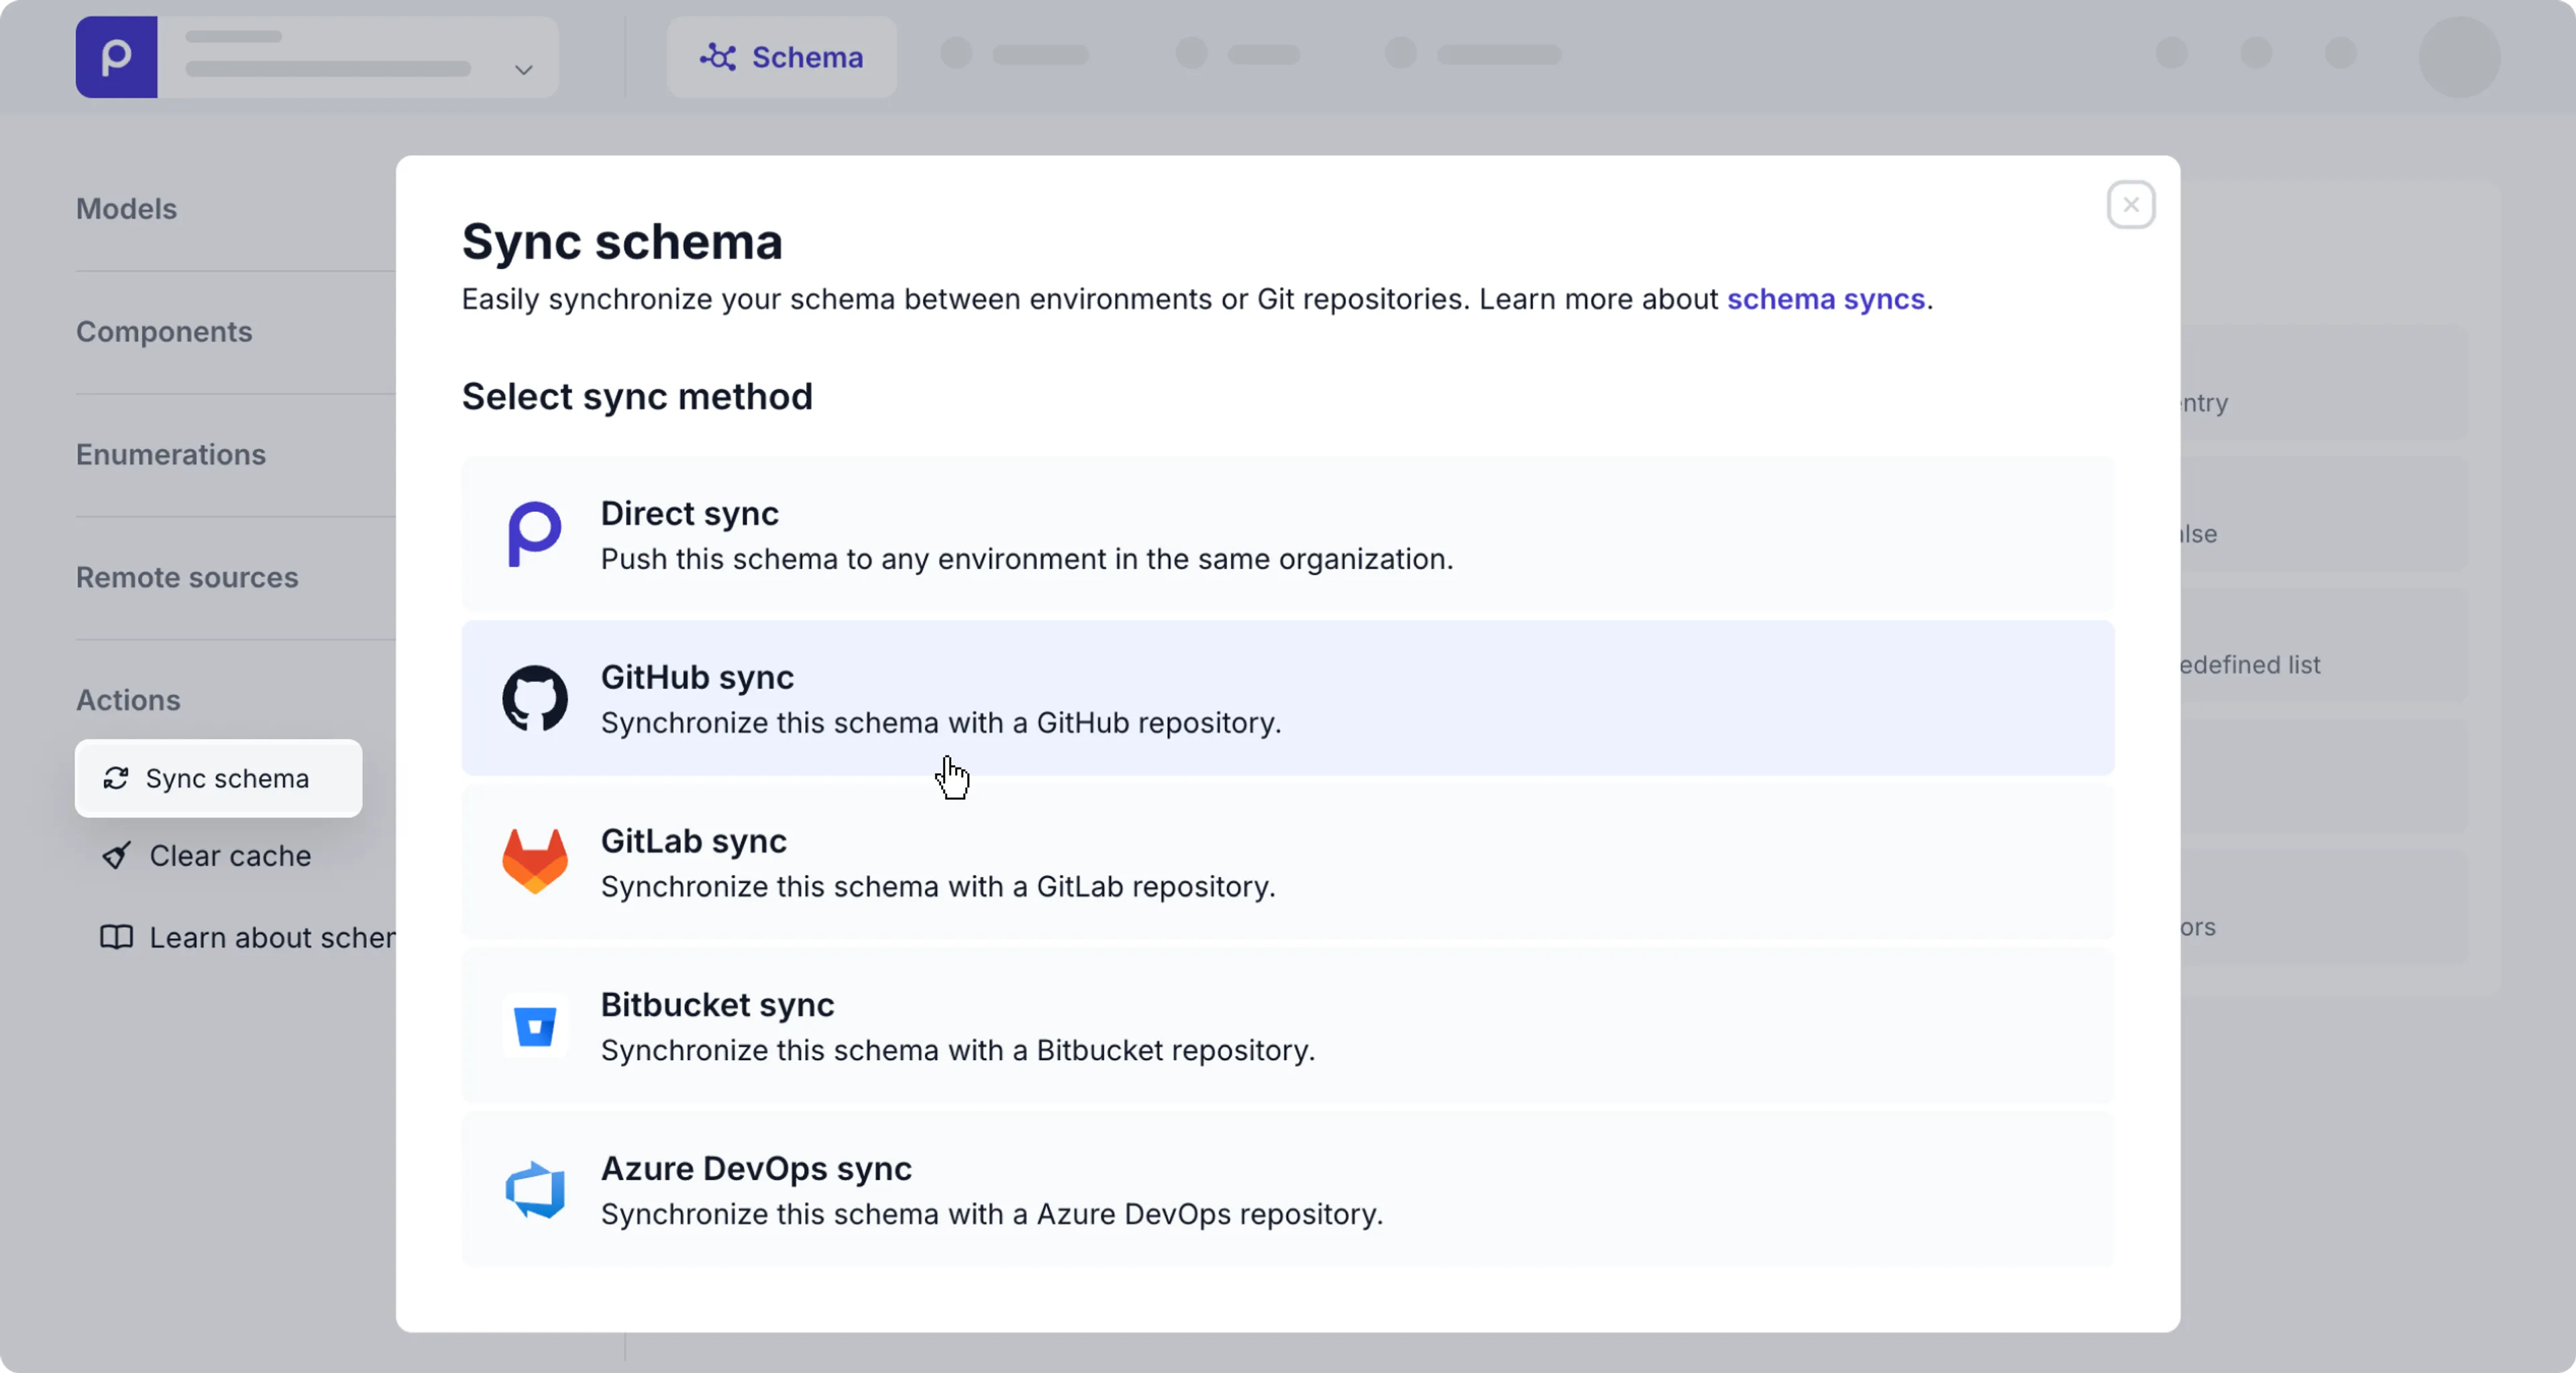
Go to the Schema tab in the environment or the Shared schema tab in the organization and click the Sync schema link in the Actions section on the bottom left of the page.
-
Click the GitHub sync option and sign in to your GitHub account, if you are not yet signed in. Once signed in, an input screen appears.
-
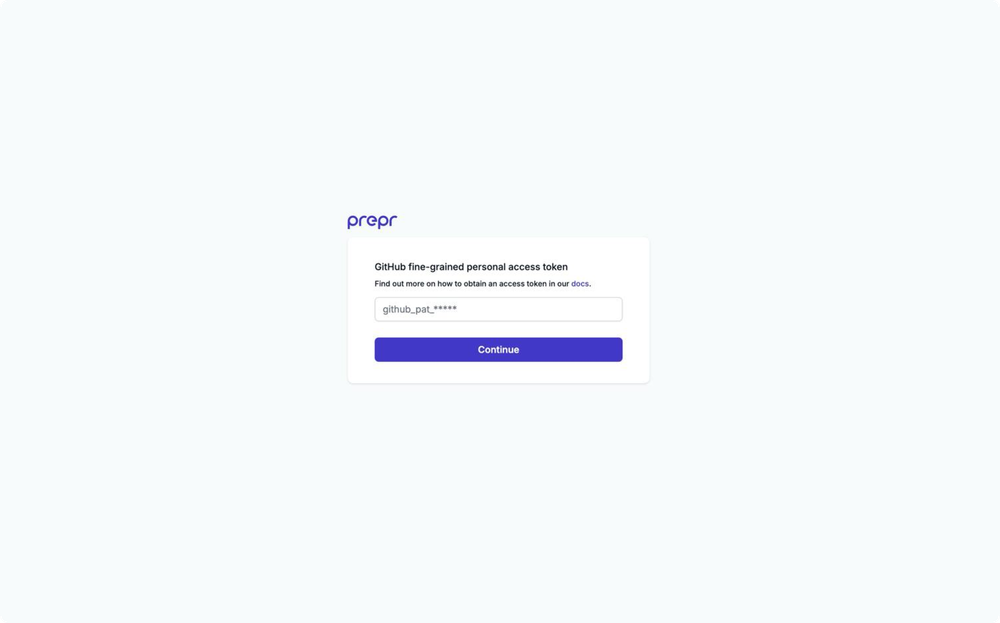
Paste the token that you copied in the previous step and click the Continue button. Choose the repository and branch and click the Continue button. Another input screen appears to select the sync method.
-
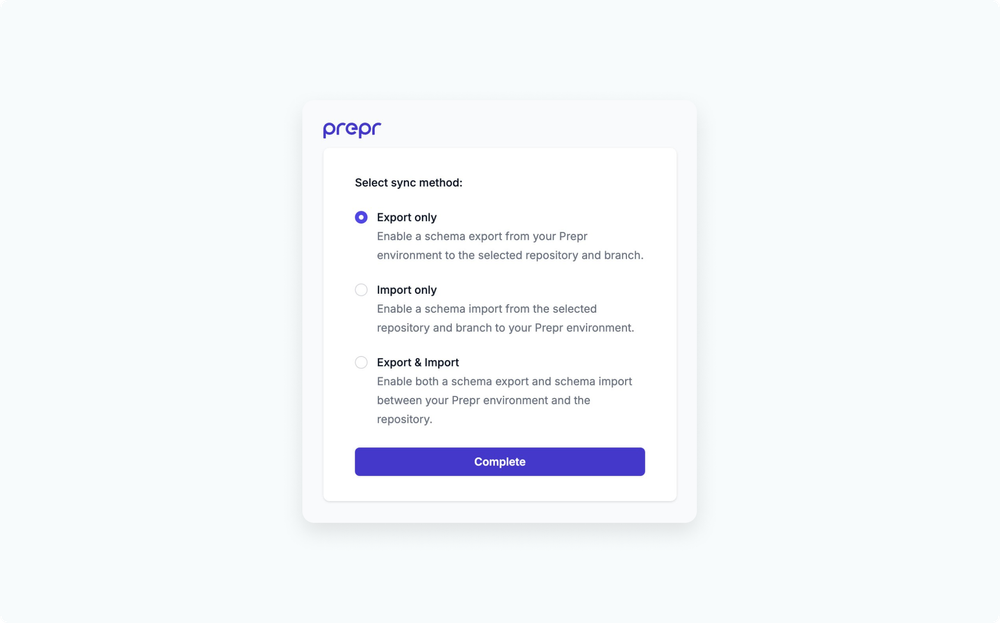
Select your preferred sync method for this environment and click the Complete button.
- Choose Export only if this environment has the most up-to-date schema.
- Choose Import only if the schema in this environment needs to be updated with a more up-to-date schema.
- Choose Export & Import for the situation where you have schema updates from multiple development or testing environments.
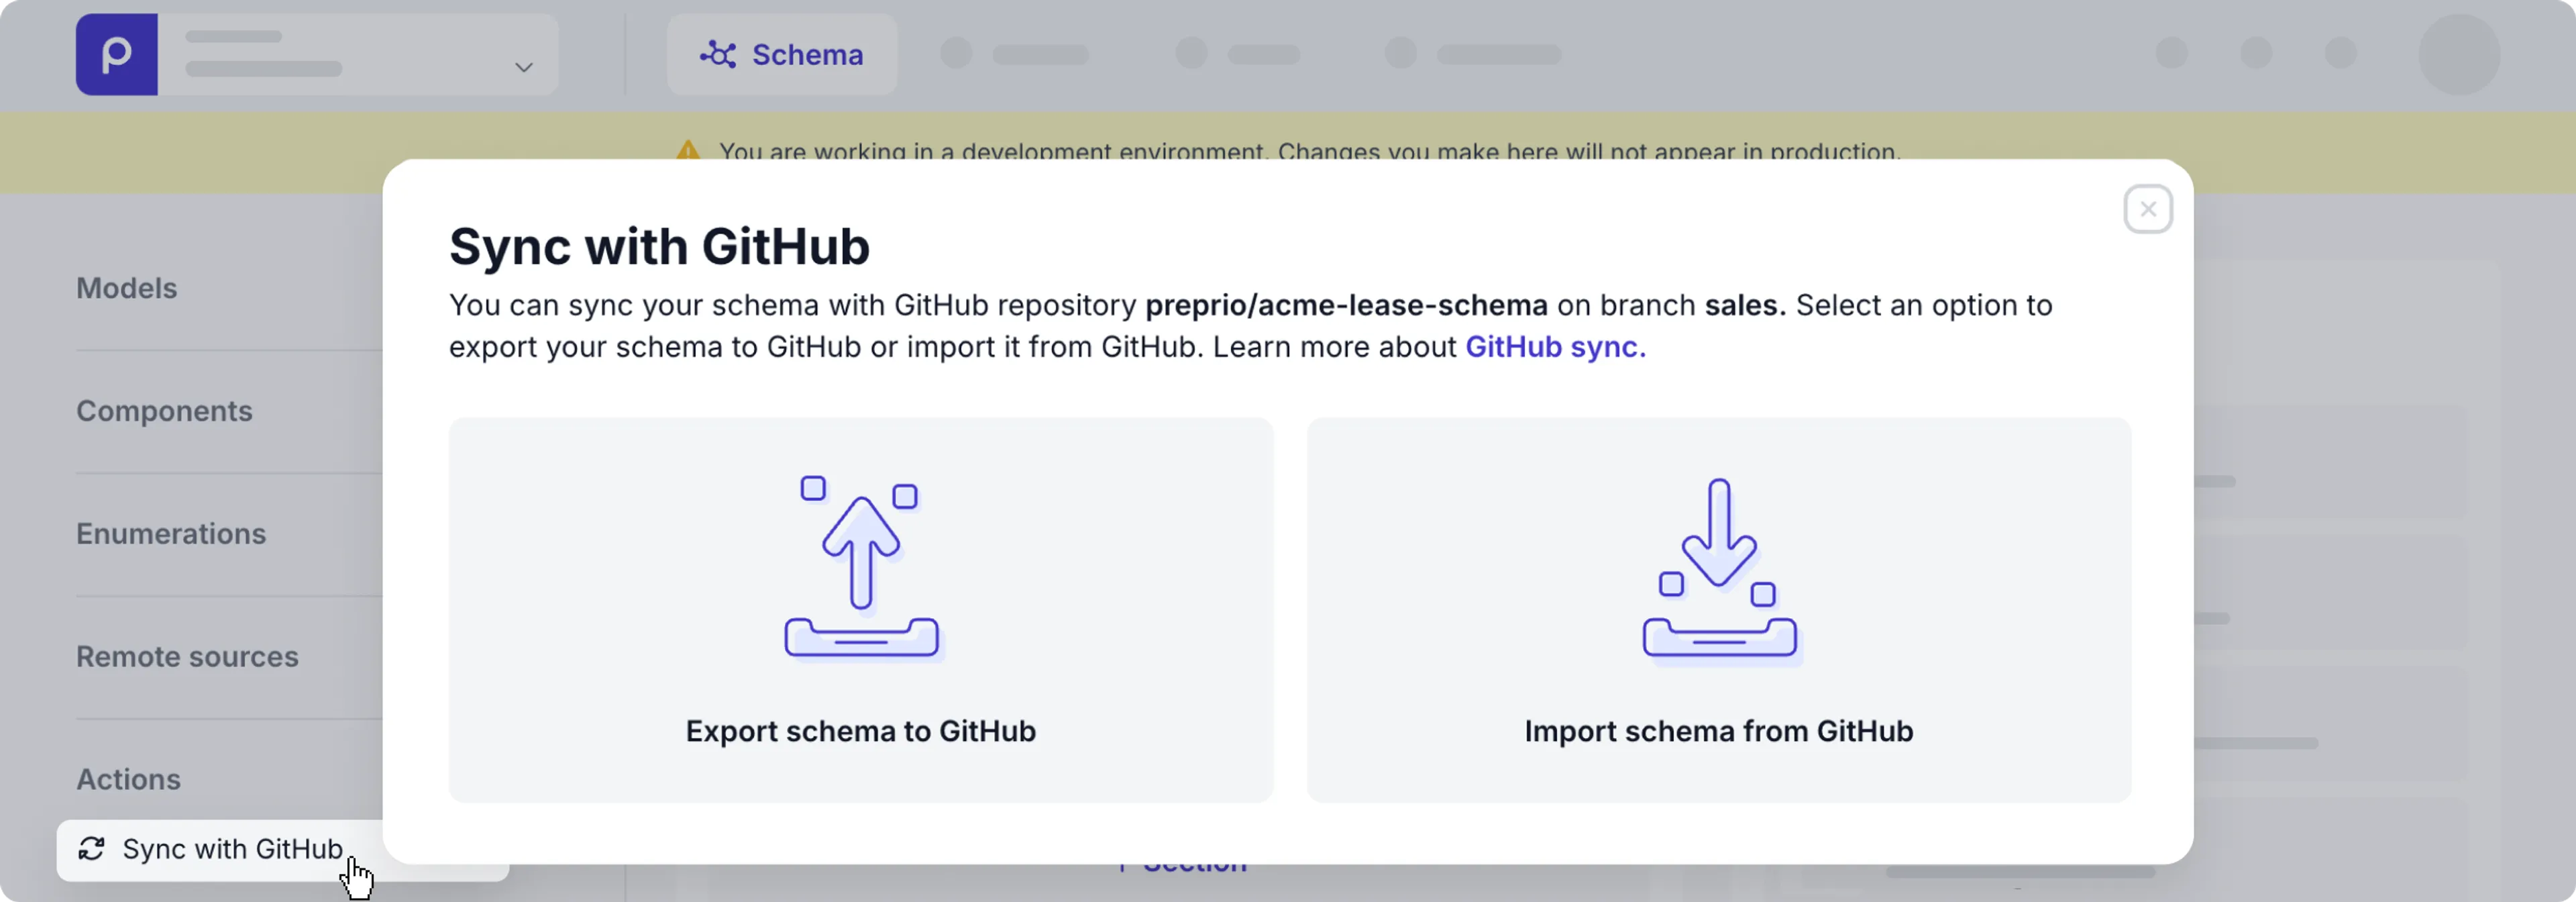
Once GitHub is connected, the Sync schema action is replaced with either Export to GitHub, Import from GitHub or Sync with GitHub depending on your chosen setup. You can click the Sync with GitHub link to choose to export or import a schema.
Export to GitHub
If your environment or organization has the most up-to-date schema, you can export it to a GitHub repository to make it available to other environments.
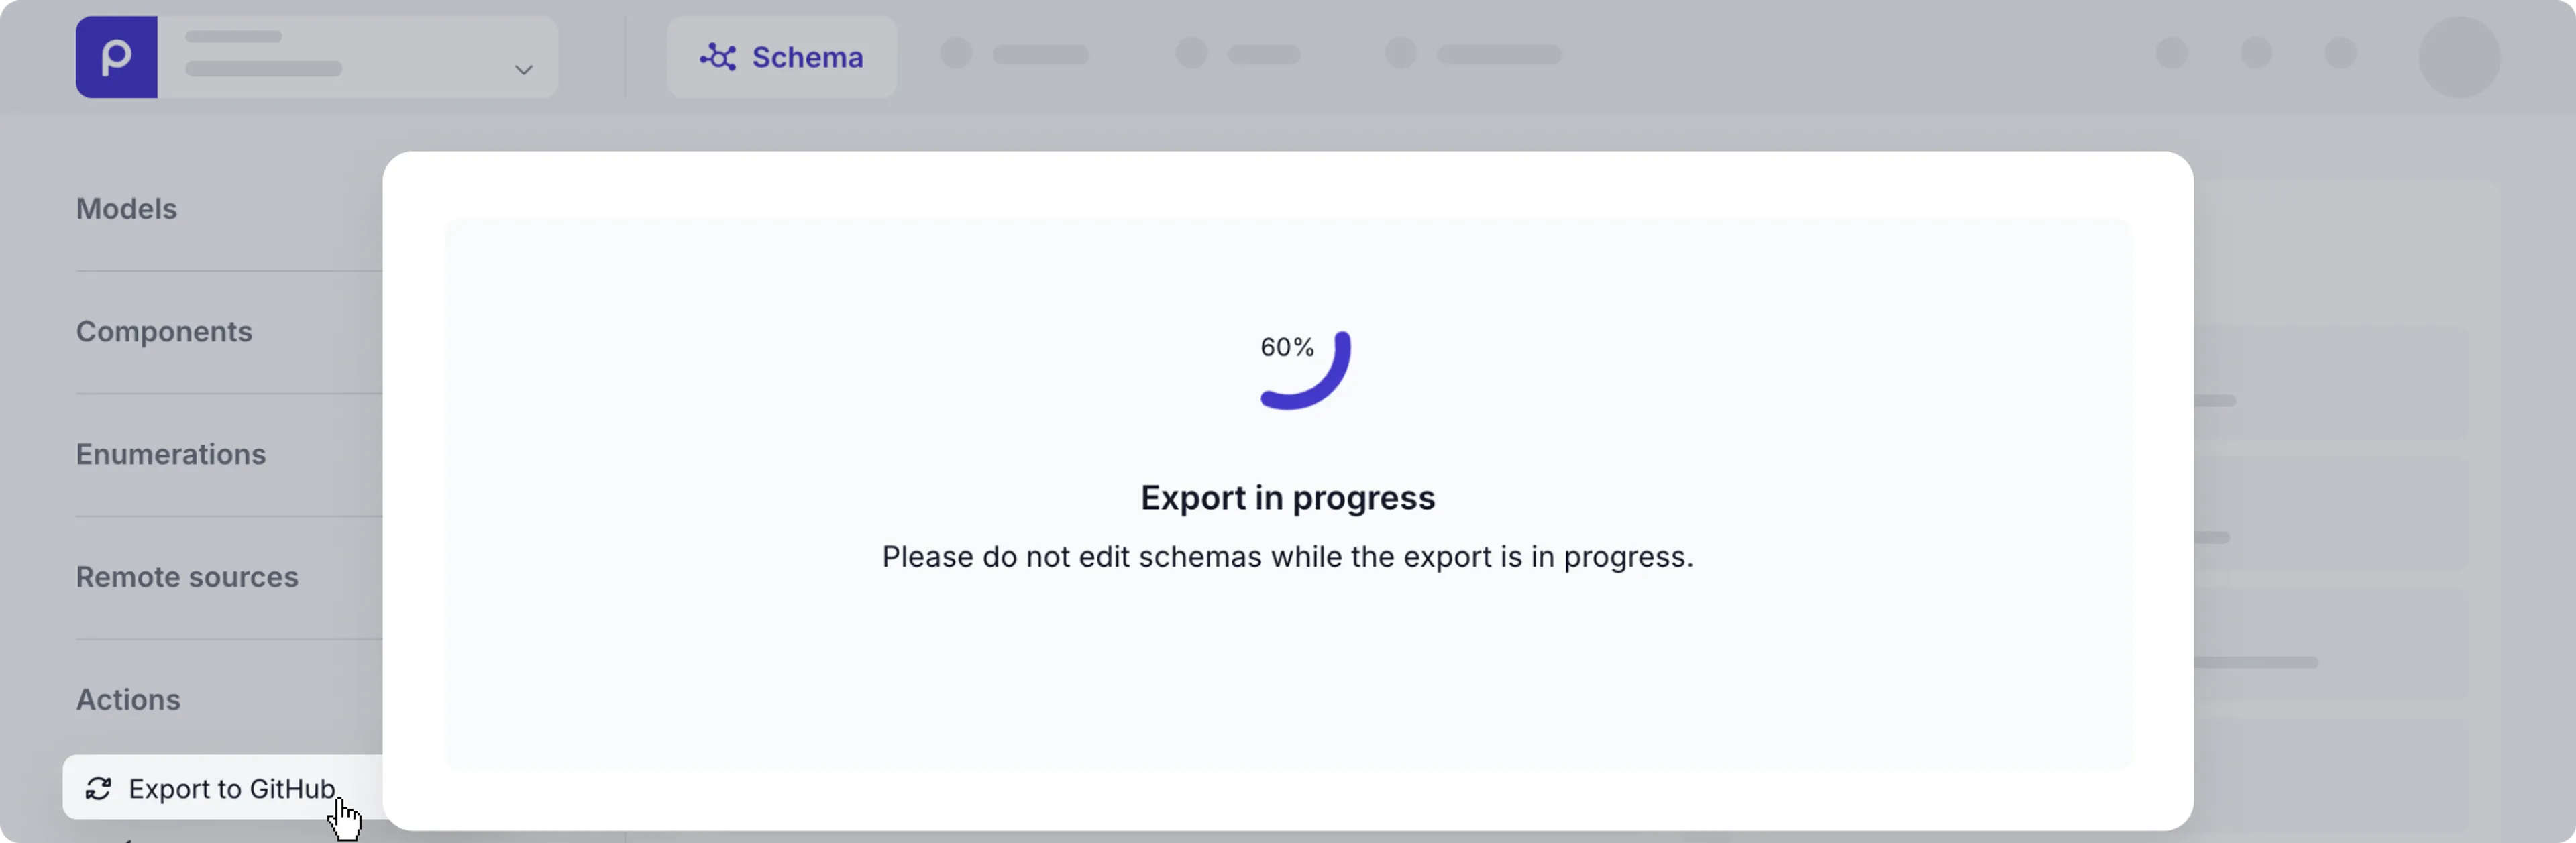
-
Once your GitHub account is connected, you can either click the Export to GitHub or the Sync with GitHub link and choose the Export schema to GitHub option. When the export starts, you’ll see the Export in progress status.
-
Once completed, the repository will be updated as follows:
- If the repository is empty, the push request simply creates JSON files for each of the models, components, enumerations and remote sources in the schema.
- The model JSON file names will match each model’s Singular name in lowercase.
- The component JSON file names will match their Type Name values in lower case.
- The enumeration JSON file names will match their Type Name values in lower case.
- The remote source JSON file names will match their Type Name values in lower case.
- If the repository already has JSON files, expect the following behavior:
- If the JSON files match models, components, enumerations, and remote sources in the schema, these JSON files will be overwritten.
- If there are JSON files in the repository that don’t have matching models, components, enumerations, or remote sources, these JSON files will be removed from the repository.
- For models, components, enumerations, and remote sources that don’t have matching JSON files, new JSON files will be created in the repository.
- If the repository is empty, the push request simply creates JSON files for each of the models, components, enumerations and remote sources in the schema.
When successful, you’ll see an Export complete status message.
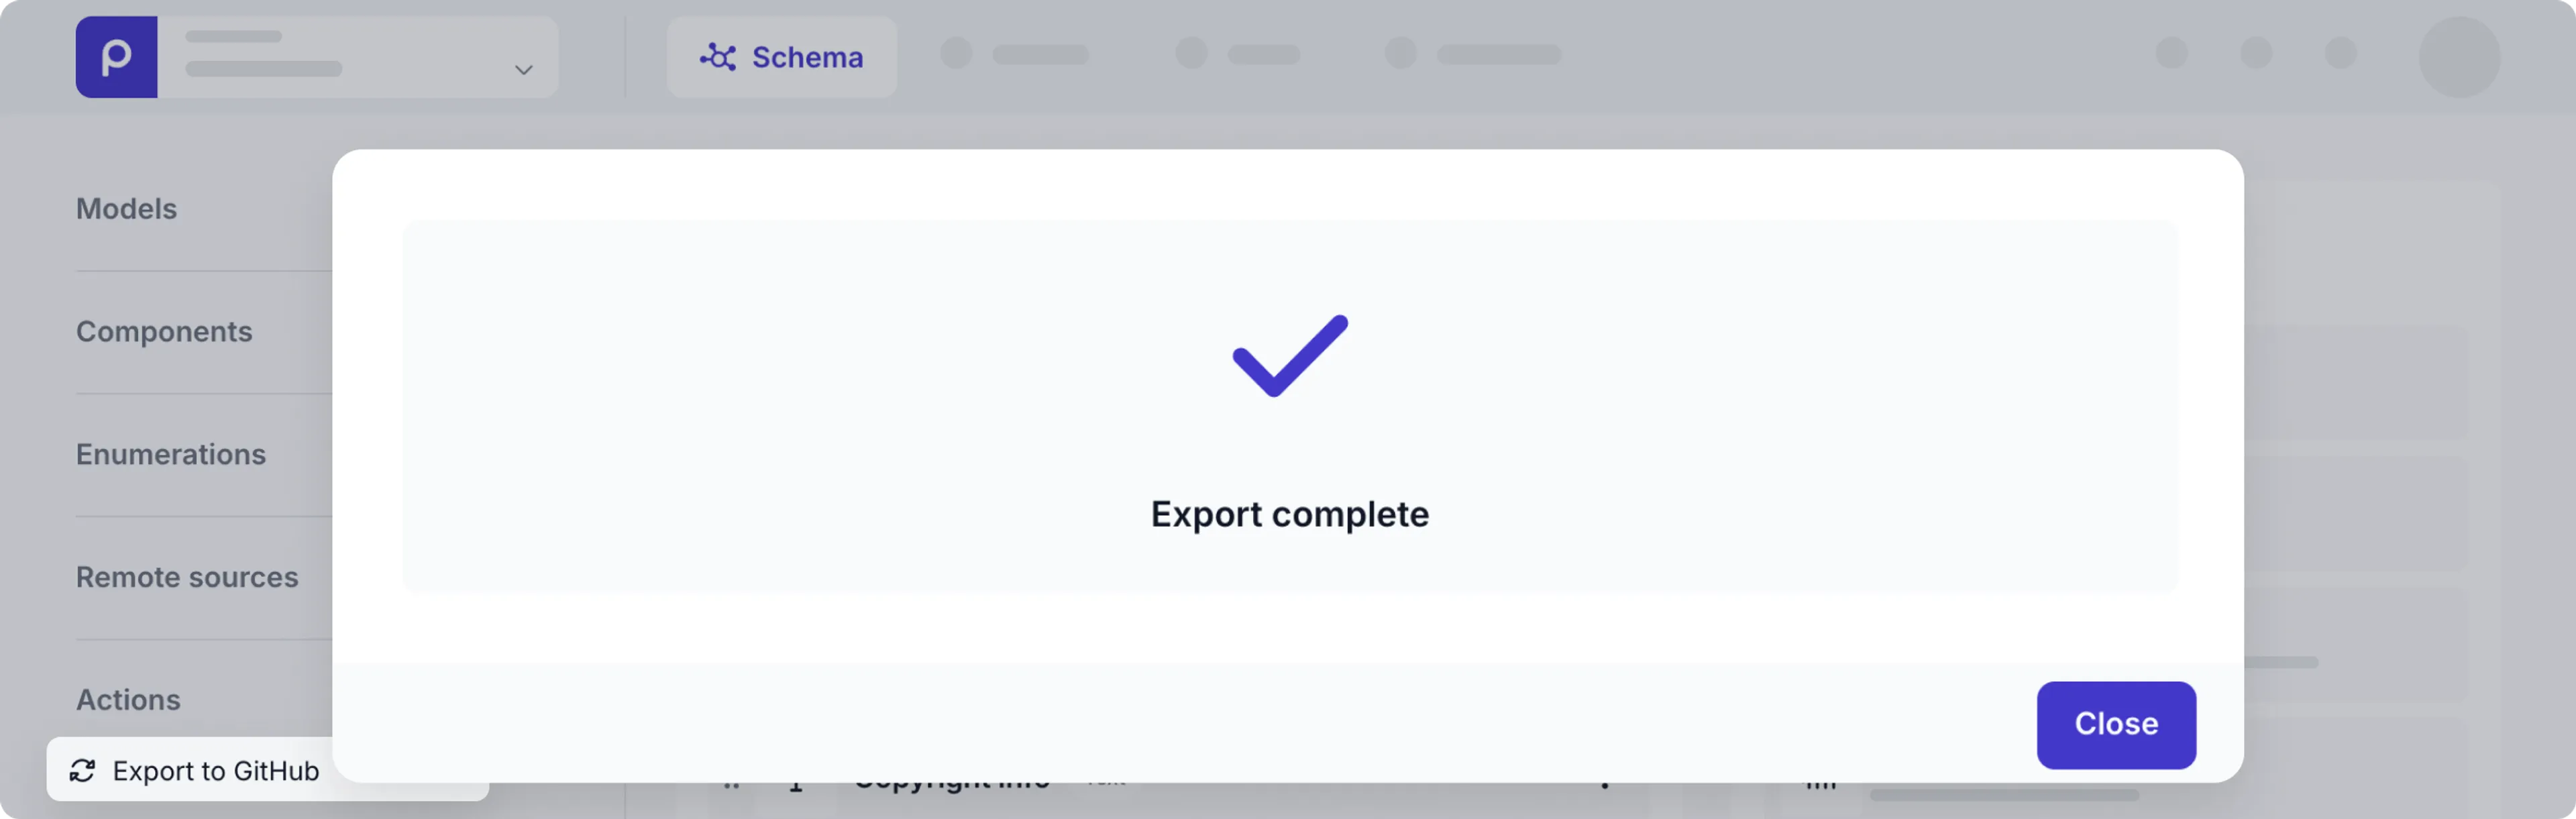
Now your GitHub repository is up to date with the latest schema. And you can use this repository to sync any other schema in your organization by triggering an import from GitHub.
Import from GitHub
If your environment or organization needs to be updated with a more up-to-date schema, you can do an import from a GitHub repository to update it.
-
Once your GitHub account is connected, you can click the Import from GitHub link or click the Sync with GitHub link and choose the Import schema from GitHub option. When the import is triggered, you’ll see the Validating GitHub schema status.
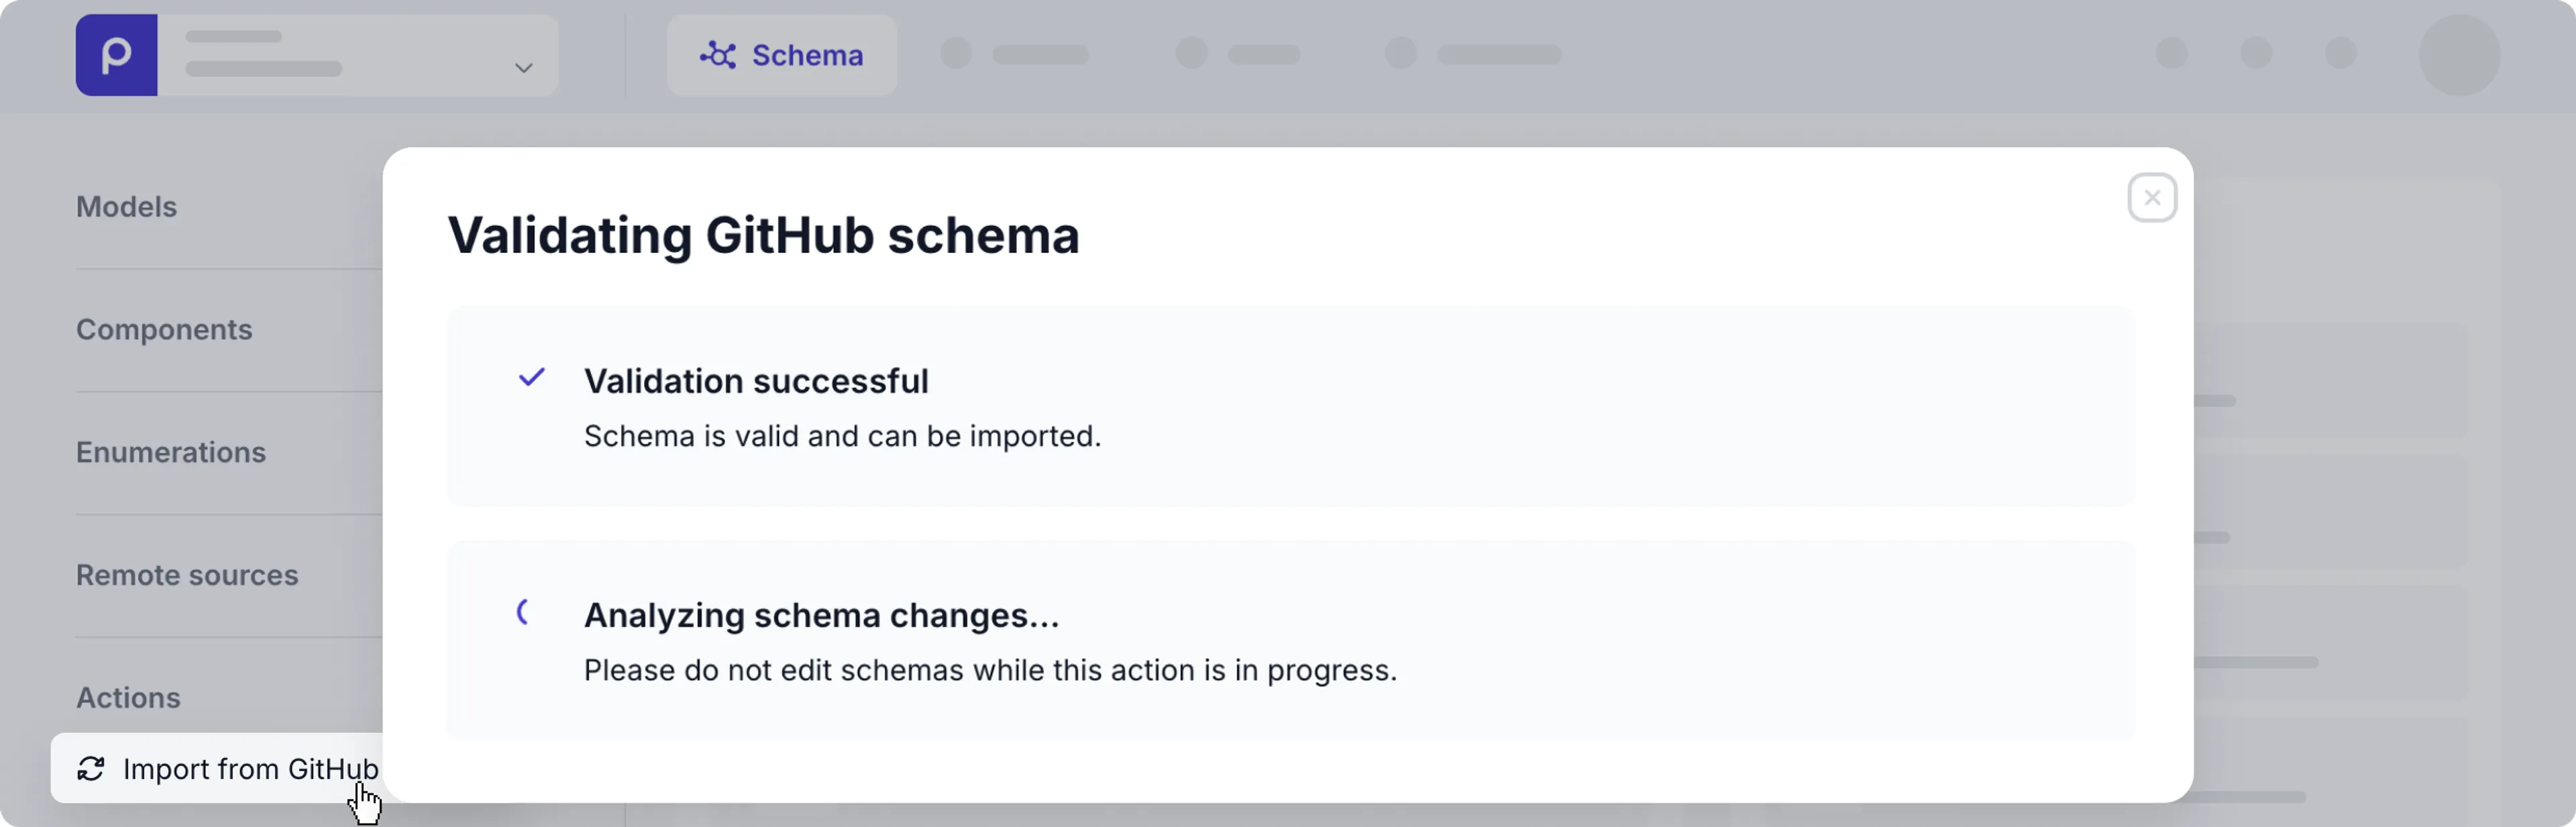
-
When the schema validation completes, you can preview your changes.
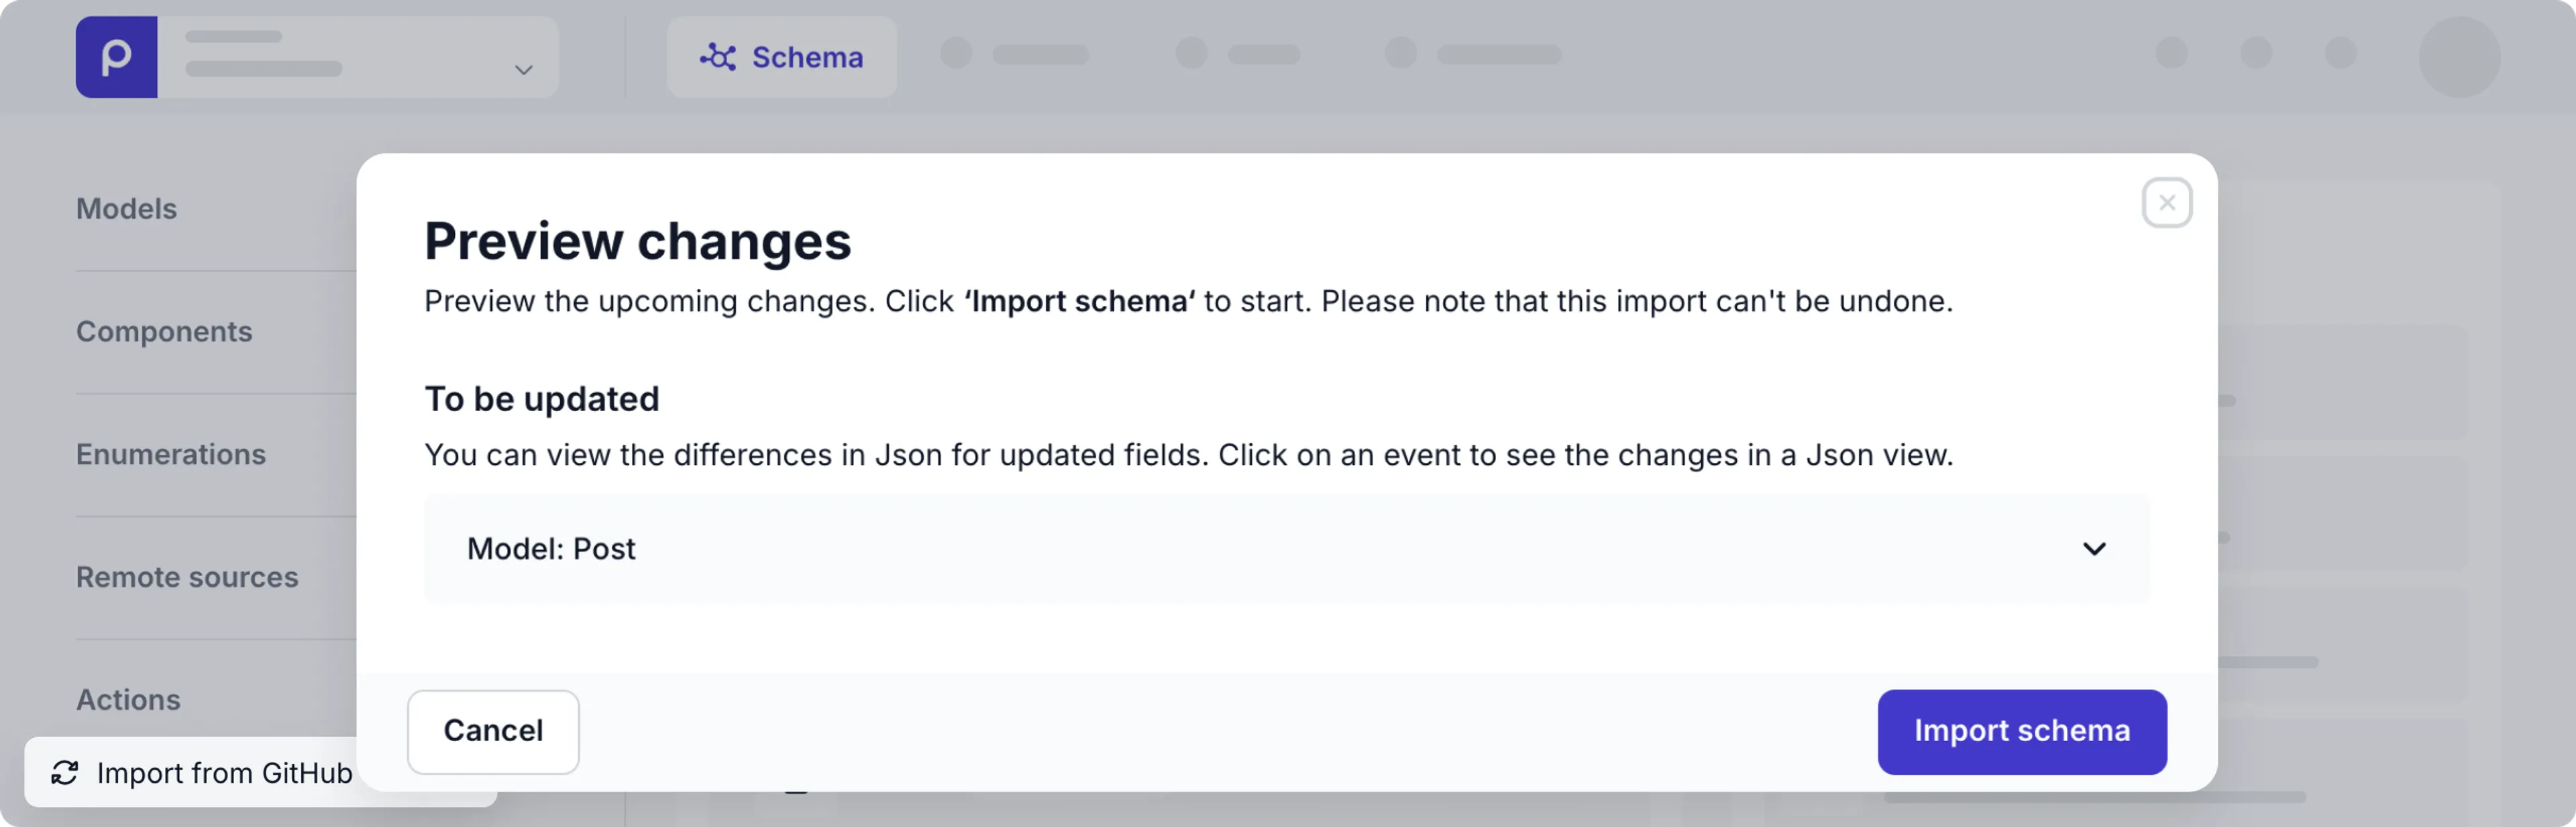
-
When you’re happy with the changes, click the Import schema button.
-
Once the import is completed, the schema is updated as follows:
- Models, components, enumerations, and remote sources will be overwritten with the matching JSON files in the GitHub repository. The pull request will find matching models, components, enumerations, and remote sources using the model Singular name and the component and remote source Type name values in lower case.
- If there are JSON files that don’t have a match in your environment or organization schema, new models, components, enumerations, and remote sources will be created for each of these.
- If there are models, components, enumerations and remote sources that don’t have a matching JSON file, these will be automatically deleted if they are not in use by any content items.
That’s it! You‘ve synchronized the schema using a GitHub repository.
You can disconnect a GitHub account from a Prepr environment. For example, if you need to switch to a different GitHub account. In this case, simply click go to the Settings → Integrations page and click the Deactivate link for the GitHub integration.
GitLab schema sync
The process below shows you how to connect to your GitLab account and sync a schema using a GitLab repository.
Generate a project access token
To use a GitLab project to sync schemas, follow the steps below to create a project access token in your GitLab account.
- Log in to your GitLab account and follow the GitLab docs to create a project to manage your Prepr schema.
- While in your project, expand the Settings in the side menu.
- Click the Access Tokens link and in the Project Access Tokens page, click the Add new token button.
- Enter a Token name to indicate the purpose of the token like
Prepr schema syncand select an Expiration for the token. Choose a role for the users who will be syncing schemas, for example:Maintainer. - In the Select scopes section, check the api, read_repository and the write_repository options.
- Click the Create project access token button and make sure to copy the generated token and save it somewhere safe. The token value will only be visible once.
- To define the push and merge permissions for this project, expand the Settings in the side menu and click the Repository link. Expand the Protected branches section to define and set the role for the Allow to merge and the Allow to push and merge to the same role that you chose for the access token.
- Get and save the Project ID value of your GitLab project as follows:
- In your project, expand the Settings in the side menu and click the General link. Copy and save the Project ID value.
Once done, you are ready to connect to your GitLab account from Prepr CMS.
Connect to GitLab
The next step is to connect the Prepr CMS environment or organization to your GitLab account with the steps below.
You can enable the GitLab sync for each environment by either activating the GitLab option on the Integrations page or via the Schema page as detailed below.
-
Navigate to each Prepr environment or organization where schemas need to be synced.
-
Go to the Schema tab in the environment or the Shared schema tab in the organization and click the Sync schema link in the Actions section on the bottom left of the page.
-
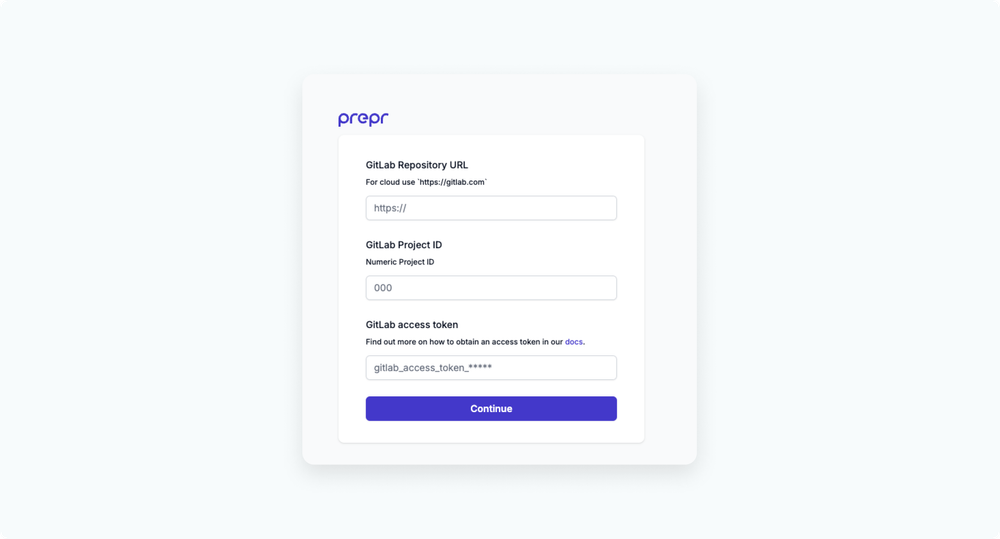
Click the GitLab sync option and sign in to your GitLab account, if you are not yet signed in. An input screen appears.
-
Paste the GitLab Repository URL value (
https://gitlab.com/), the GitLab Project ID, and the GitLab access token that you saved in the previous step and click the Continue button. Another input screen appears to select the sync method. -
Select your preferred sync method for this environment and click the Complete button.
- Choose Export only if this environment has the most up-to-date schema.
- Choose Import only if the schema in this environment needs to be updated with a more up-to-date schema.
- Choose Export & Import for the situation where you have schema updates from multiple development or testing environments.
Once GitLab is connected, the Sync schema link text is replaced with Export to GitLab, Import from GitLab, or Sync with GitLab depending on your chosen setup.
You can click the Sync with GitLab link to choose to export or import a schema.

Export to GitLab
-
Once your GitLab project is connected, you can click the Export to GitLab link or the Sync with GitLab link and choose the Export schema to GitLab option. When the export is triggered, you’ll see the Export in progress status.

-
Once completed, the repository will be updated as follows:
- If the repository is empty, the push request simply creates JSON files for each of the models, components, enumerations and remote sources in the schema.
- The model JSON file names will match each model’s Singular name in lowercase.
- The component JSON file names will match their Type Name values in lower case.
- The enumeration JSON file names will match their Type Name values in lower case.
- The remote source JSON file names will match their Type Name values in lower case.
- If the repository already has JSON files, expect the following behavior:
- If the JSON files match models, components, enumerations, and remote sources in the schema, these JSON files will be overwritten.
- If there are JSON files in the repository that don’t have matching models, components, enumerations, or remote sources, these JSON files will be removed from the repository.
- For models, components, enumerations, and remote sources that don’t have matching JSON files, new JSON files will be created in the repository.
- If the repository is empty, the push request simply creates JSON files for each of the models, components, enumerations and remote sources in the schema.
When successful, you’ll see an Export complete status message. Now your GitLab repository is up to date with the latest schema. And you can use this repository to sync any other schema in your organization by triggering an import from GitLab.
Import from GitLab
-
If your GitLab has previously been connected, click the Import from GitLab link or click the Sync with GitLab link. and choose the Import schema from GitLab option. When the import is triggered, you’ll see the Validating GitLab schema status.
-
When the schema validation completes, you can preview your changes.

-
When you’re happy with the changes, click the Import schema button. Once the import is completed, the schema is updated as follows:
- Models, components, enumerations, and remote sources will be overwritten with the matching JSON files in the GitLab repository. The pull request will find matching models, components, enumerations, and remote sources using the model Singular name and the component and remote source Type name values in lower case.
- If there are JSON files that don’t have a match in your environment or organization schema, new models, components, enumerations, and remote sources will be created for each of these.
- If there are models, components, enumerations and remote sources that don’t have a matching JSON file, these will be automatically deleted if they are not in use by any content items.
That’s it! You‘ve synchronized the schema using a GitLab repository.
You can disconnect a GitLab account from a Prepr environment. For example, if you need to switch to a different GitLab account. In this case, simply click go to the Settings → Integrations page and click the Deactivate link for the GitLab integration.
Bitbucket schema sync
The process below shows you how to connect to your Bitbucket account and sync a schema using a Bitbucket cloud repository.
Generate a repository access token
To use a Bitbucket repository to sync schemas, follow the steps below to create a repository access token in your Bitbucket account.
- Log in to your Bitbucket account and follow the Bitbucket docs to create a repository to manage your Prepr schema.
- While in your repository, click the Repository settings in the left side menu.
- Click the Access Tokens link and in the Access Tokens page, click the Create Repository Access Token button.
- Enter a Name to indicate the purpose of the token like
Prepr schema sync. - In the Repositories section check the Read and Write options.
- Click the Create button and make sure to copy the generated token and save it somewhere safe. The token value will only be visible once.
Once done, you are ready to connect to your Bibucket account from Prepr CMS.
Connect to Bitbucket
The next step is to connect the Prepr CMS environment or organization to your Bitbucket account with the steps below.
You can enable the Bitbucket sync for each environment by either activating the Bitbucket option on the Integrations page or via the Schema page as detailed below.
-
Navigate to each Prepr environment or organization where schemas need to be synced.
-
Go to the Schema tab in the environment or the Shared schema tab in the organization and click the Sync schema link in the Actions section on the bottom left of the page.
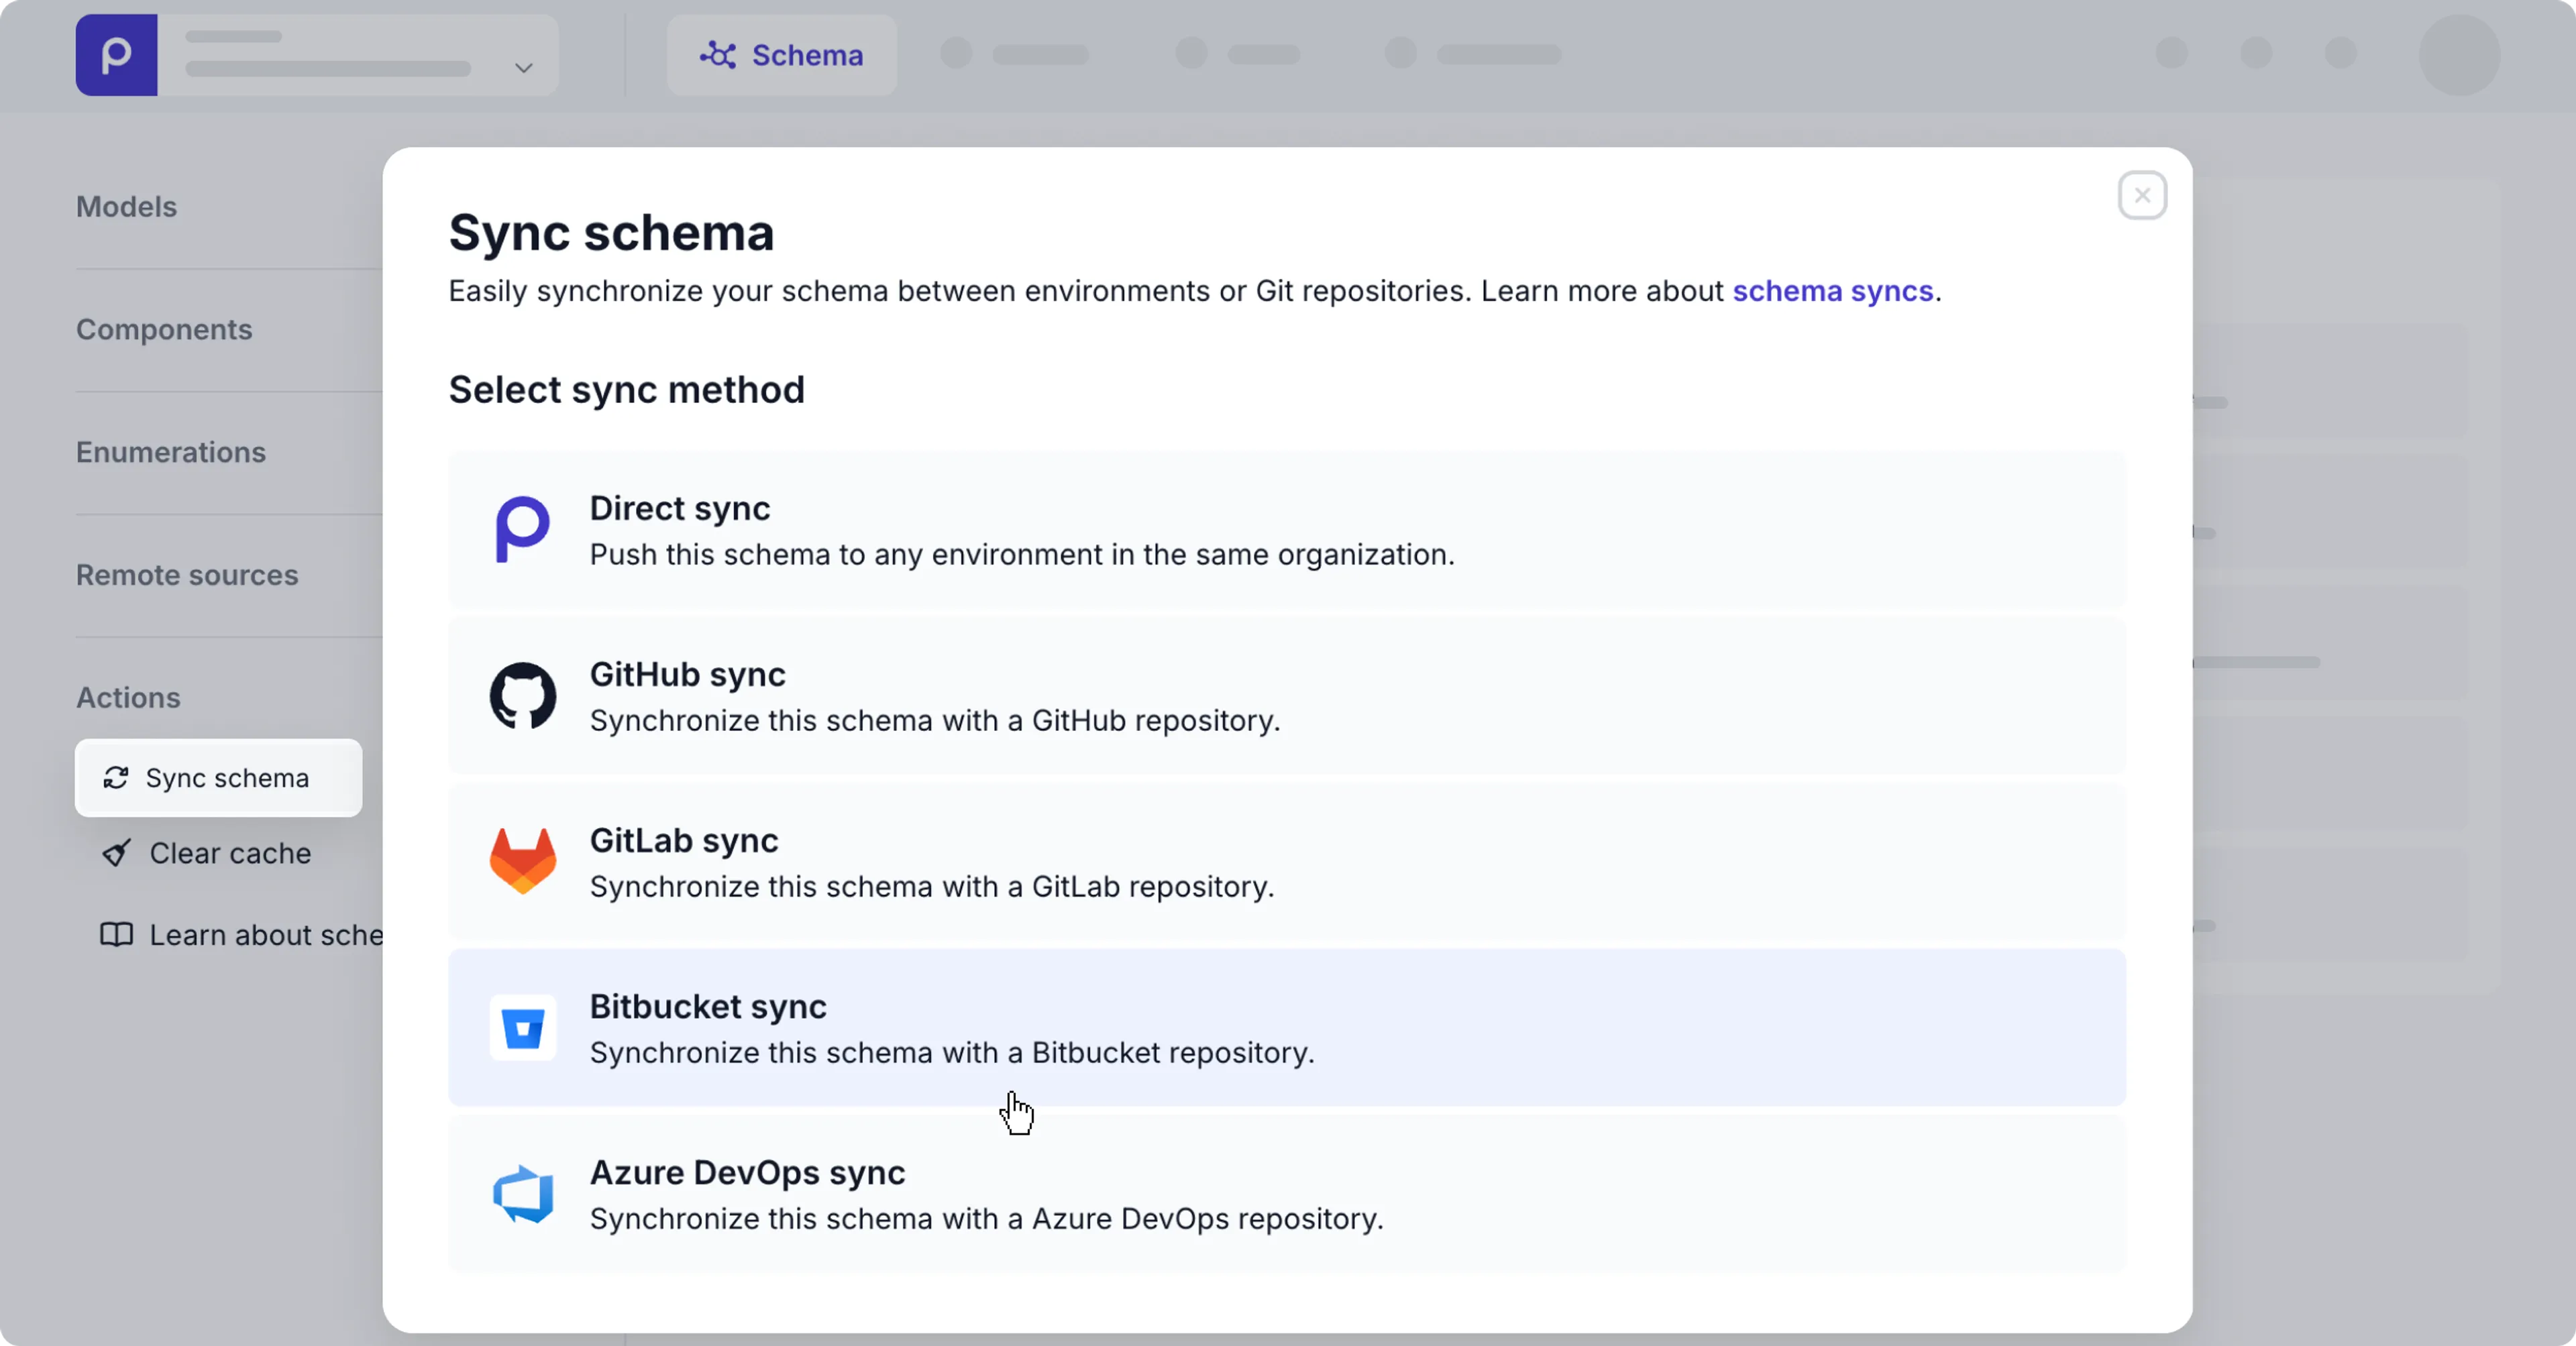
-
Click the Bitbucket sync option and sign in to your Bitbucket account, if you are not yet signed in. An input screen appears.
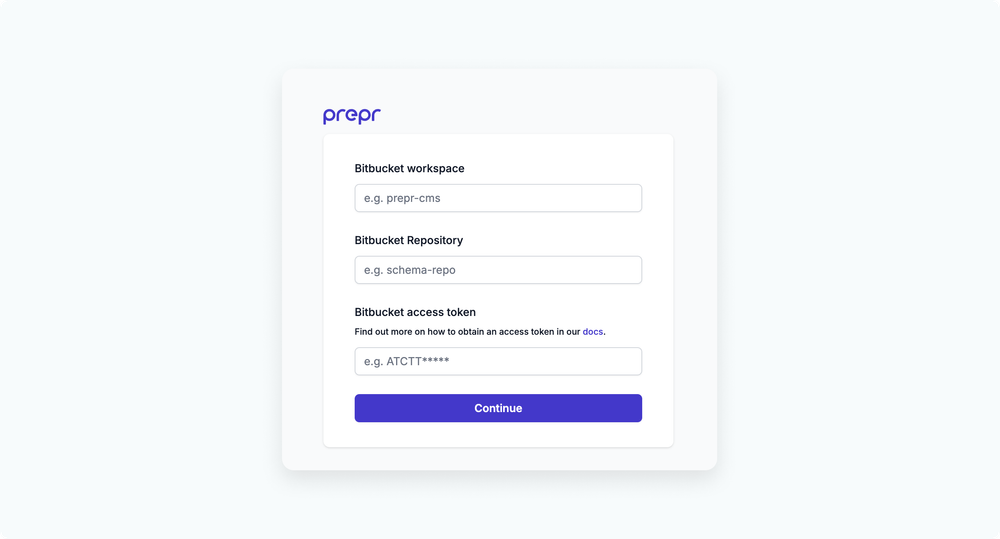
-
Paste the Bitbucket workspace name, Bitbucket Repository name, and the Bitbucket access token that you saved in the previous step and click the Continue button. Another input screen appears to select the sync method.
-
Select your preferred sync method for this environment and click the Complete button.
- Choose Export only if this environment has the most up-to-date schema.
- Choose Import only if the schema in this environment needs to be updated with a more up-to-date schema.
- Choose Export & Import for the situation where you have schema updates from multiple development or testing environments.
Once Bitbucket is connected, the Sync schema link text is replaced with Export to Bitbucket, Import from Bitbucket, or Sync with Bitbucket depending on your chosen setup.
You can click the Sync with Bitbucket link to choose to export or import a schema.
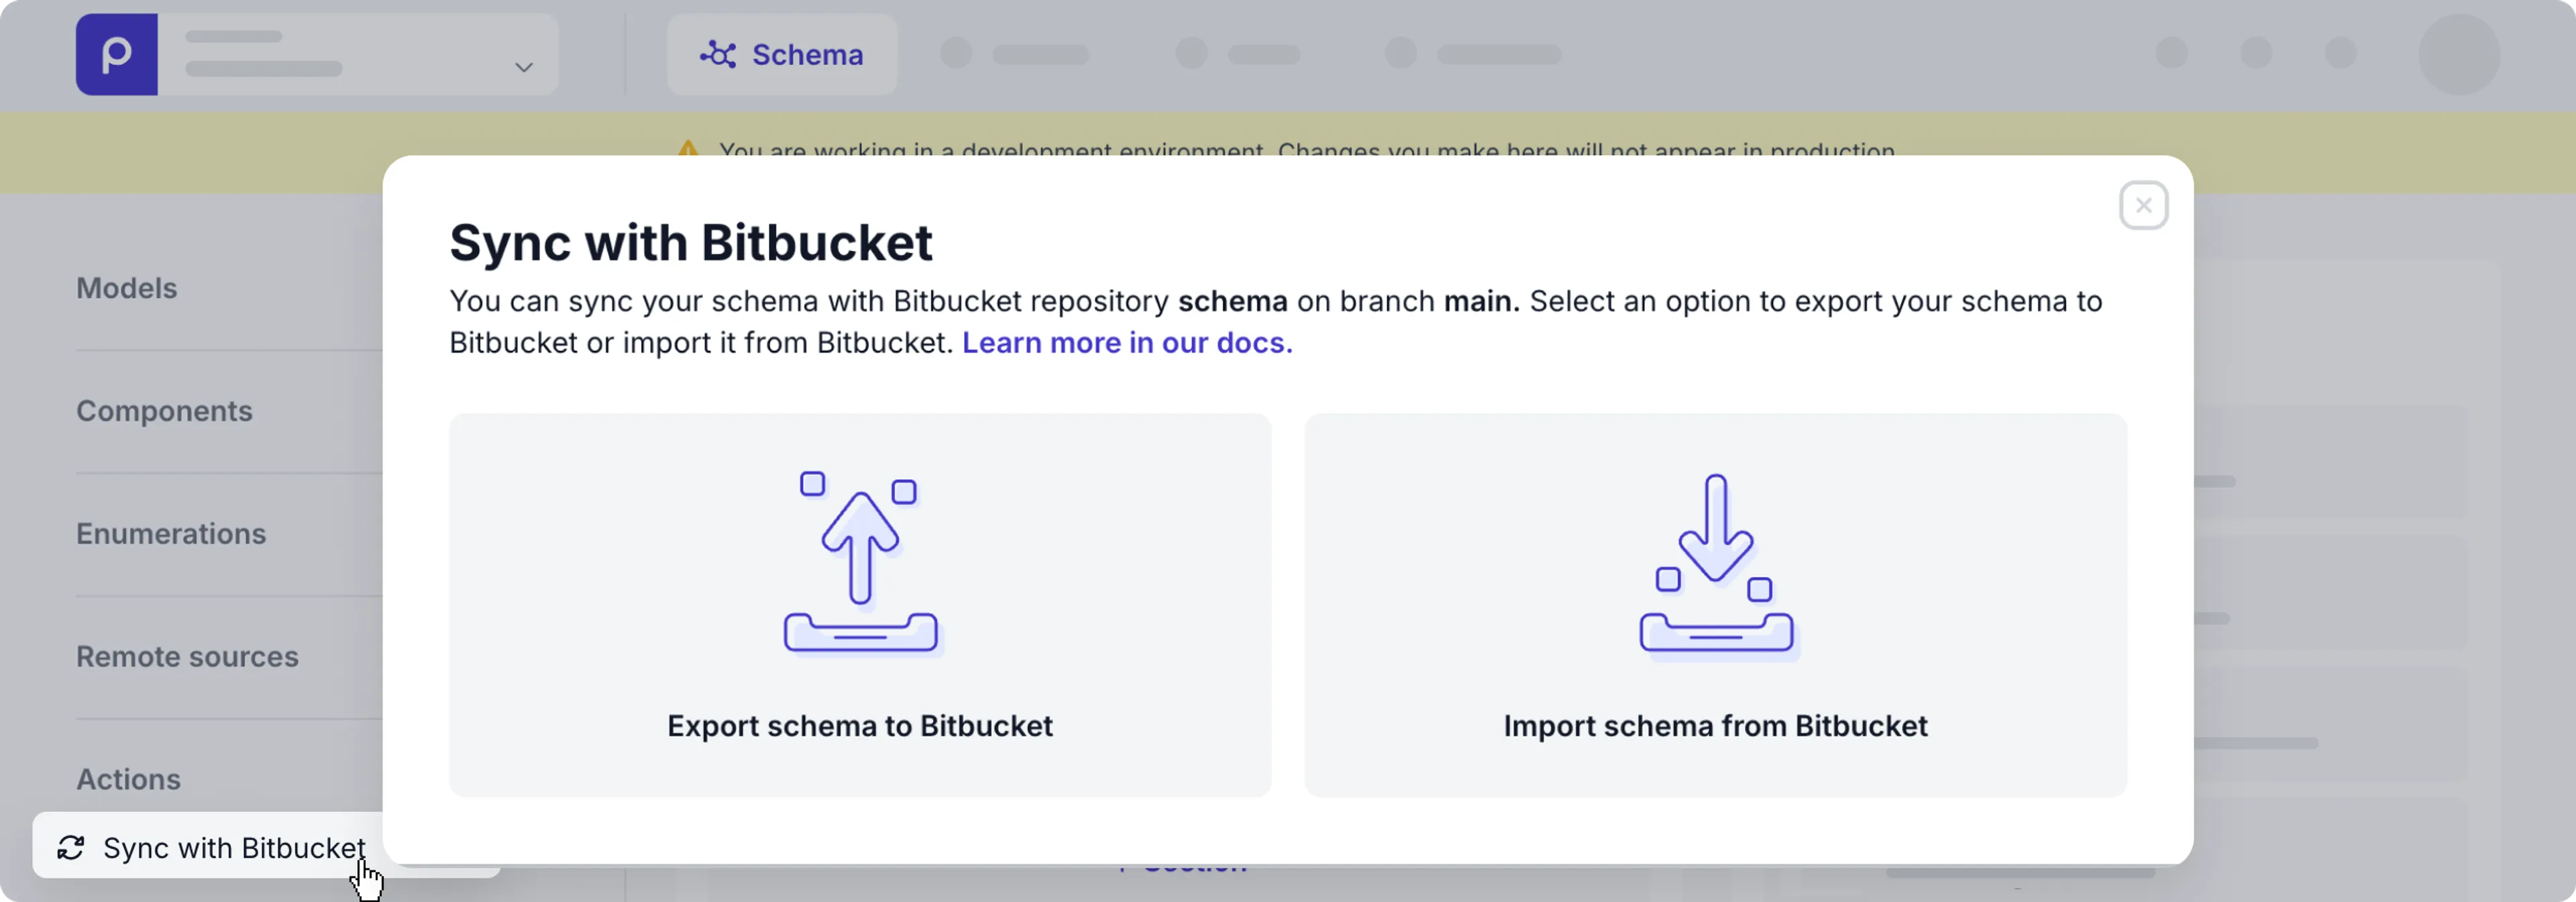
Export to Bitbucket
-
Once your Bitbucket repository is connected, you can click the Sync with Bitbucket link or click the Sync with Bitbucket link and choose the Export schema to Bitbucket option. When the export is triggered, you’ll see the Export in progress status.

-
Once completed, the repository will be updated as follows:
- If the repository is empty, the push request simply creates JSON files for each of the models, components, enumerations and remote sources in the schema.
- The model JSON file names will match each model’s Singular name in lowercase.
- The component JSON file names will match their Type Name values in lower case.
- The enumeration JSON file names will match their Type Name values in lower case.
- The remote source JSON file names will match their Type Name values in lower case.
- If the repository already has JSON files, expect the following behavior:
- If the JSON files match models, components, enumerations, and remote sources in the schema, these JSON files will be overwritten.
- If there are JSON files in the repository that don’t have matching models, components, enumerations, or remote sources, these JSON files will be removed from the repository.
- For models, components, enumerations, and remote sources that don’t have matching JSON files, new JSON files will be created in the repository.
- If the repository is empty, the push request simply creates JSON files for each of the models, components, enumerations and remote sources in the schema.
When successful, you’ll see an Export complete status message. Now your Bitbucket repository is up to date with the latest schema. And you can use this repository to sync any other schema in your organization by triggering an import from Bitbucket.
Import from Bitbucket
-
If your Bitbucket repository has previously been connected, click the Import from Bitbucket link or the Sync with Bitbucket link and choose the Import schema from Bitbucket option. When the import is triggered, you’ll see the Validating Bitbucket schema status.
-
When the schema validation completes, you can preview your changes.

-
When you’re happy with the changes, click the Import schema button. Once the import is completed, the schema is updated as follows:
- Models, components, enumerations, and remote sources will be overwritten with the matching JSON files in the Bitbucket repository. The pull request will find matching models, components, enumerations, and remote sources using the model Singular name and the component and remote source Type name values in lower case.
- If there are JSON files that don’t have a match in your environment or organization schema, new models, components, enumerations, and remote sources will be created for each of these.
- If there are models, components, enumerations and remote sources that don’t have a matching JSON file, these will be automatically deleted if they are not in use by any content items.
That’s it! You‘ve synchronized the schema using a Bitbucket repository.
You can disconnect the Bitbucket account from your Prepr environment. For example, if you need to switch to a different Bitbucket account. In this case, simply click go to the Settings → Integrations page and click the Deactivate link in the Bitbucket integration block.
Azure DevOps schema sync
The process below shows you how to connect to your Azure DevOps account and sync a schema using an Azure DevOps repository.
Generate a personal access token in Azure DevOps
Follow the instructions in the Microsoft docs to create a personal access token. Once you’ve noted the names of your Azure DevOps organization, project, repository, and copied the generated access token, you’re ready to connect to your Azure DevOps account from Prepr CMS.
Connect to Azure DevOps
The next step is to connect the Prepr CMS environment or organization to your Azure DevOps account with the steps below.
You can enable the Azure DevOps sync for each environment by either activating the Azure DevOps option on the Integrations page or via the Schema page as detailed below.
-
Navigate to each Prepr environment or organization where schemas need to be synced.
-
Go to the Schema tab in the environment or the Shared schema tab in the organization and click the Sync schema link in the Actions section on the bottom left of the page.
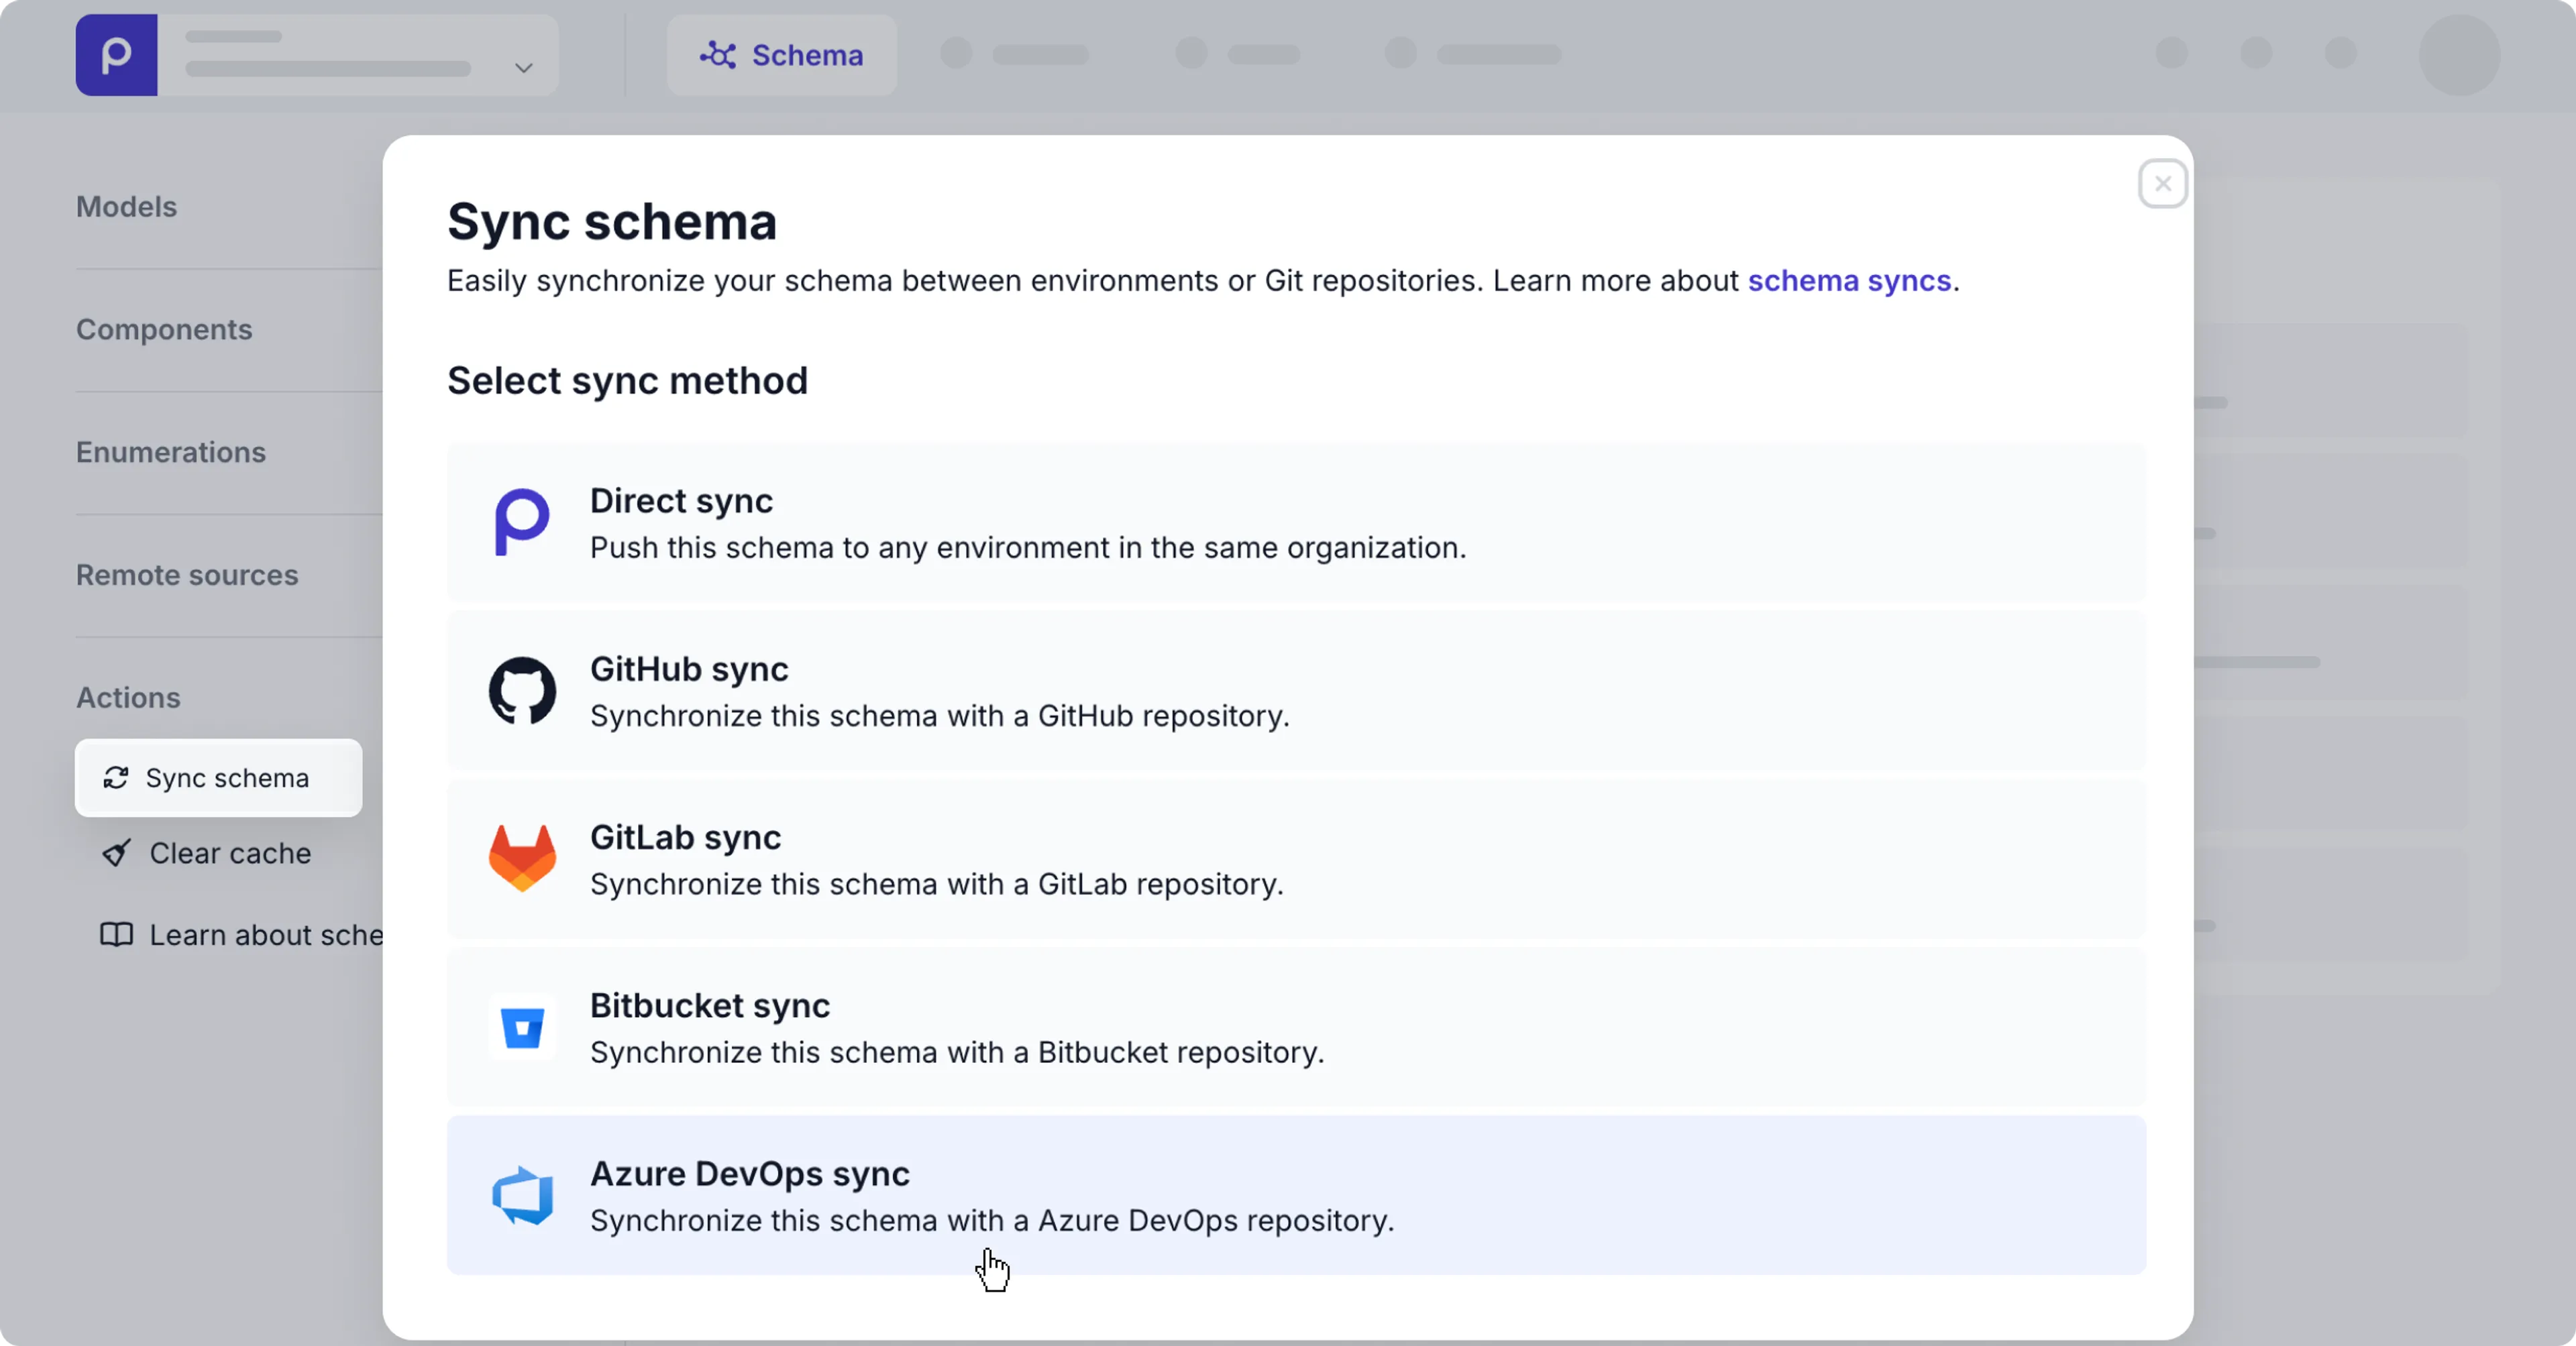
-
Click the Azure DevOps sync option and fill in the form.
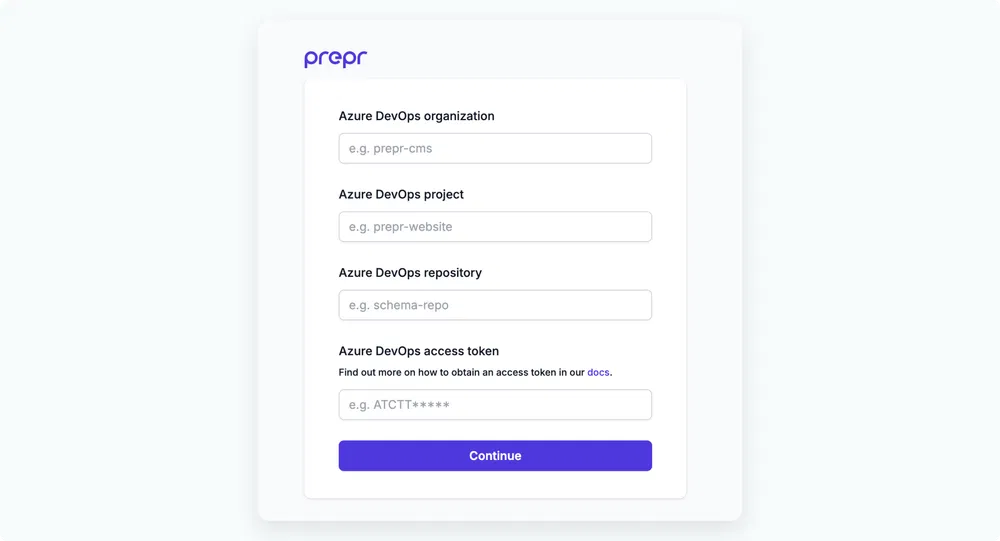
- Enter values for the Azure DevOps organization, Azure DevOps project, Azure DevOps repository and paste the Azure DevOps access token. Then, click the Continue button.
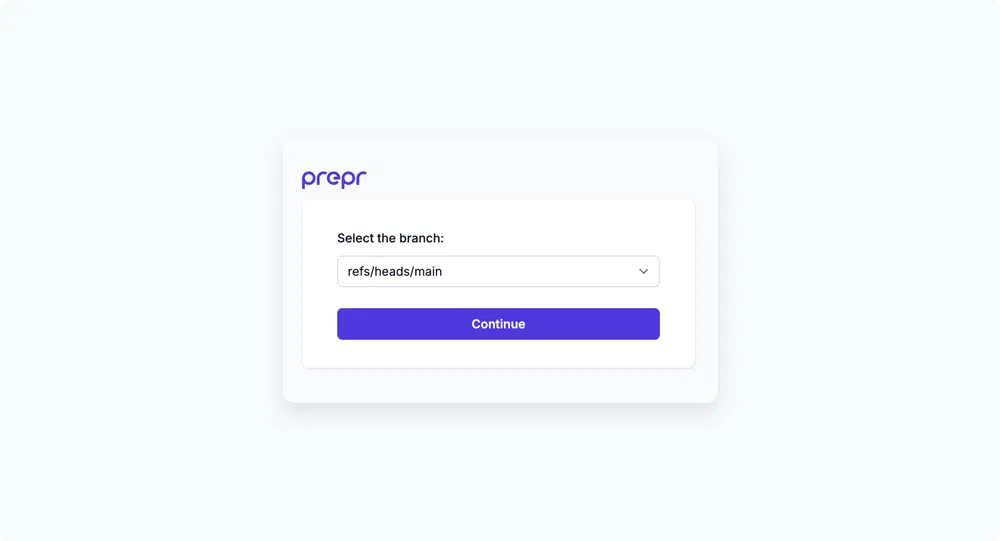
- Choose the repository branch that you want to sync to and click the Continue button.
- Select your preferred sync method for this environment and click the Complete button.
- Choose Export only if this environment has the most up-to-date schema.
- Choose Import only if the schema in this environment needs to be updated with a more up-to-date schema.
- Choose Export & Import for the situation where you have schema updates from multiple development or testing environments.
Once Azure DevOps is connected, the Sync schema link text is replaced with Export to Azure DevOps, Import from Azure DevOps, or Sync with Azure DevOps depending on your chosen setup.
You can click the Sync with Azure DevOps to choose to export or import a schema.
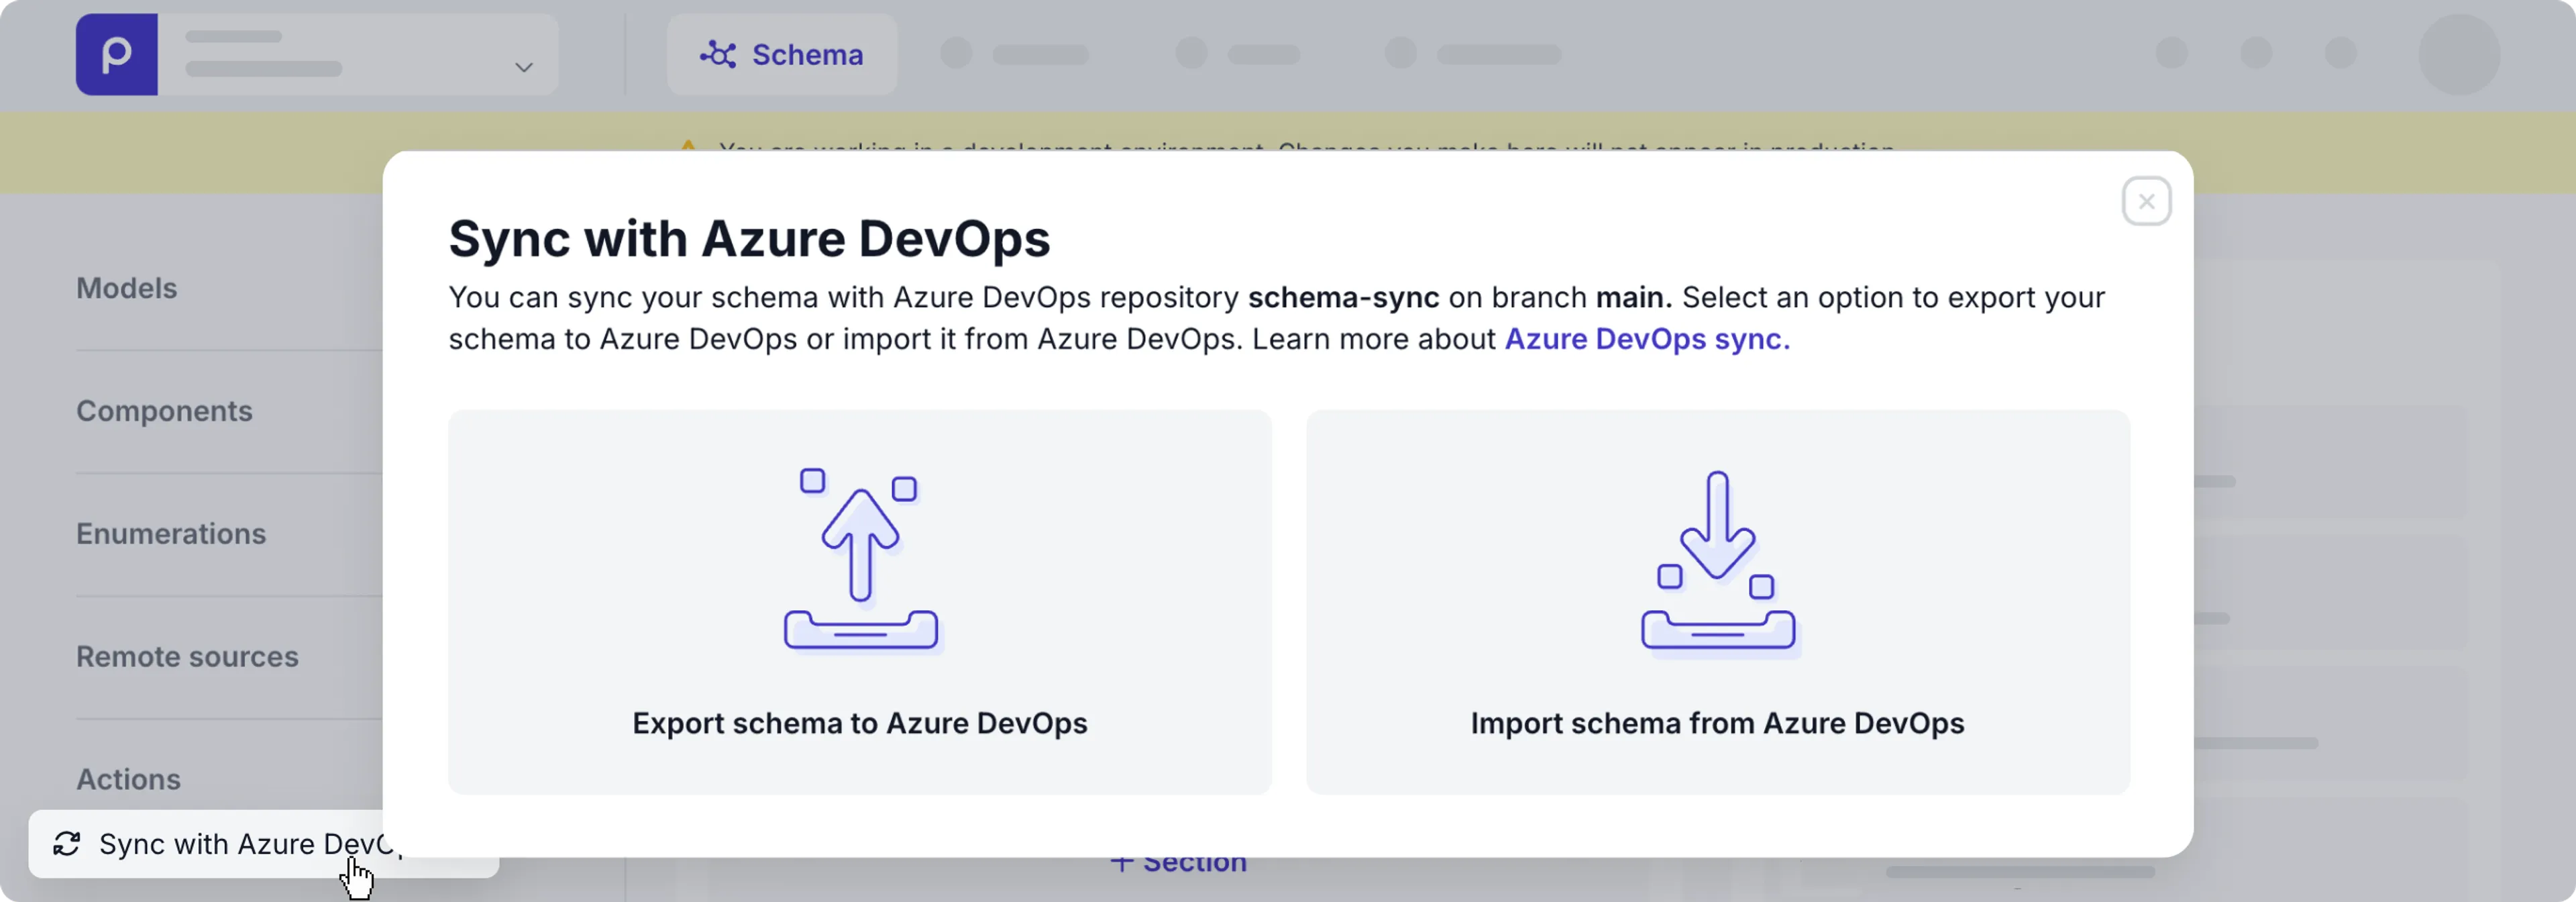
Export to Azure DevOps
-
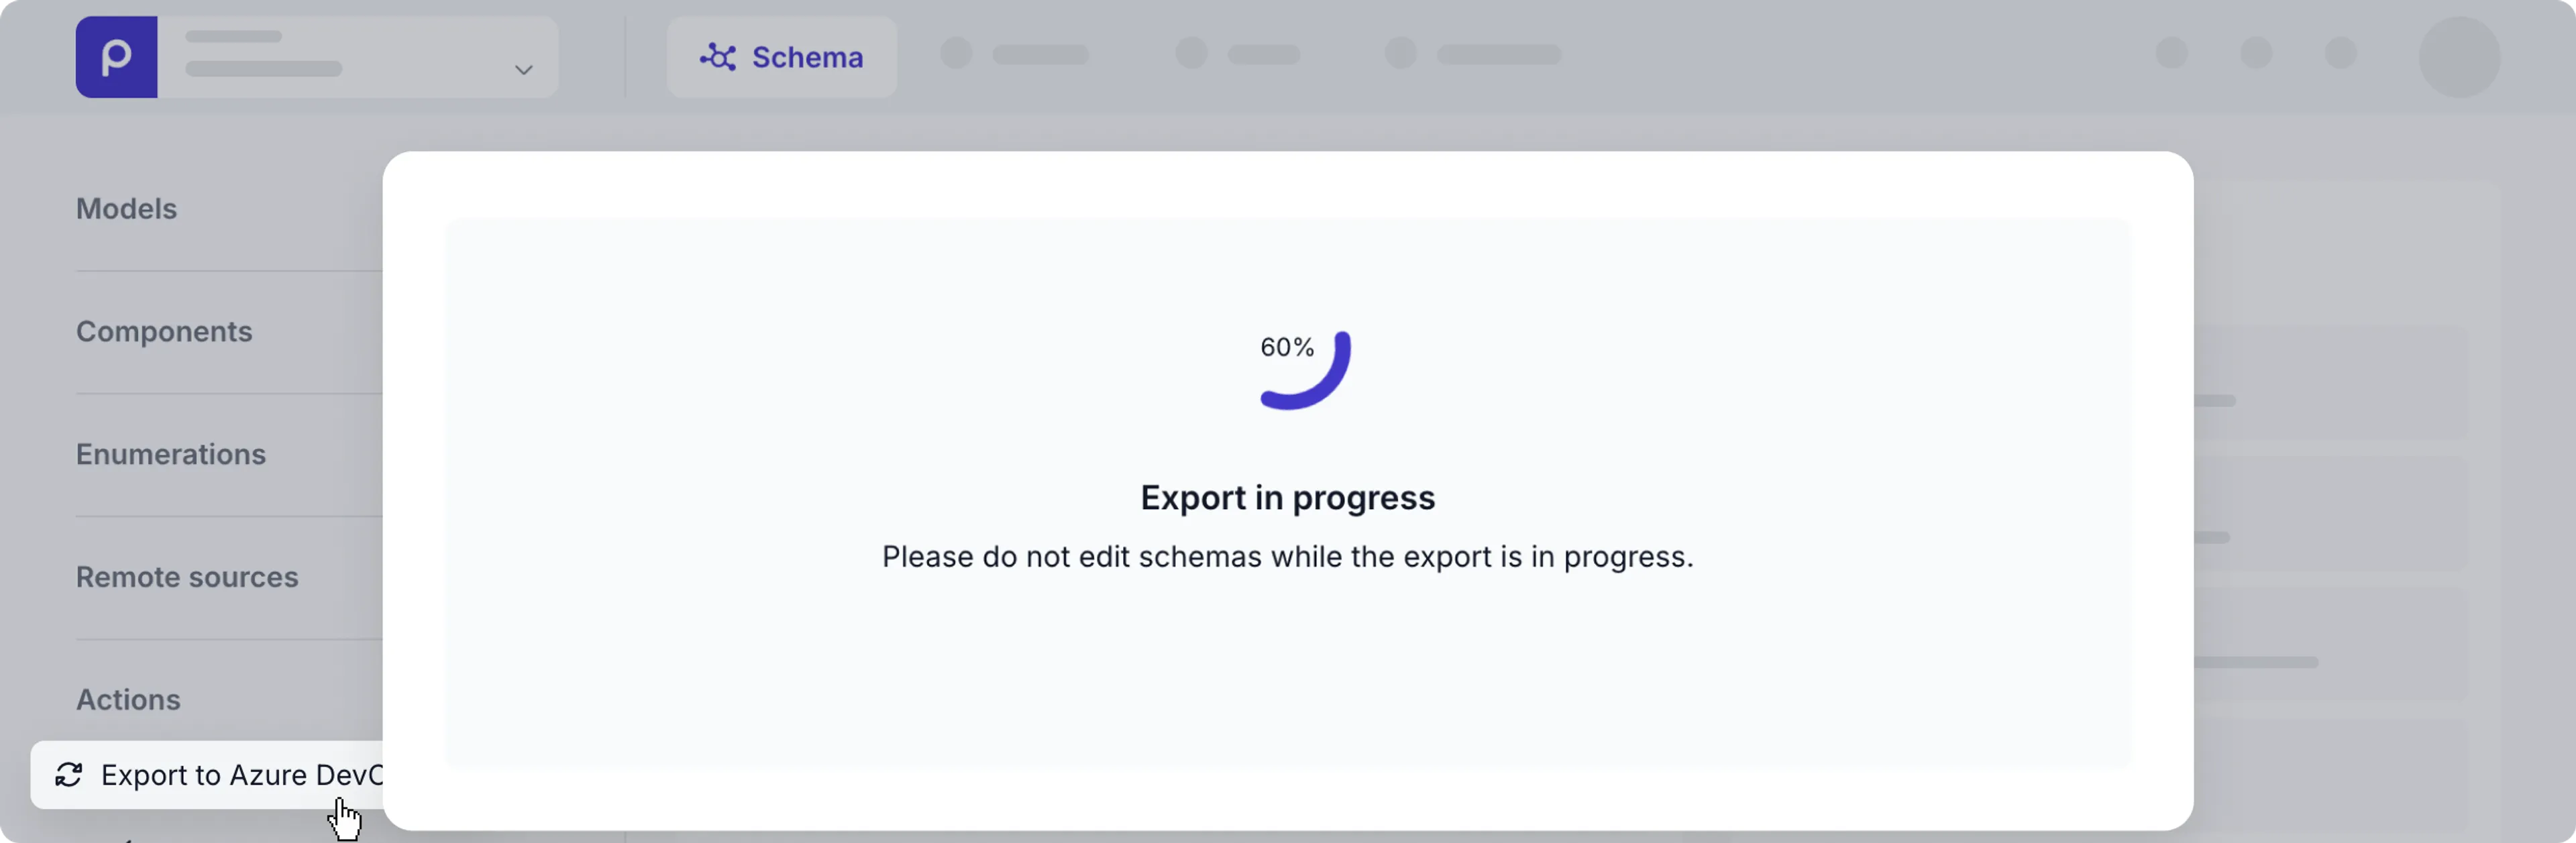
Once your Azure DevOps repository is connected, you can click the Export to Azure DevOps link to start the export process or click the Sync with Azure DevOps link and choose the Export schema to Azure DevOps option. When the export is triggered, you’ll see the Export in progress status.
-
Once completed, the repository will be updated as follows:
- If the repository is empty, the push request simply creates JSON files for each of the models, components, enumerations and remote sources in the schema.
- The model JSON file names will match each model’s Singular name in lowercase.
- The component JSON file names will match their Type Name values in lower case.
- The enumeration JSON file names will match their Type Name values in lower case.
- The remote source JSON file names will match their Type Name values in lower case.
- If the repository already has JSON files, expect the following behavior:
- If the JSON files match models, components, enumerations, and remote sources in the schema, these JSON files will be overwritten.
- If there are JSON files in the repository that don’t have matching models, components, enumerations, or remote sources, these JSON files will be removed from the repository.
- For models, components, enumerations, and remote sources that don’t have matching JSON files, new JSON files will be created in the repository.
When successful, you’ll see an Export complete status message. Now your Azure DevOps repository is up to date with the latest schema. And you can use this repository to sync any other schema in your organization by triggering an import from Azure DevOps.
Import from Azure DevOps
-
Once your Azure DevOps repository is connected, you can click the Import from Azure DevOps link or click the Sync with Azure DevOps link and choose the Import schema from Azure DevOps option. When the import is triggered, you’ll see the Validating Azure DevOps schema status.
-
When the schema validation completes, you can preview your changes.

- When you’re happy with the changes, click the Import schema button.
Once the import is completed, the schema is updated as follows:
- Models, components, enumerations, and remote sources will be overwritten with the matching JSON files in the Azure DevOps repository. The pull request will find matching models, components, enumerations, and remote sources using the model Singular name and the component and remote source Type name values in lower case.
- If there are JSON files that don’t have a match in your environment or organization schema, new models, components, enumerations, and remote sources will be created for each of these.
- If there are models, components, enumerations and remote sources that don’t have a matching JSON file, these will be automatically deleted if they are not in use by any content items.
That’s it! You‘ve synchronized the schema using a Azure DevOps repository.
You can disconnect the Azure DevOps account from your Prepr environment. For example, if you need to switch to a different Azure DevOps account. In this case, simply go to the Settings → Integrations page and click the Deactivate link in the Azure DevOps integration block.
If you have any questions about schema synchronization, please reach out to our Support team .