Adding live video streams to web apps
Follow this guide to learn how to add a live video stream to your web application using Prepr.
Introduction
Imagine you are about to hold a corporate event. In this case, you may want to create a web page to announce and broadcast your virtual event. Also, recording your online event might be essential, especially if you attract attendees located in another time zone or want to send out the replay to all registrants.
Prepr makes all this incredibly simple with the Live streaming feature powered by Mux’s advanced video services.
Prepr works as a centralized interface you can use for the following purposes:
- Create and manage a live video stream.
- Integrate a live video stream in a web application using the API and a video player.
- Save and store your live stream as an on-demand video recording.
Prerequisites
You need to have the following setup before you can render images in your web application.
- A free Prepr account
- At least one content model in your environment.
For more information on how to set up a content model in Prepr, check out the content modeling basics. If you’re still unsure about how to structure your content, check out our example models for inspiration.
Adding live streams to your web application
The steps below make use of the example of a live stream in a blog article.
Define the Assets field in your model
To allow editors to add live streams to content items, you need to add the Assets field to the corresponding model:
- Click the Schema tab and click the model you want to update.
- Drag the Assets field from the list of field types to the position you want it in your model.
- In our example, we choose the Single-asset field. This means content editors can only add one live stream to a blog article content item.
- Enter the Display name and make sure the Video asset type is enabled.
- Click the Settings tab to enable the Caption, for example. Then click the Save button. For more information on different settings, check out the Field types guide.
Now, you can set up a live stream so editors can add a live stream to a blog article content item.
Set up a live stream in Prepr
- Go to the Media tab and in the Upload asset button, click to open the drop-down menu and choose the Add live stream option.

-
In the pop-up dialog window, give your livestream asset a name and click the Add button to generate a unique stream key for your broadcast.
-
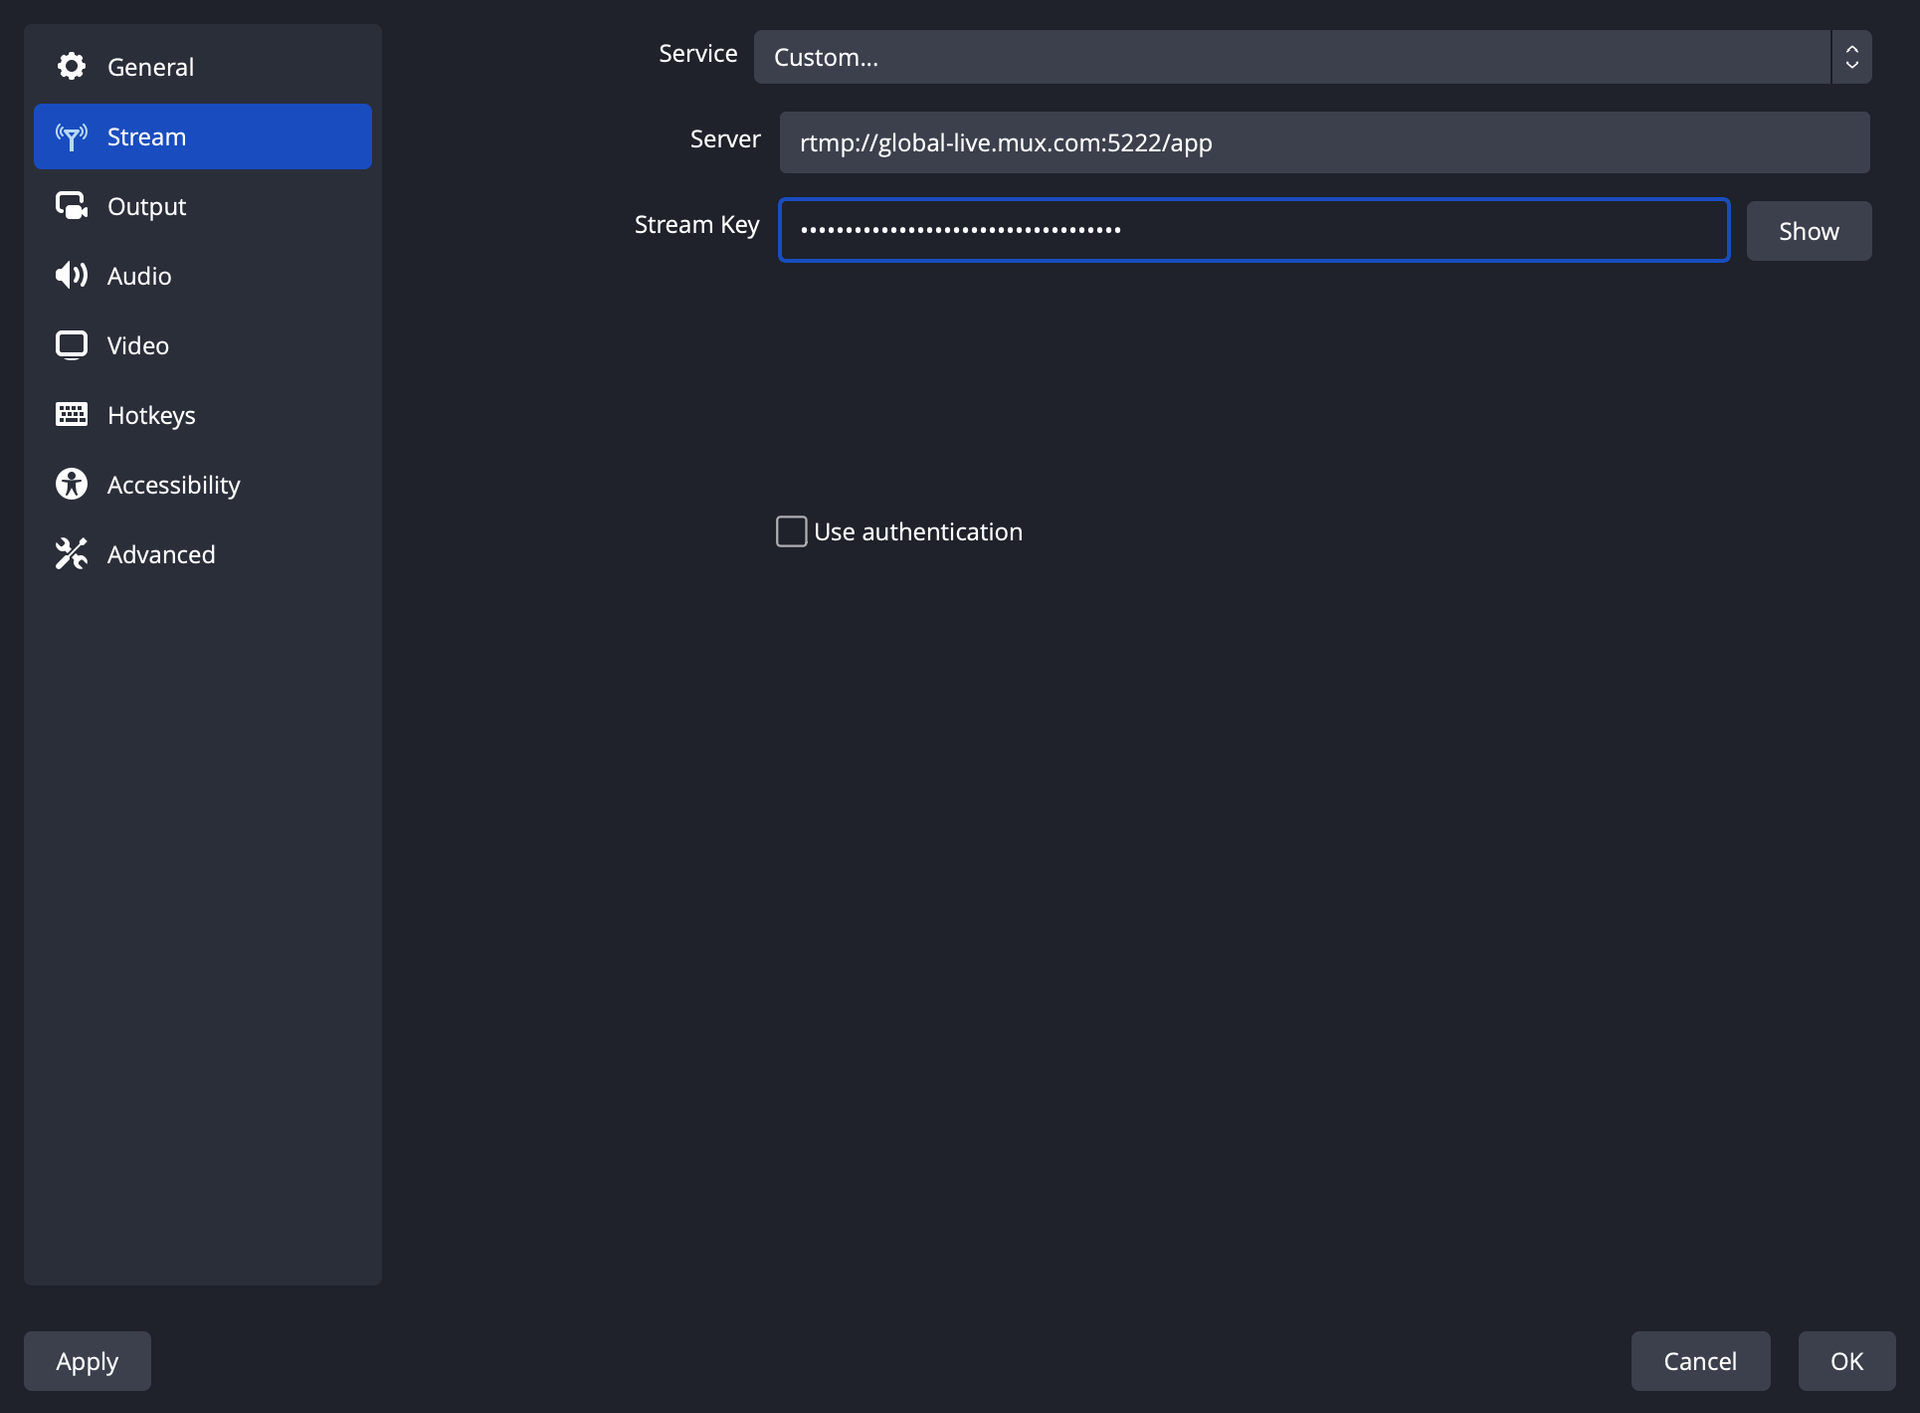
The next screen gives you the Server URL and Stream key that you need to connect to the broadcast software:
- Server URL is the URL of the Mux RTMP server used to connect your broadcast software to Mux’s entry point for live streams.
- Stream key is your secret key used to authenticate your live stream with the Mux RTMP server in your broadcast software.
⚠️The stream key is shown only once. Make sure to save it securely.
-
You can add subtitles to your live stream directly in Prepr (For Mux Player only) and set a custom video thumbnail.
Once done, content editors can add the livestream asset to a blog article content item.
Add live stream to a content item
Now that you’ve set up a live stream, let’s look at the typical steps a content editor follows to add it to a blog article content item.
- Navigate to the Content tab. You can either create a new content item or use an existing one.

- On the Content item page, click the Live stream field to open the Media Library.
- Select the livestream asset and click the Add 1 asset button.
- To make the content available in a web application, click the Publish button.
Now that the content is available, you can configure your preferred broadcast software.
Configure your broadcast software
In this step, you need to configure your broadcast software using the Stream key and Server URL you copied when you created the live stream.
Broadcast software uses video encoding technology to convert your video feed into a digital format suitable for live streaming across various devices and platforms. Here’s the list of broadcast solutions you may want to consider:
- OBS (free and open source, macOS/Windows/Linux)
- Wirecast (commercial, macOS/Windows)
- Larix Broadcaster (free, iOS)
- Wirecast Go (commercial, iOS)
The below example uses OBS configuration. For more details, check out the OBS documentation .
Once the broadcasting software is set up, you can add a web player to your front end.
Retrieve the live stream using the API
Use the following snippets as a starting point to retrieve your live stream via the API. You may want to add or remove fields according to your desired setup. For more information, see the GraphQL API reference.
To integrate your live stream with a 3rd party player, make sure to include the url field in your API request.
It will return a video URL in the format: https://stream.mux.com/{PLAYBACK_ID}.m3u8.
For Mux Player, including the playback_id is sufficient.
QUERY
query {
  BlogArticle (id: "a75f79e6-b11f-4f9e-a173-de58856a7") {
    _id
    title
    _slug
    live_stream {
      _id
      name
      url
      playback_id
      caption
      alignment
    }
  }
}Please check out the Connecting front-end apps guide to learn more about retrieving content in a specific front-end framework.
Now that you have the live stream details, you can implement the web player with these values.
Add a web player to your front end
You’ve prepared a livestream asset, configured your broadcast software, and retrieved the live stream details. Now you can choose which web player to use in your web application.
Because Mux delivers your videos in the HTTP Live Streaming (HLS) format, we recommend using a player that supports HLS. Here are some popular players you may want to use:
- Mux Player is a native player developed by Mux.
- HLS.js is free and open source. HLS.js will be a good choice if you want to use the HTML5 video element’s default controls or build your own UI elements.
- Agnoplay is a fully agnostic, cloud-based player solution for web, iOS, and Android.
- JWPlayer is a commercial player that supports HLS by default and uses HLS.js as an underlying HLS engine.
Check out other options in the Mux documentation .
To add the Mux Player to your web app, go to the Media tab and open the livestream asset. On the livestream Asset detail page, go to the Embed code field, to find the sample code you can include in your web app.
Check out the Mux player docs for HTML and React implementation details.
Before your live video stream starts, the playback URL will be inactive, therefore, no content will be available in a web player. In that case, we recommend setting up an intro layout, for example, the countdown timer or image cover, etc., to give your live stream a professional look and to grab the audience’s attention. Refer to your web player documentation for more details.
Play your live stream
Follow your broadcast software instructions to play the live stream. Some general recommendations are listed below.
Start a live stream
Once the live stream begins, it becomes available in your web application instantly. At the same time, the software starts pushing live video to the video host server.
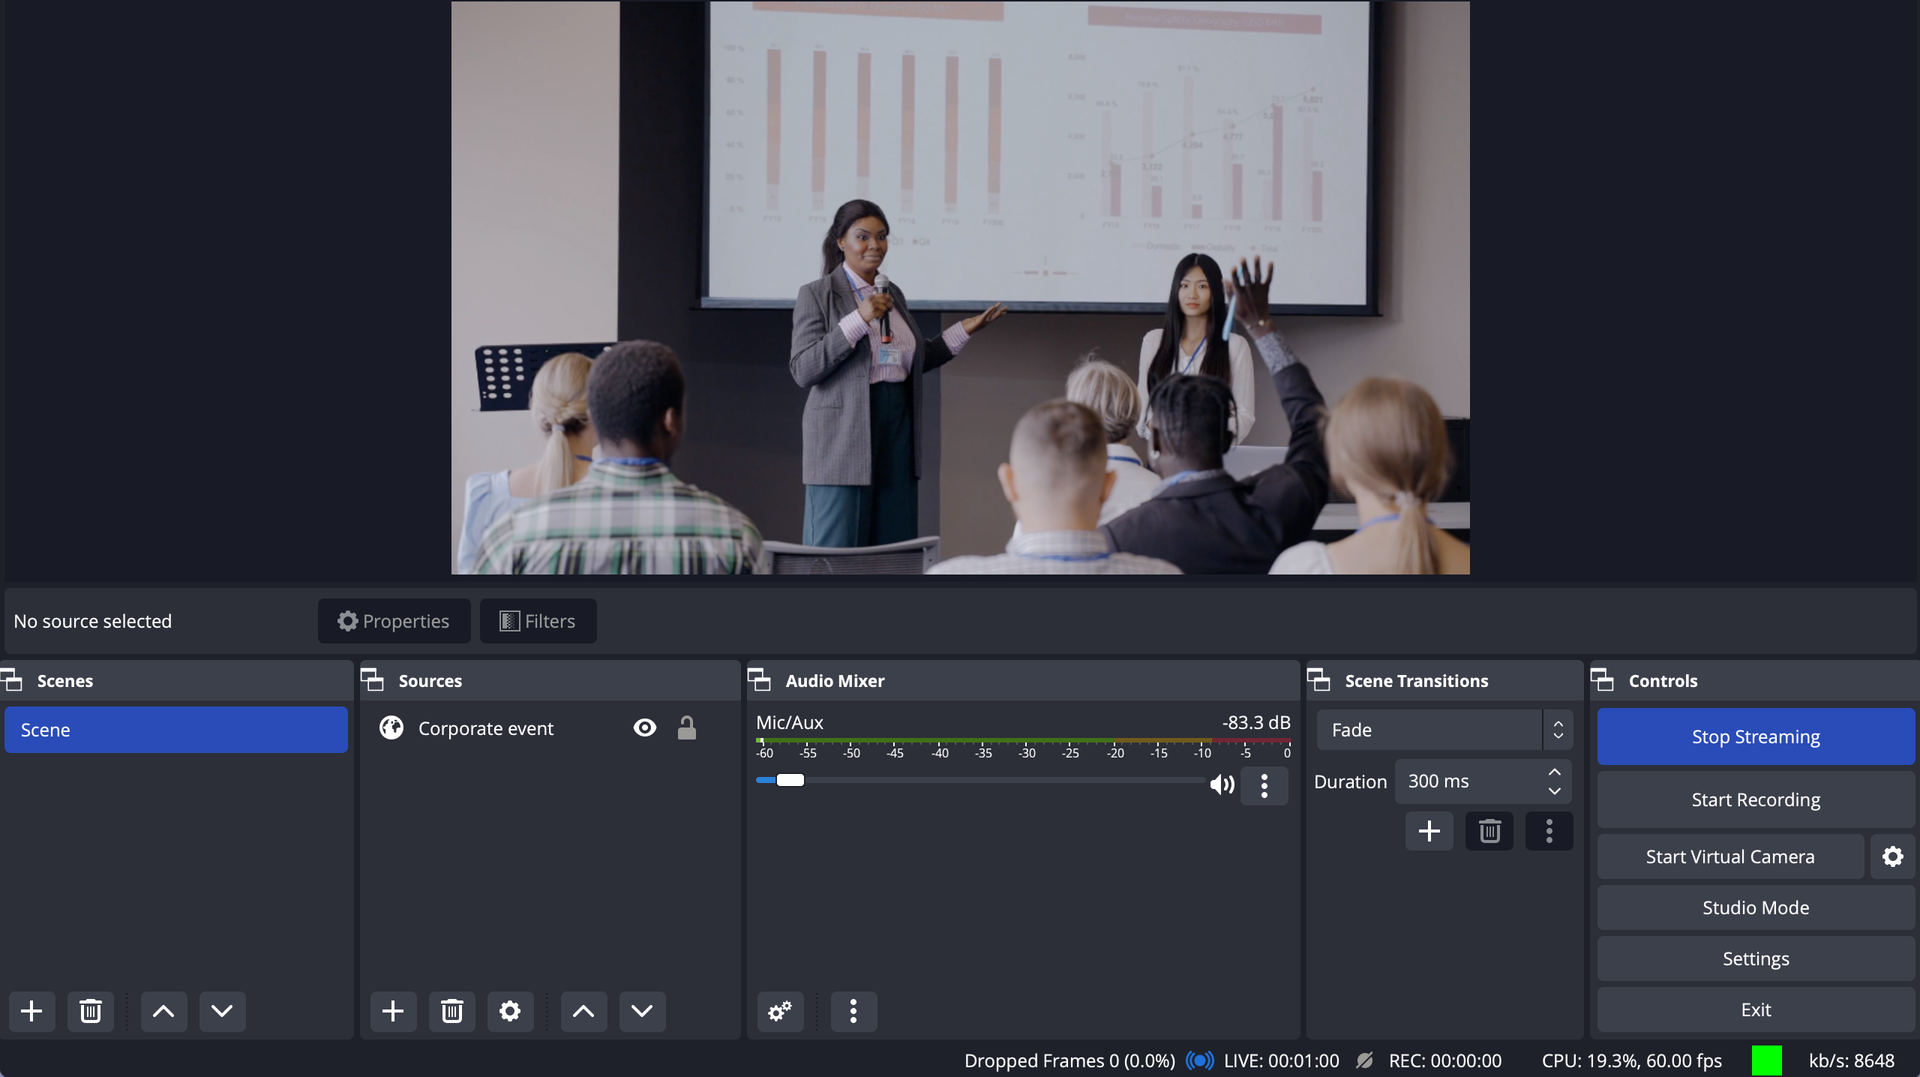
You can also see the Live label in the livestream asset in Prepr:
![]()
Stop a live stream
Refer to your broadcast software documentation on how to stop a live stream.
Please note there may be a slight delay between when you stop streaming in the broadcast software and when the recording stops in Prepr. To stop recording immediately, we recommend that you follow this sequence of actions:
- First, stop recording your live stream in Prepr. For that, go to the Media tab and open the livestream asset. On the livestream Asset detail page, click the Finish live stream button.

- Then, stop streaming in your broadcast software.
Make sure to stop streaming within the 60s timeframe after you stop recording in Prepr. If not, your broadcast software may re-establish the connection, resulting in a new recorded asset.
Once done, the live stream will be replaced with the video recording in your web application automatically. Alternatively, you can access and play this video recording in the Media Library.
Because Prepr keeps your Stream key active, the livestream asset also remains available in the Media Library. So you can start a new live stream using the same credentials anytime. In this case, you’ll get several video recordings of your live stream in the Media Library, and your web page will show the latest recording every time.
Want to learn more?
Check out the following guides to learn how to add other asset types to your web application: