Running A/B tests
This guide shows you how to easily run A/B tests in Prepr CMS.
This guide highlights typical marketing tasks when running A/B testing. Check out the set up A/B testing guide for developers for the one-time setup in the front-end app.
Introduction
Let’s look at a typical use case for an A/B test.
You want to increase the number of visitors who request a quote through your car leasing website. To achieve this goal, you take the following actions:
-
You find that the Electric Lease landing page is one of the main entry points in the visitor journey that starts from clicking the Find a car button and resulting in a quote request.

-
So, you come up with a plan to improve the content in the hero section of this landing page. You prepare two variants of the hero section (variants A and B) but are unsure which one will most effectively drive visitors toward requesting a quote.

-
To determine which variant performs best, you run an A/B test with the following goals:
- Micro-conversion goal: You want to measure how many visitors click the Find your car button on the Electric Lease Landing Page because it’s the start of the visitor journey to reach the end goal.
- Macro-conversion goal: You want to measure how many visitors request a quote within a day of visiting the home page.
Prerequisites
To run A/B testing on your website like in the above example, you need to have the following set up in Prepr:
This guide uses the Acme Lease demo data as an example.
Create an A/B test in Prepr
Define experiment goals
Before creating an A/B test, it’s important to define the goals for your experiment to see the impact of the A/B test on a number of events along the visitor journey. For example, to measure how many visitors who view the B variant successfully request a quote compared to those who view the A variant.
Let’s define the primary goal to request a quote. The secondary goal is to measure the click-through rate (CTR) from the A/B test content.
-
Go to Segments → Goals.
-
Click the + Add goal link. For the primary goal, set the condition to Visitors who
didviewspecific items,Contact sales,at least oncein the last quarter.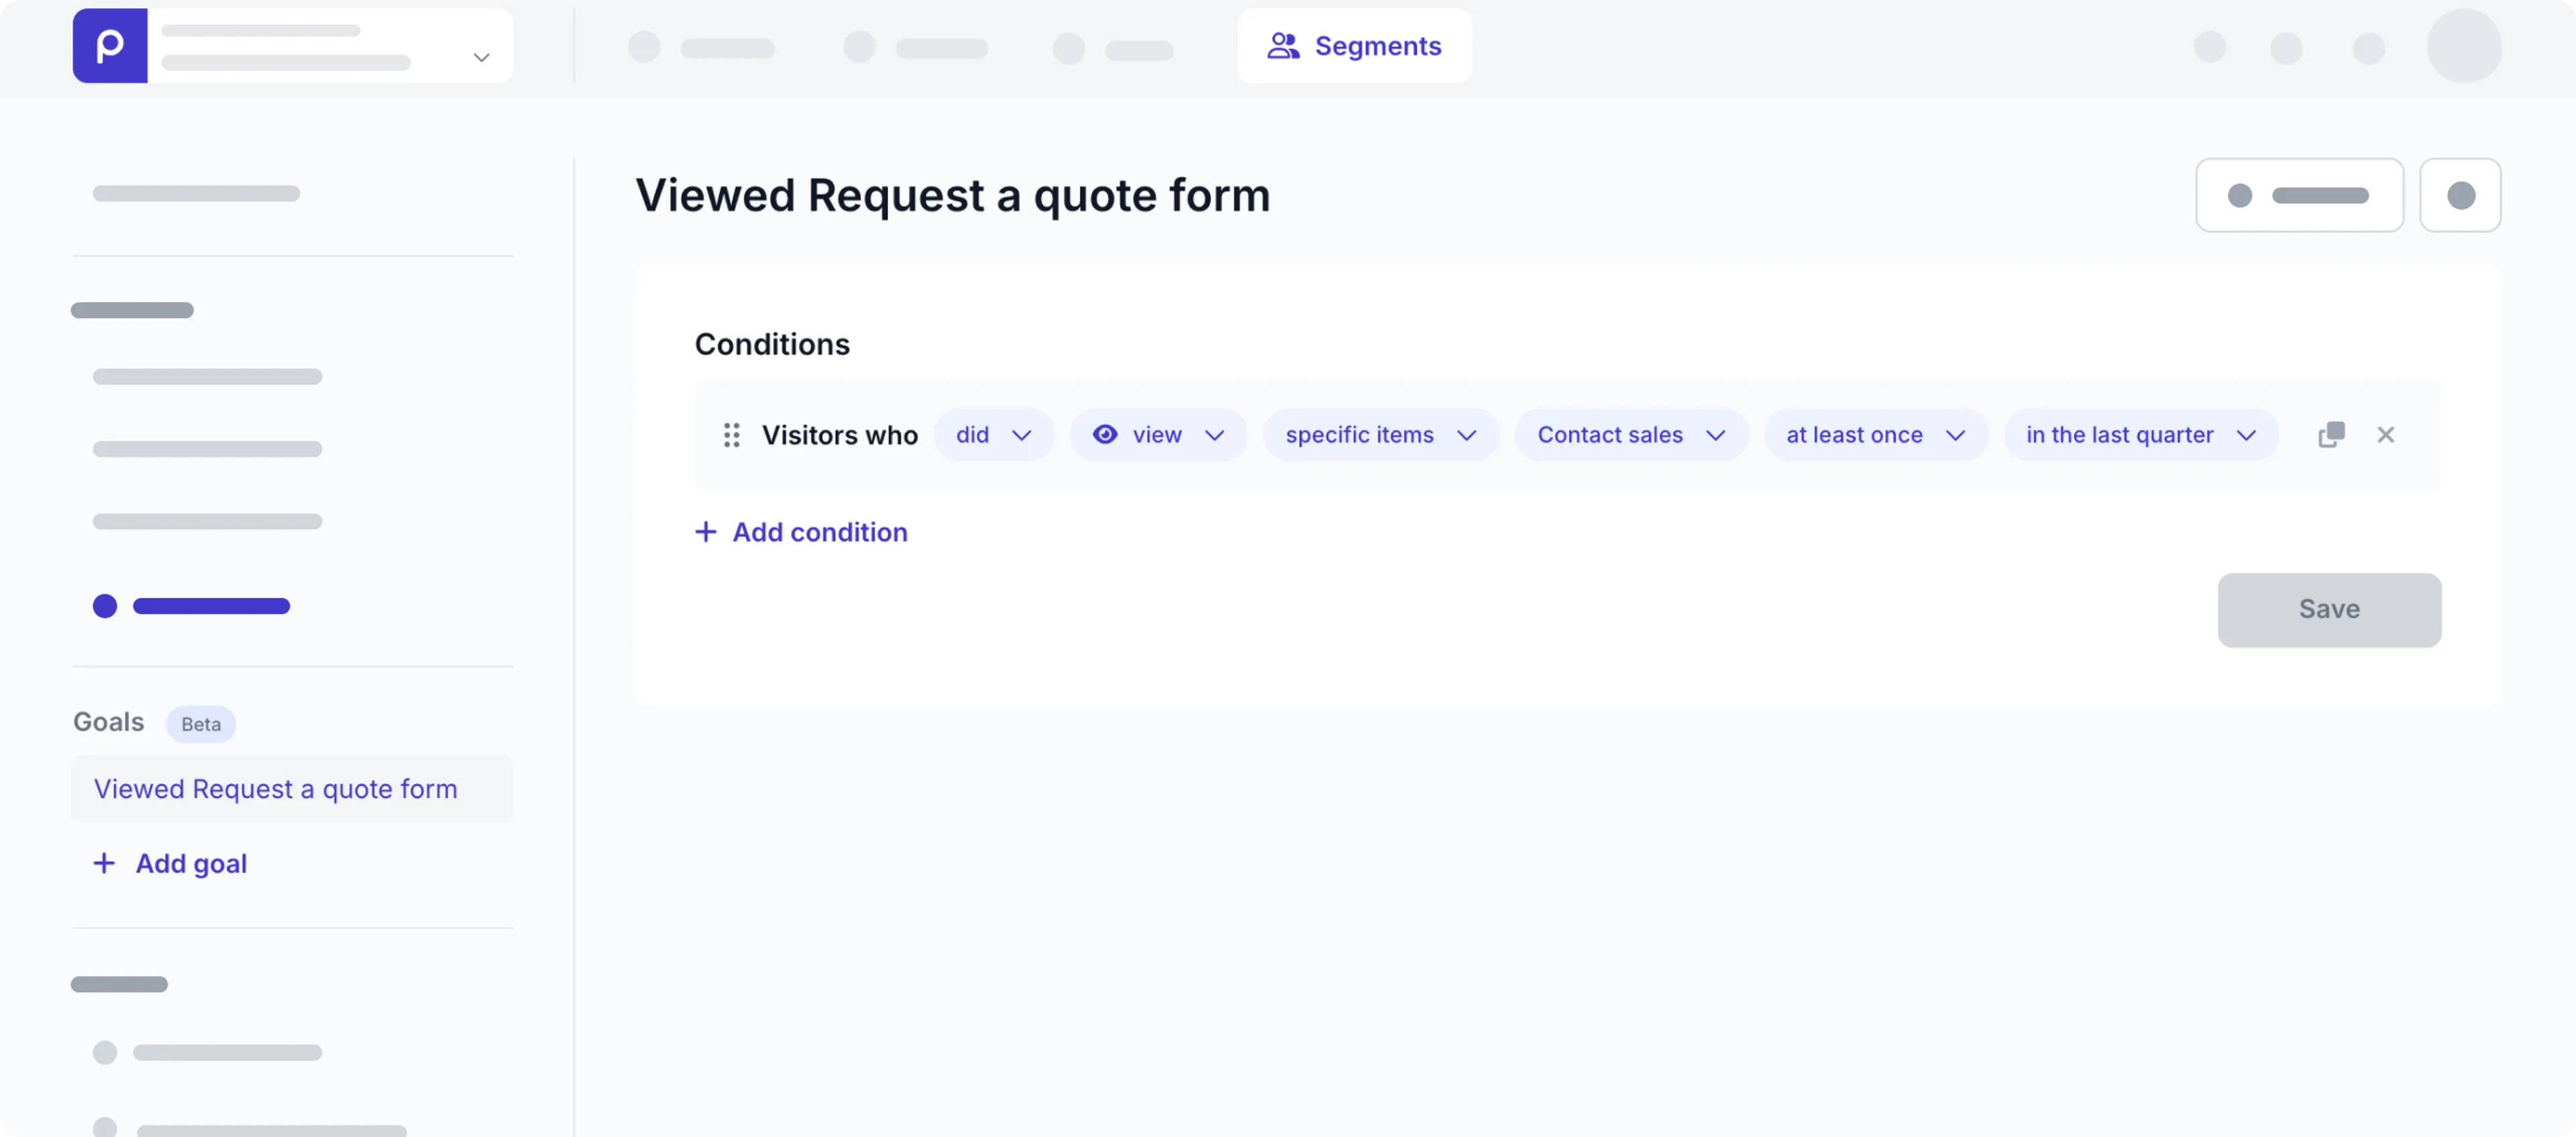
You can set up any combination of conditions in your goals for visitor Events. Combine conditions by using the
ANDorORlogical operators. -
Click the Save button and enter a name like Viewed Request a quote form.
-
Click the Save button.
Add the A/B test to a stack element
-
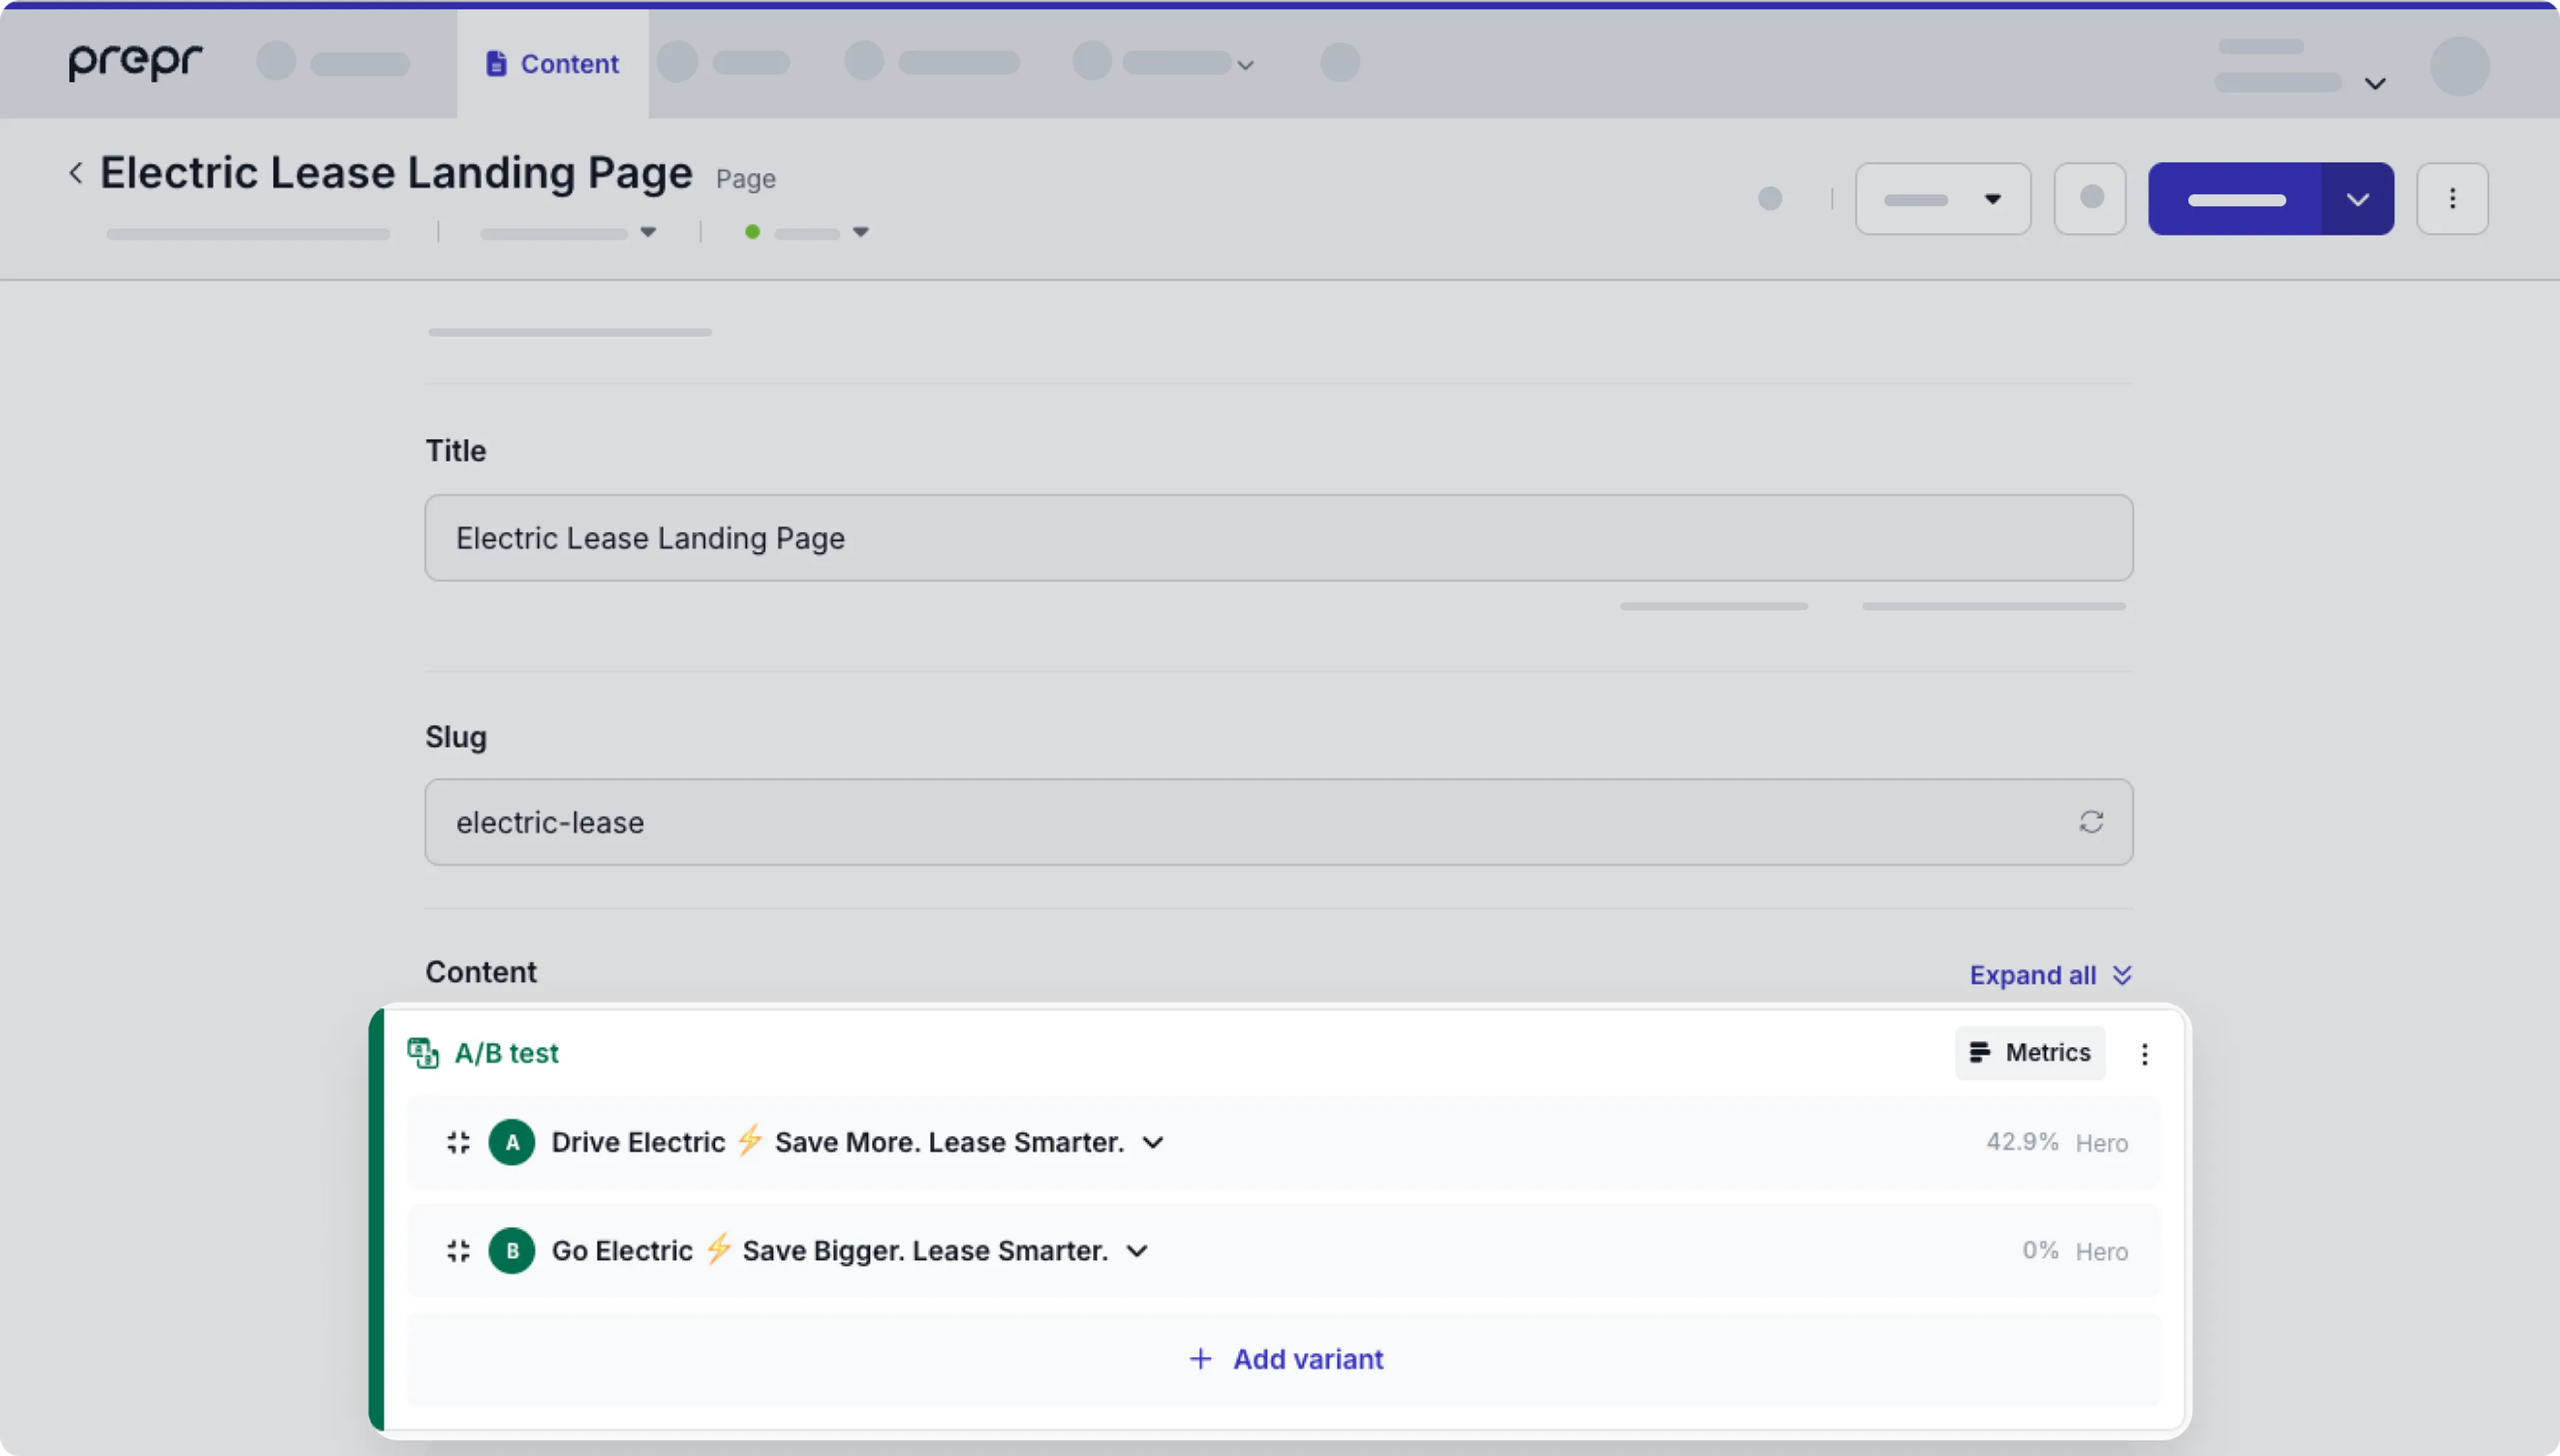
Go to the Content tab, click to open the content item where you want to add the A/B test, such as the Electric Lease Landing Page.
-
In the Stack field, in our example it’s called Content, go to a specific section like the Hero and click the icon to add an A/B test. When you do this, a B variant will be created, which is a copy of the A variant.
-
Update the images and text for each variant.
You can also run an A/B test with a single variant by deleting one of them. Hover over the variant to see the icon. In that case, by default 50% of your users will see the selected item and the other 50% won’t see it. Go to the Manage settings option to change this traffic distribution.
-
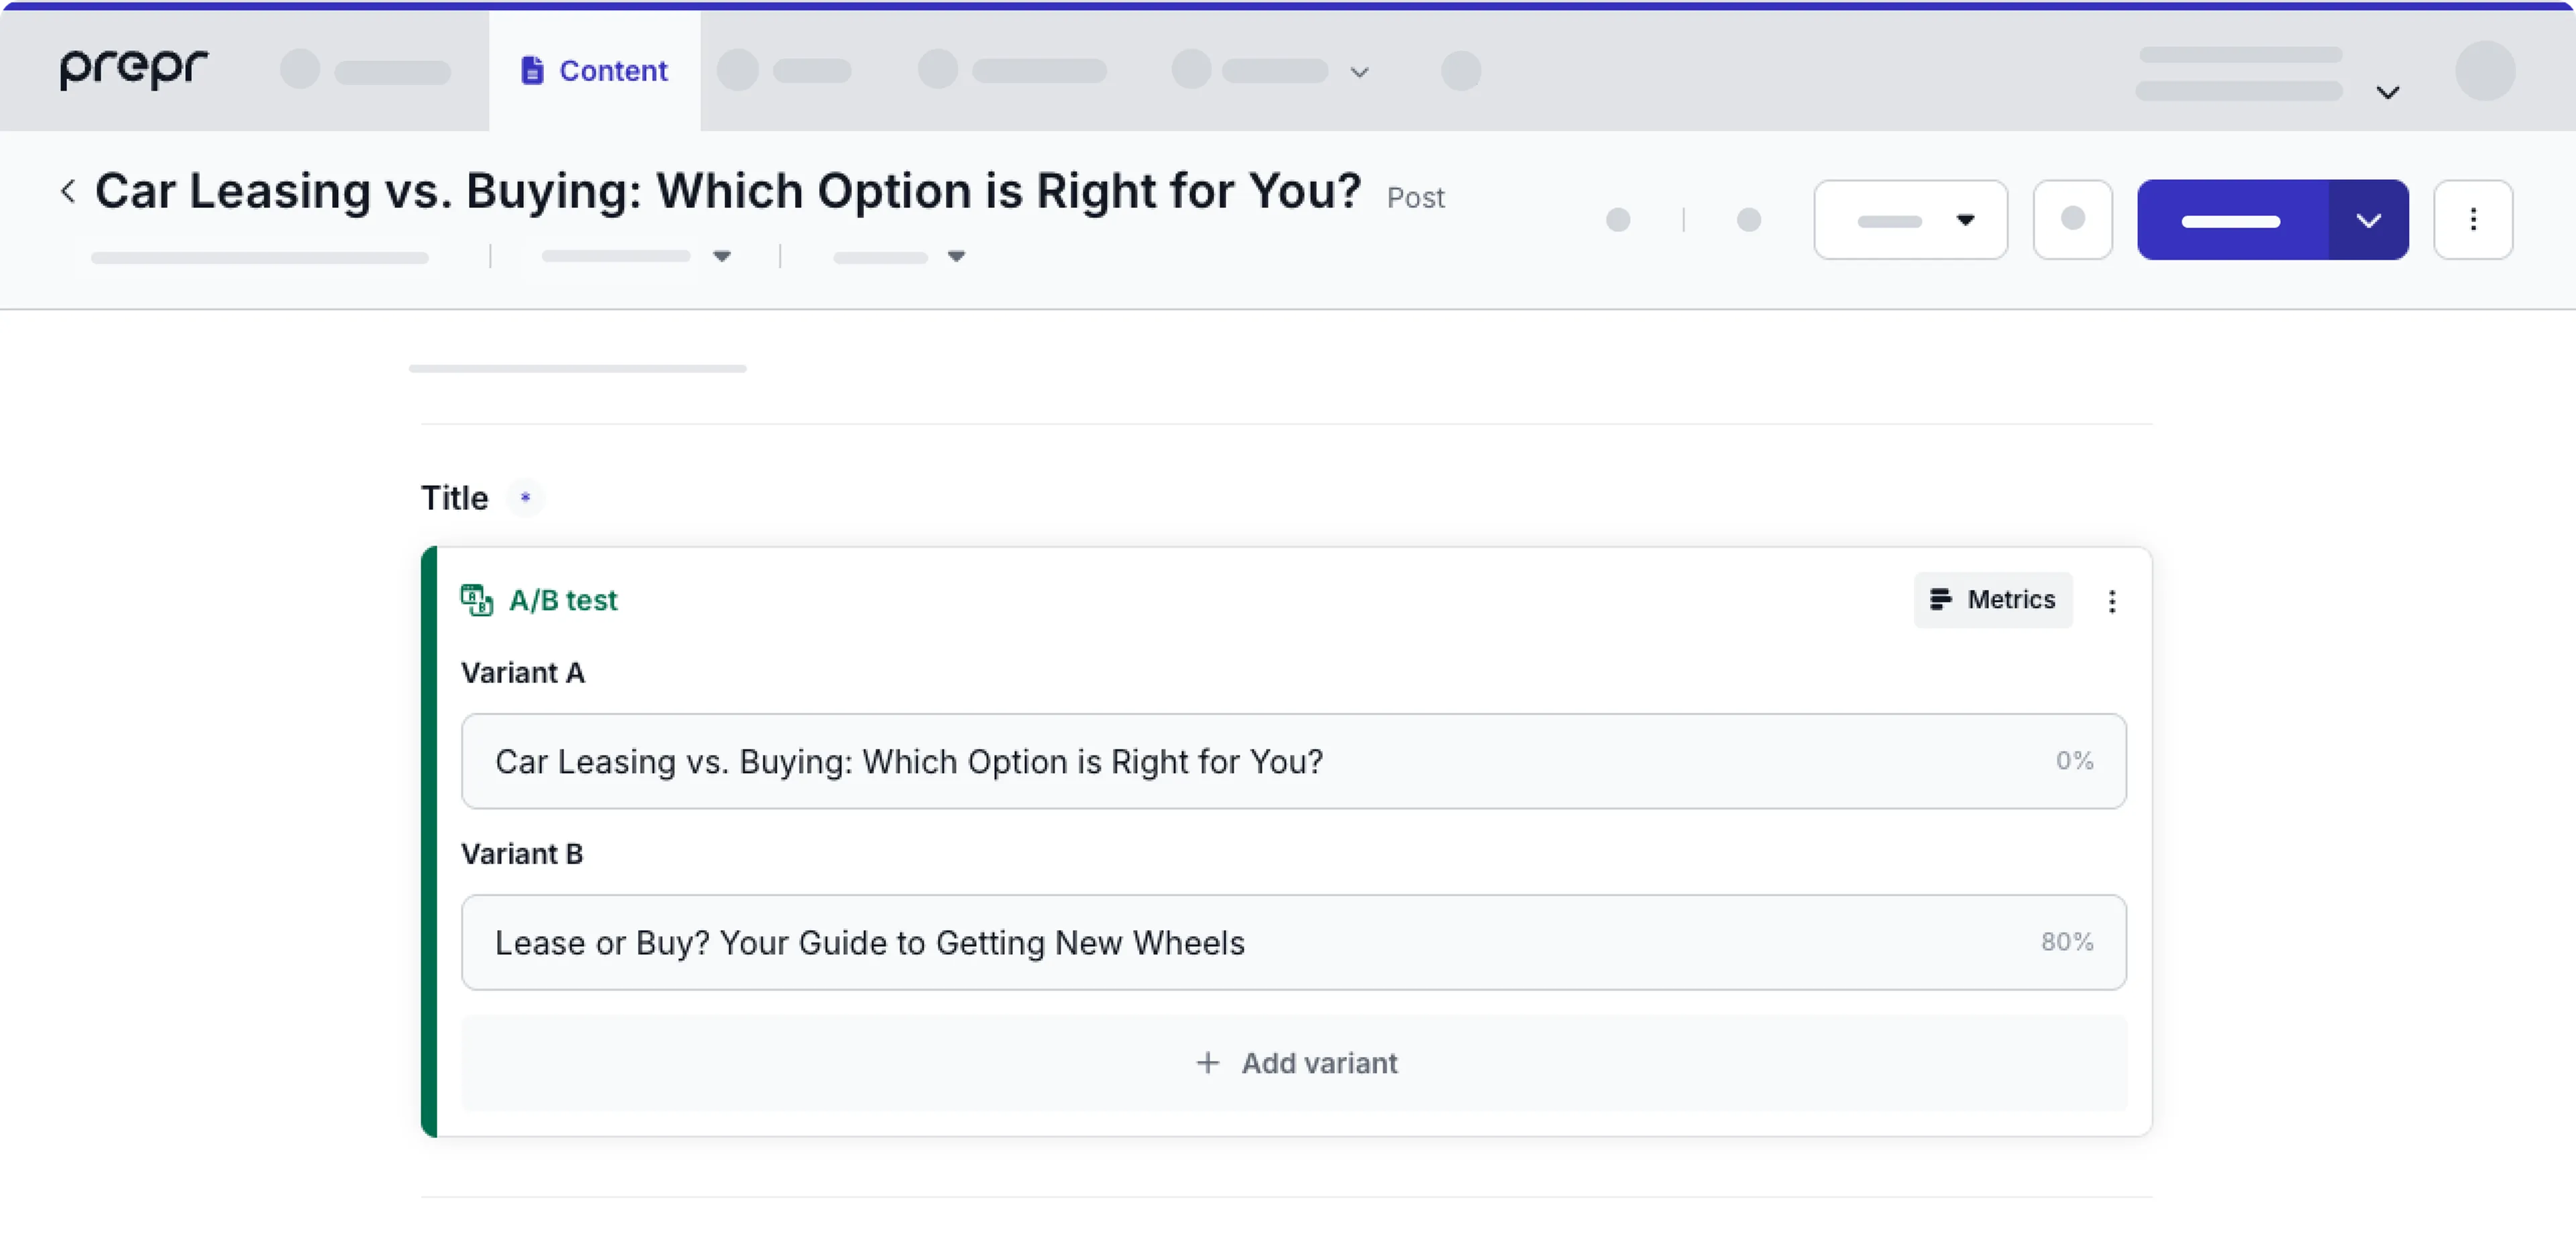
Instead of the Stack field, you can also add an A/B test to just a Text field like the headline of an article if A/B testing is enabled on that field.
-
Now that you’ve added the A/B test, you can link the goals from the previous step. To link the goals to your A/B test, follow the steps below.
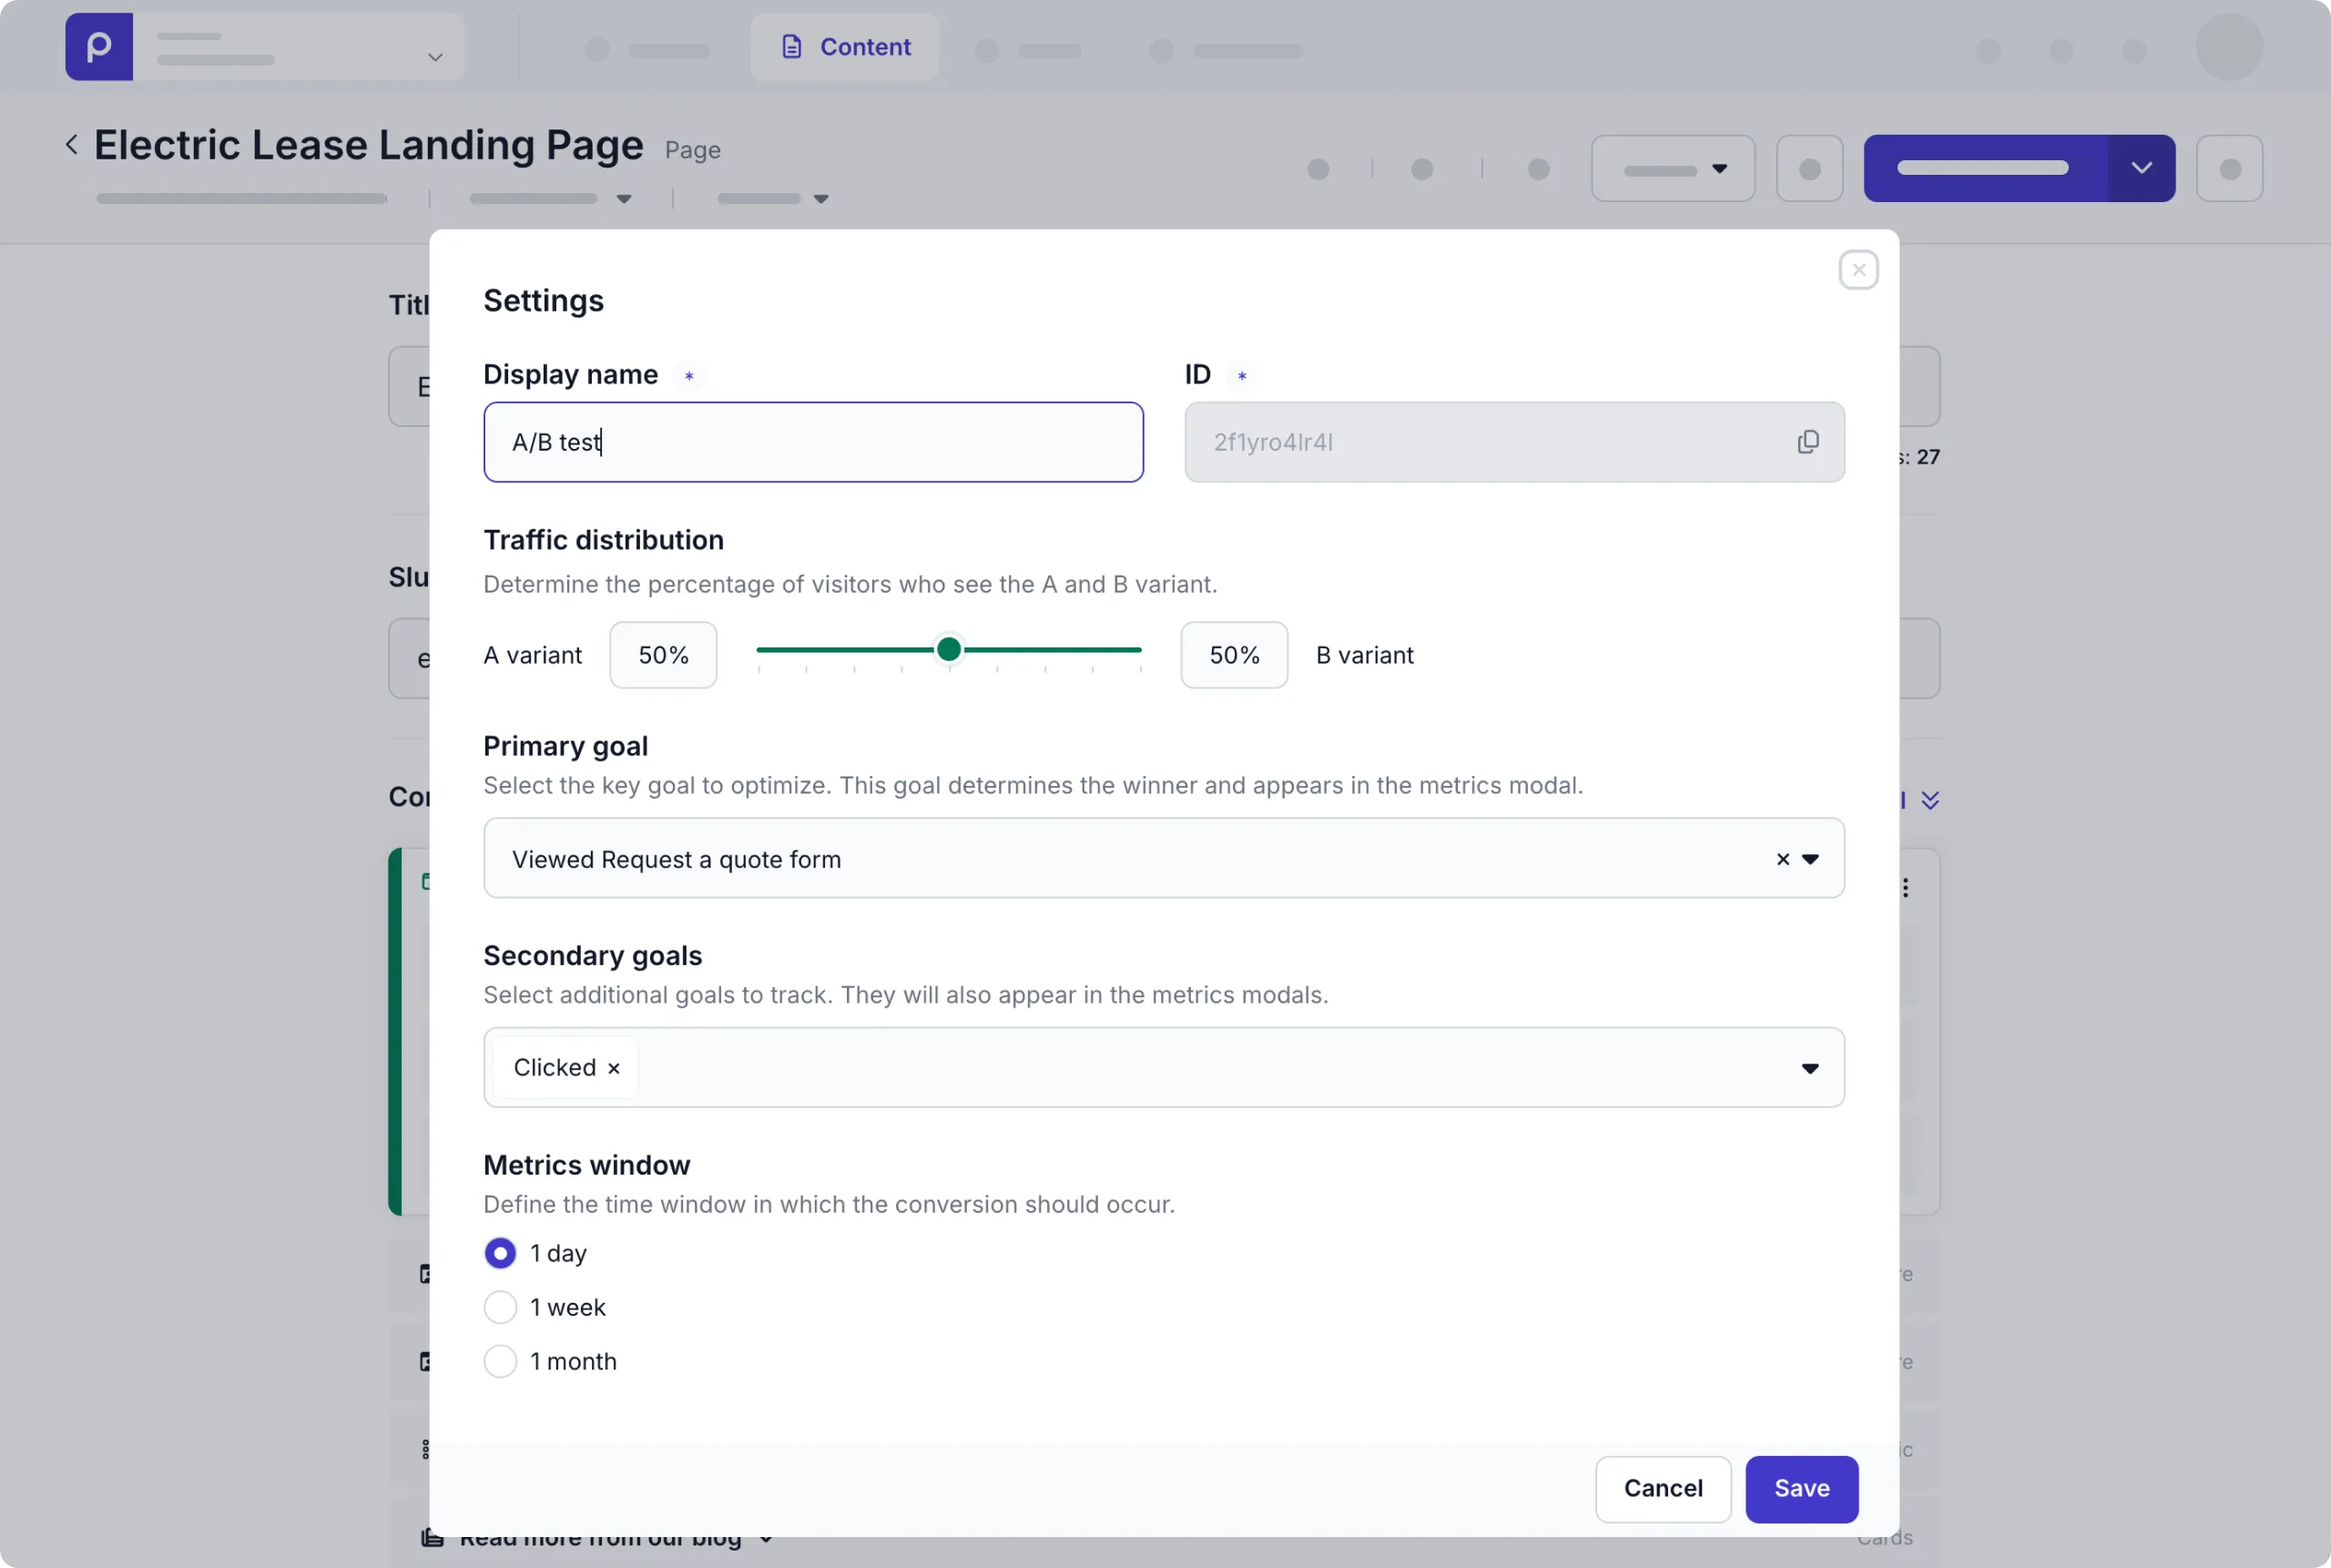
- Click the icon in your A/B test group and choose the Manage settings option.
- Set the Primary goal value to the Viewed Request a quote form goal you defined in the previous step.
- Set the Secondary goals value to the Clicked event. This picks up the click event on the Find a car button set up in the front end.
- Keep the default Time window of 1 day to measure the number of visitors who requested a quote within one day of viewing the A/B test content.
That’s it. You’ve just set up the A/B test in Prepr.
Once you’re ready, click Publish and close.
When you add an A/B test to your content, you won’t see any metrics data initially (Awaiting data) until a developer adds the one-time setup and web app visitors start interacting with your A/B test content.
Manage the A/B test
You can make some changes to your A/B test, for example, if you want to change the default traffic distribution where Variant A and Variant B both get shown to 50% of all visitors. The options listed below are available to make changes to your running A/B test. Click the icon in your A/B test group to see these options.
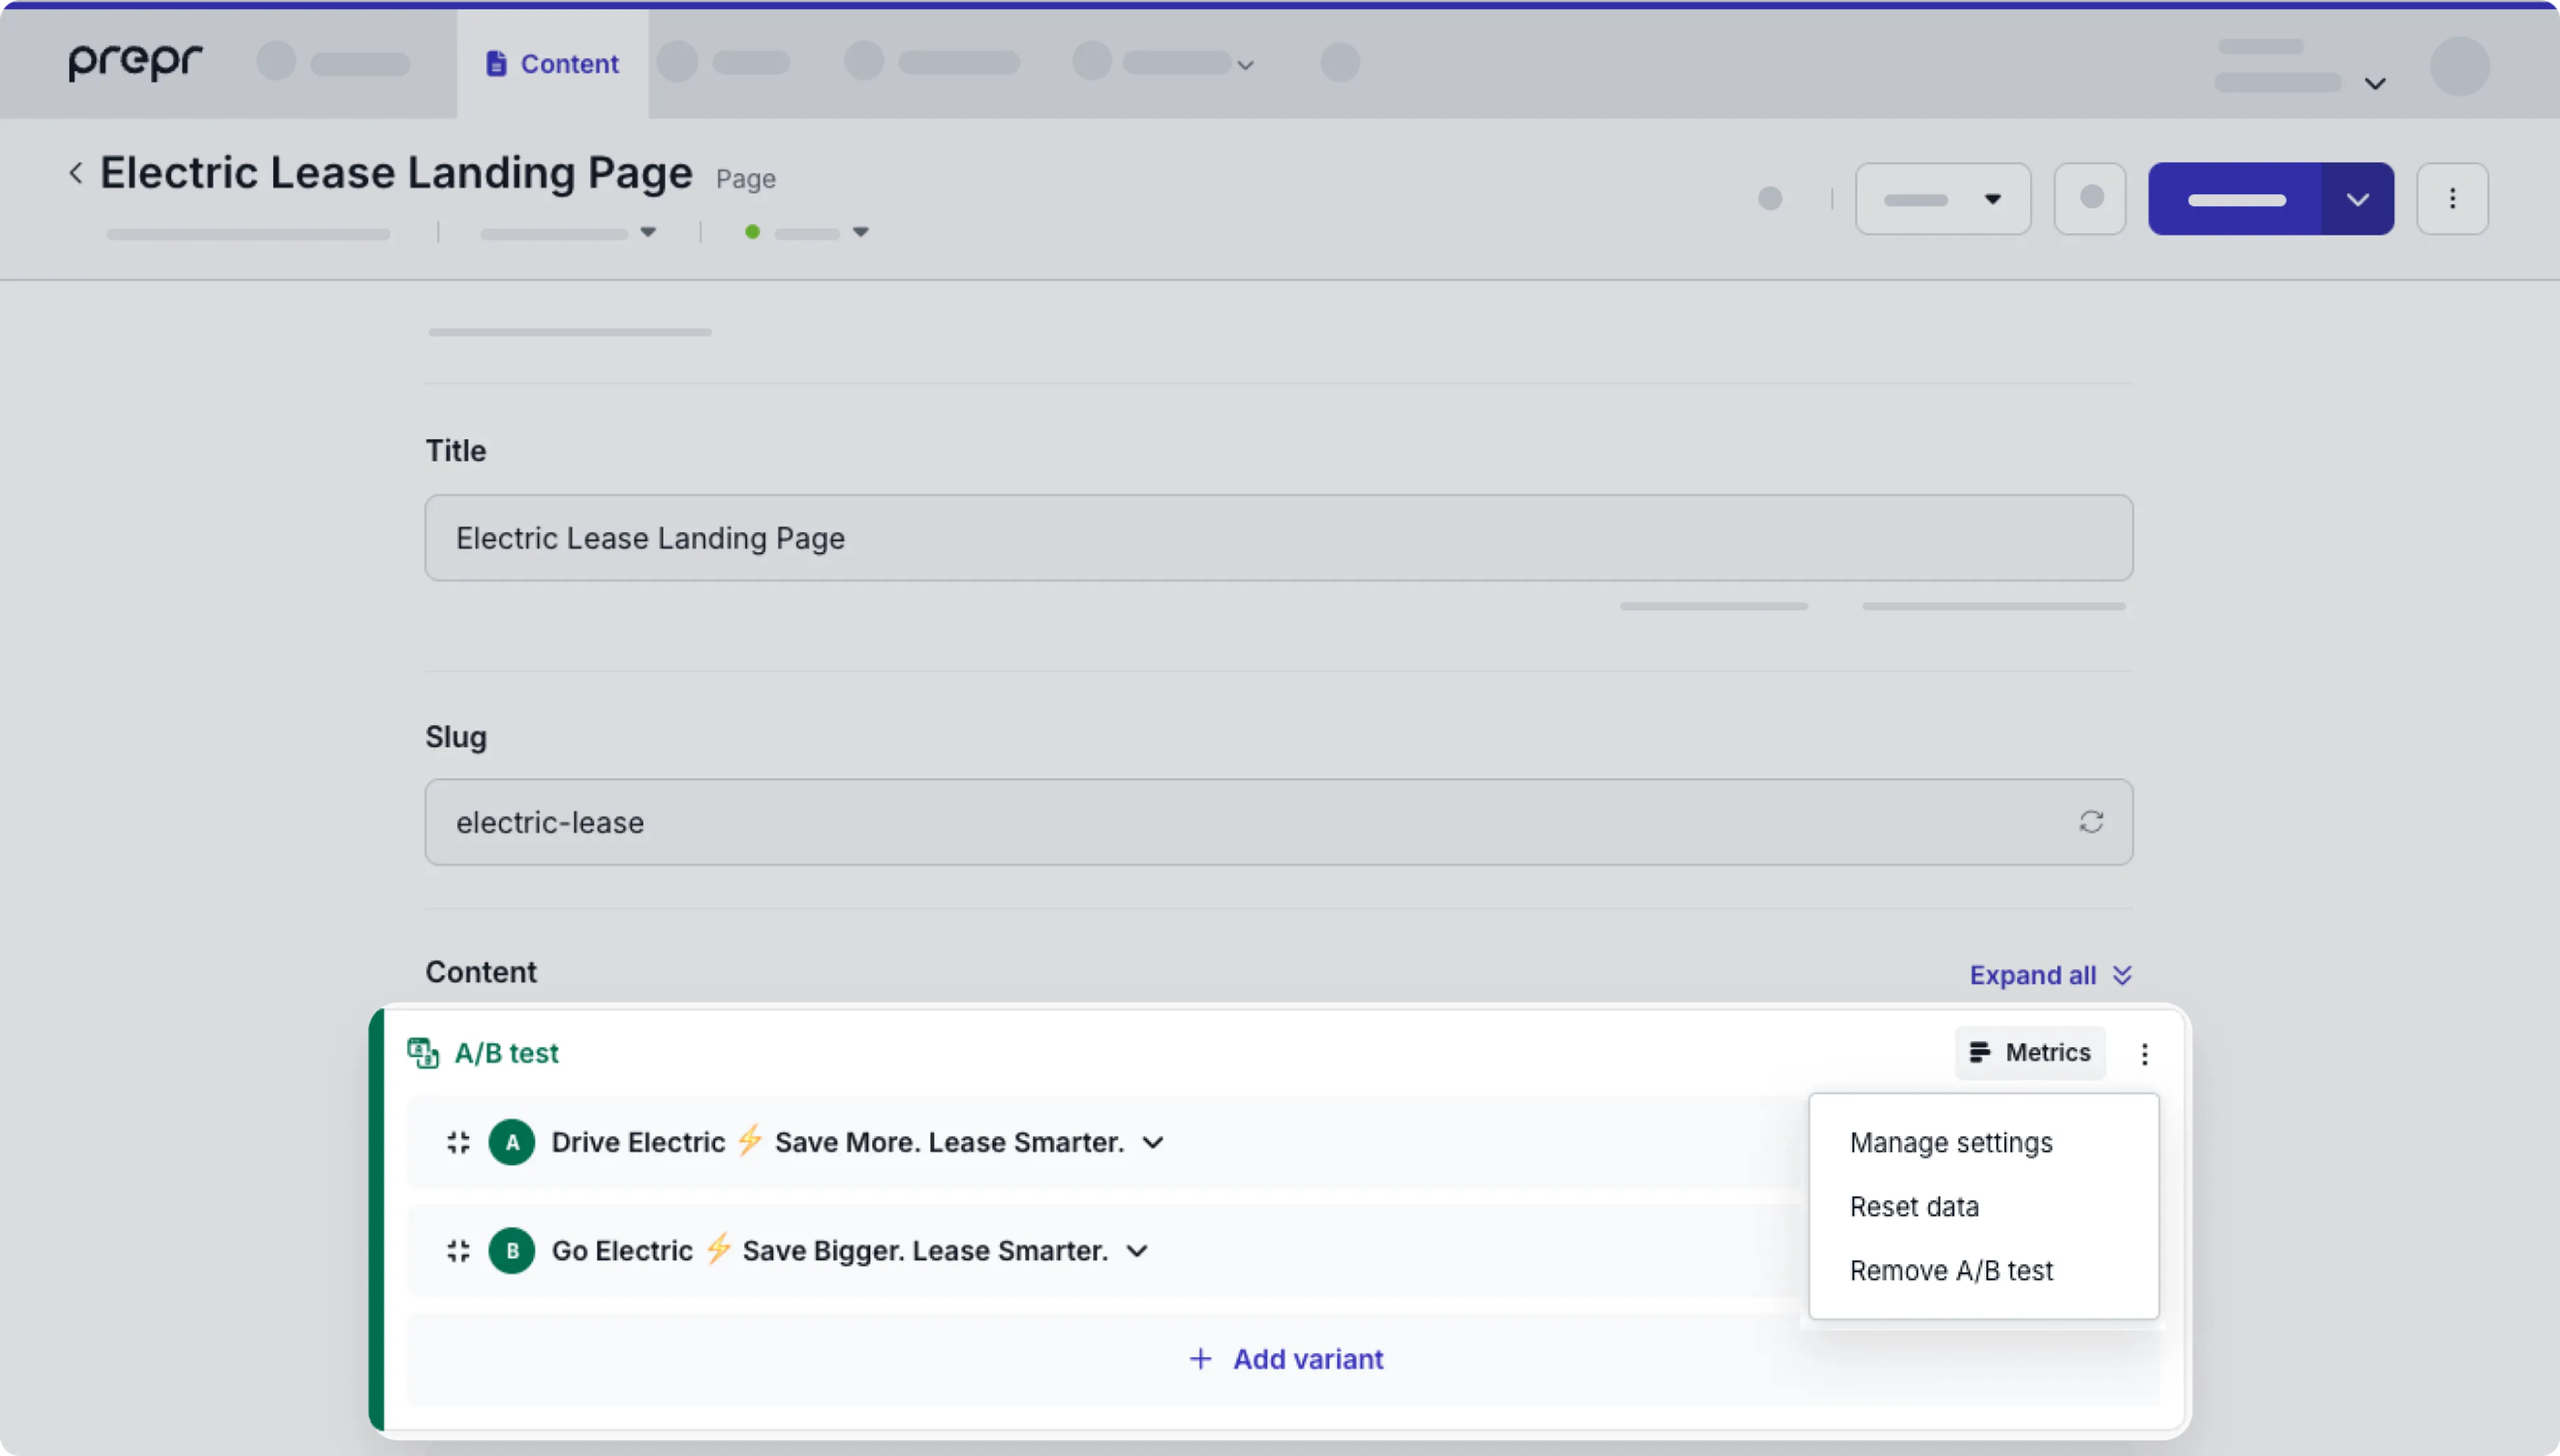
Manage settings
Choose Manage settings to change the Display name to set it apart from other A/B tests in the same content item or to change the traffic distribution of Variant A and Variant B and to set up the goals applicable for this A/B test.
Reset data
After some time, your live A/B test will accumulate some data and these give you insights into how the variants perform against each other. It’s possible that from these insights you want to make adjustments to the variants and re-evaluate the adjusted variants instead of creating a new A/B test. In this case you can reset the metrics data. When you do this Prepr starts tracking and collecting data from scratch as if it’s a new A/B test.
Note that if you reset the metrics data, you can no longer view the previously tracked metrics.
Remove A/B test
You can also remove an A/B test at any time by clicking the Remove A/B test option. Choose the variant you want to keep and the other will be removed from the content item.
Evaluate the A/B test
After a developer has done the one-time setup for A/B testing and your A/B test has been active for some time, you’ll see some metrics data for your A/B test.
When the metrics for the A/B test are available and already significant for both variants, you can choose the winner and end the experiment.
Go to your A/B test in the content item and click the Metrics link to open the metrics report. If your A/B test has been running for a while, you should see some results like in the image below.
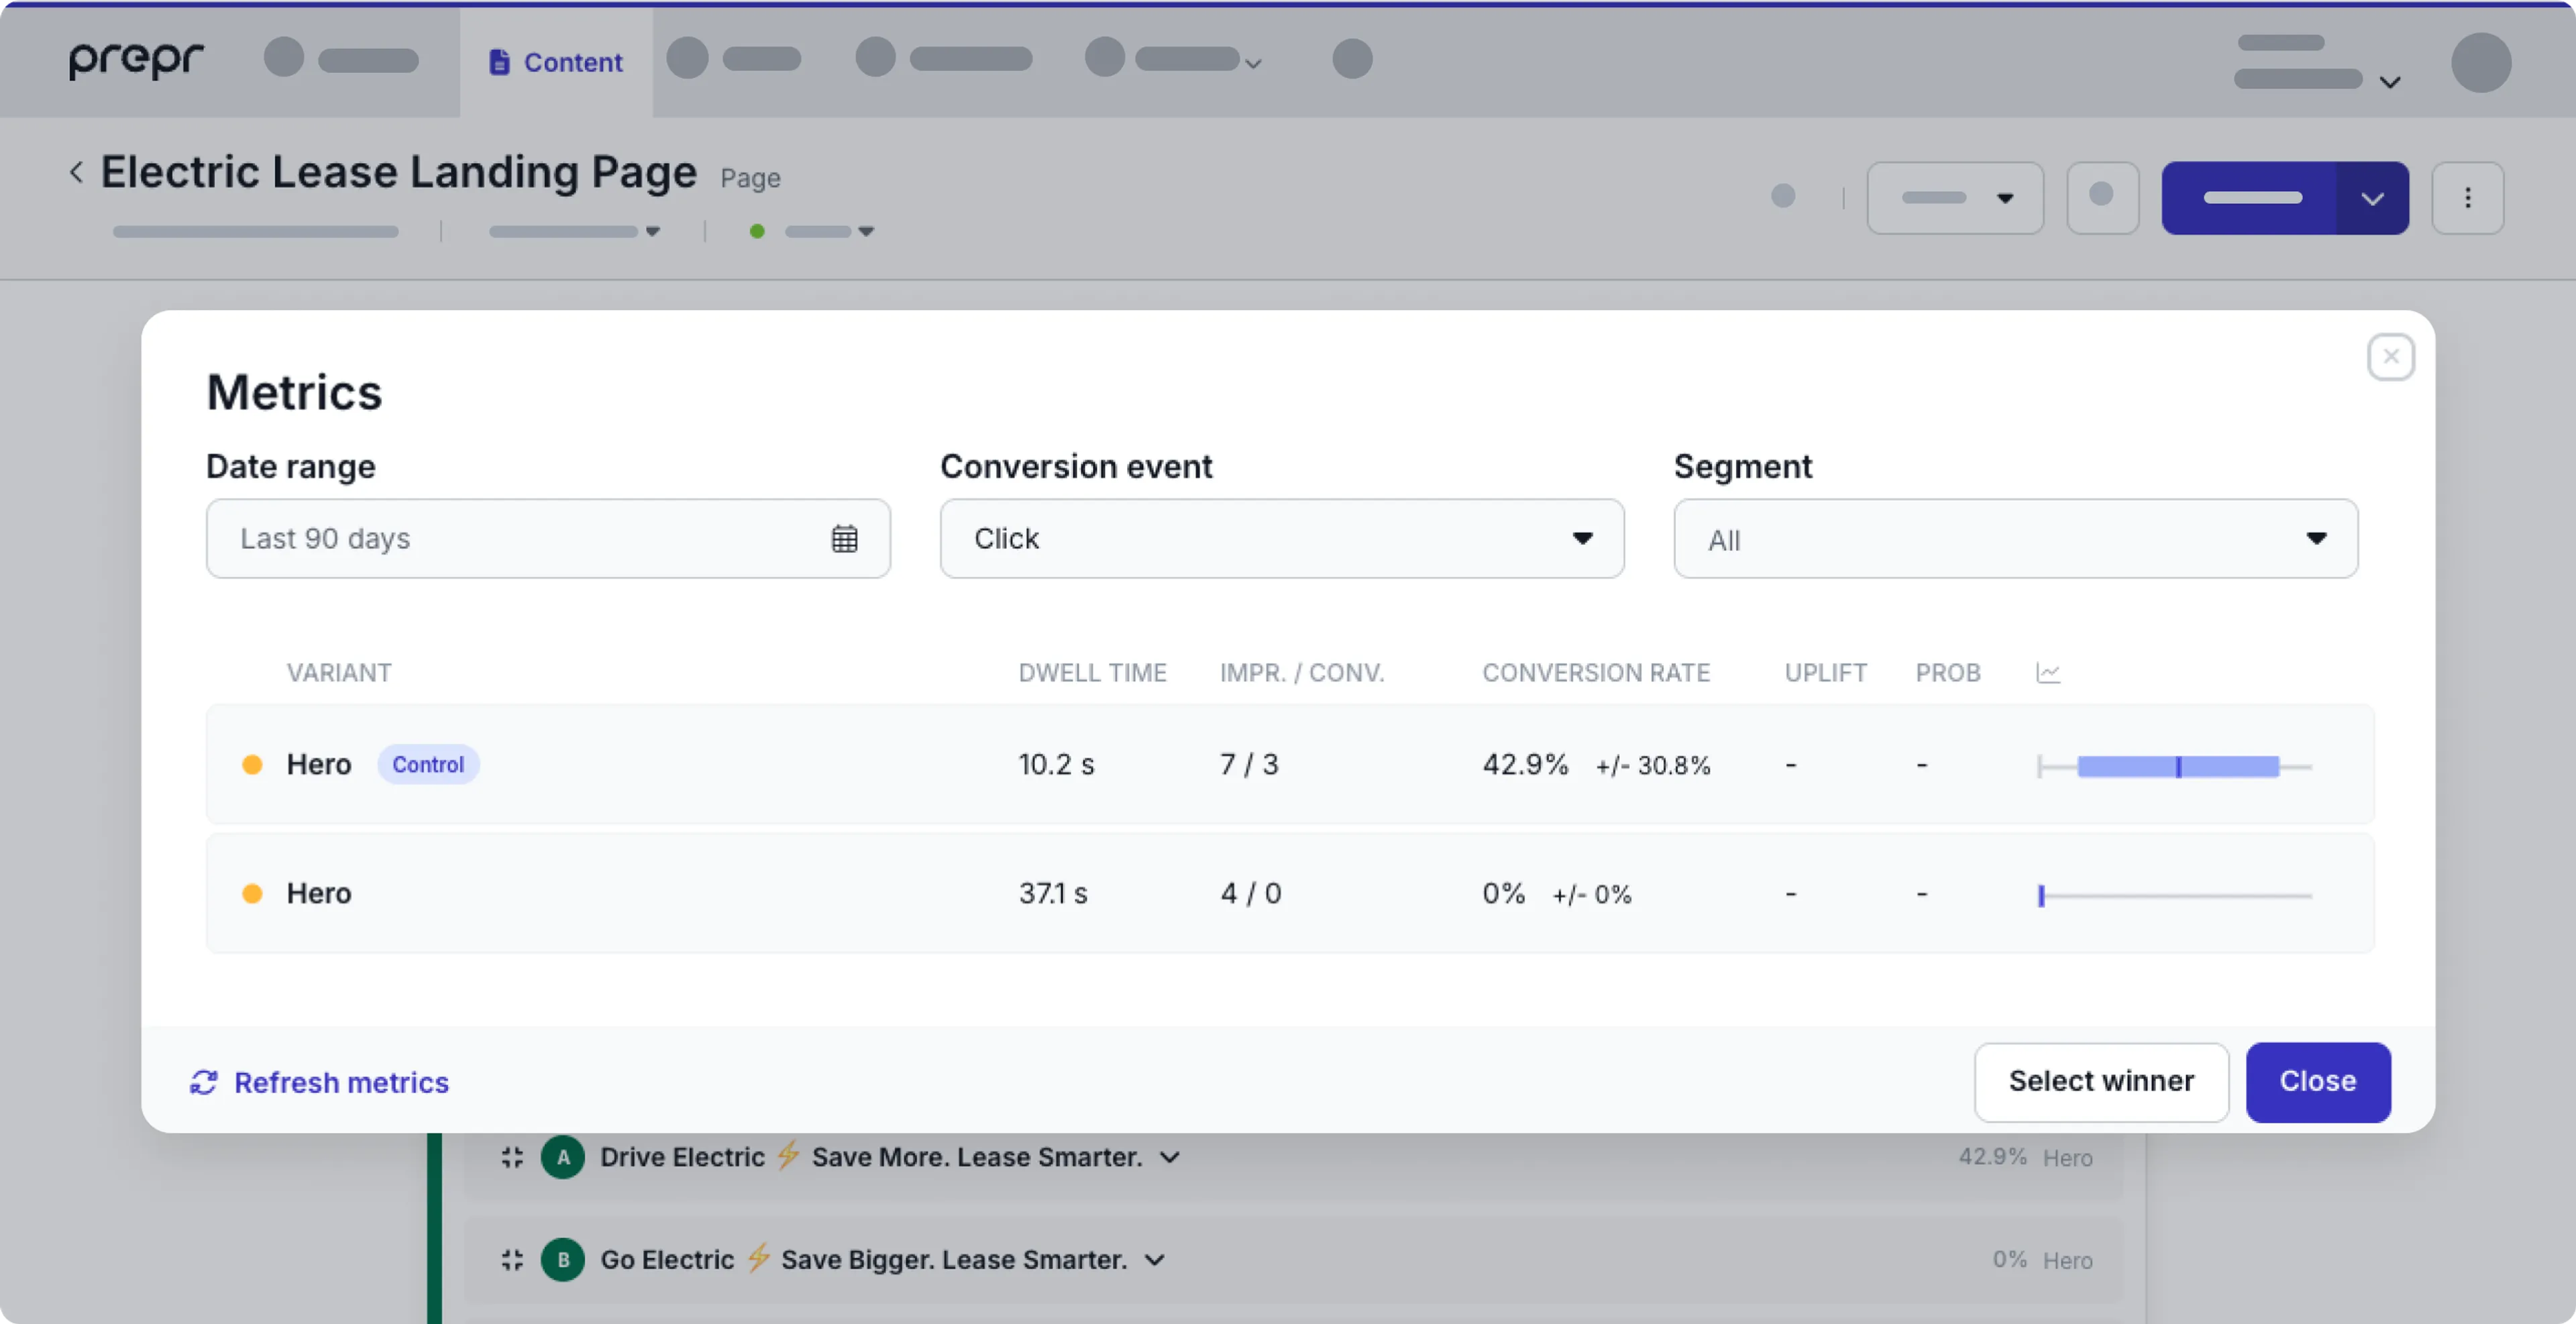
The metrics data can be filtered by a Date range (Maximum 90 days, defaulted to the start of the experiment) and the Segment. You can also choose to view the metrics data by a specific Conversion event. The color marker at the beginning of each variant indicates if the metrics are significant (green) or not (orange). Whether the metrics are significant is based on the probability and a minimum sample size.
See the list below for the metrics available in Prepr.
- Dwell time - The average amount of time in seconds that visitors view this element.
- Impressions (IMPR) - The number of times that the element is viewed by visitors. The developer sets this element during the A/B testing setup.
- Conversions (CONV) - The number of times that a desired action is performed on the element by visitors, such as a click. The developer sets this element during the A/B testing setup.
- Conversion rate - A percentage based on the conversions and the impressions. It is calculated as
(Impressions/Conversions)×100. - Standard error - You’ll notice a +/- percentage value next to the conversion rate. This value tells you how much the conversion rates vary from the mean.
- Uplift - The increase in the conversion rate for the variant (B) compared to the control (A). It is calculated as: (Conversion Rate (B) − Conversion Rate (A)) / Conversion Rate (A) × 100
- Probability (PROB) - This is the probability that this variant will outperform the control.
End the A/B test
If you don’t have a significant result, then we recommend to continue the A/B test until the results are significant.
When you get a significant result, you can then choose the winning variant by clicking the Select A or the Select B button. Prepr automatically highlights the best performing variant based on the data collected.
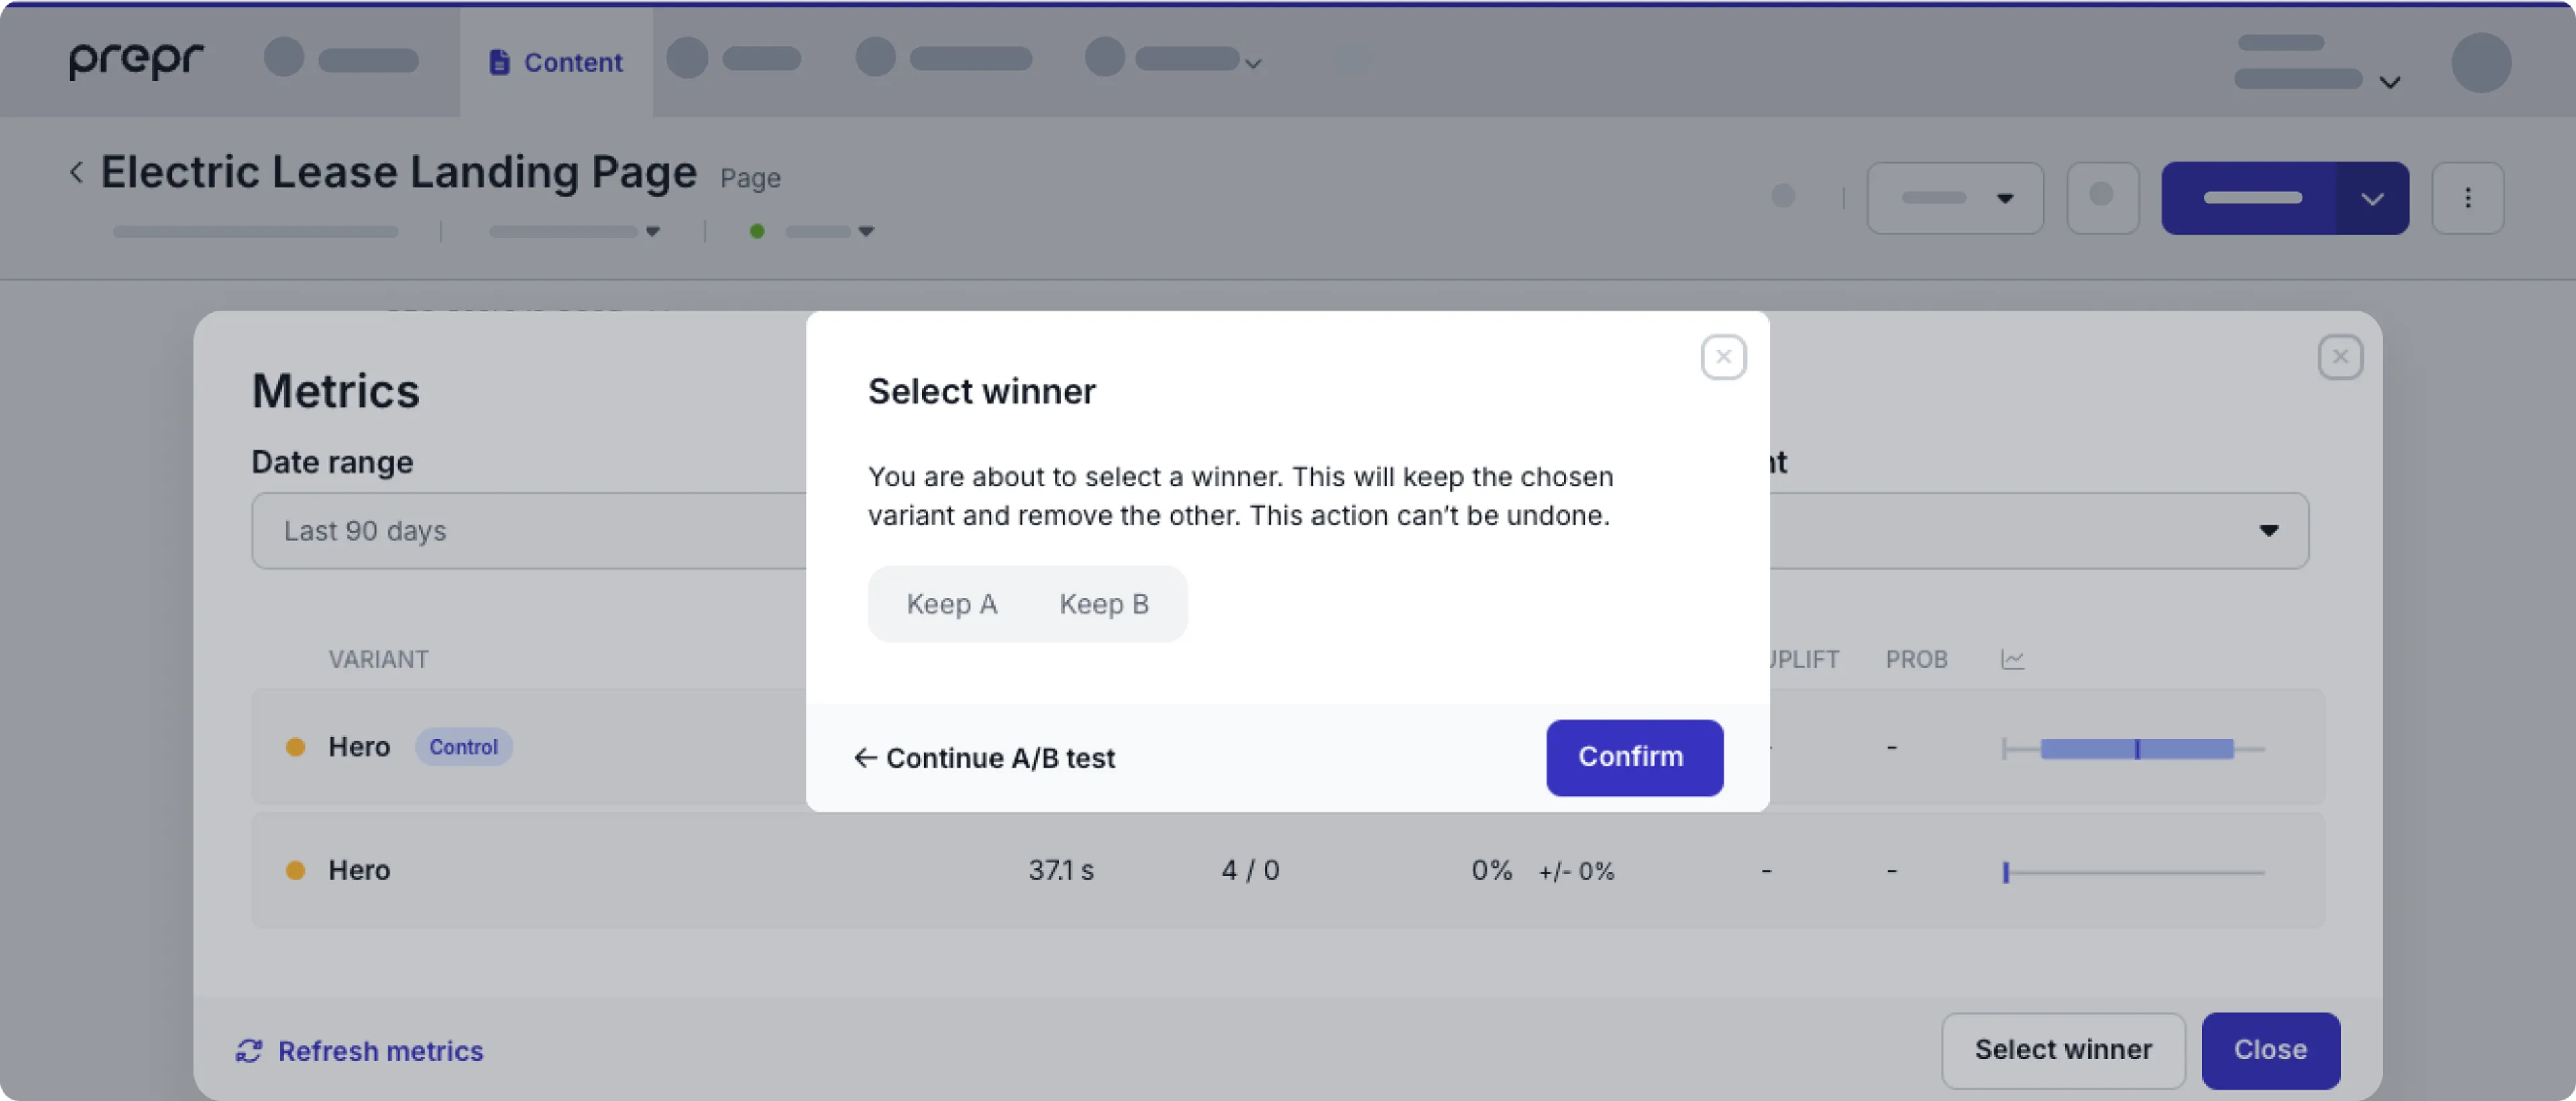
After you selected A or B, Prepr will deliver the chosen variant to your website visitors. The other variant will be removed from the Stack.
Congratulations, you have successfully implemented an A/B test and used it to improve the visitor journey on your web app.
Want to learn more?
Check out the following guides:
Schedule a free consultation
Do you want to get started with A/B testing but still have questions or want a demo?
Schedule a free call with a Prepr solution engineer.