Setting up environments
A user can belong to multiple organizations and an organization can have one or more environments. This article explains what an environment is and how to use environments in Prepr.
Introduction
An environment is an isolated container for your project, for example for a website or an app. An environment contains the schema, content items, media files, customer segments and users. When you have multiple environments, it allows you to safely test your project without affecting your production-ready content. Let’s look at how to do this in more detail.
Create an environment
If you haven’t already done so, go to https://signup.prepr.io/ and sign up for a Prepr account.
- After you sign up, you’ll be prompted to add an environment.
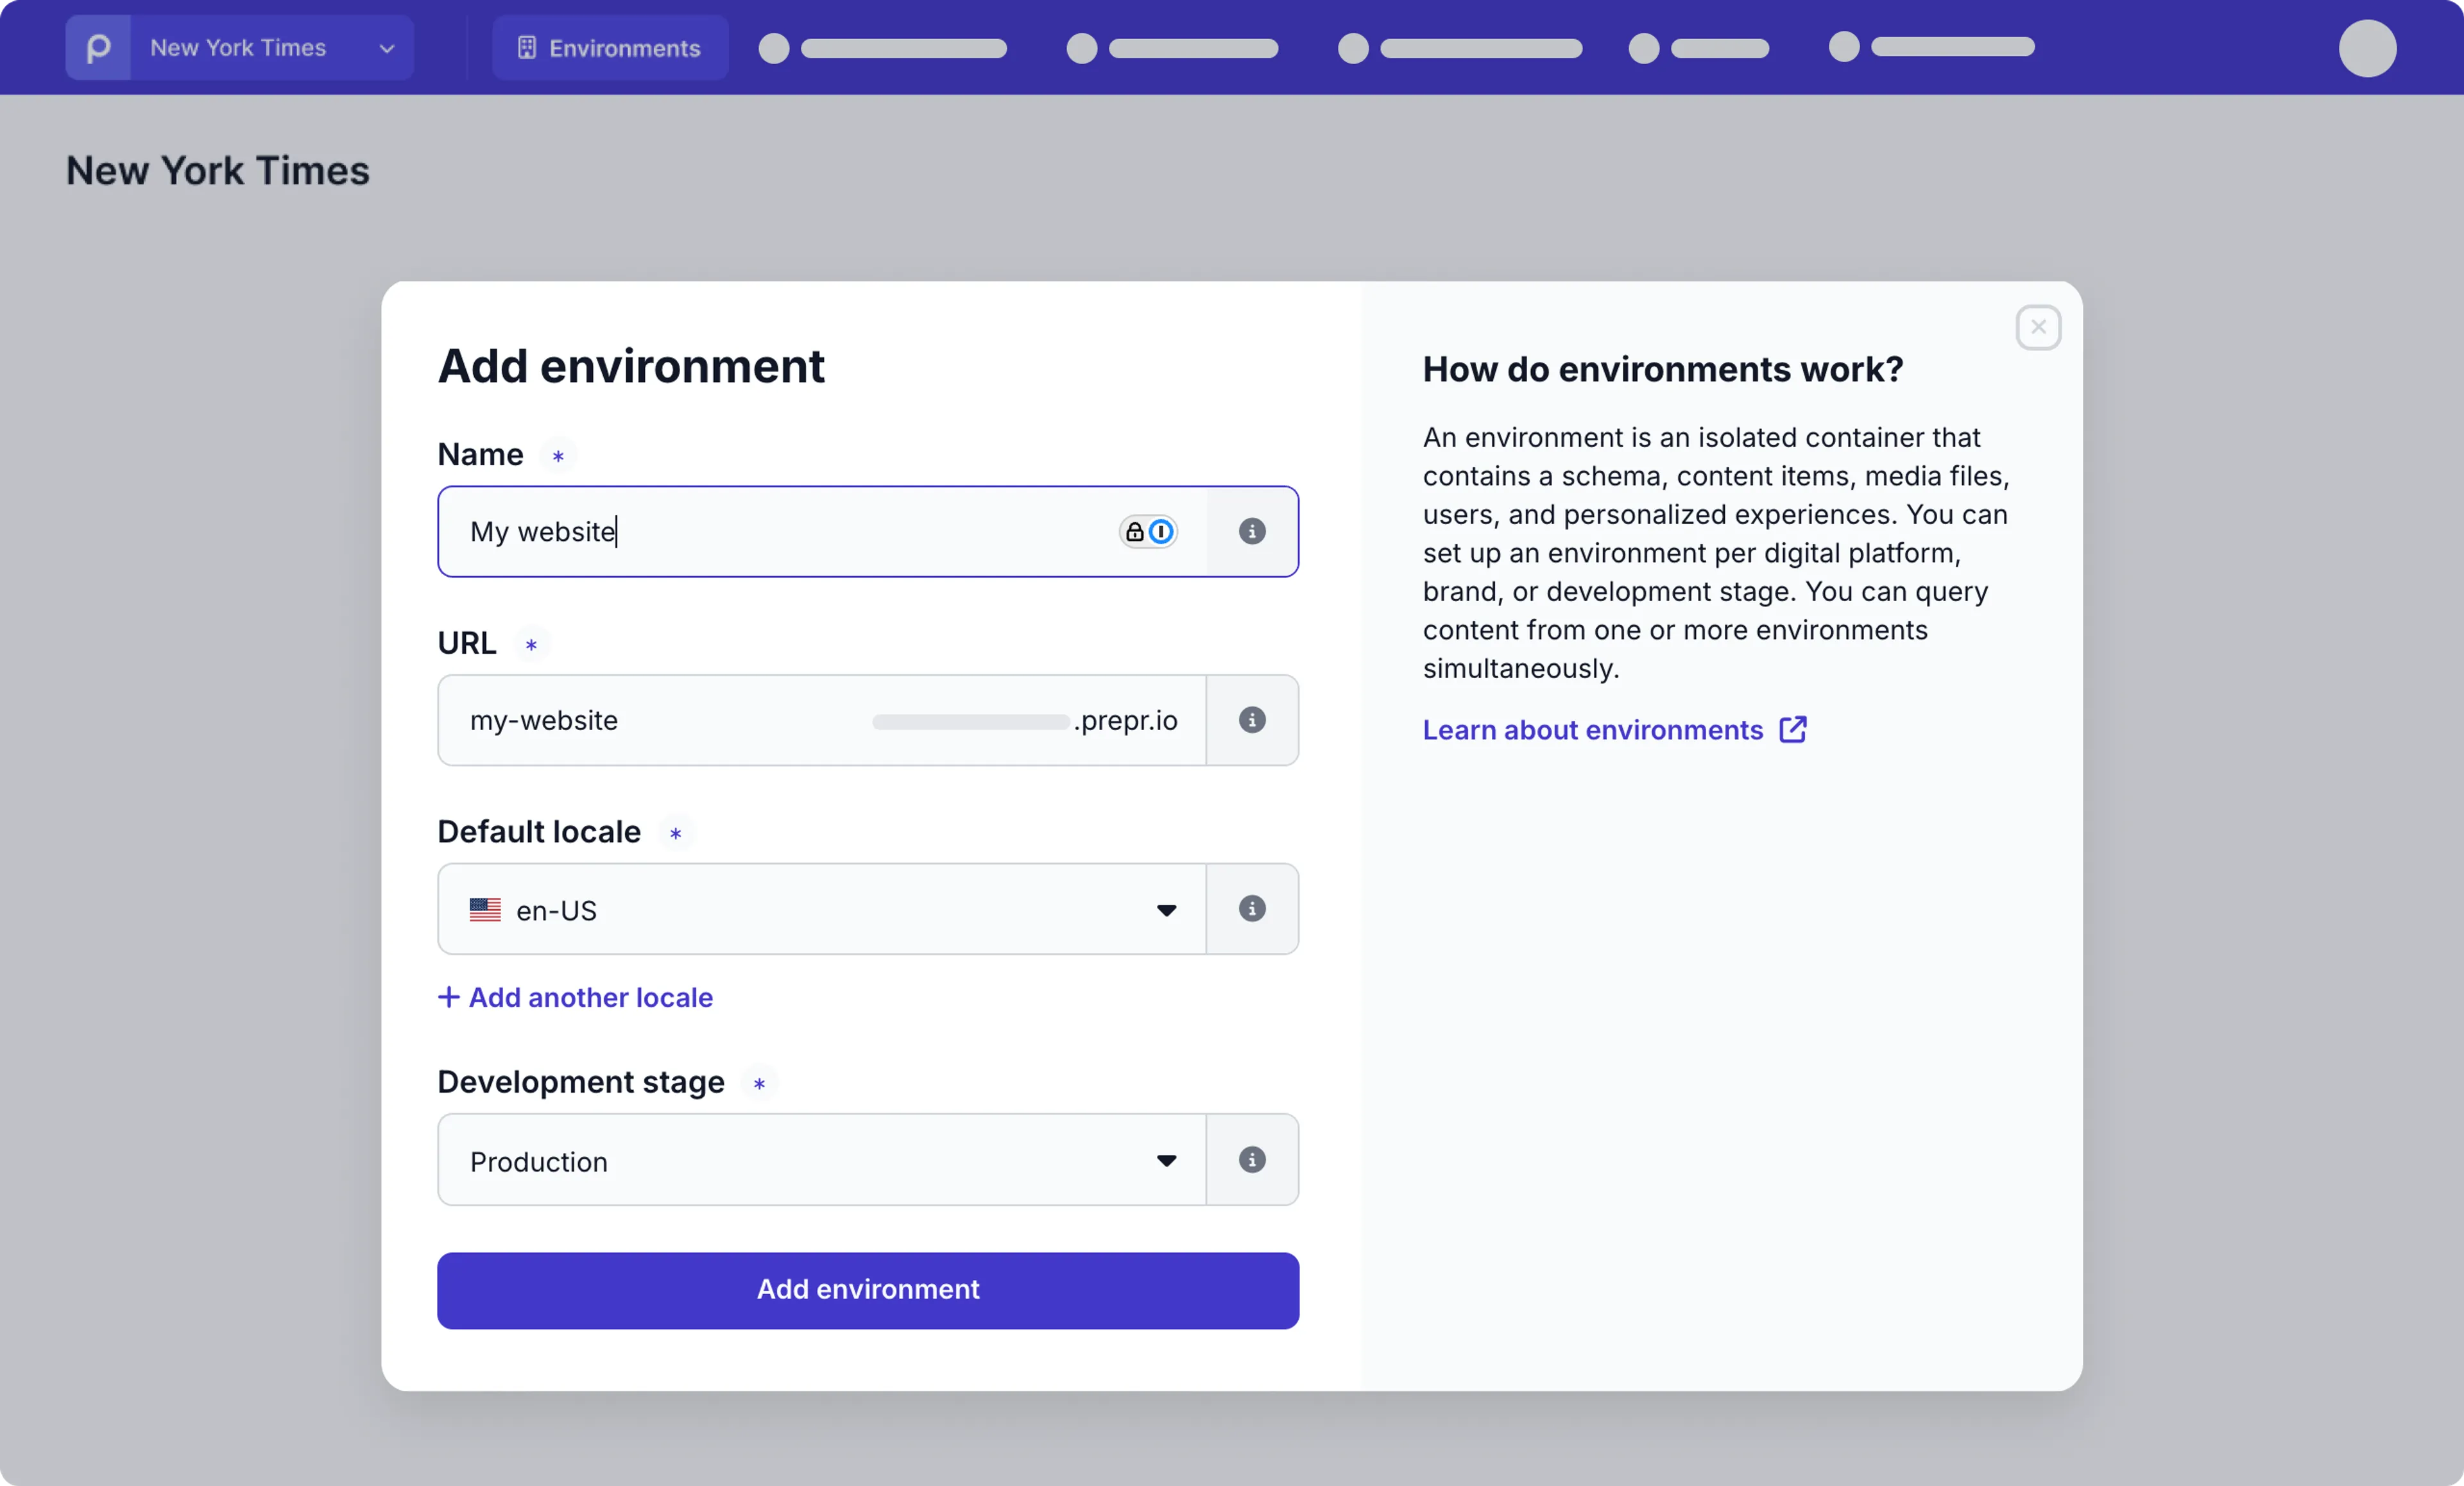
- Enter a meaningful Name for your environment. The URL will be generated automatically based on the name you entered.
- Choose a Default locale for your project. Learn more about how to use locales in the Localization guide.
- Set the Development stage to either Development, Testing, Acceptance or Production according to your DTAP configuration.
- Click the Add environment button to confirm the settings.
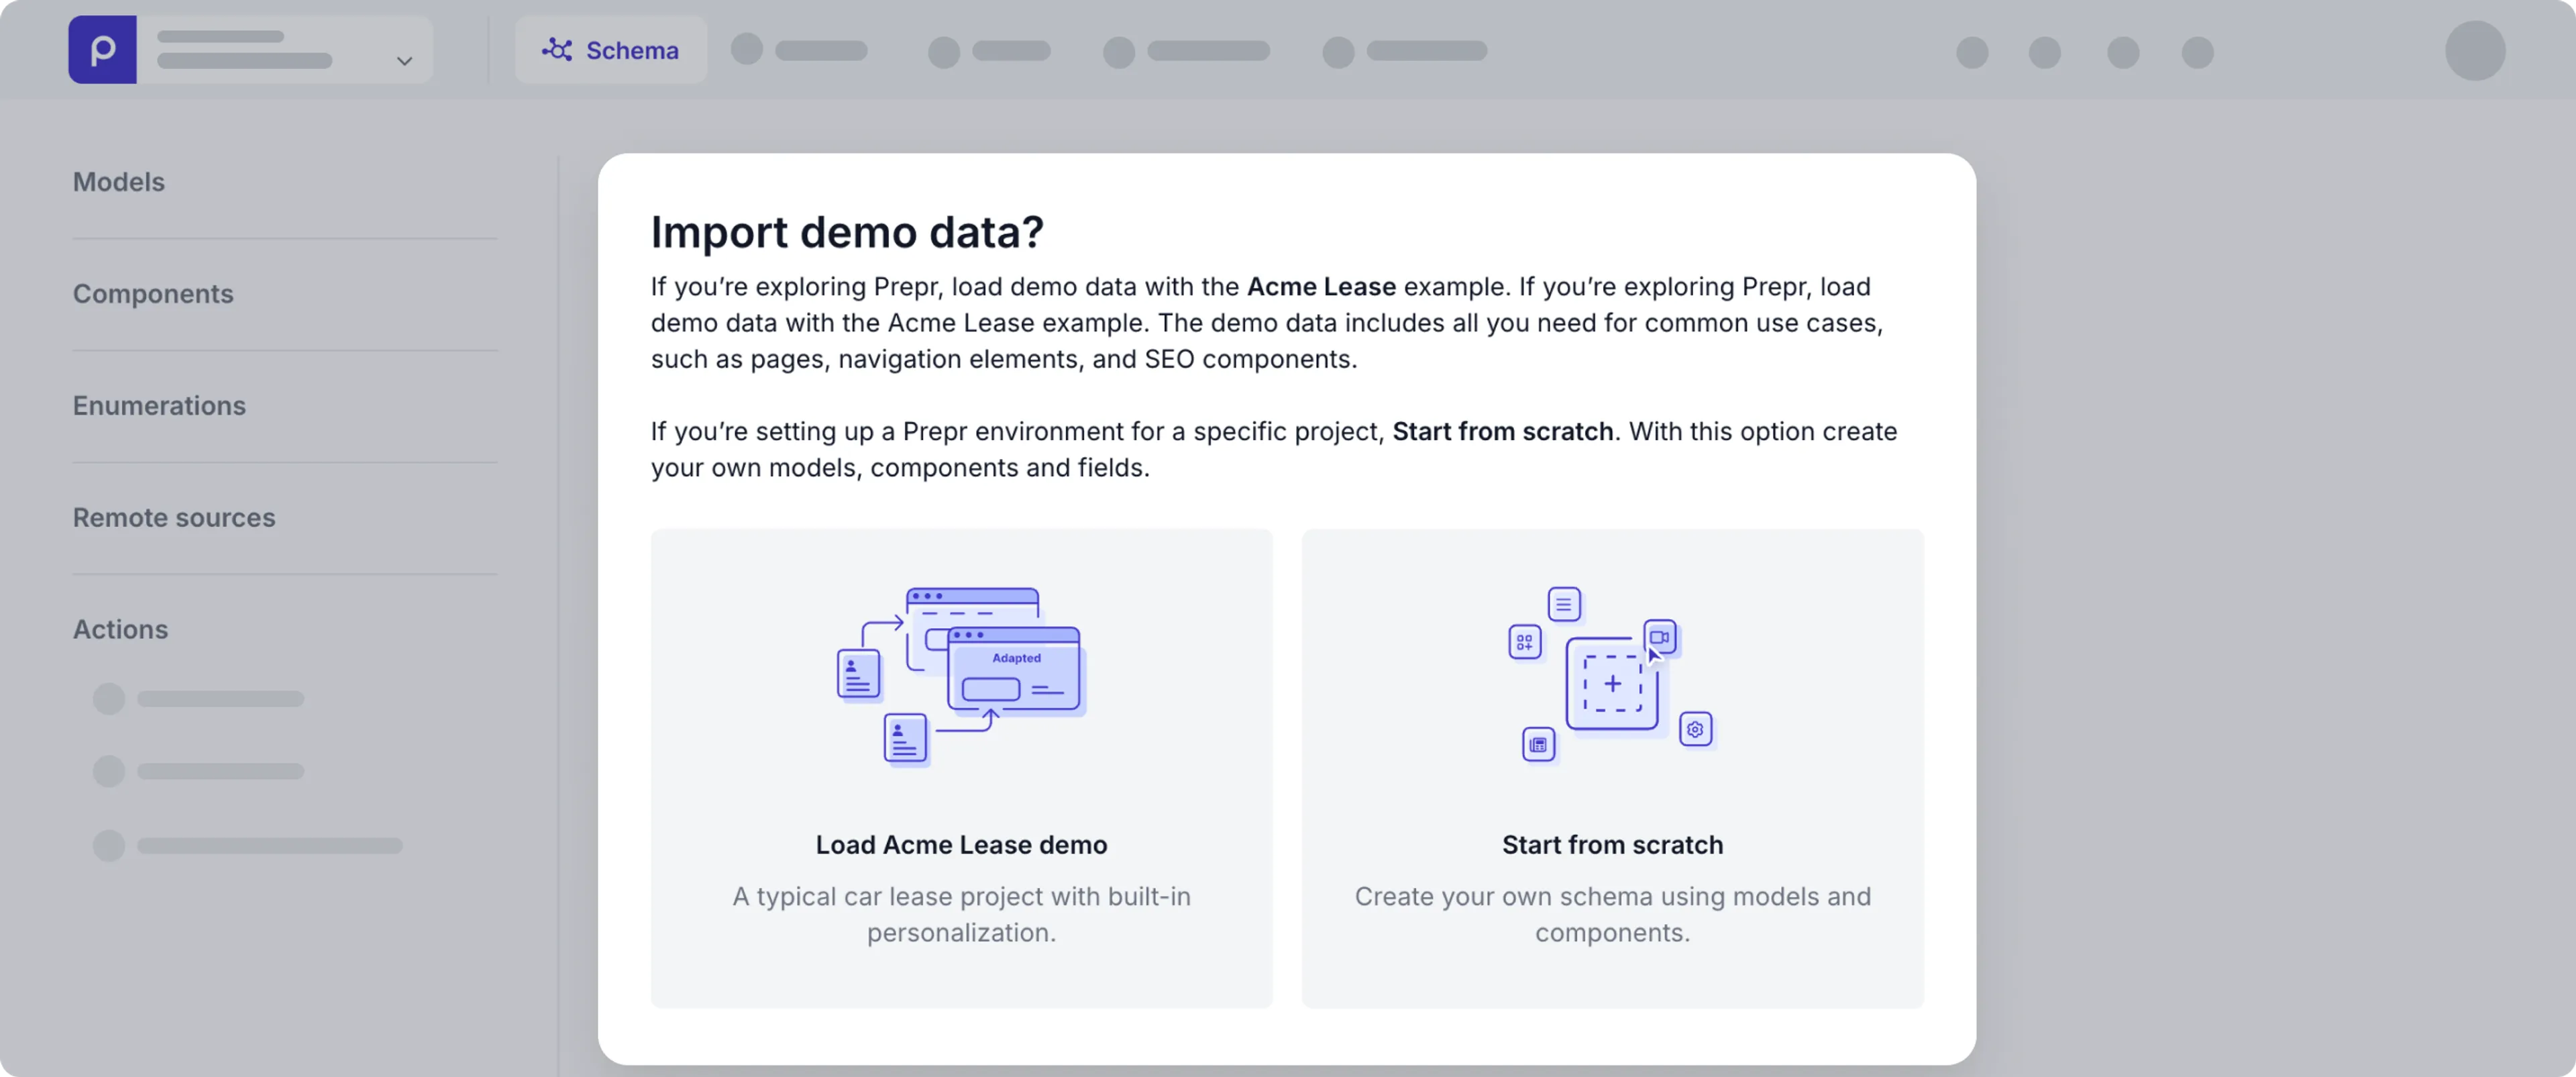
Next, you’ll be prompted to load Prepr demo data or start from scratch.
-
Load Acme Lease demo. If you’re exploring Prepr we recommend loading demo data from the Acme Lease example. It includes examples for common use cases, like a blog and landing pages. Also, you’ll get sample customer segments to try A/B testing and Personalization features in Prepr.
-
Start from scratch. If you’re setting up a Prepr environment with a specific project in mind, choose to start from scratch. This allows you to add models, components, and fields yourself.
Once you’ve made your choice, the environment is now ready for you to use. Check out the Users and Roles and permissions docs to manage additional users.
Set up a DTAP configuration
Many development teams use a DTAP (Development, Test, Acceptance and Production) configuration to manage their development, testing, acceptance and deployment to production. One of the first things that you need to decide before starting your project is your DTAP strategy. Your DTAP strategy will define how many environments you need to create.
Create your DTAP environments
It’s good practice to create one environment for each phase of your integration and deployment process as follows.
- Development - used by developers to freely test their initial development without affecting production-ready content and systems.
- Testing - used by testers to test the web site or app without affecting production-ready content.
- Acceptance - front-end users can QA the front-end in accordance with their requirements.
- Production - used by content editors to manage content, media files and to add adaptive content and run A/B tests.
When logged into one of your environments, you’ll see a banner at the top to highlight when you’re in a test or development environment.

Add your users
Some basic user roles and permissions are available out of the box. If needed, set up additional user roles and add users for each environment. Check out the Users and Roles and permissions docs for more details.
Create a schema
The production environment is used by content editors to maintain the content so this is where you create your schema first. Copy this schema to the other environments when needed for development and testing.
Check out the Sync schemas doc on how to synchronize the entire source schema.
If you only want to copy a couple of models and components, check out the Export/Import models and Export/Import components docs for more details.
Copy content
Sometimes developers and testers need more realistic content to do their testing. In this case, you may want to copy the published content from one environment to another. As a developer you can do this by following the Export content process.
Environment setup for multiple brands
Prepr offers specific features to support multiple brands in an organization. We recommend that you create an environment per brand and manage your schema and content using the following features:
- Shared schema
- Shared content
Shared schema
Different brands often need different content, but it makes sense for an organization to keep the structure of all the content the same across their brands. In this case, it’s useful to use the same schema across multiple environments. That’s what we call a shared schema. This will also simplify and speed up development by enabling a leaner and more consistent code base.
To create a Shared schema do the following:
- Click the environment dropdown at the top right, choose your organization and click to open the environments overview.
- Click the Shared schema tab to open the Schema Editor.
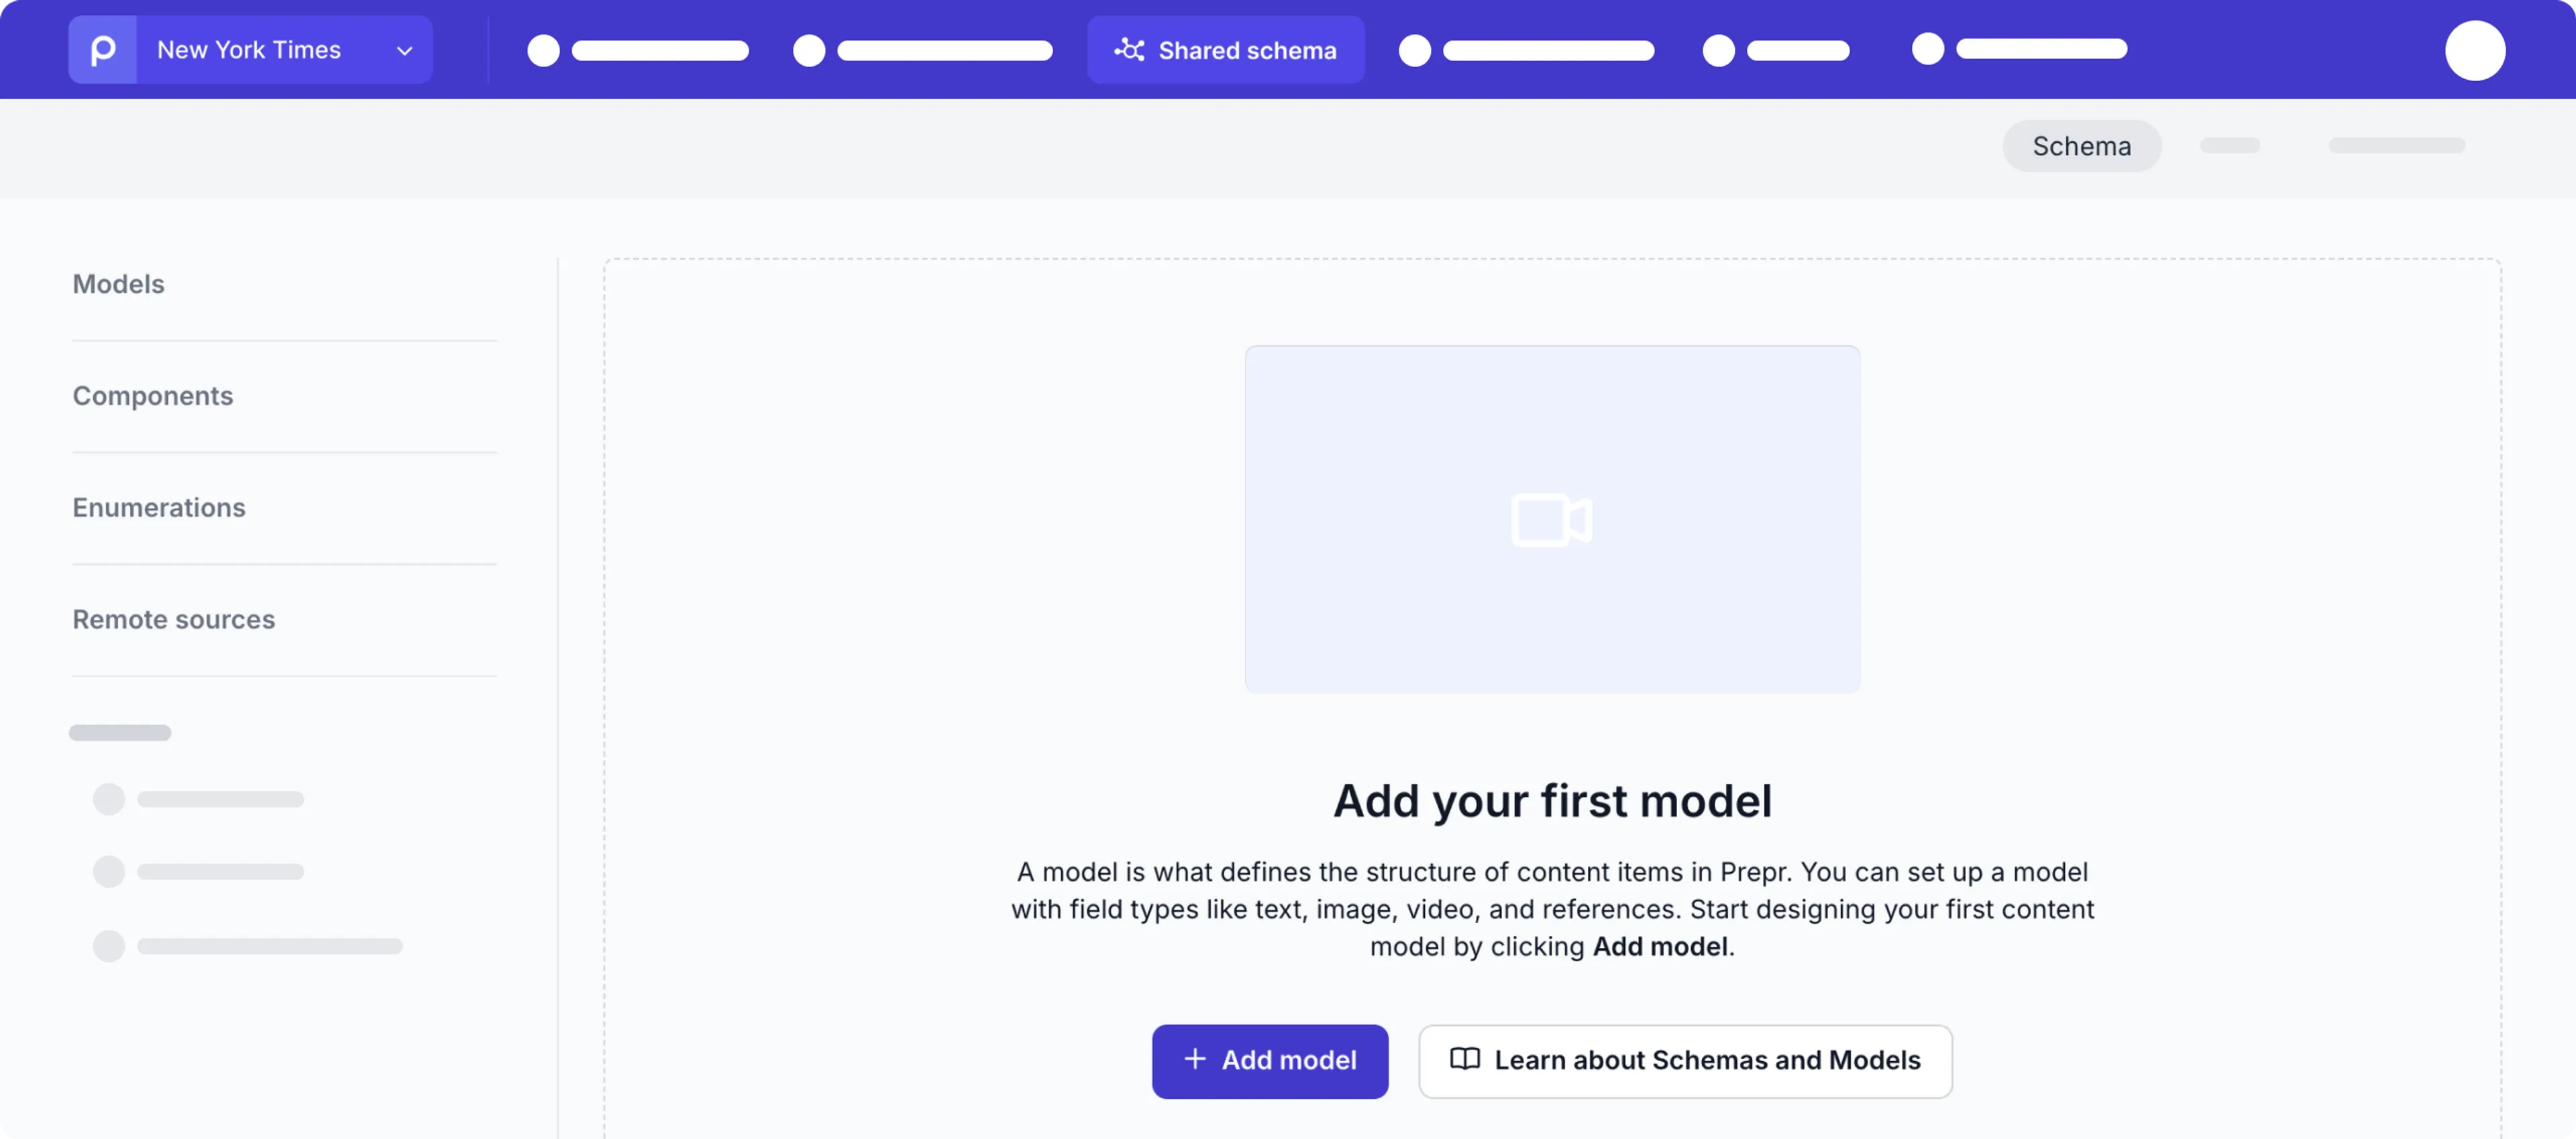
Now you can create models, components, enumerations and remote sources that will be shared by multiple environments within your organization. Check out the Create schema docs for more details.
Shared content
Sometimes, different brands want to share content within the same organization. For example, each brand creates their own articles, but these articles belong to common categories. This can be done with shared content.
To enable sharing of specific content, enable the toggle Allow items from all environments when you add the Content reference field to a model.
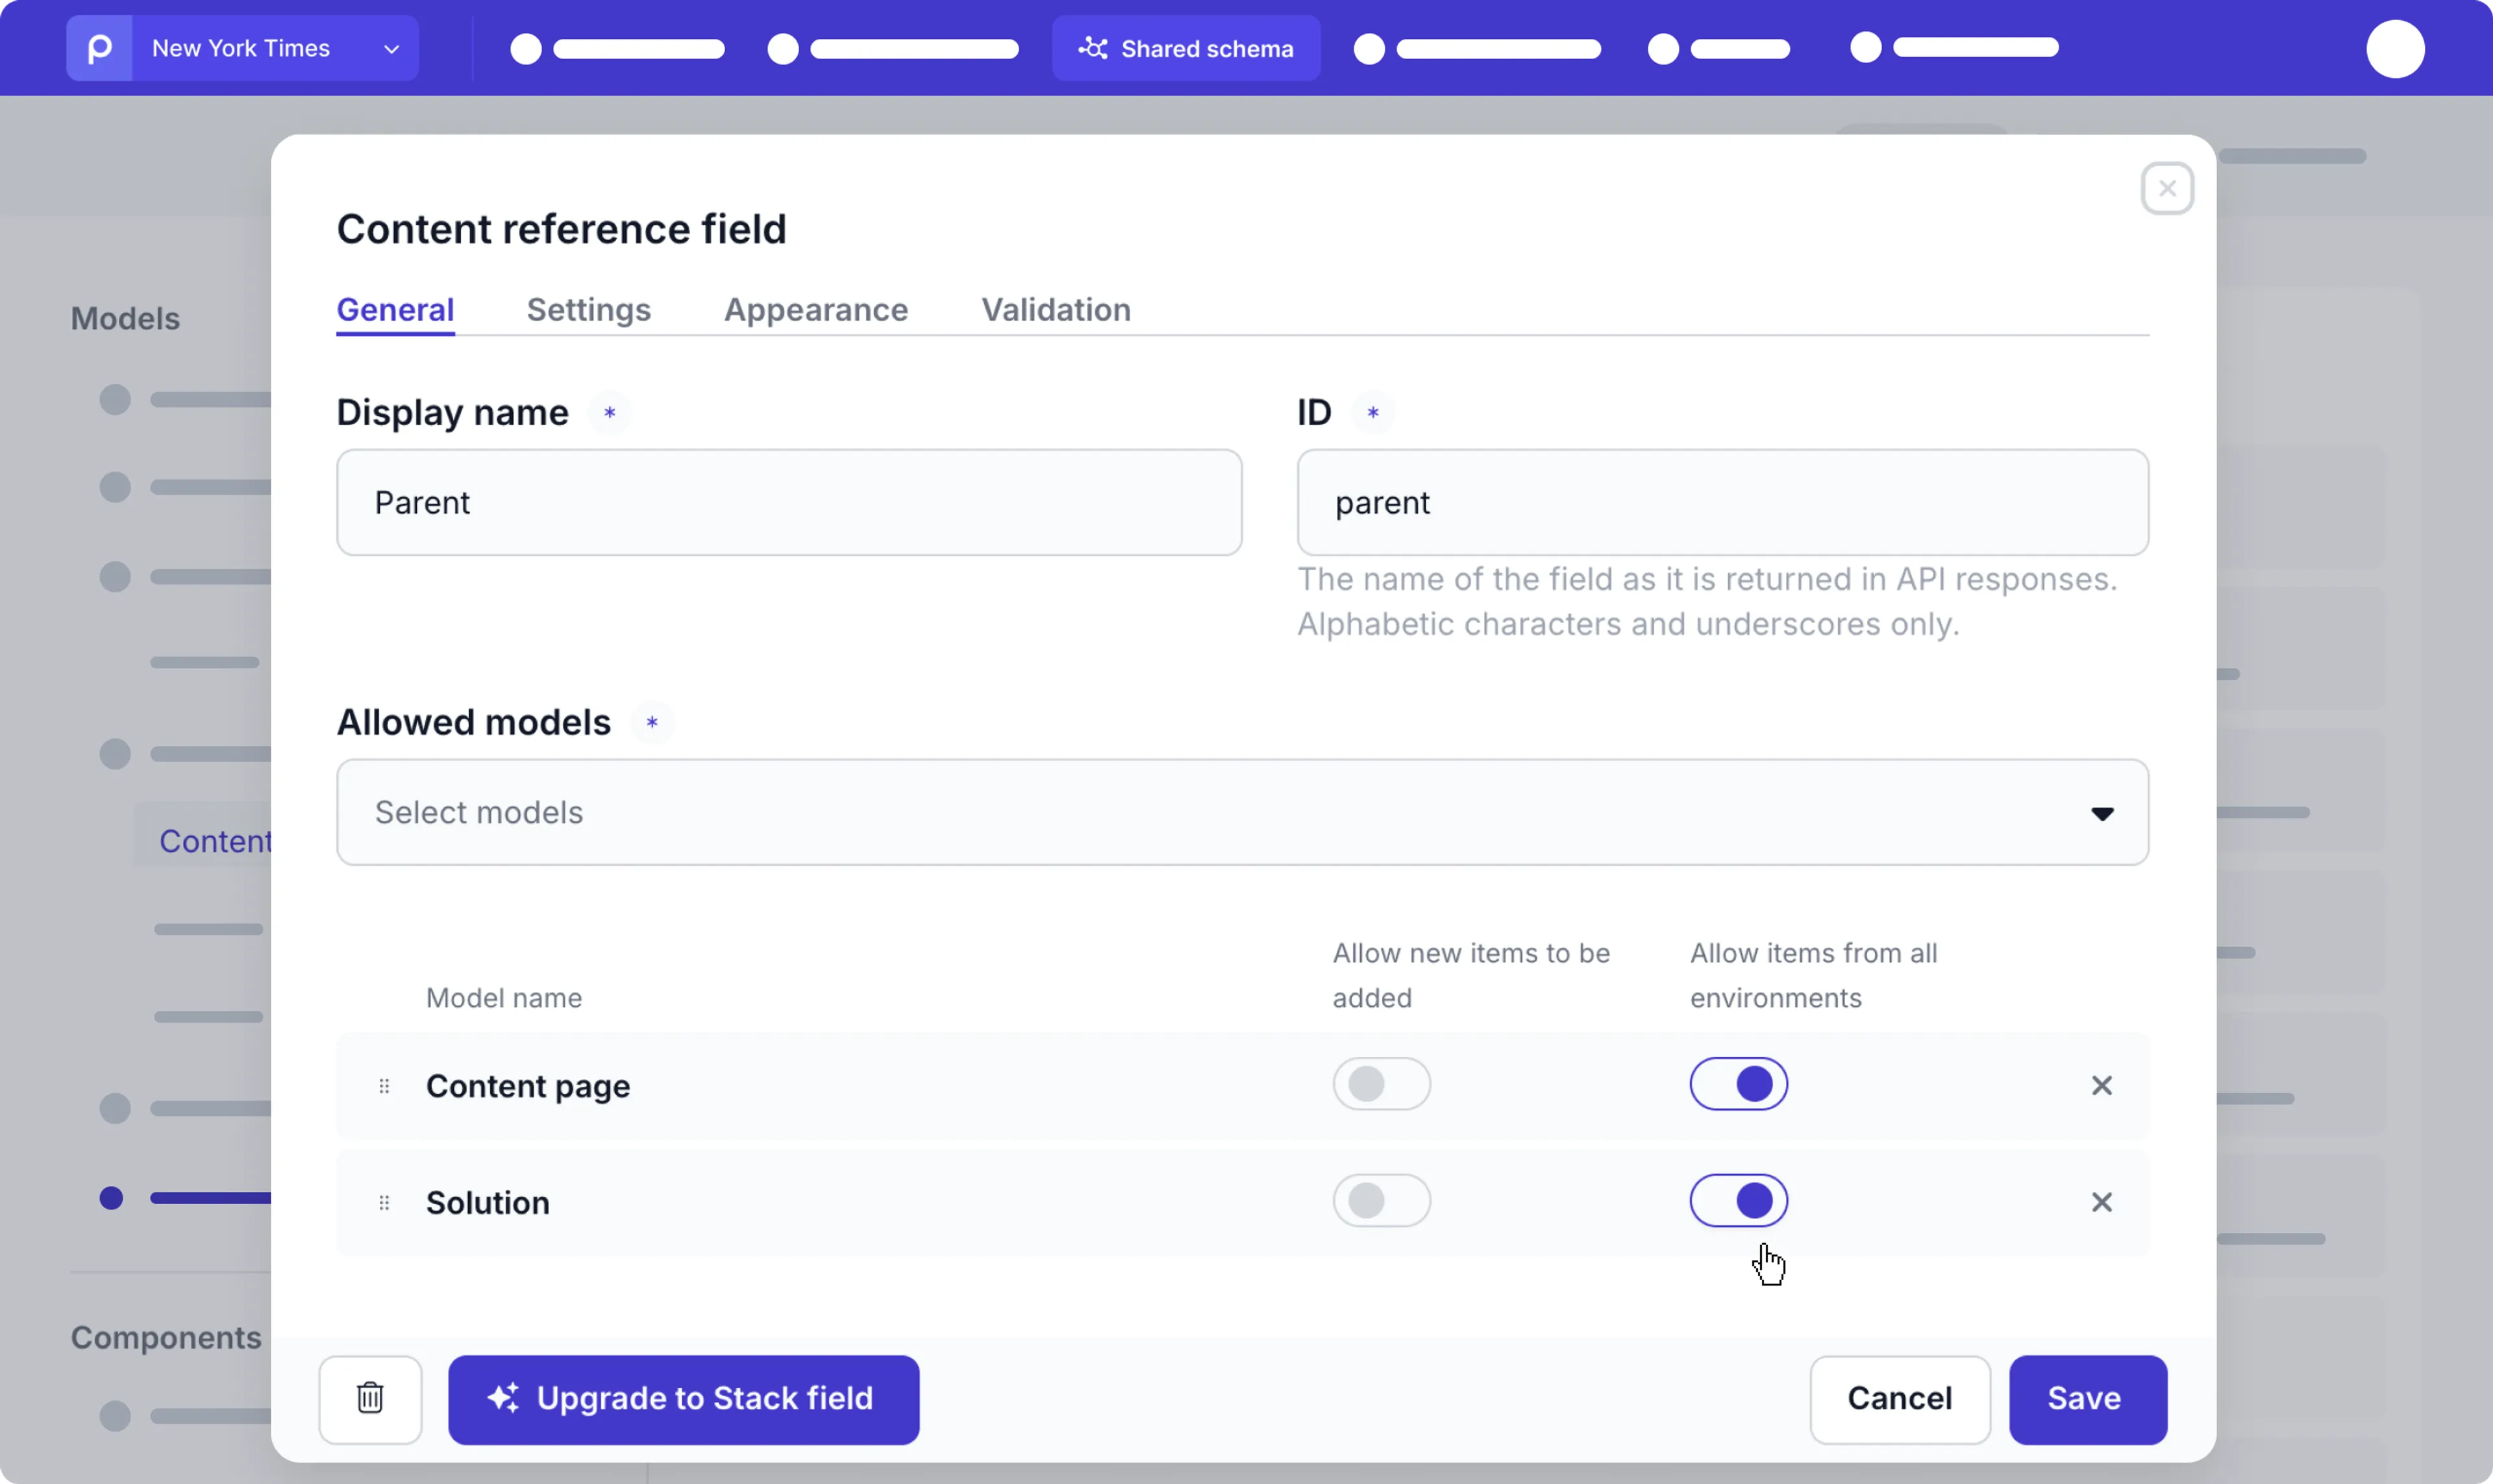
Check out the Create schema docs for more details.
Manage Environment settings
You can update your environment settings by clicking the icon and choosing the General option.
You must be an owner, admin or have the Environment permission to access the environment settings. Read more about roles and permissions in Prepr.
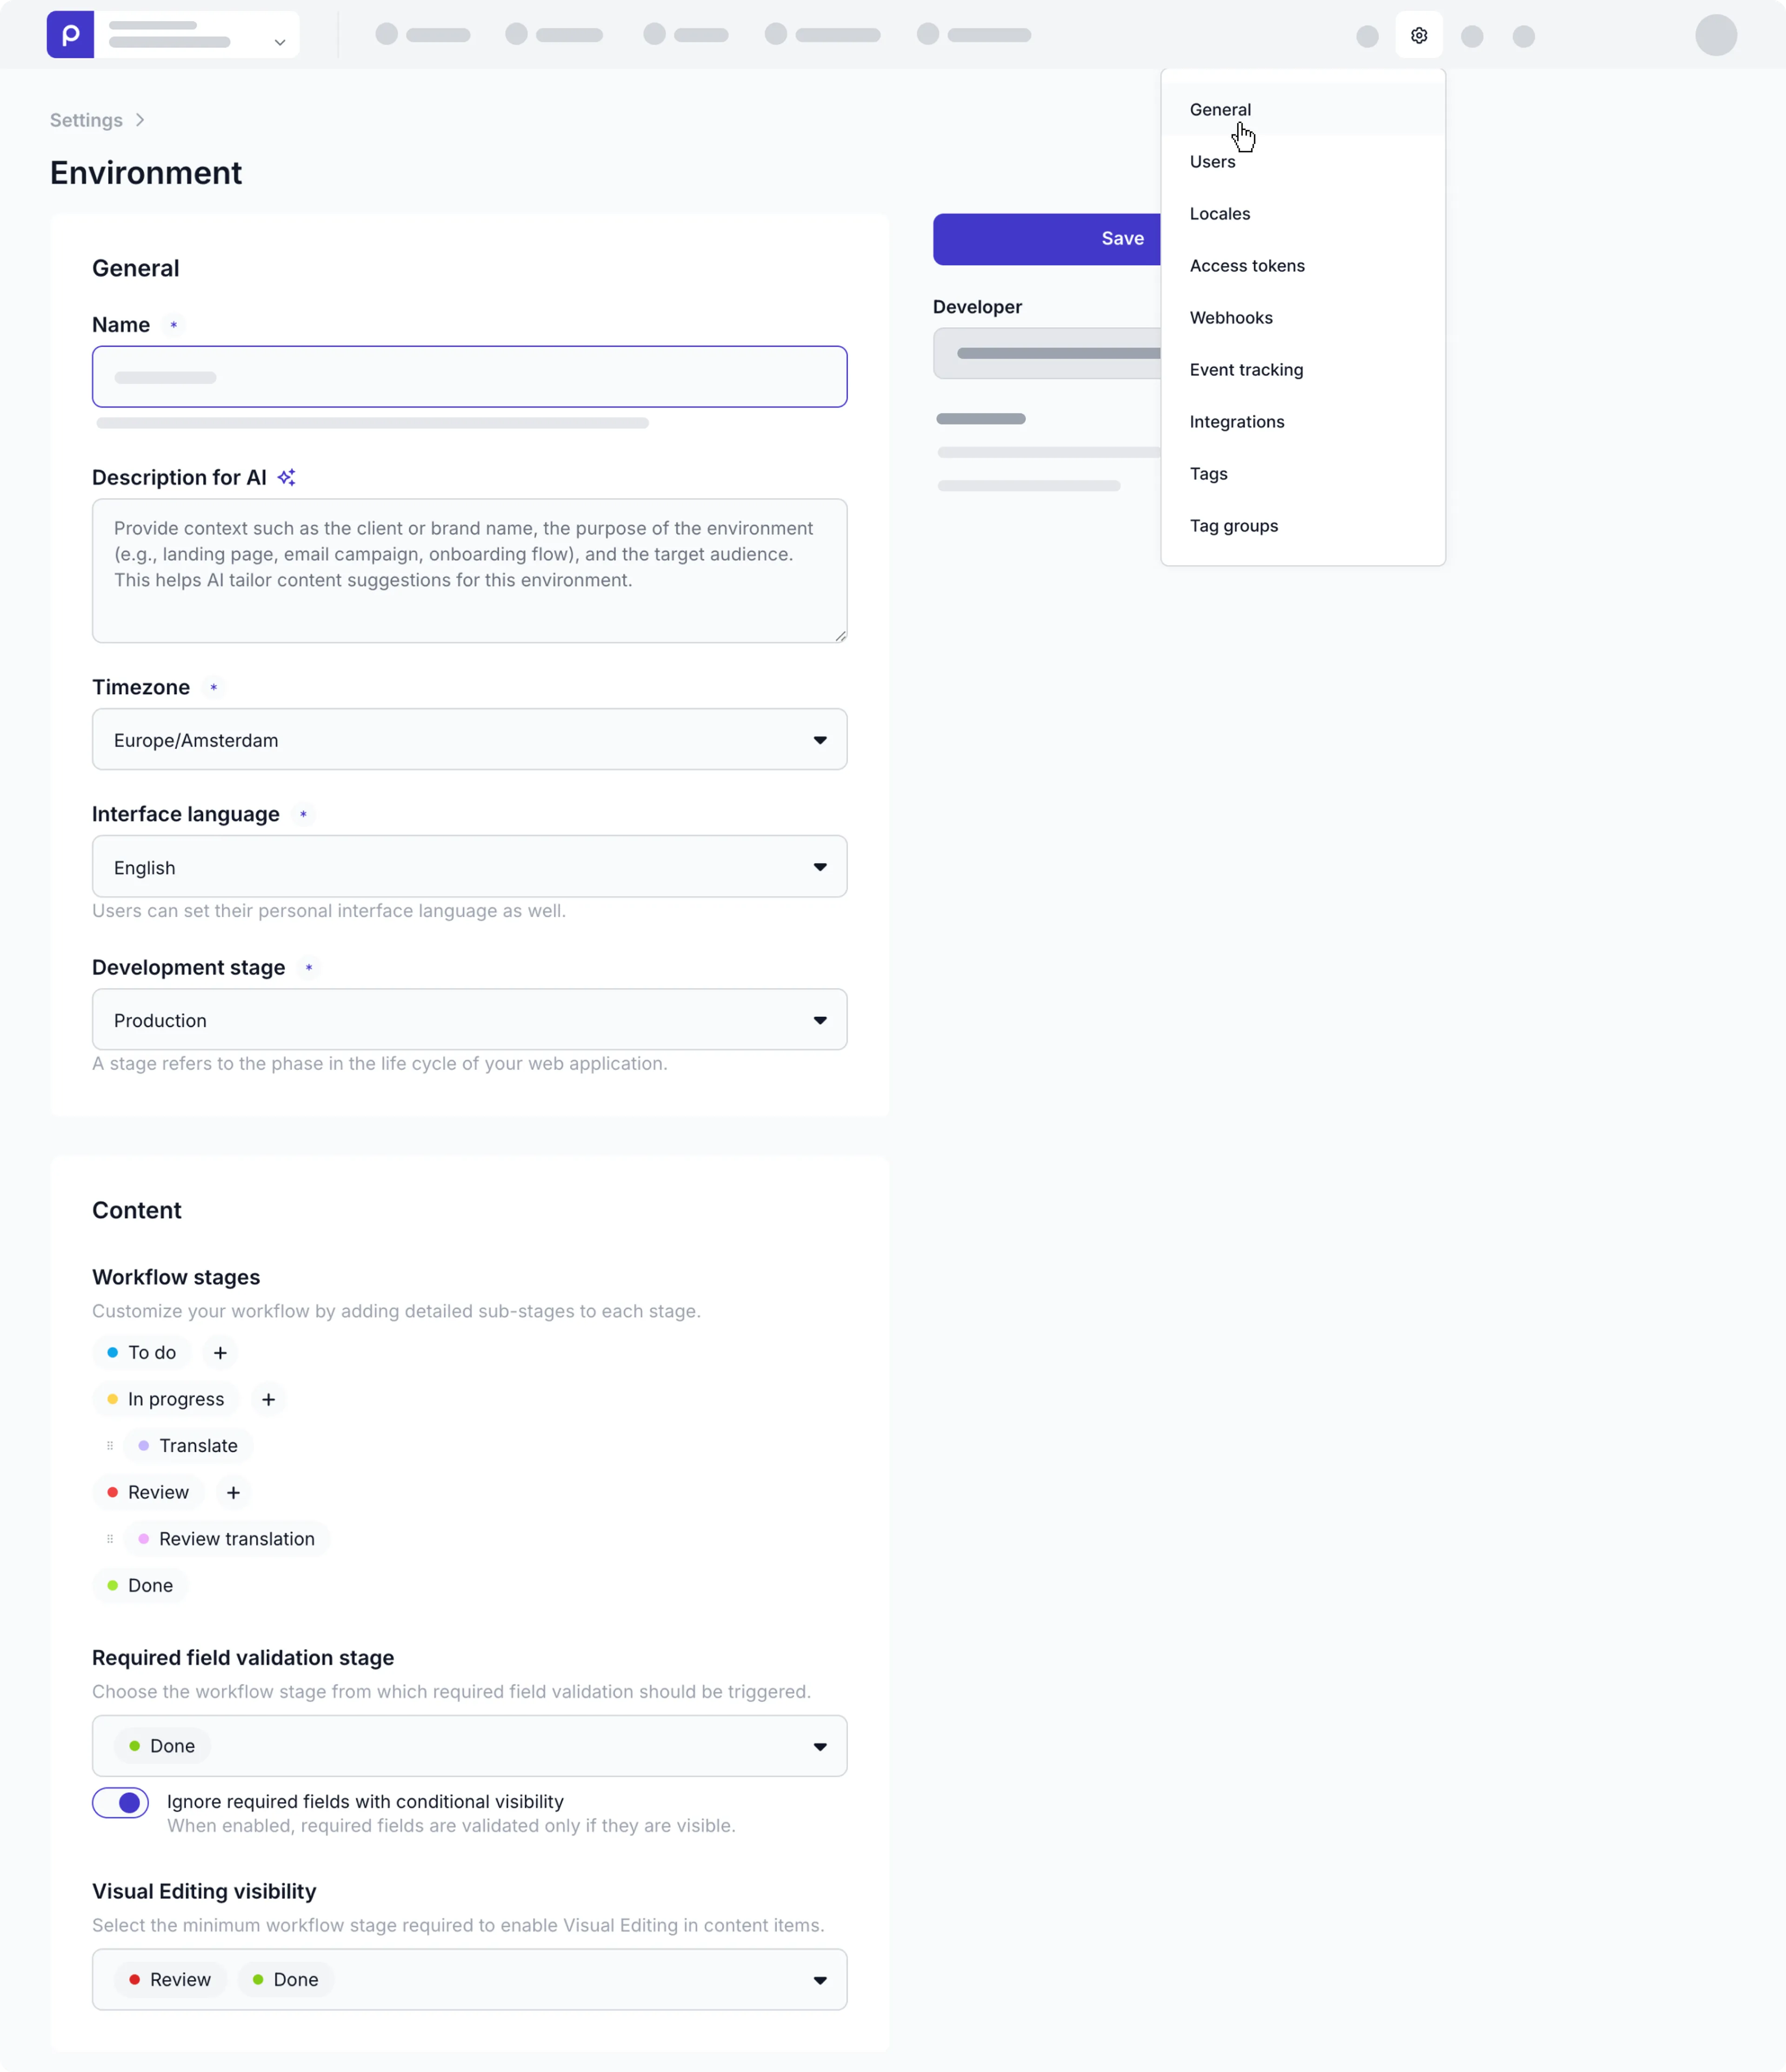
General settings
In the General section, you can rename your environment, define a Description for AI, and change its Timezone, Interface language, and Development stage.
The Interface language value is the default language for users, however each user can set their own preferred language in their profile if you have a multilingual environment setup.
Define environment context for AI requests
If your implementation team enables any AI features, enter some context about the environment purpose in the Description for AI field.
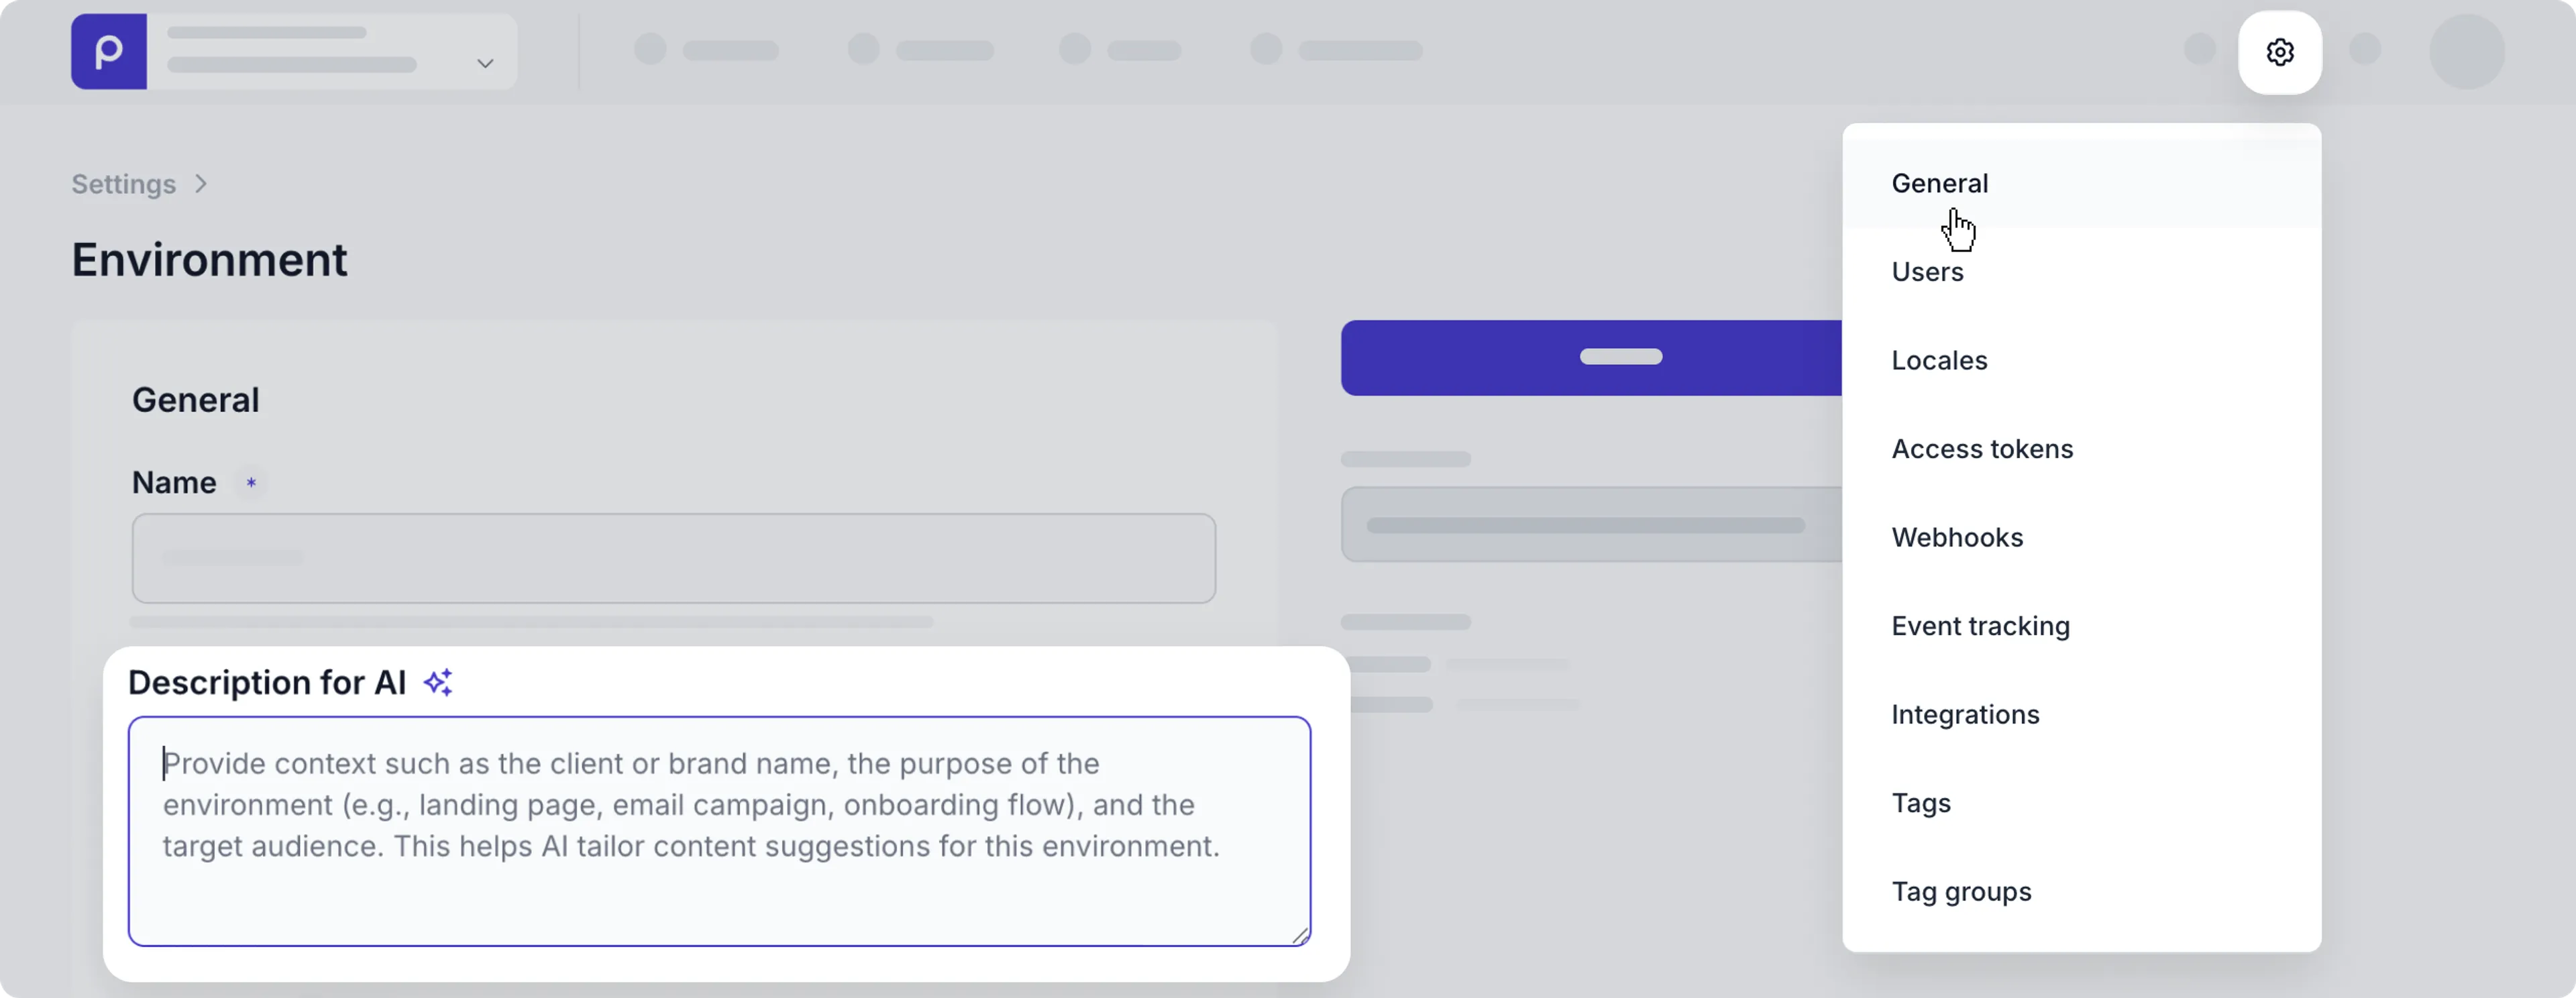
The AI model uses this context to tailor AI requests such as those triggered by the text field AI Generate feature. Our AI requests use this context description to ensure outputs are consistent with the brand, audience, and overall purpose of your environment, thereby maximizing accuracy and relevance.
Make use of the example below to help you define the context for your environment.
# Organization Overview: Acme Lease

## Identify the Organization

- **Name:** Acme Lease
- **Type:** Local business/Automotive
- **Primary Language:** English

## Collect Information

### Basic Details

- **Brand Name:** Acme Car Lease
- **Industry:**  Passenger car leasing
- **Legal Name:** Acme Car Lease NL

### Operational Details

- **Mission:** To provide the simplest, most transparent, and most flexible passenger car leasing experience, making it effortless to drive the perfect vehicle for their lives.
- **Vision:**  To be the most trusted and preferred local partner for accessible, hassle-free vehicle mobility, leading our region in the transition to smarter, more sustainable driving solutions.
- **Core Values:** Trust and transparency,	local focus and care, simplicity and forward mobility
- **Brand:**

### Products and Services

- **Main products** Passenger cars, electric passenger cars, classic passenger cars

### Geographic Presence

- **Location:** Netherlands
- **Operational Hours:** Daily 24 hours
- **Main Distribution Channels:** Website
- **Market Presence:**

### Competitive Edge and Strategy

- Acme Car Lease is the most trusted, local partner for future-ready mobility.
- We combine personalized, transparent service with specialized expertise in electric vehicle leasing and regional incentives that national brokers cannot match.

## Contact Information

- **Phone:**   +31 11 111 111
- **Email:**  [[email protected]](mailto: [email protected])
- **Website:**   [Acme Car Lease](https://acme-lease-v2.vercel.app/)
- **Social Media:**
  - [Facebook](...)
  - [Instagram](...)
Content settings
Apart from the general environment settings you can also manage some content-related settings defined below.
Workflow stages
You can add custom workflow stages to each of the existing Prepr workflow stages to align the collaboration workflow with your own content creation process. For example, when you have translation tasks for content items, you could add a stage like Translate to the In progress stage.

To add a custom workflow stage, follow the steps below:
- Click the icon and choose the General option.
- Scroll down to the Workflow stages in the Content section and click the icon next to the related workflow stage.
- Then, give your custom workflow stage a name and choose a color to represent that stage in the content pages.
If you don’t have access to add custom workflow stages, contact our Sales team for more details.
Content tree parent slug format
To get the best possible result in the Content tree layout for your editors, you need to define the standard format of the parent content item slug values.
To do this, go to the Parent slug format setting, and simply choose one of the values to use a predefined Regex expression or add a Custom expression.
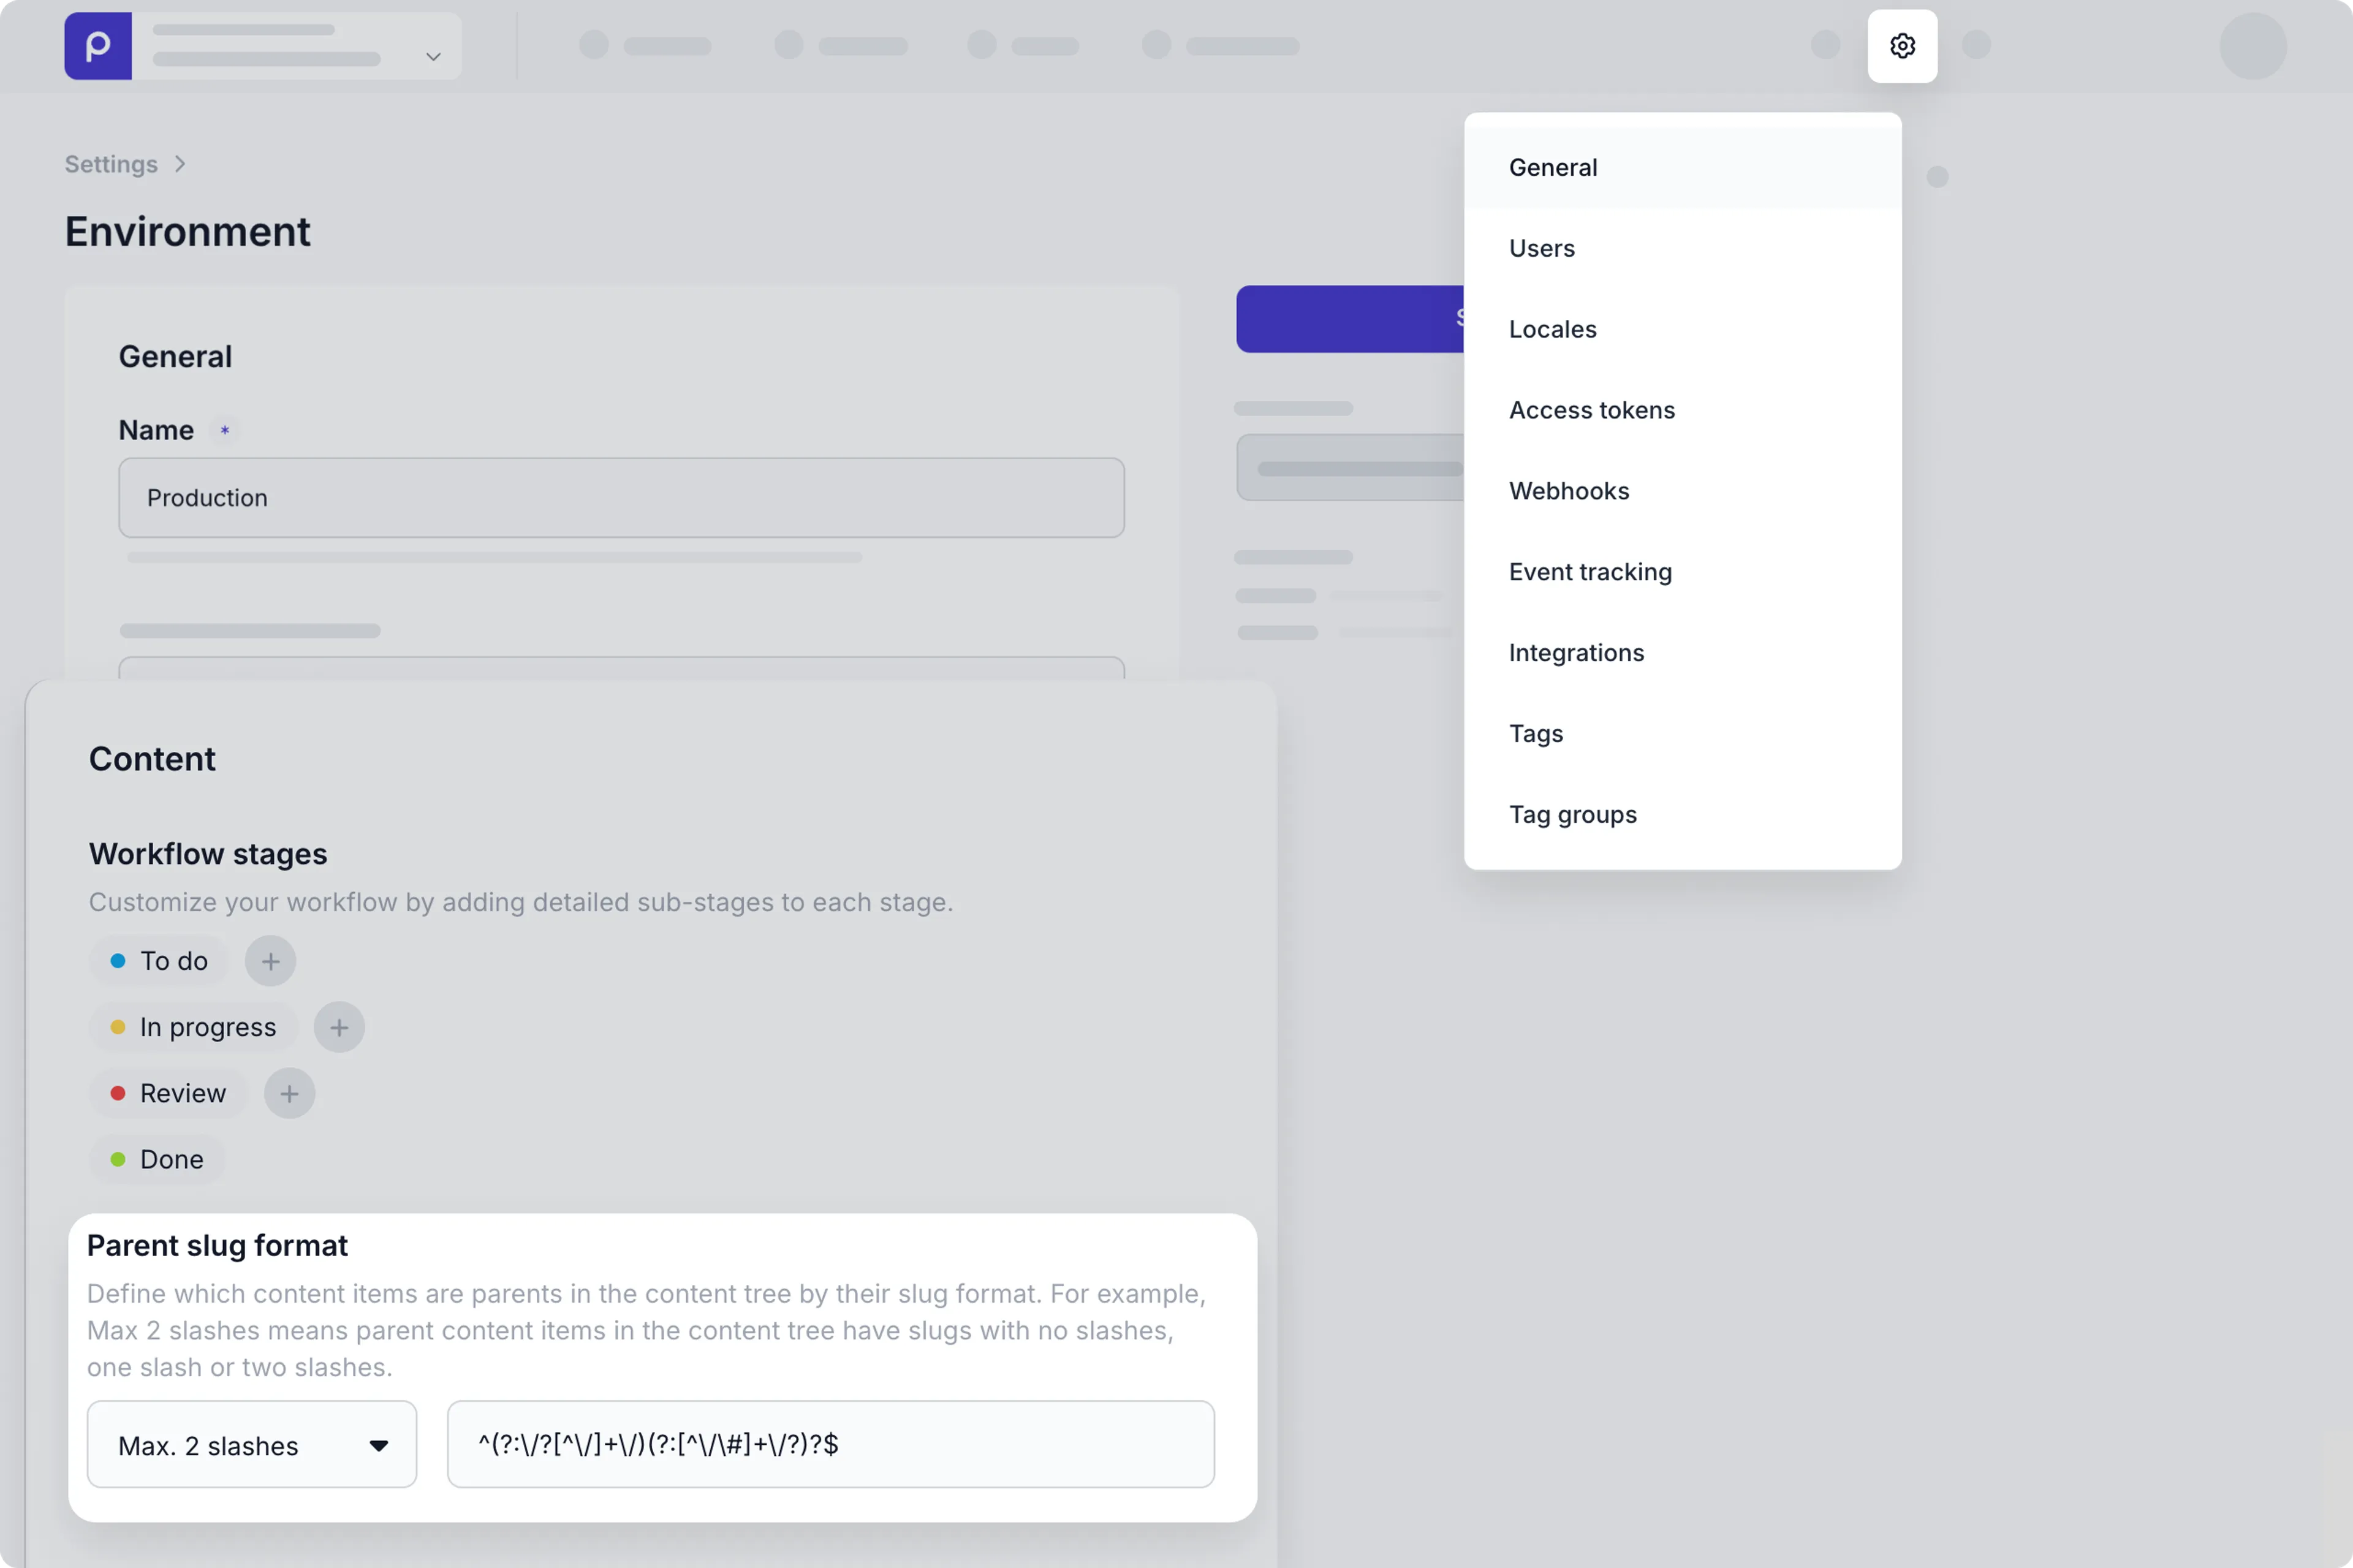
- Not set - This default value means the content tree layout is not available to content editors.
- No slashes - Choose this value if the topmost parent content items never have slashes (
/) in the slug. - Maximum 1 slash - Choose this value if the topmost parent content items have no slashes or one slash.
- Maximum 2 slashes - Choose this value if the topmost parent content items have no slashes, one slash or two slashes.
- Custom - Create your own regex expression to match your standard format of the parent content item slug.
To see the results of your definition, navigate to the Content page and choose the Content tree layout
Required field validation
The default drop-down value is set to Done, but you can choose another group of workflow stages to trigger the required field validation. For example, when a content item is moved to Review or Done.
If your team implements conditional field visibility, you can also define whether Prepr needs to check required conditional fields when they are hidden with the Ignore required fields with conditional visibility toggle. When enabled, you allow a content item to be saved and published when a required field is hidden.
Visual Editing visibility
This dropdown allows you to choose when you can preview content items directly in the content detail page. The default drop-down value is set to To do In progress Review Done.