Install the Prepr preview toolbar
This guide shows you how to install the Prepr preview toolbar to easily review A/B testing and Adaptive content directly in your Astro website.
At the end of this section, you can use the Prepr preview toolbar in your website.
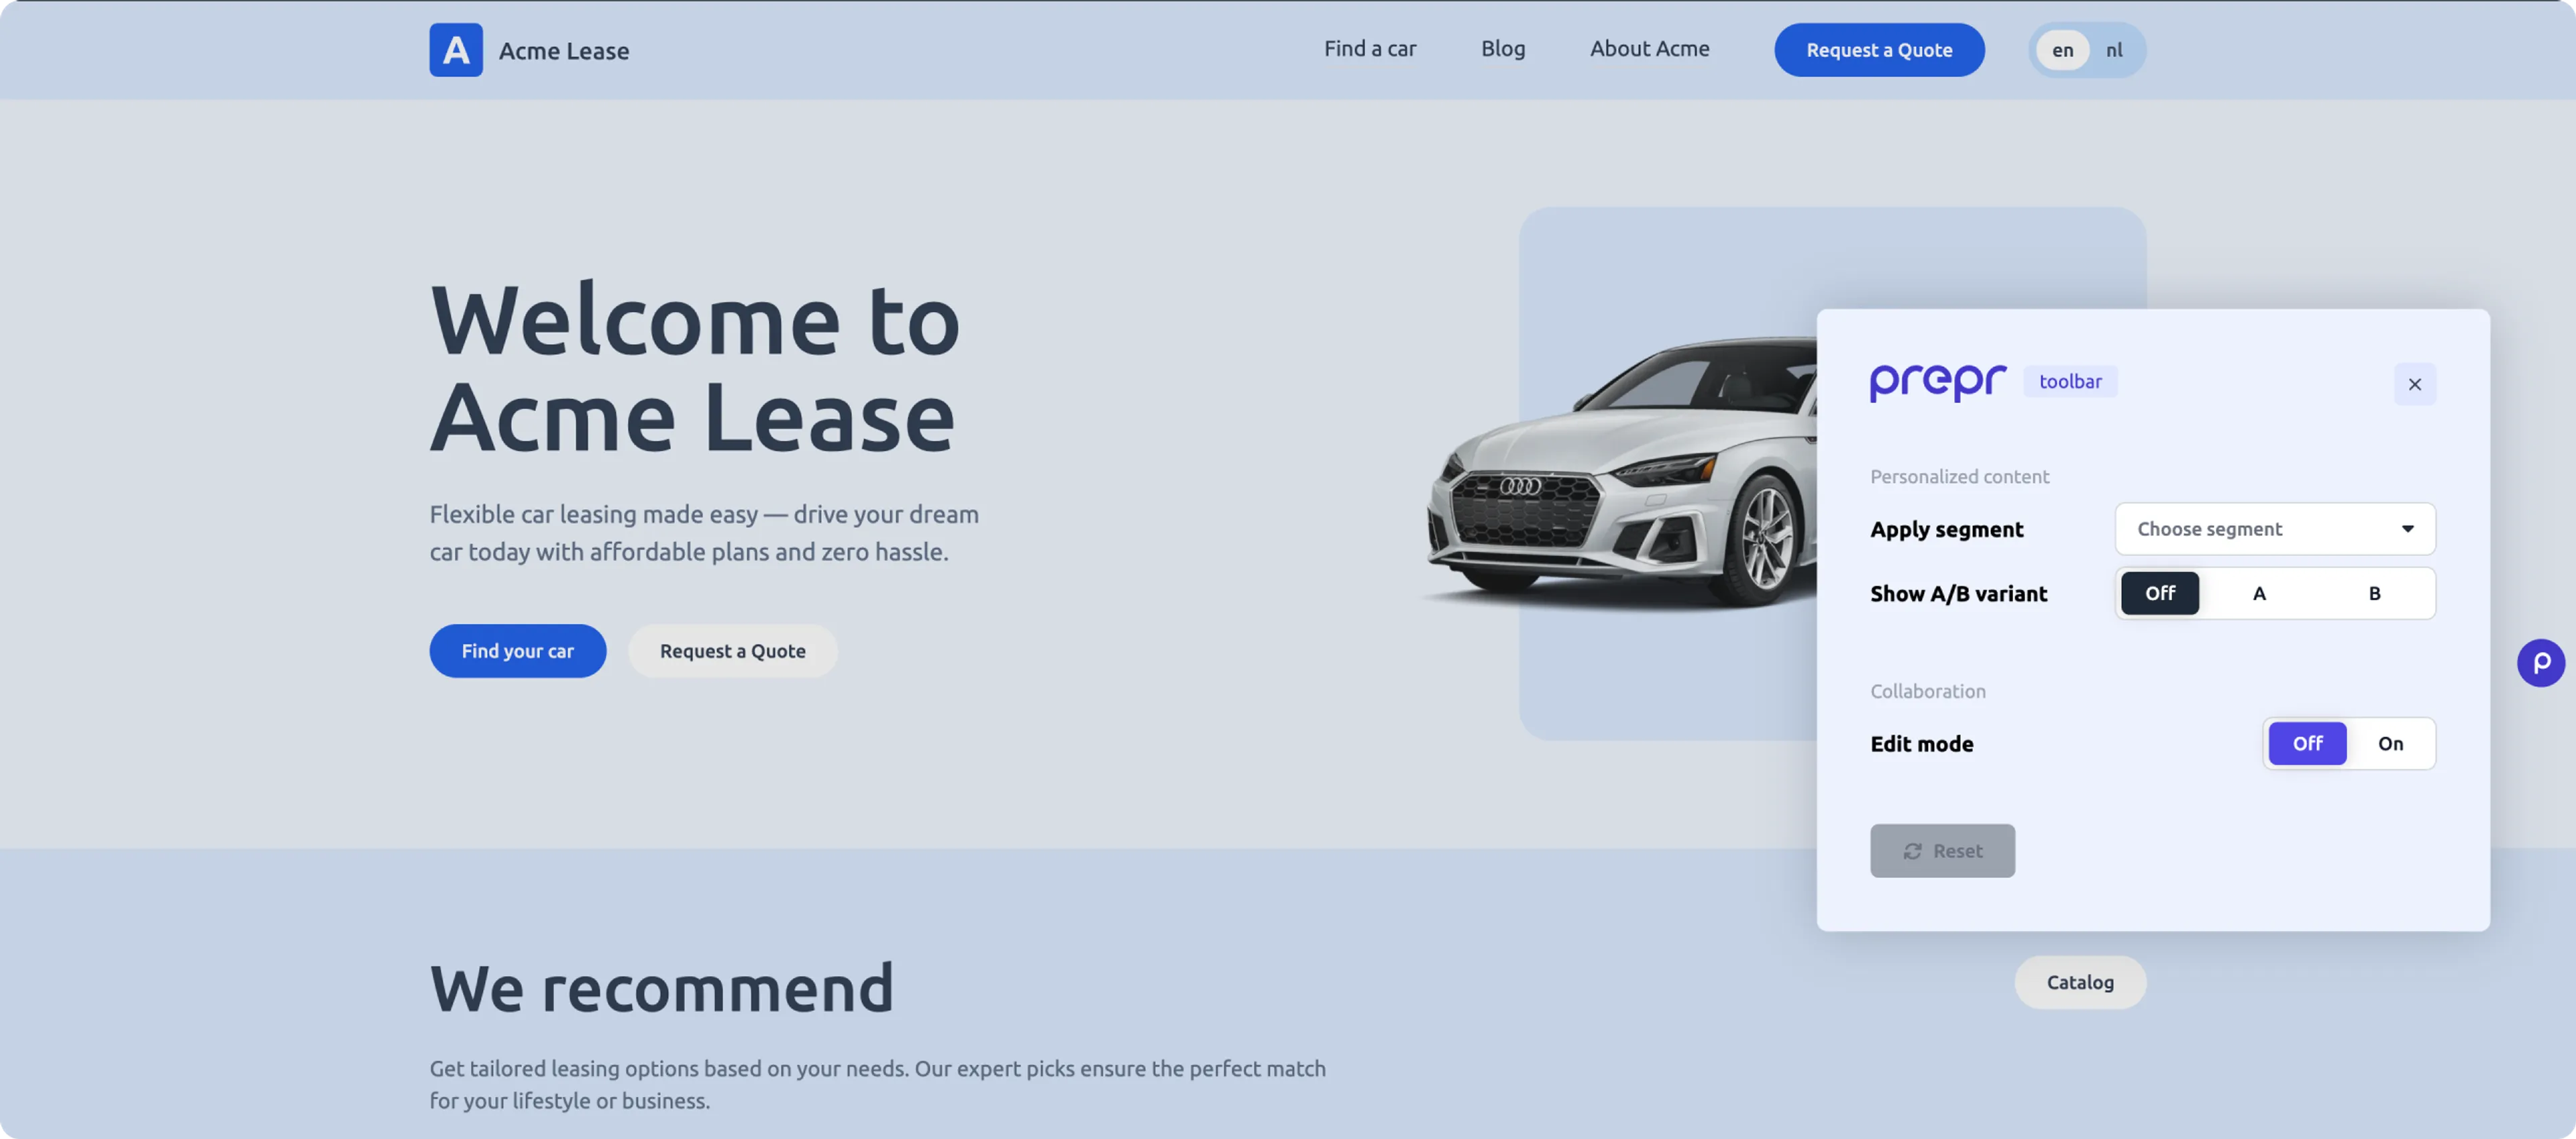
Add the Prepr preview toolbar to your website
The steps below assume that you already have A/B testing or personalization set up in your Astro website. If you haven’t yet added A/B testing or personalization, follow the steps in these sections first. Otherwise, let’s get started.
When you installed the Prepr Toolkit previously, it included the Prepr preview toolbar which is pre-configured for adaptive content and A/B testing.
Enable the Prepr preview toolbar
The Prepr preview toolbar is already installed, so the next step is to enable it. To enable the preview toolbar in your Astro front end, follow the steps below.
-
Add the
PREPR_ENVvariable to the.envfile. You can enable the preview toolbar for a staging environment by setting the value topreview.Set this variable to
productionwhen you deploy your website to production so that the preview toolbar component doesn’t get displayed in your live website../.envPREPR_GRAPHQL_URL=<YOUR-PREPR-GRAPHQL-URL> PREPR_ENV=preview -
Since we are setting up the configuration for the staging environment, update the value of the
PREPR_GRAPHQL_URLvariable to the API URL of the GraphQL Preview access token. This access token allows content editors to preview unpublished content items.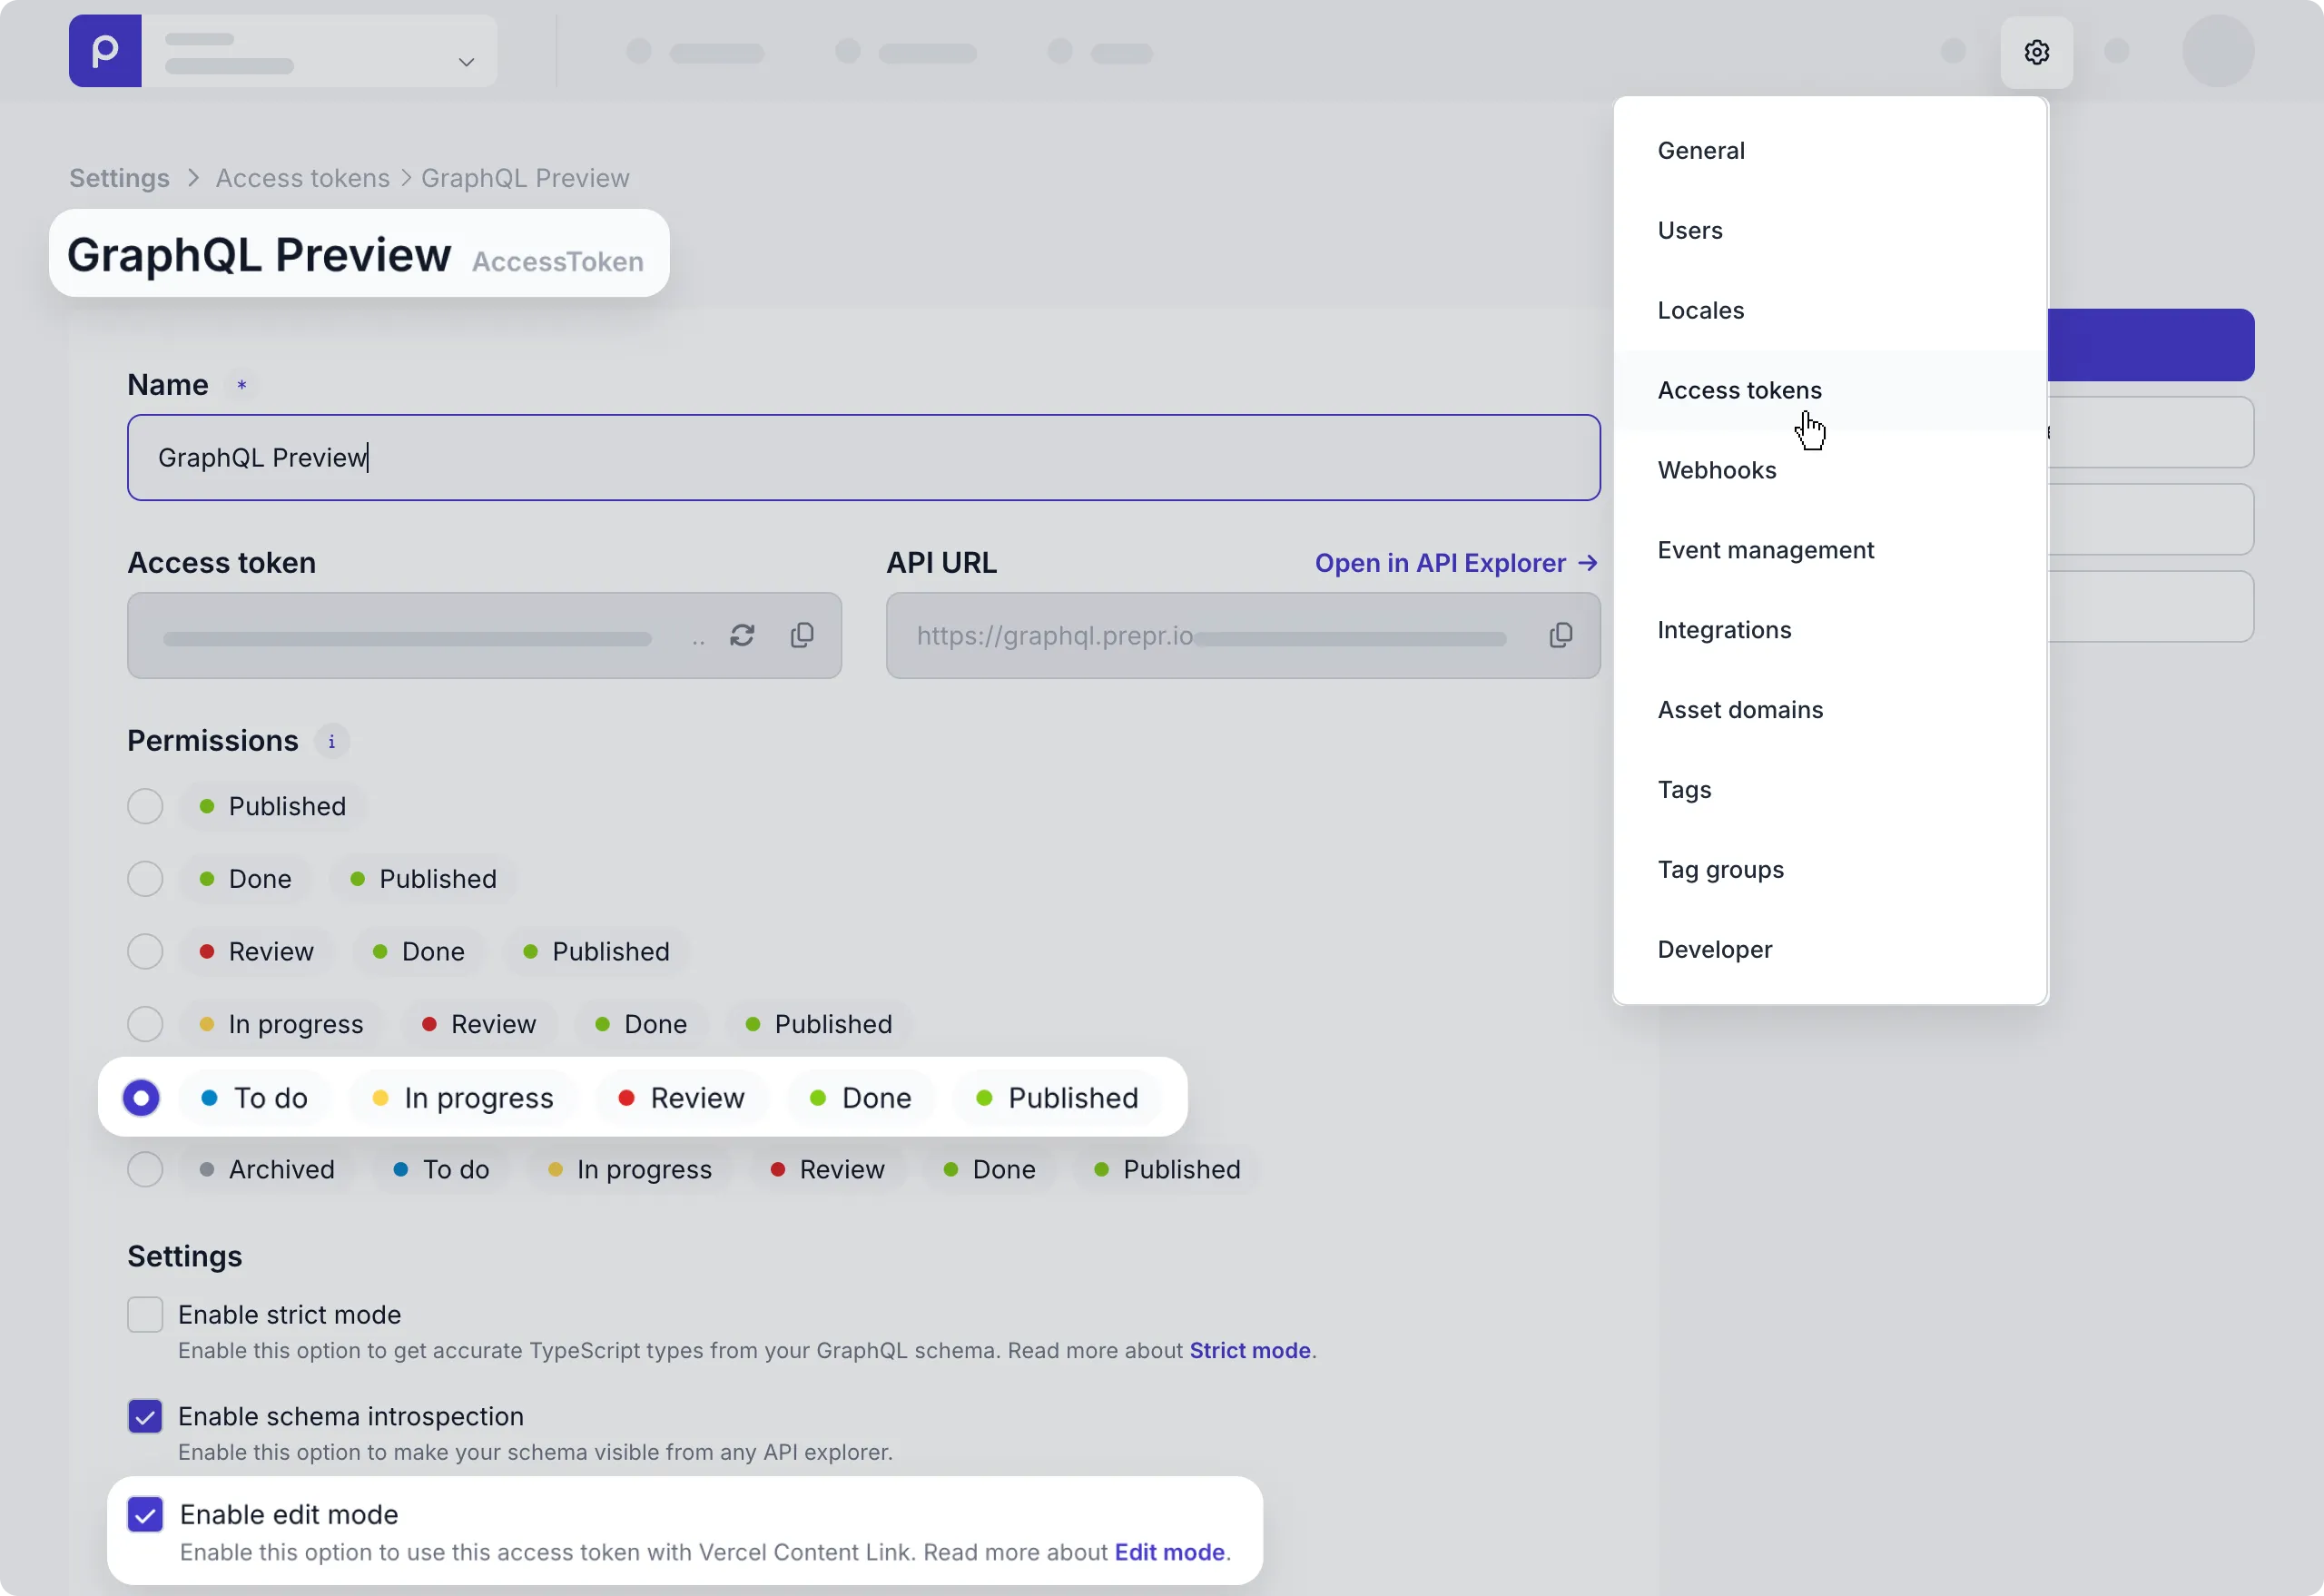
-
The preview toolbar component fetches all segments from the Prepr API. So, you need to give it access to do this by ticking the Enable edit mode checkbox in the access token. Click the Save button.
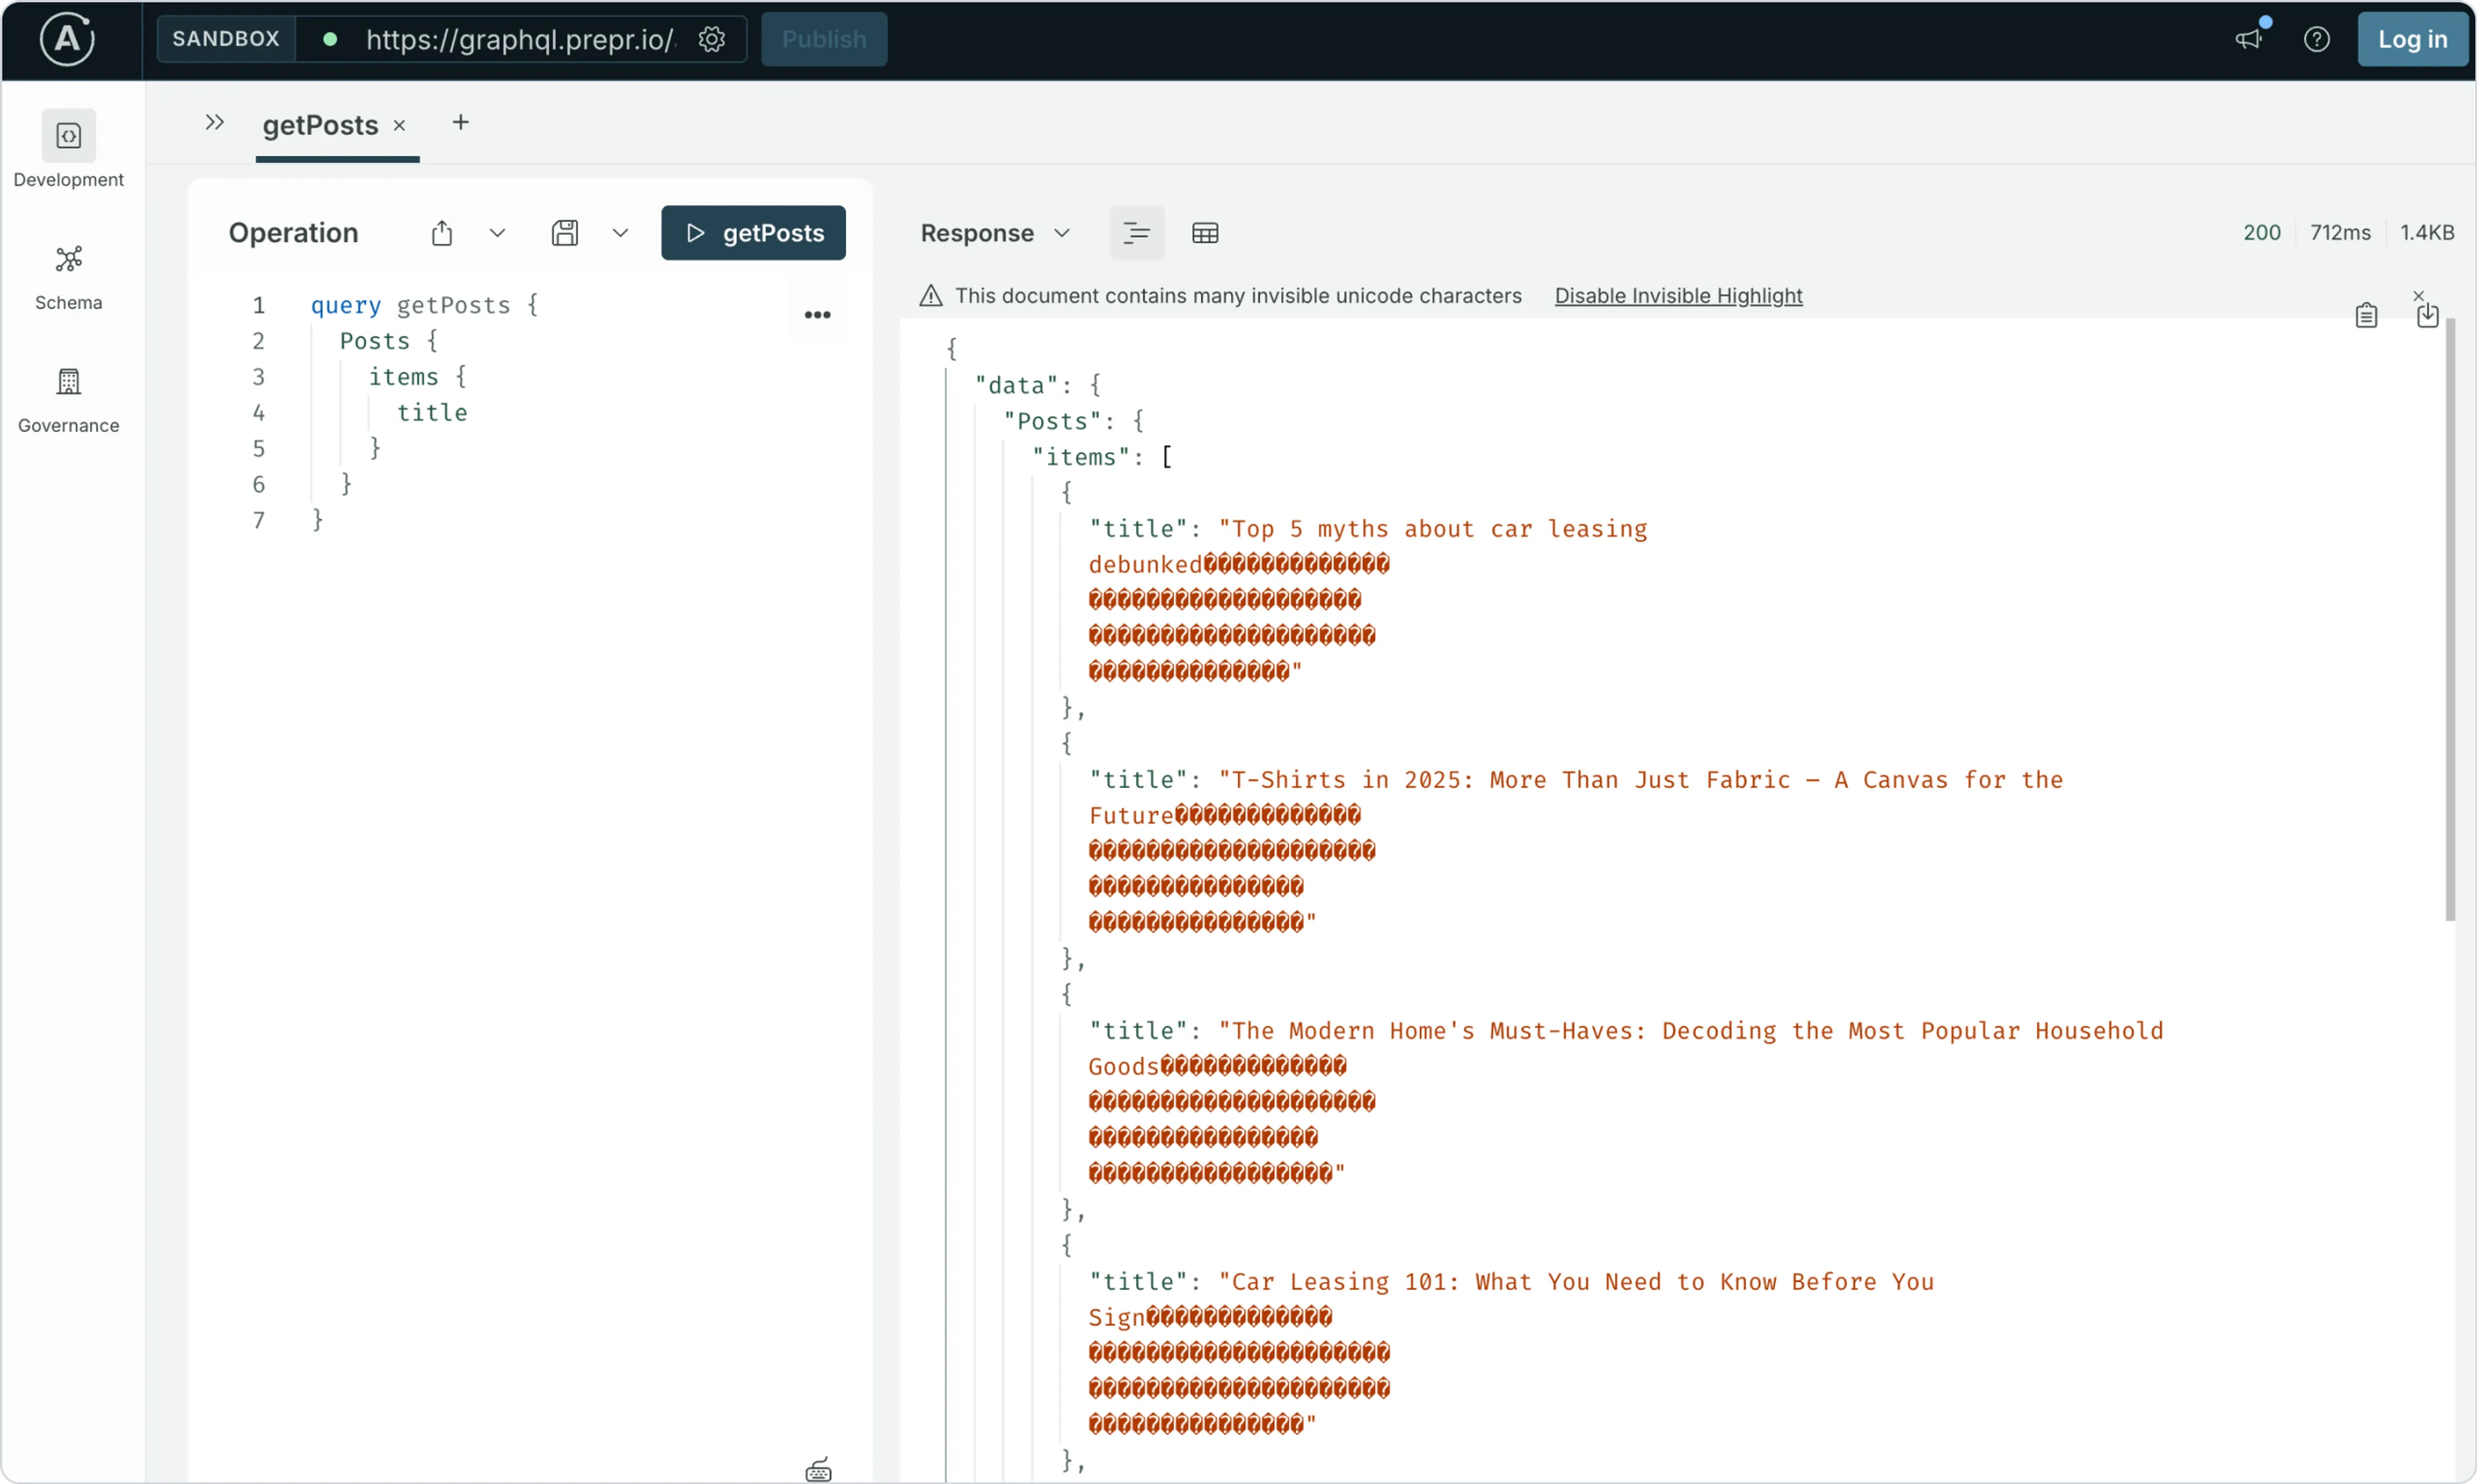
Invisible unicode characters
When using the preview access token, you’ll notice your query responses include additional unicode characters for the whitespace in the text fields. When you turn on edit mode in an access token, Stega-encoding serializes metadata into invisible UTF-8 encoded characters and appends them to string values.
-
Add the
PREPR_ENVvariable to the environment schema inastro.config.mjsso it’s typed and validated likePREPR_GRAPHQL_URL:./astro.config.mjs// @ts-check import { defineConfig, envField, fontProviders } from 'astro/config'; import node from '@astrojs/node'; import tailwindcss from '@tailwindcss/vite'; export default defineConfig({ // Render every request on the server: personalization and A/B testing // depend on per-visitor request headers. output: 'server', adapter: node({ mode: 'standalone' }), fonts: [ { provider: fontProviders.google(), name: 'Ubuntu', cssVariable: '--font-ubuntu', weights: [400, 700], subsets: ['latin'], }, ], vite: { plugins: [tailwindcss()], }, image: { // Domain of the Acme Lease demo images. Add your own asset domain here. domains: ['demo-patterns.stream.prepr.io'], }, env: { schema: { PREPR_GRAPHQL_URL: envField.string({ context: 'server', access: 'secret' }), PREPR_ENV: envField.enum({ context: 'server', access: 'secret', values: ['preview', 'production'], default: 'production', }), }, }, }); -
So far, your web app is setting the headers based on the visitor cookies to determine how to render the A/B testing and adaptive content. To make sure the Prepr preview toolbar overrides the headers to switch between the A/B testing and adaptive content variants, update
middleware.tsto enable the preview option../src/middleware.tsimport { defineMiddleware } from 'astro:middleware'; import { PREPR_ENV } from 'astro:env/server'; import { onPreprRequest } from '@preprio/toolkit/astro'; export const onRequest = defineMiddleware((context, next) => // In preview, the toolbar can override the visitor's segment and A/B variant. onPreprRequest(context, next, { preview: PREPR_ENV === 'preview' }), );
Add the preview toolbar component
Now that the preview access token is updated, you can render the preview toolbar in your website, by adding it to Layout.astro with the following code.
---
import { Font } from 'astro:assets';
import NavBar from '../components/NavBar.astro';
import PreprTrackingPixel from '@preprio/toolkit/astro/components/PreprTrackingPixel';
import PreprToolbar from '@preprio/toolkit/astro/components/PreprToolbar';
import { extractAccessToken } from '@preprio/toolkit';
import { getToolbarProps } from '@preprio/toolkit/astro';
import { PREPR_GRAPHQL_URL, PREPR_ENV } from 'astro:env/server';
import '../styles/globals.css';

const accessToken = extractAccessToken(PREPR_GRAPHQL_URL);
const toolbarProps =
  PREPR_ENV === 'preview' ? await getToolbarProps(Astro.request.headers, PREPR_GRAPHQL_URL) : null;
---

<!doctype html>
<html lang="en">
  <head>
    <meta charset="utf-8" />
    <meta name="viewport" content="width=device-width" />
    <link rel="icon" href="/favicon.ico" />
    <title>Prepr Astro complete starter</title>
    <meta name="description" content="Showing the power of personalization and A/B testing" />
    <Font cssVariable="--font-ubuntu" preload />
    {accessToken && <PreprTrackingPixel id={accessToken} />}
    <slot name="head" />
  </head>
  <body style="font-family: var(--font-ubuntu)">
    <NavBar />
    <slot />
    {toolbarProps && <PreprToolbar {...toolbarProps} />}
  </body>
</html>
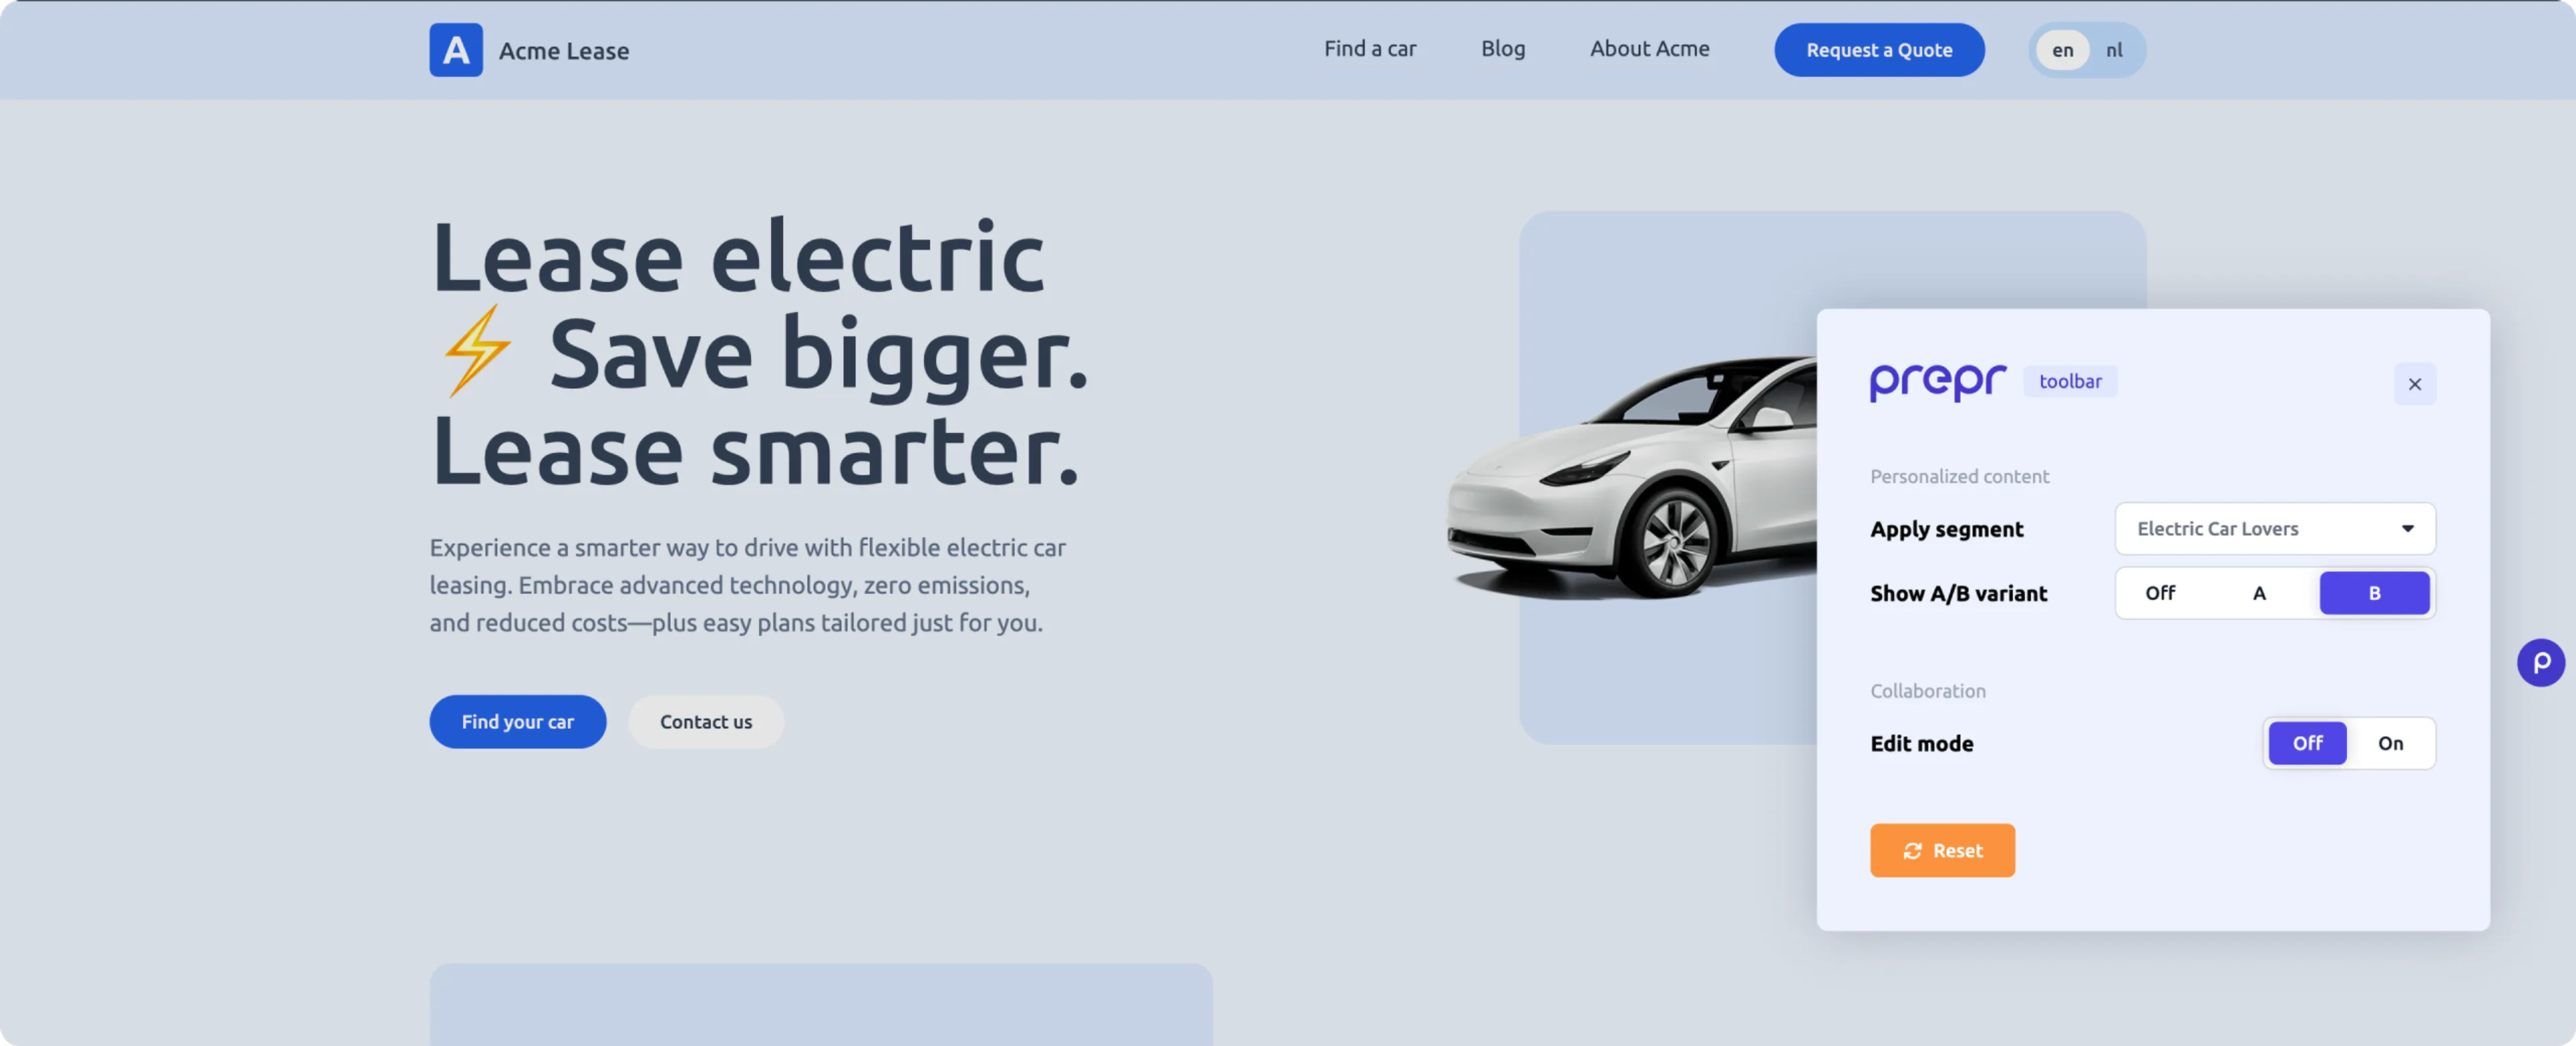
When you open your website in the browser, you can see the Prepr icon on the page.
Test the preview toolbar
Now that the preview toolbar is being rendered, you can test it with the following steps:
-
Stop the localhost website server (
CTRL-C) if it’s running and restart it with thenpm run devterminal command. -
Go to the home page of your website, open the Prepr preview toolbar and click the Reset button.
-
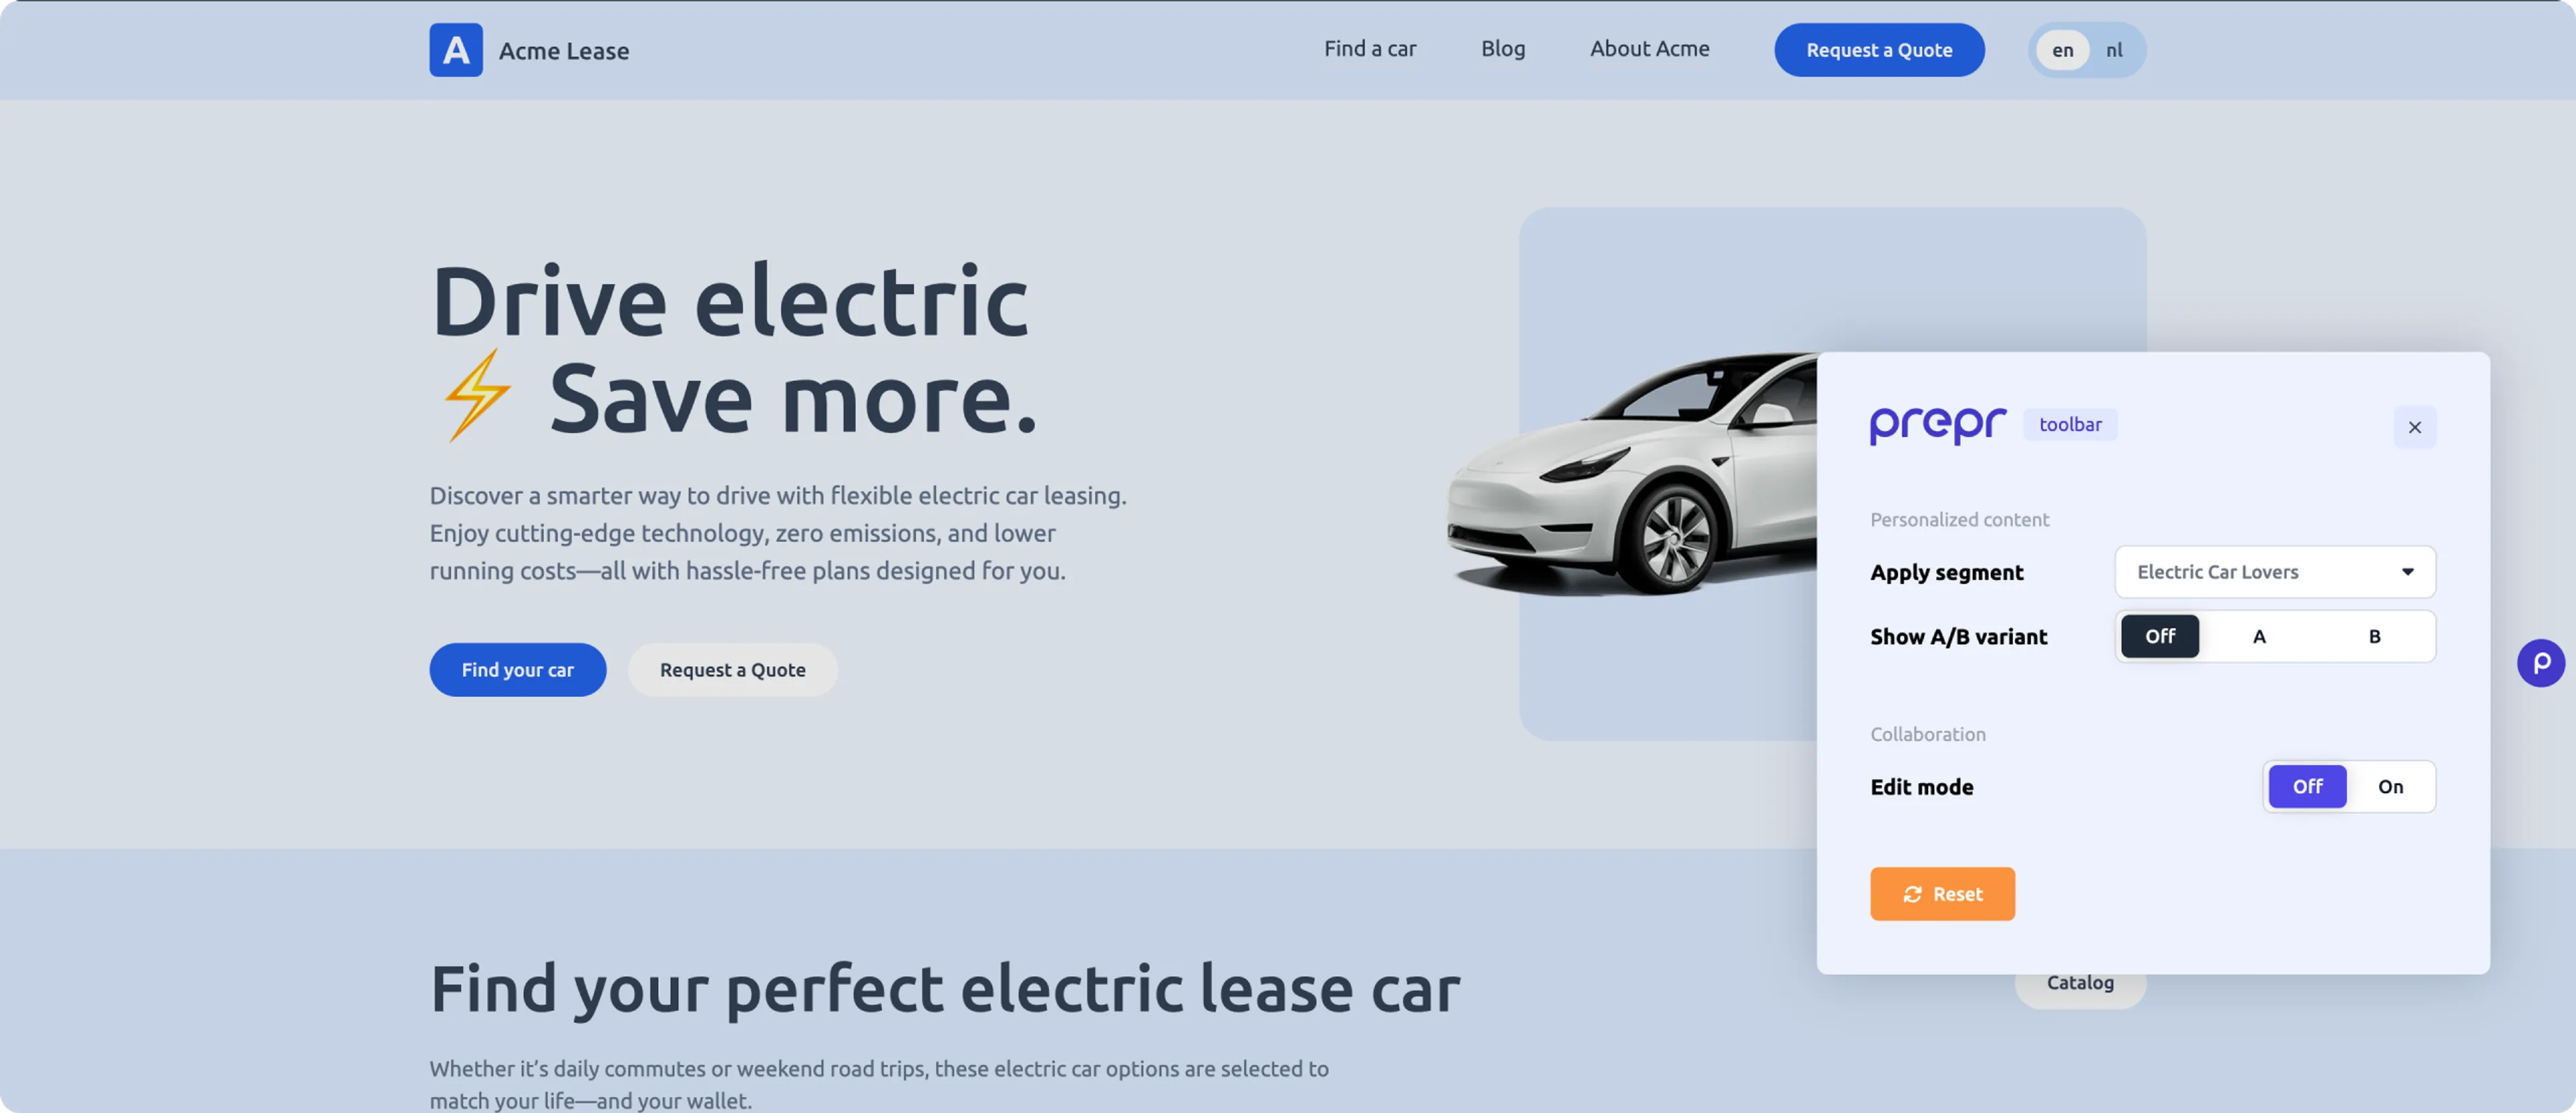
Choose the Electric Car Lovers segment. You’ll see the personalized header for this segment.
- Go to
http://localhost:4321/electric-leaseto open the Electric Lease Landing Page in the browser and choose the B variant. You’ll see that the text changes to the B variant content.
All done
Congratulations! You have successfully installed the Prepr preview toolbar in your Astro website. This brings you to the end of the Astro complete guide which has given you all the tools and tips you need to create your own web app connected to Prepr CMS complete with personalization, A/B testing and a preview toolbar. Don’t hesitate to give us feedback on your experience using this guide.
Next steps
To learn more on how to expand your project, check out the following resources: